A tale of space and science

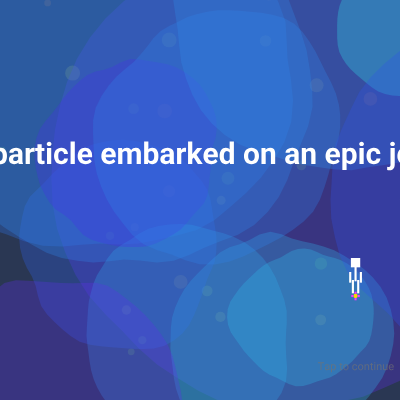
This sketch creates an animated cinematic narrative featuring stick figures exploring a cosmic story. Smooth gradient backgrounds, floating particles, and organic blob shapes evolve through nine scenes, with stick figures in different poses holding symbolic pixel-art items while text narrates their space exploration journey.

🧪 Try This!

Experiment with the code by making these changes:

  1. Speed up scene transitions — Reduce sceneDuration to see scenes change more rapidly, making the story feel faster-paced.
  2. Make the background warmer — Change the particle hue range from cool blues to warm oranges and yellows throughout the story.
  3. Add more floating particles — Increase the particle count to make the background feel denser and more atmospheric.
  4. Slow down particle hue cycling — Reduce the hue increment to make color shifts in particles more gradual and subtle.
  5. Make stick figure limbs thicker — Increase the cellThickness multiplier to give stick figures bulkier, more visible limbs.
  6. Speed up walking and waving — Increase the frameCount multipliers in pose animation to make figure movements faster and more energetic.
Prefer the full editor? Open it there →

📖 About This Sketch

This sketch tells a complete visual story: two stick-figure probes embark on a cosmic adventure, with each scene introducing new dialogue, changing hues, and symbolic pixel-art items. The visuals are powered by layered gradient backgrounds, animating particles that drift upward, and organic blob shapes that morph in real time using Perlin noise. The stick figures themselves animate through poses like walking, waving, and pointing, creating the illusion of character movement and emotion.

The code is organized around a central scenes array that holds all the narrative data—background hues, dialogue text, and figure positions and poses. A scene timer automatically advances through each scene every 2.5 seconds, triggering smooth fade-in and fade-out effects. By reading this sketch, you will learn how to structure multi-scene animations, drive visuals with data arrays, generate organic shapes with noise, and synchronize text with visual storytelling.

⚙️ How It Works

  1. When the sketch loads, setup() creates a responsive canvas, loads two font weights for typography, and populates two arrays: one with 50 floating particles and one with 15 organic blob shapes, each with unique positions, sizes, hues, and noise offsets.
  2. Every frame, draw() layers three gradient rectangles with the current scene's hue to create atmospheric depth, then animates and renders all particles (drifting upward, cycling hues) and all blob shapes (morphing via Perlin noise applied to a circular boundary).
  3. The scene timer increments each frame; when it reaches 150 frames (2.5 seconds), the scene advances to the next one in the array, cycling back to the beginning after the final scene.
  4. As each scene displays, a smooth alpha value fades figures and text in during the first 15% of the scene and fades them out during the last 15%, creating seamless transitions.
  5. For each scene, if figure1 or figure2 exist, drawStickFigure() renders them with animated poses (walking limbs, waving arms), and drawPixelArtItem() draws symbolic items (flowers, hearts, stars, clouds) below each figure.
  6. The narrative text displays centered on screen using the bold Roboto font, and a subtle 'Tap to continue' hint appears at the bottom, allowing viewers to skip ahead by clicking.

🎓 Concepts You'll Learn

Scene management and state arraysGradient backgrounds and layered fillsPerlin noise for organic animationAlpha transparency and fade effectsPose-based character animationPixel-art shape generationResponsive canvas sizingFont loading and typography

📝 Code Breakdown

preload()

preload() runs before setup() and is the right place to load external assets like fonts and images. p5.js waits for preload() to finish before moving forward, ensuring fonts are ready when draw() begins.

function preload() {
  // Load regular Roboto for general text and a bold version for dialogue
  robotoFont = loadFont('https://unpkg.com/@fontsource/roboto@latest/files/roboto-latin-400-normal.woff');
  robotoFontBold = loadFont('https://unpkg.com/@fontsource/roboto@latest/files/roboto-latin-700-normal.woff'); // Load bold version
}
Line-by-line explanation (2 lines)
robotoFont = loadFont('https://unpkg.com/@fontsource/roboto@latest/files/roboto-latin-400-normal.woff');
Loads the regular (400 weight) Roboto font from a CDN and stores it for later use in small hint text.
robotoFontBold = loadFont('https://unpkg.com/@fontsource/roboto@latest/files/roboto-latin-700-normal.woff');
Loads the bold (700 weight) Roboto font from a CDN and stores it for the main narrative dialogue.

setup()

setup() runs once at the start and initializes all global state: the canvas, text settings, and the particle/blob arrays. The two for loops are the engines that create the background animation—each object stores position, size, speed, and hue so draw() can animate them independently.

🔬 This loop populates the particles array with objects. What happens if you change the hue range from random(180, 260) to random(0, 360)? Will the particles look more varied or more uniform?

  for (let i = 0; i < 50; i++) { // Increased number of particles
    particles.push({
      x: random(width),
      y: random(height),
      size: random(6, 15), // Larger size range
      speed: random(0.5, 1.5), // Faster speed range
      hue: random(180, 260) // Biased towards blue hues
    });
  }
function setup() {
  setCanvasDimensions(); // Call function to set canvas size
  textFont(robotoFontBold); // Default to bold for the main scene text
  colorMode(HSB, 360, 100, 100, 100);
  noStroke(); // We'll use filled rectangles, so no stroke needed
  textAlign(CENTER, CENTER);
  
  // Create more floating particles for noticeable background animation
  for (let i = 0; i < 50; i++) { // Increased number of particles
    particles.push({
      x: random(width),
      y: random(height),
      size: random(6, 15), // Larger size range
      speed: random(0.5, 1.5), // Faster speed range
      hue: random(180, 260) // Biased towards blue hues
    });
  }
  
  // Create more organic blob shapes with wider radius range
  for (let i = 0; i < 15; i++) { // Increased number of blobs
    ambientShapes.push({
      x: random(width),
      y: random(height),
      radius: random(width * 0.1, width * 0.3), // Wider radius range
      hue: random(180, 260), // Biased towards blue hues
      noiseOffset: random(1000) // Unique noise offset for each blob
    });
  }
}
Line-by-line explanation (5 lines)

🔧 Subcomponents:

for-loop Particle Array Population for (let i = 0; i < 50; i++) {

Creates 50 particle objects with random positions, sizes, speeds, and hues, then adds them to the particles array.

for-loop Blob Shape Array Population for (let i = 0; i < 15; i++) {

Creates 15 blob objects with random positions, radii, hues, and unique noise offsets, then adds them to the ambientShapes array.

setCanvasDimensions();
Calls the helper function to calculate and create a canvas with the target aspect ratio (16:9) that fills the window.
textFont(robotoFontBold);
Sets the default font to the bold Roboto variant loaded in preload(), so text appears bold by default.
colorMode(HSB, 360, 100, 100, 100);
Switches from RGB to HSB (Hue, Saturation, Brightness) mode with ranges 0–360 for hue and 0–100 for saturation and brightness. This makes it easier to create cohesive color schemes.
noStroke();
Disables outlines on all shapes; only fill colors will be visible.
textAlign(CENTER, CENTER);
Centers text both horizontally and vertically around the coordinates where text() is called.

draw()

draw() is the heartbeat of the sketch—it runs 60 times per second and handles animation, scene advancement, and rendering all visual elements. The key ideas are layered backgrounds (creating depth), particle recycling (efficient background animation), Perlin noise morphing (organic shapes), and alpha-based fading (smooth scene transitions).

🔬 This loop moves particles upward and recycles them when they leave the screen. What happens if you change p.y -= p.speed to p.y += p.speed? Do particles now drift downward instead?

  for (let p of particles) {
    p.y -= p.speed;
    if (p.y < -20) {
      p.y = height + 20;
      p.x = random(width);
    }

🔬 This code morphs blob shapes using Perlin noise. The last argument (frameCount * 0.005) controls animation speed. What happens if you increase it to frameCount * 0.02? Do the blobs animate faster?

    for (let i = 0; i < TWO_PI; i += 0.1) { // Iterate through angles
      let xOff = map(cos(i), -1, 1, 0, 1);
      let yOff = map(sin(i), -1, 1, 0, 1);
      // More pronounced shape fluctuations
      let r = shape.radius + map(noise(xOff + shape.noiseOffset, yOff + shape.noiseOffset, frameCount * 0.005), 0, 1, -shape.radius * 0.4, shape.radius * 0.4);
function draw() {
  // Dark gradient background based on current scene hue
  let currentHue = scenes[currentSceneIndex].bgHue;
  
  // Layered gradient background - brighter and more saturated
  fill(currentHue, 40, 30); // Base brighter color
  rect(0, 0, width, height);
  fill(currentHue, 60, 40, 40); // Lighter, more opaque layer
  rect(0, 0, width, height);
  fill(0, 0, 0, 5); // Very subtle, almost black layer for depth - less opaque
  rect(0, 0, width, height);
  
  // Animate floating particles (existing)
  for (let p of particles) {
    p.y -= p.speed;
    if (p.y < -20) {
      p.y = height + 20;
      p.x = random(width);
    }
    p.hue = (p.hue + 0.8) % 360; // Faster hue change, still within blue range due to setup
    fill(p.hue, 70, 80, 25); // More visible particles
    circle(p.x, p.y, p.size);
  }
  
  // Animate and draw organic blob shapes (new)
  for (let shape of ambientShapes) {
    push();
    translate(shape.x, shape.y);
    fill(shape.hue, 80, 90, 30); // Brighter, more saturated, more visible blobs
    
    beginShape();
    for (let i = 0; i < TWO_PI; i += 0.1) { // Iterate through angles
      let xOff = map(cos(i), -1, 1, 0, 1);
      let yOff = map(sin(i), -1, 1, 0, 1);
      // More pronounced shape fluctuations
      let r = shape.radius + map(noise(xOff + shape.noiseOffset, yOff + shape.noiseOffset, frameCount * 0.005), 0, 1, -shape.radius * 0.4, shape.radius * 0.4);
      let x = r * cos(i);
      let y = r * sin(i);
      vertex(x, y);
    }
    endShape(CLOSE);
    
    shape.noiseOffset += 0.02; // Faster animation for blobs
    pop();
  }
  
  // Auto-advance scenes (existing)
  sceneTimer++;
  if (sceneTimer >= sceneDuration) {
    sceneTimer = 0;
    currentSceneIndex = (currentSceneIndex + 1) % scenes.length;
  }
  
  let currentScene = scenes[currentSceneIndex];
  let progress = sceneTimer / sceneDuration;
  
  // Smooth fade in/out for scene elements (existing)
  let alpha = progress < 0.15 ? map(progress, 0, 0.15, 0, 100) :
              progress > 0.85 ? map(progress, 0.85, 1, 100, 0) : 100;
  
  let centerY = height / 2;
  let figureY = height * 0.7; // Stick figures stand on the bottom part of the screen
  let figureBaseSize = width * 0.15; // Stick figures are bigger!
  
  fill(0, 0, 100, alpha); // White color for stick figures
  
  // Draw figure 1 if it exists for the current scene (existing)
  if (currentScene.figure1) {
    drawStickFigure(
      width * currentScene.figure1.x,
      figureY,
      figureBaseSize * currentScene.figure1.size,
      currentScene.figure1.pose,
      alpha
    );
    // Draw item for figure 1
    if (currentScene.figure1.item) {
      drawPixelArtItem(
        width * currentScene.figure1.x,
        figureY,
        figureBaseSize * currentScene.figure1.size,
        currentScene.figure1.item,
        alpha
      );
    }
  }
  
  // Draw figure 2 if it exists for the current scene (existing)
  if (currentScene.figure2) {
    drawStickFigure(
      width * currentScene.figure2.x,
      figureY,
      figureBaseSize * currentScene.figure2.size,
      currentScene.figure2.pose,
      alpha
    );
    // Draw item for figure 2
    if (currentScene.figure2.item) {
      drawPixelArtItem(
        width * currentScene.figure2.x,
        figureY,
        figureBaseSize * currentScene.figure2.size,
        currentScene.figure2.item,
        alpha
      );
    }
  }
  
  // Display scene text (dialogue/narration)
  textSize(min(30, width / 12)); // Slightly larger base size for dialogue
  textFont(robotoFontBold); // Use the bold font for the main text
  
  fill(0, 0, 100, alpha); // Pure white text for maximum contrast
  text(currentScene.text, width / 2, centerY - 50);
  
  // "Tap to continue" hint
  textSize(11);
  textFont(robotoFont); // Use the regular font for this smaller hint
  fill(0, 0, 45, alpha * 0.7);
  text("Tap to continue", width / 2, height - 35);
}

Line-by-line explanation (15 lines)

🔧 Subcomponents:

calculation Layered Gradient Background fill(currentHue, 40, 30); // Base brighter color rect(0, 0, width, height);

Creates the first layer of the background gradient using the current scene's hue, forming the base atmospheric color.

for-loop Particle Animation Loop for (let p of particles) {

Iterates through all particles, updates their vertical position, recycles those that drift off-screen, cycles their hues, and draws them at their new positions.

for-loop Organic Blob Animation Loop for (let shape of ambientShapes) {

Iterates through all blob shapes, uses Perlin noise to morph their circular boundaries, and draws the resulting organic shapes.

conditional Scene Auto-Advance if (sceneTimer >= sceneDuration) {

Checks if the current scene's duration has elapsed; if so, resets the timer and advances to the next scene.

calculation Fade In/Out Alpha let alpha = progress < 0.15 ? map(progress, 0, 0.15, 0, 100) : progress > 0.85 ? map(progress, 0.85, 1, 100, 0) : 100;

Calculates a smooth alpha (opacity) value that fades figures and text in during the first 15% of the scene and out during the last 15%.

conditional Conditional Figure Rendering if (currentScene.figure1) {

Checks if figure1 exists for the current scene; if so, draws the stick figure and its associated item.

let currentHue = scenes[currentSceneIndex].bgHue;
Reads the background hue value from the current scene's data object, so the background color matches the narrative mood.
fill(currentHue, 40, 30);
Sets the fill color to the current hue with 40% saturation and 30% brightness (a muted tone), in HSB mode.
rect(0, 0, width, height);
Draws a full-screen rectangle with the fill color, creating the first layer of the background gradient.
p.y -= p.speed;
Moves each particle upward by subtracting its speed from its y-coordinate.
if (p.y < -20) { p.y = height + 20; p.x = random(width); }
When a particle drifts above the top of the screen, it recycles: y resets to below the bottom edge and x is randomized so it reappears at a new horizontal position.
p.hue = (p.hue + 0.8) % 360;
Incrementally shifts each particle's hue by 0.8 degrees per frame, then wraps it back to 0 when it exceeds 360 to cycle through the color spectrum.
circle(p.x, p.y, p.size);
Draws a circle at the particle's updated position with its current size.
for (let i = 0; i < TWO_PI; i += 0.1) {
Iterates through angles from 0 to 2π (a full circle) in 0.1-radian steps, creating approximately 62 vertices for the blob shape.
let r = shape.radius + map(noise(xOff + shape.noiseOffset, yOff + shape.noiseOffset, frameCount * 0.005), 0, 1, -shape.radius * 0.4, shape.radius * 0.4);
Uses 3D Perlin noise to fluctuate the radius at each angle, making the blob appear organic and morphing; noise values are mapped to a range of ±40% of the base radius.
sceneTimer++;
Increments the scene timer by 1 frame each draw cycle.
if (sceneTimer >= sceneDuration) {
Checks if the timer has reached the scene duration (150 frames); when true, the scene advances.
let progress = sceneTimer / sceneDuration;
Calculates progress as a number from 0 to 1 representing how far through the current scene we are.
let alpha = progress < 0.15 ? map(progress, 0, 0.15, 0, 100) : progress > 0.85 ? map(progress, 0.85, 1, 100, 0) : 100;
Uses a ternary operator to create a smooth fade: when progress is 0–15%, alpha fades from 0 to 100; when progress is 85–100%, alpha fades from 100 to 0; otherwise alpha is fully opaque (100).
if (currentScene.figure1) {
Checks if figure1 is defined for the current scene; only draws it if the property exists and is not null.
text(currentScene.text, width / 2, centerY - 50);
Draws the narrative dialogue text centered horizontally and slightly above the middle of the screen.

drawStickFigure()

drawStickFigure() demonstrates pose-based animation: by checking the pose parameter and applying different sine-wave angles, the same figure can appear to walk, wave, or stand still. The use of push() and pop() for local transformations (translate and rotate) is a key p5.js technique—it keeps transformations local to one limb without affecting others.

🔬 This code draws the head and body as rectangles. What happens if you change cellThickness to size * 0.15? Do the limbs appear much thicker, almost chunky?

  let cellThickness = size * 0.08; // Thickness of limbs and body
  
  // Head (a square)
  rect(0, -size * 0.65, size * 0.35, size * 0.35);
  
  // Body (a thicker rectangle)
  rect(0, -size * 0.3, cellThickness, size * 0.7);
function drawStickFigure(x, y, size, pose = 'standing', alpha = 100) {
  push();
  translate(x, y);
  
  fill(0, 0, 100, alpha); // White color for stick figure
  
  rectMode(CENTER); // Draw rectangles from their center
  
  let cellThickness = size * 0.08; // Thickness of limbs and body
  
  // Head (a square)
  rect(0, -size * 0.65, size * 0.35, size * 0.35);
  
  // Body (a thicker rectangle)
  rect(0, -size * 0.3, cellThickness, size * 0.7); // From head base to hip
  
  // Arms
  let armAngle = 0;
  if (pose === 'waving') {
    armAngle = sin(frameCount * 0.1) * PI / 6; // Simple waving motion
  } else if (pose === 'walking') {
    armAngle = sin(frameCount * 0.15) * PI / 8; // Simple walking motion
  }
  
  // Left arm
  push();
  translate(-size * 0.2, -size * 0.3); // Shoulder position
  rotate(armAngle);
  rect(0, size * 0.2, cellThickness, size * 0.4); // Draw arm as rectangle relative to shoulder
  pop();
  
  // Right arm
  push();
  translate(size * 0.2, -size * 0.3); // Shoulder position
  rotate(-armAngle); // Rotate in opposite direction for symmetry
  rect(0, size * 0.2, cellThickness, size * 0.4); // Draw arm as rectangle relative to shoulder
  pop();
  
  // Legs
  let legAngle = 0;
  if (pose === 'walking') {
    legAngle = sin(frameCount * 0.15) * PI / 8; // Simple walking motion
  }
  
  // Left leg
  push();
  translate(-size * 0.1, 0); // Hip position
  rotate(legAngle);
  rect(0, size * 0.25, cellThickness, size * 0.5); // Draw leg as rectangle relative to hip
  pop();
  
  // Right leg
  push();
  translate(size * 0.1, 0); // Hip position
  rotate(-legAngle); // Rotate in opposite direction for symmetry
  rect(0, size * 0.25, cellThickness, size * 0.5); // Draw leg as rectangle relative to hip
  pop();
  
  pop(); // Restore previous drawing state (including rectMode)
}
Line-by-line explanation (11 lines)

🔧 Subcomponents:

conditional Arm Animation Angle if (pose === 'waving') { armAngle = sin(frameCount * 0.1) * PI / 6; }

Sets armAngle using a sine wave when the pose is 'waving', creating a smooth oscillating motion for the arms.

conditional Leg Animation Angle if (pose === 'walking') { legAngle = sin(frameCount * 0.15) * PI / 8; }

Sets legAngle using a sine wave when the pose is 'walking', animating the legs in sync with the arms.

push();
Saves the current drawing state (transformation matrix, fill, stroke, etc.) so we can restore it later.
translate(x, y);
Moves the drawing origin to the stick figure's position (x, y), so all subsequent drawing happens relative to that point.
rectMode(CENTER);
Sets rectangle drawing mode so that rectangles are drawn from their center rather than their top-left corner—this makes rotation and positioning easier.
let cellThickness = size * 0.08;
Calculates the thickness of limbs and body as 8% of the figure's size, ensuring the figure scales proportionally.
rect(0, -size * 0.65, size * 0.35, size * 0.35);
Draws the head as a square slightly above the origin (-size * 0.65 positions it high).
rect(0, -size * 0.3, cellThickness, size * 0.7);
Draws the body as a tall, thin rectangle from the head down toward the hips.
armAngle = sin(frameCount * 0.1) * PI / 6;
Uses a sine wave of frameCount to create smooth oscillating arm motion; sin() returns values from -1 to 1, multiplied by PI/6 gives arm angles from -30° to 30°.
translate(-size * 0.2, -size * 0.3);
Moves the drawing origin to the left shoulder position before drawing the left arm.
rotate(armAngle);
Rotates the left arm by the calculated angle, making it swing naturally.
rotate(-armAngle);
Rotates the right arm by the negative angle, creating symmetrical opposite motion so both arms swing in harmony.
pop();
Restores the previously saved drawing state, undoing all translations, rotations, and other transforms applied in this function.

drawPixelArtItem()

drawPixelArtItem() demonstrates the switch statement and pixel-art assembly—each case builds a small iconic shape from basic rectangles and circles. By scaling all dimensions with pixelSize, the items remain proportional no matter the stick figure's size. The same pattern could be extended with more cases (sword, shield, etc.) to create a richer visual vocabulary.

🔬 This case draws a flower with four petals. What happens if you comment out one of the rect() lines, like the top petal? Will you see a three-petal flower?

    case 'flower':
      // Simple pixel flower (can be reinterpreted as a data point or quantum bit)
      fill(50, 100, 100, alpha); // Yellow center
      circle(0, 0, pixelSize * 4);
      fill(300, 80, 100, alpha); // Pink petals
      rectMode(CENTER);
      rect(0, -pixelSize * 3, pixelSize * 2, pixelSize * 2);
      rect(pixelSize * 3, 0, pixelSize * 2, pixelSize * 2);
      rect(0, pixelSize * 3, pixelSize * 2, pixelSize * 2);
      rect(-pixelSize * 3, 0, pixelSize * 2, pixelSize * 2);
function drawPixelArtItem(x, y, size, itemName, alpha = 100) {
  push();
  translate(x, y);
  noStroke();
  
  let itemSize = size * 0.4; // Item size relative to stick figure size
  let pixelSize = itemSize / 10; // Base pixel size for 10x10 grid (adjust as needed)
  
  // Position slightly below the stick figure's feet
  translate(0, size * 0.5 + size * 0.1);
  
  switch (itemName) {
    case 'flower':
      // Simple pixel flower (can be reinterpreted as a data point or quantum bit)
      fill(50, 100, 100, alpha); // Yellow center
      circle(0, 0, pixelSize * 4);
      fill(300, 80, 100, alpha); // Pink petals
      rectMode(CENTER);
      rect(0, -pixelSize * 3, pixelSize * 2, pixelSize * 2);
      rect(pixelSize * 3, 0, pixelSize * 2, pixelSize * 2);
      rect(0, pixelSize * 3, pixelSize * 2, pixelSize * 2);
      rect(-pixelSize * 3, 0, pixelSize * 2, pixelSize * 2);
      break;
    case 'heart':
      // Simple pixel heart (can be reinterpreted as entanglement or connection)
      fill(0, 80, 100, alpha); // Red heart
      rectMode(CENTER);
      // Top two squares
      rect(-pixelSize, -pixelSize * 2, pixelSize * 2, pixelSize * 2);
      rect(pixelSize, -pixelSize * 2, pixelSize * 2, pixelSize * 2);
      // Main body
      rect(0, 0, pixelSize * 6, pixelSize * 6);
      // Cutout for heart shape
      fill(0, 0, 100, alpha); // White color to cut out top
      rect(0, -pixelSize * 2, pixelSize * 2, pixelSize * 2);
      break;
    case 'star':
      // Simple pixel star (can be reinterpreted as a distant galaxy or energy source)
      fill(50, 100, 100, alpha); // Yellow star
      rectMode(CENTER);
      rect(0, 0, pixelSize * 6, pixelSize * 2);
      rect(0, -pixelSize * 2, pixelSize * 2, pixelSize * 2);
      rect(0, pixelSize * 2, pixelSize * 2, pixelSize * 2);
      rect(-pixelSize * 2, -pixelSize, pixelSize * 2, pixelSize * 2);
      rect(pixelSize * 2, -pixelSize, pixelSize * 2, pixelSize * 2);
      break;
    case 'cloud':
      // Simple pixel cloud (can be reinterpreted as a molecular cloud or nebula)
      fill(0, 0, 100, alpha); // White cloud
      rectMode(CENTER);
      rect(-pixelSize * 2, 0, pixelSize * 4, pixelSize * 4);
      rect(pixelSize * 2, 0, pixelSize * 4, pixelSize * 4);
      rect(0, -pixelSize * 2, pixelSize * 4, pixelSize * 4);
      break;
    default:
      // No item
      break;
  }
  
  pop();
}
Line-by-line explanation (9 lines)

🔧 Subcomponents:

switch-case Item Type Selection switch (itemName) {

Uses a switch statement to branch on the itemName parameter and draw the appropriate pixel-art symbol (flower, heart, star, or cloud).

calculation Flower Drawing case 'flower':

Draws a pixel-art flower with a yellow center circle and four pink petals positioned at cardinal directions.

let itemSize = size * 0.4;
Scales the item to 40% of the stick figure's size, so larger figures get larger items proportionally.
let pixelSize = itemSize / 10;
Calculates a base unit size for drawing pixel-art shapes on an imaginary 10x10 grid, allowing all items to scale together.
translate(0, size * 0.5 + size * 0.1);
Moves the drawing origin down below the stick figure's feet (size * 0.5 gets to the hip, +size * 0.1 goes further down), positioning the item below the figure.
switch (itemName) {
Evaluates the itemName string and jumps to the matching case block, allowing different items to be drawn based on the name.
fill(50, 100, 100, alpha);
Sets the fill color to a bright yellow (hue 50) with full saturation and brightness.
fill(300, 80, 100, alpha);
Sets the fill color to pink (hue 300, a magenta hue) with high saturation and brightness.
rect(0, -pixelSize * 3, pixelSize * 2, pixelSize * 2);
Draws a square petal at the top of the flower, positioned at -3 pixelSize units above the origin.
fill(0, 80, 100, alpha);
Sets the fill color to red (hue 0) for the heart shape.
fill(0, 0, 100, alpha);
Sets the fill color to pure white (no saturation, full brightness) for drawing the heart's cutout.

mousePressed()

mousePressed() is a built-in p5.js callback that fires whenever the mouse is clicked (or the screen is tapped on mobile). In this sketch, it overrides the automatic scene advancement, allowing viewers to skip ahead manually or go back to re-read a scene.

function mousePressed() {
  // Advance to the next scene on tap
  sceneTimer = 0;
  currentSceneIndex = (currentSceneIndex + 1) % scenes.length;
}
Line-by-line explanation (2 lines)
sceneTimer = 0;
Resets the scene timer to 0, effectively starting the new scene from the beginning of its fade-in phase.
currentSceneIndex = (currentSceneIndex + 1) % scenes.length;
Increments the current scene index by 1, and uses the modulo operator (%) to wrap back to 0 when the index exceeds the number of scenes, creating a loop.

setCanvasDimensions()

setCanvasDimensions() is a helper function that keeps the canvas responsive to window resizing. By centralizing canvas size logic here, the code stays clean and it's easy to adjust the aspect ratio in one place (the TARGET_ASPECT_RATIO constant).

function setCanvasDimensions() {
  canvasHeight = windowHeight;
  canvasWidth = canvasHeight * TARGET_ASPECT_RATIO;
  createCanvas(canvasWidth, canvasHeight);
}
Line-by-line explanation (3 lines)
canvasHeight = windowHeight;
Sets the canvas height to match the full window height, filling the vertical space.
canvasWidth = canvasHeight * TARGET_ASPECT_RATIO;
Calculates the canvas width by multiplying the height by the target aspect ratio (16:9), ensuring the canvas maintains the desired proportions.
createCanvas(canvasWidth, canvasHeight);
Creates the actual p5.js canvas with the calculated width and height.

windowResized()

windowResized() is a built-in p5.js callback that fires whenever the browser window is resized. By calling setCanvasDimensions(), the sketch dynamically adapts to new screen sizes, making it work well on mobile and desktop.

function windowResized() {
  setCanvasDimensions(); // Recalculate and resize canvas on window resize
}
Line-by-line explanation (1 lines)
setCanvasDimensions();
Calls the helper function to recalculate canvas dimensions based on the new window size and recreate the canvas.

📦 Key Variables

robotoFont object (p5.Font)

Stores the regular-weight Roboto font loaded from a CDN, used for small text like the 'Tap to continue' hint.

let robotoFont;
robotoFontBold object (p5.Font)

Stores the bold-weight Roboto font loaded from a CDN, used for the main narrative dialogue.

let robotoFontBold;
particles array of objects

Holds all floating particle objects, each with x, y, size, speed, and hue properties. These animate continuously in the background.

let particles = [];
ambientShapes array of objects

Holds all organic blob shape objects, each with x, y, radius, hue, and noiseOffset properties. These morph using Perlin noise to create living, breathing backgrounds.

let ambientShapes = [];
currentSceneIndex number

Tracks which scene in the scenes array is currently being displayed (0–8).

let currentSceneIndex = 0;
sceneTimer number

Counts frames within the current scene. When it reaches sceneDuration, the scene advances and the timer resets.

let sceneTimer = 0;
sceneDuration number

The number of frames each scene stays on screen before auto-advancing (150 frames = 2.5 seconds at 60 fps).

let sceneDuration = 150;
TARGET_ASPECT_RATIO number (constant)

Defines the desired canvas aspect ratio (16:9), used to calculate canvas dimensions based on window size.

const TARGET_ASPECT_RATIO = 16 / 9;
canvasWidth number

Stores the calculated width of the canvas in pixels, computed from window height and the target aspect ratio.

let canvasWidth;
canvasHeight number

Stores the calculated height of the canvas in pixels, matching the window height.

let canvasHeight;
scenes array of objects

The core narrative data structure. Each object represents one scene with bgHue, text, figure1, and figure2 properties defining the visual and textual content.

let scenes = [ { bgHue: 240, text: '...', figure1: {...}, figure2: null }, ... ];

🔧 Potential Improvements (6)

Here are some ways this code could be enhanced:

BUG mousePressed()

Clicking anywhere on the page advances the scene, even if a user meant to interact with other page elements. On mobile, any touch advances the scene.

💡 Add a check for whether the click occurred within the canvas: if (mouseX > 0 && mouseX < width && mouseY > 0 && mouseY < height) before advancing.

PERFORMANCE drawPixelArtItem() switch statement

The function is called twice per scene (once per figure) and recalculates pixelSize, rectMode, and translate every time, even though these rarely change.

💡 Precompute item geometries as data objects (arrays of rectangles/circles) in setup(), then iterate over them in draw() to reduce redundant calculations.

STYLE scenes array

The scenes array is very long and mixes narrative data with positional/visual data, making it hard to read and maintain.

💡 Separate narrative from visuals: create a narrativeScenes array with just text, and a visualScenes array with figures and poses; map them together with a simple index.

FEATURE draw() and mousePressed()

There is no way to go backward through scenes or pause/resume the animation—only forward auto-advance or tap to skip ahead.

💡 Add keyboard controls: press left/right arrow keys to go backward/forward, or space to toggle pause mode. Store a paused flag and check it before incrementing sceneTimer.

BUG draw() alpha fade calculation

The fade-in and fade-out happen over the same time (15% each), but if a scene is very short or the text is long, the fade may overlap with reading time.

💡 Make fade durations independent of sceneDuration by using a constant frame count (e.g., first 9 frames fade in, last 9 fade out) rather than percentages.

STYLE drawStickFigure() and drawPixelArtItem()

Magic numbers like 0.65, 0.3, 0.08, etc., are hardcoded throughout, making it difficult to adjust proportions globally.

💡 Define constants like HEAD_OFFSET, BODY_WIDTH, ARM_THICKNESS at the top of the file, then use them throughout. This makes the figure proportions easy to tweak.

🔄 Code Flow

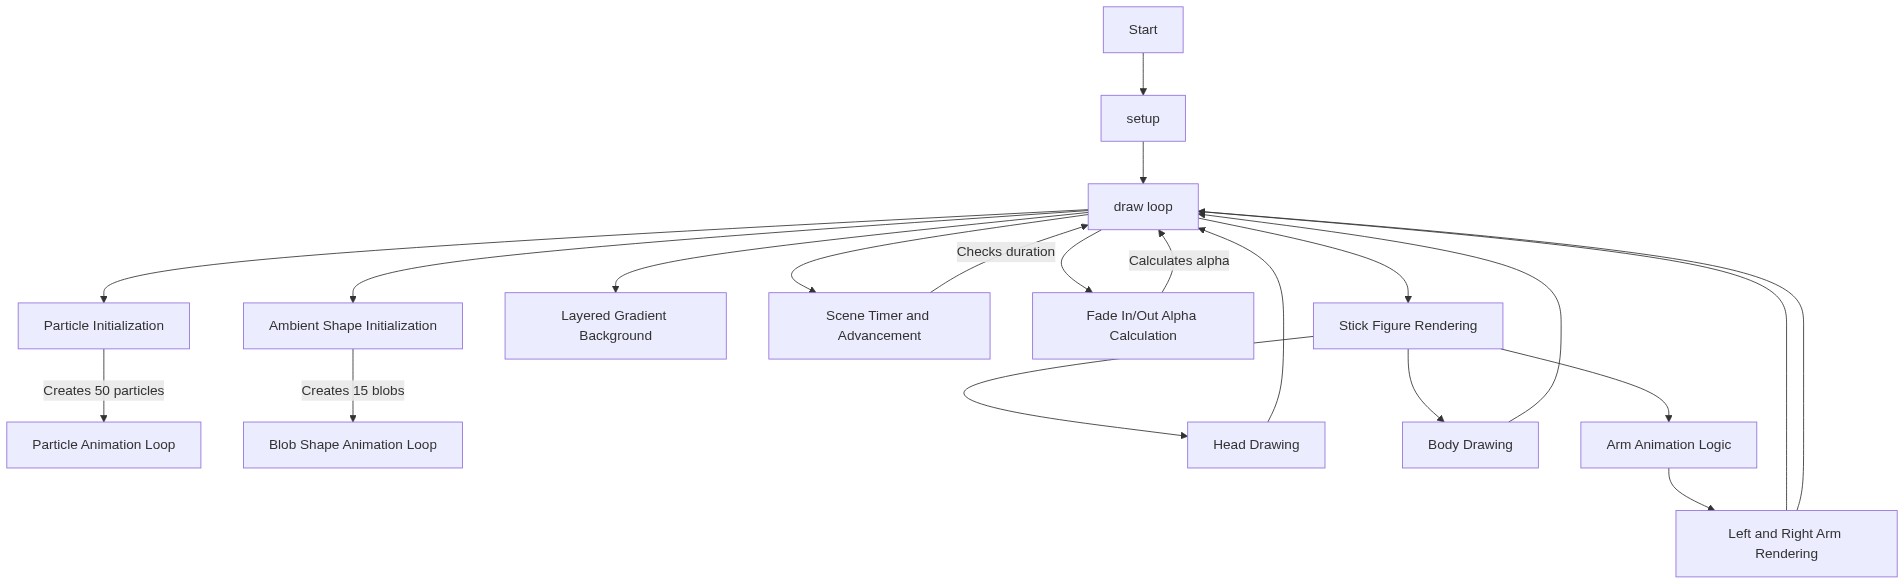
Code flow showing preload, setup, draw, drawstickfigure, drawpixelartitem, mousepressed, setcanvasdimensions, windowresized

💡 Click on function names in the diagram to jump to their code

graph TD start[Start] --> setup[setup] setup --> particle-init[Particle Array Population] setup --> blob-init[Blob Shape Array Population] setup --> draw[draw loop] click setup href "#fn-setup" click particle-init href "#sub-particle-init" click blob-init href "#sub-blob-init" draw --> gradient-layer[Layered Gradient Background] draw --> scene-advance[Scene Auto-Advance] draw --> fade-calculation[Fade In/Out Alpha] draw --> figure-rendering[Conditional Figure Rendering] draw --> particle-animation[Particle Animation Loop] draw --> blob-animation[Organic Blob Animation Loop] click draw href "#fn-draw" click gradient-layer href "#sub-gradient-layer" click scene-advance href "#sub-scene-advance" click fade-calculation href "#sub-fade-calculation" click figure-rendering href "#sub-figure-rendering" click particle-animation href "#sub-particle-animation" click blob-animation href "#sub-blob-animation" particle-animation --> particle-loop[Particle Animation Loop] particle-loop --> particle-update[Update Particle Position] particle-update --> particle-recycle[Recycle Off-Screen Particles] particle-recycle --> particle-hue[Cycle Particle Hues] particle-hue --> particle-draw[Draw Particles] click particle-loop href "#sub-particle-animation" click particle-update href "#sub-particle-update" click particle-recycle href "#sub-particle-recycle" click particle-hue href "#sub-particle-hue" click particle-draw href "#sub-particle-draw" blob-animation --> blob-loop[Organic Blob Animation Loop] blob-loop --> blob-morph[Morph Blob Boundaries] blob-morph --> blob-draw[Draw Blobs] click blob-loop href "#sub-blob-animation" click blob-morph href "#sub-blob-morph" click blob-draw href "#sub-blob-draw" figure-rendering --> figure-check[Check Figure Existence] figure-check --> draw-stick-figure[Draw Stick Figure] figure-check --> draw-item[Draw Pixel Art Item] click figure-check href "#sub-figure-check" click draw-stick-figure href "#fn-drawstickfigure" click draw-item href "#fn-drawpixelartitem" draw-stick-figure --> arm-angle-calc[Arm Animation Angle] draw-stick-figure --> leg-angle-calc[Leg Animation Angle] click arm-angle-calc href "#sub-arm-angle-calc" click leg-angle-calc href "#sub-leg-angle-calc" draw-item --> item-switch[Item Type Selection] item-switch --> flower-case[Flower Drawing] click item-switch href "#sub-item-switch" click flower-case href "#sub-flower-case"

❓ Frequently Asked Questions

What visual experience does 'A tale of space and science' offer?

The sketch presents a cinematic stick-figure space story with smooth gradient skies, glowing particles, and shifting abstract shapes, creating a captivating visual journey.

Can users interact with the 'A tale of space and science' sketch?

This particular sketch is designed to be a passive viewing experience, where users watch the animated scenes unfold without direct interaction.

What creative coding techniques are showcased in this p5.js sketch?

The sketch demonstrates techniques such as scene transitions, animated figure movements, and the use of color gradients to enhance storytelling in a visual format.

Preview

A tale of space and science - p5.js creative coding sketch preview
Sketch Preview
Code flow diagram showing the structure of A tale of space and science - Code flow showing preload, setup, draw, drawstickfigure, drawpixelartitem, mousepressed, setcanvasdimensions, windowresized
Code Flow Diagram