
AI Coffee Cooling - Watch Your Drink Get Cold

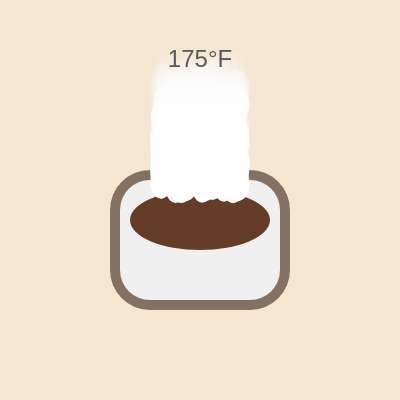
This sketch simulates a cup of coffee slowly cooling from 180°F down to room temperature, with rising steam that fades as the drink cools and status messages that appear at key temperature thresholds. The cup itself subtly shifts color from a warm tan to a cooler gray-brown as it loses heat, and steam particles are spawned, animated, and removed continuously to create a living, breathing thermal simulation.

🧪 Try This!

Experiment with the code by making these changes:

  1. Speed up the cooling — Increasing the amount subtracted from temp each frame makes the coffee cool down (and the whole simulation finish) much faster.
  2. Make steam thicker — Raising the top end of the steam rate mapping produces many more steam puffs per frame while the coffee is hot.
  3. Give the coffee a colder starting point — Lowering the starting temp value means the coffee starts closer to room temperature, so it reaches 'Cold :(' almost immediately.
Prefer the full editor? Open it there →

📖 About This Sketch

This sketch renders a cartoon coffee cup that cools in real time from a scorching 180°F down to a chilly 72°F room temperature, complete with rising wisps of steam that thin out as the drink loses heat. It leans on p5.js color interpolation with lerpColor(), value remapping with map(), and a particle-style array of steam puffs that are created and destroyed every frame - three techniques that show up constantly in generative art and simulations. The steam behaves like a tiny particle system: each puff is an object with its own position, upward velocity, and fading alpha value, pushed into an array and later spliced out once it becomes invisible.

The code is intentionally compact, with a single global temp variable driving almost everything you see - the cup's color, the amount of steam produced, and which status text appears on screen. By studying draw() you'll learn how one changing number can be remapped with map() into several different visual properties (color mix, particle count, transparency) to make a whole scene feel alive, and how to manage a growing-and-shrinking array of particles safely by looping backwards when removing items.

⚙️ How It Works

  1. When the sketch loads, setup() creates a full-window canvas, defines the warm and cool cup colors used later for blending, and sets up centered text alignment for the temperature readout.
  2. Every frame, draw() paints a soft background, then nudges temp a tiny bit closer to the 72°F target - since temp can never drop below target, the cooling naturally levels off instead of overshooting.
  3. The cup's fill color is calculated fresh each frame by mapping the current temp into a 0-to-1 blend factor and using lerpColor() to mix between the warm and cool cup colors, so the cup visibly shifts hue as it cools.
  4. How much steam appears is also driven by temp: map() converts the current temperature into a particle spawn rate (up to 20 new puffs per frame when hot, zero once room temperature is reached), and new steam objects are pushed into the steam array with random horizontal offsets and upward velocities.
  5. A second loop walks backward through the steam array, moving each puff upward, fading its alpha, and removing it once it becomes fully transparent - walking backward avoids skipping elements when splicing.
  6. Finally, the current temperature is drawn as text, and a simple if/else chain checks temp against 120°F and 72°F to display 'Drinkable!' or 'Cold :(' at the right moments.

🎓 Concepts You'll Learn

Color interpolation with lerpColorValue remapping with map()Particle systems using arrays of objectsReverse iteration for safe array removalConditional status messagesResponsive canvas with windowResized

📝 Code Breakdown

setup()

setup() runs once when the sketch starts. It's the right place to define fixed colors and text settings that draw() will reuse every frame instead of recalculating them.

function setup(){
  createCanvas(windowWidth,windowHeight);
  warmCup=color(200,150,90);
  coolCup=color(130,110,100);
  textAlign(CENTER,CENTER);textSize(24);
}
Line-by-line explanation (4 lines)
createCanvas(windowWidth,windowHeight);
Creates a canvas that fills the entire browser window, so the coffee cup scene stretches to fit any screen size.
warmCup=color(200,150,90);
Stores a warm tan-brown color to represent the cup when the coffee is hot - used later as the starting color for blending.
coolCup=color(130,110,100);
Stores a cooler, grayer color to represent the cup once the coffee has cooled - this is the color the cup blends toward.
textAlign(CENTER,CENTER);textSize(24);
Sets all future text to be centered on its x/y position and to render at 24 pixels tall, so the temperature readout sits neatly in place.
draw()

draw() runs continuously, around 60 times per second. This sketch shows how a single changing value (temp) can be reused via map() to drive completely different visual properties - color blending, particle spawn rate, and transparency - all from one source of truth.

🔬 This line spawns steam puffs with an upward speed between -0.5 and -1.5. What happens visually if you widen that range to random(-0.5,-4), making the steam shoot up much faster?

  for(let i=0;i<rate;i++)steam.push({x:cupX+random(-40,40),y:cupY-60+random(-10,10),vy:random(-0.5,-1.5),a:255});

🔬 The ellipse drawn for each steam puff is 20 by 30 pixels. What happens if you make steam puffs much bigger, like 50 by 70?

    if(p.a<=0)steam.splice(i,1);
    else{fill(255,255,255,p.a*map(temp,72,180,0.2,1,true));ellipse(p.x,p.y,20,30);}
function draw(){
  background(245,230,210);
  temp=max(target,temp-0.02);
  let cupX=width/2,cupY=height*0.6;
  let cupCol=lerpColor(warmCup,coolCup,map(temp,72,180,0,1,true));
  noStroke();rectMode(CENTER);fill(cupCol);
  rect(cupX,cupY,180,140,40);
  fill(240);rect(cupX,cupY,160,120,30);
  fill(100,60,40);ellipse(cupX,cupY-20,140,60);
  let rate=int(map(temp,72,180,0,20,true));
  for(let i=0;i<rate;i++)steam.push({x:cupX+random(-40,40),y:cupY-60+random(-10,10),vy:random(-0.5,-1.5),a:255});
  for(let i=steam.length-1;i>=0;i--){
    let p=steam[i];p.y+=p.vy;p.a-=3;
    if(p.a<=0)steam.splice(i,1);
    else{fill(255,255,255,p.a*map(temp,72,180,0.2,1,true));ellipse(p.x,p.y,20,30);}
  }
  fill(90);text(floor(temp)+"°F",width/2,height*0.15);
  if(temp<=120 && temp>72)text("Drinkable!",width/2,height*0.25);
  else if(temp<=72)text("Cold :(",width/2,height*0.25);
}
Line-by-line explanation (16 lines)

🔧 Subcomponents:

for-loop Steam Spawner for(let i=0;i<rate;i++)steam.push({x:cupX+random(-40,40),y:cupY-60+random(-10,10),vy:random(-0.5,-1.5),a:255});

Creates new steam particle objects and adds them to the steam array, with the count controlled by the current temperature.

for-loop Steam Updater (reverse loop) for(let i=steam.length-1;i>=0;i--){

Walks backward through every steam particle to move it upward, fade it, and remove it once invisible - backward iteration keeps splice() from skipping items.

conditional Remove Faded Steam if(p.a<=0)steam.splice(i,1);

Deletes a steam particle from the array once its alpha (opacity) has faded to zero or below.

conditional Status Message Check if(temp<=120 && temp>72)text("Drinkable!",width/2,height*0.25); else if(temp<=72)text("Cold :(",width/2,height*0.25);

Displays 'Drinkable!' while the coffee is in a safe-to-drink range, and 'Cold :(' once it reaches room temperature.

background(245,230,210);
Repaints the whole canvas with a warm cream color every frame, which erases the previous frame's drawing so nothing smears.
temp=max(target,temp-0.02);
Subtracts a tiny amount of heat from temp each frame, but max() stops it from ever dropping below target (72), so the cooling naturally levels off.
let cupX=width/2,cupY=height*0.6;
Calculates the horizontal and vertical center point where the cup will be drawn, positioned a bit below the vertical middle of the screen.
let cupCol=lerpColor(warmCup,coolCup,map(temp,72,180,0,1,true));
Converts the current temperature into a 0-to-1 blend amount, then mixes warmCup and coolCup by that amount to get the cup's current color.
noStroke();rectMode(CENTER);fill(cupCol);
Turns off outlines, tells rect() to draw shapes centered on the coordinates given (instead of from a corner), and sets the fill color for the next shape.
rect(cupX,cupY,180,140,40);
Draws the outer cup body as a rounded rectangle 180 pixels wide and 140 tall, with 40-pixel rounded corners.
fill(240);rect(cupX,cupY,160,120,30);
Draws a lighter, slightly smaller rectangle on top to create the illusion of the cup's inner rim/wall.
fill(100,60,40);ellipse(cupX,cupY-20,140,60);
Draws a dark brown ellipse near the top of the cup to represent the coffee's surface.
let rate=int(map(temp,72,180,0,20,true));
Maps the current temperature to a whole number between 0 and 20 - hotter coffee produces a higher steam spawn rate.
for(let i=0;i<rate;i++)steam.push({x:cupX+random(-40,40),y:cupY-60+random(-10,10),vy:random(-0.5,-1.5),a:255});
Creates 'rate' new steam particle objects this frame, each starting near the coffee surface with a random horizontal jitter, a random upward speed, and full opacity (a:255).
let p=steam[i];p.y+=p.vy;p.a-=3;
Grabs one steam particle, moves it upward by its velocity, and reduces its alpha by 3 so it gradually fades out.
if(p.a<=0)steam.splice(i,1);
If the particle has fully faded, it's removed from the array so it isn't drawn or updated anymore.
else{fill(255,255,255,p.a*map(temp,72,180,0.2,1,true));ellipse(p.x,p.y,20,30);}
Otherwise, draws the particle as a white ellipse whose transparency depends on both its own fade (p.a) and the coffee's temperature - steam looks fainter as the coffee cools.
fill(90);text(floor(temp)+"°F",width/2,height*0.15);
Draws the rounded-down current temperature near the top of the screen in dark gray text.
if(temp<=120 && temp>72)text("Drinkable!",width/2,height*0.25);
Shows a 'Drinkable!' message while the coffee is between room temperature and 120°F, the sweet spot for sipping.
else if(temp<=72)text("Cold :(",width/2,height*0.25);
Once the coffee reaches room temperature, switches the message to 'Cold :(' instead.

windowResized()

windowResized() is a special p5.js function that's automatically called whenever the browser window is resized, which is essential for building responsive full-window sketches.

function windowResized(){resizeCanvas(windowWidth,windowHeight);}
Line-by-line explanation (1 lines)
resizeCanvas(windowWidth,windowHeight);
Whenever the browser window changes size, this resizes the canvas to match, so the coffee scene always fills the screen.

📦 Key Variables

temp number

Tracks the current coffee temperature in Fahrenheit; drives the cup color, steam rate, and status text every frame.

let temp = 180;
target number

The room temperature the coffee cools down to and stops at.

let target = 72;
steam array

Holds all active steam particle objects, each with position, velocity, and alpha (opacity).

let steam = [];
warmCup object (p5.Color)

The cup's color when the coffee is at its hottest, used as the starting point for lerpColor blending.

let warmCup = color(200, 150, 90);
coolCup object (p5.Color)

The cup's color once the coffee has fully cooled, used as the ending point for lerpColor blending.

let coolCup = color(130, 110, 100);

🔧 Potential Improvements (4)

Here are some ways this code could be enhanced:

STYLE Whole file

The code is extremely compact with almost no whitespace or line breaks between statements (e.g. multiple statements chained on one line like 'noStroke();rectMode(CENTER);fill(cupCol);'), which makes it harder for beginners to read and debug.

💡 Add line breaks and spacing between statements, and consider extracting magic numbers like 72 and 180 into named constants (e.g. const ROOM_TEMP = 72; const START_TEMP = 180;) so their meaning is clearer and they're easier to change consistently.

PERFORMANCE draw()

map(temp,72,180,0,1,true) and map(temp,72,180,0,20,true) both remap the same input range every single frame, and the alpha calculation inside the steam loop calls map() again for every particle, every frame.

💡 Since these mappings share the same input range, you could compute a single normalized value once per frame (e.g. let tNorm = map(temp,72,180,0,1,true);) and reuse it for the color blend, steam rate, and alpha calculations instead of calling map() repeatedly.

FEATURE draw() / general interactivity

The simulation is entirely passive - once the coffee cools down, there's nothing for the user to do, and refreshing the page is the only way to restart it.

💡 Add a mousePressed() function that resets temp back to 180 (perhaps only when the cup is clicked), letting viewers 'reheat' and re-watch the coffee cool without reloading the page.

BUG draw() status text conditions

The condition temp<=120 && temp>72 excludes exactly 72°F from ever showing 'Drinkable!', which is a minor edge case, but more importantly there's no message shown at all while temp is between 120 and 180 (i.e. 'too hot to drink' has no feedback).

💡 Consider adding a third message for the hot range, e.g. else if(temp>120)text('Too Hot!', width/2, height*0.25); so every temperature range gives the viewer feedback.

🔄 Code Flow

Code flow showing setup, draw, windowresized

💡 Click on function names in the diagram to jump to their code

graph TD start[Start] --> setup[setup] setup --> draw[draw loop] draw --> spawnloop[spawn-steam-loop] spawnloop --> updateloop[update-steam-loop] updateloop --> steamcheck[steam-removal-check] updateloop --> drinkcheck[drinkable-cold-check] drinkcheck --> draw click setup href "#fn-setup" click draw href "#fn-draw" click spawnloop href "#sub-spawn-steam-loop" click updateloop href "#sub-update-steam-loop" click steamcheck href "#sub-steam-removal-check" click drinkcheck href "#sub-drinkable-cold-check"

❓ Frequently Asked Questions

What visual experience does the AI Coffee Cooling sketch provide?

The sketch visually simulates a cup of coffee cooling down, displaying a gradual temperature drop from 180°F while steam dissipates, and the cup color subtly shifts from warm to cool.

Is the AI Coffee Cooling sketch interactive for users?

The sketch is not interactive; it runs automatically, allowing users to observe the coffee cooling process and the accompanying visual effects.

What creative coding techniques are showcased in this sketch?

This sketch demonstrates techniques such as color interpolation, particle simulation for steam, and dynamic text display based on temperature changes.

Preview

AI Coffee Cooling - Watch Your Drink Get Cold - p5.js creative coding sketch preview
Sketch Preview
Code flow diagram showing the structure of AI Coffee Cooling - Watch Your Drink Get Cold - Code flow showing setup, draw, windowresized
Code Flow Diagram