AI Dream Painter - xelsed.ai

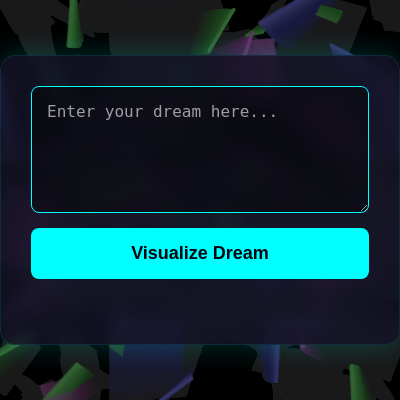
This sketch turns a typed dream description into a living abstract painting: text is sent to OpenAI, which returns a mood, three colors, a speed, and a shape type, and fifty floating shapes then drift across a fading canvas using those AI-chosen properties. The result is a generative visual mood-board that morphs every time you submit new text.

🧪 Try This!

Experiment with the code by making these changes:

  1. Fill the screen with more shapes — Raising NUM_SHAPES creates a much denser, busier composition since more FloatingShape objects are created on every reset.
  2. Lengthen the motion trails — Lowering the fade alpha in draw() makes the black overlay more transparent, so old shape positions linger much longer on screen.
  3. Speed up all the motion — Increasing BASE_SPEED makes every shape's angle advance faster each frame, so the whole scene feels more energetic even before the AI weighs in.
Prefer the full editor? Open it there →

📖 About This Sketch

AI Dream Painter lets you type a dream or thought into a text box, sends it to OpenAI's GPT-4o-mini, and uses the AI's structured JSON reply - a mood, three hex colors, a speed, and a shape - to drive fifty softly drifting particles across the screen. Visually it relies on Perlin noise for organic wandering motion, a low-alpha background() call each frame to create motion trails, and canvas shadowBlur for glow effects on 'happy' and 'energetic' moods. It's a great example of combining an external API with real-time generative animation.

The code is organized around a small OOP FloatingShape class that each shape instance uses for its own position, size and color index, plus a handful of p5.js lifecycle functions (preload, setup, draw, windowResized) and one async function, callOpenAI(), that talks to the network. By studying it you'll learn how to call fetch() with async/await inside a sketch, how to safely parse and validate JSON coming back from an LLM, and how switch statements can map a handful of AI-generated labels ('mood', 'speed', 'shape') onto very different rendering behavior.

⚙️ How It Works

  1. When the page loads, preload() decrypts a hidden API key and setup() creates a full-window canvas, grabs the textarea/button/message DOM elements, wires up event listeners, and creates 50 FloatingShape objects using default mood/color/speed/shape values.
  2. Every frame, draw() paints a nearly-transparent black rectangle over the whole canvas (instead of fully clearing it) which leaves faint trails behind moving shapes, then loops over the shapes array calling update() and display() on each one.
  3. Each shape's update() nudges its angle forward based on the AI's 'speed' setting, then uses Perlin noise to add small organic jitter to its x/y position, wrapping around the edges of the screen so nothing disappears off-canvas.
  4. When you type a dream and press the button (or hit Enter), callOpenAI() sends your text to the OpenAI chat completions endpoint with a system prompt asking for mood, colors, speed, and shape as JSON.
  5. The parsed response overwrites the global aiOutput object and initializeShapes() rebuilds all 50 shapes so they immediately reflect the new colors, and on every subsequent frame display() reads aiOutput.mood and aiOutput.shape to decide fill/stroke/glow and whether to draw circles, triangles, or lines.
  6. If the network call fails or the AI returns malformed JSON, the code falls back to a default 'mysterious' mood so the visualization never breaks.

🎓 Concepts You'll Learn

Async/await & fetch API callsDOM manipulation with select()Perlin noise for organic motionObject-oriented programming with ES6 classesJSON parsing & validationSwitch statements for state-driven renderingCanvas shadowBlur glow effects

📝 Code Breakdown

getApiKey()

This function demonstrates a very lightweight (and not very secure) way to hide a string in client-side code. Because everything runs in the browser, a determined user can still open devtools and call getApiKey() directly - true secrets should live on a server, never in client JavaScript.

function getApiKey() {
  if (!apiKey) {
    apiKey = atob(encoded).split('').map(c => String.fromCharCode(c.charCodeAt(0) ^ key)).join('');
  }
  return apiKey;
}
Line-by-line explanation (3 lines)

🔧 Subcomponents:

conditional Decrypt Once if (!apiKey) {

Only decrypts the key the first time it's called, caching the result in the global apiKey variable

if (!apiKey) {
Checks whether the key has already been decrypted; if apiKey is still undefined, we do the work below
apiKey = atob(encoded).split('').map(c => String.fromCharCode(c.charCodeAt(0) ^ key)).join('');
atob() decodes the base64 string, then each character's char code is XORed with the secret key number and turned back into a character, reversing a simple XOR-encryption scheme
return apiKey;
Returns the decrypted key string so it can be used in the Authorization header of the fetch request

preload()

preload() is a special p5.js function that runs before setup() and is meant for loading assets (images, fonts, data) that later code depends on. Here it's repurposed to guarantee the API key exists before any button clicks can happen.

function preload() {
  getApiKey(); // Ensure API key is decrypted
}
Line-by-line explanation (1 lines)
getApiKey();
Calls the decryption function once before setup() runs, so the API key is ready as soon as the sketch starts

setup()

setup() runs once and is the right place to configure the canvas, grab DOM references with select(), and wire up event listeners so your sketch can respond to user input.

function setup() {
  createCanvas(windowWidth, windowHeight);
  background(0);
  noStroke();

  // Select the HTML DOM elements
  dreamInput = select('#dream-input');
  visualizeButton = select('#visualize-button');
  responseDiv = select('#response-message');

  // Attach event listeners
  visualizeButton.mousePressed(callOpenAI);
  // Attach keypress listener to the raw HTML element for Enter key detection
  dreamInput.elt.onkeypress = handleKeyPress;

  // Initialize shapes with default AI output
  initializeShapes();
}
Line-by-line explanation (9 lines)
createCanvas(windowWidth, windowHeight);
Creates a canvas that fills the entire browser window
background(0);
Paints the canvas black once before animation starts
noStroke();
Turns off outlines by default for shapes drawn later (individual shapes may re-enable stroke)
dreamInput = select('#dream-input');
Grabs the HTML textarea element so p5.js can read its value and attach events to it
visualizeButton = select('#visualize-button');
Grabs the button element so a click handler can be attached
responseDiv = select('#response-message');
Grabs the message div used to show status text like 'Analyzing dream...'
visualizeButton.mousePressed(callOpenAI);
Registers callOpenAI() to run whenever the button is clicked
dreamInput.elt.onkeypress = handleKeyPress;
Accesses the raw underlying HTML element (.elt) to attach a native onkeypress handler for detecting the Enter key
initializeShapes();
Builds the initial array of 50 FloatingShape objects using the default aiOutput values

draw()

draw() is the animation heartbeat of any p5.js sketch, running roughly 60 times per second. Using a translucent background() instead of a fully opaque one is a classic trick for creating trailing/ghosting effects cheaply.

🔬 This loop is what makes every shape move and appear each frame. What do you think happens if you comment out shapeObj.update() but leave shapeObj.display()?

  for (let shapeObj of shapes) {
    shapeObj.update();
    shapeObj.display();
  }
function draw() {
  background(0, 5); // Subtle fade effect for trails

  for (let shapeObj of shapes) {
    shapeObj.update();
    shapeObj.display();
  }
}
Line-by-line explanation (4 lines)

🔧 Subcomponents:

for-loop Update & Draw Each Shape for (let shapeObj of shapes) {

Loops through every FloatingShape in the array, moving it and then drawing it in its new position

background(0, 5); // Subtle fade effect for trails
Draws a black rectangle over the whole canvas with only alpha 5 out of 255, so old frames aren't fully erased - this creates soft motion trails instead of a hard wipe
for (let shapeObj of shapes) {
A for...of loop that visits every shape object stored in the global shapes array
shapeObj.update();
Calls the shape's own update() method to move it slightly based on AI speed and Perlin noise
shapeObj.display();
Calls the shape's own display() method to draw it with the AI-determined color, mood styling, and shape type

windowResized()

windowResized() is an automatically-called p5.js function whenever the browser window changes size, letting you keep your canvas and content responsive.

function windowResized() {
  resizeCanvas(windowWidth, windowHeight);
  initializeShapes(); // Re-initialize shapes to adapt to new canvas size
}
Line-by-line explanation (2 lines)
resizeCanvas(windowWidth, windowHeight);
Adjusts the canvas element to match the browser window's new width and height
initializeShapes();
Recreates all shapes so their positions are valid random coordinates within the newly sized canvas

initializeShapes()

This function is called both on startup and every time the AI returns a new response, which is why the whole visualization instantly refreshes with new colors: it literally throws away the old shapes and builds new ones.

🔬 This loop decides how many shapes exist. What happens visually if you spawn them all near the center instead of randomly across the whole canvas?

  for (let i = 0; i < NUM_SHAPES; i++) {
    shapes.push(new FloatingShape(random(width), random(height)));
  }
function initializeShapes() {
  shapes = [];
  for (let i = 0; i < NUM_SHAPES; i++) {
    shapes.push(new FloatingShape(random(width), random(height)));
  }
}
Line-by-line explanation (3 lines)

🔧 Subcomponents:

for-loop Create Shapes for (let i = 0; i < NUM_SHAPES; i++) {

Runs NUM_SHAPES times, each time constructing a new FloatingShape at a random position and pushing it into the shapes array

shapes = [];
Empties the shapes array, discarding any existing shapes
for (let i = 0; i < NUM_SHAPES; i++) {
Loops NUM_SHAPES times (default 50) to build a fresh batch of shapes
shapes.push(new FloatingShape(random(width), random(height)));
Creates a new FloatingShape object at a random x,y position on the canvas and adds it to the array

handleKeyPress()

This is a native DOM event handler (not a p5.js function) attached directly to the textarea's onkeypress property, showing how p5.js sketches can freely mix with regular browser JavaScript and events.

function handleKeyPress(event) {
  if (event.keyCode === 13 && !event.shiftKey) { // 13 is Enter key, !event.shiftKey to allow new lines
    event.preventDefault(); // Prevent new line in textarea
    callOpenAI();
  }
}
Line-by-line explanation (3 lines)

🔧 Subcomponents:

conditional Detect Plain Enter Key if (event.keyCode === 13 && !event.shiftKey) {

Only triggers the AI call when Enter is pressed alone, allowing Shift+Enter to insert a new line instead

if (event.keyCode === 13 && !event.shiftKey) {
keyCode 13 is the Enter key; checking !event.shiftKey means this only fires when Shift isn't also held down
event.preventDefault();
Stops the textarea's default behavior of inserting a newline character when Enter is pressed
callOpenAI();
Triggers the same function the button click uses, sending the dream text to OpenAI

callOpenAI()

This function shows the full lifecycle of a real-world API call: reading user input, showing loading state, building a request body, awaiting fetch(), validating the untrusted response, updating application state, and cleaning up in a finally block regardless of success or failure.

🔬 This guards against incomplete AI responses. What would happen to the visuals if this validation block were removed and the AI returned JSON missing a 'shape' field?

  if (!parsedOutput.mood || !parsedOutput.colors || !parsedOutput.speed || !parsedOutput.shape) {
        throw new Error('Parsed JSON is missing required fields.');
      }
async function callOpenAI() {
  const userInput = dreamInput.value().trim();
  if (!userInput) {
    responseDiv.html('Please enter your dream first.');
    return;
  }

  // Disable UI elements and show loading message
  visualizeButton.attribute('disabled', '');
  dreamInput.attribute('disabled', '');
  responseDiv.html('Analyzing dream... Please wait.');

  const requestBody = {
    model: 'gpt-4o-mini', // Using the specified model
    messages: [
      {
        role: 'system',
        content: `You are a dream analyzer. Your task is to analyze a dream provided by the user and return a JSON object with the following structure:
          {
            "mood": "happy" | "sad" | "mysterious" | "energetic",
            "colors": ["#RRGGBB", "#RRGGBB", "#RRGGBB"], // Array of 3 distinct hex color codes. Ensure they are valid hex codes.
            "speed": "slow" | "medium" | "fast",
            "shape": "circles" | "triangles" | "lines"
          }
          Ensure the output is a valid JSON string. Do not include any other text or explanation outside of the JSON. If a dream is too vague to determine a specific value, choose a reasonable default. For colors, try to pick colors that align with the mood, for example:
          - happy: ["#FFD700", "#FF69B4", "#7FFF00"]
          - sad: ["#4682B4", "#778899", "#2F4F4F"]
          - mysterious: ["#191970", "#4B0082", "#20B2AA"]
          - energetic: ["#FF4500", "#FFD700", "#FF1493"]`
      },
      {
        role: 'user',
        content: userInput // Send only the user's dream content
      }
    ],
    response_format: { type: "json_object" } // Request JSON object directly
  };

  try {
    const response = await fetch('https://api.openai.com/v1/chat/completions', {
      method: 'POST',
      headers: {
        'Content-Type': 'application/json',
        'Authorization': 'Bearer ' + getApiKey()
      },
      body: JSON.stringify(requestBody)
    });

    if (!response.ok) {
      const errorData = await response.json();
      throw new Error(`OpenAI API error: ${response.status} - ${errorData.error.message}`);
    }

    const data = await response.json();
    const assistantMessageContent = data.choices[0].message.content;

    // Attempt to parse the JSON content
    let parsedOutput;
    try {
      parsedOutput = JSON.parse(assistantMessageContent);
      // Basic validation of the parsed JSON structure
      if (!parsedOutput.mood || !parsedOutput.colors || !parsedOutput.speed || !parsedOutput.shape) {
        throw new Error('Parsed JSON is missing required fields.');
      }
      if (!Array.isArray(parsedOutput.colors) || parsedOutput.colors.length !== 3 || !parsedOutput.colors.every(color => /^#([A-Fa-f0-9]{6}|[A-Fa-f0-9]{3})$/.test(color))) {
        throw new Error('Colors must be an array of 3 valid hex codes.');
      }
    } catch (parseError) {
      console.error('Failed to parse AI response JSON:', assistantMessageContent, parseError);
      responseDiv.html('AI returned malformed JSON. Using default visuals. Error: ' + parseError.message);
      // Reset to default if parsing fails
      aiOutput = {
        mood: 'mysterious',
        colors: ['#333366', '#663366', '#336633'],
        speed: 'medium',
        shape: 'lines'
      };
      initializeShapes(); // Re-initialize shapes with default
      return; // Exit here, no further processing of malformed JSON
    }

    aiOutput = parsedOutput;
    console.log('AI Output:', aiOutput);
    responseDiv.html(`Mood: ${aiOutput.mood}, Speed: ${aiOutput.speed}, Shape: ${aiOutput.shape}`);

    // Update visuals based on new AI output
    initializeShapes(); // Re-initialize shapes with new AI output
    // The shapes will then update in the draw loop with the new aiOutput values
  } catch (error) {
    console.error('Error calling OpenAI API:', error);
    responseDiv.html('Error analyzing dream: ' + error.message + '. Please try again.');
  } finally {
    // Re-enable UI elements
    visualizeButton.removeAttribute('disabled');
    dreamInput.removeAttribute('disabled');
  }
}

Line-by-line explanation (12 lines)

🔧 Subcomponents:

conditional Empty Input Guard if (!userInput) {

Stops the function early with a message if the user hasn't typed anything

calculation Network Request const response = await fetch('https://api.openai.com/v1/chat/completions', {

Sends the dream text and system prompt to OpenAI's chat completions endpoint and awaits the response

conditional HTTP Error Check if (!response.ok) {

Detects failed HTTP requests (e.g. bad API key, rate limit) and throws a descriptive error

conditional Validate AI JSON if (!parsedOutput.mood || !parsedOutput.colors || !parsedOutput.speed || !parsedOutput.shape) {

Checks that all four required fields exist before trusting the AI's response

conditional Validate Hex Colors if (!Array.isArray(parsedOutput.colors) || parsedOutput.colors.length !== 3 || !parsedOutput.colors.every(color => /^#([A-Fa-f0-9]{6}|[A-Fa-f0-9]{3})$/.test(color))) {

Uses a regular expression to make sure all three colors are properly formatted hex codes before using them

const userInput = dreamInput.value().trim();
Reads the current text from the textarea and trims whitespace from both ends
if (!userInput) {
If the trimmed text is empty, shows a prompt message and exits the function early with return
visualizeButton.attribute('disabled', '');
Disables the button so the user can't trigger multiple overlapping requests while one is in progress
responseDiv.html('Analyzing dream... Please wait.');
Shows a loading message so the user knows something is happening
const requestBody = {
Builds the JSON payload that will be sent to OpenAI, including the model name, a system prompt instructing the exact JSON format wanted, and the user's dream text
const response = await fetch('https://api.openai.com/v1/chat/completions', {
await pauses this async function until the network request to OpenAI's API completes, without freezing the rest of the sketch
if (!response.ok) {
response.ok is false for HTTP error statuses (400, 401, 429, etc); this branch reads the error body and throws so it's caught below
const assistantMessageContent = data.choices[0].message.content;
Digs into OpenAI's response structure to get the actual text/JSON string the AI generated
parsedOutput = JSON.parse(assistantMessageContent);
Converts the AI's JSON string into a real JavaScript object so its fields can be used
aiOutput = parsedOutput;
Replaces the global aiOutput object with the newly validated AI response, which every shape's update()/display() will read on the next frame
initializeShapes();
Rebuilds all shapes so their colors immediately reflect the new aiOutput.colors array
visualizeButton.removeAttribute('disabled');
Runs in the finally block so the button is always re-enabled, whether the request succeeded or failed

FloatingShape.constructor()

The constructor runs once when 'new FloatingShape(x, y)' is called, setting up all the per-instance state (position, size, angle, noise offset, color choice) that update() and display() will later read and modify.

  constructor(x, y) {
    this.x = x;
    this.y = y;
    this.size = random(20, 100);
    this.angle = random(TWO_PI);
    this.noiseOffset = random(1000); // Offset for Perlin noise
    this.colorIndex = floor(random(3)); // Index into aiOutput.colors array
  }
Line-by-line explanation (5 lines)
this.x = x;
Stores the starting horizontal position passed in when the shape was created
this.size = random(20, 100);
Gives each shape a random size between 20 and 100 pixels, so shapes vary visually
this.angle = random(TWO_PI);
Picks a random starting angle in radians (0 to 2π), used for both movement direction and drawing orientation
this.noiseOffset = random(1000); // Offset for Perlin noise
Gives each shape its own unique position in Perlin noise space so they all wander differently instead of moving in sync
this.colorIndex = floor(random(3)); // Index into aiOutput.colors array
Randomly assigns which of the AI's 3 colors this particular shape will use

FloatingShape.update()

update() is called once per frame per shape and is where all motion logic lives, separate from display() which only draws. Combining a slowly-advancing angle with Perlin noise is a common technique for organic, non-repeating wandering motion.

🔬 This switch maps the AI's speed label to a multiplier. What happens to the fast case if you change 2.0 to 10.0?

    switch (aiOutput.speed) {
      case 'slow':
        currentSpeed *= 0.5;
        break;
      case 'fast':
        currentSpeed *= 2.0;
        break;
  update() {
    let currentSpeed = BASE_SPEED;
    switch (aiOutput.speed) {
      case 'slow':
        currentSpeed *= 0.5;
        break;
      case 'fast':
        currentSpeed *= 2.0;
        break;
      case 'medium':
      default:
        // currentSpeed remains BASE_SPEED
        break;
    }

    this.angle += currentSpeed;

    // Perlin noise for subtle, organic movement
    const noiseFactor = 0.01;
    this.x += sin(this.angle) * (noise(this.noiseOffset) - 0.5) * 5 * (currentSpeed / BASE_SPEED);
    this.y += cos(this.angle) * (noise(this.noiseOffset + 100) - 0.5) * 5 * (currentSpeed / BASE_SPEED);
    this.noiseOffset += noiseFactor;

    // Wrap around edges
    this.x = (this.x + width) % width;
    this.y = (this.y + height) % height;
  }
Line-by-line explanation (8 lines)

🔧 Subcomponents:

switch-case Map AI Speed to Multiplier switch (aiOutput.speed) {

Converts the AI's text label ('slow'/'medium'/'fast') into a numeric multiplier applied to BASE_SPEED

let currentSpeed = BASE_SPEED;
Starts with the default base speed before adjusting it based on the AI's answer
switch (aiOutput.speed) {
Branches based on the string value stored in aiOutput.speed
currentSpeed *= 0.5;
Halves the speed for the 'slow' case
currentSpeed *= 2.0;
Doubles the speed for the 'fast' case
this.angle += currentSpeed;
Advances this shape's angle every frame, which is later used both for noise sampling and for drawing rotated shapes like triangles and lines
this.x += sin(this.angle) * (noise(this.noiseOffset) - 0.5) * 5 * (currentSpeed / BASE_SPEED);
Moves the shape horizontally by an amount driven by both its angle and a Perlin noise value (shifted to be centered around 0), scaled by how much faster/slower than base speed it currently is
this.noiseOffset += noiseFactor;
Advances this shape's position along the Perlin noise curve so the next frame samples a slightly different, smoothly-changing value
this.x = (this.x + width) % width;
Uses the modulo operator to wrap the x position back to 0 if it goes past width, or to width if it goes negative, creating a seamless wraparound

FloatingShape.display()

display() shows how a single visual style system can be driven entirely by data (the AI's mood and shape strings) rather than hardcoded choices, and how p5.js lets you drop into the native canvas drawingContext for effects like shadowBlur that aren't built into p5 itself.

🔬 This block only adds glow for happy/energetic moods. What happens if you change 15 to 50, or add 'mysterious' to the condition so it glows too?

    if (aiOutput.mood === 'happy' || aiOutput.mood === 'energetic') {
      drawingContext.shadowBlur = 15;
      drawingContext.shadowColor = shapeColor.toString();
    } else {
      drawingContext.shadowBlur = 0;
    }
  display() {
    let shapeColor = color(aiOutput.colors[this.colorIndex]);
    let alphaValue = 150; // Default alpha

    switch (aiOutput.mood) {
      case 'happy':
        shapeColor.setAlpha(200);
        stroke(shapeColor); // Outline for happy shapes
        strokeWeight(2);
        fill(shapeColor);
        break;
      case 'sad':
        shapeColor.setAlpha(100);
        noStroke(); // No outline for sad shapes
        fill(shapeColor);
        break;
      case 'mysterious':
        shapeColor.setAlpha(120);
        stroke(shapeColor);
        strokeWeight(1);
        noFill(); // Outline only for mysterious shapes
        break;
      case 'energetic':
        shapeColor.setAlpha(255);
        stroke(shapeColor);
        strokeWeight(3); // Thicker outline for energetic shapes
        fill(shapeColor);
        break;
      default:
        shapeColor.setAlpha(alphaValue);
        noStroke();
        fill(shapeColor);
        break;
    }

    // Add some glow based on mood using drawingContext.shadowBlur
    // Note: this uses native canvas API and affects all subsequent drawing until reset
    if (aiOutput.mood === 'happy' || aiOutput.mood === 'energetic') {
      drawingContext.shadowBlur = 15;
      drawingContext.shadowColor = shapeColor.toString();
    } else {
      drawingContext.shadowBlur = 0;
    }

    // Draw the shape based on AI output
    switch (aiOutput.shape) {
      case 'circles':
        circle(this.x, this.y, this.size);
        break;
      case 'triangles':
        const r = this.size / 2;
        triangle(
          this.x + r * cos(this.angle), this.y + r * sin(this.angle),
          this.x + r * cos(this.angle + TWO_PI / 3), this.y + r * sin(this.angle + TWO_PI / 3),
          this.x + r * cos(this.angle + TWO_PI * 2 / 3), this.y + r * sin(this.angle + TWO_PI * 2 / 3)
        );
        break;
      case 'lines':
        // Lines generally don't have fill
        noFill();
        stroke(shapeColor);
        strokeWeight(max(1, this.size / 20)); // Line thickness based on size
        const lineLength = this.size * 0.8;
        line(
          this.x - lineLength / 2 * cos(this.angle), this.y - lineLength / 2 * sin(this.angle),
          this.x + lineLength / 2 * cos(this.angle), this.y + lineLength / 2 * sin(this.angle)
        );
        break;
      default:
        circle(this.x, this.y, this.size);
        break;
    }

    // Reset shadow blur for other elements if any, or next frame
    drawingContext.shadowBlur = 0;
  }
Line-by-line explanation (11 lines)

🔧 Subcomponents:

switch-case Style By Mood switch (aiOutput.mood) {

Chooses fill, stroke, alpha, and outline weight based on the AI's detected mood

conditional Glow For Upbeat Moods if (aiOutput.mood === 'happy' || aiOutput.mood === 'energetic') {

Adds a native canvas shadow blur glow effect only for happy or energetic moods

switch-case Draw By Shape Type switch (aiOutput.shape) {

Draws a circle, triangle, or line depending on the AI's chosen shape type

let shapeColor = color(aiOutput.colors[this.colorIndex]);
Converts the hex string at this shape's colorIndex into a p5.Color object that can be modified and used for fill/stroke
switch (aiOutput.mood) {
Branches the styling logic based on the AI's mood label
shapeColor.setAlpha(200);
Adjusts just the transparency channel of the color object without changing its RGB values
stroke(shapeColor); // Outline for happy shapes
Sets the outline color for subsequent shapes to this shape's color
if (aiOutput.mood === 'happy' || aiOutput.mood === 'energetic') {
Only upbeat moods get a glow effect applied
drawingContext.shadowBlur = 15;
Reaches into the native HTML5 canvas API (drawingContext) to enable a blurred shadow, giving shapes a glowing look
switch (aiOutput.shape) {
Branches the actual drawing call based on the AI's chosen shape type
circle(this.x, this.y, this.size);
Draws a circle centered on the shape's position with its size as the diameter
const r = this.size / 2;
Calculates a radius used to position the triangle's three points
const lineLength = this.size * 0.8;
Determines how long the drawn line segment is, based on the shape's size
drawingContext.shadowBlur = 0;
Resets the glow effect at the end so it doesn't leak into whatever gets drawn next

📦 Key Variables

encoded string

A base64-encoded, XOR-obfuscated version of the OpenAI API key stored directly in the source

const encoded = '...';
key number

The XOR key (0x5A) used to decrypt the encoded API key string

const key = 0x5A;
apiKey string

Caches the decrypted API key after the first call to getApiKey() so decryption only happens once

let apiKey;
dreamInput object

Reference to the HTML textarea element where the user types their dream

let dreamInput;
visualizeButton object

Reference to the button element that triggers the OpenAI call

let visualizeButton;
responseDiv object

Reference to the div used to display status and error messages to the user

let responseDiv;
aiOutput object

Holds the current mood, colors, speed, and shape values that drive all shape behavior; starts with sensible defaults and is replaced after each successful API call

let aiOutput = { mood: 'mysterious', colors: ['#333366','#663366','#336633'], speed: 'medium', shape: 'lines' };
shapes array

Stores all the active FloatingShape instances that get updated and drawn every frame

let shapes = [];
NUM_SHAPES number

Constant controlling how many FloatingShape objects are created

const NUM_SHAPES = 50;
BASE_SPEED number

Constant baseline speed multiplier that the AI's slow/medium/fast setting scales up or down

const BASE_SPEED = 0.005;

🔧 Potential Improvements (4)

Here are some ways this code could be enhanced:

BUG getApiKey() / callOpenAI()

The OpenAI API key is decrypted and used directly in client-side JavaScript, and the XOR 'encryption' is trivially reversible - anyone can open devtools, call getApiKey(), or inspect the network request headers to steal the key.

💡 Move the OpenAI call to a small server-side proxy (e.g. a serverless function) that holds the real API key as a server secret, and have the sketch fetch from your own endpoint instead of api.openai.com directly.

PERFORMANCE initializeShapes() called from callOpenAI()

Every successful AI response completely discards and rebuilds all 50 shapes, causing an abrupt visual 'jump cut' instead of a smooth transition between the old and new mood/colors.

💡 Instead of recreating shapes, consider updating each existing shape's colorIndex reference (they already read from the global aiOutput.colors array) and use lerpColor() to smoothly animate between the old and new color palette over a few seconds.

STYLE FloatingShape.update() and display()

Magic numbers like 5, 100, and 0.8 are scattered through the movement and drawing math without explanation, making the shape's behavior hard to tune or understand at a glance.

💡 Extract these into named constants (e.g. NOISE_MOVE_SCALE, NOISE_Y_OFFSET, LINE_LENGTH_RATIO) declared near the top of the file so their purpose is clear and they're easy to experiment with.

BUG FloatingShape.display() shape switch statement

const r and const lineLength are declared inside individual switch cases without their own block braces {}; while this specific code works because the names don't collide, declaring let/const inside a switch without wrapping each case in { } is a common source of 'already declared' errors if the code is edited later.

💡 Wrap each case body in braces, e.g. case 'triangles': { const r = ...; ... break; }, so each case gets its own scope and future edits are safer.

🔄 Code Flow

Code flow showing getapikey, preload, setup, draw, windowresized, initializeshapes, handlekeypress, callopenai, constructor, update, display

💡 Click on function names in the diagram to jump to their code

graph TD start[Start] --> setup[setup] setup --> preload[preload] preload --> cachecheck[cache-check] cachecheck --> draw[draw loop] draw --> shapecreationloop[shape-creation-loop] shapecreationloop --> initializeshapes[initializeshapes] initializeshapes --> shapeLoop[shape-loop] shapeLoop --> update[update] update --> display[display] display --> draw click setup href "#fn-setup" click preload href "#fn-preload" click cachecheck href "#sub-cache-check" click draw href "#fn-draw" click shapecreationloop href "#sub-shape-creation-loop" click initializeshapes href "#fn-initializeshapes" click shapeLoop href "#sub-shape-loop" click update href "#fn-update" click display href "#fn-display" draw --> enterkeycheck[enter-key-check] enterkeycheck --> emptyinputguard[empty-input-guard] emptyinputguard -->|Input not empty| fetchcall[fetch-call] fetchcall --> responseerrorcheck[response-error-check] responseerrorcheck -->|Response valid| jsonvalidation[json-validation] jsonvalidation --> colorvalidation[color-validation] colorvalidation --> speedswitch[speed-switch] speedswitch --> moodswitch[mood-switch] moodswitch --> glowcheck[glow-check] glowcheck --> shapecheck[shape-switch] click enterkeycheck href "#sub-enter-key-check" click emptyinputguard href "#sub-empty-input-guard" click fetchcall href "#sub-fetch-call" click responseerrorcheck href "#sub-response-error-check" click jsonvalidation href "#sub-json-validation" click colorvalidation href "#sub-color-validation" click speedswitch href "#sub-speed-switch" click moodswitch href "#sub-mood-switch" click glowcheck href "#sub-glow-check" click shapecheck href "#sub-shape-switch"

❓ Frequently Asked Questions

What type of visuals does the AI Dream Painter sketch generate?

The sketch creates unique, morphing abstract visuals that reflect the mood, colors, and shapes derived from the user's text input about their dreams or imagination.

How can users interact with the AI Dream Painter sketch?

Users can type their dream or imagination into an input field and click a button to visualize it, with the visuals updating in real-time based on their input.

What creative coding concepts are demonstrated in the AI Dream Painter sketch?

This sketch showcases the integration of AI with creative coding, utilizing text analysis to influence dynamic visual generation, and real-time interaction with user input.

Preview

AI Dream Painter - xelsed.ai - p5.js creative coding sketch preview
Sketch Preview
Code flow diagram showing the structure of AI Dream Painter - xelsed.ai - Code flow showing getapikey, preload, setup, draw, windowresized, initializeshapes, handlekeypress, callopenai, constructor, update, display
Code Flow Diagram