
AI Dungeon Master - Procedural Adventure - xelsed.ai

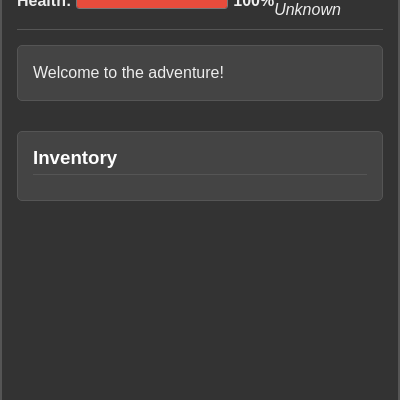
This sketch turns OpenAI's chat model into a living Dungeon Master: every choice you click is sent to GPT-3.5, which replies with narrative text plus structured JSON describing your health, inventory, and the current scene. p5.js reads that JSON every frame and procedurally paints the matching setting - forest, cave, castle, village, or river - complete with time-of-day gradients, weather effects, and scattered story elements like monsters or treasure chests.

🧪 Try This!

Experiment with the code by making these changes:

  1. Make health more fragile — Lowering the maximum health total makes every point of AI-generated damage represent a bigger, scarier chunk of your health bar.
  2. Grow giant tree canopies — Increasing the random size range for forest canopies makes every tree in the forest scene look much bigger and lusher.
  3. Fill the night sky with stars — Raising the star loop's iteration count makes night scenes far more densely packed with tiny white dots.
Prefer the full editor? Open it there →

📖 About This Sketch

This project pairs the OpenAI chat completions API with a procedural p5.js renderer to create a text adventure that draws its own illustrations. Instead of hand-authored branching dialogue, the AI itself invents the narrative, tracks health and inventory, and hands back a JSON object describing the scene; p5.js then uses switch statements, gradients, and simple shape drawing to turn words like 'forest' or 'storm' into an actual picture. It also uses the browser's speech synthesis API to read the story aloud, and DOM manipulation (select, createButton, html) to update health bars, inventory lists, and choice buttons outside the canvas.

The code is split into two halves that work together: game-flow functions (startGame, handleChoice, callOpenAI, updateGame, updateUI) that talk to OpenAI and manage state, and drawing functions (drawScene, drawTimeOfDay, drawForest, drawCave, drawCastle, drawVillage, drawRiver, drawWeather, drawElements) that turn the current gameState object into pixels every frame. Studying it teaches how to structure a fetch() call to an AI API, how to design prompts that force structured JSON replies, and how a single shared state object can drive both a canvas drawing and a DOM-based UI at the same time.

⚙️ How It Works

  1. On load, setup() builds the canvas inside the game-container div, grabs references to every DOM element (health bar, narrative box, inventory list, buttons), wires up speech synthesis, and calls startGame(), which resets gameState and asks OpenAI to open the story.
  2. Every frame, draw() calls drawScene(), which repaints the sky gradient for the current time of day, the setting (forest/cave/castle/village/river) via a switch statement, any weather effects like rain or lightning, and the individual elements - trees, monsters, chests - listed in the AI's last JSON reply.
  3. When the player clicks a choice button, handleChoice() records the choice text, bundles the entire gameState and story history into a big prompt string, and passes it to callOpenAI().
  4. callOpenAI() sends a POST request to OpenAI's chat completions endpoint asking specifically for a JSON object response, then hands the parsed JSON to updateGame(), which adjusts health, swaps in the new scene, appends items to the inventory, and updates and speaks the narrative text.
  5. updateUI() rebuilds the health bar percentage, location label, inventory list, and the new set of choice buttons every time state changes, so the next round of decisions is ready to click.
  6. If health hits zero or the AI sets gameOver or victory to true, the matching overlay screen is shown; clicking the restart button calls restartGame(), which calls startGame() again to begin a brand-new story.

🎓 Concepts You'll Learn

Fetch API and async/awaitPrompting an LLM for structured JSONProcedural drawing driven by dataGradient backgrounds with lerpColorSwitch statements for scene variantsDOM manipulation alongside a canvasSpeech synthesis API

📝 Code Breakdown

getApiKey()

This function tries to hide the OpenAI API key from casual viewing of the source by base64-encoding it and XOR-scrambling it. It is a good example of why client-side 'obfuscation' is not real security - anyone can call getApiKey() in the browser console and get the plain key back instantly.

function getApiKey(){return atob(encoded).split('').map(c=>String.fromCharCode(c.charCodeAt(0)^key)).join('');}
Line-by-line explanation (4 lines)

🔧 Subcomponents:

calculation XOR Decode Map c=>String.fromCharCode(c.charCodeAt(0)^key)

Reverses a simple XOR obfuscation on each decoded character to reconstruct the real API key

atob(encoded)
Decodes the base64-encoded string back into raw obfuscated text
.split('')
Turns that text into an array of individual characters so they can be processed one at a time
.map(c=>String.fromCharCode(c.charCodeAt(0)^key))
For each character, gets its numeric code, XORs it with the secret key number, and turns the result back into a character - this undoes the same XOR operation used to hide the key
.join('')
Glues the decoded characters back into a single string - the real OpenAI API key
setup()

setup() runs once when the page loads. Here it does double duty: preparing the p5.js canvas AND wiring up all the surrounding HTML UI, which is a common pattern when p5.js is used inside a larger web page rather than as a standalone sketch.

function setup() {
  // Create p5.js canvas and place it within the game-container
  const gameContainer = select('#game-container');
  let canvasWidth = min(windowWidth * 0.9, 1400 - 30); // 30px for padding
  let canvasHeight = min(windowHeight * 0.5, 900 * 0.5);
  let canvas = createCanvas(canvasWidth, canvasHeight);
  canvas.parent('game-container');

  // Get DOM elements
  healthBarDiv = select('#health-bar');
  healthTextSpan = select('#health-text');
  locationTextDiv = select('#location-text');
  narrativeTextP = select('#narrative-text');
  choicesContainer = select('#choices-container');
  inventoryListUl = select('#inventory-list');
  loadingOverlay = select('#loading-overlay');
  gameOverScreen = select('#game-over-screen');
  victoryScreen = select('#victory-screen');
  restartButton = select('#restart-button');

  restartButton.mousePressed(restartGame);

  // Initialize speech synthesis
  synth = window.speechSynthesis;
  synth.onvoiceschanged = () => {
    // Find a suitable voice, e.g., a male English voice
    voice = synth.getVoices().find(v => v.lang === 'en-US' && v.name.includes('Male')) || synth.getVoices().find(v => v.lang === 'en-US');
  };
  if (synth.getVoices().length > 0) { // If voices are already loaded
    voice = synth.getVoices().find(v => v.lang === 'en-US' && v.name.includes('Male')) || synth.getVoices().find(v => v.lang === 'en-US');
  }

  // Initial UI update and game start
  updateUI();
  startGame();
}
Line-by-line explanation (7 lines)

🔧 Subcomponents:

conditional Voice Already Loaded Check if (synth.getVoices().length > 0) {

Handles the case where speech voices are already available synchronously, instead of waiting for the async onvoiceschanged event

let canvas = createCanvas(canvasWidth, canvasHeight);
Builds the p5.js drawing surface using sizes calculated from the window and container dimensions
canvas.parent('game-container');
Moves the canvas element into the game-container div so it sits inside the page layout instead of floating at the top
healthBarDiv = select('#health-bar');
select() grabs a reference to an existing HTML element by its CSS id so p5.js can update it later
restartButton.mousePressed(restartGame);
Attaches a click handler so the restart button calls restartGame() whenever it's pressed
synth = window.speechSynthesis;
Grabs the browser's built-in text-to-speech engine so narrative text can be read aloud
updateUI();
Draws the initial (empty) health bar, location, and inventory before any AI response has arrived
startGame();
Kicks off the adventure by resetting gameState and requesting the opening narrative from OpenAI

draw()

draw() is p5.js's built-in animation loop. Keeping it this thin - just one function call - is good practice: it keeps all the actual drawing logic organized inside drawScene() and its helpers rather than cluttering the main loop.

function draw() {
  drawScene();
}
Line-by-line explanation (1 lines)
drawScene();
Every frame (about 60 times per second), this repaints the entire background, setting, weather, and elements based on whatever gameState.currentScene currently holds

windowResized()

windowResized() is a special p5.js function that automatically runs whenever the browser window changes size, which is the standard way to keep a sketch responsive.

function windowResized() {
  const gameContainer = select('#game-container');
  let canvasWidth = min(windowWidth * 0.9, gameContainer.width - 30);
  let canvasHeight = min(windowHeight * 0.5, gameContainer.height * 0.5);
  resizeCanvas(canvasWidth, canvasHeight);

  // Adjust UI element sizes/positions if needed
  // For this layout, p5play automatically handles canvas position,
  // and the CSS flexbox handles other elements.
  // We might need to manually adjust if elements were absolutely positioned.
}
Line-by-line explanation (2 lines)
const gameContainer = select('#game-container');
Re-fetches the container element so its current width/height can be measured
resizeCanvas(canvasWidth, canvasHeight);
p5.js function that changes the canvas dimensions without needing to recreate it, keeping the procedural scene responsive to window resizing

startGame()

startGame() is the single source of truth for what a 'fresh' game looks like. Because it's also called by restartGame(), any change made here affects both the first launch and every restart.

async function startGame() {
  gameState = {
    health: 100,
    inventory: [],
    location: 'Unknown',
    storyHistory: [],
    currentScene: {
      setting: 'forest', // Default for initial draw
      timeOfDay: 'day',
      weather: 'clear',
      elements: []
    }
  };
  updateUI();
  gameOverScreen.style('display', 'none');
  victoryScreen.style('display', 'none');

  const promptMessage = 'Start a new fantasy adventure. The hero wakes up in an unknown place. Generate JSON response as described.';
  await callOpenAI(promptMessage);
}
Line-by-line explanation (5 lines)
gameState = {
Completely replaces the global gameState object with fresh starting values, effectively resetting the whole adventure
updateUI();
Immediately refreshes the health bar, inventory list, and location text to show the reset values
gameOverScreen.style('display', 'none');
Hides the game-over overlay in case a previous run ended the game
const promptMessage = 'Start a new fantasy adventure...
Defines the opening instruction sent to the AI, telling it to invent the first scene
await callOpenAI(promptMessage);
Pauses this async function until the AI responds, then hands the prompt off to callOpenAI() to actually make the network request

handleChoice()

This function shows how to keep an LLM 'on rails': by re-sending the full game state and a rigid JSON schema description on every single request, the AI has no memory of its own but behaves as if it does because you resend the whole history each time.

async function handleChoice(choiceText) {
  if (gameState.gameOver || gameState.victory) return;

  // Add player's choice to story history
  gameState.storyHistory.push(`Player chose: "${choiceText}"`);

  // Construct OpenAI prompt
  const promptMessage = `You are a creative Dungeon Master. Current state: ${JSON.stringify(gameState)}. Story so far: ${gameState.storyHistory.join('\n')}. Player chose: "${choiceText}". Generate JSON response: {narrative:string (2-3 sentences describing what happens), scene:{setting:forest/cave/castle/village/river, timeOfDay:day/night/dawn/dusk, weather:clear/rain/fog/storm, elements:[tree/rock/chest/monster/npc/fire/water]}, choices:[{id:1,text:string},{id:2,text:string},{id:3,text:string}], healthChange:number, newItem:string or null, gameOver:boolean, victory:boolean}`;

  await callOpenAI(promptMessage);
}
Line-by-line explanation (4 lines)

🔧 Subcomponents:

conditional Game Over Guard if (gameState.gameOver || gameState.victory) return;

Stops any further choices from being processed once the story has ended

if (gameState.gameOver || gameState.victory) return;
A guard clause - if the game has already ended, exit immediately so no more AI calls are made
gameState.storyHistory.push(`Player chose: "${choiceText}"`);
Records exactly what the player clicked into the running story log, which gets sent back to the AI for context
const promptMessage = `You are a creative Dungeon Master...`
Builds a big instruction string that includes the entire game state and history so the AI remembers everything that happened so far, plus a strict description of the JSON shape it must reply with
await callOpenAI(promptMessage);
Sends the constructed prompt to OpenAI and waits for the result before this function finishes

callOpenAI()

This function is the bridge between p5.js and a real AI service. The pattern of try/catch/finally around a fetch() call, plus forcing response_format to JSON, is a reusable template for any project that wants an LLM to return structured data instead of plain prose.

async function callOpenAI(promptMessage) {
  loadingOverlay.addClass('visible'); // Show loading spinner
  try {
    const apiKey = getApiKey();
    const response = await fetch(OPENAI_API_URL, {
      method: 'POST',
      headers: {
        'Content-Type': 'application/json',
        'Authorization': `Bearer ${apiKey}`
      },
      body: JSON.stringify({
        model: OPENAI_MODEL,
        messages: [
          {"role": "system", "content": "You are a creative Dungeon Master. Your responses must be valid JSON as described. Maintain narrative coherence and player agency. Ensure choices are distinct and move the story forward."},
          {"role": "user", "content": promptMessage}
        ],
        response_format: { "type": "json_object" }, // Crucial for JSON output
        temperature: OPENAI_TEMP,
        max_tokens: OPENAI_MAX_TOKENS
      })
    });

    if (!response.ok) {
      const errorData = await response.json();
      console.error('OpenAI API Error:', response.status, errorData);
      narrativeTextP.html(`An error occurred: ${errorData.error.message || response.statusText}. Please try again.`);
      speak('An error occurred. Please try again.');
      return;
    }

    const data = await response.json();
    const jsonString = data.choices[0].message.content;

    // Try to parse the JSON string, sometimes OpenAI might return extra text
    let parsedResponse;
    try {
      parsedResponse = JSON.parse(jsonString);
    } catch (parseError) {
      console.error('Failed to parse OpenAI JSON response:', parseError, jsonString);
      narrativeTextP.html('OpenAI returned invalid JSON. Trying again...');
      speak('The story is unclear. Trying again.');
      // Optionally, retry the OpenAI call
      await callOpenAI(promptMessage);
      return;
    }

    updateGame(parsedResponse);

  } catch (error) {
    console.error('Network or other error:', error);
    narrativeTextP.html(`A network error occurred: ${error.message}. Please check your connection.`);
    speak('A network error occurred. Please check your connection.');
  } finally {
    loadingOverlay.removeClass('visible'); // Hide loading spinner
  }
}
Line-by-line explanation (10 lines)

🔧 Subcomponents:

conditional HTTP Error Check if (!response.ok) {

Detects failed HTTP requests (bad API key, rate limit, etc.) and shows an error message instead of crashing

conditional JSON Parse Retry } catch (parseError) {

Catches malformed JSON from the AI and automatically retries the same prompt

loadingOverlay.addClass('visible');
Shows a loading spinner overlay while waiting for the AI's response
const apiKey = getApiKey();
Decodes the obfuscated API key just before it's needed
const response = await fetch(OPENAI_API_URL, {
Sends an HTTP POST request to OpenAI's chat completions endpoint and pauses execution until a response arrives
response_format: { "type": "json_object" },
Tells OpenAI to guarantee its reply is valid JSON rather than free-form text, which makes parsing much more reliable
if (!response.ok) {
Checks whether the HTTP request itself failed (e.g. wrong API key or rate limit) before trying to read any game data from it
const jsonString = data.choices[0].message.content;
Digs into OpenAI's response structure to pull out the actual text the model generated
parsedResponse = JSON.parse(jsonString);
Converts that text into a real JavaScript object with narrative, scene, choices, etc.
await callOpenAI(promptMessage);
If parsing failed, this recursively retries the exact same request, hoping for a valid JSON reply next time
updateGame(parsedResponse);
Hands the successfully parsed data off to updateGame() to actually apply it to the game state and screen
loadingOverlay.removeClass('visible');
Runs no matter what (success, error, or exception) thanks to finally, ensuring the spinner never gets stuck visible

updateGame()

updateGame() is where AI output becomes game state. It's a good example of validating and transforming data from an external source (health clamped, item de-duplicated) rather than trusting it blindly.

function updateGame(response) {
  // Update health
  gameState.health = constrain(gameState.health + response.healthChange, 0, MAX_HEALTH);

  // Update location and scene
  gameState.location = response.scene.setting.charAt(0).toUpperCase() + response.scene.setting.slice(1);
  gameState.currentScene = response.scene;

  // Add narrative to history
  gameState.storyHistory.push(response.narrative);

  // Handle new item
  if (response.newItem && !gameState.inventory.includes(response.newItem)) {
    gameState.inventory.push(response.newItem);
    narrativeTextP.html(`${response.narrative}<br><br>You found a ${response.newItem}!`);
    speak(`${response.narrative}. You found a ${response.newItem}!`);
  } else {
    narrativeTextP.html(response.narrative);
    speak(response.narrative);
  }

  updateUI(response.choices);

  // Check for game over or victory
  if (gameState.health <= 0 || response.gameOver) {
    gameState.gameOver = true;
    speak('Game Over!');
    gameOverScreen.style('display', 'flex');
  } else if (response.victory) {
    gameState.victory = true;
    speak('You Win!');
    victoryScreen.style('display', 'flex');
  }
}
Line-by-line explanation (6 lines)

🔧 Subcomponents:

conditional New Item Check if (response.newItem && !gameState.inventory.includes(response.newItem)) {

Only adds an item to the inventory if the AI provided one and it isn't already carried

conditional Game Over / Victory Check if (gameState.health <= 0 || response.gameOver) {

Determines whether the story has ended in defeat or victory and shows the matching overlay

gameState.health = constrain(gameState.health + response.healthChange, 0, MAX_HEALTH);
Applies the AI's suggested health change, then clamps the result so health can never go below 0 or above MAX_HEALTH
gameState.location = response.scene.setting.charAt(0).toUpperCase() + response.scene.setting.slice(1);
Capitalizes the first letter of the setting name (e.g. 'forest' becomes 'Forest') for a nicer-looking location label
gameState.currentScene = response.scene;
Replaces the entire scene description, which is what drawScene() reads on the very next frame to change the picture
if (response.newItem && !gameState.inventory.includes(response.newItem)) {
Checks both that an item was given AND that the player doesn't already have it, preventing duplicate inventory entries
updateUI(response.choices);
Refreshes all the on-screen UI, including generating a brand-new set of choice buttons from the AI's suggestions
if (gameState.health <= 0 || response.gameOver) {
Ends the game either because health ran out locally, or because the AI itself decided the story should end

updateUI()

updateUI() shows a common p5.js pattern for hybrid canvas+DOM projects: instead of drawing text with p5's text() function, it directly manipulates real HTML elements using select(), createElement(), and createButton(), which is often easier for scrolling lists and clickable menus.

🔬 This loop turns each inventory string into a list item. What happens if you prefix the text, like createElement('li', '🎒 ' + item), to add an icon in front of every item?

    for (let item of gameState.inventory) {
      inventoryListUl.child(createElement('li', item));
    }
function updateUI(choices = []) {
  // Update health bar
  let healthPercentage = (gameState.health / MAX_HEALTH) * 100;
  healthBarDiv.style('--health-percentage', `${healthPercentage}%`);
  healthTextSpan.html(`${gameState.health}%`);

  // Update location
  locationTextDiv.html(`Location: ${gameState.location}`);

  // Update inventory
  inventoryListUl.html(''); // Clear previous items
  if (gameState.inventory.length === 0) {
    inventoryListUl.html('<li>Empty</li>');
  } else {
    for (let item of gameState.inventory) {
      inventoryListUl.child(createElement('li', item));
    }
  }

  // Update choices
  choicesContainer.html(''); // Clear previous choices
  if (!gameState.gameOver && !gameState.victory && choices.length > 0) {
    for (let choice of choices) {
      let button = createButton(choice.text);
      button.mousePressed(() => handleChoice(choice.text));
      choicesContainer.child(button);
    }
  }
}
Line-by-line explanation (7 lines)

🔧 Subcomponents:

for-loop Inventory List Builder for (let item of gameState.inventory) {

Creates one <li> element per inventory item and appends it to the list

for-loop Choice Button Builder for (let choice of choices) {

Creates one clickable button per AI-suggested choice, each wired to call handleChoice()

let healthPercentage = (gameState.health / MAX_HEALTH) * 100;
Converts the raw health number into a percentage the CSS health bar can use
healthBarDiv.style('--health-percentage', `${healthPercentage}%`);
Sets a CSS custom property that the stylesheet uses to control the width of the red health fill
inventoryListUl.html(''); // Clear previous items
Wipes out the old list contents before rebuilding it from scratch, avoiding duplicate entries
for (let item of gameState.inventory) {
Loops through every item currently in the inventory array
inventoryListUl.child(createElement('li', item));
Creates a new list-item HTML element containing the item's name and attaches it as a child of the inventory list
if (!gameState.gameOver && !gameState.victory && choices.length > 0) {
Only shows choice buttons if the story is still active and the AI actually provided choices
button.mousePressed(() => handleChoice(choice.text));
Wires each button so clicking it sends that specific choice text back into the game flow

restartGame()

restartGame() is a thin wrapper that reuses startGame() rather than duplicating reset logic - a good example of avoiding repeated code by calling an existing function.

function restartGame() {
  startGame();
  gameOverScreen.style('display', 'none');
  victoryScreen.style('display', 'none');
}
Line-by-line explanation (2 lines)
startGame();
Resets gameState back to defaults and requests a brand-new opening scene from the AI
gameOverScreen.style('display', 'none');
Hides the game-over overlay so the fresh game is visible

speak()

speak() wraps the browser's built-in Web Speech API. This is not part of p5.js itself but shows how easily p5 sketches can combine with other browser APIs to add features like text-to-speech.

function speak(text) {
  if (synth && voice) {
    let utterance = new SpeechSynthesisUtterance(text);
    utterance.voice = voice;
    utterance.rate = 1; // Speed of speech
    synth.cancel(); // Stop any current speech
    synth.speak(utterance);
  }
}
Line-by-line explanation (4 lines)

🔧 Subcomponents:

conditional Voice Ready Guard if (synth && voice) {

Only attempts speech if the speech synthesis engine and a chosen voice are both available

let utterance = new SpeechSynthesisUtterance(text);
Creates a speech request object wrapping the text to be spoken
utterance.rate = 1; // Speed of speech
Sets how fast the voice talks - 1 is normal speed
synth.cancel();
Stops any speech currently playing so new narration doesn't overlap with the old
synth.speak(utterance);
Hands the utterance to the browser's speech engine to actually be spoken aloud

drawScene()

drawScene() is the top-level director function - it doesn't draw anything itself, it just decides the ORDER in which every other drawing function runs each frame, from background to foreground.

🔬 This fallback runs if the AI ever sends an unrecognized setting name. What happens if you change the fallback color, or make it call drawForest() instead so there's always something recognizable on screen?

    default:
      background(0, 50, 100); // Default dark blue
      break;
function drawScene() {
  // Draw background based on time of day
  drawTimeOfDay();

  // Draw setting
  switch (gameState.currentScene.setting) {
    case 'forest':
      drawForest();
      break;
    case 'cave':
      drawCave();
      break;
    case 'castle':
      drawCastle();
      break;
    case 'village':
      drawVillage();
      break;
    case 'river':
      drawRiver();
      break;
    default:
      background(0, 50, 100); // Default dark blue
      break;
  }

  // Draw weather
  drawWeather();

  // Draw elements
  drawElements();
}
Line-by-line explanation (4 lines)

🔧 Subcomponents:

switch-case Setting Dispatcher switch (gameState.currentScene.setting) {

Picks which environment-drawing function to call based on the AI's chosen setting

drawTimeOfDay();
Paints the sky gradient (and stars if night) first, as the base layer under everything else
switch (gameState.currentScene.setting) {
Looks at the text value of the current setting and branches to the matching drawing function
drawWeather();
Layers rain, fog, or storm effects on top of the environment
drawElements();
Draws the individual story elements (trees, monsters, chests, etc.) listed for this scene, on top of everything else

drawTimeOfDay()

This function shows how a single text field from the AI ('day', 'night', etc.) can control an entire visual mood by mapping it to a pair of colors that get blended into a gradient.

function drawTimeOfDay() {
  let c1, c2;
  switch (gameState.currentScene.timeOfDay) {
    case 'dawn':
      c1 = color(255, 150, 0); // Orange
      c2 = color(100, 150, 255); // Light blue
      break;
    case 'day':
      c1 = color(100, 150, 255); // Light blue
      c2 = color(200, 220, 255); // Pale blue
      break;
    case 'dusk':
      c1 = color(150, 50, 200); // Purple
      c2 = color(255, 100, 0); // Orange
      break;
    case 'night':
      c1 = color(20, 20, 70); // Dark blue
      c2 = color(0, 0, 0); // Black
      // Draw stars
      fill(255);
      noStroke();
      for (let i = 0; i < 100; i++) {
        circle(random(width), random(height * 0.7), random(1, 3));
      }
      break;
    default:
      c1 = color(100, 150, 255);
      c2 = color(200, 220, 255);
      break;
  }
  setGradient(0, 0, width, height, c1, c2);
}
Line-by-line explanation (5 lines)

🔧 Subcomponents:

switch-case Time of Day Colors switch (gameState.currentScene.timeOfDay) {

Picks the two gradient colors (and whether to draw stars) based on the current time of day string

for-loop Star Field for (let i = 0; i < 100; i++) {

Scatters 100 small white dots across the upper 70% of the canvas to represent stars at night

let c1, c2;
Declares two color variables that will hold the top and bottom colors of the sky gradient
c1 = color(255, 150, 0); // Orange
Sets the top-of-sky color for dawn to a warm orange
for (let i = 0; i < 100; i++) {
Repeats 100 times to scatter that many stars
circle(random(width), random(height * 0.7), random(1, 3));
Draws a tiny circle at a random position in the upper part of the canvas with a random size between 1 and 3 pixels, giving each star a slightly different look
setGradient(0, 0, width, height, c1, c2);
Passes the chosen two colors to the gradient-drawing helper, which paints the actual sky

setGradient()

This is a classic manual-gradient technique in p5.js: since p5 has no built-in gradient fill, you fake one by drawing many thin lines, each with a color interpolated with lerpColor().

🔬 This loop draws one line per pixel row for a perfectly smooth gradient. What happens if you change the loop step to i += 8 (drawing fewer, thicker bands)?

  for (let i = y; i <= y + h; i++) {
    let inter = map(i, y, y + h, 0, 1);
    let c = lerpColor(c1, c2, inter);
    stroke(c);
    line(x, i, x + w, i);
  }
function setGradient(x, y, w, h, c1, c2) {
  noFill();
  for (let i = y; i <= y + h; i++) {
    let inter = map(i, y, y + h, 0, 1);
    let c = lerpColor(c1, c2, inter);
    stroke(c);
    line(x, i, x + w, i);
  }
}
Line-by-line explanation (3 lines)

🔧 Subcomponents:

for-loop Row-by-Row Blend for (let i = y; i <= y + h; i++) {

Draws one horizontal line per pixel row, gradually blending from c1 to c2 to fake a smooth gradient

let inter = map(i, y, y + h, 0, 1);
Converts the current row number into a 0-to-1 progress value - map() is p5's tool for rescaling a number from one range into another
let c = lerpColor(c1, c2, inter);
Blends between color c1 and color c2 using that progress value - 0 gives pure c1, 1 gives pure c2, and values between mix them
line(x, i, x + w, i);
Draws a full-width horizontal line at row i using the blended color, which together with every other row creates a smooth gradient

drawWeather()

drawWeather() demonstrates layering transparent shapes (using the 4th alpha argument of fill/stroke) on top of an already-drawn scene to simulate atmospheric effects without redrawing the whole background.

🔬 This loop draws 200 rain streaks per frame. What happens if you drop the count to 20, or change the slant from (x+5, y+15) to something steeper like (x+20, y+15)?

      for (let i = 0; i < 200; i++) {
        let x = random(width);
        let y = random(height);
        line(x, y, x + 5, y + 15);
      }
function drawWeather() {
  noFill();
  stroke(255, 255, 255, 150); // White transparent
  switch (gameState.currentScene.weather) {
    case 'rain':
      stroke(100, 100, 255, 150); // Blue transparent
      for (let i = 0; i < 200; i++) {
        let x = random(width);
        let y = random(height);
        line(x, y, x + 5, y + 15);
      }
      break;
    case 'fog':
      fill(255, 255, 255, 50); // White transparent overlay
      noStroke();
      rect(0, 0, width, height);
      break;
    case 'storm':
      // Darker overlay
      fill(0, 0, 0, 100);
      noStroke();
      rect(0, 0, width, height);
      // Lightning zigzags (random flash)
      if (random() < 0.02) { // 2% chance per frame
        stroke(255, 255, 0); // Yellow
        strokeWeight(3);
        let startX = random(width);
        let startY = 0;
        let endX = random(width);
        let endY = height * 0.7; // Don't go too low
        line(startX, startY, startX + random(-50, 50), startY + random(50, 100));
        line(startX + random(-50, 50), startY + random(50, 100), endX, endY);
      }
      break;
    case 'clear':
      // Do nothing, background is already drawn
      break;
  }
}
Line-by-line explanation (5 lines)

🔧 Subcomponents:

switch-case Weather Dispatcher switch (gameState.currentScene.weather) {

Draws a different overlay effect depending on the AI's chosen weather string

for-loop Rain Streaks for (let i = 0; i < 200; i++) {

Draws 200 short diagonal lines at random positions to simulate falling rain

conditional Random Lightning Flash if (random() < 0.02) { // 2% chance per frame

Gives a small random chance each frame of drawing a jagged lightning bolt during a storm

for (let i = 0; i < 200; i++) {
Repeats 200 times to draw that many raindrop streaks each frame
line(x, y, x + 5, y + 15);
Draws a short diagonal line from a random point, slanting down and to the right to look like falling rain
fill(255, 255, 255, 50); // White transparent overlay
Uses a low alpha (transparency) value so the rectangle drawn next lightens the whole scene slightly instead of hiding it completely, simulating fog
if (random() < 0.02) { // 2% chance per frame
random() with no arguments returns a decimal between 0 and 1; only about 2% of frames pass this test, making lightning flash briefly and unpredictably
line(startX, startY, startX + random(-50, 50), startY + random(50, 100));
Draws the first zigzag segment of a lightning bolt from a random top point, offset randomly to look jagged

drawForest()

drawForest() is a simple but effective example of using map() to distribute a fixed number of shapes evenly across the canvas width, combined with random() to keep each one visually unique.

🔬 This loop always spaces trees using map(i, 0, 4, ...) which assumes exactly 5 trees. What happens if you change the loop to 10 trees but forget to update the '4' inside map() to '9'?

  for (let i = 0; i < 5; i++) {
    let x = map(i, 0, 4, width * 0.1, width * 0.9);
    let trunkHeight = random(height * 0.4, height * 0.6);
    rect(x, height - trunkHeight, 20, trunkHeight);
    // Green canopy circles
    fill(34, 139, 34);
    circle(x + 10, height - trunkHeight - 50, random(80, 120));
  }
function drawForest() {
  // Brown trunks
  fill(139, 69, 19);
  noStroke();
  for (let i = 0; i < 5; i++) {
    let x = map(i, 0, 4, width * 0.1, width * 0.9);
    let trunkHeight = random(height * 0.4, height * 0.6);
    rect(x, height - trunkHeight, 20, trunkHeight);
    // Green canopy circles
    fill(34, 139, 34);
    circle(x + 10, height - trunkHeight - 50, random(80, 120));
  }
}
Line-by-line explanation (4 lines)

🔧 Subcomponents:

for-loop Tree Row Generator for (let i = 0; i < 5; i++) {

Places 5 trees evenly spaced across the width of the canvas, each with a random trunk height and canopy size

let x = map(i, 0, 4, width * 0.1, width * 0.9);
Spreads tree index 0-4 evenly between 10% and 90% of the canvas width, so trees are spaced out rather than overlapping
let trunkHeight = random(height * 0.4, height * 0.6);
Picks a random trunk height between 40% and 60% of the canvas height for visual variety between trees
rect(x, height - trunkHeight, 20, trunkHeight);
Draws the trunk as a 20px-wide rectangle rising from the bottom of the canvas up to trunkHeight
circle(x + 10, height - trunkHeight - 50, random(80, 120));
Draws the leafy canopy as a circle centered above the trunk, with a random diameter between 80 and 120 pixels

drawCave()

drawCave() is a great real-world lesson in variable shadowing: declaring 'let height' inside the loop hides the canvas's built-in global height variable for the rest of that block, which is exactly what breaks the stalagmite line below it.

function drawCave() {
  fill(50); // Dark grey
  noStroke();
  rect(0, 0, width, height);
  fill(100); // Lighter grey for stalactites
  for (let i = 0; i < 10; i++) {
    let x = map(i, 0, 9, width * 0.1, width * 0.9);
    let height = random(50, 150);
    triangle(x, 0, x - 20, height, x + 20, height); // Stalactite from top
    triangle(x, height(canvas) , x - 20, height(canvas) - height, x + 20, height(canvas) - height); // Stalagmite from bottom
  }
}
Line-by-line explanation (5 lines)

🔧 Subcomponents:

for-loop Stalactite/Stalagmite Generator for (let i = 0; i < 10; i++) {

Attempts to draw 10 hanging stalactites from the ceiling and matching stalagmites from the floor

rect(0, 0, width, height);
Fills the entire canvas with dark grey as the cave's base color
let x = map(i, 0, 9, width * 0.1, width * 0.9);
Spaces each stalactite/stalagmite pair evenly across the canvas width
let height = random(50, 150);
Picks a random length for this rock formation - but note this creates a LOCAL variable also named 'height', which hides the canvas's global height for the rest of the loop body
triangle(x, 0, x - 20, height, x + 20, height); // Stalactite from top
Draws a downward-pointing triangle from the top edge of the canvas using the random length as its point
triangle(x, height(canvas) , x - 20, height(canvas) - height, x + 20, height(canvas) - height);
This line is broken: it tries to call height(canvas) as a function, but height is now a plain number (from the line above) and canvas isn't even in scope here, so this will throw a runtime error

drawCastle()

drawCastle() shows two different looping styles side by side: counting a fixed number of items (the 2 towers) versus stepping across a continuous space (the battlements), both common patterns in procedural drawing.

🔬 This loop's iteration count depends on 'width' rather than a fixed number. What happens if you change the step (40) to a much bigger number like 150?

  for (let i = 0; i < width; i += 40) {
    rect(i, height * 0.3, 20, height * 0.1);
  }
function drawCastle() {
  fill(150); // Stone grey
  noStroke();
  rect(0, height * 0.4, width, height * 0.6); // Main wall
  // Crenellated top
  for (let i = 0; i < width; i += 40) {
    rect(i, height * 0.3, 20, height * 0.1);
  }
  // Towers
  fill(120);
  for (let i = 0; i < 2; i++) {
    let x = map(i, 0, 1, width * 0.2, width * 0.8);
    rect(x, height * 0.2, 80, height * 0.4);
    fill(100); // Darker roof
    triangle(x, height * 0.2, x + 80, height * 0.2, x + 40, height * 0.1);
  }
}
Line-by-line explanation (5 lines)

🔧 Subcomponents:

for-loop Crenellated Top for (let i = 0; i < width; i += 40) {

Draws a repeating row of small rectangular battlements along the top of the castle wall

for-loop Towers for (let i = 0; i < 2; i++) {

Places two tall towers with pointed roofs on either side of the main wall

rect(0, height * 0.4, width, height * 0.6); // Main wall
Draws the main castle wall filling the lower 60% of the canvas height
for (let i = 0; i < width; i += 40) {
Walks across the canvas in 40-pixel steps, unlike other loops in this sketch that count a fixed number of items - here the loop count depends on the canvas width itself
rect(i, height * 0.3, 20, height * 0.1);
Draws one small battlement block at each step, creating the classic zigzag castle silhouette
let x = map(i, 0, 1, width * 0.2, width * 0.8);
Positions the two towers at 20% and 80% of the canvas width
triangle(x, height * 0.2, x + 80, height * 0.2, x + 40, height * 0.1);
Draws a triangular pointed roof on top of each tower

drawVillage()

drawVillage() reuses the same 'evenly space with map(), randomize with random()' recipe seen in drawForest(), showing how a handful of drawing techniques can be recombined to create many different scene types.

🔬 houseWidth is fixed at 100 for every house. What happens if you make it random too, like random(60, 140)?

  for (let i = 0; i < 3; i++) {
    let x = map(i, 0, 2, width * 0.15, width * 0.75);
    let houseWidth = 100;
    let houseHeight = random(80, 120);
    rect(x, height - houseHeight, houseWidth, houseHeight);
    fill(150, 100, 50); // Roof color
    triangle(x, height - houseHeight, x + houseWidth, height - houseHeight, x + houseWidth / 2, height - houseHeight - 50);
  }
function drawVillage() {
  fill(200, 150, 100); // Warm colors
  noStroke();
  for (let i = 0; i < 3; i++) {
    let x = map(i, 0, 2, width * 0.15, width * 0.75);
    let houseWidth = 100;
    let houseHeight = random(80, 120);
    rect(x, height - houseHeight, houseWidth, houseHeight);
    fill(150, 100, 50); // Roof color
    triangle(x, height - houseHeight, x + houseWidth, height - houseHeight, x + houseWidth / 2, height - houseHeight - 50);
  }
}
Line-by-line explanation (3 lines)

🔧 Subcomponents:

for-loop House Row Generator for (let i = 0; i < 3; i++) {

Draws 3 simple houses with triangular roofs spaced across the canvas

let houseHeight = random(80, 120);
Gives each house a slightly different random height for visual variety
rect(x, height - houseHeight, houseWidth, houseHeight);
Draws the rectangular body of the house rising from the bottom of the canvas
triangle(x, height - houseHeight, x + houseWidth, height - houseHeight, x + houseWidth / 2, height - houseHeight - 50);
Draws a triangular roof spanning the top of the house, peaking 50 pixels above the walls

drawRiver()

drawRiver() is a good introduction to beginShape()/vertex()/endShape() for custom polygons, plus using sin(frameCount * speed) to animate a wave shape smoothly over time without any extra state variables.

🔬 frameCount * 0.02 makes the waves scroll over time. What happens if you speed that up to frameCount * 0.1, or slow it to frameCount * 0.005?

  for (let x = 0; x <= width; x += 20) {
    let y = height * 0.7 + sin(x * 0.05 + frameCount * 0.02) * 20;
    vertex(x, y);
  }
function drawRiver() {
  fill(50, 100, 200); // Blue wavy lines
  noStroke();
  beginShape();
  vertex(0, height * 0.7);
  for (let x = 0; x <= width; x += 20) {
    let y = height * 0.7 + sin(x * 0.05 + frameCount * 0.02) * 20;
    vertex(x, y);
  }
  vertex(width, height);
  vertex(0, height);
  endShape(CLOSE);
  // Rocks as grey ellipses
  fill(100);
  for (let i = 0; i < 5; i++) {
    circle(random(width), random(height * 0.8, height * 0.95), random(20, 50));
  }
}
Line-by-line explanation (4 lines)

🔧 Subcomponents:

for-loop Wavy Surface Builder for (let x = 0; x <= width; x += 20) {

Builds the river's rippling top edge by placing a vertex every 20 pixels whose height follows a sine wave

for-loop Riverbed Rocks for (let i = 0; i < 5; i++) {

Scatters 5 grey circular rocks near the bottom of the canvas to decorate the riverbed

beginShape();
Starts a custom multi-point shape - every vertex() call between this and endShape() becomes one corner of the polygon
let y = height * 0.7 + sin(x * 0.05 + frameCount * 0.02) * 20;
Calculates a wavy y position using sin(): the x*0.05 controls how tightly packed the waves are, frameCount*0.02 shifts the wave over time so it appears to flow, and *20 controls how tall the waves are
endShape(CLOSE);
Finishes the shape and connects the last point back to the first, filling in the enclosed river area
circle(random(width), random(height * 0.8, height * 0.95), random(20, 50));
Draws a rock at a random position near the bottom of the canvas with a random size

drawElements()

drawElements() maps plain text keywords straight from the AI's JSON response into distinct little drawings using a switch statement - a very direct example of turning language into images. Note that because x and y are randomized inside draw()'s loop every frame, elements visibly jitter around instead of staying put (see the Improvements section).

🔬 The mouth uses arc(x, y+10, 30, 20, 0, PI) - a half circle from 0 to PI radians. What happens if you change PI to TWO_PI (a full circle) or to HALF_PI (a quarter turn)?

      case 'monster':
        fill(200, 50, 50);
        circle(x, y, 50);
        fill(0);
        circle(x - 10, y - 5, 5);
        circle(x + 10, y - 5, 5);
        arc(x, y + 10, 30, 20, 0, PI);
        break;
function drawElements() {
  for (let element of gameState.currentScene.elements) {
    noStroke();
    let x = random(width * 0.1, width * 0.9);
    let y = random(height * 0.6, height * 0.9);

    switch (element) {
      case 'tree':
        fill(139, 69, 19);
        rect(x, y, 20, 80);
        fill(34, 139, 34);
        circle(x + 10, y, 60);
        break;
      case 'rock':
        fill(100);
        circle(x, y, 40);
        break;
      case 'chest':
        fill(160, 120, 80);
        rect(x, y, 50, 40);
        fill(200, 160, 120);
        rect(x + 10, y + 10, 30, 20);
        break;
      case 'monster':
        fill(200, 50, 50);
        circle(x, y, 50);
        fill(0);
        circle(x - 10, y - 5, 5);
        circle(x + 10, y - 5, 5);
        arc(x, y + 10, 30, 20, 0, PI);
        break;
      case 'npc':
        fill(255, 200, 150);
        circle(x, y, 40);
        fill(0);
        circle(x - 5, y - 5, 3);
        circle(x + 5, y - 5, 3);
        line(x - 5, y + 10, x + 5, y + 10);
        break;
      case 'fire':
        fill(255, 150, 0);
        triangle(x, y, x - 15, y - 30, x + 15, y - 30);
        fill(255, 0, 0);
        triangle(x, y, x - 10, y - 20, x + 10, y - 20);
        break;
      case 'water':
        fill(50, 100, 200);
        rect(x, y, 80, 20);
        break;
    }
  }
}
Line-by-line explanation (4 lines)

🔧 Subcomponents:

for-loop Element Iterator for (let element of gameState.currentScene.elements) {

Loops through every story element the AI mentioned (like 'monster' or 'chest') and draws each one at a random spot

switch-case Element Appearance Dispatcher switch (element) {

Chooses which small icon-like drawing to render based on the element's name

for (let element of gameState.currentScene.elements) {
Iterates over the array of element names (like ['tree','monster']) that the AI included in its scene description
let x = random(width * 0.1, width * 0.9);
Picks a random horizontal position for this element within the middle 80% of the canvas
switch (element) {
Compares the element's name string against each case to decide what shape combination to draw
arc(x, y + 10, 30, 20, 0, PI);
Draws a half-circle (from angle 0 to PI radians, i.e. a half turn) to form the monster's open mouth

📦 Key Variables

encoded string

Holds the OpenAI API key after it has been base64-encoded and XOR-scrambled, so it isn't stored as obvious plain text in the source

const encoded='KTF3Kig1MHcIaDhqCms+OA0A...';
key number

The XOR cipher key used to scramble and unscramble the encoded API key

const key=0x5A;
gameState object

The single source of truth for the whole adventure: current health, inventory, location, full story history, and the current scene description that drawScene() reads every frame

let gameState = { health: 100, inventory: [], location: 'Unknown', storyHistory: [], currentScene: {...} };
healthBarDiv object

Reference to the HTML element showing the health bar, updated whenever health changes

let healthBarDiv;
healthTextSpan object

Reference to the HTML span showing the health percentage as text

let healthTextSpan;
locationTextDiv object

Reference to the HTML element displaying the current location name

let locationTextDiv;
narrativeTextP object

Reference to the paragraph element where the AI's story text is displayed

let narrativeTextP;
choicesContainer object

Reference to the container div where clickable choice buttons are dynamically added

let choicesContainer;
inventoryListUl object

Reference to the unordered list element showing the player's collected items

let inventoryListUl;
loadingOverlay object

Reference to a loading spinner overlay shown while waiting for the AI's response

let loadingOverlay;
gameOverScreen object

Reference to the overlay screen displayed when the player dies or the AI ends the story

let gameOverScreen;
victoryScreen object

Reference to the overlay screen displayed when the player wins

let victoryScreen;
restartButton object

Reference to the button that restarts the adventure from scratch

let restartButton;
MAX_HEALTH number

The upper cap on health, used to clamp health changes and calculate the health bar's fill percentage

const MAX_HEALTH = 100;
OPENAI_API_URL string

The endpoint URL for OpenAI's chat completions API that every game request is sent to

const OPENAI_API_URL = 'https://api.openai.com/v1/chat/completions';
OPENAI_MODEL string

Which OpenAI model to use for generating the story (e.g. gpt-3.5-turbo)

const OPENAI_MODEL = 'gpt-3.5-turbo';
OPENAI_TEMP number

Controls how random/creative the AI's replies are - higher values produce more varied, less predictable narration

const OPENAI_TEMP = 0.7;
OPENAI_MAX_TOKENS number

Caps how long the AI's JSON response can be, indirectly limiting narrative length

const OPENAI_MAX_TOKENS = 500;
synth object

Reference to the browser's built-in speech synthesis engine used to read narration aloud

let synth;
voice object

Stores the chosen text-to-speech voice (preferring an English male voice) used whenever speak() is called

let voice;

🔧 Potential Improvements (4)

Here are some ways this code could be enhanced:

BUG getApiKey() / encoded, key

The OpenAI API key is only lightly obfuscated with base64 and a single-byte XOR cipher, both of which are trivially reversible by anyone who opens the browser console and calls getApiKey() directly - the key is not actually protected at all.

💡 Move the OpenAI request to a small server-side proxy (even a serverless function) that holds the real API key and never sends it to the browser; have the client call your own endpoint instead of api.openai.com directly.

BUG drawCave()

Inside the for-loop, 'let height = random(50, 150);' creates a local variable that shadows p5's global 'height' (canvas height). The very next line then calls 'height(canvas)' as if it were a function, but height is now just a number and 'canvas' isn't in scope in this function at all - this will throw a runtime TypeError the first time a cave scene is drawn.

💡 Rename the local variable (e.g. 'spikeLength') and replace the broken 'height(canvas)' calls with the actual global 'height' variable, e.g. 'triangle(x, height, x - 20, height - spikeLength, x + 20, height - spikeLength);' for the stalagmite.

PERFORMANCE drawElements()

Random x/y positions for each scene element are recalculated every single frame inside draw() (about 60 times per second), so trees, monsters, and chests visibly jitter around instead of staying in a fixed spot between frames.

💡 Compute each element's position once when the scene data first arrives (e.g. in updateGame(), store {type, x, y} objects on gameState.currentScene.elements) and have drawElements() simply read those stored coordinates instead of calling random() every frame.

STYLE callOpenAI()

When JSON parsing fails, the function recursively calls 'await callOpenAI(promptMessage)' with no retry limit, which could recurse indefinitely (and repeatedly bill API calls) if the model keeps returning malformed JSON.

💡 Pass a retry counter into callOpenAI() and stop retrying (showing a friendly error instead) after 2-3 attempts.

🔄 Code Flow

Code flow showing getapikey, setup, draw, windowresized, startgame, handlechoice, callopenai, updategame, updateui, restartgame, speak, drawscene, drawtimeofday, setgradient, drawweather, drawforest, drawcave, drawcastle, drawvillage, drawriver, drawelements

💡 Click on function names in the diagram to jump to their code

graph TD start[Start] --> setup[setup] setup --> draw[draw loop] draw --> drawscene[drawScene] drawscene --> drawtimeofday[drawTimeOfDay] drawtimeofday --> timeofday-switch[Time of Day Colors] drawscene --> drawweather[drawWeather] drawweather --> weather-switch[Weather Dispatcher] drawscene --> drawforest[drawForest] drawforest --> tree-loop[Tree Row Generator] drawscene --> drawcave[drawCave] drawcave --> stalactite-loop[Stalactite/Stalagmite Generator] drawscene --> drawcastle[drawCastle] drawcastle --> tower-loop[Towers] drawcastle --> crenellation-loop[Crenellated Top] drawscene --> drawvillage[drawVillage] drawvillage --> house-loop[House Row Generator] drawscene --> drawriver[drawRiver] drawriver --> wave-loop[Wavy Surface Builder] drawriver --> rock-loop[Riverbed Rocks] drawscene --> drawelements[drawElements] drawelements --> elements-loop[Element Iterator] drawelements --> element-switch[Element Appearance Dispatcher] click setup href "#fn-setup" click draw href "#fn-draw" click drawscene href "#fn-drawscene" click drawtimeofday href "#fn-drawtimeofday" click timeofday-switch href "#sub-timeofday-switch" click drawweather href "#fn-drawweather" click weather-switch href "#sub-weather-switch" click drawforest href "#fn-drawforest" click tree-loop href "#sub-tree-loop" click drawcave href "#fn-drawcave" click stalactite-loop href "#sub-stalactite-loop" click drawcastle href "#fn-drawcastle" click tower-loop href "#sub-tower-loop" click crenellation-loop href "#sub-crenellation-loop" click drawvillage href "#fn-drawvillage" click house-loop href "#sub-house-loop" click drawriver href "#fn-drawriver" click wave-loop href "#sub-wave-loop" click rock-loop href "#sub-rock-loop" click drawelements href "#fn-drawelements" click elements-loop href "#sub-elements-loop" click element-switch href "#sub-element-switch"

❓ Frequently Asked Questions

What visual elements can users expect to see in the AI Dungeon Master sketch?

The sketch visually creates procedurally generated scenes such as forests, caves, and castles, dynamically drawn on the canvas based on the AI's narrative descriptions.

How do users interact with the AI Dungeon Master game?

Users interact by making choices that influence the storyline and by managing their inventory and health throughout the adventure.

What creative coding techniques are showcased in this p5.js sketch?

This sketch demonstrates procedural generation of visuals and real-time narrative generation using AI, showcasing the integration of creative coding with interactive storytelling.

Preview

AI Dungeon Master - Procedural Adventure - xelsed.ai - p5.js creative coding sketch preview
Sketch Preview
Code flow diagram showing the structure of AI Dungeon Master - Procedural Adventure - xelsed.ai - Code flow showing getapikey, setup, draw, windowresized, startgame, handlechoice, callopenai, updategame, updateui, restartgame, speak, drawscene, drawtimeofday, setgradient, drawweather, drawforest, drawcave, drawcastle, drawvillage, drawriver, drawelements
Code Flow Diagram
