
AI Ink Flow Meditation - Zen Calligraphy Brush Simulation - xelsed.ai

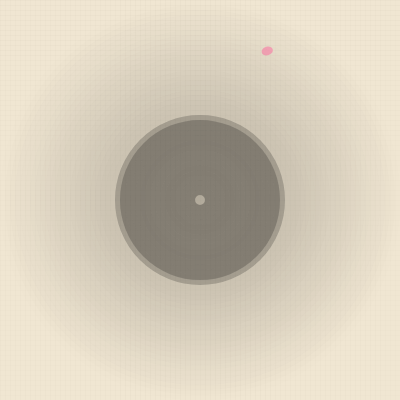
This sketch turns the whole browser window into a sheet of textured rice paper where dragging the mouse paints flowing ink strokes that pool, bleed at the edges, and slowly dry. If you stop moving for a few seconds, pink cherry blossom petals drift down across the canvas.

🧪 Try This!

Experiment with the code by making these changes:

  1. Make ink dry much slower — Lowering the drying rate keeps every stroke wet, dark, and bleeding for far longer before it fades and disappears.
  2. Bring the cherry blossoms sooner — Shortening the idle threshold makes petals start falling almost as soon as you stop moving instead of waiting three full seconds.
  3. Change the petal color to white blossoms — Swapping the fill color changes every falling petal from soft pink to a snowy white, instantly changing the mood of the idle animation.
Prefer the full editor? Open it there →

📖 About This Sketch

This sketch simulates a Zen calligraphy brush: as you drag the mouse (or your finger), it paints organic ink strokes onto a textured paper background that pool thickly when you move slowly and thin out when you move fast. The ink visibly bleeds outward with a soft glow, then gradually dries over time, fading from a dark wet black to a lighter, drier tone. It's built almost entirely from p5.js graphics-buffer tricks - createGraphics(), blendMode(MULTIPLY/ADD), curveVertex() for smooth lines, and noise() for organic texture - plus a small object-oriented particle system for the falling cherry blossom petals that appear when you pause.

The code is organized around two custom classes, InkStroke and Petal, each with their own draw() and update() logic, plus a handful of helper functions (drawPaperTexture, drawVignette, drawRipple) that build the paper look. The main draw() loop ties everything together every frame: it clears and rebuilds an offscreen ink buffer, redraws every active stroke, checks how long the mouse has been idle, and layers a static vignette on top. Studying this sketch teaches you how to layer multiple createGraphics() buffers, how blend modes create convincing ink pooling and bleeding, and how a simple idle-timer can trigger a completely different animation state (the petals).

⚙️ How It Works

  1. When the sketch loads, setup() creates the main canvas plus two offscreen graphics buffers - one (pg) for the paper texture and ink, and one (vignetteGraphics) for a static darkened-edge overlay that's drawn once and reused every frame.
  2. Every frame, draw() clears the ink buffer, redraws the paper's noise-based fiber texture, then loops through every active InkStroke and calls its draw() method, removing any stroke that has finished drying.
  3. As you drag the mouse, mouseDragged() measures how far the cursor moved since the last frame (its speed) and either starts a brand-new InkStroke or appends a point to the current one - slow movement produces a high 'weight' value (thick ink), fast movement produces a low one (thin ink).
  4. Inside InkStroke.draw(), the stroke's wetness value ticks down a little each frame; a MULTIPLY-blended curved shape draws the main stroke body, while an ADD-blended cloud of small noise-jittered circles around its edges fakes wet ink bleeding into the paper fibers.
  5. If the mouse or touch stays still for more than 3 seconds, draw() starts spawning Petal objects every 30 frames; each petal drifts downward with its own velocity and rotation until it floats off the bottom of the screen and is removed.
  6. Finally, the combined paper+ink buffer and the static vignette buffer are drawn to the main canvas with image(), and if a stroke is actively being painted, drawRipple() adds a subtle glow at the cursor position.

🎓 Concepts You'll Learn

Offscreen graphics buffers (createGraphics)Blend modes (MULTIPLY and ADD)Perlin noise for organic textureCustom ES6 classes and OOPcurveVertex for smooth freehand linesState-driven animation via idle detectionParticle systems (array of falling objects)

📝 Code Breakdown

setup()

setup() runs once when the sketch starts. Here it's used to prepare two offscreen graphics buffers with createGraphics() - a common pattern for separating layers (paper+ink vs. static overlay) so each can be redrawn or cached independently.

function setup() {
  createCanvas(windowWidth, windowHeight);
  pixelDensity(1); // Ensure consistent pixel density across devices

  // Create graphics buffer for ink and paper texture
  pg = createGraphics(width, height);
  pg.pixelDensity(1);

  // Create graphics buffer for vignette
  vignetteGraphics = createGraphics(width, height);
  vignetteGraphics.pixelDensity(1);
  drawVignette(); // Draw vignette once, it's static

  // Initial paper texture
  drawPaperTexture(pg);

  // Set last mouse moved time
  lastMouseMovedTime = millis();
}
Line-by-line explanation (7 lines)
createCanvas(windowWidth, windowHeight);
Makes the canvas fill the entire browser window.
pixelDensity(1);
Forces one canvas pixel per screen pixel, so high-DPI ('retina') displays don't slow down all the per-pixel noise drawing.
pg = createGraphics(width, height);
Creates a separate offscreen drawing surface the same size as the canvas, used to hold the paper texture and ink so it can be composited separately from the UI overlay.
vignetteGraphics = createGraphics(width, height);
Creates a second offscreen buffer just for the dark vignette effect, so it only needs to be calculated once instead of every frame.
drawVignette();
Draws the vignette rings into vignetteGraphics a single time since the vignette never changes.
drawPaperTexture(pg);
Fills the ink buffer with the initial cream-colored paper and fiber texture before anything is painted.
lastMouseMovedTime = millis();
Records the current time in milliseconds so the idle timer has a valid starting point.
draw()

draw() runs continuously at the screen's refresh rate. This sketch shows a common layering pattern: build complex content into offscreen buffers (pg, vignetteGraphics), then composite them onto the visible canvas with image() - much faster than drawing every ink detail directly to the main canvas.

🔬 Strokes are removed once isDry() returns true. What happens to the canvas and to performance if you comment out the splice() line so strokes are never removed?

  for (let i = inkStrokes.length - 1; i >= 0; i--) {
    inkStrokes[i].draw(pg);
    if (inkStrokes[i].isDry()) {
      inkStrokes.splice(i, 1); // Remove dry strokes to save memory and performance
    }
  }
function draw() {
  // Clear the main canvas
  background(255);

  // Clear the ink buffer (pg) with transparency
  pg.clear();

  // Redraw the paper texture (with animating fibers)
  drawPaperTexture(pg);

  // Draw all existing ink strokes
  for (let i = inkStrokes.length - 1; i >= 0; i--) {
    inkStrokes[i].draw(pg);
    if (inkStrokes[i].isDry()) {
      inkStrokes.splice(i, 1); // Remove dry strokes to save memory and performance
    }
  }

  // Draw current ink stroke being drawn
  if (currentStroke) {
    currentStroke.draw(pg);
  }

  // Draw the combined paper and ink from pg to the main canvas
  image(pg, 0, 0);

  // --- Handle cherry blossom petals if mouse is idle ---
  mouseIdleTimer = millis() - lastMouseMovedTime;
  if (mouseIdleTimer > 3000) { // 3 seconds idle
    if (frameCount % 30 == 0) { // Add a new petal every 30 frames
      cherryBlossomPetals.push(new Petal());
    }
    for (let i = cherryBlossomPetals.length - 1; i >= 0; i--) {
      cherryBlossomPetals[i].update();
      cherryBlossomPetals[i].draw();
      if (cherryBlossomPetals[i].isOffScreen()) {
        cherryBlossomPetals.splice(i, 1);
      }
    }
  }

  // Draw vignette on top of everything
  image(vignetteGraphics, 0, 0);

  // Handle ink ripple effect (simple version)
  // Only draw if a stroke is actively being made
  if (currentStroke) {
    drawRipple(pg, mouseX, mouseY);
  }
}
Line-by-line explanation (10 lines)

🔧 Subcomponents:

for-loop Update & Draw Ink Strokes for (let i = inkStrokes.length - 1; i >= 0; i--) {

Loops backwards through every ink stroke so it can safely remove ones that have fully dried while still drawing the rest.

conditional Draw Active Stroke if (currentStroke) {

Draws the stroke currently being painted by the user on top of the finished strokes.

conditional Idle Detection for Petals if (mouseIdleTimer > 3000) { // 3 seconds idle

Checks whether the mouse has been still for 3 seconds and, if so, begins spawning and animating cherry blossom petals.

conditional Spawn New Petal if (frameCount % 30 == 0) { // Add a new petal every 30 frames

Adds a new falling petal roughly once every 30 frames using the global frame counter as a simple timer.

for-loop Update & Draw Petals for (let i = cherryBlossomPetals.length - 1; i >= 0; i--) {

Moves each petal, draws it, and removes any that have drifted below the bottom of the screen.

background(255);
Paints the visible canvas white every frame before drawing anything new on top.
pg.clear();
Wipes the offscreen ink buffer back to fully transparent so the paper texture can be freshly redrawn each frame.
drawPaperTexture(pg);
Redraws the cream paper background and its subtle animated fiber lines into the buffer.
inkStrokes[i].draw(pg);
Tells each stroke object to render itself into the ink buffer and advance its own drying process.
inkStrokes.splice(i, 1);
Removes a stroke from the array entirely once it's fully dry, so the array (and the work done each frame) doesn't grow forever.
image(pg, 0, 0);
Copies the entire offscreen buffer (paper + ink) onto the visible canvas in one draw call.
mouseIdleTimer = millis() - lastMouseMovedTime;
Calculates how many milliseconds have passed since the mouse last moved.
cherryBlossomPetals.push(new Petal());
Creates a brand-new Petal object with random position and speed, and adds it to the array of active petals.
image(vignetteGraphics, 0, 0);
Draws the pre-rendered dark vignette on top of everything else, framing the scene.
drawRipple(pg, mouseX, mouseY);
While actively painting, adds a soft glowing circle at the current cursor position for extra visual feedback.

InkStroke constructor

This is the constructor of a custom class - it runs once whenever `new InkStroke(...)` is called in mouseDragged() or touchMoved(), setting up the initial state for a brand new stroke object.

constructor(x, y, speed, weight) {
    this.points = [{ x, y, speed, weight }];
    this.wetness = 1.0; // 1.0 = fully wet, 0.0 = fully dry
    this.dryingRate = 0.005; // How fast wetness decreases per frame
    this.baseWeight = weight; // Store initial weight for consistent bleed
  }
Line-by-line explanation (4 lines)
this.points = [{ x, y, speed, weight }];
Stores the stroke as an array of point objects; the very first point is added here when the stroke is created.
this.wetness = 1.0;
Every new stroke starts fully 'wet', which controls its darkness and bleed amount.
this.dryingRate = 0.005;
Sets how much wetness is lost per frame - a small number so strokes dry gradually rather than instantly.
this.baseWeight = weight;
Remembers the stroke's initial thickness so the bleed effect can scale consistently even as speed changes mid-stroke.

addPoint()

Growing an array of points over time like this is what lets curveVertex() later draw a smooth line through the entire path the mouse traveled.

addPoint(x, y, speed, weight) {
    this.points.push({ x, y, speed, weight });
  }
Line-by-line explanation (1 lines)
this.points.push({ x, y, speed, weight });
Appends a new point (with its position, movement speed, and brush weight) to the end of this stroke's points array as the mouse keeps moving.

InkStroke.draw()

This method is where the whole 'ink' illusion happens: two passes with different blend modes (MULTIPLY for the solid stroke body, ADD for the glowing bleed) layered with noise-driven jitter. It's a great example of combining blend modes and Perlin noise to fake a natural material.

🔬 edgeCount decides how many bleed circles are stamped around each point. What happens if you set it to 1 (a single blob per point)? What about 20?

      let edgeCount = 5; // More circles for smoother bleed
      for (let j = 0; j < edgeCount; j++) {
        let offset = map(j, 0, edgeCount - 1, -strokeWidth / 2, strokeWidth / 2);
draw(g) {
    if (this.points.length < 2) return;

    // Gradual drying effect: reduce wetness over time
    if (this.wetness > 0) {
      this.wetness -= this.dryingRate;
      this.wetness = max(0, this.wetness);
    }

    // --- Draw the main stroke body ---
    g.blendMode(MULTIPLY); // Ink darkens overlaps
    g.noStroke();

    // Calculate current alpha based on wetness
    // Dries lighter, not fully transparent, to maintain definition
    let mainAlpha = map(this.wetness, 0, 1, 100, 255);
    g.fill(0, mainAlpha); // Black ink

    g.beginShape();
    // Repeat first and last points for curveVertex to work properly with fewer points
    g.curveVertex(this.points[0].x, this.points[0].y);
    for (let i = 0; i < this.points.length; i++) {
      let pt = this.points[i];
      g.curveVertex(pt.x, pt.y);
    }
    g.curveVertex(this.points[this.points.length - 1].x, this.points[this.points.length - 1].y);
    g.endShape();

    // --- Draw organic edges / bleeding effect ---
    g.blendMode(ADD); // Makes bleeding brighter and more diffuse
    g.noStroke();

    // Bleed effect is more prominent when ink is wet
    let bleedAlpha = map(this.wetness, 0, 1, 0, 15); // Fades out as ink dries
    g.fill(0, bleedAlpha);

    for (let i = 0; i < this.points.length; i++) {
      let pt = this.points[i];
      let strokeWidth = map(pt.speed, 0, 20, this.baseWeight * 1.5, this.baseWeight * 0.5, true); // Bleed width scales with stroke

      // Determine stroke direction to calculate perpendicular angle for edges
      let prevPt = this.points[max(0, i - 1)];
      let angle = atan2(pt.y - prevPt.y, pt.x - prevPt.x);
      let perpAngle = angle + HALF_PI;

      // Draw small circles along the edges with noise offset for organic texture
      let edgeCount = 5; // More circles for smoother bleed
      for (let j = 0; j < edgeCount; j++) {
        let offset = map(j, 0, edgeCount - 1, -strokeWidth / 2, strokeWidth / 2);
        let noiseOffset = noise(pt.x * 0.01, pt.y * 0.01 + offset * 0.05, frameCount * 0.01);
        noiseOffset = map(noiseOffset, 0, 1, -strokeWidth * 0.5, strokeWidth * 0.5); // More dramatic bleed

        let edgeX1 = pt.x + cos(perpAngle) * (offset + noiseOffset * this.wetness); // Noise effect reduces as ink dries
        let edgeY1 = pt.y + sin(perpAngle) * (offset + noiseOffset * this.wetness);

        let bleedSize = map(this.wetness, 0, 1, 5, strokeWidth * 0.7); // Bleed is wider when wet
        g.ellipse(edgeX1, edgeY1, bleedSize, bleedSize);
      }
    }
  }
Line-by-line explanation (11 lines)

🔧 Subcomponents:

conditional Reduce Wetness if (this.wetness > 0) {

Gradually dries the ink by decreasing wetness every frame this stroke is drawn, clamped at zero.

for-loop Build Smooth Curve for (let i = 0; i < this.points.length; i++) {

Feeds every recorded mouse point into curveVertex() so the stroke follows a smooth curved path rather than sharp straight segments.

for-loop Bleed Along Each Point for (let i = 0; i < this.points.length; i++) {

Visits every point along the stroke's path so bleeding texture can be added around each one.

for-loop Draw Bleed Circles for (let j = 0; j < edgeCount; j++) {

Draws several small semi-transparent, noise-offset circles around each point to fake organic ink bleeding into the paper.

if (this.points.length < 2) return;
Bails out early if the stroke only has one point yet, since you need at least two points to draw a line.
this.wetness -= this.dryingRate;
Reduces the stroke's wetness a tiny bit every time it's drawn (i.e. every frame), simulating drying over time.
g.blendMode(MULTIPLY);
Switches the buffer's blend mode so new ink darkens whatever is already underneath, mimicking how real ink overlaps get darker.
let mainAlpha = map(this.wetness, 0, 1, 100, 255);
Converts wetness (0 to 1) into an opacity value between 100 and 255, so the stroke stays partially visible even fully dry.
g.curveVertex(this.points[0].x, this.points[0].y);
curveVertex needs an extra 'control point' at each end of the curve, so the first point is repeated here to anchor the start.
g.blendMode(ADD);
Switches to additive blending for the bleed effect, which brightens overlapping areas instead of darkening them, giving a soft glowing bleed look.
let bleedAlpha = map(this.wetness, 0, 1, 0, 15);
Bleed opacity fades toward zero as the stroke dries, so bleeding is only visible while the ink is fresh.
let strokeWidth = map(pt.speed, 0, 20, this.baseWeight * 1.5, this.baseWeight * 0.5, true);
Uses the recorded speed at this point to decide how wide the bleed halo should be - slower movement gets a wider bleed.
let perpAngle = angle + HALF_PI;
Rotates the stroke's direction angle by 90 degrees to get the perpendicular direction, used to offset bleed circles to either side of the line.
let noiseOffset = noise(pt.x * 0.01, pt.y * 0.01 + offset * 0.05, frameCount * 0.01);
Samples Perlin noise using the point's position and the current frame, producing a smoothly changing 'random' wobble instead of jittery randomness.
g.ellipse(edgeX1, edgeY1, bleedSize, bleedSize);
Draws one small circle at the computed offset position - many of these overlapping circles together create the organic bleeding edge.

isDry()

Small boolean 'checker' methods like this keep the main draw() loop readable - instead of comparing raw numbers there, it just asks the object 'are you dry yet?'.

isDry() {
    return this.wetness <= 0;
  }
Line-by-line explanation (1 lines)
return this.wetness <= 0;
Returns true once the stroke's wetness has fully drained to zero, signaling that draw() can safely remove it.

Petal constructor

This constructor gives every petal slightly different randomized properties, which is why the falling blossoms look natural rather than mechanically identical.

constructor() {
    this.x = random(-width * 0.1, width * 1.1);
    this.y = random(-height * 0.1, height * 0.1);
    this.vx = random(-0.5, 0.5);
    this.vy = random(0.5, 1.5);
    this.rotation = random(TWO_PI);
    this.rotationSpeed = random(-0.02, 0.02);
    this.size = random(10, 25);
    this.color = color(255, 150, 180, 200); // Pink, semi-transparent
  }
Line-by-line explanation (6 lines)
this.x = random(-width * 0.1, width * 1.1);
Places the petal at a random horizontal position, allowed to start slightly off-screen on either side.
this.y = random(-height * 0.1, height * 0.1);
Places the petal near the top of the screen (allowing a bit above it), so it starts falling from near the top.
this.vx = random(-0.5, 0.5);
Gives the petal a small random horizontal drift, left or right.
this.vy = random(0.5, 1.5);
Gives the petal a random downward falling speed.
this.rotationSpeed = random(-0.02, 0.02);
Makes each petal spin slowly in a random direction as it falls.
this.color = color(255, 150, 180, 200);
Sets a soft, semi-transparent pink color for every petal.

Petal.update()

This is the classic 'velocity' pattern used in almost every particle animation: store a speed, then add it to position every frame.

update() {
    this.x += this.vx;
    this.y += this.vy;
    this.rotation += this.rotationSpeed;
  }
Line-by-line explanation (3 lines)
this.x += this.vx;
Moves the petal horizontally by its drift speed each frame.
this.y += this.vy;
Moves the petal downward by its falling speed each frame.
this.rotation += this.rotationSpeed;
Slowly spins the petal by adding its rotation speed to its current rotation angle.

Petal.draw()

This function shows how translate() + rotate() + push()/pop() let you draw a shape in its own local coordinate space (centered at 0,0) and have it appear correctly positioned and rotated anywhere on screen - much simpler than calculating rotated coordinates by hand.

🔬 This bezier pair defines the petal's rounded outline. What happens if you change size / 2 to size * 0.9 in both bezierVertex calls, making the petal much wider and rounder?

    beginShape();
    vertex(0, -this.size / 2);
    bezierVertex(this.size / 2, -this.size / 2, this.size / 2, this.size / 2, 0, this.size / 2);
    bezierVertex(-this.size / 2, this.size / 2, -this.size / 2, -this.size / 2, 0, -this.size / 2);
    endShape();
draw() {
    push();
    translate(this.x, this.y);
    rotate(this.rotation);
    fill(this.color);
    noStroke();
    // Simple petal shape
    beginShape();
    vertex(0, -this.size / 2);
    bezierVertex(this.size / 2, -this.size / 2, this.size / 2, this.size / 2, 0, this.size / 2);
    bezierVertex(-this.size / 2, this.size / 2, -this.size / 2, -this.size / 2, 0, -this.size / 2);
    endShape();
    pop();
  }
Line-by-line explanation (6 lines)
push();
Saves the current drawing settings (position, rotation) so this petal's transformations don't affect anything drawn afterward.
translate(this.x, this.y);
Moves the drawing origin to the petal's current position, so the shape below can be drawn relative to (0,0).
rotate(this.rotation);
Rotates the coordinate system by the petal's current rotation angle, so the shape appears spinning.
beginShape();
Starts defining a custom shape made of vertices and curves.
bezierVertex(this.size / 2, -this.size / 2, this.size / 2, this.size / 2, 0, this.size / 2);
Draws a smooth curved edge from the top point to the bottom point, bulging outward to the right - this is one 'half' of the petal outline.
pop();
Restores the drawing settings saved earlier, undoing the translate/rotate before the next petal (or anything else) is drawn.

Petal.isOffScreen()

Cleaning up offscreen particles like this prevents the petals array from growing forever and wasting memory/CPU on objects nobody can see.

isOffScreen() {
    return this.y > height * 1.1;
  }
Line-by-line explanation (1 lines)
return this.y > height * 1.1;
Returns true once the petal has fallen slightly past the bottom edge of the canvas, so it can be safely removed from the array.

mouseDragged()

mouseDragged() is a built-in p5.js event function that automatically runs whenever the mouse moves while a button is held down - it's the main entry point that drives the whole ink-painting interaction.

🔬 Weight ranges from 30 (slow) down to 5 (fast). What happens visually if you change 30 to 80, making slow strokes enormous?

  if (!currentStroke) {
    let speed = dist(pmouseX, pmouseY, mouseX, mouseY);
    let weight = map(speed, 0, 20, 30, 5, true); // Slower = thicker, faster = thinner
    currentStroke = new InkStroke(mouseX, mouseY, speed, weight);
    inkStrokes.push(currentStroke);
function mouseDragged() {
  // If no current stroke, start a new one
  if (!currentStroke) {
    let speed = dist(pmouseX, pmouseY, mouseX, mouseY);
    let weight = map(speed, 0, 20, 30, 5, true); // Slower = thicker, faster = thinner
    currentStroke = new InkStroke(mouseX, mouseY, speed, weight);
    inkStrokes.push(currentStroke);
  } else {
    let speed = dist(pmouseX, pmouseY, mouseX, mouseY);
    let weight = map(speed, 0, 20, 30, 5, true);
    currentStroke.addPoint(mouseX, mouseY, speed, weight);
  }
  lastMouseMovedTime = millis();
  return false; // Prevent default browser behavior (e.g., text selection)
}
Line-by-line explanation (6 lines)

🔧 Subcomponents:

conditional Start or Continue Stroke if (!currentStroke) {

Decides whether to begin a brand new InkStroke object or keep adding points to the one already in progress.

let speed = dist(pmouseX, pmouseY, mouseX, mouseY);
Measures how far the mouse traveled since the last frame - a big distance means fast movement.
let weight = map(speed, 0, 20, 30, 5, true); // Slower = thicker, faster = thinner
Converts speed into brush thickness: slow motion (speed near 0) maps to a thick 30px line, fast motion (speed 20+) maps to a thin 5px line.
currentStroke = new InkStroke(mouseX, mouseY, speed, weight);
Creates a brand-new stroke object starting at the current mouse position.
inkStrokes.push(currentStroke);
Adds the new stroke to the master array so draw() will render and eventually dry it out.
currentStroke.addPoint(mouseX, mouseY, speed, weight);
If a stroke is already being drawn, just appends the new mouse position as another point along it.
return false;
Tells the browser to skip its default drag behavior (like selecting text), so painting feels smooth.

mouseReleased()

mouseReleased() is a built-in p5.js event that fires once when a mouse button goes up, marking the natural end of a single brush stroke.

function mouseReleased() {
  currentStroke = null; // End the current stroke
  return false;
}
Line-by-line explanation (1 lines)
currentStroke = null;
Clears the reference to the active stroke so the next mouseDragged() call will start a fresh one instead of continuing this one.

mouseMoved()

mouseMoved() fires even when no button is pressed, which is why it's used purely to reset the idle timer and keep the petals from spawning while you're just hovering around.

function mouseMoved() {
  lastMouseMovedTime = millis();
  return false;
}
Line-by-line explanation (1 lines)
lastMouseMovedTime = millis();
Updates the timestamp of the last movement, resetting the idle timer used to decide whether cherry blossoms should appear.

touchStarted()

touchStarted() is p5.js's mobile equivalent of mousePressed(), letting the sketch respond to finger taps on touchscreens.

function touchStarted() {
  lastMouseMovedTime = millis();
  return false; // Prevent default browser touch behavior (e.g., zooming)
}
Line-by-line explanation (2 lines)
lastMouseMovedTime = millis();
Resets the idle timer as soon as a touch begins, so petals stop while you're interacting.
return false;
Stops the browser's default touch gestures like pinch-zoom or scrolling from interfering with painting.

touchMoved()

This function mirrors mouseDragged() but for touchscreens, showing how p5.js sketches can support both mouse and touch input with very similar code paths, sharing the same InkStroke class underneath.

function touchMoved() {
  if (touches.length > 0) {
    let touch = touches[0];
    // If no current stroke, start a new one
    if (!currentStroke) {
      let speed = dist(pmouseX, pmouseY, touch.x, touch.y);
      let weight = map(speed, 0, 20, 30, 5, true);
      currentStroke = new InkStroke(touch.x, touch.y, speed, weight);
      inkStrokes.push(currentStroke);
    } else {
      let speed = dist(pmouseX, pmouseY, touch.x, touch.y);
      let weight = map(speed, 0, 20, 30, 5, true);
      currentStroke.addPoint(touch.x, touch.y, speed, weight);
    }
  }
  lastMouseMovedTime = millis();
  return false; // Prevent default browser touch behavior
}
Line-by-line explanation (3 lines)

🔧 Subcomponents:

conditional Check Active Touch if (touches.length > 0) {

Only processes touch input if there is at least one active finger touching the screen.

conditional Start or Continue Stroke if (!currentStroke) {

Same logic as the mouse version: decide whether to begin a new stroke or extend the current one, but using touch coordinates.

let touch = touches[0];
Grabs the first active touch point from the built-in `touches` array (multi-touch is ignored, only the first finger matters).
let speed = dist(pmouseX, pmouseY, touch.x, touch.y);
Estimates movement speed by comparing the previous mouse position to the new touch position.
currentStroke = new InkStroke(touch.x, touch.y, speed, weight);
Starts a new stroke at the touch's position instead of the mouse's, so the same InkStroke class works for both input types.

touchEnded()

touchEnded() completes the touch-input pair with touchStarted()/touchMoved(), keeping the interaction consistent across devices.

function touchEnded() {
  currentStroke = null; // End the current stroke
  return false;
}
Line-by-line explanation (1 lines)
currentStroke = null;
Ends the active stroke when the finger lifts off the screen, just like mouseReleased() does for the mouse.

windowResized()

windowResized() is a built-in p5.js callback that fires automatically when the browser window changes size, which is essential for any fullscreen sketch that uses createGraphics() buffers matching canvas dimensions.

function windowResized() {
  resizeCanvas(windowWidth, windowHeight);
  // Re-create graphics buffers with new dimensions
  pg = createGraphics(width, height);
  pg.pixelDensity(1);
  vignetteGraphics = createGraphics(width, height);
  vignetteGraphics.pixelDensity(1);
  drawVignette(); // Redraw static vignette
  // Note: Existing ink strokes are not resized, they will be drawn at their original coordinates.
  // For a more robust solution, stroke points would need to be remapped.
}
Line-by-line explanation (3 lines)
resizeCanvas(windowWidth, windowHeight);
Resizes the visible canvas to match the browser window's new dimensions whenever it changes (e.g. rotating a phone).
pg = createGraphics(width, height);
Throws away the old ink buffer and creates a fresh one matching the new canvas size, since buffers can't be resized in place.
drawVignette();
Redraws the vignette into the newly-sized buffer so the darkened edges still match the new window dimensions.

drawPaperTexture()

This function is called every single frame inside draw(), regenerating the paper texture with slowly-shifting Perlin noise so the fibers subtly animate over time rather than looking like a static image.

🔬 This loop draws one fiber line every 5 pixels. What happens to the texture's density and to frame rate if you change the step to 20? To 2?

  for (let y = 0; y < height; y += 5) {
    let noiseVal = noise(y * 0.005, frameCount * 0.001);
    let alpha = map(noiseVal, 0, 1, 0, 5); // Vary transparency
    g.fill(0, alpha);
    g.rect(0, y, width, 1);
  }
function drawPaperTexture(g) {
  g.push();
  g.noStroke();
  g.fill(240, 230, 210); // Warm cream/beige for rice paper
  g.rect(0, 0, width, height);

  g.blendMode(MULTIPLY); // Darken the texture slightly
  g.fill(0, 10); // Very subtle dark lines

  // Draw subtle horizontal fibers with Perlin noise
  for (let y = 0; y < height; y += 5) {
    let noiseVal = noise(y * 0.005, frameCount * 0.001);
    let alpha = map(noiseVal, 0, 1, 0, 5); // Vary transparency
    g.fill(0, alpha);
    g.rect(0, y, width, 1);
  }

  // Draw subtle vertical fibers with Perlin noise
  for (let x = 0; x < width; x += 5) {
    let noiseVal = noise(x * 0.005, frameCount * 0.001 + 100);
    let alpha = map(noiseVal, 0, 1, 0, 5); // Vary transparency
    g.fill(0, alpha);
    g.rect(x, 0, 1, height);
  }
  g.pop();
}
Line-by-line explanation (5 lines)

🔧 Subcomponents:

for-loop Horizontal Paper Fibers for (let y = 0; y < height; y += 5) {

Draws a faint horizontal line every 5 pixels down the canvas, using Perlin noise to vary its opacity for a fibrous paper look.

for-loop Vertical Paper Fibers for (let x = 0; x < width; x += 5) {

Draws a faint vertical line every 5 pixels across the canvas, mirroring the horizontal fibers to create a woven paper texture.

g.fill(240, 230, 210); // Warm cream/beige for rice paper
Sets the base paper color to a warm cream/beige tone.
g.blendMode(MULTIPLY); // Darken the texture slightly
Switches to multiply blending so the faint fiber lines drawn next will darken the paper rather than covering it up.
let noiseVal = noise(y * 0.005, frameCount * 0.001);
Samples Perlin noise based on the row's position and the current frame, producing a value that drifts smoothly over time rather than flickering randomly.
let alpha = map(noiseVal, 0, 1, 0, 5);
Converts the noise value into a very low opacity (0-5), so the fiber lines stay subtle.
g.rect(0, y, width, 1);
Draws a full-width, 1-pixel-tall rectangle at row y - one 'fiber' line.

drawVignette()

Because the vignette never changes, it's drawn once into its own buffer in setup() rather than every frame in draw() - a performance optimization worth noticing: static visuals don't need to be recalculated every frame.

🔬 The max alpha here is 50, giving a subtle vignette. What happens if you change that 50 to 150 for a much darker frame around the edges?

  for (let i = 0; i < maxDist; i += 5) {
    let alpha = map(i, 0, maxDist, 0, 50); // Darker further from center
    vignetteGraphics.stroke(0, alpha);
    vignetteGraphics.strokeWeight(10); // Thicker stroke for smoother gradient
    vignetteGraphics.ellipse(width / 2, height / 2, width - i * 2, height - i * 2);
  }
function drawVignette() {
  vignetteGraphics.push();
  vignetteGraphics.noFill();
  vignetteGraphics.blendMode(MULTIPLY); // Darkens the edges

  let maxDist = dist(0, 0, width / 2, height / 2);
  for (let i = 0; i < maxDist; i += 5) {
    let alpha = map(i, 0, maxDist, 0, 50); // Darker further from center
    vignetteGraphics.stroke(0, alpha);
    vignetteGraphics.strokeWeight(10); // Thicker stroke for smoother gradient
    vignetteGraphics.ellipse(width / 2, height / 2, width - i * 2, height - i * 2);
  }
  vignetteGraphics.pop();
}
Line-by-line explanation (3 lines)

🔧 Subcomponents:

for-loop Concentric Darkening Rings for (let i = 0; i < maxDist; i += 5) {

Draws many overlapping ellipse outlines that shrink toward the center, each slightly darker, building up a soft vignette that darkens the screen's edges.

let maxDist = dist(0, 0, width / 2, height / 2);
Calculates the distance from a corner to the canvas center, used as the outer bound for the darkening rings.
let alpha = map(i, 0, maxDist, 0, 50); // Darker further from center
Rings closer to the outer edge (larger i) get a higher opacity, making the corners noticeably darker than the center.
vignetteGraphics.ellipse(width / 2, height / 2, width - i * 2, height - i * 2);
Draws one ellipse outline centered on the canvas, shrinking slightly with each step of i to build up the layered darkening effect.

drawRipple()

This tiny function is called only while a stroke is actively being drawn, giving immediate visual feedback right at the cursor - a nice example of using blendMode(ADD) purely for a glow effect distinct from the ink's own bleed.

function drawRipple(g, x, y) {
  g.push();
  g.blendMode(ADD); // Makes it brighter/more diffuse
  g.noStroke();
  g.fill(0, 10); // Subtle black glow

  // Animate a short-lived ripple
  g.ellipse(x, y, 30, 30);
  g.pop();
}
Line-by-line explanation (3 lines)
g.blendMode(ADD); // Makes it brighter/more diffuse
Uses additive blending so the ripple glows softly rather than looking like a flat dark dot.
g.fill(0, 10); // Subtle black glow
Uses a very low opacity fill, so the glow is barely visible and builds up gradually with each frame it's drawn.
g.ellipse(x, y, 30, 30);
Draws a 30-pixel circle centered on the current cursor/touch position to indicate where ink is actively being laid down.

📦 Key Variables

pg object

An offscreen graphics buffer (from createGraphics) that holds the paper texture and all ink strokes, composited onto the main canvas each frame.

let pg;
vignetteGraphics object

A separate offscreen buffer holding the static darkened-edge vignette, drawn once and reused every frame for performance.

let vignetteGraphics;
mouseIdleTimer number

Stores how many milliseconds have passed since the mouse last moved; used to decide when to start showing cherry blossoms.

let mouseIdleTimer = 0;
lastMouseMovedTime number

Records the timestamp (from millis()) of the last mouse/touch movement, used to calculate mouseIdleTimer.

let lastMouseMovedTime = 0;
cherryBlossomPetals array

Holds all currently active Petal objects that are falling across the screen during idle periods.

let cherryBlossomPetals = [];
inkStrokes array

Holds every InkStroke object that has been painted and hasn't fully dried yet.

let inkStrokes = [];
currentStroke object

A reference to the InkStroke currently being painted (or null if no stroke is in progress), used to decide whether to start a new stroke or extend the existing one.

let currentStroke = null;

🔧 Potential Improvements (4)

Here are some ways this code could be enhanced:

BUG touchMoved() and mouseDragged()

Stroke speed is always computed using pmouseX/pmouseY (the previous mouse position), even inside touchMoved() where the input is touch.x/touch.y. On touch devices pmouseX/pmouseY may not track finger movement accurately, causing incorrect speed readings and inconsistent stroke thickness.

💡 Track a dedicated 'previous touch position' variable (e.g. prevTouchX/prevTouchY) updated at the end of touchMoved(), and use that instead of pmouseX/pmouseY when computing speed for touch input.

PERFORMANCE drawPaperTexture()

This function loops over every 5 pixels of both width and height and calls noise() plus a fill()/rect() pair for each one, every single frame - on a large fullscreen canvas this is a significant amount of per-frame work just for a subtle background texture.

💡 Render the fiber texture to a small offscreen buffer once (or update it only every N frames), or precompute the noise values less frequently and cache the resulting texture between frames.

STYLE mouseDragged() and touchMoved()

Both functions duplicate almost identical logic for computing speed/weight and deciding whether to start a new InkStroke or add a point to the current one.

💡 Extract a shared helper function like handleStrokeInput(x, y, prevX, prevY) that both mouseDragged() and touchMoved() call, reducing duplication and making future changes easier to keep in sync.

FEATURE windowResized()

The comment itself acknowledges that existing ink strokes keep their original pixel coordinates after a resize, so they can appear in the wrong relative position (or even off-screen) if the window's proportions change significantly.

💡 Store each stroke point as a normalized coordinate (x/width, y/height) and multiply by the current width/height when drawing, so strokes automatically reposition correctly whenever the canvas is resized.

🔄 Code Flow

Code flow showing setup, draw, inkstroke, addpoint, inkstrokedraw, isdry, petal, update, petaldraw, isoffscreen, mousedragged, mousereleased, mousemoved, touchstarted, touchmoved, touchended, windowresized, drawpapertexture, drawvignette, drawripple

💡 Click on function names in the diagram to jump to their code

graph TD start[Start] --> setup[setup] setup --> draw[draw loop] draw --> stroke-loop[stroke-loop] stroke-loop --> current-stroke-draw[current-stroke-draw] current-stroke-draw --> drying-update[drying-update] drying-update --> drawpapertexture[drawpapertexture] drawpapertexture --> drawvignette[drawvignette] drawvignette --> idle-check[idle-check] idle-check --> petal-spawn[petal-spawn] petal-spawn --> petal-loop[petal-loop] petal-loop --> draw click setup href "#fn-setup" click draw href "#fn-draw" click stroke-loop href "#sub-stroke-loop" click current-stroke-draw href "#sub-current-stroke-draw" click drying-update href "#sub-drying-update" click drawpapertexture href "#fn-drawpapertexture" click drawvignette href "#fn-drawvignette" click idle-check href "#sub-idle-check" click petal-spawn href "#sub-petal-spawn" click petal-loop href "#sub-petal-loop"

❓ Frequently Asked Questions

What visual experience does the AI Ink Flow Meditation sketch provide?

The sketch creates a tranquil visual experience by simulating flowing ink strokes on aged rice paper, which pool, bleed, and dry organically, accompanied by drifting cherry blossoms when the user pauses.

How can users interact with the Zen Calligraphy Brush simulation?

Users can interact by moving their mouse to create ink strokes; moving slowly produces thick, pooling strokes while quick movements generate sharp lines.

What creative coding concepts are showcased in this p5.js sketch?

The sketch demonstrates techniques such as real-time stroke rendering, dynamic wetness effects for ink simulation, and blending modes for achieving organic visual effects.

Preview

AI Ink Flow Meditation - Zen Calligraphy Brush Simulation - xelsed.ai - p5.js creative coding sketch preview
Sketch Preview
Code flow diagram showing the structure of AI Ink Flow Meditation - Zen Calligraphy Brush Simulation - xelsed.ai - Code flow showing setup, draw, inkstroke, addpoint, inkstrokedraw, isdry, petal, update, petaldraw, isoffscreen, mousedragged, mousereleased, mousemoved, touchstarted, touchmoved, touchended, windowresized, drawpapertexture, drawvignette, drawripple
Code Flow Diagram
