AI Liquid Chrome Mirror - Mouse Velocity Metallic Distortion - xelsed.ai

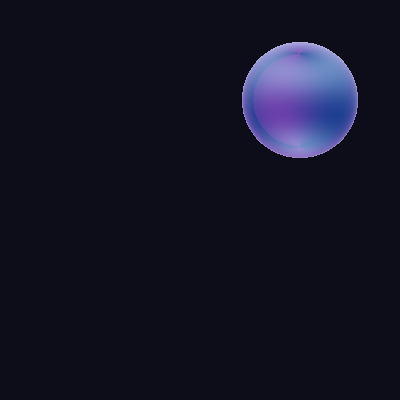
This WEBGL sketch raymarches a chrome-like sphere in real time, deforming its surface with sine-wave ripples whenever the mouse moves. The faster the cursor travels, the stronger the ripples become, while the reflective surface renders a fake procedural environment in shifting blues and purples for a molten-metal look.

🧪 Try This!

Experiment with the code by making these changes:

  1. Slow down ripple decay — Lowering the lerp smoothing factor makes velocity change more gradually, so ripples take longer to build up and much longer to settle after you stop moving.
  2. Shrink the chrome sphere — sphereRadius directly controls how large the reflective sphere appears on screen.
  3. Switch to a red-gold palette — Changing the three base reflection colors instantly gives the metal a completely different mood.
  4. Make ripples denser — Increasing the ripple frequency multiplier packs more concentric rings across the surface, giving a finer, more agitated liquid texture.
Prefer the full editor? Open it there →

📖 About This Sketch

This sketch creates a single raymarched sphere rendered entirely inside a custom GLSL fragment shader, and it reacts to how fast you move your mouse rather than just where the mouse is. Slow, gentle movement keeps the surface calm and mirror-smooth, while quick flicks send visible ripple waves rippling across the metallic blob. It's built almost entirely with p5's WEBGL renderer and the p5.Shader class, combining signed distance functions (SDFs), raymarching, surface normals, reflection vectors, and a Fresnel edge-glow effect - all classic real-time-graphics techniques distilled into a compact shader.

The p5.js side of the code is tiny: preload() compiles the shader, setup() attaches it to a full-window canvas, and draw() feeds a handful of uniforms (resolution, mouse position, velocity, and time) into the GPU every frame before drawing one full-screen rectangle. All of the interesting visual logic lives inside the embedded GLSL string, in functions like df() (the combined distance field), calcNormal(), and fakeEnvReflection(). Studying this sketch is a great way to learn how JavaScript and GLSL talk to each other through uniforms, and how a handful of math functions can fake a convincing 3D liquid metal surface without any 3D geometry at all.

⚙️ How It Works

  1. On load, preload() compiles a custom GLSL shader from the embedded vertex and fragment shader strings using new p5.Shader(this.renderer, vert, frag).
  2. setup() creates a full-window WEBGL canvas, calls shader(myShader) to activate it, and records the mouse's starting position so velocity can be measured from frame one.
  3. Every frame, draw() measures how far the mouse moved since the previous frame and smooths that raw delta into velocityX/velocityY using lerp, so ripples build up gradually and settle slowly once the mouse stops.
  4. draw() then sends the canvas size, mouse position, velocity, and elapsed time into the shader as uniforms, and finally draws one rectangle that covers the whole canvas - this single rect triggers the fragment shader once per pixel on screen.
  5. Inside the fragment shader, a raymarching loop steps a ray forward through a signed-distance-field sphere (df()) that's deformed by a sine-wave ripple whose amplitude is driven directly by mouse velocity.
  6. Where the ray hits the surface, the shader computes a normal, reflects the view direction off it, colors the pixel with a fake procedural environment reflection (fakeEnvReflection()), and blends in a brighter Fresnel glow at grazing angles for the metallic sheen.

🎓 Concepts You'll Learn

WEBGL custom shaders in p5.jsGLSL vertex & fragment shadersRaymarching with signed distance functions (SDFs)Uniforms bridging JavaScript and GLSLMouse velocity tracking with lerp smoothingSurface normals & reflection vectorsFresnel effect for edge highlightingFake procedural environment mapping

📝 Code Breakdown

preload()

preload() runs once before setup() and is guaranteed to finish before the sketch starts drawing. It's the right place to compile shaders, load images, or load fonts because p5.js will wait for it to complete.

function preload() {
  // Create the shader from the embedded vertex and fragment shader strings
  // The 'this.renderer' argument is important for p5.js 1.x shaders
  myShader = new p5.Shader(this.renderer, vert, frag);
}
Line-by-line explanation (1 lines)
myShader = new p5.Shader(this.renderer, vert, frag);
Compiles the GLSL vertex string (vert) and fragment string (frag) into a usable p5.Shader object, storing it in the global myShader variable so setup()/draw() can use it.

setup()

setup() runs once. In a shader-based sketch, its main jobs are picking the WEBGL renderer, activating the shader with shader(), and initializing any state (like previous mouse position) that draw() will need on its very first frame.

function setup() {
  createCanvas(windowWidth, windowHeight, WEBGL);
  noStroke(); // No outlines for the rectangle that draws the shader
  
  // Apply the shader to the canvas
  shader(myShader);
  
  // Initialize previous mouse position to current mouse position
  prevMouseX = mouseX;
  prevMouseY = mouseY;
}
Line-by-line explanation (5 lines)
createCanvas(windowWidth, windowHeight, WEBGL);
Creates a canvas that fills the browser window, using the WEBGL renderer required for custom shaders.
noStroke();
Removes outlines so the full-screen rectangle used to trigger the shader has no visible border.
shader(myShader);
Tells p5.js to use the compiled shader for all subsequent drawing calls in this sketch.
prevMouseX = mouseX;
Records the starting mouse X so the very first velocity calculation in draw() isn't a huge jump from (0,0).
prevMouseY = mouseY;
Same idea as above, but for the Y coordinate.

draw()

draw() runs continuously, and in a shader sketch its job is to keep the GPU fed with fresh uniform values every frame. Almost all the visual complexity actually happens on the GPU inside the fragment shader - draw() is just the messenger.

🔬 The velocity's Y component is negated here to match WebGL's flipped Y axis. What happens if you remove that negative sign (pass velocityY instead of -velocityY)? Try it and see whether ripples still respond correctly when you move the mouse vertically.

  myShader.setUniform('u_mouse', [mouseX, height - mouseY]);
  myShader.setUniform('u_velocity', [velocityX, -velocityY]);
function draw() {
  // 1. Calculate mouse velocity
  let dx = mouseX - prevMouseX;
  let dy = mouseY - prevMouseY;
  
  // Lerp (linear interpolate) velocity for smoothing and decay
  // This makes the ripples settle slowly when the mouse stops moving
  velocityX = lerp(velocityX, dx, 0.1);
  velocityY = lerp(velocityY, dy, 0.1);

  // Update previous mouse position for the next frame's calculation
  prevMouseX = mouseX;
  prevMouseY = mouseY;

  // 2. Pass uniforms to the shader
  // Uniforms are variables that you pass from p5.js to your shader
  myShader.setUniform('u_resolution', [width, height]);
  
  // Invert Y for mouse position and velocity to match WebGL coordinate system
  myShader.setUniform('u_mouse', [mouseX, height - mouseY]);
  myShader.setUniform('u_velocity', [velocityX, -velocityY]);
  
  // Pass time for animations within the shader (e.g., color shifts, ripple speed)
  myShader.setUniform('u_time', frameCount * 0.01); // frameCount is a p5.js built-in, 0.01 controls time speed

  // 3. Draw a rectangle that covers the entire canvas
  // This triggers the fragment shader for every pixel on the screen
  rect(0, 0, width, height);
}
Line-by-line explanation (11 lines)

🔧 Subcomponents:

calculation Mouse Velocity Calculation let dx = mouseX - prevMouseX;

Finds how far the mouse moved since last frame, the raw input driving the ripple strength.

calculation Velocity Smoothing velocityX = lerp(velocityX, dx, 0.1);

Smooths the jumpy per-frame delta into a gradually changing velocity value so ripples ease in and out.

calculation Uniform Upload myShader.setUniform('u_velocity', [velocityX, -velocityY]);

Sends JavaScript values across to the GPU so the shader can react to mouse motion.

let dx = mouseX - prevMouseX;
Calculates how far the mouse moved horizontally since the last frame.
let dy = mouseY - prevMouseY;
Calculates how far the mouse moved vertically since the last frame.
velocityX = lerp(velocityX, dx, 0.1);
Blends the old velocity with the new delta by 10%, smoothing sudden jumps and letting velocity decay gradually toward zero when the mouse stops.
velocityY = lerp(velocityY, dy, 0.1);
Same smoothing applied to the vertical velocity component.
prevMouseX = mouseX;
Stores the current mouse X so next frame's delta calculation is accurate.
prevMouseY = mouseY;
Stores the current mouse Y for the same reason.
myShader.setUniform('u_resolution', [width, height]);
Uploads the canvas size to the shader so it can convert pixel coordinates into a normalized -1 to 1 range.
myShader.setUniform('u_mouse', [mouseX, height - mouseY]);
Sends the mouse position to the shader, flipping the Y axis because WebGL's coordinate system has Y increasing upward while screen coordinates have Y increasing downward.
myShader.setUniform('u_velocity', [velocityX, -velocityY]);
Sends the smoothed velocity to the shader (also Y-flipped) so the ripple strength can be driven by how fast the mouse is moving.
myShader.setUniform('u_time', frameCount * 0.01);
Sends an ever-increasing time value to the shader, used to animate ripples and color shifts independent of mouse movement.
rect(0, 0, width, height);
Draws a single rectangle covering the entire canvas. Because the shader is active, the GPU runs the fragment shader once for every pixel inside this rectangle - this is how the whole screen gets shaded.

windowResized()

windowResized() is a p5.js callback that automatically fires whenever the browser window changes size, letting you keep full-window sketches responsive.

function windowResized() {
  resizeCanvas(windowWidth, windowHeight);
  // Re-apply the shader after canvas resize to ensure it's still active
  shader(myShader);
}
Line-by-line explanation (2 lines)
resizeCanvas(windowWidth, windowHeight);
Resizes the canvas to match the new browser window dimensions whenever the window is resized.
shader(myShader);
Re-activates the shader after resizing, since resizing the canvas can reset the active shader in some p5.js/WEBGL contexts.

Vertex Shader (vert)

This vertex shader is a simple pass-through: since the sketch just draws one flat rectangle covering the screen, there's no need for any 3D transforms here - all the interesting math happens per-pixel in the fragment shader below.

attribute vec3 aPosition; // Vertex position
attribute vec2 aTexCoord; // Texture coordinates

varying vec2 vTexCoord; // Pass texture coordinates to fragment shader

void main() {
  vTexCoord = aTexCoord; // Assign texture coordinates
  vec4 positionVec4 = vec4(aPosition, 1.0); // Convert position to 4D vector
  gl_Position = positionVec4; // Set the final vertex position
}
Line-by-line explanation (6 lines)
attribute vec3 aPosition;
Receives the 3D position of each corner of the full-screen rectangle from p5.js.
attribute vec2 aTexCoord;
Receives the texture coordinate (0 to 1 range) for each corner, used to map pixels across the rectangle.
varying vec2 vTexCoord;
Declares a value that gets smoothly interpolated across every pixel and handed to the fragment shader.
vTexCoord = aTexCoord;
Passes the texture coordinate straight through unchanged to the fragment shader.
vec4 positionVec4 = vec4(aPosition, 1.0);
Converts the 3D vertex position into the 4D homogeneous coordinate format GLSL requires for gl_Position.
gl_Position = positionVec4;
Tells the GPU exactly where this vertex should appear on screen - this is a required output of every vertex shader.

sdSphere()

Signed distance functions are the building blocks of raymarched scenes. sdSphere() is the simplest possible SDF, and more complex shapes (or deformations, like the ripple below) are usually built by combining several SDFs together.

float sdSphere(vec3 p, float r) {
    return length(p) - r;
}
Line-by-line explanation (2 lines)
float sdSphere(vec3 p, float r) {
Defines a Signed Distance Function (SDF) that measures how far a 3D point p is from the surface of a sphere of radius r centered at the origin.
return length(p) - r;
length(p) is the distance from the origin to point p. Subtracting r gives a negative number inside the sphere, zero on its surface, and positive outside - exactly what raymarching needs.

rippleSDF()

This function is the heart of the 'liquid' effect - it's a deformation added on top of a perfect sphere. Because it's driven by u_time and an externally-passed strength value, it can be animated and controlled from JavaScript without touching the sphere's base shape.

🔬 This is where the ripple pattern is generated. What happens if you change 15.0 (the ripple frequency) to a small number like 3.0 versus a large number like 40.0?

    float d = length(p.xy); // Calculate distance from the sphere's vertical axis
    // Use a sine wave to create the ripple pattern, influenced by time and speed
    float ripple = sin(d * 15.0 - u_time * speed) * strength;
float rippleSDF(vec3 p, float strength, float speed) {
    float d = length(p.xy); // Calculate distance from the sphere's vertical axis
    // Use a sine wave to create the ripple pattern, influenced by time and speed
    float ripple = sin(d * 15.0 - u_time * speed) * strength;
    return ripple;
}
Line-by-line explanation (3 lines)
float d = length(p.xy);
Measures the radial distance of the point from the center axis (using only its x and y components), which is used to make the ripple radiate outward like waves on a pond.
float ripple = sin(d * 15.0 - u_time * speed) * strength;
Generates a traveling sine wave: 'd * 15.0' controls how many ripple rings fit across the surface, 'u_time * speed' animates the wave outward over time, and multiplying by strength scales how tall the ripples are.
return ripple;
Returns the ripple offset, which df() adds to the base sphere distance to physically bulge the surface.

df()

df() is the 'distance function' that raymarching relies on - it's called for every step of every ray. Combining sdSphere() with rippleSDF() is a simple example of how complex organic shapes are built by adding smaller SDFs together.

🔬 This caps how strong the ripples can get, no matter how fast you flick the mouse. What happens if you raise the clamp's upper limit from 0.5 to 2.0 - does the surface still look like a smooth sphere, or does it start to break apart?

    float velLen = length(u_velocity) * 0.01; // Scale velocity for appropriate ripple strength
    velLen = clamp(velLen, 0.0, 0.5); // Cap the ripple strength to a maximum value
float df(vec3 p) {
    float sphereRadius = 1.0;
    float baseDist = sdSphere(p, sphereRadius); // Base sphere shape

    // Mouse velocity determines the strength of the ripples
    float velLen = length(u_velocity) * 0.01; // Scale velocity for appropriate ripple strength
    velLen = clamp(velLen, 0.0, 0.5); // Cap the ripple strength to a maximum value

    // Apply the ripple deformation
    float rippleDist = rippleSDF(p, velLen, 2.0); // strength, speed
    
    return baseDist + rippleDist; // Combine sphere and ripple SDFs
}
Line-by-line explanation (6 lines)

🔧 Subcomponents:

calculation Velocity-to-Ripple-Strength Mapping float velLen = length(u_velocity) * 0.01;

Converts raw mouse velocity magnitude into a small usable ripple strength value.

calculation Ripple Strength Clamp velLen = clamp(velLen, 0.0, 0.5);

Prevents extremely fast mouse movement from creating an unstable or exaggerated ripple.

float sphereRadius = 1.0;
Sets the base radius of the chrome sphere.
float baseDist = sdSphere(p, sphereRadius);
Computes the distance to a perfect, undeformed sphere - this is the starting shape.
float velLen = length(u_velocity) * 0.01;
Takes the magnitude (speed, ignoring direction) of the mouse velocity uniform and scales it down to a usable range for ripple strength.
velLen = clamp(velLen, 0.0, 0.5);
Restricts the ripple strength to between 0 and 0.5 so extremely fast mouse flicks don't break the surface deformation.
float rippleDist = rippleSDF(p, velLen, 2.0);
Calls the ripple function using the velocity-based strength and a fixed speed of 2.0 for the wave's animation rate.
return baseDist + rippleDist;
Adds the ripple deformation on top of the base sphere distance, combining the two into one final surface that the raymarcher will trace.

calcNormal()

Since raymarched surfaces don't have explicit polygon normals like traditional 3D meshes, this 'finite difference' trick approximates the surface's slope by sampling the distance field at tiny offsets in each direction - a standard raymarching technique.

vec3 calcNormal(vec3 p) {
    vec2 e = vec2(EPSILON, 0.0); // Small offset for finite difference calculation
    return normalize(vec3(
        df(p + e.xyy) - df(p - e.xyy), // Calculate x-component of normal
        df(p + e.yxy) - df(p - e.yxy), // Calculate y-component of normal
        df(p + e.yyx) - df(p - e.yyx)  // Calculate z-component of normal
    ));
}
Line-by-line explanation (5 lines)
vec2 e = vec2(EPSILON, 0.0);
Creates a tiny offset vector used to sample the distance field just slightly to each side of point p.
df(p + e.xyy) - df(p - e.xyy),
Samples the distance field slightly ahead and behind along the x-axis; the difference approximates how the surface tilts in that direction.
df(p + e.yxy) - df(p - e.yxy),
Does the same finite-difference sampling along the y-axis.
df(p + e.yyx) - df(p - e.yyx)
Does the same finite-difference sampling along the z-axis.
return normalize(vec3(...));
Combines the three differences into a vector and normalizes it into a unit-length surface normal, which points straight out from the surface at that point.

fakeEnvReflection()

There's no actual environment texture being reflected here - this function fakes an entire chrome environment map using only sine and cosine math based on the reflection direction. This is a common cheap trick in shader art for convincing metallic looks without loading any images.

🔬 These two patterns control how the colors band across the sphere. What happens if you make pattern1 and pattern2 use the same frequency (both 10.0) instead of 10.0 and 8.0?

    float pattern1 = sin(u * 10.0 + u_time * 0.1) * 0.5 + 0.5;
    float pattern2 = cos(v * 8.0 + u_time * 0.05) * 0.5 + 0.5;
vec3 fakeEnvReflection(vec3 refDir) {
    refDir = normalize(refDir); // Ensure reflection direction is a unit vector

    // Convert reflection direction to spherical coordinates for pattern generation
    float u = atan(refDir.z, refDir.x) / TWO_PI + 0.5;
    float v = asin(refDir.y) / PI + 0.5;

    // Create various patterns using sin/cos functions
    float pattern1 = sin(u * 10.0 + u_time * 0.1) * 0.5 + 0.5;
    float pattern2 = cos(v * 8.0 + u_time * 0.05) * 0.5 + 0.5;

    // Define base colors for the chrome reflection (blues and purples)
    vec3 color1 = vec3(0.1, 0.2, 0.5); // Deep blue
    vec3 color2 = vec3(0.4, 0.2, 0.6); // Purple
    vec3 color3 = vec3(0.7, 0.8, 0.9); // Light metallic sheen

    // Mix colors based on patterns to create the reflective effect
    vec3 reflectionColor = mix(color1, color2, pattern1);
    reflectionColor = mix(reflectionColor, color3, pattern2 * 0.5);
    
    // Add subtle, time-based color shifts for more dynamism
    reflectionColor += sin(u_time * 0.2) * vec3(0.05, 0.0, 0.05); // Subtle purple shift
    reflectionColor += cos(u_time * 0.15) * vec3(0.0, 0.05, 0.05); // Subtle cyan shift

    return reflectionColor;
}
Line-by-line explanation (13 lines)

🔧 Subcomponents:

calculation Spherical Coordinate Conversion float u = atan(refDir.z, refDir.x) / TWO_PI + 0.5;

Converts a 3D reflection direction into 2D (u,v) coordinates so patterns can be generated across it, similar to how a texture wraps around a sphere.

calculation Layered Color Mix vec3 reflectionColor = mix(color1, color2, pattern1);

Blends three base colors together using the generated sine/cosine patterns to fake a reflective environment without any actual image texture.

refDir = normalize(refDir);
Ensures the reflection direction vector has length 1, which is required for correct spherical coordinate math.
float u = atan(refDir.z, refDir.x) / TWO_PI + 0.5;
Computes a horizontal 'longitude' coordinate from the reflection direction, mapped into the 0-1 range.
float v = asin(refDir.y) / PI + 0.5;
Computes a vertical 'latitude' coordinate from the reflection direction, also mapped into 0-1.
float pattern1 = sin(u * 10.0 + u_time * 0.1) * 0.5 + 0.5;
Generates a repeating stripe-like pattern across the u coordinate, animated slowly over time, and rescaled from -1..1 into 0..1.
float pattern2 = cos(v * 8.0 + u_time * 0.05) * 0.5 + 0.5;
Generates a second, differently-spaced pattern across the v coordinate for extra visual variation.
vec3 color1 = vec3(0.1, 0.2, 0.5);
Defines a deep blue base color used in the reflection.
vec3 color2 = vec3(0.4, 0.2, 0.6);
Defines a purple base color.
vec3 color3 = vec3(0.7, 0.8, 0.9);
Defines a light, near-white metallic highlight color.
vec3 reflectionColor = mix(color1, color2, pattern1);
Blends between blue and purple using pattern1 as the mix ratio, creating a shifting gradient.
reflectionColor = mix(reflectionColor, color3, pattern2 * 0.5);
Blends in the light metallic color using pattern2, but only up to 50% strength, to add sheen without washing out the blue/purple tones.
reflectionColor += sin(u_time * 0.2) * vec3(0.05, 0.0, 0.05);
Adds a small, slowly oscillating purple tint over time for extra life in the color.
reflectionColor += cos(u_time * 0.15) * vec3(0.0, 0.05, 0.05);
Adds a small, slowly oscillating cyan tint over time as well.
return reflectionColor;
Returns the final procedurally-generated 'environment map' color for this reflection direction.

Fragment Shader main()

This is the entry point of the fragment shader, called once per pixel on the GPU. It sets up a camera ray per pixel, marches that ray through the scene using the distance field, and shades any surface it hits - the complete recipe for a raymarched render.

🔬 This loop is what actually 'renders' the 3D sphere by marching a ray toward it. What happens visually if MAX_STEPS (defined near the top of the shader) is dropped very low, like 10? Do you start to see banding or gaps in the surface?

    for (int i = 0; i < MAX_STEPS; i++) {
        float dist = df(currentPos); // Get distance to the object from current ray position
        totalDist += dist;           // Accumulate total distance
        currentPos += rayDir * dist; // Move the ray forward by the distance
void main() {
    // Convert vTexCoord (0-1) to fragment coordinates (0-resolution)
    vec2 fragCoord = vTexCoord * u_resolution;
    vec2 uv = fragCoord / u_resolution;
    uv = uv * 2.0 - 1.0; // Map to -1 to 1 range

    // Adjust for aspect ratio
    uv.x *= u_resolution.x / u_resolution.y;

    // Raymarching setup
    vec3 camPos = vec3(0.0, 0.0, -2.0); // Camera position slightly back along Z-axis
    vec3 rayDir = normalize(vec3(uv, 1.0)); // Direction of the ray from camera through current pixel

    vec3 currentPos = camPos; // Start ray at camera position
    float totalDist = 0.0;    // Total distance traveled by the ray
    bool hit = false;         // Flag to check if the ray hit the object

    // Raymarching loop
    for (int i = 0; i < MAX_STEPS; i++) {
        float dist = df(currentPos); // Get distance to the object from current ray position
        totalDist += dist;           // Accumulate total distance
        currentPos += rayDir * dist; // Move the ray forward by the distance

        if (dist < EPSILON) { // If distance is very small, we've hit the object
            hit = true;
            break;
        }
        if (totalDist > MAX_DIST) { // If ray traveled too far, it missed the object
            break;
        }
    }

    vec3 finalColor = vec3(0.05, 0.05, 0.1); // Dark background color

    if (hit) {
        vec3 N = calcNormal(currentPos); // Calculate normal at the hit point
        vec3 R = reflect(rayDir, N);     // Calculate reflection vector

        vec3 reflectionColor = fakeEnvReflection(R); // Get the reflective color

        // Fresnel effect: Makes surfaces more reflective at grazing angles
        float fresnel = pow(1.0 + dot(rayDir, N), 5.0);
        fresnel = clamp(fresnel, 0.0, 1.0); // Clamp fresnel to 0-1 range

        // Mix reflection color with a brighter color based on fresnel for edge glow
        finalColor = mix(reflectionColor, vec3(1.0), fresnel * 0.5);
    }

    gl_FragColor = vec4(finalColor, 1.0); // Set the final pixel color
}
Line-by-line explanation (17 lines)

🔧 Subcomponents:

for-loop Raymarching Loop for (int i = 0; i < MAX_STEPS; i++) { ... }

Repeatedly steps a ray forward through the scene, checking how close it is to the surface until it either hits the object or travels too far and misses.

conditional Surface Hit Coloring if (hit) { ... }

Only runs the lighting/reflection math if the ray actually reached the chrome surface - otherwise the pixel stays the dark background color.

vec2 fragCoord = vTexCoord * u_resolution;
Converts the 0-1 texture coordinate into actual pixel coordinates (0 to canvas width/height).
uv = uv * 2.0 - 1.0;
Remaps the 0-1 UV coordinates into a -1 to 1 range, centering the origin in the middle of the screen.
uv.x *= u_resolution.x / u_resolution.y;
Corrects for non-square canvases so the sphere doesn't look stretched on wide or tall screens.
vec3 camPos = vec3(0.0, 0.0, -2.0);
Places a virtual camera 2 units back along the Z-axis, looking toward the origin where the sphere sits.
vec3 rayDir = normalize(vec3(uv, 1.0));
Builds a direction vector from the camera through this specific pixel, forming one ray per pixel.
for (int i = 0; i < MAX_STEPS; i++) {
Begins the raymarching loop, which will run up to MAX_STEPS times to find where the ray intersects the surface.
float dist = df(currentPos);
Asks the distance field how far the current ray position is from the sphere's (rippled) surface.
currentPos += rayDir * dist;
Advances the ray forward by exactly that distance - a safe jump since we know nothing is closer than 'dist' units away.
if (dist < EPSILON) {
If the ray gets extremely close to the surface, we consider it a hit and stop marching.
if (totalDist > MAX_DIST) {
If the ray has traveled very far without hitting anything, it's missed the object entirely, so we stop marching.
vec3 finalColor = vec3(0.05, 0.05, 0.1);
Sets a dark navy default color for pixels where the ray never hits the sphere (the background).
vec3 N = calcNormal(currentPos);
Calculates the surface normal at the exact point the ray hit, needed for lighting and reflection.
vec3 R = reflect(rayDir, N);
Computes the reflection direction of the incoming ray off the surface, like light bouncing off a mirror.
vec3 reflectionColor = fakeEnvReflection(R);
Looks up a procedural 'environment' color based on the reflection direction, giving the chrome its colorful look.
float fresnel = pow(1.0 + dot(rayDir, N), 5.0);
Calculates the Fresnel term, which is near zero when looking straight at the surface and grows toward 1 at grazing angles - mimicking how real reflective materials get shinier at their edges.
finalColor = mix(reflectionColor, vec3(1.0), fresnel * 0.5);
Blends the reflection color with pure white based on the Fresnel value, creating a bright rim-light effect around the edges of the sphere.
gl_FragColor = vec4(finalColor, 1.0);
Outputs the final computed color for this pixel, fully opaque.

📦 Key Variables

myShader object

Stores the compiled p5.Shader object built from the vert and frag GLSL strings, used to activate and update the shader.

let myShader;
prevMouseX number

Remembers the mouse's X position from the previous frame so draw() can calculate how far it moved.

let prevMouseX = 0;
prevMouseY number

Remembers the mouse's Y position from the previous frame, used the same way as prevMouseX.

let prevMouseY = 0;
velocityX number

Holds the smoothed horizontal mouse velocity, sent to the shader to control ripple strength.

let velocityX = 0;
velocityY number

Holds the smoothed vertical mouse velocity, sent to the shader alongside velocityX.

let velocityY = 0;

🔧 Potential Improvements (5)

Here are some ways this code could be enhanced:

BUG fragment shader (frag)

The uniform u_mouse is declared and uploaded from draw() every frame, but it is never actually referenced anywhere in the fragment shader's math (df, calcNormal, fakeEnvReflection, or main all ignore it).

💡 Either remove the unused uniform to simplify the code, or put it to use - for example, offset the sphere's center toward the mouse position, or add a highlight where the reflection direction points back at the cursor.

PERFORMANCE draw()

Every frame, draw() allocates brand-new JavaScript arrays for setUniform (e.g. [width, height], [mouseX, height - mouseY], [velocityX, -velocityY]), creating unnecessary garbage collection pressure at 60fps.

💡 Declare reusable arrays once outside draw() (e.g. let resArr = [0,0];) and just update their contents each frame instead of creating new arrays.

PERFORMANCE fragment shader main()

MAX_STEPS is fixed at 100 raymarching iterations for every single pixel, every frame, regardless of screen size - on large or high-DPI displays this can be very GPU-intensive.

💡 Consider rendering at a lower internal resolution (e.g. via pixelDensity(1) or a smaller offscreen buffer) and let the browser upscale, or reduce MAX_STEPS/EPSILON for a performance/quality tradeoff.

STYLE fragment shader (frag)

Numeric constants like 10.0, 8.0, 0.1, 0.05, and 2.0 are scattered throughout df(), rippleSDF(), and fakeEnvReflection() with no named constants explaining their purpose.

💡 Define named GLSL constants (e.g. const float RIPPLE_FREQ = 15.0;) near the top of the shader so their role is clearer and they're easier to tune in one place.

FEATURE sketch overall

The visual effect only responds to velocity magnitude, so moving the mouse in any direction produces an identical, symmetric ripple pattern regardless of movement direction.

💡 Use the direction of u_velocity (not just its length) to bias the ripple pattern, for example by offsetting the ripple's phase or center based on velocity direction, making the surface feel more directional and fluid.

🔄 Code Flow

Code flow showing preload, setup, draw, windowresized, vert, sdsphere, ripplesdf, df, calcnormal, fakeenvreflection, main

💡 Click on function names in the diagram to jump to their code

graph TD start[Start] --> setup[setup] setup --> draw[draw loop] draw --> velocity-calc[Mouse Velocity Calculation] draw --> velocity-smoothing[Velocity Smoothing] draw --> uniform-passing[Uniform Upload] draw --> velocity-to-strength[Velocity-to-Ripple-Strength Mapping] draw --> clamp-strength[Ripple Strength Clamp] draw --> raymarch-loop[Raymarching Loop] raymarch-loop --> hit-conditional[Surface Hit Coloring] hit-conditional --> color-mixing[Layered Color Mix] draw --> spherical-coords[Spherical Coordinate Conversion] click setup href "#fn-setup" click draw href "#fn-draw" click velocity-calc href "#sub-velocity-calc" click velocity-smoothing href "#sub-velocity-smoothing" click uniform-passing href "#sub-uniform-passing" click velocity-to-strength href "#sub-velocity-to-strength" click clamp-strength href "#sub-clamp-strength" click raymarch-loop href "#sub-raymarch-loop" click hit-conditional href "#sub-hit-conditional" click color-mixing href "#sub-color-mixing" click spherical-coords href "#sub-spherical-coords"

❓ Frequently Asked Questions

What visual effects does the AI Liquid Chrome Mirror sketch produce?

This sketch creates a mesmerizing liquid mercury effect that reflects blue-purple hues, responding dynamically to mouse movements to create smooth surfaces or violent ripples.

How can users interact with the AI Liquid Chrome Mirror sketch?

Users can interact by moving their mouse across the canvas; slower movements create calm reflections while faster movements generate dramatic ripples in the metallic surface.

What creative coding concepts are demonstrated in the AI Liquid Chrome Mirror sketch?

The sketch showcases the use of WebGL shaders to create real-time visual effects, as well as the concept of mouse velocity influencing graphic output for dynamic interactivity.

Preview

AI Liquid Chrome Mirror - Mouse Velocity Metallic Distortion - xelsed.ai - p5.js creative coding sketch preview
Sketch Preview
Code flow diagram showing the structure of AI Liquid Chrome Mirror - Mouse Velocity Metallic Distortion - xelsed.ai - Code flow showing preload, setup, draw, windowresized, vert, sdsphere, ripplesdf, df, calcnormal, fakeenvreflection, main
Code Flow Diagram