
AI Magnetic Field Lines - Iron Filings Physics Visualization - xelsed.ai

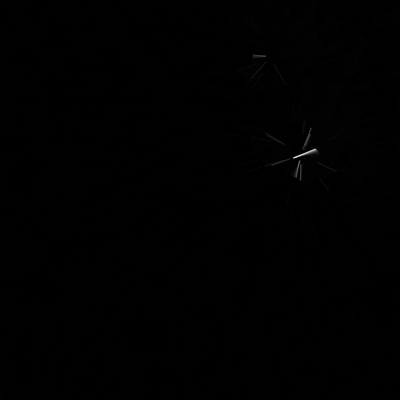
This sketch simulates iron filings scattered on paper above hidden magnets, using hundreds of tiny line segments that rotate to align with the combined magnetic field from several invisible poles. Perlin noise adds a gentle organic drift to both the poles and the filings, and clicking the canvas drops in new poles that instantly reshape the field pattern.

🧪 Try This!

Experiment with the code by making these changes:

  1. Supercharge the filing count — More filings create a denser, higher-resolution field visualization at the cost of some performance.
  2. Remove the ghost trails — The low-alpha background is what creates the soft glowing trails - a fully opaque background gives a crisp, flicker-free look instead.
  3. Make filings drift more wildly — Increasing driftMagnitude makes each filing wander further per frame, giving the whole field a more turbulent, restless feel.
Prefer the full editor? Open it there →

📖 About This Sketch

This sketch recreates the classic physics-class demo of iron filings snapping into curved lines around a magnet - except here the 'filings' are hundreds of tiny rotating line segments and the magnets are invisible poles you can place with a click. Each filing calculates the combined magnetic field from every pole using the real inverse-square law, then rotates with translate()/rotate() to point along that field, exactly the way a compass needle would. Perlin noise nudges both the poles and the filings each frame so the whole field feels alive rather than frozen, and a low-alpha background() call leaves soft trails as everything drifts.

The code is organized around two ES6 classes - MagneticPole, which stores a position, strength, and polarity and can report its field vector at any point, and MagneticLine, which sums up every pole's contribution to figure out its own angle and brightness. setup() seeds the initial poles and filings, draw() re-runs the physics and redraws every filing each frame, and mousePressed()/windowResized() handle user interaction and responsive resizing. Studying this sketch teaches you how to build a simple vector field simulation, how to use class methods to keep physics calculations organized, and how push()/translate()/rotate() let you orient shapes without manual trigonometry in your drawing code.

⚙️ How It Works

  1. When the page loads, setup() creates a full-window canvas, switches to radian angles, and spawns 3 random magnetic poles plus 600 randomly-placed MagneticLine filings.
  2. Every frame, draw() paints a semi-transparent black rectangle over the canvas (instead of a solid clear) so old filing positions fade into faint trails rather than vanishing instantly.
  3. Each pole then calls its own update(), drifting slightly using Perlin noise so the field source itself feels alive rather than static.
  4. Each filing calls update(poles), which loops over every pole, asks it for its field vector via getFieldVector(), sums all those vectors into one combined field, and uses atan2() to turn that field into the angle the filing should point.
  5. Filing brightness and transparency are remapped from the local field strength versus the strongest field seen this frame, so filings near a pole glow brighter than ones far away - display() then uses push()/translate()/rotate()/pop() to draw the tiny line at its new angle.
  6. Clicking the canvas fires mousePressed(), which drops a brand-new pole at the cursor and spawns 50 fresh filings around it so the new pole's influence is immediately visible, while windowResized() rebuilds the whole filing array whenever the browser window changes size.

🎓 Concepts You'll Learn

Object-oriented programming with ES6 classesVector fields and inverse-square law physicsPerlin noise for organic motionpush()/translate()/rotate()/pop() transformationsatan2() for direction from vector componentsColor/alpha mapping with map()Mouse interaction and dynamic array growthResponsive canvas resizing

📝 Code Breakdown

MagneticPole (constructor)

A class constructor runs once when you write 'new MagneticPole(x, y)'. It's the perfect place to set up random starting properties like strength and polarity so every pole behaves a little differently.

  constructor(x, y) {
    this.x = x;
    this.y = y;
    this.strength = random(5000, 15000); // Magnitude of the pole's influence
    this.polarity = random([-1, 1]);    // -1 for 'south' (field towards), 1 for 'north' (field away)
    
    // Perlin noise offsets for a natural, non-repeating drift
    this.noiseOffsetX = random(1000);
    this.noiseOffsetY = random(1000);
    this.noiseStep = 0.005; // How quickly the pole's noise offset changes
    this.driftMagnitude = 1; // Maximum amount the pole drifts per frame
  }
Line-by-line explanation (4 lines)
this.strength = random(5000, 15000);
Gives this pole a random 'power level' between 5000 and 15000 - stronger poles create more intense fields nearby.
this.polarity = random([-1, 1]);
Randomly picks north (1) or south (-1) - this flips whether the field points toward or away from the pole.
this.noiseOffsetX = random(1000);
Picks a random starting point in Perlin noise's infinite space so every pole drifts differently and unpredictably.
this.driftMagnitude = 1; // Maximum amount the pole drifts per frame
Limits how far the pole can move each frame, keeping its drift subtle rather than jumping around wildly.
MagneticPole.update()

This method runs once per frame for every pole, giving each one a slow, smooth wander using Perlin noise instead of jittery random() jumps.

🔬 This is what makes poles drift smoothly instead of teleporting. What happens if you replace noise(this.noiseOffsetX) with random(0,1) here - does the motion still look organic?

    this.x += map(noise(this.noiseOffsetX), 0, 1, -this.driftMagnitude, this.driftMagnitude);
    this.y += map(noise(this.noiseOffsetY), 0, 1, -this.driftMagnitude, this.driftMagnitude);
  update() {
    // Map Perlin noise values (0 to 1) to a drift range (-driftMagnitude to driftMagnitude)
    this.x += map(noise(this.noiseOffsetX), 0, 1, -this.driftMagnitude, this.driftMagnitude);
    this.y += map(noise(this.noiseOffsetY), 0, 1, -this.driftMagnitude, this.driftMagnitude);

    // Increment noise offsets for the next frame
    this.noiseOffsetX += this.noiseStep;
    this.noiseOffsetY += this.noiseStep;
  }
Line-by-line explanation (2 lines)
this.x += map(noise(this.noiseOffsetX), 0, 1, -this.driftMagnitude, this.driftMagnitude);
noise() returns a smooth value between 0 and 1; map() rescales that to a small positive-or-negative offset, which is added to x so the pole drifts smoothly instead of jumping randomly.
this.noiseOffsetX += this.noiseStep;
Moves forward through Perlin noise space each frame - without this the noise value would never change and the pole would freeze after its first tiny nudge.

MagneticPole.getFieldVector()

This method is the physics engine of the sketch. It's called once per pole for every single filing, every single frame, so this small function does the real electromagnetic math that drives everything you see.

  getFieldVector(px, py) {
    let dx = px - this.x;
    let dy = py - this.y;
    let dist = sqrt(dx * dx + dy * dy); // Distance from the pole to the point

    // Cap distance to avoid excessively strong fields (division by zero or huge numbers)
    // right at the pole's location, making the simulation more stable.
    dist = max(dist, 10); 

    let angle = atan2(dy, dx); // Angle from pole to point
    let fieldMagnitude = this.strength / (dist * dist); // Inverse square law for strength

    // Direction depends on polarity:
    // Polarity 1 (north): Field points away from the pole
    // Polarity -1 (south): Field points towards the pole
    let fieldX = fieldMagnitude * cos(angle) * this.polarity;
    let fieldY = fieldMagnitude * sin(angle) * this.polarity;

    return { x: fieldX, y: fieldY, magnitude: fieldMagnitude };
  }
Line-by-line explanation (6 lines)

🔧 Subcomponents:

calculation Minimum Distance Clamp dist = max(dist, 10);

Prevents the field strength from exploding to infinity when a filing gets extremely close to (or exactly on top of) a pole.

calculation Inverse Square Law let fieldMagnitude = this.strength / (dist * dist); // Inverse square law for strength

Mimics real magnetic/electric field physics: strength falls off with the square of the distance.

let dist = sqrt(dx * dx + dy * dy);
Computes the straight-line distance between the pole and the query point using the Pythagorean theorem.
dist = max(dist, 10);
Never lets distance drop below 10 pixels, which stops the field from becoming infinitely strong right at the pole's center.
let angle = atan2(dy, dx); // Angle from pole to point
atan2() converts the dx/dy difference into an angle in radians, telling us which direction the point lies from the pole.
let fieldMagnitude = this.strength / (dist * dist); // Inverse square law for strength
Real magnetic and electric fields weaken with the square of distance - this line encodes that exact relationship.
let fieldX = fieldMagnitude * cos(angle) * this.polarity;
Converts the magnitude and angle back into an x-component, flipped by polarity so south poles pull inward and north poles push outward.
return { x: fieldX, y: fieldY, magnitude: fieldMagnitude };
Returns a small object bundling both vector components and the raw magnitude, so callers can use whichever they need.

MagneticLine (constructor)

This constructor sets up all the starting values a filing needs before its angle and brightness get calculated for the first time in update().

  constructor(x, y) {
    this.x = x;
    this.y = y;
    this.length = random(10, 25); // Small line segment length for "filing" effect
    this.angle = 0;             // Current orientation of the line
    this.fieldStrength = 0;     // Stores the magnitude of the magnetic field at this line's position

    // Perlin noise offset for line position drift
    this.noiseOffset = random(1000);
    this.noiseStep = 0.01;     // How quickly the line's noise offset changes
    this.driftMagnitude = 0.5; // Maximum amount the line drifts per frame
  }
Line-by-line explanation (3 lines)
this.length = random(10, 25); // Small line segment length for "filing" effect
Each filing gets a slightly different length between 10 and 25 pixels, which adds visual variety to the field pattern.
this.angle = 0; // Current orientation of the line
Starts every filing pointing at angle 0 (to the right); update() will immediately correct this to match the actual field.
this.noiseOffset = random(1000);
Gives this filing its own unique position in Perlin noise space so its drift doesn't sync up with other filings.

MagneticLine.update()

This is the heart of the simulation - it runs for all 600+ filings every single frame, calculating real physics-based field direction and strength so each filing can orient itself like a tiny compass needle.

🔬 This loop is why filings react to EVERY pole at once. What do you think happens to the pattern if you only sum the first pole's field by adding 'if (pole === poles[0])' inside the loop?

    for (let pole of poles) {
      let field = pole.getFieldVector(this.x, this.y);
      combinedFieldX += field.x;
      combinedFieldY += field.y;
    }
  update(poles) {
    let combinedFieldX = 0;
    let combinedFieldY = 0;

    // Sum the field vectors from all poles at this line's position
    for (let pole of poles) {
      let field = pole.getFieldVector(this.x, this.y);
      combinedFieldX += field.x;
      combinedFieldY += field.y;
    }

    // Calculate the magnitude of the combined field vector
    this.fieldStrength = sqrt(combinedFieldX * combinedFieldX + combinedFieldY * combinedFieldY);

    // Update the global maxFieldStrength for accurate color scaling
    maxFieldStrength = max(maxFieldStrength, this.fieldStrength);

    // Set the line's angle to match the direction of the combined magnetic field
    this.angle = atan2(combinedFieldY, combinedFieldX);

    // Apply Perlin noise-based drift to the line's position
    this.x += map(noise(this.noiseOffset), 0, 1, -this.driftMagnitude, this.driftMagnitude);
    this.y += map(noise(this.noiseOffset + 100), 0, 1, -this.driftMagnitude, this.driftMagnitude);

    this.noiseOffset += this.noiseStep;

    // Wrap the line around the canvas edges to keep it visible
    this.x = (this.x + width) % width;
    this.y = (this.y + height) % height;
  }
Line-by-line explanation (5 lines)

🔧 Subcomponents:

for-loop Sum All Pole Fields for (let pole of poles) { let field = pole.getFieldVector(this.x, this.y); combinedFieldX += field.x; combinedFieldY += field.y; }

Adds up the individual field vector contributed by every single pole so the filing reacts to the full combined magnetic field, not just one pole.

calculation Canvas Wraparound this.x = (this.x + width) % width;

Uses the modulo operator to wrap a filing back to the opposite edge if its drift pushes it off-screen, keeping the filing count constant.

let field = pole.getFieldVector(this.x, this.y);
Asks this specific pole what field vector it produces at the filing's current position.
this.fieldStrength = sqrt(combinedFieldX * combinedFieldX + combinedFieldY * combinedFieldY);
Converts the summed x/y field components back into a single magnitude number, used later for brightness.
maxFieldStrength = max(maxFieldStrength, this.fieldStrength);
Keeps track of the single strongest field seen anywhere this frame, so display() can scale colors relative to it.
this.angle = atan2(combinedFieldY, combinedFieldX);
Converts the combined field vector into an angle, which is exactly the direction this filing should point - just like a compass needle.
this.x = (this.x + width) % width;
The modulo (%) operator wraps position: if x drifts past width or below 0, this snaps it back onto the canvas from the opposite side.

MagneticLine.display()

display() shows how push()/pop() let you use a local, temporary coordinate system for each shape - translate and rotate here only affect this one line, making it trivial to draw hundreds of independently-oriented shapes.

🔬 This push/translate/rotate/pop pattern is how the filing points along the field without any manual trig in the drawing call. What happens visually if you draw a small circle instead of a line here, like circle(0, 0, 4)?

    push(); // Save current drawing state
    translate(this.x, this.y); // Move to the line's center
    rotate(this.angle);       // Rotate to align with the magnetic field
    line(-this.length / 2, 0, this.length / 2, 0); // Draw the line segment
    pop();  // Restore previous drawing state
  display() {
    strokeWeight(1);
    
    // Map field strength to brightness and alpha for visual effect
    // Stronger fields result in brighter, slightly more opaque lines.
    let brightness = map(this.fieldStrength, 0, maxFieldStrength, 50, 255);
    let alpha = map(this.fieldStrength, 0, maxFieldStrength, 10, 150); // Low alpha for subtle, "ghostly" effect

    stroke(brightness, alpha);
    
    push(); // Save current drawing state
    translate(this.x, this.y); // Move to the line's center
    rotate(this.angle);       // Rotate to align with the magnetic field
    line(-this.length / 2, 0, this.length / 2, 0); // Draw the line segment
    pop();  // Restore previous drawing state
  }
Line-by-line explanation (7 lines)
let brightness = map(this.fieldStrength, 0, maxFieldStrength, 50, 255);
Rescales this filing's field strength (relative to the strongest field this frame) into a grayscale brightness between 50 and 255 - stronger fields glow brighter.
stroke(brightness, alpha);
Sets the stroke color using p5's grayscale + alpha shorthand: first number is brightness, second is transparency.
push(); // Save current drawing state
Saves the current transform state so the translate/rotate below only affects this one filing, not everything drawn afterward.
translate(this.x, this.y); // Move to the line's center
Shifts the coordinate origin to the filing's position so the line can be drawn centered there.
rotate(this.angle); // Rotate to align with the magnetic field
Rotates the coordinate system by the field angle calculated in update(), so drawing a horizontal line actually draws it pointing along the field.
line(-this.length / 2, 0, this.length / 2, 0); // Draw the line segment
Draws a simple horizontal line centered on the new origin - because of translate/rotate above, it appears at the right position and angle.
pop(); // Restore previous drawing state
Restores the saved transform, undoing the translate/rotate so the next filing starts from a clean slate.

setup()

setup() runs exactly once when the sketch loads. It's where you build your initial world - here, the starting poles and filings that draw() will animate every frame after.

function setup() {
  createCanvas(windowWidth, windowHeight);
  angleMode(RADIANS); // Use radians for angle calculations
  background(0);    // Dark background

  // Create 2-3 initial magnetic poles at random positions
  for (let i = 0; i < 3; i++) {
    poles.push(new MagneticPole(random(width), random(height)));
  }

  // Create the magnetic line segments at random positions
  for (let i = 0; i < numLines; i++) {
    lines.push(new MagneticLine(random(width), random(height)));
  }
}
Line-by-line explanation (4 lines)

🔧 Subcomponents:

for-loop Spawn Initial Poles for (let i = 0; i < 3; i++) { poles.push(new MagneticPole(random(width), random(height))); }

Creates 3 magnetic poles at random screen positions so the field has something to visualize from the very first frame.

for-loop Spawn All Filings for (let i = 0; i < numLines; i++) { lines.push(new MagneticLine(random(width), random(height))); }

Fills the lines array with numLines (600) filings scattered randomly across the canvas.

createCanvas(windowWidth, windowHeight);
Makes the canvas fill the entire browser window rather than a fixed pixel size.
angleMode(RADIANS); // Use radians for angle calculations
Tells p5 that functions like rotate() and atan2() should work in radians (0 to 2*PI) instead of degrees - this is actually p5's default, so this line is a helpful reminder rather than a required change.
poles.push(new MagneticPole(random(width), random(height)));
Creates a new MagneticPole object at a random position and adds it to the global poles array.
lines.push(new MagneticLine(random(width), random(height)));
Creates a new MagneticLine filing at a random position and adds it to the global lines array.

draw()

draw() is p5's animation loop, running about 60 times per second. Splitting work into 'update everything, then display everything' loops is a common and important pattern that keeps physics calculations separate from rendering.

🔬 Poles update before lines so filings always react to the newest pole positions. What happens to the visual smoothness if you comment out the pole.update() loop entirely, freezing the poles in place?

  for (let pole of poles) {
    pole.update();
  }

  // Update all magnetic lines (re-align to field, drift their positions)
  for (let line of lines) {
    line.update(poles);
  }
function draw() {
  // Use a low-alpha background to create a subtle "trail" or persistence effect
  background(0, 50); 

  // Reset maxFieldStrength each frame. This is crucial for the map() function
  // to correctly scale line brightness/alpha based on the *current* strongest
  // field, adapting as poles move.
  maxFieldStrength = 0.01; 

  // Update all magnetic poles (drift their positions)
  for (let pole of poles) {
    pole.update();
  }

  // Update all magnetic lines (re-align to field, drift their positions)
  for (let line of lines) {
    line.update(poles);
  }

  // Display all magnetic lines
  for (let line of lines) {
    line.display();
  }
}
Line-by-line explanation (5 lines)

🔧 Subcomponents:

for-loop Update All Poles for (let pole of poles) { pole.update(); }

Moves every pole slightly using its Perlin noise drift before the filings react to the new field layout.

for-loop Update All Filings for (let line of lines) { line.update(poles); }

Recalculates each filing's angle and field strength based on the freshly-updated pole positions.

for-loop Draw All Filings for (let line of lines) { line.display(); }

Draws every filing at its newly-computed angle and brightness, producing the visible field pattern.

background(0, 50);
Draws a black rectangle over the whole canvas with only 50/255 alpha, so previous frames fade rather than disappear instantly - this is what creates the soft glowing trails.
maxFieldStrength = 0.01;
Resets the 'strongest field seen' tracker back to a tiny value at the start of every frame, so it can be recalculated fresh as poles move around.
for (let pole of poles) { pole.update(); }
Loops over every pole and lets it drift a tiny bit via Perlin noise before any field calculations happen this frame.
for (let line of lines) { line.update(poles); }
Loops over every filing, passing in the full poles array so each filing can sum up the combined field and pick its new angle.
for (let line of lines) { line.display(); }
A separate loop draws all the filings only after every filing's physics has been updated, avoiding any visual inconsistency between updated and un-updated filings.

mousePressed()

mousePressed() is a p5.js event function that automatically runs once every time the mouse is clicked, giving you an easy hook for turning user interaction into new objects in your sketch.

🔬 This safety check keeps performance stable by trimming old filings. What happens if you remove this check entirely and click rapidly 20+ times - does the frame rate visibly drop?

  if (lines.length > numLines * 1.5) { 
    lines.splice(0, lines.length - numLines);
  }
function mousePressed() {
  // Add a new magnetic pole at the mouse click location
  poles.push(new MagneticPole(mouseX, mouseY));
  
  // Add some new lines around the new pole to immediately visualize its field
  for (let i = 0; i < 50; i++) {
    let x = mouseX + random(-50, 50);
    let y = mouseY + random(-50, 50);
    lines.push(new MagneticLine(x, y));
  }
  
  // If the total number of lines exceeds a threshold, remove the oldest ones
  // to maintain performance, especially if many poles are added.
  if (lines.length > numLines * 1.5) { 
    lines.splice(0, lines.length - numLines);
  }
}
Line-by-line explanation (3 lines)

🔧 Subcomponents:

for-loop Spawn Filings Around Click for (let i = 0; i < 50; i++) { let x = mouseX + random(-50, 50); let y = mouseY + random(-50, 50); lines.push(new MagneticLine(x, y)); }

Adds 50 new filings scattered within 50 pixels of the click point so the new pole's effect is immediately visible instead of waiting for existing filings to drift nearby.

conditional Trim Excess Filings if (lines.length > numLines * 1.5) { lines.splice(0, lines.length - numLines); }

Prevents the lines array from growing forever as the user clicks repeatedly, keeping the frame rate stable by removing the oldest filings once the array gets 50% larger than numLines.

poles.push(new MagneticPole(mouseX, mouseY));
Creates a brand new magnetic pole exactly where the user clicked, using p5's built-in mouseX/mouseY variables.
let x = mouseX + random(-50, 50);
Picks a random x position within 50 pixels of the click, so the new filings form a small cluster around the new pole.
lines.splice(0, lines.length - numLines);
splice() removes elements from an array; here it deletes enough of the oldest filings (from the front of the array) to bring the count back down to numLines.

windowResized()

windowResized() is a p5.js event that automatically fires whenever the browser window changes size. It's important for full-window sketches so the canvas (and content within it) always matches the viewport.

function windowResized() {
  resizeCanvas(windowWidth, windowHeight);
  background(0); // Clear the canvas on resize
  
  // Re-generate all lines to place them randomly across the new canvas size
  lines = [];
  for (let i = 0; i < numLines; i++) {
    lines.push(new MagneticLine(random(width), random(height)));
  }
}
Line-by-line explanation (3 lines)

🔧 Subcomponents:

for-loop Rebuild Filings Array for (let i = 0; i < numLines; i++) { lines.push(new MagneticLine(random(width), random(height))); }

Recreates a fresh set of filings scattered across the new canvas dimensions, since the old positions might now be off-screen or oddly clustered.

resizeCanvas(windowWidth, windowHeight);
Changes the canvas size to match the browser window's new dimensions.
lines = [];
Empties the entire lines array by reassigning it to a brand new empty array, discarding all previous filings.
lines.push(new MagneticLine(random(width), random(height)));
Creates a fresh filing at a random position within the newly-sized canvas, using the updated width/height values.

📦 Key Variables

poles array

Holds every MagneticPole object currently affecting the field, starting with 3 and growing each time the user clicks.

let poles = [];
lines array

Holds every MagneticLine filing object that gets updated and drawn each frame.

let lines = [];
numLines number

The target/baseline number of filings the sketch tries to maintain, used both at startup and when trimming excess filings after clicks.

let numLines = 600;
maxFieldStrength number

Tracks the strongest combined field strength seen this frame, used to normalize brightness/alpha so colors adapt as poles move or new ones are added.

let maxFieldStrength = 0.01;

🔧 Potential Improvements (4)

Here are some ways this code could be enhanced:

BUG mousePressed() vs draw()

The lines array is trimmed back down to a safe size after every click, but the poles array is never trimmed - every click permanently adds one more pole and every pole is checked against every filing every frame, so after many clicks the O(poles x lines) field calculation in MagneticLine.update() can silently degrade the frame rate.

💡 Cap the poles array similarly (e.g. poles.splice(0, poles.length - maxPoles) once it exceeds a limit) or fade out/remove the oldest poles over time so performance stays stable during long interactive sessions.

STYLE draw() and MagneticLine methods

The loop variable 'for (let line of lines)' shadows the global p5.js line() drawing function within that block's scope, which is confusing to read and would throw an error if you ever tried to call line(x1,y1,x2,y2) inside that same loop.

💡 Rename the loop variable to something like 'filingLine' or 'segment' to avoid colliding with p5's built-in line() function name.

PERFORMANCE MagneticLine.update()

Every filing loops over every pole every frame to sum field vectors, which is O(numLines x numPoles) work per frame - fine for a handful of poles, but it grows quickly and there's no early-exit or spatial partitioning for poles that are very far away and contribute a negligible field.

💡 Skip poles whose distance exceeds some cutoff (their field contribution at that range is already tiny thanks to the inverse-square law) to reduce unnecessary calculations, especially once many poles have been added by clicking.

FEATURE mousePressed()

There's currently no way to remove a pole once it's created, and no visual indicator of where poles actually are, making it hard to understand exactly what's driving the pattern.

💡 Add a right-click or key handler to remove the nearest pole, and optionally draw a faint marker at each pole's position (toggleable with a key) to help learners see the actual field sources.

🔄 Code Flow

Code flow showing magneticpole, magneticpoleupdate, getfieldvector, magneticline, magneticlineupdate, magneticlinedisplay, setup, draw, mousepressed, windowresized

💡 Click on function names in the diagram to jump to their code

graph TD start[Start] --> setup[setup] setup --> create-poles-loop[create-poles-loop] create-poles-loop --> create-lines-loop[create-lines-loop] create-lines-loop --> draw[draw loop] draw --> update-poles-loop[update-poles-loop] update-poles-loop --> update-lines-loop[update-lines-loop] update-lines-loop --> display-lines-loop[display-lines-loop] display-lines-loop --> draw click setup href "#fn-setup" click draw href "#fn-draw" click create-poles-loop href "#sub-create-poles-loop" click create-lines-loop href "#sub-create-lines-loop" click update-poles-loop href "#sub-update-poles-loop" click update-lines-loop href "#sub-update-lines-loop" click display-lines-loop href "#sub-display-lines-loop" update-poles-loop --> magneticpoleupdate[magneticpoleupdate] magneticpoleupdate --> magneticpole[magneticpole] click magneticpoleupdate href "#fn-magneticpoleupdate" click magneticpole href "#fn-magneticpole" update-lines-loop --> magneticlineupdate[magneticlineupdate] magneticlineupdate --> magneticline[getfieldvector] getfieldvector --> distance-cap[distance-cap] getfieldvector --> inverse-square[inverse-square] getfieldvector --> sum-fields-loop[sum-fields-loop] click magneticlineupdate href "#fn-magneticlineupdate" click getfieldvector href "#fn-getfieldvector" click distance-cap href "#sub-distance-cap" click inverse-square href "#sub-inverse-square" click sum-fields-loop href "#sub-sum-fields-loop" display-lines-loop --> magneticlinedisplay[magneticlinedisplay] magneticlinedisplay --> edge-wrap[edge-wrap] click magneticlinedisplay href "#fn-magneticlinedisplay" click edge-wrap href "#sub-edge-wrap" mousepressed --> spawn-lines-loop[spawn-lines-loop] spawn-lines-loop --> trim-lines-check[trim-lines-check] trim-lines-check --> regen-lines-loop[regen-lines-loop] click mousepressed href "#fn-mousepressed" click spawn-lines-loop href "#sub-spawn-lines-loop" click trim-lines-check href "#sub-trim-lines-check" click regen-lines-loop href "#sub-regen-lines-loop" windowresized --> regen-lines-loop click windowresized href "#fn-windowresized"

❓ Frequently Asked Questions

What visual effects can I expect from the AI Magnetic Field Lines sketch?

This sketch visually represents invisible magnetic fields, with line segments aligning to the combined field from multiple magnetic poles, similar to how iron filings behave on paper.

How can I interact with the AI Magnetic Field Lines visualization?

Users can click anywhere on the canvas to add new magnetic poles, prompting the field lines to reorganize and demonstrate how the magnetic field changes.

What creative coding techniques are showcased in this sketch?

The sketch demonstrates real electromagnetic physics calculations, the use of Perlin noise for natural movement, and dynamic visualizations of magnetic fields.

Preview

AI Magnetic Field Lines - Iron Filings Physics Visualization - xelsed.ai - p5.js creative coding sketch preview
Sketch Preview
Code flow diagram showing the structure of AI Magnetic Field Lines - Iron Filings Physics Visualization - xelsed.ai - Code flow showing magneticpole, magneticpoleupdate, getfieldvector, magneticline, magneticlineupdate, magneticlinedisplay, setup, draw, mousepressed, windowresized
Code Flow Diagram