AI Neon Rain City - Cyberpunk Rainy Night Simulation - xelsed.ai

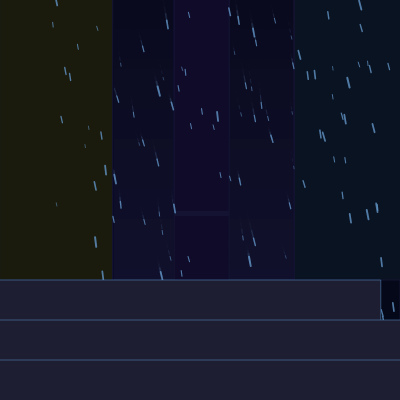
This sketch renders a moody cyberpunk skyline at night, with silhouetted buildings, flickering neon signs, wind-driven rain, spreading ripples, drifting fog, and the occasional lightning flash. Moving the mouse left and right controls the wind, tilting every raindrop's fall angle in real time.

🧪 Try This!

Experiment with the code by making these changes:

  1. Slow down the falling rain — Lowering the raindrop speed range makes the rain drift down gently instead of racing to the ground.
  2. Make wind swings much wilder — Widening the mapped output range means small mouse movements tilt the rain far more dramatically.
  3. Brighter lightning flash — Raising the alpha (and brightening the RGB values) of the lightning overlay turns a subtle flicker into a blinding strobe.
Prefer the full editor? Open it there →

📖 About This Sketch

This sketch builds an animated cyberpunk cityscape: dark building silhouettes topped with flickering pink, cyan, and purple neon signs, streaked by hundreds of wind-blown raindrops that splash into fading ripples on the ground, all wrapped in drifting fog and occasional lightning flashes. The atmosphere comes from a handful of p5.js techniques working together - additive blendMode() for the neon glow, lerpColor() for a smooth sky gradient, push()/pop() with a vertical scale flip for the wet-street reflection, and mouseX mapped to a wind variable that bends every raindrop's angle.

The code is organized around five ES6 classes - Building, NeonSign, Raindrop, Ripple, and FogLayer - each responsible for its own update() and display() logic, plus a set of initialize functions that populate arrays of these objects once in setup(). The draw() loop then simply walks through each array every frame, calling display() (and update()) on every object. Studying this sketch is a great way to learn how object-oriented design keeps a visually complex scene readable, and how simple math tricks (angle offsets, alpha fade-outs, additive blending) create convincing atmosphere.

⚙️ How It Works

  1. When the sketch loads, setup() creates a full-window canvas and calls five initialize functions that fill global arrays with Building, NeonSign, Raindrop, and FogLayer objects, each given randomized positions, sizes, and colors.
  2. Every frame, draw() first paints a vertical gradient sky and checks the lightning timer, then loops through the buildings array drawing each silhouette.
  3. Neon signs are drawn next inside a blendMode(ADD) block, which makes overlapping glowing colors add together into brighter, whiter light instead of just covering each other up.
  4. drawStreetReflection() flips the drawing surface upside-down with scale(1, -1) inside a push()/pop() block to paint blurry, semi-transparent copies of the buildings and signs as a reflection on the street.
  5. drawRain() moves every raindrop according to the current windDirection (calculated from mouseX), and whenever a raindrop reaches the bottom of the screen it spawns a new Ripple object and resets to the top so the rain never runs out.
  6. drawRipples() and drawFog() update and fade out ripples and drift the fog layers, and at the very end of draw() windDirection is recalculated from the mouse's horizontal position, so moving the mouse instantly changes how much every future raindrop leans left or right.

🎓 Concepts You'll Learn

Object-oriented programming with ES6 classesParticle systems (rain and ripples)Additive blend mode for glow effectsColor interpolation with lerpColorpush()/pop() with scale() for reflectionsMapping mouse position to a physics variableObject pooling (resetting raindrops instead of recreating them)

📝 Code Breakdown

setup()

setup() runs once before the first frame. Here it is used purely to call other 'initialize' functions, which is a clean way to keep setup() short while still doing a lot of preparation work.

function setup() {
  createCanvas(windowWidth, windowHeight);
  noStroke();

  initializeBuildings();
  initializeNeonSigns();
  initializeRaindrops();
  initializeFog();
  initializeLightning();
  
  // Optional: Add rain sound
  // ambientSound = new p5.Noise('white');
  // ambientSound.amp(0.1);
  // ambientSound.start();
}
Line-by-line explanation (7 lines)
createCanvas(windowWidth, windowHeight);
Makes the canvas fill the entire browser window so the scene is fullscreen.
noStroke();
Turns off shape outlines by default so buildings and neon rects are drawn as solid, borderless shapes.
initializeBuildings();
Calls the helper that creates and positions all Building objects.
initializeNeonSigns();
Calls the helper that attaches NeonSign objects to buildings that were randomly chosen to have neon.
initializeRaindrops();
Fills the raindrops array with Raindrop objects ready to fall.
initializeFog();
Creates the drifting FogLayer objects near the bottom of the screen.
initializeLightning();
Resets the lightning timer so the first flash happens after a random delay.

initializeBuildings()

This function shows a common procedural-generation pattern: loop a fixed number of times, randomize a few parameters each iteration, and use a running variable (currentX) to avoid overlapping shapes.

🔬 What happens to the skyline's silhouette if you narrow the width range to random(20, 60) - do the buildings start to look more like a dense downtown or thinner towers?

    let buildingWidth = random(50, 200);
    let buildingHeight = random(height * 0.4, height * 0.9);
function initializeBuildings() {
  let currentX = 0;
  for (let i = 0; i < NUM_BUILDINGS; i++) {
    let buildingWidth = random(50, 200);
    let buildingHeight = random(height * 0.4, height * 0.9);
    let buildingY = height - buildingHeight;
    buildings.push(new Building(currentX, buildingY, buildingWidth, buildingHeight));
    currentX += buildingWidth + random(20, 100); // Spacing between buildings
  }
}
Line-by-line explanation (6 lines)

🔧 Subcomponents:

for-loop Building Placement Loop for (let i = 0; i < NUM_BUILDINGS; i++) {

Creates NUM_BUILDINGS buildings side by side, tracking the running x position so each new building starts after the last one plus a random gap.

let currentX = 0;
Tracks the horizontal position where the next building should start, beginning at the left edge.
let buildingWidth = random(50, 200);
Picks a random width between 50 and 200 pixels for this building.
let buildingHeight = random(height * 0.4, height * 0.9);
Picks a random height that's between 40% and 90% of the canvas height, so buildings vary in size but never dwarf the whole screen.
let buildingY = height - buildingHeight;
Calculates the top y-coordinate so the building's base always sits on the bottom edge of the canvas.
buildings.push(new Building(currentX, buildingY, buildingWidth, buildingHeight));
Creates a new Building object with these dimensions and adds it to the global buildings array.
currentX += buildingWidth + random(20, 100);
Moves the placement cursor forward by this building's width plus a random gap, so the next building doesn't overlap it.

initializeNeonSigns()

This function demonstrates linking objects together - each NeonSign stores a reference to its parent building, so if the building ever moved, the sign's display() could recalculate its position automatically using xOffset and yOffset.

function initializeNeonSigns() {
  for (let building of buildings) {
    if (building.hasNeon) {
      let numSigns = floor(random(1, 4));
      for (let i = 0; i < numSigns; i++) {
        let signWidth = random(20, min(building.w - 20, 100));
        let signHeight = random(10, 50);
        let xOffset = random(10, building.w - signWidth - 10);
        let yOffset = random(10, building.h - signHeight - 10);
        let neonColor = random(NEON_COLORS);
        neonSigns.push(new NeonSign(building, xOffset, yOffset, signWidth, signHeight, neonColor));
      }
    }
  }
}
Line-by-line explanation (6 lines)

🔧 Subcomponents:

conditional Has Neon Check if (building.hasNeon) {

Only buildings flagged with hasNeon (decided randomly in the Building constructor) get neon signs attached.

for-loop Sign Creation Loop for (let i = 0; i < numSigns; i++) {

Creates between 1 and 3 neon signs per eligible building, each with its own random size, position, and color.

for (let building of buildings) {
Loops over every building that was already created.
let numSigns = floor(random(1, 4));
Rounds a random number between 1 and 4 down to a whole number, so each neon building gets 1, 2, or 3 signs.
let signWidth = random(20, min(building.w - 20, 100));
Keeps sign width within the building's own width so signs never stick out past the wall.
let xOffset = random(10, building.w - signWidth - 10);
Positions the sign horizontally relative to the building, leaving a 10px margin on both sides.
let neonColor = random(NEON_COLORS);
Randomly picks one of the pink, cyan, or purple colors from the NEON_COLORS array.
neonSigns.push(new NeonSign(building, xOffset, yOffset, signWidth, signHeight, neonColor));
Creates the NeonSign object and stores it, remembering which building it belongs to so it can follow that building's position.

initializeRaindrops()

A short but important function - it shows how a constant (NUM_RAINDROPS) at the top of the file controls behavior deep inside the sketch, making the rain density easy to tune in one place.

function initializeRaindrops() {
  for (let i = 0; i < NUM_RAINDROPS; i++) {
    raindrops.push(new Raindrop());
  }
}
Line-by-line explanation (2 lines)
for (let i = 0; i < NUM_RAINDROPS; i++) {
Repeats NUM_RAINDROPS times to create that many raindrops.
raindrops.push(new Raindrop());
Creates a new Raindrop object (whose constructor calls reset() to pick a random starting position) and adds it to the array.

initializeFog()

This function shows how the modulo operator (%) is a simple way to alternate behavior across a loop - here creating visual variety in something as simple as which direction each fog layer drifts.

function initializeFog() {
  for (let i = 0; i < FOG_LAYERS; i++) {
    let fogY = height * 0.7 + i * (height * 0.1);
    let fogH = height * 0.2;
    let fogAlpha = random(30, 80);
    let fogSpeed = random(FOG_SPEED_RANGE);
    if (i % 2 === 0) fogSpeed *= -1; // Make some layers drift left
    fogLayers.push(new FogLayer(fogY, fogH, fogAlpha, fogSpeed));
  }
}
Line-by-line explanation (3 lines)

🔧 Subcomponents:

conditional Alternate Drift Direction if (i % 2 === 0) fogSpeed *= -1; // Make some layers drift left

Uses the modulo operator to alternate fog layers between drifting left and right, so the fog doesn't all move the same way.

let fogY = height * 0.7 + i * (height * 0.1);
Stacks each fog layer slightly lower than the previous one, starting at 70% down the canvas.
let fogSpeed = random(FOG_SPEED_RANGE);
Picks a random drift speed from the FOG_SPEED_RANGE array (used here as a min/max pair for random()).
if (i % 2 === 0) fogSpeed *= -1;
Flips the sign of the speed for every other layer (i is even), so fog layers drift in alternating directions for a more natural look.

initializeLightning()

This function is called both at startup and again every time a lightning flash finishes, effectively resetting the countdown to the next strike.

function initializeLightning() {
  lightningTimer = random(LIGHTNING_INTERVAL);
  isLightning = false;
}
Line-by-line explanation (2 lines)
lightningTimer = random(LIGHTNING_INTERVAL);
Picks a random number of frames to wait before the next lightning flash, using the LIGHTNING_INTERVAL array as a min/max range.
isLightning = false;
Makes sure the lightning flag starts off, so no flash happens immediately.

draw()

draw() runs ~60 times per second and acts as the sketch's conductor - it doesn't contain much logic itself, but calls out to focused helper functions in a specific order, which is a great pattern for keeping complex animations organized.

🔬 This block draws neon signs with additive blending for a glow. What happens visually if you change blendMode(ADD) to blendMode(BLEND) here - do the signs still look like they're glowing?

  blendMode(ADD);
  for (let sign of neonSigns) {
    sign.display();
  }
  blendMode(BLEND); // Reset blend mode
function draw() {
  drawBackground();
  updateLightning();

  // Draw buildings
  for (let building of buildings) {
    building.display();
  }

  // Draw neon signs (blendMode(ADD) for glow)
  blendMode(ADD);
  for (let sign of neonSigns) {
    sign.display();
  }
  blendMode(BLEND); // Reset blend mode

  // Draw street reflection
  drawStreetReflection();

  // Draw rain and ripples
  drawRain();
  drawRipples();

  // Draw fog
  drawFog();

  // Update wind direction based on mouseX
  windDirection = map(mouseX, 0, width, -2, 2);
}
Line-by-line explanation (10 lines)

🔧 Subcomponents:

for-loop Building Draw Loop for (let building of buildings) {

Draws every building silhouette in order.

for-loop Neon Glow Block blendMode(ADD);

Switches to additive blending so overlapping neon colors brighten instead of just overlapping, then draws every sign, then resets the blend mode.

drawBackground();
Paints the gradient sky fresh every frame, which also erases the previous frame's drawing.
updateLightning();
Checks the lightning timer and flashes the background if it's time for a strike.
for (let building of buildings) { building.display(); }
Draws every building silhouette.
blendMode(ADD);
Switches p5's color blending mode to additive, so drawing bright colors on top of each other makes them glow brighter rather than just covering the pixels underneath.
for (let sign of neonSigns) { sign.display(); }
Draws (and flickers) every neon sign using the additive blend mode for a glowing look.
blendMode(BLEND);
Restores normal blending so later drawing (rain, fog) isn't affected by the additive mode.
drawStreetReflection();
Draws the flipped, blurred reflection of the city on the wet street.
drawRain(); drawRipples();
Updates and draws all raindrops and any ripples they've created.
drawFog();
Updates and draws the drifting fog layers on top of everything else.
windDirection = map(mouseX, 0, width, -2, 2);
Converts the mouse's horizontal position into a wind value between -2 and 2, which every raindrop reads next frame to tilt its fall angle.

drawBackground()

lerpColor() is p5's tool for blending between two colors - looping it over every row is a classic (if not the fastest) way to fake a smooth gradient without loading an image.

🔬 This loop redraws the entire gradient one row at a time, every single frame. What happens to performance if you change 'y++' to 'y += 4' so it only draws every 4th row?

  for (let y = 0; y < height; y++) {
    let inter = map(y, 0, height, 0, 1);
    let c = lerpColor(c1, c2, inter);
    stroke(c);
    line(0, y, width, y);
  }
function drawBackground() {
  // Dark blue-purple gradient background
  let c1 = color(10, 10, 30); // Deep dark blue
  let c2 = color(20, 20, 50); // Slightly lighter dark blue
  for (let y = 0; y < height; y++) {
    let inter = map(y, 0, height, 0, 1);
    let c = lerpColor(c1, c2, inter);
    stroke(c);
    line(0, y, width, y);
  }
}
Line-by-line explanation (5 lines)

🔧 Subcomponents:

for-loop Gradient Line Loop for (let y = 0; y < height; y++) {

Draws one horizontal line per pixel row, each blended between two colors, to fake a smooth vertical gradient.

let c1 = color(10, 10, 30);
Defines the top color of the gradient - a very dark blue.
let c2 = color(20, 20, 50);
Defines the bottom color of the gradient - a slightly lighter dark blue.
let inter = map(y, 0, height, 0, 1);
Converts the current row's y position into a value between 0 and 1, representing how far down the screen we are.
let c = lerpColor(c1, c2, inter);
Blends between c1 and c2 using inter as the mix amount - 0 gives pure c1, 1 gives pure c2, and values in between give a smooth mix.
line(0, y, width, y);
Draws a full-width horizontal line at this row using the blended color, building up the gradient one row at a time.

updateLightning()

This is a simple state machine using a boolean flag (isLightning) and two counters - a very common pattern for timed effects in games and animations.

🔬 This is the countdown that triggers each flash. What happens if you change LIGHTNING_INTERVAL (the array used to set lightningTimer) to a much smaller range, like [30, 100]?

    lightningTimer--;
    if (lightningTimer <= 0) {
      isLightning = true;
      lightningDuration = random(LIGHTNING_DURATION);
    }
function updateLightning() {
  if (isLightning) {
    background(200, 200, 255, 100); // Briefly light up background
    lightningDuration--;
    if (lightningDuration <= 0) {
      isLightning = false;
      initializeLightning(); // Schedule next lightning
    }
  } else {
    lightningTimer--;
    if (lightningTimer <= 0) {
      isLightning = true;
      lightningDuration = random(LIGHTNING_DURATION);
    }
  }
}
Line-by-line explanation (6 lines)

🔧 Subcomponents:

conditional During Flash if (isLightning) {

While a flash is active, paints a bright translucent overlay and counts down until the flash ends.

conditional Waiting For Flash } else {

While waiting, counts down the timer until it's time to trigger the next flash.

if (isLightning) {
Checks whether a lightning flash is currently happening.
background(200, 200, 255, 100);
Draws a semi-transparent pale blue-white rectangle over the whole canvas, simulating a flash of light without erasing what's underneath.
lightningDuration--;
Counts down the number of frames left for this flash.
if (lightningDuration <= 0) { isLightning = false; initializeLightning(); }
When the flash duration runs out, turns off the flash and reschedules the next one with a new random delay.
lightningTimer--;
While waiting for the next flash, counts down the delay timer each frame.
if (lightningTimer <= 0) { isLightning = true; lightningDuration = random(LIGHTNING_DURATION); }
Once the timer reaches zero, starts a new flash and picks a random duration for how long it lasts.

drawStreetReflection()

The translate() + scale(1, -1) combo is the standard p5.js trick for drawing mirror reflections - it's much simpler than manually recalculating flipped coordinates for every shape.

🔬 This nested loop fakes blur by stacking REFLECTION_BLUR_LINES semi-transparent rectangles. What happens to the reflection's sharpness if REFLECTION_BLUR_LINES is raised to 20?

  for (let building of buildings) {
    // Multiple semi-transparent rects for blur effect
    for (let i = 0; i < REFLECTION_BLUR_LINES; i++) {
      let reflectionAlpha = map(i, 0, REFLECTION_BLUR_LINES, REFLECTION_ALPHA, 0);
      fill(building.color, reflectionAlpha);
      rect(building.x, building.y + i, building.w, building.h);
    }
  }
function drawStreetReflection() {
  push();
  translate(0, height);
  scale(1, -1); // Flip vertically

  // Draw blurred building reflections
  for (let building of buildings) {
    // Multiple semi-transparent rects for blur effect
    for (let i = 0; i < REFLECTION_BLUR_LINES; i++) {
      let reflectionAlpha = map(i, 0, REFLECTION_BLUR_LINES, REFLECTION_ALPHA, 0);
      fill(building.color, reflectionAlpha);
      rect(building.x, building.y + i, building.w, building.h);
    }
  }

  // Draw neon sign reflections (blendMode(ADD) for glow)
  blendMode(ADD);
  for (let sign of neonSigns) {
    if (sign.isLit) {
      let signX = sign.building.x + sign.xOffset;
      let signY = sign.building.y + sign.yOffset;
      fill(sign.color, REFLECTION_ALPHA * 2); // Brighter reflection for neon
      // Multiple rects for blurry glow reflection
      for (let i = 0; i < REFLECTION_BLUR_LINES; i++) {
        rect(signX + i, signY + i, sign.w, sign.h);
        rect(signX - i, signY - i, sign.w, sign.h);
      }
    }
  }
  blendMode(BLEND); // Reset blend mode

  pop();

  // Draw a semi-transparent dark layer over the reflection area
  // to make it more abstract and less clear
  fill(0, 0, 20, 150); // Dark, semi-transparent overlay
  rect(0, height * 0.7, width, height * 0.3);
}
Line-by-line explanation (10 lines)

🔧 Subcomponents:

calculation Vertical Flip Setup translate(0, height); scale(1, -1);

Moves the origin to the bottom of the canvas then flips the y-axis, so anything drawn afterward appears upside-down, mimicking a reflection.

for-loop Blurred Building Reflection for (let i = 0; i < REFLECTION_BLUR_LINES; i++) {

Draws several slightly-offset, increasingly transparent copies of each building to fake a soft blur in the reflection.

for-loop Glowing Sign Reflection for (let i = 0; i < REFLECTION_BLUR_LINES; i++) {

Draws offset copies of each lit neon sign in both directions with additive blending, creating a glowing smeared reflection.

push();
Saves the current drawing state (transformations, styles) so changes made here don't affect the rest of the sketch.
translate(0, height);
Moves the coordinate system's origin down to the bottom edge of the canvas.
scale(1, -1);
Flips everything drawn afterward upside-down along the y-axis, since the origin is now at the bottom.
let reflectionAlpha = map(i, 0, REFLECTION_BLUR_LINES, REFLECTION_ALPHA, 0);
Calculates a fading transparency for each of the several stacked copies, so the reflection looks blurred rather than a hard duplicate.
rect(building.x, building.y + i, building.w, building.h);
Draws the building copy, nudged down slightly by i pixels each time, in flipped coordinate space (so it appears below the street line).
blendMode(ADD);
Switches to additive blending again so overlapping neon reflections glow brighter.
if (sign.isLit) {
Only draws a reflection for signs that are currently lit (not mid-flicker-off).
rect(signX + i, signY + i, sign.w, sign.h); rect(signX - i, signY - i, sign.w, sign.h);
Draws two offset copies of the sign - one shifted down-right and one up-left - to create a spread, glowing smear effect.
pop();
Restores the normal (non-flipped) coordinate system for anything drawn afterward.
fill(0, 0, 20, 150); rect(0, height * 0.7, width, height * 0.3);
Paints a dark semi-transparent rectangle over the reflection area, softening and obscuring it so it reads as wet pavement rather than a sharp mirror image.

drawRain()

Recycling objects (calling reset() instead of creating a new Raindrop every time) avoids constantly allocating and garbage-collecting objects, which keeps the animation running smoothly even with hundreds of raindrops.

🔬 This is where splashes are born. What happens visually if you comment out the ripples.push(...) line so raindrops recycle silently with no splash?

    if (drop.isOffscreen()) {
      // If raindrop hits bottom, create a ripple
      if (drop.y > height) {
        ripples.push(new Ripple(drop.x, height, drop.size));
      }
      // Reset the raindrop to the top for continuous rain
      drop.reset();
    }
function drawRain() {
  for (let i = raindrops.length - 1; i >= 0; i--) {
    let drop = raindrops[i];
    drop.update(windDirection);
    drop.display();

    if (drop.isOffscreen()) {
      // If raindrop hits bottom, create a ripple
      if (drop.y > height) {
        ripples.push(new Ripple(drop.x, height, drop.size));
      }
      // Reset the raindrop to the top for continuous rain
      drop.reset();
    }
  }
}
Line-by-line explanation (6 lines)

🔧 Subcomponents:

for-loop Backwards Raindrop Loop for (let i = raindrops.length - 1; i >= 0; i--) {

Iterates backwards through the raindrops array so each drop can update, display, and be reset safely.

conditional Offscreen / Splash Check if (drop.isOffscreen()) {

Detects when a raindrop has left the visible canvas, spawns a ripple if it hit the ground, and recycles it back to the top.

for (let i = raindrops.length - 1; i >= 0; i--) {
Loops through every raindrop from last to first (backwards loops are a common safe pattern when items might be modified inside the loop).
drop.update(windDirection);
Moves this raindrop according to the current wind direction.
drop.display();
Draws the raindrop as a short angled line.
if (drop.isOffscreen()) {
Checks if the drop has fallen past the bottom or drifted off the left/right edges.
if (drop.y > height) { ripples.push(new Ripple(drop.x, height, drop.size)); }
If the drop specifically hit the bottom (rather than drifting off the side), creates a new Ripple at its landing spot.
drop.reset();
Recycles the raindrop back to a random position above the screen, so the sketch never needs to create or destroy raindrop objects - it just reuses the same ones forever.

drawRipples()

This is the classic 'iterate backwards and splice()' pattern for safely removing items from an array while looping over it - looping forwards while splicing would skip elements.

function drawRipples() {
  for (let i = ripples.length - 1; i >= 0; i--) {
    let ripple = ripples[i];
    ripple.update();
    ripple.display();

    if (ripple.isFinished()) {
      ripples.splice(i, 1); // Remove finished ripples
    }
  }
}
Line-by-line explanation (4 lines)

🔧 Subcomponents:

conditional Remove Finished Ripples if (ripple.isFinished()) { ripples.splice(i, 1); }

Deletes ripples from the array once they've faded out or grown too large, preventing the array from growing forever.

for (let i = ripples.length - 1; i >= 0; i--) {
Loops backwards through ripples so removing items mid-loop doesn't skip any.
ripple.update();
Grows the ripple's circle and fades its transparency a little more.
ripple.display();
Draws the ripple as an expanding, fading circle outline.
if (ripple.isFinished()) { ripples.splice(i, 1); }
Removes the ripple from the array once it's fully faded or grown past its maximum size, unlike raindrops, ripples are truly deleted rather than recycled since new ones are constantly being created.

drawFog()

A minimal example of the update/display pattern used throughout this sketch - each object knows how to move itself and how to draw itself, keeping drawFog() itself extremely simple.

function drawFog() {
  for (let fog of fogLayers) {
    fog.update();
    fog.display();
  }
}
Line-by-line explanation (3 lines)
for (let fog of fogLayers) {
Loops through each fog layer object.
fog.update();
Shifts the fog layer horizontally based on its speed.
fog.display();
Draws the fog layer as a wide, semi-transparent rectangle.

windowResized()

p5.js automatically calls windowResized() whenever the browser window changes size - this is the standard place to call resizeCanvas() and rebuild any layout that depends on width/height.

function windowResized() {
  resizeCanvas(windowWidth, windowHeight);
  // Re-initialize elements that depend on canvas size
  buildings = [];
  neonSigns = [];
  raindrops = [];
  ripples = [];
  fogLayers = [];
  initializeBuildings();
  initializeNeonSigns();
  initializeRaindrops();
  initializeFog();
  initializeLightning();
}
Line-by-line explanation (3 lines)
resizeCanvas(windowWidth, windowHeight);
Resizes the canvas to match the browser window's new dimensions.
buildings = []; neonSigns = []; raindrops = []; ripples = []; fogLayers = [];
Empties all the arrays, since the old buildings/rain positions were based on the old canvas size and no longer make sense.
initializeBuildings(); initializeNeonSigns(); initializeRaindrops(); initializeFog(); initializeLightning();
Rebuilds the entire scene from scratch using the new canvas dimensions.

Building.display()

Building is one of the simplest classes here - its constructor does all the randomization, so display() just has to draw a single rectangle using the values already stored on 'this'.

  display() {
    fill(this.color);
    rect(this.x, this.y, this.w, this.h);
  }
Line-by-line explanation (2 lines)
fill(this.color);
Sets the drawing color to this building's stored dark bluish color.
rect(this.x, this.y, this.w, this.h);
Draws the building as a simple rectangle using its stored position and size.

NeonSign.display()

This method combines an early return (a clean way to skip work) with a countdown timer stored on the object itself, letting every sign flicker independently and unpredictably without any global timer.

  display() {
    if (!this.isLit) return;

    let signX = this.building.x + this.xOffset;
    let signY = this.building.y + this.yOffset;

    // Flicker logic
    this.flickerTimer--;
    if (this.flickerTimer <= 0) {
      this.isLit = !this.isLit;
      this.flickerTimer = random(5, 200); // Shorter flicker or longer off time
    }

    fill(this.color);
    rect(signX, signY, this.w, this.h);
  }
Line-by-line explanation (6 lines)

🔧 Subcomponents:

conditional Skip Drawing When Off if (!this.isLit) return;

Immediately exits the function without drawing anything if the sign is currently in its 'off' flicker state.

conditional Flicker Timer Toggle if (this.flickerTimer <= 0) {

Every so often flips the sign between lit and unlit and picks a new random countdown, creating an irregular flicker.

if (!this.isLit) return;
If the sign is currently off (mid-flicker), stop here and draw nothing this frame.
let signX = this.building.x + this.xOffset;
Calculates the sign's actual screen position by adding its offset to its parent building's position.
this.flickerTimer--;
Counts down toward the next flicker event.
this.isLit = !this.isLit;
Flips the sign's lit state - if it was on, it turns off, and vice versa.
this.flickerTimer = random(5, 200);
Picks a new random countdown for the next flicker, so lit/unlit periods vary unpredictably.
rect(signX, signY, this.w, this.h);
Draws the sign as a solid glowing rectangle (extra brightness comes from the blendMode(ADD) set in draw()).

Raindrop.reset()

reset() is called both from the constructor (to set up a brand-new raindrop) and from drawRain() (to recycle an existing one) - reusing this one method for both cases avoids duplicating code.

  reset() {
    this.x = random(width + 100); // Start slightly off-screen right for angle
    this.y = random(-height, 0);
    this.speed = random(3, 8);
    this.size = random(0.5, 2); // Vary size for depth effect
    this.color = color(RAIN_COLOR);
    this.angleOffset = random(-0.1, 0.1); // Slight random angle variation
  }
Line-by-line explanation (5 lines)
this.x = random(width + 100);
Picks a random starting x position that can go slightly past the right edge, giving room for drops to drift in from off-screen when it's windy.
this.y = random(-height, 0);
Starts the drop somewhere above the visible canvas, so drops enter the screen at staggered times rather than all appearing at once.
this.speed = random(3, 8);
Gives this raindrop a random falling speed, so all the rain doesn't move in perfect unison.
this.size = random(0.5, 2);
Randomizes the drop's thickness, which is later used to fake depth (thicker/closer drops vs thinner/further ones).
this.angleOffset = random(-0.1, 0.1);
Adds a tiny random tilt to this drop's fall angle so the rain doesn't look perfectly uniform even before wind is applied.

Raindrop.update()

This is a classic use of trigonometry for movement: converting an angle into x and y velocity components with cos() and sin(), which is the foundation of nearly all angled motion in creative coding.

🔬 The 0.1 multiplier controls how strongly wind bends the rain's angle. What happens if you raise it to 0.5 - does moving the mouse now make the rain nearly horizontal?

  update(wind) {
    let currentAngle = PI / 2 + wind * 0.1 + this.angleOffset;
    this.x += this.speed * cos(currentAngle);
    this.y += this.speed * sin(currentAngle);
  }
  update(wind) {
    let currentAngle = PI / 2 + wind * 0.1 + this.angleOffset;
    this.x += this.speed * cos(currentAngle);
    this.y += this.speed * sin(currentAngle);
  }
Line-by-line explanation (3 lines)
let currentAngle = PI / 2 + wind * 0.1 + this.angleOffset;
Starts from straight down (PI/2 radians in p5's angle system points downward when used with cos/sin like this), then tilts it based on the wind strength and this drop's own tiny random offset.
this.x += this.speed * cos(currentAngle);
Moves the drop horizontally - cos(angle) gives the horizontal component of the direction, scaled by speed.
this.y += this.speed * sin(currentAngle);
Moves the drop vertically - sin(angle) gives the vertical component of the direction, scaled by speed.

Raindrop.display()

Drawing a raindrop as a short line rather than a dot is a simple trick for implying motion blur/speed, and computing the angle the same way as in update() keeps the visual streak consistent with the drop's real direction of travel.

  display() {
    stroke(this.color);
    strokeWeight(this.size);
    let currentAngle = PI / 2 + windDirection * 0.1 + this.angleOffset;
    line(this.x, this.y, this.x + this.size * 5 * cos(currentAngle), this.y + this.size * 5 * sin(currentAngle));
  }
Line-by-line explanation (3 lines)
strokeWeight(this.size);
Sets the line thickness for this drop based on its randomized size, giving thicker or thinner streaks.
let currentAngle = PI / 2 + windDirection * 0.1 + this.angleOffset;
Recalculates the same tilt angle used in update(), so the visible streak lines up with the direction the drop is actually moving.
line(this.x, this.y, this.x + this.size * 5 * cos(currentAngle), this.y + this.size * 5 * sin(currentAngle));
Draws a short line from the drop's position extending in the direction of travel, with length proportional to its size - this is what makes each raindrop look like a streak rather than a dot.

Raindrop.isOffscreen()

This is a simple boundary check returning a boolean - keeping it as its own method makes drawRain()'s logic ('if offscreen, maybe splash, then reset') much easier to read.

  isOffscreen() {
    return this.y > height || this.x < -100 || this.x > width + 100;
  }
Line-by-line explanation (1 lines)
return this.y > height || this.x < -100 || this.x > width + 100;
Returns true if the drop has fallen past the bottom, or drifted far enough left or right (100px buffer) to no longer be visible, in any of these cases the drop needs to be reset.

Ripple.update()

Pairing a growing size with a shrinking alpha is a very common technique for 'expand and fade' effects like ripples, explosions, or shockwaves.

  update() {
    this.currentSize += 2;
    this.alpha -= 5;
  }
Line-by-line explanation (2 lines)
this.currentSize += 2;
Grows the ripple's diameter by 2 pixels every frame, making it expand outward.
this.alpha -= 5;
Fades the ripple's opacity by 5 each frame, so it becomes more transparent as it grows, eventually disappearing.

Ripple.display()

Because alpha is a normal object property here (not a p5 built-in), the sketch can independently animate it in update() and simply read it in display() - a clean separation of logic and rendering.

  display() {
    noFill();
    stroke(this.color, this.alpha);
    strokeWeight(1);
    circle(this.x, this.y, this.currentSize);
  }
Line-by-line explanation (3 lines)
noFill();
Makes sure the circle is drawn as an outline only, not a filled disc, so it looks like a ring on the water.
stroke(this.color, this.alpha);
Sets the outline color and uses the ripple's current alpha value so it visibly fades as it grows.
circle(this.x, this.y, this.currentSize);
Draws the ripple's ring at its current, growing size.

Ripple.isFinished()

drawRipples() uses this method to decide when to splice a ripple out of the array - keeping the 'am I done?' logic inside the class keeps the main loop clean.

  isFinished() {
    return this.alpha <= 0 || this.currentSize > this.maxSize;
  }
Line-by-line explanation (1 lines)
return this.alpha <= 0 || this.currentSize > this.maxSize;
Returns true once the ripple has completely faded out OR grown past its maximum allowed size, whichever happens first.

FogLayer.update()

Wrapping a moving object back to the opposite edge once it leaves the screen is a standard technique for creating infinite scrolling or drifting backgrounds without needing extra copies of the object.

🔬 This is what makes fog drift forever without vanishing. What happens if you multiply this.speed by 5 here, making the fog race across the screen?

  update() {
    this.x += this.speed;
    if (this.speed > 0 && this.x > width) this.x = -this.w + random(this.w / 2);
    if (this.speed < 0 && this.x < -this.w) this.x = width - random(this.w / 2);
  }
  update() {
    this.x += this.speed;
    if (this.speed > 0 && this.x > width) this.x = -this.w + random(this.w / 2);
    if (this.speed < 0 && this.x < -this.w) this.x = width - random(this.w / 2);
  }
Line-by-line explanation (3 lines)

🔧 Subcomponents:

conditional Wrap When Drifting Right if (this.speed > 0 && this.x > width) this.x = -this.w + random(this.w / 2);

When a rightward-drifting fog layer moves entirely off the right edge, teleports it back to just off the left edge so it can drift across again.

conditional Wrap When Drifting Left if (this.speed < 0 && this.x < -this.w) this.x = width - random(this.w / 2);

Does the same wrap-around for leftward-drifting fog layers, teleporting them back to the right side.

this.x += this.speed;
Shifts the fog layer's horizontal position by its speed (which can be positive or negative) each frame.
if (this.speed > 0 && this.x > width) this.x = -this.w + random(this.w / 2);
If this fog layer drifts right and has moved completely off-screen, wraps it back around to just before the left edge, creating an endless drifting loop.
if (this.speed < 0 && this.x < -this.w) this.x = width - random(this.w / 2);
Does the mirror-image wrap for fog layers drifting left, so they never run out of screen to drift across.

FogLayer.display()

Making the fog rectangle wider than the canvas (width * 1.5) is what allows it to drift left and right without ever showing a visible gap at the edge.

  display() {
    fill(this.color, this.alpha);
    rect(this.x, this.y, this.w, this.h);
  }
Line-by-line explanation (2 lines)
fill(this.color, this.alpha);
Sets a semi-transparent fog color using this layer's own alpha value, so fog layers can vary in thickness.
rect(this.x, this.y, this.w, this.h);
Draws the fog as a wide, translucent rectangle - since w is 1.5x the canvas width, it always covers the screen even while drifting.

📦 Key Variables

NUM_BUILDINGS number

How many Building objects are generated across the skyline.

const NUM_BUILDINGS = 10;
NEON_CHANCE number

Probability (0-1) that any given building is chosen to have neon signs.

const NEON_CHANCE = 0.6;
NUM_RAINDROPS number

How many Raindrop objects exist and are recycled for the rain effect.

const NUM_RAINDROPS = 300;
RAIN_COLOR array

RGBA values used to color every raindrop's streak.

const RAIN_COLOR = [100, 150, 200, 200];
RIPPLE_COLOR array

RGBA values used to color the expanding ripple rings.

const RIPPLE_COLOR = [80, 130, 180, 150];
FOG_COLOR array

RGB values used as the base tint for every fog layer.

const FOG_COLOR = [30, 30, 50];
NEON_COLORS array

A palette of pink, cyan, and purple colors randomly assigned to neon signs.

const NEON_COLORS = [[255,0,100],[0,255,255],[150,0,255]];
LIGHTNING_INTERVAL array

Min/max frame count used to randomize the delay between lightning flashes.

const LIGHTNING_INTERVAL = [300, 1000];
LIGHTNING_DURATION array

Min/max frame count used to randomize how long each lightning flash lasts.

const LIGHTNING_DURATION = [5, 15];
REFLECTION_ALPHA number

Base opacity used when drawing building and neon reflections on the street.

const REFLECTION_ALPHA = 80;
REFLECTION_BLUR_LINES number

How many offset copies are drawn to fake a blurred reflection.

const REFLECTION_BLUR_LINES = 5;
FOG_LAYERS number

How many FogLayer objects are created near the bottom of the screen.

const FOG_LAYERS = 3;
FOG_SPEED_RANGE array

Min/max drift speed used when randomizing each fog layer's movement.

const FOG_SPEED_RANGE = [0.5, 1.5];
buildings array

Stores every Building object currently in the scene.

let buildings = [];
neonSigns array

Stores every NeonSign object attached to buildings.

let neonSigns = [];
raindrops array

Stores every Raindrop object, continuously updated and recycled.

let raindrops = [];
ripples array

Stores active Ripple objects created when raindrops hit the ground; removed once faded out.

let ripples = [];
fogLayers array

Stores every FogLayer object drifting near the bottom of the screen.

let fogLayers = [];
windDirection number

The current wind strength/direction, recalculated from mouseX each frame and used to tilt every raindrop.

let windDirection = 0;
lightningTimer number

Countdown (in frames) until the next lightning flash begins.

let lightningTimer = 0;
lightningDuration number

Countdown (in frames) for how much longer the current lightning flash lasts.

let lightningDuration = 0;
isLightning boolean

Whether a lightning flash is currently active this frame.

let isLightning = false;
ambientSound object

Reserved for an optional p5.sound rain noise generator (currently unused/commented out).

let ambientSound;

🔧 Potential Improvements (4)

Here are some ways this code could be enhanced:

PERFORMANCE drawBackground()

The gradient is redrawn by looping through every single pixel row and calling line() on it, every single frame - that's height calls to lerpColor() and line() sixty times per second.

💡 Render the gradient once into an offscreen createGraphics() buffer in setup(), then just call image() to draw that buffer each frame in draw(), only regenerating it in windowResized().

BUG Raindrop.isOffscreen() / drawRain()

isOffscreen() also returns true when a drop drifts off the left/right edges due to wind, but drawRain() only spawns a ripple when drop.y > height, this is handled correctly, but if a drop exits sideways while very close to the bottom, it resets without ever producing a splash, which is a minor inconsistency in an otherwise clean design.

💡 Consider also spawning a ripple (or a different 'blown away' effect) when a drop exits sideways so the recycling always feels intentional rather than abrupt.

STYLE draw()

Magic numbers like -2, 2 (wind range) and 0.1 (wind sensitivity, duplicated in both Raindrop.update() and Raindrop.display()) are hardcoded in multiple places, making them harder to find and tune consistently.

💡 Pull these into named constants at the top of the file (e.g., WIND_RANGE = 2, WIND_ANGLE_FACTOR = 0.1) and reference them everywhere they're used, so a single edit updates the whole sketch.

FEATURE updateLightning() / mousePressed()

Lightning only ever strikes on its own random timer, giving the viewer no way to trigger a flash themselves.

💡 Add a mousePressed() function that immediately sets isLightning = true and picks a random lightningDuration, letting users trigger their own thunderstorm on click.

🔄 Code Flow

Code flow showing setup, initializebuildings, initializeneonsigns, initializeraindrops, initializefog, initializelightning, draw, drawbackground, updatelightning, drawstreetreflection, drawrain, drawripples, drawfog, windowresized, building-display, neonsign-display, raindrop-reset, raindrop-update, raindrop-display, raindrop-isoffscreen, ripple-update, ripple-display, ripple-isfinished, foglayer-update, foglayer-display

💡 Click on function names in the diagram to jump to their code

graph TD start[Start] --> setup[setup] setup --> initializebuildings[initializebuildings] setup --> initializeneonsigns[initializeneonsigns] setup --> initializeraindrops[initializeraindrops] setup --> initializefog[initializefog] setup --> initializelightning[initializelightning] setup --> draw[draw loop] draw --> drawbackground[drawbackground] draw --> updatelightning[updatelightning] draw --> drawstreetreflection[drawstreetreflection] draw --> drawrain[drawrain] draw --> drawripples[drawripples] draw --> drawfog[drawfog] %% Subcomponents inside draw drawrain --> raindrop-loop[raindrop-loop] raindrop-loop --> raindrop-update[raindrop-update] raindrop-loop --> raindrop-display[raindrop-display] raindrop-loop --> raindrop-reset[raindrop-reset] raindrop-loop --> offscreen-check[offscreen-check] offscreen-check --> ripple-cleanup[ripple-cleanup] drawfog --> foglayer-update[foglayer-update] foglayer-update --> fog-direction-check[fog-direction-check] foglayer-update --> wrap-right[wrap-right] foglayer-update --> wrap-left[wrap-left] foglayer-update --> foglayer-display[foglayer-display] updatelightning --> lightning-active-branch[lightning-active-branch] updatelightning --> lightning-waiting-branch[lightning-waiting-branch] drawstreetreflection --> flip-transform[flip-transform] drawstreetreflection --> building-reflection-loop[building-reflection-loop] drawstreetreflection --> neon-reflection-loop[neon-reflection-loop] drawbackground --> gradient-loop[gradient-loop] draw --> building-draw-loop[building-draw-loop] building-draw-loop --> building-display[building-display] building-draw-loop --> neon-building-check[neon-building-check] neon-building-check --> neon-sign-loop[neon-sign-loop] neon-sign-loop --> neonsign-display[neonsign-display] neon-sign-loop --> neon-blend-block[neon-blend-block] click setup href "#fn-setup" click initializebuildings href "#fn-initializebuildings" click initializeneonsigns href "#fn-initializeneonsigns" click initializeraindrops href "#fn-initializeraindrops" click initializefog href "#fn-initializefog" click initializelightning href "#fn-initializelightning" click draw href "#fn-draw" click drawbackground href "#fn-drawbackground" click updatelightning href "#fn-updatelightning" click drawstreetreflection href "#fn-drawstreetreflection" click drawrain href "#fn-drawrain" click drawripples href "#fn-drawripples" click drawfog href "#fn-drawfog" click raindrop-loop href "#sub-raindrop-loop" click raindrop-update href "#fn-raindrop-update" click raindrop-display href "#fn-raindrop-display" click raindrop-reset href "#fn-raindrop-reset" click offscreen-check href "#sub-offscreen-check" click ripple-cleanup href "#sub-ripple-cleanup" click foglayer-update href "#fn-foglayer-update" click fog-direction-check href "#sub-fog-direction-check" click wrap-right href "#sub-wrap-right" click wrap-left href "#sub-wrap-left" click foglayer-display href "#fn-foglayer-display" click updatelightning href "#fn-updatelightning" click lightning-active-branch href "#sub-lightning-active-branch" click lightning-waiting-branch href "#sub-lightning-waiting-branch" click drawstreetreflection href "#fn-drawstreetreflection" click flip-transform href "#sub-flip-transform" click building-reflection-loop href "#sub-building-reflection-loop" click neon-reflection-loop href "#sub-neon-reflection-loop" click drawbackground href "#fn-drawbackground" click gradient-loop href "#sub-gradient-loop" click building-draw-loop href "#sub-building-draw-loop" click building-display href "#fn-building-display" click neon-building-check href "#sub-neon-building-check" click neon-sign-loop href "#sub-neon-sign-loop" click neonsign-display href "#fn-neonsign-display" click neon-blend-block href "#sub-neon-blend-block"

❓ Frequently Asked Questions

What kind of visual experience does the AI Neon Rain City sketch create?

The sketch simulates a moody cyberpunk night with neon-lit buildings, falling rain, and reflections on wet pavement, creating an immersive atmospheric scene.

How can users interact with the AI Neon Rain City simulation?

Users can control the wind direction by moving their mouse, which affects the movement of the raindrops in the simulation.

What creative coding concepts are showcased in the AI Neon Rain City project?

The sketch demonstrates concepts such as object-oriented programming with classes for buildings and neon signs, as well as visual effects like rain, ripples, and dynamic lighting.

Preview

AI Neon Rain City - Cyberpunk Rainy Night Simulation - xelsed.ai - p5.js creative coding sketch preview
Sketch Preview
Code flow diagram showing the structure of AI Neon Rain City - Cyberpunk Rainy Night Simulation - xelsed.ai - Code flow showing setup, initializebuildings, initializeneonsigns, initializeraindrops, initializefog, initializelightning, draw, drawbackground, updatelightning, drawstreetreflection, drawrain, drawripples, drawfog, windowresized, building-display, neonsign-display, raindrop-reset, raindrop-update, raindrop-display, raindrop-isoffscreen, ripple-update, ripple-display, ripple-isfinished, foglayer-update, foglayer-display
Code Flow Diagram