AI Neon Sign - Type Your Own Glowing Text

This sketch creates an interactive neon sign generator where users can type custom text that appears with a glowing neon effect. The text pulses with realistic neon glow using layered transparency, and clicking cycles through vibrant neon colors (pink, cyan, green) against a brick wall background.

๐ŸŽ“ Concepts You'll Learn

Text renderingGlow effects using layered transparencyPerlin noise for animationColor manipulationMouse interactionWindow resizingInput handlingBrick pattern generation

๐Ÿ”„ Code Flow

Code flow showing setup, draw, drawbricks, mousepressed, windowresized

๐Ÿ’ก Click on function names in the diagram to jump to their code

graph TD start[Start] --> setup[setup] setup --> canvas-setup[Canvas Creation] setup --> text-styling[Text Styling] setup --> input-creation[Input Field Setup] setup --> color-array[Color Palette] setup --> draw[draw loop] draw --> background-fill[Dark Background] draw --> brick-drawing[Background Brick Pattern] draw --> text-input-retrieval[Get User Text] draw --> size-calculation[Base Text Size] draw --> pulse-animation[Pulse Factor] draw --> color-selection[Current Neon Color] draw --> glow-loop[Layered Glow Effect] glow-loop --> alpha-calculation[Transparency Calculation] glow-loop --> text-rendering[Draw Text] draw --> windowresized[windowResized] windowresized --> canvas-resize[Canvas Resize] mousepressed --> color-cycling[Color Index Update] draw --> mousepressed[Mouse Pressed] brick-drawing --> row-loop[Brick Row Loop] row-loop --> column-loop[Brick Column Loop] column-loop --> brick-drawing[Rectangle Drawing] click setup href "#fn-setup" click draw href "#fn-draw" click windowresized href "#fn-windowresized" click mousepressed href "#fn-mousepressed" click canvas-setup href "#sub-canvas-setup" click text-styling href "#sub-text-styling" click input-creation href "#sub-input-creation" click color-array href "#sub-color-array" click background-fill href "#sub-background-fill" click brick-drawing href "#sub-brick-drawing" click text-input-retrieval href "#sub-text-input-retrieval" click size-calculation href "#sub-size-calculation" click pulse-animation href "#sub-pulse-animation" click color-selection href "#sub-color-selection" click glow-loop href "#sub-glow-loop" click alpha-calculation href "#sub-alpha-calculation" click text-rendering href "#sub-text-rendering" click canvas-resize href "#sub-canvas-resize" click brick-style href "#sub-brick-style" click row-loop href "#sub-row-loop" click column-loop href "#sub-column-loop" click brick-drawing href "#sub-brick-drawing" click color-cycling href "#sub-color-cycling"

๐Ÿ“ Code Breakdown

setup()

setup() runs once when the sketch starts. It's where you initialize the canvas, set up styling, and create interactive elements like the input box. The color array stores the neon colors that will cycle through when clicked.

function setup() {
  createCanvas(windowWidth, windowHeight);
  textAlign(CENTER, CENTER); textStyle(BOLD); noStroke();
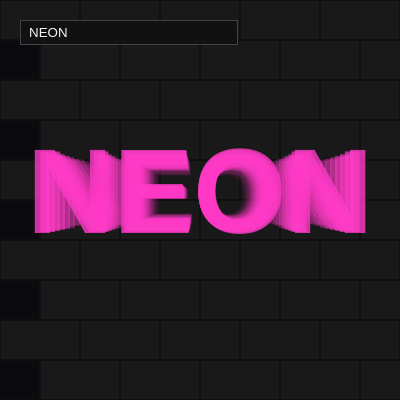
  inp = createInput("NEON"); inp.position(20, 20); inp.size(200);
  cols = [color(255, 60, 200), color(0, 255, 255), color(0, 255, 120)];
}

๐Ÿ”ง Subcomponents:

initialization Canvas Creation createCanvas(windowWidth, windowHeight)

Creates a full-screen canvas that responds to window dimensions

initialization Text Styling textAlign(CENTER, CENTER); textStyle(BOLD); noStroke()

Centers text both horizontally and vertically, makes it bold, and removes outline strokes

initialization Input Field Setup inp = createInput("NEON"); inp.position(20, 20); inp.size(200)

Creates a text input box with default text 'NEON' positioned at top-left for user typing

initialization Color Palette cols = [color(255, 60, 200), color(0, 255, 255), color(0, 255, 120)]

Stores three neon colors (pink, cyan, green) that cycle when user clicks

Line by Line:

createCanvas(windowWidth, windowHeight)
Creates a canvas that fills the entire browser window, making the sketch responsive to window size
textAlign(CENTER, CENTER)
Aligns all text to be centered both horizontally and vertically from the position you specify
textStyle(BOLD)
Makes all text bold for a stronger neon sign appearance
noStroke()
Removes outlines from shapes, so text and bricks won't have borders
inp = createInput("NEON")
Creates an HTML input field with 'NEON' as the starting text that users can edit
inp.position(20, 20)
Places the input box 20 pixels from the left and 20 pixels from the top of the screen
inp.size(200)
Sets the input box width to 200 pixels
cols = [color(255, 60, 200), color(0, 255, 255), color(0, 255, 120)]
Creates an array of three neon colors: bright pink, cyan, and neon green

draw()

draw() runs 60 times per second, creating animation. The key to the neon effect is drawing the text multiple times with decreasing transparency and increasing size - each layer adds to the glow. The Perlin noise creates a realistic pulsing effect that real neon signs have.

function draw() {
  drawBricks();
  let t = inp.value() || " ";
  let base = min(width, height) * 0.18, f = map(noise(frameCount * 0.05), 0, 1, 0.7, 1.1);
  let c = cols[ci];
  for (let i = 12; i > 0; i--) {
    let a = 255 * pow(i / 12, 1.5) * f;
    fill(red(c), green(c), blue(c), a);
    textSize(base + i * 4);
    text(t, width / 2, height / 2);
  }
}

๐Ÿ”ง Subcomponents:

function-call Background Brick Pattern drawBricks()

Draws the brick wall background for each frame

variable-assignment Get User Text let t = inp.value() || " "

Reads the current text from the input box, or uses a space if empty

calculation Base Text Size let base = min(width, height) * 0.18

Calculates the base font size as 18% of the smaller screen dimension

calculation Pulse Factor f = map(noise(frameCount * 0.05), 0, 1, 0.7, 1.1)

Uses Perlin noise to create a smooth pulsing effect that varies between 0.7 and 1.1

variable-assignment Current Neon Color let c = cols[ci]

Gets the current color from the color array based on the click counter

for-loop Layered Glow Effect for (let i = 12; i > 0; i--)

Draws the text 12 times with decreasing opacity to create the neon glow effect

calculation Transparency Calculation let a = 255 * pow(i / 12, 1.5) * f

Calculates alpha (transparency) that decreases with each layer and pulses with the animation factor

function-call Draw Text text(t, width / 2, height / 2)

Line by Line:

drawBricks()
Calls the function that draws the brick wall background
let t = inp.value() || " "
Gets the text from the input box; if it's empty, uses a space instead
let base = min(width, height) * 0.18
Calculates a responsive font size that's 18% of whichever is smaller: width or height
f = map(noise(frameCount * 0.05), 0, 1, 0.7, 1.1)
Creates a smooth pulsing animation using Perlin noise that varies the text size between 70% and 110% of base size
let c = cols[ci]
Gets the current neon color from the color array using the click index
for (let i = 12; i > 0; i--)
Loops 12 times, starting from 12 and counting down to 1, drawing the text each time with different opacity
let a = 255 * pow(i / 12, 1.5) * f
Calculates transparency: starts bright (255) and fades out as i decreases, creating the glow effect
fill(red(c), green(c), blue(c), a)
Sets the fill color to the current neon color with the calculated transparency level
textSize(base + i * 4)
Sets the font size larger for each layer (outer layers are bigger), creating depth in the glow
text(t, width / 2, height / 2)
Draws the text at the center of the canvas with the current size and transparency

drawBricks()

This function creates a brick wall pattern by using a nested loop. The clever part is the offset: (y / 40) % 2 alternates between 0 and 1 for each row, causing every other row to start at a different x position. This creates the classic staggered brick pattern you see on real walls.

function drawBricks() {
  background(10, 10, 15);
  fill(25); stroke(15); strokeWeight(2);
  for (let y = 0; y < height + 40; y += 40) {
    for (let x = (y / 40) % 2 ? 40 : 0; x < width + 80; x += 80) rect(x, y, 80, 40);
  }
  noStroke();
}

๐Ÿ”ง Subcomponents:

initialization Dark Background background(10, 10, 15)

Fills the entire canvas with a very dark blue-black color for the night atmosphere

initialization Brick Styling fill(25); stroke(15); strokeWeight(2)

Sets brick color to dark gray, outline to darker gray, and outline thickness to 2 pixels

for-loop Brick Row Loop for (let y = 0; y < height + 40; y += 40)

Creates horizontal rows of bricks from top to bottom, spaced 40 pixels apart

for-loop Brick Column Loop for (let x = (y / 40) % 2 ? 40 : 0; x < width + 80; x += 80)

Creates alternating brick columns to create the classic brick pattern offset

function-call Rectangle Drawing rect(x, y, 80, 40)

Draws each brick as an 80x40 pixel rectangle

Line by Line:

background(10, 10, 15)
Clears the canvas and fills it with a very dark blue-black color (almost black with a slight blue tint)
fill(25)
Sets the fill color for bricks to a very dark gray
stroke(15)
Sets the outline color to an even darker gray for brick borders
strokeWeight(2)
Makes the brick outlines 2 pixels thick
for (let y = 0; y < height + 40; y += 40)
Loops through vertical positions, creating rows of bricks spaced 40 pixels apart
for (let x = (y / 40) % 2 ? 40 : 0; x < width + 80; x += 80)
Creates alternating columns: odd rows start at x=40, even rows start at x=0, creating the brick offset pattern
rect(x, y, 80, 40)
Draws a brick rectangle that is 80 pixels wide and 40 pixels tall
noStroke()
Removes strokes for the rest of the sketch so the text doesn't have outlines

mousePressed()

This function runs whenever the mouse is clicked. The modulo operator (%) is key here - it ensures ci never exceeds the number of colors available. For example, if there are 3 colors and ci is 2, then (2 + 1) % 3 = 0, cycling back to the first color.

function mousePressed() { ci = (ci + 1) % cols.length; }

๐Ÿ”ง Subcomponents:

calculation Color Index Update ci = (ci + 1) % cols.length

Increments the color index and wraps it back to 0 when it reaches the end of the color array

Line by Line:

ci = (ci + 1) % cols.length
Increases ci by 1 each click; the modulo operator (%) wraps it back to 0 after reaching the last color, creating a cycle through all colors

windowResized()

windowResized() is a special p5.js function that automatically runs whenever the browser window is resized. By calling resizeCanvas(), we ensure the sketch always fills the entire screen and remains responsive to window changes.

function windowResized() { resizeCanvas(windowWidth, windowHeight); }

๐Ÿ”ง Subcomponents:

function-call Canvas Resize resizeCanvas(windowWidth, windowHeight)

Adjusts the canvas size to match the new window dimensions when the user resizes their browser

Line by Line:

resizeCanvas(windowWidth, windowHeight)
Automatically resizes the p5.js canvas to fill the entire window whenever the window is resized

๐Ÿ“ฆ Key Variables

inp object

Stores the HTML input element that lets users type custom text for the neon sign

let inp; inp = createInput("NEON");
cols array

Stores an array of three neon color objects that cycle through when clicked

let cols = [color(255, 60, 200), color(0, 255, 255), color(0, 255, 120)];
ci number

Color index - tracks which color in the cols array is currently active (0, 1, or 2)

let ci = 0;

๐Ÿงช Try This!

Experiment with the code by making these changes:

  1. Change the default text from 'NEON' to your name: modify line 4 to inp = createInput("YOUR NAME")
  2. Add a fourth neon color to the array: add color(255, 255, 0) (yellow) as a fourth element in cols on line 5
  3. Make the glow effect stronger by increasing the loop count from 12 to 20 on line 12 (for (let i = 20; i > 0; i--))
  4. Slow down the pulsing animation by changing 0.05 to 0.02 on line 10 to make the glow pulse more slowly
  5. Change the brick background color by modifying the background() call on line 22 from (10, 10, 15) to (20, 0, 40) for a more purple tone
  6. Increase the text size by changing 0.18 to 0.25 on line 10 to make the neon text larger
Open in Editor & Experiment โ†’

๐Ÿ”ง Potential Improvements

Here are some ways this code could be enhanced:

BUG draw() line 9

The glow effect draws text from largest to smallest, but visually it would look more realistic if the brightest, smallest text was drawn last (on top)

๐Ÿ’ก Reverse the loop order: for (let i = 1; i <= 12; i++) and change the size calculation to (base + (12 - i) * 4) so the core text renders last

PERFORMANCE draw() lines 11-14

The text is drawn 12 times every frame (60 frames per second), which is 720 text renders per second - expensive for complex text

๐Ÿ’ก Consider reducing the loop count to 8 or using createGraphics() to cache the glow effect and only redraw when text changes

STYLE setup() line 5

The input field styling is minimal and doesn't clearly indicate it's interactive

๐Ÿ’ก Add placeholder text and improve CSS styling: inp.attribute('placeholder', 'Type your text...') and enhance input styling in CSS with better colors and focus states

FEATURE mousePressed()

Users must click to change colors, but there's no visual indication of how many colors are available or which one is active

๐Ÿ’ก Add color indicator dots or text showing 'Color 1/3' in the top-right corner to guide users

BUG drawBricks() line 23

The loop extends beyond the canvas (height + 40, width + 80) to prevent gaps, but this is inefficient and could cause issues on very large screens

๐Ÿ’ก Use a more precise calculation: for (let y = 0; y <= height; y += 40) and similar for x to avoid unnecessary off-screen rendering

Preview

AI Neon Sign - Type Your Own Glowing Text - p5.js creative coding sketch preview
Sketch Preview
Code flow diagram showing the structure of AI Neon Sign - Type Your Own Glowing Text - Code flow showing setup, draw, drawbricks, mousepressed, windowresized
Code Flow Diagram