
AI Stopwatch Timer - Clean Start/Stop Utility

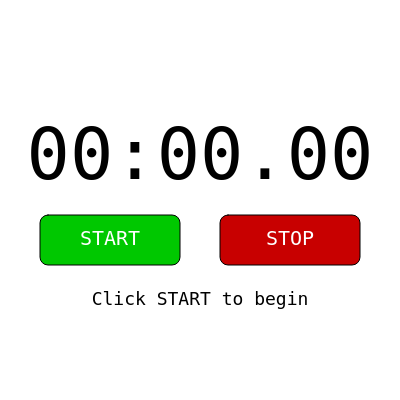
This sketch creates a fully functional digital stopwatch centered on the screen, showing minutes, seconds, and centiseconds in a large monospace font. A green START button and a red STOP button let you begin and pause the timer, with the elapsed time correctly resuming from where it left off.

🧪 Try This!

Experiment with the code by making these changes:

  1. Give the clock a dark theme — Swap the white background for black and the black digits for white to create a dark-mode stopwatch.
  2. Make the clock digits huge — Increasing textSize makes the time display dominate the screen even more.
  3. Recolor the START button — fill(0,200,0) sets green using RGB values - swap them for any other color instantly.
Prefer the full editor? Open it there →

📖 About This Sketch

This sketch builds a working digital stopwatch entirely inside a p5.js canvas, complete with a large monospace time readout and two clickable buttons drawn as rounded rectangles. What makes it worth studying is that it is a real, usable tool built from very few ingredients: a boolean flag to track running state, p5's built-in millis() clock, and simple math to convert milliseconds into minutes, seconds, and centiseconds. It also demonstrates how to detect mouse clicks inside custom-drawn shapes without any HTML buttons at all.

The code is organized around just four functions: setup() prepares the canvas and text settings once, draw() redraws the time and buttons 60 times per second, mousePressed() checks whether a click landed inside the START or STOP rectangle, and windowResized() keeps the canvas filling the browser window. By reading through it you'll learn how to fake a pause/resume feature with a single timestamp trick, and how to turn raw pixel coordinates into clickable UI regions.

⚙️ How It Works

  1. When the page loads, setup() creates a canvas that fills the window, centers all text alignment, and switches to a monospace font so the digits don't jitter as they change.
  2. Every frame, draw() clears the background, calculates the current elapsed time (either live, while running, or frozen, while stopped), and splits that time into minutes, seconds, and centiseconds to build the time string.
  3. draw() then renders the green START button and red STOP button as rounded rectangles at fixed positions, plus a helpful hint message the first time the page loads.
  4. When the mouse is pressed, mousePressed() checks the click coordinates against the pixel boundaries of each button rectangle.
  5. Clicking START (only possible while stopped) sets running to true and recalculates startTime so the clock resumes instead of resetting to zero.
  6. Clicking STOP (only possible while running) sets running to false and stores the current elapsed time so the display freezes exactly where it stopped.

🎓 Concepts You'll Learn

Animation loop (draw)Boolean state machine (running)Time functions (millis)Custom button hit-testingText formatting with nf()Responsive canvas resizing

📝 Code Breakdown

setup()

setup() runs exactly once when the sketch starts. It's the right place to configure canvas size and any settings (like fonts or alignment) that should apply for the whole sketch.

function setup() {
  createCanvas(windowWidth, windowHeight);
  textAlign(CENTER, CENTER);
  textFont('monospace');
}
Line-by-line explanation (3 lines)
createCanvas(windowWidth, windowHeight);
Creates a canvas that fills the entire browser window, so the stopwatch always uses the full available space.
textAlign(CENTER, CENTER);
Tells p5 to center text both horizontally and vertically around the x,y coordinates you give text(), which makes positioning the clock and button labels much easier.
textFont('monospace');
Switches to a monospace font so digits are all the same width - this prevents the clock display from jittering side to side as numbers change.
draw()

draw() runs continuously (about 60 times per second), which is why it constantly recalculates the time and redraws everything - this is the core animation loop pattern used in almost every p5.js sketch.

🔬 This block only shows the hint before the very first start (elapsed===0). What happens if you remove the `elapsed===0` part of the condition, leaving just `!running`? Would the hint reappear every time you press STOP?

  if(!running&&elapsed===0){
    fill(0);
    textSize(18);
    text("Click START to begin",width/2,y+60);
  }
function draw() {
  background(255);
  let t = running ? millis() - startTime : elapsed;
  let m=floor(t/60000),s=floor(t/1000)%60,cs=floor((t%1000)/10);
  textSize(72);
  fill(0);
  text(nf(m,2)+":"+nf(s,2)+"."+nf(cs,2), width/2, height/2-40);
  let bw=140,bh=50,y=height/2+40,off=90;
  rectMode(CENTER);
  fill(0,200,0);
  rect(width/2-off,y,bw,bh,8);
  fill(255);
  textSize(20);
  text("START",width/2-off,y);
  fill(200,0,0);
  rect(width/2+off,y,bw,bh,8);
  fill(255);
  text("STOP",width/2+off,y);
  if(!running&&elapsed===0){
    fill(0);
    textSize(18);
    text("Click START to begin",width/2,y+60);
  }
}
Line-by-line explanation (21 lines)

🔧 Subcomponents:

calculation Elapsed Time Conversion let m=floor(t/60000),s=floor(t/1000)%60,cs=floor((t%1000)/10);

Converts the raw millisecond count into minutes, seconds, and centiseconds for display

conditional First-Run Hint if(!running&&elapsed===0){

Shows a helper message only before the stopwatch has ever been started

background(255);
Repaints the whole canvas white every frame, erasing the previous frame's drawing so nothing smears or trails.
let t = running ? millis() - startTime : elapsed;
Figures out the current time to display: if the stopwatch is running, it's the live time since startTime; if stopped, it's the frozen elapsed value.
let m=floor(t/60000),s=floor(t/1000)%60,cs=floor((t%1000)/10);
Breaks the total milliseconds t into minutes (m), seconds (s, wrapped with %60), and centiseconds (cs, the leftover milliseconds divided down to two digits).
textSize(72);
Sets a large font size for the main clock readout so it's the focal point of the screen.
fill(0);
Sets the drawing color to black for the upcoming time text.
text(nf(m,2)+":"+nf(s,2)+"."+nf(cs,2), width/2, height/2-40);
Builds the 'MM:SS.CC' string using nf() to pad each number with a leading zero, then draws it centered above the middle of the screen.
let bw=140,bh=50,y=height/2+40,off=90;
Defines the width, height, vertical position, and horizontal offset shared by both buttons, so their layout is computed in one place.
rectMode(CENTER);
Changes how rect() interprets its x,y arguments - instead of the top-left corner, they now mean the center point, matching how the button positions are calculated.
fill(0,200,0);
Sets the fill color to green (using RGB values) for the START button.
rect(width/2-off,y,bw,bh,8);
Draws the START button as a rounded rectangle positioned to the left of center, with corner radius 8.
fill(255);
Switches fill color to white for the button label text.
textSize(20);
Shrinks the text size for button labels, which are smaller than the main clock.
text("START",width/2-off,y);
Draws the word 'START' centered on top of the green button.
fill(200,0,0);
Sets the fill color to red for the STOP button.
rect(width/2+off,y,bw,bh,8);
Draws the STOP button as a rounded rectangle positioned to the right of center.
fill(255);
Sets fill back to white for the STOP label.
text("STOP",width/2+off,y);
Draws the word 'STOP' centered on the red button.
if(!running&&elapsed===0){
Checks whether the stopwatch has never been started (not running, and no elapsed time recorded yet).
fill(0);
Sets text color to black for the hint message.
textSize(18);
Sets a small font size for the hint message so it doesn't compete with the clock or buttons.
text("Click START to begin",width/2,y+60);
Draws a friendly instruction below the buttons to guide first-time users.

mousePressed()

mousePressed() is a built-in p5.js event function that fires once every time the mouse button is clicked. Since this sketch has no real HTML buttons, it manually checks whether the click coordinates fall inside each drawn rectangle - a technique used constantly for custom canvas UI.

🔬 This condition requires !running before START can work. What happens if you delete the `!running&&` part - could clicking START while already running reset your elapsed time unexpectedly?

  if(!running&&mouseX>width/2-off-bw/2&&mouseX<width/2-off+bw/2&&
     mouseY>y-bh/2&&mouseY<y+bh/2){running=true;startTime=millis()-elapsed;}
function mousePressed() {
  let bw=140,bh=50,y=height/2+40,off=90;
  if(!running&&mouseX>width/2-off-bw/2&&mouseX<width/2-off+bw/2&&
     mouseY>y-bh/2&&mouseY<y+bh/2){running=true;startTime=millis()-elapsed;}
  if(running&&mouseX>width/2+off-bw/2&&mouseX<width/2+off+bw/2&&
     mouseY>y-bh/2&&mouseY<y+bh/2){running=false;elapsed=millis()-startTime;}
}
Line-by-line explanation (5 lines)

🔧 Subcomponents:

conditional START Button Hit Test if(!running&&mouseX>width/2-off-bw/2&&mouseX<width/2-off+bw/2&&

Detects a click inside the START button's rectangle while the stopwatch is stopped

conditional STOP Button Hit Test if(running&&mouseX>width/2+off-bw/2&&mouseX<width/2+off+bw/2&&

Detects a click inside the STOP button's rectangle while the stopwatch is running

let bw=140,bh=50,y=height/2+40,off=90;
Recreates the exact same button dimensions and positions used in draw(), so the clickable area matches what's on screen.
if(!running&&mouseX>width/2-off-bw/2&&mouseX<width/2-off+bw/2&&
Only checks the START button if the stopwatch is currently stopped, and tests whether the mouse's x position falls within the button's left and right edges.
mouseY>y-bh/2&&mouseY<y+bh/2){running=true;startTime=millis()-elapsed;}
Also checks the mouse's y position is within the button's top and bottom edges; if the full click lands inside the button, it starts the timer and sets startTime so it resumes from any previously accumulated elapsed time.
if(running&&mouseX>width/2+off-bw/2&&mouseX<width/2+off+bw/2&&
Only checks the STOP button while the stopwatch is running, testing the mouse's x position against the STOP button's horizontal edges.
mouseY>y-bh/2&&mouseY<y+bh/2){running=false;elapsed=millis()-startTime;}
Confirms the mouse's y position is inside the button too; if so, it pauses the stopwatch and saves the current elapsed time so the display freezes.

windowResized()

windowResized() is a p5.js callback that automatically fires whenever the browser window changes size, letting you keep the canvas responsive without any extra polling code.

function windowResized(){resizeCanvas(windowWidth,windowHeight);}
Line-by-line explanation (1 lines)
resizeCanvas(windowWidth,windowHeight);
Resizes the canvas to match the browser window's new width and height whenever the window is resized, keeping the stopwatch centered and full-screen.

📦 Key Variables

running boolean

Tracks whether the stopwatch is currently counting (true) or paused (false); this single flag drives both the time calculation and which button is clickable.

let running = false;
startTime number

Stores the millis() timestamp from when the stopwatch was last started, used to calculate how much time has passed since then.

let startTime = 0;
elapsed number

Stores the frozen total elapsed time (in milliseconds) whenever the stopwatch is stopped, so timing can resume correctly instead of resetting to zero.

let elapsed = 0;

🔧 Potential Improvements (4)

Here are some ways this code could be enhanced:

BUG mousePressed()

The sketch only listens for mouse clicks, so it won't respond to taps on touchscreen devices like phones or tablets.

💡 Add a touchStarted() function that runs the same hit-test logic (or simply calls mousePressed()) so the stopwatch works on mobile.

STYLE draw() and mousePressed()

The button geometry (bw, bh, y, off) is calculated identically in both draw() and mousePressed(). If one is changed without the other, the visible buttons and their clickable areas will no longer match.

💡 Define these as global constants (or a small helper function that returns the button rectangles) so both functions read from a single source of truth.

FEATURE sketch overall

There's no way to reset the stopwatch back to 00:00.00 once it has been stopped, other than reloading the page.

💡 Add a third 'RESET' button that sets elapsed = 0 and running = false, only enabled while the stopwatch is stopped.

STYLE draw()

Variable names like m, s, cs, t, bw, bh, and off are terse and make the code harder to read for beginners revisiting it later.

💡 Rename them to descriptive names such as minutes, seconds, centiseconds, buttonWidth, buttonHeight, and buttonOffset for clarity.

🔄 Code Flow

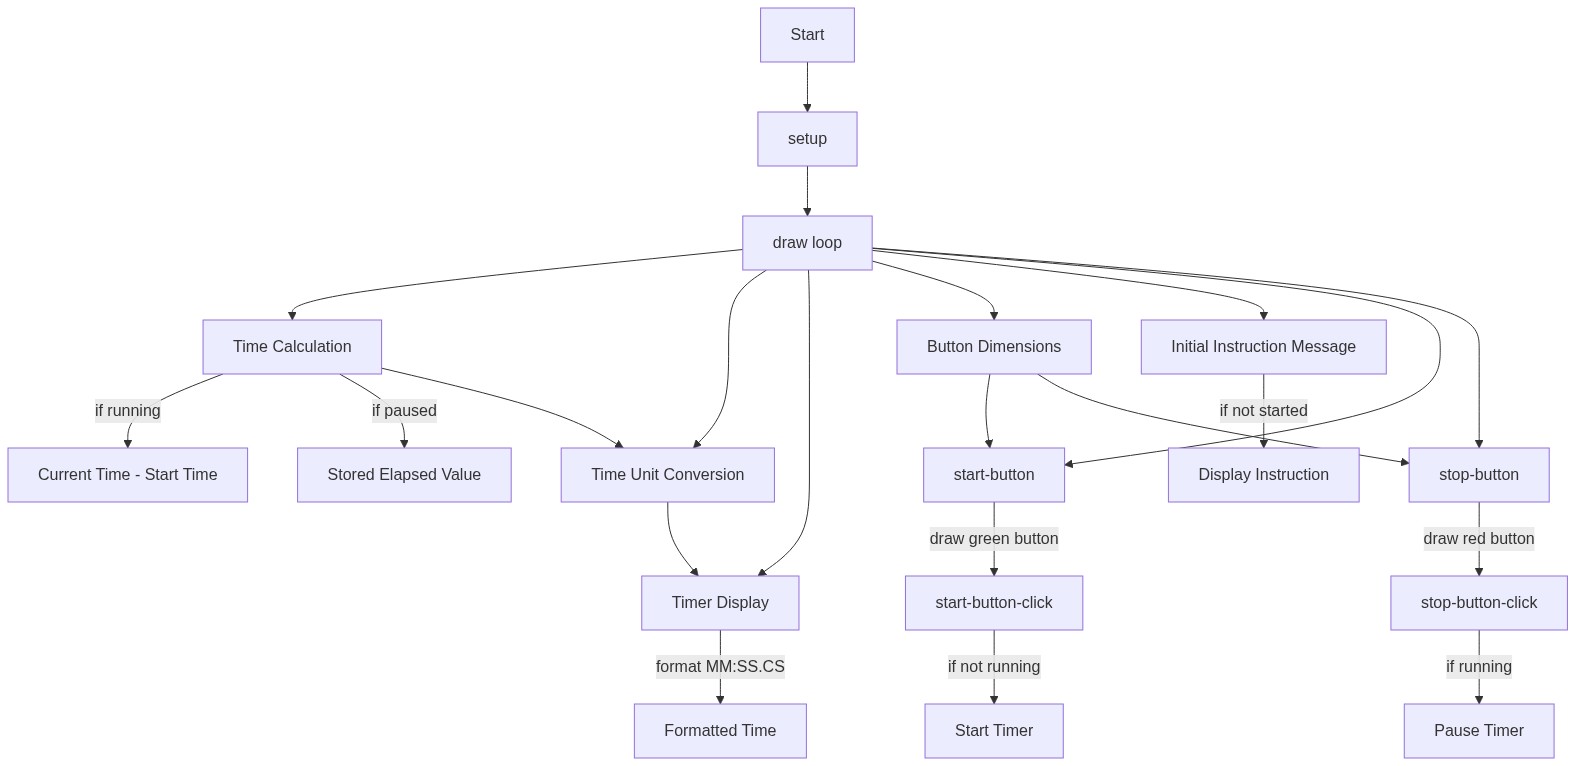
Code flow showing setup, draw, mousepressed, windowresized

💡 Click on function names in the diagram to jump to their code

graph TD start[Start] --> setup[setup] setup --> draw[draw loop] draw --> timecalc[Elapsed Time Conversion] draw --> hintconditional[First-Run Hint] draw --> starthittest[START Button Hit Test] draw --> stophittest[STOP Button Hit Test] timecalc --> draw hintconditional --> draw starthittest --> draw stophittest --> draw click setup href "#fn-setup" click draw href "#fn-draw" click timecalc href "#sub-time-calc" click hintconditional href "#sub-hint-conditional" click starthittest href "#sub-start-hit-test" click stophittest href "#sub-stop-hit-test"

❓ Frequently Asked Questions

What visual elements are included in the AI Stopwatch Timer sketch?

The sketch features a large digital display that shows minutes, seconds, and milliseconds, along with two buttons for starting and stopping the timer.

How can users interact with the AI Stopwatch Timer sketch?

Users can start the timer by clicking the green 'START' button and pause it with the red 'STOP' button.

What creative coding technique does this stopwatch sketch demonstrate?

This sketch demonstrates real-time rendering and user interaction through mouse events in p5.js.

Preview

AI Stopwatch Timer - Clean Start/Stop Utility - p5.js creative coding sketch preview
Sketch Preview
Code flow diagram showing the structure of AI Stopwatch Timer - Clean Start/Stop Utility - Code flow showing setup, draw, mousepressed, windowresized
Code Flow Diagram