
AI Watercolor Canvas - Paint with Soft Blending

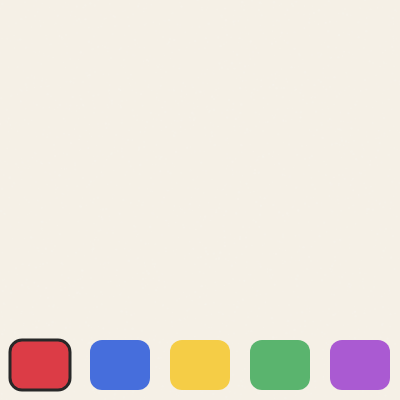
This sketch turns the browser window into a soft, meditative watercolor canvas where dragging the mouse lays down translucent, overlapping blobs of color that blend naturally with the paper and with each other. A speckled cream paper texture sits underneath, and a row of color-swatch buttons at the bottom lets you switch paint colors or clear the canvas with the C key.

🧪 Try This!

Experiment with the code by making these changes:

  1. Bigger, bolder brush strokes — Widening the radius range makes every blob bigger, so strokes look thicker and cover more area per drag.
  2. Add a sixth color — The palette array directly controls both the brush color and how many buttons are drawn, so adding one more color adds a new button automatically.
  3. Grainier paper texture — Tripling the speckle count in makePaper() makes the paper background noticeably more textured and grainy.
  4. Try a lighter blend mode — Swapping MULTIPLY for SCREEN changes strokes from darkening/soaking-in to glowing/lightening where they overlap the paper.
Prefer the full editor? Open it there →

📖 About This Sketch

This sketch recreates the feel of real watercolor painting in the browser: dragging the mouse deposits clusters of soft, semi-transparent circles that pool and blend together, sitting on top of a grainy cream-colored paper texture. The illusion of pigment soaking into paper comes from two p5.js techniques working together - offscreen graphics buffers created with createGraphics(), and blendMode(MULTIPLY), which darkens colors where they overlap instead of just painting over them. A palette of five colors is offered through simple on-screen buttons, and pressing C wipes the canvas clean.

The code is organized around two separate 'layers': a paper buffer that is drawn once and never changes, and a paint buffer that accumulates every brush stroke and can be cleared independently. Studying this sketch teaches you how to separate static background art from dynamic user-drawn content, how mouse coordinates map to random 'brush' shapes for an organic look, and how a single blend mode can transform flat colors into something that feels wet and layered.

⚙️ How It Works

  1. When the sketch loads, setup() creates a full-window canvas, defines five paint colors, generates the speckled paper texture once via makePaper(), and creates a second blank, transparent graphics layer (paintLayer) for strokes.
  2. Every frame, draw() stamps the paper texture onto the canvas, switches to MULTIPLY blend mode, stamps the paintLayer on top so any painted color darkens the paper realistically, then switches blending back to normal to draw the five color-swatch buttons along the bottom.
  3. Clicking or dragging the mouse anywhere above the button bar calls paint(), which draws six small random-sized, random-opacity circles clustered around the mouse position onto paintLayer - the randomness is what makes each stroke look organic instead of a perfect circle.
  4. Clicking within the button bar instead uses map() and constrain() to convert the mouse's x position into a color index, changing which color the next stroke will use.
  5. Pressing the C key calls paintLayer.clear(), instantly wiping all painted strokes while leaving the paper texture untouched, so you can start a fresh painting.
  6. If the browser window is resized, windowResized() rebuilds the canvas, regenerates the paper texture at the new size, and creates a fresh empty paint layer - which also means any in-progress painting is lost on resize.

🎓 Concepts You'll Learn

Offscreen graphics buffers (createGraphics)Blend modes (blendMode/MULTIPLY)Random-based organic shapesLayered renderingColor objects and channel extraction (red/green/blue)map() and constrain() for UI hit-testingMouse and keyboard event handlersResponsive canvas resizing

📝 Code Breakdown

setup()

setup() runs once when the sketch starts. It's the ideal place to build offscreen buffers with createGraphics() that will be reused every frame instead of being recreated.

function setup(){
  createCanvas(windowWidth,windowHeight);
  cols=[color(220,60,70),color(70,110,220),color(245,205,70),color(90,180,110),color(170,90,210)];
  makePaper();
  paintLayer=createGraphics(width,height);paintLayer.clear();
}
Line-by-line explanation (4 lines)
createCanvas(windowWidth,windowHeight);
Creates a canvas that fills the entire browser window, so the painting area always matches the screen size.
cols=[color(220,60,70),color(70,110,220),color(245,205,70),color(90,180,110),color(170,90,210)];
Builds the array of five p5.Color objects used both for the brush and for the palette buttons - a reddish, a blue, a yellow, a green, and a purple.
makePaper();
Calls the helper function that renders the speckled cream paper texture into its own offscreen buffer.
paintLayer=createGraphics(width,height);paintLayer.clear();
Creates a second offscreen buffer the same size as the canvas, dedicated to holding painted strokes, and clears it so it starts fully transparent.
makePaper()

This function shows how to bake a complex, randomized texture into an offscreen buffer just once, instead of recalculating thousands of ellipses every single frame - a key performance technique.

🔬 This loop draws 4000 tiny speckles to build the paper texture. What happens visually if you drop the count to 200? What if you push it to 20000?

for(let i=0;i<4000;i++){
    let s=random(1,3);
    paper.fill(255,255,255,random(10,25));
    paper.ellipse(random(width),random(height),s,s);
  }
function makePaper(){
  paper=createGraphics(width,height);
  paper.background(245,240,230);paper.noStroke();
  for(let i=0;i<4000;i++){
    let s=random(1,3);
    paper.fill(255,255,255,random(10,25));
    paper.ellipse(random(width),random(height),s,s);
  }
}
Line-by-line explanation (5 lines)

🔧 Subcomponents:

for-loop Speckle Generator Loop for(let i=0;i<4000;i++){

Repeats 4000 times to scatter tiny translucent white dots across the paper buffer, building up a grainy texture.

paper=createGraphics(width,height);
Creates a brand-new offscreen graphics buffer the same size as the canvas to hold the static paper texture.
paper.background(245,240,230);paper.noStroke();
Fills the buffer with a warm cream color like real watercolor paper, and disables outlines for the speckles that follow.
let s=random(1,3);
Picks a random tiny diameter (between 1 and 3 pixels) for each speckle so they vary slightly in size.
paper.fill(255,255,255,random(10,25));
Sets the speckle color to white with a very low, randomized transparency, so each dot is barely visible - together they create subtle texture instead of obvious spots.
paper.ellipse(random(width),random(height),s,s);
Draws the speckle at a completely random position on the canvas.

draw()

draw() runs continuously and is where layering happens: static background, dynamic paint layer with special blending, then UI on top with normal blending. This pattern of 'reset blend mode after using it' is essential to avoid accidentally blending your UI elements too.

🔬 The '12' here is the corner radius of each button. What happens if you change it to 0 (sharp corners) or to something huge like 40 (almost circular buttons)?

fill(cols[i]);rect(x,y,w-20,btnH-20,12);
    if(i===cur){noFill();stroke(40);strokeWeight(3);rect(x,y,w-20,btnH-20,12);noStroke();}
function draw(){
  image(paper,0,0);blendMode(MULTIPLY);image(paintLayer,0,0);blendMode(BLEND);
  let w=width/cols.length;noStroke();
  for(let i=0;i<cols.length;i++){
    let x=i*w+10,y=height-btnH+10;
    fill(cols[i]);rect(x,y,w-20,btnH-20,12);
    if(i===cur){noFill();stroke(40);strokeWeight(3);rect(x,y,w-20,btnH-20,12);noStroke();}
  }
}
Line-by-line explanation (5 lines)

🔧 Subcomponents:

for-loop Color Button Row for(let i=0;i<cols.length;i++){

Draws one rectangular button per palette color along the bottom of the screen.

conditional Selected Color Outline if(i===cur){noFill();stroke(40);strokeWeight(3);rect(x,y,w-20,btnH-20,12);noStroke();}

Draws a dark outline around whichever button matches the currently selected color.

image(paper,0,0);blendMode(MULTIPLY);image(paintLayer,0,0);blendMode(BLEND);
Draws the static paper texture first, switches to MULTIPLY blending so the next image darkens where it overlaps the paper, draws the accumulated paint strokes with that blending, then resets blending back to normal for the UI.
let w=width/cols.length;noStroke();
Calculates an equal width for each color button by dividing the canvas width by the number of colors, and turns off shape outlines.
let x=i*w+10,y=height-btnH+10;
Positions each button with a small 10px inset from its slot and from the top of the toolbar area.
fill(cols[i]);rect(x,y,w-20,btnH-20,12);
Fills with the i-th palette color and draws a rounded rectangle button (12px corner radius).
if(i===cur){noFill();stroke(40);strokeWeight(3);rect(x,y,w-20,btnH-20,12);noStroke();}
If this button is the currently selected color, draws a dark 3px-thick outline over it to show which one is active.

paint()

paint() is the heart of the watercolor illusion - it never draws a single hard-edged shape, but instead layers multiple randomized, semi-transparent circles so strokes look soft and organic rather than mechanical.

🔬 The alpha value 'a' controls how transparent each blob is. What happens if you narrow the range random(30,80) down to random(150,200) - do strokes look more solid or more watery?

let r=random(30,60),a=random(30,80);
    paintLayer.noStroke();
    paintLayer.fill(red(c),green(c),blue(c),a);
    paintLayer.ellipse(mouseX+random(-10,10),mouseY+random(-10,10),r,r);
function paint(){
  if(mouseY>height-btnH)return;
  let c=cols[cur];
  for(let i=0;i<6;i++){
    let r=random(30,60),a=random(30,80);
    paintLayer.noStroke();
    paintLayer.fill(red(c),green(c),blue(c),a);
    paintLayer.ellipse(mouseX+random(-10,10),mouseY+random(-10,10),r,r);
  }
}
Line-by-line explanation (5 lines)

🔧 Subcomponents:

for-loop Brush Blob Loop for(let i=0;i<6;i++){

Draws 6 randomly-sized, randomly-transparent circles clustered near the mouse to fake a soft, organic brush stroke.

if(mouseY>height-btnH)return;
Immediately exits the function if the mouse is over the button bar, so you don't accidentally paint while picking a color.
let c=cols[cur];
Grabs the currently selected color object to paint with.
let r=random(30,60),a=random(30,80);
Picks a random radius and a random opacity for this particular blob, which is what gives each stroke its organic, uneven texture.
paintLayer.fill(red(c),green(c),blue(c),a);
Extracts the red, green, and blue channels from the selected color object using red()/green()/blue(), but pairs them with the random alpha instead of the color's original opacity.
paintLayer.ellipse(mouseX+random(-10,10),mouseY+random(-10,10),r,r);
Draws the blob near the mouse position but nudged by a small random offset, so six blobs per call don't stack in a perfect line but form a cluster.

mousePressed()

This function shows a classic pattern for turning a continuous mouse coordinate into a discrete UI selection using map(), floor(), and constrain() together.

function mousePressed(){
  if(mouseY>height-btnH){
    cur=constrain(floor(map(mouseX,0,width,0,cols.length)),0,cols.length-1);
  }else paint();
}
Line-by-line explanation (3 lines)

🔧 Subcomponents:

conditional Button Bar Check if(mouseY>height-btnH){

Decides whether the click landed in the color-picker bar or on the painting area.

if(mouseY>height-btnH){
Checks if the mouse's vertical position is inside the bottom toolbar strip.
cur=constrain(floor(map(mouseX,0,width,0,cols.length)),0,cols.length-1);
map() converts the mouse's x position (0 to width) into a fractional index (0 to number of colors), floor() rounds it down to a whole button index, and constrain() clamps it so it can never point outside the array - this becomes the new selected color.
}else paint();
If the click wasn't on the toolbar, it must be on the canvas, so start painting a stroke right away at that spot.

mouseDragged()

mouseDragged() fires on every frame the mouse moves while pressed, which is what turns individual paint() calls into a smooth, continuous brush stroke as you drag across the canvas.

function mouseDragged(){paint();}
Line-by-line explanation (1 lines)
function mouseDragged(){paint();}
p5.js automatically calls mouseDragged() repeatedly while the mouse button is held down and moving, so this simply calls paint() every time, creating a continuous stroke as you drag.

keyPressed()

keyPressed() is called automatically whenever any key is pressed, and the built-in 'key' variable tells you exactly which character was typed.

function keyPressed(){if(key==='c'||key==='C')paintLayer.clear();}
Line-by-line explanation (1 lines)

🔧 Subcomponents:

conditional Clear Key Check if(key==='c'||key==='C')paintLayer.clear();

Checks for either lowercase or uppercase C and clears the paint layer if pressed.

if(key==='c'||key==='C')paintLayer.clear();
Checks whether the pressed key was 'c' or 'C' (covering both Caps Lock states) and, if so, clears every painted stroke from paintLayer while leaving the paper texture untouched underneath.

windowResized()

windowResized() is a built-in p5.js callback that fires automatically whenever the browser window changes size, letting you keep the canvas and any dependent buffers in sync with the new dimensions.

function windowResized(){
  resizeCanvas(windowWidth,windowHeight);
  makePaper();paintLayer=createGraphics(width,height);paintLayer.clear();
}
Line-by-line explanation (3 lines)
resizeCanvas(windowWidth,windowHeight);
Resizes the actual canvas element to match the new browser window dimensions.
makePaper();
Regenerates the paper texture at the new size, since the old texture buffer no longer matches the canvas dimensions.
paintLayer=createGraphics(width,height);paintLayer.clear();
Creates a brand-new, correctly-sized paint layer and clears it - note this means any painted strokes are lost when the window is resized.

📦 Key Variables

cols array

Stores the five p5.Color objects that make up the paint palette, used both for brush color and button rendering.

cols=[color(220,60,70),color(70,110,220),color(245,205,70),color(90,180,110),color(170,90,210)];
cur number

Index into the cols array indicating which color is currently selected for painting.

let cur=0;
paper object

A p5.Graphics offscreen buffer holding the static, speckled cream paper texture drawn once at startup.

let paper;
paintLayer object

A p5.Graphics offscreen buffer that accumulates every painted stroke; drawn with MULTIPLY blending over the paper and cleared when the user presses C.

let paintLayer;
btnH number

Height in pixels reserved at the bottom of the canvas for the row of color-swatch buttons.

let btnH=70;

🔧 Potential Improvements (4)

Here are some ways this code could be enhanced:

BUG windowResized()

Resizing the browser window completely destroys the current painting because paintLayer is recreated and cleared, and makePaper() also regenerates a brand-new random texture.

💡 Before recreating paintLayer, draw the old buffer onto the new one at the same relative position (e.g. newLayer.image(oldLayer,0,0)) so painted work survives a resize, and consider caching the paper texture instead of regenerating it randomly each time.

PERFORMANCE makePaper()

Drawing 4000 ellipses runs synchronously every time the canvas is created or resized, which can cause a visible freeze on window resize, especially on large or high-DPI screens.

💡 Reduce the speckle count on very large canvases (scale count by area) or generate the texture at a smaller resolution and scale it up with image() to avoid a resize-time stutter.

STYLE whole file

Many magic numbers (4000, 6, 30-60, 10-80, btnH=70, 12px corner radius) are inlined directly in the code, making them hard to find and tune.

💡 Pull these into named constants near the top of the file (e.g. const PAPER_SPECKLES = 4000; const BLOBS_PER_STROKE = 6;) so they're easier to discover and adjust.

FEATURE mousePressed()/mouseDragged()

The sketch only listens for mouse events, so it won't respond to touch input on phones or tablets even though the canvas is full-window and looks touch-friendly.

💡 Add touchStarted() and touchMoved() handlers that call the same paint()/button-selection logic as their mouse counterparts, and return false from them to prevent default scrolling.

🔄 Code Flow

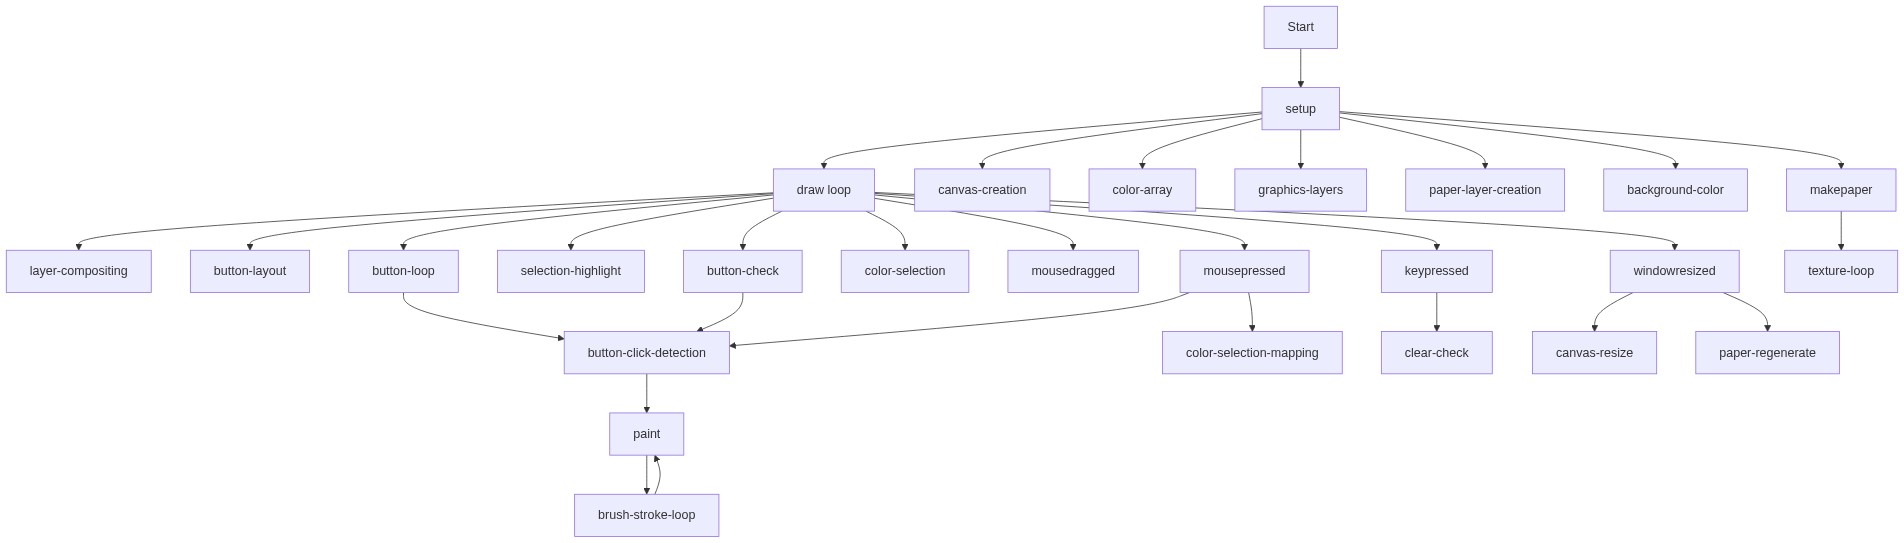
Code flow showing setup, makepaper, draw, paint, mousepressed, mousedragged, keypressed, windowresized

💡 Click on function names in the diagram to jump to their code

graph TD start[Start] --> setup[setup] setup --> makepaper[makepaper] setup --> draw[draw loop] draw --> static[Static Background] draw --> paintlayer[Dynamic Paint Layer] draw --> ui[UI Layer] paintlayer --> blobloop[blob-loop] blobloop --> paint paint --> paintlayer draw --> buttonloop[button-loop] buttonloop --> selectedhighlight[selected-highlight] buttonloop --> ui draw --> buttonhittest[button-hit-test] buttonhittest --> paintlayer draw --> clearcheck[clear-check] clearcheck --> paintlayer click setup href "#fn-setup" click makepaper href "#fn-makepaper" click draw href "#fn-draw" click paint href "#fn-paint" click buttonloop href "#sub-button-loop" click selectedhighlight href "#sub-selected-highlight" click blobloop href "#sub-blob-loop" click buttonhittest href "#sub-button-hit-test" click clearcheck href "#sub-clear-check"

❓ Frequently Asked Questions

What visual experience does the AI Watercolor Canvas sketch provide?

The sketch creates a meditative watercolor painting effect with soft, blending strokes on a cream paper background, allowing users to generate beautiful, layered artwork.

How can users interact with the AI Watercolor Canvas sketch?

Users can click and drag to paint, select colors from buttons below the canvas, and press 'C' to clear the canvas and start fresh.

What creative coding techniques are showcased in the AI Watercolor Canvas sketch?

This sketch demonstrates blending modes and the use of graphics layers to simulate watercolor effects and soft, natural color transitions.

Preview

AI Watercolor Canvas - Paint with Soft Blending - p5.js creative coding sketch preview
Sketch Preview
Code flow diagram showing the structure of AI Watercolor Canvas - Paint with Soft Blending - Code flow showing setup, makepaper, draw, paint, mousepressed, mousedragged, keypressed, windowresized
Code Flow Diagram