
Animated Circle - xelsed.ai

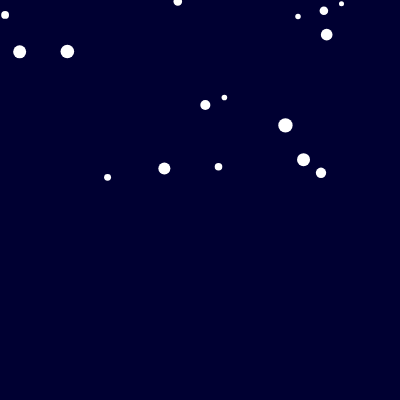
This sketch fills a night-sky canvas with softly drifting circular snowflakes that fall from the top of the screen and pile up realistically at the bottom, building white mounds that grow taller wherever more snow lands. It combines simple particle animation with a clever height-map trick to simulate accumulating snow without any physics engine.

🧪 Try This!

Experiment with the code by making these changes:

  1. Heavier snowstorm — Raising the spawn probability makes many more snowflakes fall at once for a blizzard effect.
  2. Chunkier snowflakes — Widening the size range creates bigger, more visible flakes mixed in with the small ones.
  3. Brighter winter sky — Adjusting the background color changes the mood of the night sky behind the falling snow.
Prefer the full editor? Open it there →

📖 About This Sketch

This sketch creates a cozy falling-snow scene: circular snowflakes spawn at random intervals near the top of a dark blue canvas, drift downward with a gentle side-to-side sway, and settle into a growing white pile along the bottom edge. It's a great example of an object-oriented particle system in p5.js, using a custom Snowflake class, an array that tracks and removes particles each frame, and the sin() function to fake natural wind-like motion.

The code is split into the standard setup()/draw() pair plus a windowResized() handler and a Snowflake class with constructor(), fall(), and show() methods. Studying it teaches you how to manage a growing-and-shrinking array of objects safely (by looping backward and using splice), how to convert continuous positions into discrete array 'buckets' to build a height-map (the snow pile), and how a single sine wave can add lifelike drift to otherwise straight-line motion.

⚙️ How It Works

  1. When the sketch loads, setup() creates a full-window canvas, builds an array of zeros (snowPileHeights) representing the snow depth across evenly spaced horizontal segments, and locks the frame rate to 30fps.
  2. Every frame, draw() paints a dark blue sky, then has a small random chance of spawning a brand-new Snowflake object into the snowflakes array.
  3. The code then loops backward through every snowflake, calling fall() to move it downward and sideways, and show() to draw it as a white circle.
  4. For each flake, its x position is converted into an index into snowPileHeights to check whether it has reached the current snow height at that horizontal spot; if so, its size is added to that segment's pile height and the flake is deleted from the array.
  5. Flakes that drift entirely off the sides or bottom without landing are also deleted, keeping the snowflakes array from growing forever.
  6. Finally, draw() renders the snowPileHeights array as a row of white rectangles along the bottom, and if the browser window is resized, windowResized() rebuilds the canvas and resets both the pile and all snowflakes for a fresh start.

🎓 Concepts You'll Learn

Particle systemsES6 classesArray management with splice()Sine wave motionHeight-map accumulationBackward for-loops for safe removal

📝 Code Breakdown

setup()

setup() runs once when the sketch starts. It's the right place to size the canvas and initialize data structures - here, the snowPileHeights array is prepared before any snow can fall.

function setup() {
  createCanvas(windowWidth, windowHeight);
  // Initialize snow pile heights. Each element corresponds to a segment of the canvas width.
  // All segments start at 0 height.
  snowPileHeights = Array(floor(width / pileResolution)).fill(0);
  frameRate(30); // Set a stable frame rate for consistent animation
}
Line-by-line explanation (3 lines)
createCanvas(windowWidth, windowHeight);
Creates a canvas that fills the entire browser window, using p5's built-in windowWidth and windowHeight variables.
snowPileHeights = Array(floor(width / pileResolution)).fill(0);
Builds an array with one slot per horizontal segment of the canvas (width divided by pileResolution), and fills every slot with 0 - meaning no snow has piled up yet anywhere.
frameRate(30); // Set a stable frame rate for consistent animation
Locks draw() to run 30 times per second so the animation speed stays consistent across different computers.
draw()

draw() is the animation heartbeat of the sketch, running every frame to spawn, move, draw, and clean up snowflakes while continuously updating and rendering the accumulating snow pile.

🔬 This loop counts DOWN from the end of the array so splice() doesn't break the iteration. What do you think would happen visually (or with errors) if you changed it to count UP with 'for (let i = 0; i < snowflakes.length; i++)' while still using splice() below?

  for (let i = snowflakes.length - 1; i >= 0; i--) {
    let flake = snowflakes[i];
    flake.fall(); // Make the snowflake fall and drift
    flake.show(); // Display the snowflake

🔬 Right now each landed flake adds half its size to the pile. What happens if you change 0.5 to 1 so the full size is added, or to 0.1 for a much slower-growing pile?

        // Snowflake has hit the pile
        // Add its size (or a fraction of it) to the snow pile height at this segment
        // Scaling by 0.5 makes the pile grow slower and smoother
        snowPileHeights[pileIndex] += flake.size * 0.5;
function draw() {
  background(0, 0, 50); // Dark blue night sky

  // Generate new snowflakes randomly
  // Adjust the random() threshold (e.g., 0.2) to control the density of snowflakes
  if (random(1) < 0.2) {
    snowflakes.push(new Snowflake());
  }

  // Update, display, and manage snowflakes
  // Loop backward to safely remove snowflakes from the array without affecting iteration
  for (let i = snowflakes.length - 1; i >= 0; i--) {
    let flake = snowflakes[i];
    flake.fall(); // Make the snowflake fall and drift
    flake.show(); // Display the snowflake

    // Calculate the horizontal index for the snow pile based on snowflake's x position
    let pileIndex = floor(flake.x / pileResolution);

    // Check if the snowflake has hit the bottom or the existing snow pile
    if (pileIndex >= 0 && pileIndex < snowPileHeights.length) { // Ensure pileIndex is within bounds
      if (flake.y >= height - snowPileHeights[pileIndex]) {
        // Snowflake has hit the pile
        // Add its size (or a fraction of it) to the snow pile height at this segment
        // Scaling by 0.5 makes the pile grow slower and smoother
        snowPileHeights[pileIndex] += flake.size * 0.5;

        // Cap the snow pile height so it doesn't exceed the canvas height
        if (snowPileHeights[pileIndex] > height) {
          snowPileHeights[pileIndex] = height;
        }

        snowflakes.splice(i, 1); // Remove the snowflake from the array
      }
    } else if (flake.y > height + flake.size || flake.x < -flake.size || flake.x > width + flake.size) {
      // If the snowflake flew off the bottom or sides of the canvas without hitting the pile
      snowflakes.splice(i, 1); // Remove it
    }
  }

  // Draw the snow pile at the bottom of the canvas
  fill(255); // White color for the snow
  noStroke(); // No outline for the snow pile segments
  for (let i = 0; i < snowPileHeights.length; i++) {
    let h = snowPileHeights[i]; // Get the height of the snow at this segment
    // Draw a rectangle for each segment of the snow pile
    rect(i * pileResolution, height - h, pileResolution, h);
  }
}
Line-by-line explanation (10 lines)

🔧 Subcomponents:

conditional Random Snowflake Spawn if (random(1) < 0.2) {

Rolls a random number each frame; roughly 20% of the time a brand new Snowflake object is created and pushed into the array.

for-loop Backward Snowflake Update Loop for (let i = snowflakes.length - 1; i >= 0; i--) {

Walks through every active snowflake from the end of the array to the start, so removing an item with splice() doesn't skip the next one.

conditional Pile Index Bounds Check if (pileIndex >= 0 && pileIndex < snowPileHeights.length) {

Makes sure the calculated pile segment index is a valid array position before reading or writing to it.

conditional Has The Flake Landed? if (flake.y >= height - snowPileHeights[pileIndex]) {

Compares the flake's vertical position against the current snow height at its horizontal segment to detect a landing.

conditional Cap Pile Height if (snowPileHeights[pileIndex] > height) {

Prevents a segment's snow pile from growing taller than the canvas itself.

conditional Remove Off-Screen Flakes } else if (flake.y > height + flake.size || flake.x < -flake.size || flake.x > width + flake.size) {

Cleans up any snowflake that drifts past the canvas edges without ever landing on the pile, keeping the array from growing forever.

for-loop Draw Snow Pile Segments for (let i = 0; i < snowPileHeights.length; i++) {

Loops through every stored pile height and draws a white rectangle for that segment, building up the snow mound visual.

background(0, 0, 50); // Dark blue night sky
Repaints the whole canvas dark blue every frame, erasing the previous frame so old snowflake positions disappear.
if (random(1) < 0.2) { snowflakes.push(new Snowflake()); }
Generates a random decimal between 0 and 1, and about 20% of the time creates a new Snowflake object and adds it to the snowflakes array.
for (let i = snowflakes.length - 1; i >= 0; i--) {
Iterates backward through the snowflakes array so that removing items mid-loop with splice() doesn't cause any snowflake to be skipped.
flake.fall(); flake.show();
Calls the flake's own methods to update its position and then draw it on screen this frame.
let pileIndex = floor(flake.x / pileResolution);
Converts the flake's continuous x position into a whole-number index that matches a segment in the snowPileHeights array.
if (flake.y >= height - snowPileHeights[pileIndex]) {
Checks if the flake has reached the top of the snow already piled up in its column - since taller piles push the 'landing line' higher up the screen.
snowPileHeights[pileIndex] += flake.size * 0.5;
Adds half of the flake's size to that column's pile height, making the snow mound grow a little every time a flake lands there.
if (snowPileHeights[pileIndex] > height) { snowPileHeights[pileIndex] = height; }
Clamps the pile height so it can never exceed the canvas height, avoiding snow that grows off-screen.
snowflakes.splice(i, 1);
Removes the snowflake from the array once it has landed (or flown off-screen), since it no longer needs to be tracked or drawn.
for (let i = 0; i < snowPileHeights.length; i++) { let h = snowPileHeights[i]; rect(i * pileResolution, height - h, pileResolution, h); }
Draws one white rectangle per pile segment, positioned so its top edge sits at 'height - h', creating the jagged snow mound silhouette across the bottom of the canvas.

windowResized()

windowResized() is a special p5.js function that fires automatically on browser resize, letting you keep responsive sketches in sync with the viewport - here it also resets the simulation state so nothing looks broken at the new size.

function windowResized() {
  resizeCanvas(windowWidth, windowHeight);
  // Recalculate snow pile properties based on the new canvas width
  pileResolution = width / 10; // Maintain the same resolution
  snowPileHeights = Array(floor(width / pileResolution)).fill(0);
  snowflakes = []; // Clear all snowflakes when the window is resized for a fresh start
}
Line-by-line explanation (4 lines)
resizeCanvas(windowWidth, windowHeight);
Called automatically by p5.js whenever the browser window changes size; this resizes the canvas to match the new window dimensions.
pileResolution = width / 10; // Maintain the same resolution
Recalculates the pile segment width based on the new canvas width, keeping roughly 10 segments across the screen.
snowPileHeights = Array(floor(width / pileResolution)).fill(0);
Rebuilds the pile height array from scratch at the new size, resetting all accumulated snow to zero.
snowflakes = []; // Clear all snowflakes when the window is resized for a fresh start
Empties the snowflakes array so the scene restarts cleanly rather than having flakes positioned incorrectly for the new canvas size.

Snowflake() constructor

The constructor runs once whenever 'new Snowflake()' is called, setting up each flake's unique starting properties - this randomness is what makes every snowflake look and move slightly differently.

class Snowflake {
  constructor() {
    // Start snowflakes randomly across the width and slightly above the canvas
    this.x = random(width);
    this.y = random(-100, 0);
    // Random size between 5 and 15 pixels
    this.size = random(5, 15);
    // Random falling speed between 1 and 3 pixels per frame
    this.speed = random(1, 3);
    // Random offset for the sin() function to create varied horizontal swaying
    this.driftOffset = random(100);
  }
}
Line-by-line explanation (5 lines)
this.x = random(width);
Picks a random horizontal starting position anywhere across the canvas width.
this.y = random(-100, 0);
Starts the flake slightly above the visible canvas (between -100 and 0) so it fades into view instead of popping in at the top edge.
this.size = random(5, 15);
Gives each flake a random diameter between 5 and 15 pixels, so snowflakes appear in varied sizes.
this.speed = random(1, 3);
Assigns a random fall speed between 1 and 3 pixels per frame, so some flakes fall faster than others.
this.driftOffset = random(100);
Stores a random offset used later in the sin() calculation so every flake sways at a slightly different phase instead of all moving in perfect unison.

fall()

fall() is called once per frame per snowflake and demonstrates a common creative-coding trick: using sin() with a per-object phase offset to make many objects move in a similar but not identical wavy pattern.

🔬 The 0.05 controls how quickly the sway oscillates. What happens visually if you raise it to 0.2 - do the flakes swing faster or slower?

    this.y += this.speed;
    // Add slight horizontal drift using sin() for gentle swaying
    // The frequency (0.05) and amplitude (1) can be adjusted for different drift effects
    this.x += sin((frameCount + this.driftOffset) * 0.05) * 1;
  fall() {
    // Update vertical position based on speed
    this.y += this.speed;
    // Add slight horizontal drift using sin() for gentle swaying
    // The frequency (0.05) and amplitude (1) can be adjusted for different drift effects
    this.x += sin((frameCount + this.driftOffset) * 0.05) * 1;
  }
Line-by-line explanation (2 lines)
this.y += this.speed;
Moves the flake straight down each frame by its personal speed value.
this.x += sin((frameCount + this.driftOffset) * 0.05) * 1;
Uses the sin() wave, driven by the ever-increasing frameCount plus the flake's unique driftOffset, to nudge the flake left and right smoothly - the 0.05 controls how fast it sways and the final *1 controls how far.

show()

show() is the drawing counterpart to fall() - separating movement logic (fall) from rendering logic (show) is a common and readable pattern in p5.js particle classes.

  show() {
    noStroke(); // No outline for snowflakes
    fill(255); // White color for snowflakes
    circle(this.x, this.y, this.size); // Draw the snowflake as a circle
  }
Line-by-line explanation (3 lines)
noStroke();
Removes any outline so the snowflake is drawn as a clean, solid circle.
fill(255);
Sets the fill color to pure white for the snowflake shape.
circle(this.x, this.y, this.size);
Draws a circle at the flake's current x,y position using its randomly assigned size as the diameter.

📦 Key Variables

snowflakes array

Holds every currently active Snowflake object on screen; grows as new flakes spawn and shrinks as flakes land or leave the canvas.

let snowflakes = [];
snowPileHeights array

Stores the accumulated snow height for each horizontal segment of the canvas, acting as a simple height-map for the growing snow pile.

let snowPileHeights = [];
pileResolution number

Defines how many pixels wide each snow pile segment is, controlling the resolution/smoothness of the pile's rectangles.

let pileResolution = 10;

🔧 Potential Improvements (4)

Here are some ways this code could be enhanced:

BUG windowResized()

pileResolution is recalculated as width / 10, which makes segment width scale with the window's total pixel width - on a large 4K monitor this could make each segment hundreds of pixels wide, producing a blocky, unrealistic pile, while the original setup() used a fixed 10px resolution.

💡 Keep pileResolution as a fixed constant (e.g. always 10) in windowResized() too, rather than recalculating it from width, so the pile visual quality stays consistent across screen sizes.

BUG draw() landing check

The landing check 'flake.y >= height - snowPileHeights[pileIndex]' compares the flake's center point, not its bottom edge, so larger flakes visually sink partway into the pile before being detected as landed.

💡 Compare using 'flake.y + flake.size / 2 >= height - snowPileHeights[pileIndex]' to account for the flake's radius for a more accurate landing point.

STYLE Snowflake class and draw()

Several magic numbers (0.2 spawn chance, 0.5 pile growth scale, 5-15 size range, 1-3 speed range) are hardcoded inline, making them harder to find and tune.

💡 Extract these into named constants at the top of the file (e.g. const SPAWN_CHANCE = 0.2;) so they're easier to locate and adjust without hunting through the code.

FEATURE draw() / snow pile system

Once snow piles up, it stays forever and only resets on window resize, which can eventually fill the whole bottom of the canvas with no way to melt or clear it.

💡 Add a slow decay to each snowPileHeights[i] over time (e.g. subtract a tiny amount every frame) to simulate gradual melting and keep the scene dynamic over long viewing sessions.

🔄 Code Flow

Code flow showing setup, draw, windowresized, snowflake, fall, show

💡 Click on function names in the diagram to jump to their code

graph TD start[Start] --> setup[setup] setup --> draw[draw loop] draw --> spawn-snowflake[Random Snowflake Spawn] spawn-snowflake -->|20% chance| snowflake[snowflake] snowflake -->|new instance| draw draw --> update-loop[Backward Snowflake Update Loop] update-loop --> pile-bounds-check[Pile Index Bounds Check] pile-bounds-check --> landed-check[Has The Flake Landed?] landed-check -->|yes| height-cap[Cap Pile Height] height-cap -->|update height| draw landed-check -->|no| offscreen-removal[Remove Off-Screen Flakes] offscreen-removal -->|clean up| draw draw --> draw-pile-loop[Draw Snow Pile Segments] draw-pile-loop -->|draw rectangles| draw click setup href "#fn-setup" click draw href "#fn-draw" click snowflake href "#fn-snowflake" click spawn-snowflake href "#sub-spawn-snowflake" click update-loop href "#sub-update-loop" click pile-bounds-check href "#sub-pile-bounds-check" click landed-check href "#sub-landed-check" click height-cap href "#sub-height-cap" click offscreen-removal href "#sub-offscreen-removal" click draw-pile-loop href "#sub-draw-pile-loop"

❓ Frequently Asked Questions

What visual effects can I expect from the Animated Circle - XeLseDai sketch?

This sketch creates a visually captivating scene of falling snowflakes that gradually accumulate at the bottom of the canvas, set against a dark blue night sky.

Is there any way for users to interact with the Animated Circle - XeLseDai sketch?

The sketch is not designed for user interaction; it runs autonomously, showcasing a continuous snowfall animation.

What creative coding techniques are demonstrated in the Animated Circle - XeLseDai sketch?

The sketch illustrates the use of object-oriented programming to create snowflake objects, as well as concepts like gravity simulation and dynamic array management for snow accumulation.

Preview

Animated Circle - xelsed.ai - p5.js creative coding sketch preview
Sketch Preview
Code flow diagram showing the structure of Animated Circle - xelsed.ai - Code flow showing setup, draw, windowresized, snowflake, fall, show
Code Flow Diagram