
auto clicker super fast

This sketch creates a simulated auto-clicker interface that rapidly increments a counter and plays audio feedback. Users toggle a button to start and stop the auto-clicker, which fires 100 times per second, updating a display and producing a short click sound with each increment.

🧪 Try This!

Experiment with the code by making these changes:

  1. Speed up the clicker to 200 clicks per second — Lower the interval value to trigger autoClick() more frequently, doubling the click rate
  2. Make the stop button darker red — Change the hex color code to a deeper shade when the auto-clicker is running
  3. Add a click sound that is twice as loud — Increase the amplitude value to make each click's audio burst louder and more prominent
  4. Change the click sound to a higher pitch — Increase the frequency (Hz) of the oscillator to make the click sound brighter and sharper
Prefer the full editor? Open it there →

📖 About This Sketch

This sketch builds a simulated auto-clicker interface inside p5.js—a button that toggles rapid clicking on and off, paired with an updating counter and audio feedback. It demonstrates real-world interactive patterns: toggling state, controlling timing with intervals, manipulating the DOM (the paragraph element that displays the click count), and playing dynamic sound using p5.sound's oscillator. The visual and audio feedback happen in lockstep, teaching you how to coordinate multiple forms of output.

The code is organized around three main functions: setup() initializes the button, counter display, and oscillator; toggleAutoClicker() manages the on/off state and the interval timing; and autoClick() performs each individual click, updating the display and triggering sound. By studying this sketch you will learn how setInterval() creates rapid automated actions, how to toggle state with a boolean flag, and how to coordinate DOM updates with p5.sound playback.

⚙️ How It Works

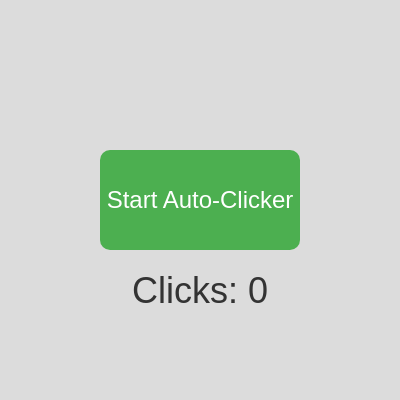
  1. When the sketch loads, setup() creates a full-window canvas, initializes a p5.Oscillator for the click sound, and positions a green 'Start Auto-Clicker' button and a 'Clicks: 0' counter in the center of the screen.
  2. When the user clicks the button, toggleAutoClicker() is called: if auto-clicking is off, it starts a setInterval that calls autoClick() every 10 milliseconds (100 times per second) and changes the button to red and 'Stop Auto-Clicker'.
  3. Each time autoClick() is called by the interval, it increments the clickCount variable, updates the counter display's HTML text, and triggers a short audio burst by ramping the oscillator's amplitude up then down.
  4. The draw() function runs every frame but remains mostly empty—all the action happens in the interval callback and the DOM updates, not on the canvas.
  5. If the user clicks the button again, toggleAutoClicker() stops the interval and resets the button to green and 'Start Auto-Clicker'.
  6. If the window is resized, windowResized() re-centers the button and counter display so they stay properly positioned.

🎓 Concepts You'll Learn

setInterval and timingState management with boolean flagsDOM manipulation and HTML updatesp5.sound oscillators and envelope controlButton callbacks and event handlingWindow resizing and responsive positioning

📝 Code Breakdown

setup()

setup() runs exactly once when the sketch starts. It is where you initialize the canvas, create UI elements like buttons and text displays, and prepare sound objects. Everything you create here is available to use in draw() and other functions.

function setup() {
  createCanvas(windowWidth, windowHeight);
  background(220);

  // Setup a simple sine wave oscillator for the click sound
  clickSound = new p5.Oscillator();
  clickSound.setType('sine');
  clickSound.freq(440); // Standard A4 note
  clickSound.amp(0);   // Start with zero volume
  clickSound.start();

  // Create the button to toggle the auto-clicker
  clickButton = createButton('Start Auto-Clicker');
  clickButton.position(width / 2 - 100, height / 2 - 50);
  clickButton.size(200, 100);
  clickButton.mousePressed(toggleAutoClicker); // Attach the toggle function
  clickButton.style('font-size', '24px');
  clickButton.style('background-color', '#4CAF50'); // Green color
  clickButton.style('color', 'white');
  clickButton.style('border', 'none');
  clickButton.style('border-radius', '10px');
  clickButton.style('cursor', 'pointer');

  // Create a paragraph element to display the click count
  counterDisplay = createP('Clicks: 0');
  counterDisplay.position(width / 2 - 100, height / 2 + 70);
  counterDisplay.style('font-size', '36px');
  counterDisplay.style('text-align', 'center');
  counterDisplay.style('width', '200px');
  counterDisplay.style('color', '#333'); // Dark text color
}
Line-by-line explanation (15 lines)

🔧 Subcomponents:

calculation Oscillator Initialization clickSound = new p5.Oscillator();

Creates a sound-generating oscillator that will produce the click audio

calculation Button Creation and Styling clickButton = createButton('Start Auto-Clicker');

Creates an interactive button that users click to toggle the auto-clicker

calculation Counter Display Setup counterDisplay = createP('Clicks: 0');

Creates a paragraph element that will display the current click count

createCanvas(windowWidth, windowHeight);
Creates a canvas that fills the entire browser window
background(220);
Fills the canvas with light gray (220 is an RGB value where all three channels equal 220)
clickSound = new p5.Oscillator();
Creates a new sound oscillator object that will generate tones for the click feedback
clickSound.setType('sine');
Sets the oscillator to produce a smooth sine wave (as opposed to square, triangle, or sawtooth)
clickSound.freq(440);
Sets the pitch to 440 Hz, which is the musical note A4 (the standard tuning reference)
clickSound.amp(0);
Sets the initial volume to 0 (silent) so we only hear sound when clicks happen
clickSound.start();
Starts the oscillator running (though silent at amp 0) so it is ready to play on demand
clickButton = createButton('Start Auto-Clicker');
Creates a clickable button with the label 'Start Auto-Clicker'
clickButton.position(width / 2 - 100, height / 2 - 50);
Positions the button 100 pixels to the left and 50 pixels above the center of the canvas
clickButton.size(200, 100);
Sets the button to be 200 pixels wide and 100 pixels tall
clickButton.mousePressed(toggleAutoClicker);
Connects the button so that clicking it calls the toggleAutoClicker function
clickButton.style('background-color', '#4CAF50');
Colors the button green using the hex color code #4CAF50
counterDisplay = createP('Clicks: 0');
Creates a paragraph element (HTML <p> tag) with the initial text 'Clicks: 0'
counterDisplay.position(width / 2 - 100, height / 2 + 70);
Positions the counter 100 pixels to the left and 70 pixels below the center
counterDisplay.style('font-size', '36px');
Makes the counter text large and readable at 36 pixels tall
draw()

draw() runs 60 times per second by default, but in this sketch almost nothing happens there. The auto-clicker logic runs on a separate timer (setInterval) that is faster and independent of the draw loop. This is why draw() can be nearly empty—all the action is driven by the interval and button clicks, not by animation.

function draw() {
  // The autoClick function updates the DOM element and plays sound,
  // so we don't need to do much in draw() itself for this sketch.
  // The background is set once in setup().
}
Line-by-line explanation (2 lines)
// The autoClick function updates the DOM element and plays sound,
This comment explains that the real action happens elsewhere, not in draw()
// so we don't need to do much in draw() itself for this sketch.
draw() is almost empty because setInterval handles the timing, not the animation loop

autoClick()

autoClick() is called 100 times per second by the setInterval in toggleAutoClicker(). It does three things: increments the counter, updates what the user sees on the page, and produces audio feedback. The sound uses an amplitude envelope (attack-decay) to create a short, satisfying 'click' burst.

🔬 These two lines shape the sound's envelope—the 'attack' ramps volume up, and the second line ramps it down. What happens if you change the 0.05 and 0.1 to make the attack and decay much longer, like 0.5 and 1?

  clickSound.amp(0.5, 0.05);
  clickSound.amp(0, 0.1, frameCount + 5);
function autoClick() {
  clickCount++;
  counterDisplay.html('Clicks: ' + clickCount); // Update the DOM paragraph element

  // Play a short click sound: attack to 0.5 volume over 0.05 seconds,
  // then decay to 0 volume over 0.1 seconds.
  clickSound.amp(0.5, 0.05);
  clickSound.amp(0, 0.1, frameCount + 5); // Decay happens after 5 frames (approx 0.08s)

  // Optional: Add a subtle visual flash on the canvas for feedback
  // This might slow down performance if the interval is extremely low.
  // For this sketch, the DOM update and sound are sufficient feedback.
}
Line-by-line explanation (4 lines)

🔧 Subcomponents:

calculation Increment Click Count clickCount++;

Adds 1 to the total number of clicks recorded

calculation Update Display Text counterDisplay.html('Clicks: ' + clickCount);

Changes the paragraph element's text to show the new click count

calculation Sound Attack Phase clickSound.amp(0.5, 0.05);

Ramps the volume up to 0.5 over 0.05 seconds for the click onset

calculation Sound Decay Phase clickSound.amp(0, 0.1, frameCount + 5);

Ramps the volume back down to 0 over 0.1 seconds, creating a decay envelope

clickCount++;
Increments (adds 1 to) the clickCount variable, tracking how many times this function has been called
counterDisplay.html('Clicks: ' + clickCount);
Updates the paragraph element's HTML content to display the new click count (concatenating the string 'Clicks: ' with the number)
clickSound.amp(0.5, 0.05);
Sets the oscillator's amplitude (volume) to 0.5, and transitions to that volume over 0.05 seconds (the attack phase of the sound)
clickSound.amp(0, 0.1, frameCount + 5);
Schedules the oscillator to fade from its current volume to 0 over 0.1 seconds, starting after 5 more animation frames (the decay phase)

toggleAutoClicker()

toggleAutoClicker() is called every time the user clicks the button. It uses a boolean flag (isAutoClicking) to remember whether the clicker is on or off, and switches between those two states. The if-else structure ensures that clicking once toggles from off to on, and clicking again toggles from on to off. This pattern—using a boolean to track state and an if-else to toggle—is fundamental to interactive programming.

🔬 This if-else block toggles the state. What happens if you flip the logic by removing the first 'if' and 'else'—would the button stop working? Why do you need both branches?

  if (isAutoClicking) {
    // If auto-clicking, stop it
    clearInterval(autoClickerInterval); // Clear the interval
    autoClickerInterval = null;
    clickButton.html('Start Auto-Clicker');
    clickButton.style('background-color', '#4CAF50'); // Green
    isAutoClicking = false;
  } else {
function toggleAutoClicker() {
  if (isAutoClicking) {
    // If auto-clicking, stop it
    clearInterval(autoClickerInterval); // Clear the interval
    autoClickerInterval = null;
    clickButton.html('Start Auto-Clicker');
    clickButton.style('background-color', '#4CAF50'); // Green
    isAutoClicking = false;
  } else {
    // If not auto-clicking, start it
    // Set an interval to call autoClick() every 10 milliseconds (100 clicks/second)
    // Be cautious with extremely low intervals (e.g., 0 or 1ms) as it can
    // potentially freeze the browser on some systems due to overwhelming tasks.
    autoClickerInterval = setInterval(autoClick, 10);
    clickButton.html('Stop Auto-Clicker');
    clickButton.style('background-color', '#f44336'); // Red
    isAutoClicking = true;
  }
}
Line-by-line explanation (10 lines)

🔧 Subcomponents:

conditional Stop the Auto-Clicker if (isAutoClicking) {

Checks if the auto-clicker is currently running and stops it if true

conditional Start the Auto-Clicker } else {

If the auto-clicker is stopped, this block starts it by creating a setInterval

if (isAutoClicking) {
Checks the boolean isAutoClicking to see if auto-clicking is currently active
clearInterval(autoClickerInterval);
Stops the setInterval that was calling autoClick() repeatedly, halting all automatic clicks
autoClickerInterval = null;
Sets the interval variable to null, signaling that there is no active interval
clickButton.html('Start Auto-Clicker');
Changes the button's text back to 'Start Auto-Clicker'
clickButton.style('background-color', '#4CAF50');
Changes the button color back to green to indicate the clicker is stopped
isAutoClicking = false;
Sets the boolean to false, marking that the auto-clicker is no longer running
autoClickerInterval = setInterval(autoClick, 10);
Creates a new interval that calls autoClick() every 10 milliseconds (100 times per second)
clickButton.html('Stop Auto-Clicker');
Changes the button's text to 'Stop Auto-Clicker'
clickButton.style('background-color', '#f44336');
Changes the button color to red to indicate the clicker is actively running
isAutoClicking = true;
Sets the boolean to true, marking that the auto-clicker is now running

windowResized()

windowResized() is a special p5.js function that p5 calls automatically whenever the browser window is resized. Without this function, the button and counter would stay at their original positions and could end up off-screen. By repositioning them here, you ensure the interface stays centered and usable regardless of the window size.

function windowResized() {
  resizeCanvas(windowWidth, windowHeight);
  // Re-position button and counter display to stay centered
  clickButton.position(width / 2 - 100, height / 2 - 50);
  counterDisplay.position(width / 2 - 100, height / 2 + 70);
}
Line-by-line explanation (3 lines)

🔧 Subcomponents:

calculation Canvas Resize resizeCanvas(windowWidth, windowHeight);

Adjusts the canvas size to match the new browser window dimensions

calculation Button Repositioning clickButton.position(width / 2 - 100, height / 2 - 50);

Keeps the button centered horizontally and positioned in the upper-middle area

calculation Counter Repositioning counterDisplay.position(width / 2 - 100, height / 2 + 70);

Keeps the counter display centered and positioned below the button

resizeCanvas(windowWidth, windowHeight);
Automatically called by p5.js when the browser window is resized; adjusts the canvas to fill the new dimensions
clickButton.position(width / 2 - 100, height / 2 - 50);
Recalculates the button position so it stays centered horizontally and in the upper half of the canvas
counterDisplay.position(width / 2 - 100, height / 2 + 70);
Recalculates the counter position so it stays centered horizontally and below the button

📦 Key Variables

clickCount number

Stores the total number of clicks that have occurred since the sketch started or was last reset

let clickCount = 0;
autoClickerInterval object

Holds the setInterval object that repeats the autoClick() function; set to null when no interval is active

let autoClickerInterval;
clickSound object

A p5.Oscillator that generates the audio feedback sound for each click

let clickSound;
clickButton object

A p5.Renderer.HTML button element that users click to toggle the auto-clicker on and off

let clickButton;
counterDisplay object

A p5.Renderer.HTML paragraph element that displays the current click count to the user

let counterDisplay;
isAutoClicking boolean

A true/false flag that tracks whether the auto-clicker is currently running or stopped

let isAutoClicking = false;

🔧 Potential Improvements (4)

Here are some ways this code could be enhanced:

BUG toggleAutoClicker()

Multiple rapid clicks on the button before the first interval starts could create multiple active intervals, causing unpredictable clicking rates

💡 Add a guard: check if autoClickerInterval already exists before creating a new one. For example: if (!isAutoClicking && !autoClickerInterval) { ... }

STYLE setup()

Many repeated clickButton.style() calls make the code verbose and harder to maintain

💡 Consider using CSS classes or defining button styles in style.css and applying them with clickButton.class() instead of chaining many style() calls

FEATURE autoClick()

The sketch lacks a way for the user to reset the click counter back to zero

💡 Add a reset button in setup() that calls a resetClicks() function, which sets clickCount back to 0 and updates the display

PERFORMANCE autoClick()

If the interval is set very low (below 5ms), constantly updating the DOM and oscillator amplitude on every frame can cause browser stuttering

💡 Add a warning comment or cap the minimum interval value (e.g., enforce a minimum of 5ms to prevent excessive processing)

🔄 Code Flow

Code flow showing setup, draw, autoclick, toggleautoclicker, windowresized

💡 Click on function names in the diagram to jump to their code

graph TD start[Start] --> setup[setup] setup --> button-setup[Button Creation and Styling] setup --> counter-setup[Counter Display Setup] setup --> oscillator-setup[Oscillator Initialization] setup --> draw[draw loop] draw -->|60 times/sec| toggleautoclicker[toggleAutoClicker] toggleautoclicker -->|if isAutoClicking| stop-clicker[Stop the Auto-Clicker] toggleautoclicker -->|else| start-clicker[Start the Auto-Clicker] start-clicker -->|setInterval| autoclick[autoClick] autoclick --> counter-increment[Increment Click Count] autoclick --> dom-update[Update Display Text] autoclick --> sound-attack[Sound Attack Phase] autoclick --> sound-decay[Sound Decay Phase] draw --> windowresized[windowResized] windowresized --> canvas-resize[Canvas Resize] windowresized --> button-reposition[Button Repositioning] windowresized --> counter-reposition[Counter Repositioning] click setup href "#fn-setup" click draw href "#fn-draw" click toggleautoclicker href "#fn-toggleautoclicker" click autoclick href "#fn-autoclick" click windowresized href "#fn-windowresized" click button-setup href "#sub-button-setup" click counter-setup href "#sub-counter-setup" click oscillator-setup href "#sub-oscillator-setup" click counter-increment href "#sub-counter-increment" click dom-update href "#sub-dom-update" click sound-attack href "#sub-sound-attack" click sound-decay href "#sub-sound-decay" click stop-clicker href "#sub-stop-clicker" click start-clicker href "#sub-start-clicker" click canvas-resize href "#sub-canvas-resize" click button-reposition href "#sub-button-reposition" click counter-reposition href "#sub-counter-reposition"

❓ Frequently Asked Questions

What visual elements does the auto clicker sketch display?

The sketch features a simple user interface with a button to start the auto-clicker and a text display showing the current click count.

How can users interact with the auto clicker sketch?

Users can interact by clicking the 'Start Auto-Clicker' button to begin or stop the rapid clicking action and sound.

What creative coding concepts are demonstrated in this p5.js sketch?

This sketch demonstrates the use of sound synthesis, DOM manipulation, and the implementation of real-time updates through a simulated auto-clicking mechanism.

Preview

auto clicker super fast - p5.js creative coding sketch preview
Sketch Preview
Code flow diagram showing the structure of auto clicker super fast - Code flow showing setup, draw, autoclick, toggleautoclicker, windowresized
Code Flow Diagram
