
Ball that follows your mouse

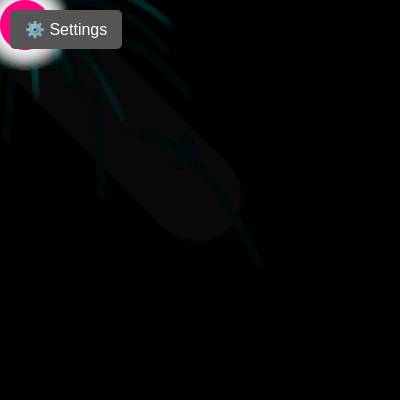
This interactive sketch creates a glowing ball that smoothly follows your mouse or touch input across the screen, leaving behind a sparkling particle trail. A customizable settings panel lets you adjust the ball's size, color, speed, glow effects, and particle behavior in real time.

🧪 Try This!

Experiment with the code by making these changes:

  1. Make the ball invisible but keep the trail — Comment out the ellipse line so particles create a floating trail with no visible ball chasing them.
  2. Reverse the trail direction (white background instead of black) — Change the background from black (0) to white (255) to invert the trail effect and create a ghosting look.
  3. Disable friction so the ball coasts forever — Remove the friction multiplication so the ball maintains its velocity indefinitely instead of slowing down.
  4. Spawn particles much more frequently — Emit particles every frame instead of every 5 frames to create a dense, continuous trail.
  5. Make particles fall straight down with strong gravity — Increase gravity in the Particle update so particles quickly drop beneath the ball instead of floating.
Prefer the full editor? Open it there →

📖 About This Sketch

This sketch creates a mesmerizing interactive experience where a glowing ball chases your mouse or touch input while leaving behind a shimmering particle trail. The ball moves with smoothly interpolated velocity using lerp, constrained speed limits, and friction—three techniques that create natural, organic motion. The particle system emits dozens of small shapes that float and fade away, and a shadow-based glow effect makes the ball feel luminous and alive. A built-in settings panel lets you adjust size, colors, speeds, and effects without touching the code.

The code is organized into a setup() function that initializes the canvas and UI controls, a draw() function that updates physics and renders everything each frame, and a Particle class that manages individual particles in the trail. By studying this sketch, you will learn how to build a particle system from scratch, implement smooth object following using velocity and lerp, create interactive UI controls with p5.js DOM elements, and use canvas shadow effects for glowing visuals.

⚙️ How It Works

  1. When the sketch loads, setup() creates a full-window canvas, positions the ball at the center, and builds a settings panel with sliders and color pickers that are hidden by default.
  2. Every frame, draw() reads the mouse position (or touch position on mobile) and uses lerp to smoothly steer the ball's velocity toward the target instead of snapping to it.
  3. Friction gradually slows the ball down, and constrain keeps its speed capped at a maximum so it never moves too fast.
  4. Every 5 frames, a new Particle object is created at the ball's current position with random horizontal velocity and upward-biased vertical velocity to simulate floating.
  5. Each particle updates its position with gravity, fades out over time, and is removed from the particles array when its lifetime expires.
  6. The ball and particles are drawn with their current colors from the color picker inputs, and if glow is enabled, the shadow properties add a blur effect around the ball.

🎓 Concepts You'll Learn

Particle systems and object poolsSmooth motion with lerp and velocityFriction and physics simulationDOM elements and interactive UI controlsCanvas shadow effects and glowTouch and mouse input handlingArray iteration and object lifecycle

📝 Code Breakdown

setup()

setup() runs once when the sketch starts. It's where you initialize your canvas size, set starting variable values, and create interactive UI elements like sliders and buttons. Every input slider uses a callback function to update a variable in real time.

function setup() {
  createCanvas(windowWidth, windowHeight);
  noStroke();
  ball.x = width / 2;
  ball.y = height / 2;

  // Create the settings panel container
  settingsPanel = createDiv();
  settingsPanel.class('settings-panel');
  settingsPanel.style('display', 'none'); // Hidden by default

  // Create the toggle button for the settings panel
  settingsToggleBtn = createButton('⚙️ Settings');
  settingsToggleBtn.class('settings-toggle-btn');
  settingsToggleBtn.mousePressed(toggleSettingsPanel);
  settingsToggleBtn.touchStarted(toggleSettingsPanel); // Also for mobile touch
  settingsToggleBtn.position(10, 10); // Top-left

  // Add settings elements to the settingsPanel
  addSetting('Ball Size:', ballSizeSlider = createSlider(10, 100, ball.size, 1));
  ballSizeSlider.input(() => ball.size = ballSizeSlider.value());

  addSetting('Ball Color:', ballColorPicker = createColorPicker(ball.color));
  ballColorPicker.input(() => ball.color = ballColorPicker.value());

  addSetting('Follow Speed:', followSpeedSlider = createSlider(0.01, 0.2, followSpeed, 0.01));
  followSpeedSlider.input(() => followSpeed = followSpeedSlider.value());

  addSetting('Particle Count:', particleCountSlider = createSlider(0, 50, particleCount, 1));
  particleCountSlider.input(() => particleCount = particleCountSlider.value());

  addSetting('Particle Color:', particleColorPicker = createColorPicker(particleColor));
  particleColorPicker.input(() => particleColor = particleColorPicker.value());

  addSetting('Particle Size:', particleSizeSlider = createSlider(2, 20, particleSize, 1));
  particleSizeSlider.input(() => particleSize = particleSizeSlider.value());

  addSetting('Trail Length:', trailLengthSlider = createSlider(5, 50, 10, 1));
  trailLengthSlider.input(() => {}); // Value used in draw()

  addSetting('Glow Effect:', glowCheckbox = createCheckbox('', glowEnabled));
  glowCheckbox.changed(() => glowEnabled = glowCheckbox.checked());

  addSetting('Glow Color:', glowColorPicker = createColorPicker(glowColor));
  glowColorPicker.input(() => glowColor = glowColorPicker.value());

  addSetting('Glow Strength:', glowStrengthSlider = createSlider(0, 50, glowStrength, 1));
  glowStrengthSlider.input(() => glowStrength = glowStrengthSlider.value());
}
Line-by-line explanation (11 lines)

🔧 Subcomponents:

calculation Canvas and Ball Initialization createCanvas(windowWidth, windowHeight); noStroke(); ball.x = width / 2; ball.y = height / 2;

Creates a full-window canvas, disables shape outlines, and centers the ball on startup

calculation Settings Panel UI Setup settingsPanel = createDiv(); settingsPanel.class('settings-panel'); settingsPanel.style('display', 'none');

Creates the hidden container for all interactive controls

calculation Slider Input Bindings addSetting('Ball Size:', ballSizeSlider = createSlider(10, 100, ball.size, 1)); ballSizeSlider.input(() => ball.size = ballSizeSlider.value());

Creates a slider and links its value directly to the ball size variable so changes appear instantly

createCanvas(windowWidth, windowHeight);
Creates a canvas that fills the entire window—windowWidth and windowHeight update if the window is resized
noStroke();
Disables outlines around all shapes drawn after this, so the ball and particles appear as solid filled circles
ball.x = width / 2;
Places the ball at the horizontal center of the canvas by setting its x position to half the canvas width
ball.y = height / 2;
Places the ball at the vertical center of the canvas
settingsPanel = createDiv();
Creates an empty HTML div element that will hold all the settings controls
settingsPanel.class('settings-panel');
Applies the CSS class 'settings-panel' to style the container with dark background, flex layout, and scrolling
settingsPanel.style('display', 'none');
Hides the settings panel on startup—it only appears when the user clicks the settings button
settingsToggleBtn = createButton('⚙️ Settings');
Creates the button that users click to open and close the settings panel
settingsToggleBtn.mousePressed(toggleSettingsPanel);
Calls the toggleSettingsPanel function when the button is clicked on desktop
settingsToggleBtn.touchStarted(toggleSettingsPanel);
Also calls toggleSettingsPanel on touch devices, ensuring the button works on mobile
ballSizeSlider.input(() => ball.size = ballSizeSlider.value());
Every time the slider moves, its numeric value is immediately copied to ball.size so the visual change happens instantly
draw()

draw() runs 60 times per second, creating smooth animation. This function updates the ball's position using physics (velocity, friction, speed limits), manages the particle system lifecycle, and applies visual effects like glow. The use of lerp here is key—it smoothly interpolates velocity instead of snapping the ball's direction, creating natural organic motion instead of twitchy following.

🔬 These lines control how the ball accelerates and decelerates. What happens if you remove the friction line (ball.vx *= friction)? Will the ball eventually stop chasing, or will it keep accelerating toward your mouse forever?

  // Smoothly move the ball towards the target
  ball.vx = lerp(ball.vx, (targetX - ball.x) * followSpeed, 0.1);
  ball.vy = lerp(ball.vy, (targetY - ball.y) * followSpeed, 0.1);

  // Apply friction
  ball.vx *= friction;
  ball.vy *= friction;

🔬 This controls how often particles are created. What happens if you change frameCount % 5 to frameCount % 1 (emit every frame) or frameCount % 20 (emit every 20 frames)? How does the trail density change?

  if (frameCount % 5 === 0) { // Emit particles every few frames
    if (particles.length < particleCount) {
      particles.push(new Particle(ball.x, ball.y));
    }
  }
function draw() {
  // --- Trail Effect ---
  // Draw semi-transparent background to create a trail effect
  let trailAlpha = map(trailLengthSlider.value(), 5, 50, 10, 50); // More trail with lower value
  background(0, trailAlpha); // Black background with varying transparency

  // --- Update Ball Position ---
  let targetX, targetY;

  if (touches.length > 0) {
    // Mobile touch input
    targetX = touches[0].x;
    targetY = touches[0].y;
  } else {
    // Desktop mouse input
    targetX = mouseX;
    targetY = mouseY;
  }

  // Smoothly move the ball towards the target
  ball.vx = lerp(ball.vx, (targetX - ball.x) * followSpeed, 0.1);
  ball.vy = lerp(ball.vy, (targetY - ball.y) * followSpeed, 0.1);

  // Apply friction
  ball.vx *= friction;
  ball.vy *= friction;

  // Clamp speed
  ball.vx = constrain(ball.vx, -maxSpeed, maxSpeed);
  ball.vy = constrain(ball.vy, -maxSpeed, maxSpeed);

  ball.x += ball.vx;
  ball.y += ball.vy;

  // Keep ball on screen
  ball.x = constrain(ball.x, ball.size / 2, width - ball.size / 2);
  ball.y = constrain(ball.y, ball.size / 2, height - ball.size / 2);

  // --- Particle System ---
  if (frameCount % 5 === 0) { // Emit particles every few frames
    if (particles.length < particleCount) {
      particles.push(new Particle(ball.x, ball.y));
    }
  }

  for (let i = particles.length - 1; i >= 0; i--) {
    particles[i].update();
    particles[i].display();
    if (particles[i].isDead()) {
      particles.splice(i, 1);
    }
  }

  // --- Draw Ball with Glow Effect ---
  if (glowEnabled) {
    drawingContext.shadowBlur = glowStrengthSlider.value();
    drawingContext.shadowColor = glowColorPicker.value();
  } else {
    drawingContext.shadowBlur = 0; // Turn off glow
  }

  fill(ballColorPicker.value());
  ellipse(ball.x, ball.y, ball.size); // FIXED: Changed from ball.sizeSlider.value() to ball.size

  drawingContext.shadowBlur = 0; // Reset glow for other elements
}
Line-by-line explanation (20 lines)

🔧 Subcomponents:

calculation Trail Opacity Control let trailAlpha = map(trailLengthSlider.value(), 5, 50, 10, 50); background(0, trailAlpha);

Maps the trail slider to transparency values and draws a semi-opaque black background that leaves previous frames visible, creating a fade trail

conditional Touch vs Mouse Detection if (touches.length > 0) { targetX = touches[0].x; targetY = touches[0].y; } else { targetX = mouseX; targetY = mouseY; }

Checks if the user is touching (mobile) or using a mouse (desktop) and reads the appropriate input position

calculation Lerp-Based Velocity ball.vx = lerp(ball.vx, (targetX - ball.x) * followSpeed, 0.1); ball.vy = lerp(ball.vy, (targetY - ball.y) * followSpeed, 0.1);

Uses lerp to smoothly interpolate velocity toward the target direction, creating acceleration rather than instant movement

calculation Friction Damping ball.vx *= friction; ball.vy *= friction;

Multiplies velocity by 0.95 each frame to gradually slow the ball down and create natural deceleration

calculation Velocity Clamping ball.vx = constrain(ball.vx, -maxSpeed, maxSpeed); ball.vy = constrain(ball.vy, -maxSpeed, maxSpeed);

Limits velocity to a maximum so the ball never moves faster than maxSpeed pixels per frame, preventing erratic fast movement

calculation Position Integration ball.x += ball.vx; ball.y += ball.vy;

Adds the velocity to the position, moving the ball by its speed each frame

calculation Screen Edge Constraint ball.x = constrain(ball.x, ball.size / 2, width - ball.size / 2); ball.y = constrain(ball.y, ball.size / 2, height - ball.size / 2);

Prevents the ball from moving off screen by keeping it within canvas bounds, accounting for its size

conditional Particle Emission Logic if (frameCount % 5 === 0) { if (particles.length < particleCount) { particles.push(new Particle(ball.x, ball.y)); } }

Emits a new particle every 5 frames at the ball's position, but never exceeds the particleCount limit

for-loop Particle Update Loop for (let i = particles.length - 1; i >= 0; i--) { particles[i].update(); particles[i].display(); if (particles[i].isDead()) { particles.splice(i, 1); } }

Loops through all particles backward, updates and draws each one, and removes dead particles from the array

conditional Glow Effect Toggle if (glowEnabled) { drawingContext.shadowBlur = glowStrengthSlider.value(); drawingContext.shadowColor = glowColorPicker.value(); } else { drawingContext.shadowBlur = 0; }

Enables or disables the shadow-based glow effect on the ball based on the checkbox

let trailAlpha = map(trailLengthSlider.value(), 5, 50, 10, 50);
Maps the trail slider position (5 to 50) to transparency values (10 to 50)—lower slider values make trails more visible because the background is more transparent
background(0, trailAlpha);
Draws a semi-transparent black background each frame—lower alpha values let previous frames show through, creating a fade trail
if (touches.length > 0) {
Checks if there are any active touch inputs on the screen—true on mobile devices, false on desktop
targetX = mouseX;
On desktop, reads the mouse's x position as the target the ball should move toward
ball.vx = lerp(ball.vx, (targetX - ball.x) * followSpeed, 0.1);
Uses lerp to smoothly blend the current velocity toward a desired velocity calculated from the target distance, creating organic acceleration
ball.vx *= friction;
Multiplies horizontal velocity by 0.95, reducing it slightly each frame to simulate air resistance and slow the ball naturally
ball.vx = constrain(ball.vx, -maxSpeed, maxSpeed);
Clamps the velocity to the range [-15, 15] so it never exceeds maxSpeed in either direction
ball.x += ball.vx;
Adds the velocity to the position—if velocity is 3, the ball moves 3 pixels right; if -2, it moves 2 pixels left
ball.x = constrain(ball.x, ball.size / 2, width - ball.size / 2);
Keeps the ball on screen by preventing its center from moving beyond the edges, accounting for the ball's radius (size / 2)
if (frameCount % 5 === 0) {
Emits a particle every 5 frames (at 60 FPS, that's 12 particles per second), spreading the emission to avoid sudden bursts
if (particles.length < particleCount) {
Only creates a new particle if we haven't hit the limit set by the particleCount slider
particles.push(new Particle(ball.x, ball.y));
Creates a new Particle object at the ball's current position and adds it to the particles array
for (let i = particles.length - 1; i >= 0; i--) {
Loops backward through the particles array—backward iteration is crucial because we're deleting elements while looping
if (particles[i].isDead()) { particles.splice(i, 1);
Removes dead particles from the array by splicing them out—this keeps memory usage low and prevents drawing expired particles
if (glowEnabled) {
Checks if the glow checkbox is ticked; if true, applies shadow blur to the next shape drawn
drawingContext.shadowBlur = glowStrengthSlider.value();
Sets the blur radius of the shadow effect—higher values create a softer, larger glow around the ball
drawingContext.shadowColor = glowColorPicker.value();
Sets the color of the shadow/glow to whatever the user picked in the color picker
fill(ballColorPicker.value());
Sets the fill color to the value from the ball color picker so the ball always matches the user's color choice
ellipse(ball.x, ball.y, ball.size);
Draws the ball as a circle at its current position with its current size; the shadow effect is applied because it was set earlier
drawingContext.shadowBlur = 0;
Resets the shadow blur to 0 so future shapes (like particles) don't accidentally inherit the glow effect

addSetting()

addSetting() is a helper function that standardizes how each setting is laid out in the UI. It takes a label string and a p5.js DOM element (like a slider) and wraps them both in a styled container. This pattern keeps the setup() function clean and readable—instead of repeating the same container/label/control pattern 10 times, you call addSetting() once per setting.

function addSetting(label, control) {
  let container = createDiv();
  container.class('setting-item');
  container.parent(settingsPanel);

  let p = createP(label);
  p.parent(container);
  control.parent(container);
}
Line-by-line explanation (6 lines)
let container = createDiv();
Creates a new HTML div element that will hold both a label and a control (slider, color picker, etc.) side by side
container.class('setting-item');
Applies the CSS class 'setting-item' which styles the container with flexbox layout and spacing
container.parent(settingsPanel);
Adds this container as a child of the settings panel so it appears inside the panel when visible
let p = createP(label);
Creates a paragraph element containing the label text (e.g., 'Ball Size:' or 'Ball Color:')
p.parent(container);
Adds the label paragraph as a child of the container so it appears above the control
control.parent(container);
Adds the control (slider, color picker, etc.) as a child of the container so they appear together

toggleSettingsPanel()

toggleSettingsPanel() is called whenever the settings button is clicked or touched. It uses a boolean flag to track state (visible or hidden) and changes the CSS display property and button text accordingly. This is a common pattern in UI programming—store state in a variable and use conditionals to change visuals based on that state.

function toggleSettingsPanel() {
  isSettingsVisible = !isSettingsVisible;
  if (isSettingsVisible) {
    settingsPanel.style('display', 'flex'); // Use flex for better layout
    settingsToggleBtn.html('✖️ Close Settings'); // Change button text
  } else {
    settingsPanel.style('display', 'none');
    settingsToggleBtn.html('⚙️ Settings');
  }
}
Line-by-line explanation (6 lines)

🔧 Subcomponents:

conditional Visibility Toggle Logic isSettingsVisible = !isSettingsVisible; if (isSettingsVisible) {

Flips the visibility flag and conditionally shows or hides the settings panel

isSettingsVisible = !isSettingsVisible;
Flips the boolean—if it was true (visible), it becomes false; if false, it becomes true
if (isSettingsVisible) {
Checks if the panel should now be visible
settingsPanel.style('display', 'flex');
Shows the settings panel by setting its CSS display property to 'flex', which arranges its children vertically
settingsToggleBtn.html('✖️ Close Settings');
Changes the button text to indicate the panel is now open and clicking will close it
settingsPanel.style('display', 'none');
Hides the settings panel by setting display to 'none', removing it from the page layout
settingsToggleBtn.html('⚙️ Settings');
Changes the button text back to the original gear icon to indicate clicking will open settings

class Particle

The Particle class encapsulates everything about a single particle: its position, velocity, opacity, and lifetime. The constructor initializes a new particle with random properties, update() moves it and fades it each frame, display() draws it, and isDead() tells the draw loop when to remove it. This object-oriented design makes it easy to manage hundreds of particles without spaghetti code.

🔬 This loop controls each particle's motion and fading. What happens if you change this.vy += 0.05 to this.vy -= 0.05 (negative gravity)? Will particles float up forever, or will they eventually stop?

  update() {
    this.x += this.vx;
    this.y += this.vy;
    this.vy += 0.05; // Gravity for particles
    this.alpha -= (255 / this.lifetime);
    this.lifetime--;
  }
class Particle {
  constructor(x, y) {
    this.x = x;
    this.y = y;
    this.vx = random(-2, 2);
    this.vy = random(-2, 0); // Particles tend to float upwards
    this.alpha = 255;
    this.lifetime = particleLifetime;
  }

  update() {
    this.x += this.vx;
    this.y += this.vy;
    this.vy += 0.05; // Gravity for particles
    this.alpha -= (255 / this.lifetime);
    this.lifetime--;
  }

  display() {
    fill(red(particleColorPicker.value()), green(particleColorPicker.value()), blue(particleColorPicker.value()), this.alpha);
    ellipse(this.x, this.y, particleSizeSlider.value());
  }

  isDead() {
    return this.lifetime <= 0;
  }
}
Line-by-line explanation (14 lines)

🔧 Subcomponents:

calculation Particle Initialization constructor(x, y) { this.x = x; this.y = y; this.vx = random(-2, 2); this.vy = random(-2, 0); this.alpha = 255; this.lifetime = particleLifetime; }

Creates a new particle at the given position with random initial velocity and full opacity

calculation Position and Fade Update this.x += this.vx; this.y += this.vy; this.vy += 0.05; this.alpha -= (255 / this.lifetime); this.lifetime--;

Moves the particle, applies gravity, and gradually reduces opacity over time

calculation Particle Rendering fill(red(particleColorPicker.value()), green(particleColorPicker.value()), blue(particleColorPicker.value()), this.alpha); ellipse(this.x, this.y, particleSizeSlider.value());

Draws the particle at its current position with the user's chosen color and fading alpha

constructor(x, y) {
The constructor method runs automatically when a new Particle is created—it receives the x and y position from the caller
this.x = x;
Stores the particle's starting x position as a property of the particle object
this.vx = random(-2, 2);
Gives each particle a random horizontal velocity between -2 and 2 pixels per frame, so they spread out sideways
this.vy = random(-2, 0);
Gives each particle an initial upward velocity between -2 and 0 (negative means up), so particles start floating upward
this.alpha = 255;
Sets the particle's opacity to fully opaque (255 is maximum opacity in p5.js)
this.lifetime = particleLifetime;
Stores the particle's lifetime in frames (default 120 frames)—this countdown determines how long it lives
this.x += this.vx;
Moves the particle horizontally by adding its velocity
this.y += this.vy;
Moves the particle vertically by adding its velocity
this.vy += 0.05;
Applies a constant downward acceleration (gravity) of 0.05 pixels per frame, so particles eventually fall even if they started floating up
this.alpha -= (255 / this.lifetime);
Gradually reduces opacity—dividing 255 by the lifetime ensures it fades completely by the time lifetime reaches 0
this.lifetime--;
Decrements the lifetime counter by 1 each frame—when it hits 0, the particle is considered dead
fill(red(particleColorPicker.value()), green(particleColorPicker.value()), blue(particleColorPicker.value()), this.alpha);
Extracts the red, green, and blue components from the particle color picker and uses them with the particle's current alpha to set a semi-transparent color
ellipse(this.x, this.y, particleSizeSlider.value());
Draws a circle at the particle's current position with the size from the size slider
return this.lifetime <= 0;
Returns true if the particle has expired (lifetime is 0 or less), signaling to the draw loop that it should be removed

windowResized()

windowResized() is a special p5.js function that runs automatically whenever the browser window is resized. Without it, the canvas would stay its original size. This function ensures the sketch remains responsive—it resizes the canvas and also repositions the ball if necessary so it doesn't get stuck off screen after a resize.

function windowResized() {
  resizeCanvas(windowWidth, windowHeight);
  // Ensure the ball stays on screen after resize
  ball.x = constrain(ball.x, ball.size / 2, width - ball.size / 2);
  ball.y = constrain(ball.y, ball.size / 2, height - ball.size / 2);
}
Line-by-line explanation (3 lines)
resizeCanvas(windowWidth, windowHeight);
Automatically resizes the canvas to match the new window dimensions when the user resizes their browser
ball.x = constrain(ball.x, ball.size / 2, width - ball.size / 2);
If the ball ends up outside the newly resized canvas, this constrains it back on screen horizontally
ball.y = constrain(ball.y, ball.size / 2, height - ball.size / 2);
Constrains the ball back on screen vertically if needed after the resize

touchStarted()

touchStarted() is a p5.js function that runs when the user's finger touches the screen. By returning false, it blocks default mobile browser behaviors like page scrolling and pinch-zoom, ensuring the sketch stays in focus and responds only to your custom touch input code.

function touchStarted() {
  return false;
}
Line-by-line explanation (1 lines)
return false;
Returning false prevents the default browser behavior (like scrolling or zooming) when the user touches the canvas

touchMoved()

touchMoved() is a p5.js function that runs continuously while the user's finger is moving on the screen. By returning false here as well, you prevent the browser from scrolling or panning in response to touch movement, allowing the ball-following behavior to work smoothly on mobile.

function touchMoved() {
  return false;
}
Line-by-line explanation (1 lines)
return false;
Returning false prevents the default browser behavior when the user moves their finger across the screen, like scrolling

📦 Key Variables

ball object

Stores the ball's position (x, y), velocity (vx, vy), size, and color. Using an object groups related data together.

let ball = { x: 0, y: 0, vx: 0, vy: 0, size: 50, color: '#FF007F' };
followSpeed number

Controls how quickly the ball accelerates toward your mouse. Used in the lerp calculation to determine target velocity.

let followSpeed = 0.1;
maxSpeed number

The maximum velocity the ball is allowed to reach. Prevents it from moving too fast even if your mouse is far away.

let maxSpeed = 15;
friction number

Multiplied by the ball's velocity each frame to slow it down gradually. 0.95 means 5% slowdown per frame.

let friction = 0.95;
particles array

Stores all active Particle objects. New particles are pushed into this array, and dead ones are spliced out.

let particles = [];
particleCount number

The maximum number of particles allowed on screen at once. Controlled by a slider in the settings.

let particleCount = 10;
particleColor string

The hex color code for particles (e.g., '#00FFFF' for cyan). Extracted in display() using red(), green(), blue().

let particleColor = '#00FFFF';
particleSize number

The diameter of each particle circle in pixels. Controlled by a slider in the settings.

let particleSize = 8;
particleLifetime number

How many frames each particle lives before fading completely. Affects both fade rate and trail duration.

let particleLifetime = 120;
settingsPanel object

A p5.js DOM element (div) that contains all the interactive controls. Hidden by default, shown when the settings button is clicked.

let settingsPanel = createDiv();
isSettingsVisible boolean

Tracks whether the settings panel is currently open or closed. Used by toggleSettingsPanel() to determine visibility.

let isSettingsVisible = false;
glowEnabled boolean

Controls whether the shadow-based glow effect is applied to the ball. Toggled by a checkbox in the settings.

let glowEnabled = true;
glowColor string

The hex color code for the glow effect (e.g., '#FFFFFF' for white). Set by the glow color picker.

let glowColor = '#FFFFFF';
glowStrength number

The blur radius of the glow effect in pixels. Higher values create a softer, larger halo around the ball.

let glowStrength = 20;

🔧 Potential Improvements (5)

Here are some ways this code could be enhanced:

PERFORMANCE Particle.display()

The display() method extracts RGB values from the color picker every single time a particle is drawn, which is wasteful. If there are 50 particles and 60 frames per second, that's 3000 color extraction calls per second.

💡 Cache the particle color as RGB values in the constructor or update() instead. For example, store this.r = red(particleColorPicker.value()), this.g = green(...), this.b = blue(...) once per update, then use them in display().

BUG draw() trail effect

The trail effect uses a semi-transparent background that never fully clears, so very faint ghost images accumulate over time and the entire canvas gradually becomes lighter or darker depending on the background color.

💡 Either use a fully opaque background (trailAlpha = 255) to clear every frame, or periodically fully clear the canvas with a fully opaque background() call every N seconds to reset accumulated artifacts.

STYLE setup() settings creation

The setup() function is very long (80+ lines) because it creates and configures 10 settings one by one. This makes the code hard to read and maintain.

💡 Create an array of setting definitions (name, min, max, initial value) and loop through them to create sliders and pickers. This would reduce setup() to ~20 lines and make adding/removing settings trivial.

FEATURE Particle class

Particles all fade out at the same rate regardless of their lifetime value, because alpha is decremented by a fixed percentage each frame. Particles live for exactly particleLifetime frames but visually fade at the same speed whether lifetime is 30 or 300 frames.

💡 Make particle fade rate depend on its actual remaining lifetime, or let users control fade speed independently from lifetime duration, so particles can have long lives that are nearly invisible, or short lives that stay bright.

BUG draw() glow setup

If a particle is drawn while shadowBlur is still set from the ball, the particle will have a glow too. The reset (drawingContext.shadowBlur = 0) only happens after the ball is drawn, not before particles are drawn.

💡 Reset shadowBlur to 0 immediately after drawing the ball and before the particle loop, or reset it before drawing particles. Current order: particles draw -> ball draws with glow -> glow reset. Should be: particles draw -> glow reset -> ball draws with glow.

🔄 Code Flow

Code flow showing setup, draw, addsetting, togglesettingspanel, particle, windowresized, touchstarted, touchmoved

💡 Click on function names in the diagram to jump to their code

graph TD start[Start] --> setup[setup] setup --> canvas-init[Canvas and Ball Initialization] setup --> ui-creation[Settings Panel UI Setup] setup --> slider-bindings[Slider Input Bindings] setup --> draw[draw loop] click setup href "#fn-setup" click canvas-init href "#sub-canvas-init" click ui-creation href "#sub-ui-creation" click slider-bindings href "#sub-slider-bindings" draw --> trail-effect[Trail Opacity Control] draw --> input-detection[Touch vs Mouse Detection] draw --> smooth-velocity[Lerp-Based Velocity] draw --> friction-application[Friction Damping] draw --> speed-capping[Velocity Capping] draw --> position-update[Position Integration] draw --> boundary-check[Screen Edge Constraint] draw --> particle-emission[Particle Emission Logic] draw --> particle-loop[Particle Update Loop] draw --> glow-setup[Glow Effect Toggle] click draw href "#fn-draw" click trail-effect href "#sub-trail-effect" click input-detection href "#sub-input-detection" click smooth-velocity href "#sub-smooth-velocity" click friction-application href "#sub-friction-application" click speed-capping href "#sub-speed-capping" click position-update href "#sub-position-update" click boundary-check href "#sub-boundary-check" click particle-emission href "#sub-particle-emission" click particle-loop href "#sub-particle-loop" click glow-setup href "#sub-glow-setup" particle-emission --> particle-constructor[Particle Initialization] click particle-constructor href "#sub-particle-constructor" particle-loop --> particle-update[Position and Fade Update] particle-loop --> particle-display[Particle Rendering] click particle-update href "#sub-particle-update" click particle-display href "#sub-particle-display" visibility-toggle[Visibility Toggle Logic] --> togglesettingspanel[toggleSettingsPanel] click togglesettingspanel href "#fn-togglesettingspanel" windowresized[windowResized] --> draw click windowresized href "#fn-windowresized" touchstarted[touchStarted] --> draw click touchstarted href "#fn-touchstarted" touchmoved[touchMoved] --> draw click touchmoved href "#fn-touchmoved"

❓ Frequently Asked Questions

What visual effects does the 'Ball that follows your mouse' sketch create?

The sketch features a glowing, colorful ball that chases the mouse pointer, leaving behind a dynamic, sparkling particle trail that enhances the visual experience.

How can users customize their experience in this p5.js sketch?

Users can interact with a settings panel to adjust parameters such as ball size, color, speed, particle effects, and glow, allowing for a fully personalized visual display.

What creative coding techniques are showcased in this sketch?

The sketch demonstrates techniques such as smooth object following, particle systems, and customizable visual effects using p5.js.

Preview

Ball that follows your mouse - p5.js creative coding sketch preview
Sketch Preview
Code flow diagram showing the structure of Ball that follows your mouse - Code flow showing setup, draw, addsetting, togglesettingspanel, particle, windowresized, touchstarted, touchmoved
Code Flow Diagram