buns game test

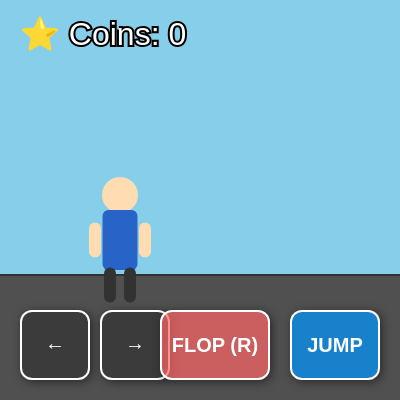
This sketch creates an infinite side-scrolling runner game where the player controls a character that can toggle between a rigid "active" mode and a floppy "ragdoll" mode. The level generates procedurally ahead of the player as they run, with coins to collect and spikes to avoid, powered by the Matter.js physics engine.

🧪 Try This!

Experiment with the code by making these changes:

  1. Make gravity stronger — Higher gravity values make all bodies fall faster and feel heavier—try 2.0 to see a more dramatic effect
  2. Make spikes spawn more often — Lower the random threshold to make spikes appear more frequently and coins rarer—increasing difficulty
  3. Make the player move faster — Increase horizontal velocity in active mode for snappier movement—notice how the character feels more responsive
  4. Make the jump much higher — More negative Y velocity launches the player higher—try -30 for a dramatic difference
  5. Paint the torso red — Changes the player's torso color from blue to red for a visual identity change
  6. Disable ragdoll mode — Comment out the ragdoll conversion to force the player to stay upright always—simplifies the game
Prefer the full editor? Open it there →

📖 About This Sketch

This sketch creates a playable infinite runner game with two distinct movement modes: an upright active character that can jump and dash, and a floppy ragdoll that flails when you toggle it. The game uses Matter.js, a professional JavaScript physics engine, to handle realistic body dynamics, collisions, and constraints that connect body parts together. As you run forward, the level generates infinitely ahead with random platforms, coins, and spike traps, while objects behind you are cleaned up to save memory.

The code is organized into physics setup (setup(), createRagdoll()), level generation (generateChunk(), cleanupWorld()), collision handling (handleCollisions()), player controls (triggerJump(), toggleRagdoll()), and rendering functions (drawActivePlayer(), drawRagdoll()). By studying it, you will learn how to integrate an external physics library into p5.js, construct a multi-part ragdoll using constraints, manage game state across multiple modes, and build a camera system that follows a physics body while generating infinite terrain.

⚙️ How It Works

  1. When the sketch loads, setup() creates a Matter.js engine with gravity, spawns the player as a rigid rectangle body, and generates the first two chunks of the level—a series of platforms, coins, and spikes at random heights.
  2. Every frame, draw() updates the physics engine, checks keyboard and touch input, and applies forces or velocity changes to the player body. The camera follows the player, staying slightly behind and above them.
  3. As the player moves forward, when the camera plus the screen width approaches nextGenX (the edge of generated terrain), a new chunk is automatically generated ahead. Objects that scroll far behind the player are removed from the world to prevent lag.
  4. When the player's body collides with a coin, it is removed and the coin counter increments. When they hit a spike, they either convert to ragdoll mode or are knocked upward if already in ragdoll mode.
  5. The player can jump (only in active mode, and only when velocity is near zero to detect ground contact), move left and right by setting horizontal velocity, or press R to toggle between active and ragdoll modes—each mode swap removes the old body/constraints and adds the new ragdoll skeleton or rigid box.
  6. Ragdoll mode draws the six body parts (head, torso, two arms, two legs) connected by visible constraint lines, while active mode draws a simple standing character that rotates with the body angle.

🎓 Concepts You'll Learn

Matter.js physics engineRigid bodies and constraintsCollision detection and eventsProcedural level generationGame state management (mode toggling)Camera trackingRagdoll physics simulation

📝 Code Breakdown

setup()

setup() runs once when the sketch loads and initializes the physics engine, game world, and initial level. Every p5.js sketch needs a setup() function to prepare the canvas and variables before draw() begins.

function setup() {
  createCanvas(windowWidth, windowHeight);

  engine = Engine.create();
  world = engine.world;
  world.gravity.y = 1.2;

  // Setup initial player state (Active Mode)
  activePlayer = Bodies.rectangle(100, height - 200, 35, 70, {
    inertia: Infinity, // Prevents tipping over
    friction: 0.05,
    frictionAir: 0.01,
    restitution: 0,
    label: 'player'
  });
  Composite.add(world, activePlayer);

  // Generate initial chunks
  generateChunk();
  generateChunk();

  // Collisions
  Matter.Events.on(engine, 'collisionStart', handleCollisions);

  // UI
  createMobilePads();
}
Line-by-line explanation (10 lines)

🔧 Subcomponents:

calculation Matter Engine Setup engine = Engine.create(); world = engine.world; world.gravity.y = 1.2;

Creates a Matter.js physics engine and world with downward gravity

calculation Active Player Body Creation activePlayer = Bodies.rectangle(100, height - 200, 35, 70, { inertia: Infinity, friction: 0.05, frictionAir: 0.01, restitution: 0, label: 'player' });

Spawns the player as a rigid rectangle at the left side of the screen

for-loop Initial Level Generation generateChunk(); generateChunk();

Generates two chunks of terrain ahead of the player before the game starts

calculation Collision Event Listener Matter.Events.on(engine, 'collisionStart', handleCollisions);

Registers a function to run whenever two bodies collide

createCanvas(windowWidth, windowHeight);
Creates a p5.js canvas that fills the entire browser window
engine = Engine.create();
Creates a new Matter.js physics engine that will update all bodies and simulate gravity
world = engine.world;
Gets a reference to the world (the container holding all physics bodies) from the engine
world.gravity.y = 1.2;
Sets downward gravity strength to 1.2; higher numbers pull bodies down faster
activePlayer = Bodies.rectangle(100, height - 200, 35, 70, { ... });
Creates a rigid rectangle body for the player at x=100, y=height-200, width=35, height=70
inertia: Infinity,
Prevents the rectangle from tipping over; it always stays upright
Composite.add(world, activePlayer);
Adds the player body to the physics world so it is simulated
generateChunk(); generateChunk();
Generates two chunks of platforms, coins, and spikes ahead
Matter.Events.on(engine, 'collisionStart', handleCollisions);
Listens for collisions and calls handleCollisions() when a collision begins
createMobilePads();
Creates on-screen touch buttons for left, right, jump, and ragdoll toggle
draw()

draw() runs 60 times per second and is the heartbeat of the game. It updates physics, reads input, moves the camera, generates terrain, and renders everything. Understanding draw() is essential to building interactive p5.js sketches.

🔬 This is the active mode movement logic. What happens if you change the 0.8 friction multiplier to 0.95? What about 0.3? How does the player's momentum feel different?

  if (leftPress) vx = -7;
    else if (rightPress) vx = 7;
    else vx *= 0.8; // Friction

🔬 These lines position the camera relative to the player. The 0.3 means 30% from the left edge, and 0.6 means 60% down from the top. What happens if you change width * 0.3 to width * 0.5? Where does the player end up on screen?

  let targetX = (isRagdoll ? ragdollObj.torso.position.x : activePlayer.position.x) - width * 0.3;
  let targetY = (isRagdoll ? ragdollObj.torso.position.y : activePlayer.position.y) - height * 0.6;
function draw() {
  background(135, 206, 235);
  Engine.update(engine);

  // Controls Logic
  let leftPress = keyIsDown(LEFT_ARROW) || keyIsDown(65) || touchInput.left;
  let rightPress = keyIsDown(RIGHT_ARROW) || keyIsDown(68) || touchInput.right;

  if (!isRagdoll) {
    let vx = activePlayer.velocity.x;
    let vy = activePlayer.velocity.y;
    if (leftPress) vx = -7;
    else if (rightPress) vx = 7;
    else vx *= 0.8; // Friction
    Body.setVelocity(activePlayer, { x: vx, y: vy });
  } else {
    // Slight air control while in ragdoll mode
    let t = ragdollObj.torso;
    if (leftPress) Body.applyForce(t, t.position, { x: -0.005, y: 0 });
    if (rightPress) Body.applyForce(t, t.position, { x: 0.005, y: 0 });
  }

  // Camera Tracking
  let targetX = (isRagdoll ? ragdollObj.torso.position.x : activePlayer.position.x) - width * 0.3;
  let targetY = (isRagdoll ? ragdollObj.torso.position.y : activePlayer.position.y) - height * 0.6;
  camX = lerp(camX, targetX, 0.1);
  camY = lerp(camY, targetY, 0.1);

  // Generate more map if we move forward
  if (camX + width * 2 > nextGenX) {
    generateChunk();
    cleanupWorld();
  }

  push();
  translate(-camX, -camY); // Apply Camera Move

  // Render Buildings
  fill(80); stroke(50); strokeWeight(2);
  for (let b of buildings) {
    beginShape();
    for (let v of b.vertices) vertex(v.x, v.y);
    endShape(CLOSE);
  }

  // Render Spikes
  fill(200, 50, 50); stroke(100, 0, 0); strokeWeight(2);
  for (let s of spikes) {
    beginShape();
    for (let v of s.vertices) vertex(v.x, v.y);
    endShape(CLOSE);
  }

  // Render Coins
  for (let c of coins) {
    fill(255, 215, 0); stroke(218, 165, 32); strokeWeight(3);
    circle(c.position.x, c.position.y, 30);
    fill(255, 255, 200); noStroke(); // Shine
    circle(c.position.x - 5, c.position.y - 5, 6);
  }

  // Render Player
  if (isRagdoll) {
    drawRagdoll(ragdollObj);
  } else {
    drawActivePlayer(activePlayer);
  }

  pop(); // Reset Camera View

  // UI (Drawn directly to screen space)
  fill(255); stroke(0); strokeWeight(4);
  textSize(32); textAlign(LEFT, TOP);
  text(`⭐ Coins: ${coinCount}`, 20, 20);
}
Line-by-line explanation (15 lines)

🔧 Subcomponents:

calculation Physics Engine Update Engine.update(engine);

Updates all physics bodies based on gravity, forces, and collisions

calculation Input Detection let leftPress = keyIsDown(LEFT_ARROW) || keyIsDown(65) || touchInput.left; let rightPress = keyIsDown(RIGHT_ARROW) || keyIsDown(68) || touchInput.right;

Checks keyboard and touch input for left/right movement

conditional Active Mode Movement if (!isRagdoll) { let vx = activePlayer.velocity.x; let vy = activePlayer.velocity.y; if (leftPress) vx = -7; else if (rightPress) vx = 7; else vx *= 0.8; // Friction Body.setVelocity(activePlayer, { x: vx, y: vy }); }

In active mode, sets player horizontal velocity based on input, with friction when no keys are pressed

conditional Ragdoll Mode Movement } else { // Slight air control while in ragdoll mode let t = ragdollObj.torso; if (leftPress) Body.applyForce(t, t.position, { x: -0.005, y: 0 }); if (rightPress) Body.applyForce(t, t.position, { x: 0.005, y: 0 }); }

In ragdoll mode, applies small sideways forces to the torso for gentle air control

calculation Camera Following let targetX = (isRagdoll ? ragdollObj.torso.position.x : activePlayer.position.x) - width * 0.3; let targetY = (isRagdoll ? ragdollObj.torso.position.y : activePlayer.position.y) - height * 0.6; camX = lerp(camX, targetX, 0.1); camY = lerp(camY, targetY, 0.1);

Calculates where the camera should be (slightly ahead and above the player) and smoothly moves toward it using lerp()

conditional Generate Next Chunk if (camX + width * 2 > nextGenX) { generateChunk(); cleanupWorld(); }

When the player approaches the edge of generated terrain, creates a new chunk and removes old objects

for-loop Render All Game Objects for (let b of buildings) { ... } for (let s of spikes) { ... } for (let c of coins) { ... }

Loops through all active buildings, spikes, and coins and draws them

background(135, 206, 235);
Clears the canvas with a light blue sky color every frame
Engine.update(engine);
Tells the Matter.js engine to simulate one frame: move bodies, apply gravity, resolve collisions
let leftPress = keyIsDown(LEFT_ARROW) || keyIsDown(65) || touchInput.left;
Checks if LEFT_ARROW, A key, or left touch button is held down; stores result in leftPress (true or false)
if (!isRagdoll) {
Runs the next block only if the player is in active (non-ragdoll) mode
if (leftPress) vx = -7;
If left key is held, set horizontal velocity to -7 (moving left)
else if (rightPress) vx = 7;
If right key is held instead, set horizontal velocity to 7 (moving right)
else vx *= 0.8; // Friction
If no keys are held, multiply velocity by 0.8 to slow down (friction effect)
Body.setVelocity(activePlayer, { x: vx, y: vy });
Updates the player's velocity in the physics engine to apply the new horizontal speed
if (leftPress) Body.applyForce(t, t.position, { x: -0.005, y: 0 });
In ragdoll mode, applies a tiny leftward force to the torso instead of setting velocity directly
let targetX = (isRagdoll ? ragdollObj.torso.position.x : activePlayer.position.x) - width * 0.3;
Calculates the desired camera X position: follow the player but stay 30% from the left edge
camX = lerp(camX, targetX, 0.1);
Smoothly moves the camera toward the target using lerp(), blending 10% of the way each frame
if (camX + width * 2 > nextGenX) {
Triggers level generation if the camera is approaching the end of generated terrain
translate(-camX, -camY); // Apply Camera Move
Shifts all drawing coordinates by the camera position, creating the illusion of the camera following the player
for (let b of buildings) { beginShape(); for (let v of b.vertices) vertex(v.x, v.y); endShape(CLOSE); }
Loops through all platform bodies and draws them by connecting their vertices (corners) with lines
text(`⭐ Coins: ${coinCount}`, 20, 20);
Displays the coin counter in the top-left corner (drawn in screen space, not affected by camera)

generateChunk()

generateChunk() creates a new section of the level with platforms, obstacles, and coins ahead of the player. It is called whenever the player approaches the edge of generated terrain, creating the 'infinite' part of the infinite runner.

🔬 These lines set each platform's width and height randomly. What happens if you change them to fixed values like let w = 200 and let y = height - 250? How does the game feel—more predictable or boring?

    let w = random(100, 300);
    let y = height - random(100, 500); // Varying heights
function generateChunk() {
  let chunkWidth = 1200;
  let endX = nextGenX + chunkWidth;

  // Ground base for this chunk
  let ground = Bodies.rectangle(nextGenX + chunkWidth / 2, height + 50, chunkWidth, 150, { isStatic: true });
  buildings.push(ground);
  Composite.add(world, ground);

  // Random platforms, spikes, and coins
  for (let x = nextGenX + 200; x < endX; x += random(250, 400)) {
    let w = random(100, 300);
    let y = height - random(100, 500); // Varying heights

    let plat = Bodies.rectangle(x, y, w, 30, { isStatic: true });
    buildings.push(plat);
    Composite.add(world, plat);

    // 40% chance for a spike, 60% chance for a coin
    if (random() < 0.4) {
      let spike = Bodies.polygon(x, y - 25, 3, 20, { 
        isStatic: true, label: 'spike', angle: -PI/2 // Point upwards
      });
      spikes.push(spike);
      Composite.add(world, spike);
    } else {
      let coin = Bodies.circle(x, y - 40, 15, {
        isStatic: true, isSensor: true, label: 'coin'
      });
      coins.push(coin);
      Composite.add(world, coin);
    }
  }

  nextGenX = endX;
}
Line-by-line explanation (12 lines)

🔧 Subcomponents:

calculation Ground Platform Creation let ground = Bodies.rectangle(nextGenX + chunkWidth / 2, height + 50, chunkWidth, 150, { isStatic: true });

Creates a large static platform at the bottom of the screen to serve as the ground

for-loop Random Platform Loop for (let x = nextGenX + 200; x < endX; x += random(250, 400)) {

Loops through random X positions, spacing platforms 250-400 pixels apart

conditional Spike vs Coin Decision if (random() < 0.4) { let spike = Bodies.polygon(x, y - 25, 3, 20, { isStatic: true, label: 'spike', angle: -PI/2 }); spikes.push(spike); Composite.add(world, spike); } else { let coin = Bodies.circle(x, y - 40, 15, { isStatic: true, isSensor: true, label: 'coin' }); coins.push(coin); Composite.add(world, coin); }

Randomly chooses 40% spikes and 60% coins for each platform

let chunkWidth = 1200;
Defines how wide each generated section of terrain is (1200 pixels)
let endX = nextGenX + chunkWidth;
Calculates where this chunk ends (start position plus width)
let ground = Bodies.rectangle(nextGenX + chunkWidth / 2, height + 50, chunkWidth, 150, { isStatic: true });
Creates a wide static platform at the bottom to be the ground floor
buildings.push(ground);
Adds the ground to the buildings array so it can be rendered and cleaned up later
Composite.add(world, ground);
Adds the ground to the physics world so it collides with the player
for (let x = nextGenX + 200; x < endX; x += random(250, 400)) {
Loops through random X positions, spacing them 250-400 pixels apart, to create platforms
let w = random(100, 300);
Each platform gets a random width between 100 and 300 pixels
let y = height - random(100, 500);
Each platform is positioned at a random height: 100-500 pixels up from the bottom
let plat = Bodies.rectangle(x, y, w, 30, { isStatic: true });
Creates a static platform (30 pixels tall) at position x, y with width w
if (random() < 0.4) {
40% chance condition—if true, spawn a spike; otherwise spawn a coin
let spike = Bodies.polygon(x, y - 25, 3, 20, { isStatic: true, label: 'spike', angle: -PI/2 });
Creates a triangle (3 sides) that points upward (-PI/2 angle), positioned above the platform
nextGenX = endX;
Updates nextGenX so the next chunk starts where this one ends

handleCollisions(event)

handleCollisions() is called by Matter.js whenever two bodies begin colliding. It checks the 'label' property (like 'coin', 'spike', 'player') to identify what collided and trigger the right response. Labels are a simple but powerful way to tag bodies for collision logic.

🔬 When you hit a spike, the code forces you into ragdoll mode and launches you upward. What happens if you remove the if (!isRagdoll) toggleRagdoll() line? Can you still hit spikes while already in ragdoll mode?

      if (!isRagdoll) toggleRagdoll();
      
      let torso = isRagdoll ? ragdollObj.torso : activePlayer;
      Body.setVelocity(torso, { x: random(-10, 10), y: -20 });
function handleCollisions(event) {
  for (let pair of event.pairs) {
    let a = pair.bodyA;
    let b = pair.bodyB;

    // Detect Coin
    let coinBody = (a.label === 'coin') ? a : (b.label === 'coin') ? b : null;
    let playerPart = (a.label !== 'coin' && a.label !== 'spike') ? a : (b.label !== 'coin' && b.label !== 'spike') ? b : null;

    if (coinBody && playerPart) {
      World.remove(world, coinBody);
      coins = coins.filter(c => c !== coinBody);
      coinCount++;
    }

    // Detect Spike
    let spikeBody = (a.label === 'spike') ? a : (b.label === 'spike') ? b : null;
    if (spikeBody && playerPart) {
      // Force ragdoll on spike touch and pop upwards
      if (!isRagdoll) toggleRagdoll();
      
      let torso = isRagdoll ? ragdollObj.torso : activePlayer;
      Body.setVelocity(torso, { x: random(-10, 10), y: -20 });
      Body.setAngularVelocity(torso, random(-0.5, 0.5));
    }
  }
}
Line-by-line explanation (13 lines)

🔧 Subcomponents:

for-loop Pair Iteration for (let pair of event.pairs) {

Loops through all body pairs that just collided

conditional Coin Detection let coinBody = (a.label === 'coin') ? a : (b.label === 'coin') ? b : null; let playerPart = (a.label !== 'coin' && a.label !== 'spike') ? a : (b.label !== 'coin' && b.label !== 'spike') ? b : null; if (coinBody && playerPart) { ... }

Identifies if a coin was hit by the player and removes it, incrementing the score

conditional Spike Detection let spikeBody = (a.label === 'spike') ? a : (b.label === 'spike') ? b : null; if (spikeBody && playerPart) { ... }

Identifies if a spike was hit by the player and forces ragdoll mode, knocking the player upward

for (let pair of event.pairs) {
Loops through each pair of bodies that just collided in this frame
let a = pair.bodyA; let b = pair.bodyB;
Extracts the two colliding bodies for easier reference
let coinBody = (a.label === 'coin') ? a : (b.label === 'coin') ? b : null;
Checks if either body is labeled 'coin'; if found, stores it in coinBody, otherwise stores null
let playerPart = (a.label !== 'coin' && a.label !== 'spike') ? a : (b.label !== 'coin' && b.label !== 'spike') ? b : null;
Identifies the other body as a player part (head, torso, arm, leg) if it's neither a coin nor a spike
if (coinBody && playerPart) {
Only runs if both a coin and a player part were involved in the collision
World.remove(world, coinBody);
Removes the coin body from the physics world immediately
coins = coins.filter(c => c !== coinBody);
Removes the coin from the coins array so it is never drawn or simulated again
coinCount++;
Increments the coin counter by 1, visible in the UI
let spikeBody = (a.label === 'spike') ? a : (b.label === 'spike') ? b : null;
Checks if either body is labeled 'spike' and stores it, or null if not found
if (!isRagdoll) toggleRagdoll();
If not already in ragdoll mode, converts to ragdoll mode immediately upon spike hit
let torso = isRagdoll ? ragdollObj.torso : activePlayer;
Selects the appropriate body (ragdoll torso or active player) to apply the knockback to
Body.setVelocity(torso, { x: random(-10, 10), y: -20 });
Sets a random sideways velocity and upward velocity to launch the player away from the spike
Body.setAngularVelocity(torso, random(-0.5, 0.5));
Adds a random spin to make the collision feel more chaotic

toggleRagdoll()

toggleRagdoll() handles the complex switching between two different player representations. It demonstrates important Matter.js patterns: saving and restoring state (position, velocity), removing objects from the world, and managing groups of bodies together. This is a key skill for building games with multiple character states.

🔬 This code switches to ragdoll mode. What happens if you comment out the line 'for (let b of ragdollObj.bodies) Body.setVelocity(b, vel);'? The ragdoll parts won't get the player's velocity—will they fall straight down or keep moving?

    let pos = activePlayer.position;
    let vel = activePlayer.velocity;
    World.remove(world, activePlayer);
    
    ragdollObj = createRagdoll(pos.x, pos.y);
    for (let b of ragdollObj.bodies) Body.setVelocity(b, vel);
function toggleRagdoll() {
  if (isRagdoll) {
    // Switch to Active Mode
    let pos = ragdollObj.torso.position;
    let vel = ragdollObj.torso.velocity;
    World.remove(world, ragdollObj.bodies);
    World.remove(world, ragdollObj.constraints);
    
    activePlayer = Bodies.rectangle(pos.x, pos.y, 35, 70, {
      inertia: Infinity, friction: 0.05, frictionAir: 0.01, restitution: 0, label: 'player'
    });
    Body.setVelocity(activePlayer, vel);
    Composite.add(world, activePlayer);
    isRagdoll = false;
  } else {
    // Switch to Ragdoll Mode
    let pos = activePlayer.position;
    let vel = activePlayer.velocity;
    World.remove(world, activePlayer);
    
    ragdollObj = createRagdoll(pos.x, pos.y);
    for (let b of ragdollObj.bodies) Body.setVelocity(b, vel);
    Composite.add(world, ragdollObj.bodies);
    Composite.add(world, ragdollObj.constraints);
    isRagdoll = true;
  }
}
Line-by-line explanation (16 lines)

🔧 Subcomponents:

conditional Ragdoll to Active Conversion if (isRagdoll) { ... }

Removes ragdoll parts and recreates a single rigid player body

conditional Active to Ragdoll Conversion } else { ... }

Removes the rigid player body and creates a multi-part ragdoll skeleton

if (isRagdoll) {
Checks if the player is currently in ragdoll mode
let pos = ragdollObj.torso.position;
Saves the ragdoll's torso position so the new active player spawns in the same place
let vel = ragdollObj.torso.velocity;
Saves the ragdoll's velocity so it is preserved when converting to active mode
World.remove(world, ragdollObj.bodies);
Removes all ragdoll body parts (head, torso, arms, legs) from the physics world
World.remove(world, ragdollObj.constraints);
Removes all constraint lines connecting the ragdoll parts
activePlayer = Bodies.rectangle(pos.x, pos.y, 35, 70, { ... });
Creates a new rigid rectangular player body at the saved position with the same size as before
Body.setVelocity(activePlayer, vel);
Applies the saved ragdoll velocity to the new active player body
Composite.add(world, activePlayer);
Adds the new active player body to the physics world
isRagdoll = false;
Updates the state flag to indicate the player is no longer in ragdoll mode
} else {
If the player is NOT in ragdoll mode, switch to ragdoll mode
let pos = activePlayer.position;
Saves the active player's position for the new ragdoll
World.remove(world, activePlayer);
Removes the rigid active player body from the physics world
ragdollObj = createRagdoll(pos.x, pos.y);
Creates a new ragdoll skeleton at the saved position
for (let b of ragdollObj.bodies) Body.setVelocity(b, vel);
Loops through each ragdoll body part and gives it the saved velocity
Composite.add(world, ragdollObj.bodies); Composite.add(world, ragdollObj.constraints);
Adds all ragdoll body parts and constraint connections to the physics world
isRagdoll = true;
Updates the state flag to indicate the player is now in ragdoll mode

createRagdoll(x, y)

createRagdoll() constructs the entire ragdoll skeleton from scratch. It demonstrates crucial concepts: creating multiple related bodies, putting them in a collision group to prevent self-collision, and using constraints (springs) to connect them. The stiffness value (0.6) controls how stretchy the ragdoll is—lower values make it bouncier, higher values make it more rigid.

🔬 These lines position the head 60 pixels above center, the torso at center, and the left arm 30 pixels to the left. What happens if you increase the head offset to y - 100? Will the ragdoll look stretched or compressed?

  let head = Bodies.circle(x, y - 60, headRadius, { ...opt, label: 'head' });
  let torso = Bodies.rectangle(x, y, torsoW, torsoH, { ...opt, label: 'torso' });
  let armL = Bodies.rectangle(x - 30, y - 10, limbL, limbW, { ...opt, label: 'armL' });
function createRagdoll(x, y) {
  let group = Body.nextGroup(true); 
  let opt = { collisionFilter: { group: group }, restitution: 0.2, friction: 0.8, density: 0.002 };

  let headRadius = 18, torsoW = 35, torsoH = 70, limbW = 12, limbL = 35;

  let head = Bodies.circle(x, y - 60, headRadius, { ...opt, label: 'head' });
  let torso = Bodies.rectangle(x, y, torsoW, torsoH, { ...opt, label: 'torso' });
  let armL = Bodies.rectangle(x - 30, y - 10, limbL, limbW, { ...opt, label: 'armL' });
  let armR = Bodies.rectangle(x + 30, y - 10, limbL, limbW, { ...opt, label: 'armR' });
  let legL = Bodies.rectangle(x - 15, y + 50, limbW, limbL, { ...opt, label: 'legL' });
  let legR = Bodies.rectangle(x + 15, y + 50, limbW, limbL, { ...opt, label: 'legR' });

  let bodies = [head, torso, armL, armR, legL, legR];
  let constraints = [
    Constraint.create({ bodyA: head, bodyB: torso, pointA: { x: 0, y: headRadius }, pointB: { x: 0, y: -torsoH / 2 }, stiffness: 0.6 }),
    Constraint.create({ bodyA: torso, bodyB: armL, pointA: { x: -torsoW / 2, y: -torsoH / 3 }, pointB: { x: limbL / 2, y: 0 }, stiffness: 0.6 }),
    Constraint.create({ bodyA: torso, bodyB: armR, pointA: { x: torsoW / 2, y: -torsoH / 3 }, pointB: { x: -limbL / 2, y: 0 }, stiffness: 0.6 }),
    Constraint.create({ bodyA: torso, bodyB: legL, pointA: { x: -torsoW / 4, y: torsoH / 2 }, pointB: { x: 0, y: -limbL / 2 }, stiffness: 0.6 }),
    Constraint.create({ bodyA: torso, bodyB: legR, pointA: { x: torsoW / 4, y: torsoH / 2 }, pointB: { x: 0, y: -limbL / 2 }, stiffness: 0.6 })
  ];

  return { bodies, constraints, head, torso, armL, armR, legL, legR };
}
Line-by-line explanation (13 lines)

🔧 Subcomponents:

calculation Collision Group Setup let group = Body.nextGroup(true);

Creates a unique collision group so ragdoll parts don't collide with each other

calculation Body Part Creation let head = Bodies.circle(x, y - 60, headRadius, { ...opt, label: 'head' }); let torso = Bodies.rectangle(x, y, torsoW, torsoH, { ...opt, label: 'torso' }); ...

Creates six body parts (head, torso, 2 arms, 2 legs) at specific relative positions

calculation Constraint Connection let constraints = [ Constraint.create({ bodyA: head, bodyB: torso, ... }), ... ];

Creates five constraints (springs) connecting body parts together

let group = Body.nextGroup(true);
Creates a unique collision group ID so all ragdoll parts belong to the same group and don't collide with each other
let opt = { collisionFilter: { group: group }, restitution: 0.2, friction: 0.8, density: 0.002 };
Defines shared options for all ragdoll bodies: group assignment, bounciness (restitution), friction, and density (mass)
let headRadius = 18, torsoW = 35, torsoH = 70, limbW = 12, limbL = 35;
Stores the dimensions of each body part for easy reference
let head = Bodies.circle(x, y - 60, headRadius, { ...opt, label: 'head' });
Creates a circular head 60 pixels above the center position; ...opt spreads the shared options
let torso = Bodies.rectangle(x, y, torsoW, torsoH, { ...opt, label: 'torso' });
Creates the main torso at the center position
let armL = Bodies.rectangle(x - 30, y - 10, limbL, limbW, { ...opt, label: 'armL' });
Creates the left arm 30 pixels to the left and 10 pixels up
let armR = Bodies.rectangle(x + 30, y - 10, limbL, limbW, { ...opt, label: 'armR' });
Creates the right arm 30 pixels to the right and 10 pixels up
let legL = Bodies.rectangle(x - 15, y + 50, limbW, limbL, { ...opt, label: 'legL' });
Creates the left leg 15 pixels to the left and 50 pixels down
let legR = Bodies.rectangle(x + 15, y + 50, limbW, limbL, { ...opt, label: 'legR' });
Creates the right leg 15 pixels to the right and 50 pixels down
let bodies = [head, torso, armL, armR, legL, legR];
Stores all six body parts in an array for easy looping
let constraints = [ ... ];
Creates an array of five constraint (spring) objects connecting the body parts
Constraint.create({ bodyA: head, bodyB: torso, pointA: { x: 0, y: headRadius }, pointB: { x: 0, y: -torsoH / 2 }, stiffness: 0.6 }),
Connects the bottom of the head to the top of the torso with a spring-like constraint
return { bodies, constraints, head, torso, armL, armR, legL, legR };
Returns an object containing the bodies array, constraints array, and references to each individual part

drawActivePlayer(p)

drawActivePlayer() shows how to draw a physics body by translating to its position and rotating to its angle. The push() and pop() functions create an isolated drawing context so transformations don't leak into other drawings. This pattern is essential for drawing rotating, moving objects in p5.js.

function drawActivePlayer(p) {
  push();
  translate(p.position.x, p.position.y);
  rotate(p.angle);
  noStroke();

  // Head
  fill(255, 220, 177); 
  circle(0, -45, 36);

  // Torso
  fill(40, 100, 200);
  rectMode(CENTER);
  rect(0, 0, 35, 60, 6);

  // Arms
  fill(255, 220, 177);
  rect(-25, 0, 12, 35, 6);
  rect(25, 0, 12, 35, 6);

  // Legs
  fill(50, 50, 50);
  rect(-10, 45, 12, 35, 6);
  rect(10, 45, 12, 35, 6);
  pop();
}
Line-by-line explanation (14 lines)
push();
Saves the current drawing state (position, rotation, fill color, etc.) so changes don't affect other drawings
translate(p.position.x, p.position.y);
Moves the origin (0,0) to the player's position, so all following drawing is relative to the player
rotate(p.angle);
Rotates the coordinate system by the player's body angle, so the character leans and tilts with the physics
noStroke();
Turns off outlines so only filled shapes are drawn
fill(255, 220, 177);
Sets the fill color to a skin tone (light orange/peach)
circle(0, -45, 36);
Draws the head at the top (0, -45) with diameter 36
fill(40, 100, 200);
Changes fill to blue
rectMode(CENTER);
Makes rectangles draw from their center instead of from the top-left corner
rect(0, 0, 35, 60, 6);
Draws the blue torso at the center with a slight rounded corner (6 pixel radius)
fill(255, 220, 177);
Switches back to skin tone for arms
rect(-25, 0, 12, 35, 6); rect(25, 0, 12, 35, 6);
Draws two arms on either side of the torso
fill(50, 50, 50);
Changes to dark gray/black for legs
rect(-10, 45, 12, 35, 6); rect(10, 45, 12, 35, 6);
Draws two legs below the torso
pop();
Restores the saved drawing state, undoing translate and rotate so other drawings aren't affected

drawRagdoll(ragdoll)

drawRagdoll() demonstrates a key physics visualization technique: constraint lines. By drawing lines between connected anchor points, you make the invisible physics visible to the player. Notice how it loops through the constraints array to access both connected bodies and their anchor points, then calculates world positions.

🔬 This loop draws the visible strings connecting the ragdoll parts. What happens if you comment out the line(pA.x, pA.y, pB.x, pB.y); line? Will the ragdoll still work, or will it just look invisible?

  for (let c of ragdoll.constraints) {
    let pA = { x: c.bodyA.position.x + c.pointA.x, y: c.bodyA.position.y + c.pointA.y };
    let pB = { x: c.bodyB.position.x + c.pointB.x, y: c.bodyB.position.y + c.pointB.y };
    line(pA.x, pA.y, pB.x, pB.y);
  }
function drawRagdoll(ragdoll) {
  strokeWeight(4); stroke(50);
  for (let c of ragdoll.constraints) {
    let pA = { x: c.bodyA.position.x + c.pointA.x, y: c.bodyA.position.y + c.pointA.y };
    let pB = { x: c.bodyB.position.x + c.pointB.x, y: c.bodyB.position.y + c.pointB.y };
    line(pA.x, pA.y, pB.x, pB.y);
  }

  noStroke();
  fill(255, 220, 177); circle(ragdoll.head.position.x, ragdoll.head.position.y, 36); // Head
  fill(40, 100, 200); drawRotatedRect(ragdoll.torso, 35, 70); // Torso
  fill(255, 220, 177); drawRotatedRect(ragdoll.armL, 35, 12); drawRotatedRect(ragdoll.armR, 35, 12); // Arms
  fill(50, 50, 50); drawRotatedRect(ragdoll.legL, 12, 35); drawRotatedRect(ragdoll.legR, 12, 35); // Legs
}
Line-by-line explanation (9 lines)

🔧 Subcomponents:

for-loop Draw Constraint Lines for (let c of ragdoll.constraints) { let pA = { x: c.bodyA.position.x + c.pointA.x, y: c.bodyA.position.y + c.pointA.y }; let pB = { x: c.bodyB.position.x + c.pointB.x, y: c.bodyB.position.y + c.pointB.y }; line(pA.x, pA.y, pB.x, pB.y); }

Draws visible lines representing the spring constraints that connect body parts

strokeWeight(4); stroke(50);
Sets the constraint lines to be 4 pixels thick and dark gray
for (let c of ragdoll.constraints) {
Loops through all five constraint (spring) objects
let pA = { x: c.bodyA.position.x + c.pointA.x, y: c.bodyA.position.y + c.pointA.y };
Calculates the world position of the constraint's anchor point on bodyA by adding the local offset
let pB = { x: c.bodyB.position.x + c.pointB.x, y: c.bodyB.position.y + c.pointB.y };
Calculates the world position of the constraint's anchor point on bodyB
line(pA.x, pA.y, pB.x, pB.y);
Draws a line from pA to pB, visualizing the constraint
fill(255, 220, 177); circle(ragdoll.head.position.x, ragdoll.head.position.y, 36);
Draws the head as a circle at its physics position
fill(40, 100, 200); drawRotatedRect(ragdoll.torso, 35, 70);
Draws the torso using the helper function, passing width and height
drawRotatedRect(ragdoll.armL, 35, 12); drawRotatedRect(ragdoll.armR, 35, 12);
Draws both arms (length 35, width 12)
drawRotatedRect(ragdoll.legL, 12, 35); drawRotatedRect(ragdoll.legR, 12, 35);
Draws both legs (width 12, length 35)

drawRotatedRect(body, w, h)

drawRotatedRect() is a small helper function that encapsulates the pattern of drawing a rotated rectangle aligned with a physics body. It reduces code duplication in drawRagdoll() and makes the code more readable. Helper functions like this are a hallmark of clean coding.

function drawRotatedRect(body, w, h) {
  push();
  translate(body.position.x, body.position.y);
  rotate(body.angle);
  rectMode(CENTER);
  rect(0, 0, w, h, 6);
  pop();
}
Line-by-line explanation (6 lines)
push();
Saves the drawing state
translate(body.position.x, body.position.y);
Moves the origin to the body's current position
rotate(body.angle);
Rotates the coordinate system to match the body's rotation angle
rectMode(CENTER);
Makes the rectangle draw from its center
rect(0, 0, w, h, 6);
Draws a rounded rectangle at the origin with width w, height h, and 6-pixel corner radius
pop();
Restores the previous drawing state

triggerJump()

triggerJump() shows a simple but effective ground detection technique: check if vertical velocity is near zero. This is much simpler than raycasting and works well for fun, arcade-style games. The abs() function converts negative velocities to positive so the condition works whether the player is falling or jumping.

function triggerJump() {
  if (isRagdoll) return; // Cant jump while floppy
  // Jump if velocity Y is relatively stable (simple ground detection)
  if (abs(activePlayer.velocity.y) < 1.5) {
    Body.setVelocity(activePlayer, { x: activePlayer.velocity.x, y: -16 });
  }
}
Line-by-line explanation (3 lines)

🔧 Subcomponents:

conditional Ragdoll Mode Guard if (isRagdoll) return;

Prevents jumping while in ragdoll mode

conditional Ground Detection if (abs(activePlayer.velocity.y) < 1.5) {

Simple ground detection by checking if vertical velocity is low (near 0)

if (isRagdoll) return;
If in ragdoll mode, exits the function immediately—no jump allowed while floppy
if (abs(activePlayer.velocity.y) < 1.5) {
Checks if the absolute (positive) vertical velocity is less than 1.5; true when the player is on the ground or moving slowly vertically
Body.setVelocity(activePlayer, { x: activePlayer.velocity.x, y: -16 });
Sets the player's Y velocity to -16 (upward) while keeping horizontal velocity unchanged, creating a jump

cleanupWorld()

cleanupWorld() is a crucial performance optimization. Without it, the physics engine would have to simulate thousands of bodies and the game would slow down. The filter() method is a clean way to remove items from an array while also performing a side effect (World.remove()). This pattern is commonly used in game development.

function cleanupWorld() {
  // Remove objects far behind the camera to save memory
  let cleanupDistance = camX - 1000;

  buildings = buildings.filter(b => {
    if (b.position.x < cleanupDistance) { World.remove(world, b); return false; }
    return true;
  });

  coins = coins.filter(c => {
    if (c.position.x < cleanupDistance) { World.remove(world, c); return false; }
    return true;
  });

  spikes = spikes.filter(s => {
    if (s.position.x < cleanupDistance) { World.remove(world, s); return false; }
    return true;
  });
}
Line-by-line explanation (4 lines)

🔧 Subcomponents:

for-loop Buildings Array Filter buildings = buildings.filter(b => { if (b.position.x < cleanupDistance) { World.remove(world, b); return false; } return true; });

Removes platforms that are far behind the camera

for-loop Coins Array Filter coins = coins.filter(c => { if (c.position.x < cleanupDistance) { World.remove(world, c); return false; } return true; });

Removes coins that are far behind the camera

for-loop Spikes Array Filter spikes = spikes.filter(s => { if (s.position.x < cleanupDistance) { World.remove(world, s); return false; } return true; });

Removes spikes that are far behind the camera

let cleanupDistance = camX - 1000;
Calculates a distance 1000 pixels behind the camera; objects past this point will be removed
buildings = buildings.filter(b => { ... });
Filters the buildings array: keeps only buildings ahead of the cleanup distance, removes those behind
if (b.position.x < cleanupDistance) { World.remove(world, b); return false; }
If a building is past the cleanup distance, remove it from the physics world and return false to remove it from the array
return true;
If the building is ahead of the cleanup distance, return true to keep it in the array

createMobilePads()

createMobilePads() creates on-screen buttons for mobile/touch control. It demonstrates p5.js UI elements (createButton), event handlers (mousePressed, touchStarted), and the importance of supporting both mouse and touch input for cross-platform games. Each button updates the global touchInput object when pressed or released.

function createMobilePads() {
  let btnStyle = `
    font-size: 20px; background: rgba(50,50,50,0.7); color: white; 
    border: 2px solid white; border-radius: 12px; user-select: none;
    touch-action: none; font-weight: bold; cursor: pointer; z-index: 100;
  `;

  let padLeft = createButton('←');
  padLeft.position(20, height - 90);
  padLeft.size(70, 70);
  padLeft.style(btnStyle);
  padLeft.mousePressed(() => touchInput.left = true);
  padLeft.mouseReleased(() => touchInput.left = false);
  padLeft.touchStarted(() => touchInput.left = true);
  padLeft.touchEnded(() => touchInput.left = false);

  let padRight = createButton('→');
  padRight.position(100, height - 90);
  padRight.size(70, 70);
  padRight.style(btnStyle);
  padRight.mousePressed(() => touchInput.right = true);
  padRight.mouseReleased(() => touchInput.right = false);
  padRight.touchStarted(() => touchInput.right = true);
  padRight.touchEnded(() => touchInput.right = false);

  let padRagdoll = createButton('FLOP (R)');
  padRagdoll.position(width - 240, height - 90);
  padRagdoll.size(110, 70);
  padRagdoll.style(btnStyle);
  padRagdoll.style('background', 'rgba(255, 100, 100, 0.7)');
  padRagdoll.mousePressed(toggleRagdoll);
  padRagdoll.touchStarted(toggleRagdoll);

  let padJump = createButton('JUMP');
  padJump.position(width - 110, height - 90);
  padJump.size(90, 70);
  padJump.style(btnStyle);
  padJump.style('background', 'rgba(0, 150, 255, 0.7)');
  padJump.mousePressed(triggerJump);
  padJump.touchStarted(triggerJump);
}
Line-by-line explanation (9 lines)
let btnStyle = ` ... `;
Defines CSS styles shared by all buttons: background, border, font size, and z-index for visibility
let padLeft = createButton('←');
Creates a p5.js button element with a left arrow symbol
padLeft.position(20, height - 90);
Places the button 20 pixels from the left and 90 pixels from the bottom of the screen
padLeft.size(70, 70);
Sets the button size to 70x70 pixels
padLeft.style(btnStyle);
Applies the CSS styles to the button
padLeft.mousePressed(() => touchInput.left = true);
When the button is pressed, sets touchInput.left to true (activates left movement)
padLeft.mouseReleased(() => touchInput.left = false);
When the button is released, sets touchInput.left to false (stops left movement)
padLeft.touchStarted(() => touchInput.left = true);
Same as mousePressed but for touch input on mobile devices
padLeft.touchEnded(() => touchInput.left = false);
Same as mouseReleased but for touch input on mobile devices

keyPressed()

keyPressed() is a p5.js function that runs whenever any key is pressed. It demonstrates checking the key variable (for letter keys) and keyCode variable (for special keys like UP_ARROW). This sketch uses it for game controls, offering keyboard shortcuts alongside the on-screen buttons.

function keyPressed() {
  if (key === ' ' || keyCode === UP_ARROW || key === 'w' || key === 'W') triggerJump();
  if (key === 'r' || key === 'R') toggleRagdoll();
}
Line-by-line explanation (2 lines)
if (key === ' ' || keyCode === UP_ARROW || key === 'w' || key === 'W') triggerJump();
Listens for spacebar, up arrow, or W key and calls triggerJump() when any of them are pressed
if (key === 'r' || key === 'R') toggleRagdoll();
Listens for R key and calls toggleRagdoll() to switch between active and ragdoll modes

windowResized()

windowResized() is a p5.js callback function that automatically runs when the browser window is resized. It ensures the canvas always fills the screen on mobile devices or when the window is resized on desktop. This is essential for responsive game design.

function windowResized() { resizeCanvas(windowWidth, windowHeight); }
Line-by-line explanation (1 lines)
resizeCanvas(windowWidth, windowHeight);
Resizes the canvas to match the current window size whenever the window is resized

📦 Key Variables

engine Matter.Engine

The Matter.js physics engine that updates all bodies and simulates gravity, collisions, and constraints

let engine = Engine.create();
world Matter.World

The physics world containing all bodies; child of the engine

let world = engine.world;
isRagdoll boolean

Tracks whether the player is currently in ragdoll mode (true) or active mode (false)

let isRagdoll = false;
activePlayer Matter.Body

The rigid rectangular body representing the player in active mode

let activePlayer = Bodies.rectangle(100, height - 200, 35, 70, { ... });
ragdollObj object

Contains arrays of ragdoll body parts and constraints, and references to individual parts (head, torso, arms, legs)

let ragdollObj = { bodies: [...], constraints: [...], head, torso, ... };
buildings array

Stores all platform bodies currently in the world

let buildings = [];
coins array

Stores all coin bodies currently in the world

let coins = [];
spikes array

Stores all spike bodies currently in the world

let spikes = [];
coinCount number

Tracks the total number of coins the player has collected

let coinCount = 0;
camX number

The camera's current X position; used to translate the view and track the player

let camX = 0;
camY number

The camera's current Y position; used to translate the view and track the player

let camY = 0;
nextGenX number

The X position where the next chunk of terrain should be generated

let nextGenX = -500;
touchInput object

Stores the current state of mobile touch buttons (left and right movement)

let touchInput = { left: false, right: false };

🔧 Potential Improvements (6)

Here are some ways this code could be enhanced:

BUG triggerJump()

Ground detection using abs(velocity.y) < 1.5 is imprecise and allows mid-air jumps if the player's vertical velocity slows naturally

💡 Use a raycast or simple ground collision flag (set true on platform contact, false when airborne) for reliable ground detection

PERFORMANCE draw()

The three separate filter loops in cleanupWorld() iterate the arrays three times per frame, which is inefficient

💡 Combine cleanup into a single loop or call cleanupWorld() less frequently (e.g., every 5 frames)

STYLE handleCollisions()

The ternary operators for identifying body labels are deeply nested and hard to read

💡 Extract a helper function like getBodyType(body) that returns 'coin', 'spike', 'player', etc., or use a switch statement

FEATURE global state

No end-game condition or lose state—player can play infinitely without consequence

💡 Add a game over screen triggered by spike collision (or health system), and a restart button

FEATURE draw()

No visual feedback for input or state changes

💡 Add a visual indicator showing the current mode (e.g., 'ACTIVE' or 'RAGDOLL' text that changes color), or highlight the active button

BUG toggleRagdoll()

When switching modes, all ragdoll parts share the same velocity vector, causing them to move as a block temporarily

💡 Set each ragdoll body's velocity individually or give parts slightly different velocities based on their position for more natural transitions

🔄 Code Flow

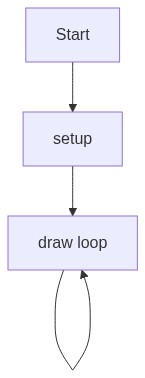
Code flow showing setup, draw, generatechunk, handlecollisions, toggleragdoll, createragdoll, drawactiveplayer, drawragdoll, drawrotatedrect, triggerjump, cleanupworld, createMobilePads, keypressed, windowresized

💡 Click on function names in the diagram to jump to their code

graph TD start[Start] --> setup[setup] setup --> engine-create[Engine Create] setup --> player-create[Player Create] setup --> initial-generation[Initial Generation] setup --> collision-listener[Collision Listener] setup --> createMobilePads[Create Mobile Pads] setup --> windowresized[Window Resized] setup --> draw[draw loop] click setup href "#fn-setup" click engine-create href "#sub-engine-create" click player-create href "#sub-player-create" click initial-generation href "#sub-initial-generation" click collision-listener href "#sub-collision-listener" click createMobilePads href "#fn-createMobilePads" click windowresized href "#fn-windowresized" draw --> physics-update[Physics Update] draw --> input-check[Input Check] draw --> camera-tracking[Camera Tracking] draw --> level-generation-trigger[Level Generation Trigger] draw --> rendering-loop[Rendering Loop] draw --> cleanupworld[Cleanup World] click draw href "#fn-draw" click physics-update href "#sub-physics-update" click input-check href "#sub-input-check" click camera-tracking href "#sub-camera-tracking" click level-generation-trigger href "#sub-level-generation-trigger" click rendering-loop href "#sub-rendering-loop" click cleanupworld href "#fn-cleanupworld" input-check --> active-mode-control[Active Mode Control] input-check --> ragdoll-mode-control[Ragdoll Mode Control] click active-mode-control href "#sub-active-mode-control" click ragdoll-mode-control href "#sub-ragdoll-mode-control" level-generation-trigger --> generatechunk[Generate Chunk] click generatechunk href "#fn-generatechunk" rendering-loop --> ground-creation[Ground Creation] rendering-loop --> platform-generation-loop[Platform Generation Loop] rendering-loop --> collision-loop[Collision Loop] click ground-creation href "#sub-ground-creation" click platform-generation-loop href "#sub-platform-generation-loop" click collision-loop href "#sub-collision-loop" platform-generation-loop --> obstacle-spawn[Obstacle Spawn] click obstacle-spawn href "#sub-obstacle-spawn" collision-loop --> coin-detection[Coin Detection] collision-loop --> spike-detection[Spike Detection] click coin-detection href "#sub-coin-detection" click spike-detection href "#sub-spike-detection" spike-detection --> toggleragdoll[Toggle Ragdoll] click toggleragdoll href "#fn-toggleragdoll" toggleragdoll --> ragdoll-to-active[Ragdoll to Active] toggleragdoll --> active-to-ragdoll[Active to Ragdoll] click ragdoll-to-active href "#sub-ragdoll-to-active" click active-to-ragdoll href "#sub-active-to-ragdoll" ragdoll-to-active --> cleanupworld active-to-ragdoll --> cleanupworld cleanupworld --> buildings-cleanup[Buildings Cleanup] cleanupworld --> coins-cleanup[Coins Cleanup] cleanupworld --> spikes-cleanup[Spikes Cleanup] click buildings-cleanup href "#sub-buildings-cleanup" click coins-cleanup href "#sub-coins-cleanup" click spikes-cleanup href "#sub-spikes-cleanup"

Preview

buns game test - p5.js creative coding sketch preview
Sketch Preview
Code flow diagram showing the structure of buns game test - Code flow showing setup, draw, generatechunk, handlecollisions, toggleragdoll, createragdoll, drawactiveplayer, drawragdoll, drawrotatedrect, triggerjump, cleanupworld, createMobilePads, keypressed, windowresized
Code Flow Diagram