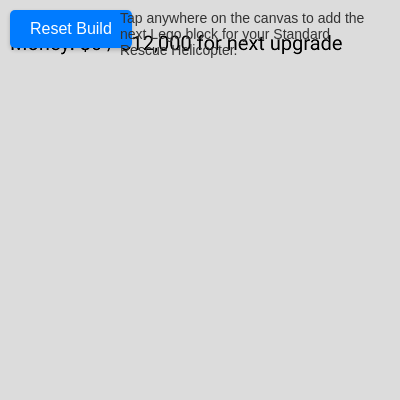
Can you beat 12,000

This interactive Lego vehicle construction game combines 3D building, selling, and mini-games. Players tap to add blocks and build helicopters, cars, trains, and buses step-by-step, then watch a customer buy each creation. As money accumulates, new vehicles unlock and playable mini-games become available at specific money thresholds.

🧪 Try This!

Experiment with the code by making these changes:

  1. Double the money per sale — Vehicles sell for twice the price, letting you unlock upgrades much faster and reach the $12,000 win goal sooner.
  2. Make rotors spin super fast — Helicopter blades and car wheels will spin at triple speed each frame, creating a dizzying visual effect.
  3. Skip to the first upgrade instantly — Start with $500, unlocking the first vehicle tier (cars, trains, buses) right away instead of grinding to earn it.
  4. Make the customer approach much faster — The customer arrives in half the time, making the selling animation snappier and more satisfying.
  5. Make food cook instantly — Patties and buns cook in 0.5 seconds instead of 2, letting you serve orders much faster in the restaurant game.
  6. Reduce obby gravity — The AI player falls more slowly in the obby game, making it easier to jump between platforms.
Prefer the full editor? Open it there →

📖 About This Sketch

This sketch creates an interactive game where players build Lego vehicles by tapping the canvas to add blocks one at a time. Each vehicle is a complete 3D model made from simple boxes, cylinders, and cones that animate (like spinning rotors and wheels). The game combines 3D graphics, interactive state machines, and reward-based progression—every sale unlocks new vehicles and mini-games to play when you've earned enough money.

The code is organized around a game state system: BUILDING (tap to add blocks), COMPLETED/SELLING (watch a customer buy the vehicle), and special states like OBBY_GAME and RESTAURANT_GAME. By studying it, you'll learn how to animate 3D shapes with rotating parts, trigger animations based on elapsed time, manage a game state machine with multiple modes, unlock features at money thresholds, and create simple AI opponents. The sketch demonstrates professional game design patterns in p5.js.

⚙️ How It Works

  1. When the sketch loads, setup() creates a WEBGL canvas, initializes an array of 10 buildable vehicle models (helicopters, cars, trains, buses, special vehicles), sets up UI buttons, and prepares game state variables. The first vehicle is ready to build.
  2. In BUILDING state, every frame draw() clears the background and displays the current vehicle with only the blocks built so far. A 'rotor animation' variable (angle) continuously increments, rotating any blocks marked as animated (like helicopter blades and car wheels). When the player taps the canvas (touchStarted), currentStep increments, adding the next block to the build sequence.
  3. Once all blocks are placed, the state shifts to COMPLETED. A timer starts and a 3D person approaches the vehicle along the Z-axis, simulating a customer arriving to buy it.
  4. When the person reaches the vehicle, state changes to SELLING. Both the person and vehicle animate off-screen to the right, and when the animation finishes, the state becomes SOLD—money increases by $100, and the 'Build Another' button appears.
  5. After each sale, the code checks if earned money has crossed upgrade thresholds ($500, $1000, $2000, $3000, $10000, $12000). At each threshold, a new vehicle type or mini-game unlocks and a selection menu appears, letting the player choose what to build or play next.
  6. The sketch also includes two mini-games: an OBBY_GAME (where AI tries to jump platforms) and a RESTAURANT_GAME (where players build food orders). Each has its own draw, input, and state logic, demonstrating how large p5.js projects separate concerns into distinct game modes.

🎓 Concepts You'll Learn

3D transforms and WEBGL renderingGame state machine (multiple modes)Animation timing with millis()Interactive tap-to-advance mechanicUnlock system based on thresholds3D object composition (block-by-block assembly)

📝 Code Breakdown

setup()

setup() runs once when the sketch starts. It's where you initialize variables, create UI elements, and prepare data structures. Notice how this sketch creates buttons and divs but hides many of them—they'll be shown/hidden later based on game state.

🔬 These lines create the left control button at the bottom-left. What happens if you change the position to (10, 10) and the size to (100, 100)? Where will the button move, and how much bigger will it get?

  let leftButton = createButton('←');
  leftButton.position(10, height - 70);
  leftButton.size(50, 50);
function setup() {
  createCanvas(windowWidth, windowHeight, WEBGL);

  textFont(moneyFont); // Set the loaded font for text() calls in WEBGL

  // Initialize currentModelIndex and currentModel here, where p5.js is ready
  currentModelIndex = 0;
  currentModel = buildableModels[currentModelIndex];
  console.log("Setup: currentModelIndex =", currentModelIndex, ", currentModel =", currentModel.name); // Verify initialization

  // Create a button to reset the build process
  resetButton = createButton('Reset Build');
  resetButton.position(10, 10);
  resetButton.mousePressed(resetBuild);

  // Add text instructions
  instructionsDiv = createElement('div', 'Tap anywhere on the canvas to add the next Lego block.');
  instructionsDiv.style('color', '#333');
  instructionsDiv.style('font-family', 'sans-serif');
  instructionsDiv.style('position', 'absolute');
  instructionsDiv.style('top', '10px');
  instructionsDiv.style('left', '120px');
  instructionsDiv.style('font-size', '14px');
  instructionsDiv.style('max-width', '250px');

  // Create "Build Another" button but hide it initially
  buildAnotherButton = createButton('Build Another Vehicle'); // Updated text
  buildAnotherButton.position(10, 10);
  buildAnotherButton.mousePressed(buildNextModel); // Correctly calls buildNextModel
  buildAnotherButton.hide(); // Hidden until a sale is made

  // Create selection div but hide it initially
  selectionDiv = createElement('div').id('selection-div');
  selectionDiv.style('position', 'absolute');
  selectionDiv.style('top', '50%');
  selectionDiv.style('left', '50%');
  selectionDiv.style('transform', 'translate(-50%, -50%)');
  selectionDiv.style('padding', '20px');
  selectionDiv.style('background', 'rgba(255, 255, 255, 0.9)');
  selectionDiv.style('border-radius', '10px');
  selectionDiv.style('box-shadow', '0 4px 8px rgba(0, 0, 0, 0.2)');
  selectionDiv.style('text-align', 'center');
  selectionDiv.style('font-family', 'sans-serif');
  selectionDiv.style('z-index', '200');
  selectionDiv.hide();

  // Create Obby Game Controls
  let leftButton = createButton('←');
  leftButton.position(10, height - 70);
  leftButton.size(50, 50);
  leftButton.mousePressed(() => obbyPlayer.vel.x = -PLAYER_SPEED);
  leftButton.mouseReleased(() => obbyPlayer.vel.x = 0);
  leftButton.touchStarted(() => obbyPlayer.vel.x = -PLAYER_SPEED);
  leftButton.touchEnded(() => obbyPlayer.vel.x = 0);
  leftButton.hide();
  obbyControls.push(leftButton);

  let rightButton = createButton('→');
  rightButton.position(70, height - 70);
  rightButton.size(50, 50);
  rightButton.mousePressed(() => obbyPlayer.vel.x = PLAYER_SPEED);
  rightButton.mouseReleased(() => obbyPlayer.vel.x = 0);
  rightButton.touchStarted(() => obbyPlayer.vel.x = PLAYER_SPEED);
  rightButton.touchEnded(() => obbyPlayer.vel.x = 0);
  rightButton.hide();
  obbyControls.push(rightButton);

  let jumpButton = createButton('Jump');
  jumpButton.position(width - 110, height - 70);
  jumpButton.size(100, 50);
  jumpButton.mousePressed(obbyJump);
  jumpButton.touchStarted(obbyJump);
  jumpButton.hide();
  obbyControls.push(jumpButton);

  backToFactoryButton = createButton('Back to Factory');
  backToFactoryButton.position(width / 2 - 75, height - 70);
  backToFactoryButton.size(150, 50);
  backToFactoryButton.mousePressed(exitObbyGame);
  backToFactoryButton.hide();

  // Initialize Obby Game
  initializeObbyGame();

  // Initial call to resetBuild to set up the first model
  resetBuild();
}
Line-by-line explanation (11 lines)

🔧 Subcomponents:

initialization Canvas and Context Setup createCanvas(windowWidth, windowHeight, WEBGL);

Creates a full-window WEBGL canvas for 3D rendering of vehicle models

loop Button and Control Creation resetButton = createButton('Reset Build');

Creates interactive HTML buttons for resetting builds and controlling mini-games

initialization Obby Game Control Setup obbyControls.push(leftButton);

Stores left, right, and jump buttons in an array for easy show/hide management during obby game

createCanvas(windowWidth, windowHeight, WEBGL);
Creates a canvas that fills the entire window using WEBGL for 3D graphics. WEBGL is p5.js's 3D rendering context.
currentModelIndex = 0;
Initializes the starting vehicle index to 0 (the first helicopter in the buildableModels array)
currentModel = buildableModels[currentModelIndex];
Sets the current vehicle to build based on the index—this is the object we'll render and pull block steps from
resetButton = createButton('Reset Build');
Creates a clickable HTML button that will reset the current build when pressed
resetButton.mousePressed(resetBuild);
Attaches a callback so clicking the button calls the resetBuild() function
instructionsDiv = createElement('div', 'Tap anywhere on the canvas to add the next Lego block.');
Creates a text div with instructions that appears on-screen to guide the player
buildAnotherButton.hide();
Hides the 'Build Another Vehicle' button initially—it only appears after a sale
leftButton.size(50, 50);
Sets the left control button to 50×50 pixels, making it a clickable square for obby game control
leftButton.touchStarted(() => obbyPlayer.vel.x = -PLAYER_SPEED);
When the button is touched/pressed, set the AI player's horizontal velocity to move left
initializeObbyGame();
Pre-loads the obby game data (platforms, player, lava) so it's ready to play when unlocked
resetBuild();
Calls resetBuild() to initialize the first model and set the game to BUILDING state
draw()

draw() is the main animation loop in p5.js, running ~60 times per second. This sketch uses draw() as a dispatcher: it checks the current game state and calls the right drawing function. This pattern—routing through a state variable—is a professional way to manage multiple game modes without messy nested code.

🔬 This is a state machine that routes to different draw functions. What happens if you add a new condition `} else if (sketchState === 'BONUS_GAME') { drawBonusGame(); }` before the final else? You've just created a new game mode—how would the code route to it when sketchState changes?

  if (sketchState === 'OBBY_GAME') {
    drawObbyGame();
  } else if (sketchState === 'BREAK_TIME') {
    drawBreakTime();
  } else if (sketchState === 'RESTAURANT_GAME') {
    drawRestaurantGame();
  } else {
    drawBuildAndSellMode();
  }
function draw() {
  if (sketchState === 'OBBY_GAME') {
    drawObbyGame();
  } else if (sketchState === 'BREAK_TIME') {
    drawBreakTime();
  } else if (sketchState === 'RESTAURANT_GAME') {
    drawRestaurantGame();
  } else {
    drawBuildAndSellMode();
  }
}
Line-by-line explanation (5 lines)

🔧 Subcomponents:

conditional Game State Router if (sketchState === 'OBBY_GAME')

Routes draw logic to different functions based on which game mode is active

if (sketchState === 'OBBY_GAME') {
Checks if the game is in obby game mode (true when the player has unlocked and chosen to play the obby mini-game)
drawObbyGame();
Calls the function that draws and updates the obby game (platforms, AI player, lava)
} else if (sketchState === 'BREAK_TIME') {
Checks if the game is in break time mode (true when player earned $10,000)
} else if (sketchState === 'RESTAURANT_GAME') {
Checks if the game is in restaurant game mode (true when player unlocked and chose the restaurant mini-game)
} else {
For all other states (BUILDING, COMPLETED, SELLING, SOLD), call the building/selling draw function

drawBuildAndSellMode()

drawBuildAndSellMode() is the heart of the building/selling loop. It manages several sub-states (BUILDING → COMPLETED → SELLING → SOLD) using elapsed time from millis(). Each frame, it advances animations a little bit, and when a threshold is crossed (like elapsed > SELL_ANIMATION_DURATION), the state changes. This is a professional pattern: state machines with time-based transitions.

function drawBuildAndSellMode() {
  background(220); // Light grey background
  orbitControl(); // Allow user to rotate the view with mouse/touch

  // Add lighting for better 3D appearance
  directionalLight(255, 255, 255, 0.25, 0.25, -1); // White light from top-front
  ambientLight(100); // Soft ambient light

  angle += 0.05; // Increment angle for rotor animation (slightly slower for build mode)

  // Determine model and person positions based on game state
  let modelMoveOffsetZ = 0;
  let modelMoveOffsetX = 0;

  if (sketchState === 'COMPLETED') {
    let elapsed = millis() - sellAnimationStartTime;
    // Person approaches model along Z-axis
    personCurrentZ = max(0, personInitialZ * currentModel.scaleFactor - elapsed * 0.1); // Scale approach speed
    personCurrentX = personGrabX * currentModel.scaleFactor; // Person stays at grab X position, scaled
    if (personCurrentZ <= 0) {
      sketchState = 'SELLING';
      sellAnimationStartTime = millis(); // Reset timer for leaving animation
      personCurrentZ = 0; // Ensure person is exactly at model's Z
    }
  } else if (sketchState === 'SELLING') {
    let elapsed = millis() - sellAnimationStartTime;
    if (elapsed < SELL_ANIMATION_DURATION) {
      // Animate person and model moving off-screen right along X-axis
      modelMoveOffsetX = map(elapsed, 0, SELL_ANIMATION_DURATION, 0, width / 2 + 100);
      personCurrentX = map(elapsed, 0, SELL_ANIMATION_DURATION, personGrabX * currentModel.scaleFactor, width / 2 + 100 + personGrabX * currentModel.scaleFactor); // Person moves with the model, scaled
      personCurrentZ = 0; // Person remains at model's Z
    } else {
      // Animation finished
      sketchState = 'SOLD';
      moneyEarned += MONEY_PER_SALE;
      resetButton.hide();
      instructionsDiv.hide();
      buildAnotherButton.show(); // Show the "Build Another" button

      // Check for upgrades after sale
      if (!upgradeUnlocked && moneyEarned >= UPGRADE_THRESHOLD) {
        triggerUpgrade();
      } else if (!upgrade2Unlocked && moneyEarned >= UPGRADE_THRESHOLD_2) {
        triggerUpgrade2();
      } else if (!upgrade3Unlocked && moneyEarned >= UPGRADE_THRESHOLD_3) { // New upgrade check for Obby Game
        triggerUpgrade3();
      } else if (!upgrade4Unlocked && moneyEarned >= UPGRADE_THRESHOLD_4) { // Nuke is now upgrade 4
        triggerUpgrade4();
      } else if (!upgrade5Unlocked && moneyEarned >= UPGRADE_THRESHOLD_5) { // Break Time upgrade
        triggerUpgrade5();
      } else if (!upgrade6Unlocked && moneyEarned >= UPGRADE_THRESHOLD_6) { // Restaurant Game upgrade
        triggerUpgrade6();
      }
    }
  }

  // Draw the current model (up to the current step)
  push();
  scale(currentModel.scaleFactor); // Apply overall scale for the current model
  translate(modelMoveOffsetX, 0, modelMoveOffsetZ); // Apply offsets for selling animation
  for (let i = 0; i < currentStep; i++) {
    let step = currentModel.buildSteps[i]; // Use build steps from the current model
    push();
    translate(step.tx, step.ty, step.tz);
    rotateX(step.rx);
    rotateY(step.ry);
    rotateZ(step.rz);

    if (step.animated) {
      if (step.axis === 'Y') {
        rotateY(angle * step.speed + step.offset);
      } else if (step.axis === 'X') {
        rotateX(angle * step.speed + step.offset);
      }
    }

    fill(step.color);
    if (step.type === 'cylinder') {
      cylinder(step.w, step.h); // w is radius, h is height for cylinder
    } else if (step.type === 'cone') {
      cone(step.w, step.h); // w is radius, h is height for cone
    } else {
      box(step.w, step.h, step.d);
    }
    pop();
  }
  pop(); // End model group transformations

  // Draw the "person" when selling
  if (sketchState === 'COMPLETED' || sketchState === 'SELLING') {
    push();
    translate(personCurrentX, -10, personCurrentZ); // Use dynamic X and Z positions

    // Head (uses randomly chosen skin tone)
    fill(currentPersonSkinTone);
    box(10, 10, 10);

    // Torso (e.g., blue shirt)
    push();
    translate(0, 15, 0);
    fill(0, 0, 255);
    box(15, 20, 10);
    pop();

    // Legs (e.g., grey pants)
    push();
    translate(0, 35, 0);
    fill(150, 150, 150);
    box(10, 20, 10);
    pop();

    // Feet (e.g., black shoes)
    push();
    translate(0, 50, 5);
    fill(0, 0, 0);
    box(12, 5, 15);
    pop();

    pop();
  }

  // Display messages and money - apply toLocaleString for correct formatting
  push();
  textAlign(LEFT);
  textSize(20);
  fill(0);
  text(`Money: $${moneyEarned.toLocaleString('en-US')} / $${UPGRADE_THRESHOLD_6.toLocaleString('en-US')} for next upgrade`, -width / 2 + 10, -height / 2 + 50); // Display money top-left

  if (sketchState === 'BUILDING' && currentStep === currentModel.buildSteps.length) {
    sketchState = 'COMPLETED'; // Transition to completed state
    sellAnimationStartTime = millis(); // Start timer for person to approach
    resetButton.hide();
    instructionsDiv.html(`Your ${currentModel.name} is built! A customer is coming to pick it up...`);
    instructionsDiv.style('left', '10px');
    instructionsDiv.style('top', '40px'); // Move instructions below money
    instructionsDiv.style('max-width', '300px');
    // Reset person's position for approach, scaled by the current model's scale factor
    personCurrentZ = personInitialZ * currentModel.scaleFactor;
    personCurrentX = personGrabX * currentModel.scaleFactor;
  }

  if (sketchState === 'COMPLETED') {
    textSize(16);
    text('A customer is approaching!', -width / 2 + 10, -height / 2 + 80);
  }

  if (sketchState === 'SOLD') {
    textSize(24);
    fill(0, 150, 0); // Green for money message
    textAlign(CENTER);
    text(`SOLD! You earned $${MONEY_PER_SALE}!`, 0, 0);
  }

  // Display upgrade message if active
  if (millis() - upgradeMessageStartTime < UPGRADE_MESSAGE_DURATION) {
    textSize(30);
    fill(255, 165, 0); // Orange for upgrade message
    textAlign(CENTER);
    if (upgrade6Unlocked) { // Restaurant message
      text('Restaurant Game Unlocked!', 0, -50);
    } else if (upgrade5Unlocked) { // Break Time message
      text(`You've earned $${UPGRADE_THRESHOLD_5.toLocaleString('en-US')}! Time for a break!`, 0, -50);
    } else if (upgrade4Unlocked) { // Nuke message
      text('Massive Nuke Unlocked!', 0, -50);
    } else if (upgrade3Unlocked) { // Obby Game message
      text('Obby Game Unlocked!', 0, -50);
    } else if (upgrade2Unlocked) {
      text('Happy New Year 2067 Vehicle Unlocked!', 0, -50);
    } else if (upgradeUnlocked) {
      text('Upgrade Unlocked! New vehicles available!', 0, -50);
    }
  }
  pop();
}
Line-by-line explanation (19 lines)

🔧 Subcomponents:

calculation Animation Timing for COMPLETED State let elapsed = millis() - sellAnimationStartTime;

Calculates how many milliseconds have passed since the customer approach started, used to animate smooth motion

for-loop Block-by-Block Model Rendering for (let i = 0; i < currentStep; i++) {

Loops through each completed build step and draws the corresponding 3D block with proper transforms and animations

conditional Rotor/Wheel Animation if (step.animated) {

For blocks marked as animated, applies continuous rotation based on the global angle variable and speed multiplier

conditional Shape Type Renderer if (step.type === 'cylinder') {

Draws the correct 3D shape type (cylinder, cone, or box) based on the step definition

conditional Upgrade Trigger System if (!upgradeUnlocked && moneyEarned >= UPGRADE_THRESHOLD) {

After each sale, checks if earned money has crossed any upgrade thresholds to unlock new vehicles/mini-games

background(220); // Light grey background
Clears the canvas each frame with a light grey color, removing the previous frame's drawing
orbitControl(); // Allow user to rotate the view with mouse/touch
Enables p5.js's built-in camera control—drag the mouse to rotate the 3D view around the model
directionalLight(255, 255, 255, 0.25, 0.25, -1); // White light from top-front
Adds directional lighting (like sunlight) from the top-front, making 3D shapes appear more realistic with shading
angle += 0.05; // Increment angle for rotor animation (slightly slower for build mode)
Increases the angle variable each frame—this drives the spinning of helicopter blades and car wheels
let elapsed = millis() - sellAnimationStartTime;
Calculates how many milliseconds have passed since the customer approach began, used for smooth timing-based animation
personCurrentZ = max(0, personInitialZ * currentModel.scaleFactor - elapsed * 0.1);
Moves the customer closer along the Z-axis each frame (0.1 pixels per millisecond), stopping at Z=0 when they reach the vehicle
scale(currentModel.scaleFactor); // Apply overall scale for the current model
Scales all subsequent drawing 3D transforms by the model's scale factor, so larger vehicles appear proportionally bigger
for (let i = 0; i < currentStep; i++) {
Loops from 0 to the current number of completed steps, drawing one block per iteration
let step = currentModel.buildSteps[i]; // Use build steps from the current model
Gets the i-th build step object, which contains position, rotation, size, color, and animation info for that block
translate(step.tx, step.ty, step.tz);
Moves the drawing origin to the step's position (tx, ty, tz), so subsequent shapes draw at the correct location
if (step.animated) {
Checks if this block should rotate (like helicopter blades)—if true, applies additional rotation
rotateY(angle * step.speed + step.offset);
Rotates the block around the Y-axis by (angle × speed + offset) radians, creating smooth spinning animation
if (step.type === 'cylinder') {
Checks if the block is a cylinder (wheels, rotor poles, smokestacks); if so, draw it as a cylinder instead of a box
cylinder(step.w, step.h); // w is radius, h is height for cylinder
Draws a cylinder with radius step.w and height step.h—used for round parts like wheels and rotor axes
} else {
If the step type is 'box' (the default), draw a rectangular block with the specified width, height, and depth
if (!upgradeUnlocked && moneyEarned >= UPGRADE_THRESHOLD) {
Checks if this is the first time earning enough money to unlock the first upgrade (cars, trains, buses)
triggerUpgrade();
Calls the function that unlocks the first set of vehicles and shows a selection menu
if (sketchState === 'BUILDING' && currentStep === currentModel.buildSteps.length) {
When the player has placed all blocks (currentStep equals the total number of steps), auto-transition to COMPLETED state
if (millis() - upgradeMessageStartTime < UPGRADE_MESSAGE_DURATION) {
If less than 2 seconds have passed since an upgrade triggered, display an upgrade unlock message on screen

touchStarted()

touchStarted() is a p5.js callback that fires whenever the user touches the screen. This sketch uses it to detect taps on the canvas area and advance the build. Notice the debounce logic (checking time between taps) and the boundary check (ensuring taps are on the canvas, not on buttons)—these are professional patterns for reliable mobile touch input.

function touchStarted() {
  // Prevent default browser touch behavior (e.g., scrolling)

  let currentTapX = mouseX;
  let currentTapY = mouseY;

  // If there are active touches, use the first one's coordinates for better reliability
  if (touches.length > 0) {
    currentTapX = touches[0].x;
    currentTapY = touches[0].y;
  }

  // Check if enough time has passed since the last tap to prevent double increments
  if (millis() - lastTapTime > TAP_DEBOUNCE_TIME) {
    // Simple check to ensure tap is on the canvas, not the Reset button or instructions area
    // The resetButton is at (10, 10) and instructions div starts at (120, 10)
    // This condition creates a safe zone in the top-left corner for the UI elements.
    // Assuming the combined button/instructions area is roughly within the first 380px wide
    // and 50px high of the canvas.
    if (sketchState === 'BUILDING' && (currentTapY > 50 || currentTapX > 380)) { // If tap is on the canvas area
      if (currentStep < currentModel.buildSteps.length) {
        currentStep++; // Advance to the next build step
        lastTapTime = millis(); // Update last tap time
        return false; // Only return false if we handled a canvas interaction
      }
    }
  }
  // If the tap was in the button/instructions area, or debounce failed,
  // or not in BUILDING state, we don't return false. This allows the button's mousePressed
  // callback (which is a separate event handler) to fire.
}
Line-by-line explanation (9 lines)

🔧 Subcomponents:

conditional Debounce Timer Check if (millis() - lastTapTime > TAP_DEBOUNCE_TIME) {

Prevents accidental double-taps by checking that 200ms have passed since the last tap

conditional Canvas vs Button Detection if (sketchState === 'BUILDING' && (currentTapY > 50 || currentTapX > 380)) {

Ensures the tap is on the canvas area (not on UI buttons) before advancing the build step

let currentTapX = mouseX;
Stores the tap's X coordinate, defaulting to p5.js's mouseX variable
if (touches.length > 0) {
If there are active touch points, use the first touch's coordinates instead—more reliable on mobile
currentTapX = touches[0].x;
Overwrites mouseX with the first touch's actual X position, accounting for any coordinate system differences
if (millis() - lastTapTime > TAP_DEBOUNCE_TIME) {
Checks if at least 200ms have passed since the last recorded tap—prevents double-increments from accidental double-taps
if (sketchState === 'BUILDING' && (currentTapY > 50 || currentTapX > 380)) {
Only advances the build if: (1) we're in BUILDING state AND (2) the tap is below the UI area (Y > 50) OR to the right of buttons (X > 380)
if (currentStep < currentModel.buildSteps.length) {
Prevents incrementing past the total number of blocks—once all blocks are placed, taps don't advance further
currentStep++; // Advance to the next build step
Increments currentStep by 1, which causes the next block to be drawn in the next frame's drawBuildAndSellMode()
lastTapTime = millis(); // Update last tap time
Records the current time to enable debounce checking on the next tap
return false; // Only return false if we handled a canvas interaction
Returning false tells p5.js to consume this touch event, preventing the browser from handling it (e.g., scrolling)

buildNextModel()

buildNextModel() cycles through unlocked vehicles using the modulo operator (%)—a professional pattern for circular lists. The filter() method keeps only unlocked models, and findIndex() locates the current model's position. Together, these array methods let you safely cycle through a filtered list.

function buildNextModel() { // This function is called by the "Build Another" button
  // Filter for unlocked models
  let unlockedModels = buildableModels.filter(model => !model.locked);

  if (unlockedModels.length === 0) {
    console.warn("No unlocked models available to build!");
    return;
  }

  // Find the index of the current model within the unlocked models
  let currentUnlockedIndex = unlockedModels.findIndex(model => model === currentModel);

  // Advance to the next unlocked model, wrapping around if needed
  currentUnlockedIndex = (currentUnlockedIndex + 1) % unlockedModels.length;
  currentModel = unlockedModels[currentUnlockedIndex]; // Set the current model

  console.log("Loading next model:", currentModel.name); // Confirm model change
  resetBuild(); // Reset the build steps and UI for the new model
}
Line-by-line explanation (6 lines)

🔧 Subcomponents:

calculation Unlocked Models Filter let unlockedModels = buildableModels.filter(model => !model.locked);

Creates an array of only the models the player has unlocked (where locked === false)

calculation Cyclic Index Wrapping currentUnlockedIndex = (currentUnlockedIndex + 1) % unlockedModels.length;

Advances to the next unlocked model, and if at the end, wraps back to the beginning using modulo operator

let unlockedModels = buildableModels.filter(model => !model.locked);
Creates a new array containing only vehicles where locked is false—skips any locked vehicles
if (unlockedModels.length === 0) {
Safety check: if no models are unlocked, warn the developer and exit to prevent crashes
let currentUnlockedIndex = unlockedModels.findIndex(model => model === currentModel);
Finds the position of the currently-building model within the unlockedModels array
currentUnlockedIndex = (currentUnlockedIndex + 1) % unlockedModels.length;
Increments the index by 1, and uses modulo (%) to wrap back to 0 if we go past the last model
currentModel = unlockedModels[currentUnlockedIndex]; // Set the current model
Sets currentModel to the next unlocked vehicle, so the next build will be this new vehicle
resetBuild(); // Reset the build steps and UI for the new model
Calls resetBuild() to reset currentStep to 0 and update the UI text for the new model

resetBuild()

resetBuild() is a cleanup function called when starting a new build. It resets all relevant variables (currentStep, sketchState) and updates the UI to match the new vehicle. Notice how it hides mini-game UI—this prevents button clutter when switching between game modes.

function resetBuild() { // This function resets the current build (for the current model)
  currentStep = 0; // Reset the build process to the beginning
  sketchState = 'BUILDING'; // Reset game state

  console.log("ResetBuild: currentModelIndex =", currentModelIndex, ", currentModel =", currentModel.name); // Verify availability

  // Adjust person's initial position based on the new model's scale factor
  personCurrentZ = personInitialZ * currentModel.scaleFactor;
  personCurrentX = personGrabX * currentModel.scaleFactor;

  // Randomly select a skin tone for the new person
  currentPersonSkinTone = random(personSkinTones);

  resetButton.show();
  instructionsDiv.html(`Tap anywhere on the canvas to add the next Lego block for your ${currentModel.name}.`);
  instructionsDiv.style('left', '120px');
  instructionsDiv.style('top', '10px');
  instructionsDiv.style('max-width', '250px');
  buildAnotherButton.hide(); // Hide "Build Another" button
  selectionDiv.hide(); // Ensure selection div is hidden when building

  // Hide Obby Game UI
  hideObbyGameUI();
  // Hide Restaurant Game UI
  hideRestaurantGameUI();
}
Line-by-line explanation (8 lines)

🔧 Subcomponents:

initialization UI Element Updates resetButton.show();

Shows/hides UI buttons and divs to reflect the BUILDING state

calculation Scale-Based Position Adjustment personCurrentZ = personInitialZ * currentModel.scaleFactor;

Scales the customer's starting position based on the new vehicle's size, so they approach from proportionally the same distance

currentStep = 0; // Reset the build process to the beginning
Sets currentStep back to 0, so the next build will draw no blocks initially—the player taps to add them
sketchState = 'BUILDING'; // Reset game state
Sets the game state to BUILDING, so touchStarted() will respond to taps and advance currentStep
personCurrentZ = personInitialZ * currentModel.scaleFactor;
Scales the customer's approach distance by the vehicle's scale factor, so huge vehicles don't have proportionally tiny people
currentPersonSkinTone = random(personSkinTones);
Picks a random skin tone from the personSkinTones array, adding visual variety to customers
resetButton.show();
Makes the 'Reset Build' button visible on-screen
instructionsDiv.html(`Tap anywhere on the canvas to add the next Lego block for your ${currentModel.name}.`);
Updates the instruction text to mention the new vehicle's name, keeping players informed
buildAnotherButton.hide(); // Hide "Build Another" button
Hides the 'Build Another' button since we're now in a new build—it only shows after a sale
hideObbyGameUI();
Hides all obby game controls (direction buttons, jump button) in case they were showing

triggerUpgrade()

triggerUpgrade() demonstrates a professional unlock system: when a money threshold is crossed, specific vehicles unlock, an on-screen message displays briefly, and a selection menu appears. The pattern is scalable—you could add more vehicles without changing this function, as long as their names match the search keywords.

function triggerUpgrade() {
  upgradeUnlocked = true;
  upgradeMessageStartTime = millis(); // Start timer for upgrade message

  // Unlock all car, train, and bus models
  buildableModels.forEach(model => {
    // Check for specific car, train, bus names, or a type property if added
    if (model.name.includes('Car') || model.name.includes('Train') || model.name.includes('Bus')) {
      model.locked = false;
      console.log(`Unlocked: ${model.name}`);
    }
  });

  // Hide current UI elements
  resetButton.hide();
  instructionsDiv.hide();
  buildAnotherButton.hide();

  // Show selection UI
  showUpgradeSelection();
}
Line-by-line explanation (7 lines)

🔧 Subcomponents:

for-loop Model Unlock Loop buildableModels.forEach(model => {

Iterates through all vehicles and unlocks those matching car/train/bus keywords

upgradeUnlocked = true;
Sets the flag so this upgrade trigger never fires again—prevents duplicate unlocking
upgradeMessageStartTime = millis(); // Start timer for upgrade message
Records the current time, which draw() uses to display the upgrade message for 2 seconds
buildableModels.forEach(model => {
Loops through every vehicle in the buildableModels array
if (model.name.includes('Car') || model.name.includes('Train') || model.name.includes('Bus')) {
Checks if the model's name contains the words 'Car', 'Train', or 'Bus'—if so, it's a vehicle from this upgrade tier
model.locked = false;
Unlocks the vehicle by setting locked to false—it will now appear in the upgrade selection menu
resetButton.hide();
Hides the reset button since we're transitioning from building to the selection menu
showUpgradeSelection();
Calls the function that displays a centered menu with buttons for each newly unlocked vehicle

showUpgradeSelection()

showUpgradeSelection() builds a dynamic menu by filtering for unlocked models and creating a button for each. It demonstrates HTML/CSS styling of p5.js buttons, conditional menu items (obby and restaurant buttons appear only if unlocked), and the pattern of storing button references for later cleanup.

function showUpgradeSelection() {
  selectionDiv.html(''); // Clear any old buttons
  selectionButtons = []; // Clear array

  let title = createElement('h3', 'Upgrade Unlocked! Choose your next activity:'); // Updated title
  title.style('margin-bottom', '15px');
  selectionDiv.child(title);

  // Filter for newly unlocked models (cars, trains, buses, special vehicle, and nuke)
  let newlyUnlockedModels = buildableModels.filter(model => !model.locked && (model.name.includes('Car') || model.name.includes('Train') || model.name.includes('Bus') || model.name === "Happy New Year 2067 Celebration Vehicle" || model.name === "Massive Nuke"));

  newlyUnlockedModels.forEach(model => {
    let button = createButton(model.name);
    button.style('display', 'block'); // Stack buttons vertically
    button.style('margin', '10px auto');
    button.style('padding', '10px 20px');
    button.style('font-size', '18px');
    button.style('cursor', 'pointer');
    button.style('border', 'none');
    button.style('border-radius', '5px');
    button.style('background', '#4CAF50'); // Green
    button.style('color', 'white');
    button.style('width', '80%');
    button.mousePressed(() => selectVehicleForBuild(model));
    selectionDiv.child(button);
    selectionButtons.push(button);
  });

  // Add Obby Game button if unlocked
  if (upgrade3Unlocked) {
    let obbyButton = createButton('Play Obby Game (AI)'); // Updated text
    obbyButton.style('display', 'block');
    obbyButton.style('margin', '10px auto');
    obbyButton.style('padding', '10px 20px');
    obbyButton.style('font-size', '18px');
    obbyButton.style('cursor', 'pointer');
    obbyButton.style('border', 'none');
    obbyButton.style('border-radius', '5px');
    obbyButton.style('background', '#FF6347'); // Tomato red for obby
    obbyButton.style('color', 'white');
    obbyButton.style('width', '80%');
    obbyButton.mousePressed(enterObbyGame); // Still calls enterObbyGame
    selectionDiv.child(obbyButton);
    selectionButtons.push(obbyButton);
  }

  // Add Restaurant Game button if unlocked
  if (upgrade6Unlocked) {
    let restaurantButton = createButton('Play Restaurant Game');
    restaurantButton.style('display', 'block');
    restaurantButton.style('margin', '10px auto');
    restaurantButton.style('padding', '10px 20px');
    restaurantButton.style('font-size', '18px');
    restaurantButton.style('cursor', 'pointer');
    restaurantButton.style('border', 'none');
    restaurantButton.style('border-radius', '5px');
    restaurantButton.style('background', '#8B4513'); // Saddle Brown for restaurant
    restaurantButton.style('color', 'white');
    restaurantButton.style('width', '80%');
    restaurantButton.mousePressed(enterRestaurantGame);
    selectionDiv.child(restaurantButton);
    selectionButtons.push(restaurantButton);
  }

  selectionDiv.show();
}
Line-by-line explanation (11 lines)

🔧 Subcomponents:

calculation Newly Unlocked Model Filter let newlyUnlockedModels = buildableModels.filter(model => !model.locked && (model.name.includes('Car') || ...));

Creates an array of vehicles that are both unlocked and match the vehicle tier keywords

for-loop Dynamic Button Creation newlyUnlockedModels.forEach(model => {

Creates a clickable button for each unlocked vehicle and adds it to the selection menu

conditional Mini-Game Button Conditionals if (upgrade3Unlocked) {

Shows obby and restaurant game buttons only if those upgrades have been unlocked

selectionDiv.html(''); // Clear any old buttons
Empties the selection menu's HTML, removing old buttons from the previous menu display
let title = createElement('h3', 'Upgrade Unlocked! Choose your next activity:');
Creates a title heading that tells the player they've unlocked new options
selectionDiv.child(title);
Adds the title heading as a child of the selection menu div, so it displays at the top
let newlyUnlockedModels = buildableModels.filter(model => !model.locked && (...));
Filters for vehicles that are unlocked (!model.locked) AND match one of the search keywords (Car, Train, Bus, special names)
newlyUnlockedModels.forEach(model => {
Loops through each newly unlocked vehicle and creates a button for it
button.style('display', 'block'); // Stack buttons vertically
Sets display to 'block' so buttons stack vertically instead of appearing in a row
button.mousePressed(() => selectVehicleForBuild(model));
Attaches a callback so clicking the button sets currentModel to this vehicle and starts a new build
selectionDiv.child(button);
Adds the button to the selection menu div so it displays on-screen
selectionButtons.push(button);
Stores the button reference in selectionButtons array, so it can be removed later when the menu closes
if (upgrade3Unlocked) {
Checks if the obby game has been unlocked—if so, shows a button to play it
if (upgrade6Unlocked) {
Checks if the restaurant game has been unlocked—if so, shows a button to play it

drawObbyGame()

drawObbyGame() combines physics (gravity, velocity), collision detection (checking platform hits), and game state management (PLAYING, WON, GAME_OVER). It demonstrates a complete mini-game within the larger sketch, with its own camera, update logic, and rendering—a scalable pattern for adding more games.

🔬 These three lines apply physics: gravity pulls down, velocity moves the player. What happens if you change `GRAVITY` from 0.5 to 1.0? The player falls twice as fast—does the jump need adjustment to reach the platforms?

    obbyPlayer.vel.y += GRAVITY;
    obbyPlayer.pos.x += obbyPlayer.vel.x;
    obbyPlayer.pos.y += obbyPlayer.vel.y;
function drawObbyGame() {
  background(135, 206, 235); // Sky blue background

  // Set up a fixed camera for the obby game
  camera(
    0, -150, 500, // Eye position (X, Y, Z)
    0, 0, 0,     // Look-at position (X, Y, Z)
    0, 1, 0      // Up direction (X, Y, Z)
  );

  // Update player physics (AI controlled)
  if (obbyGameState === 'PLAYING') {
    updateObbyAI(); // Call AI logic
    obbyPlayer.vel.y += GRAVITY;
    obbyPlayer.pos.x += obbyPlayer.vel.x;
    obbyPlayer.pos.y += obbyPlayer.vel.y;

    // Boundary checks (simple)
    if (obbyPlayer.pos.x > width / 2) obbyPlayer.pos.x = width / 2;
    if (obbyPlayer.pos.x < -width / 2) obbyPlayer.pos.x = -width / 2;

    // Check for platform collisions
    obbyPlayer.onGround = false;
    for (let platform of obbyPlatforms) {
      if (checkPlatformCollision(obbyPlayer, platform)) {
        obbyPlayer.pos.y = platform.pos.y - platform.size.y / 2 - obbyPlayer.size / 2; // Snap to top of platform
        obbyPlayer.vel.y = 0;
        obbyPlayer.onGround = true;

        // Check for winning condition
        if (platform.color[0] === 255 && platform.color[1] === 215 && platform.color[2] === 0) { // Goal platform (gold)
          obbyGameState = 'WON';
          moneyEarned += 500; // Reward for completing obby
          upgradeMessageStartTime = millis(); // Display win message
        }
        break; // Only collide with one platform at a time
      }
    }

    // Check for lava collision
    if (obbyPlayer.pos.y + obbyPlayer.size / 2 > obbyLava.pos.y - obbyLava.size.y / 2) {
      obbyGameState = 'GAME_OVER';
      upgradeMessageStartTime = millis(); // Display game over message
    }
  }

  // Draw Obby elements
  push();
  noStroke();

  // Draw Lava
  fill(obbyLava.color);
  translate(obbyLava.pos);
  box(obbyLava.size.x, obbyLava.size.y, obbyLava.size.z);
  pop();

  // Draw Platforms
  for (let platform of obbyPlatforms) {
    push();
    fill(platform.color);
    translate(platform.pos);
    box(platform.size.x, platform.size.y, platform.size.z);
    pop();
  }

  // Draw Player
  push();
  fill(currentPersonSkinTone); // Use randomly chosen skin tone for the AI player
  translate(obbyPlayer.pos.x, obbyPlayer.pos.y, obbyPlayer.pos.z);
  box(obbyPlayer.size);
  pop();
  pop();

  // Display UI messages for obby
  push();
  textAlign(CENTER);
  textSize(32);
  noStroke();
  fill(0);

  if (obbyGameState === 'GAME_OVER') {
    text('AI Game Over! It fell in the lava.', 0, -100); // AI failed
    text('Returning to Factory...', 0, -50);
    if (millis() - upgradeMessageStartTime > UPGRADE_MESSAGE_DURATION) {
      exitObbyGame();
    }
  } else if (obbyGameState === 'WON') {
    text('AI Won the Obby! Money Earned: $500!', 0, -100);
    text('Returning to Factory...', 0, -50);
    if (millis() - upgradeMessageStartTime > UPGRADE_MESSAGE_DURATION) {
      exitObbyGame();
    }
  } else {
    textSize(20);
    text('AI is playing the Obby Game...', 0, -100);
  }
  pop();
}
Line-by-line explanation (16 lines)

🔧 Subcomponents:

initialization Fixed Camera View camera(0, -150, 500, 0, 0, 0, 0, 1, 0);

Sets a fixed 3D camera perspective for the obby game, positioned to show the platforms and player from a good angle

calculation Simple Physics obbyPlayer.vel.y += GRAVITY;

Applies gravity each frame, making the player fall naturally

for-loop Platform Collision Detection for (let platform of obbyPlatforms) {

Checks if the AI player landed on any platform and updates position/velocity accordingly

for-loop Platform Rendering for (let platform of obbyPlatforms) {

Draws each platform as a 3D box in the correct color

background(135, 206, 235); // Sky blue background
Clears the canvas with sky blue, creating an outdoor atmosphere for the obby game
camera(0, -150, 500, 0, 0, 0, 0, 1, 0);
Sets a fixed 3D camera: eye at (0, -150, 500), looking at origin (0, 0, 0) with up direction (0, 1, 0)—gives a good isometric view of platforms
updateObbyAI(); // Call AI logic
Calls the AI function that decides how to move the player (left/right) and when to jump
obbyPlayer.vel.y += GRAVITY;
Increases downward velocity each frame, simulating Earth's gravity pulling the player down
obbyPlayer.pos.x += obbyPlayer.vel.x;
Updates horizontal position by velocity—moves the player left/right based on AI decisions
obbyPlayer.pos.y += obbyPlayer.vel.y;
Updates vertical position by velocity—moves the player up/down due to jumping or falling
if (obbyPlayer.pos.x > width / 2) obbyPlayer.pos.x = width / 2;
Clamps horizontal position to the canvas bounds, preventing the player from flying off-screen
for (let platform of obbyPlatforms) {
Loops through every platform, checking if the player landed on it
if (checkPlatformCollision(obbyPlayer, platform)) {
Calls a collision detection function—returns true if the player is hitting this platform from above
obbyPlayer.pos.y = platform.pos.y - platform.size.y / 2 - obbyPlayer.size / 2;
Snaps the player to the exact top surface of the platform, preventing sinking or bouncing
obbyPlayer.vel.y = 0;
Sets vertical velocity to 0 when landing, stopping the downward motion
obbyPlayer.onGround = true;
Marks the player as standing on ground, allowing the next jump to work
if (platform.color[0] === 255 && platform.color[1] === 215 && platform.color[2] === 0) { // Goal platform (gold)
Checks if this platform is the gold-colored goal—if so, the player has won the game
obbyGameState = 'WON';
Changes game state to WON, triggering the win screen and transition back to factory
if (obbyPlayer.pos.y + obbyPlayer.size / 2 > obbyLava.pos.y - obbyLava.size.y / 2) {
Checks if the player fell into the lava pit—if so, triggers game over
fill(currentPersonSkinTone); // Use randomly chosen skin tone for the AI player
Draws the player using the same random skin tone selected earlier, making it visually consistent

drawRestaurantGame()

drawRestaurantGame() demonstrates a complete game mode: displaying orders, managing a cooking queue with timed animations, checking success conditions, and tracking score. The cooking animation uses map() to link elapsed time to a visual color change—a pattern applicable to any time-based visual progression.

function drawRestaurantGame() {
  background(180, 200, 220); // Light blue-grey background

  // Draw Restaurant Layout
  fill(150, 75, 0); // Brown counter
  rectMode(CORNER);
  rect(0, height / 2 - 100, width, 200);

  fill(100); // Stove
  rect(10, height / 2 - 190, 80, 80);

  fill(200); // Customer area
  rectMode(CENTER);
  rect(width / 2, height / 2 - 200, width - 200, 100);

  // Draw Customer Order
  push();
  textAlign(CENTER);
  textSize(24);
  fill(0);
  text(`Customer Order: ${restaurantCustomerName}`, width / 2, height / 2 - 250);
  textSize(16);
  text(restaurantCustomerOrder.join(', '), width / 2, height / 2 - 220);
  pop();

  // Draw Plate
  push();
  fill(255); // White plate
  ellipse(width / 2, height / 2, 100, 50);
  pop();

  // Draw Items on Plate
  push();
  textAlign(CENTER);
  textSize(12);
  fill(0);
  restaurantPlate.forEach((item, index) => {
    text(item, width / 2, height / 2 - 5 + index * 15);
  });
  pop();

  // Draw Cooking Item
  if (restaurantCookingItem) {
    let elapsedCookingTime = millis() - restaurantCookingItem.startTime;
    let cookingProgress = map(elapsedCookingTime, 0, COOKING_TIME, 0, 1);

    if (restaurantCookingItem.ingredient === 'Patty') {
      let colorValue = map(cookingProgress, 0, 1, 200, 100); // From light brown to dark brown
      fill(colorValue, colorValue * 0.5, colorValue * 0.2);
      rectMode(CENTER);
      rect(50, height / 2 - 150, 60, 60);
      if (elapsedCookingTime >= COOKING_TIME) {
        restaurantPlate.push('Patty');
        restaurantCookingItem = null;
      }
    } else if (restaurantCookingItem.ingredient === 'Bun') {
      let colorValue = map(cookingProgress, 0, 1, 255, 180); // From white to golden brown
      fill(colorValue, colorValue * 0.9, colorValue * 0.7);
      rectMode(CENTER);
      rect(50, height / 2 - 150, 60, 30);
      if (elapsedCookingTime >= COOKING_TIME) {
        restaurantPlate.push('Bun');
        restaurantCookingItem = null;
      }
    }
  }

  // Display messages and money for restaurant - apply toLocaleString for correct formatting
  push();
  textAlign(LEFT);
  textSize(20);
  fill(0);
  text(`Money: $${moneyEarned.toLocaleString('en-US')}`, 10, 30);
  text(`Restaurant Score: ${restaurantScore}`, 10, 60);

  // Display upgrade message if active
  if (millis() - upgradeMessageStartTime < UPGRADE_MESSAGE_DURATION) {
    textSize(24);
    fill(0, 150, 0); // Green for money message
    textAlign(CENTER);
    if (upgradeMessageStartTime === millis() && restaurantScore > 0) { // Check if it's the exact moment of a correct serve
      text(`Order Served! +$200!`, 0, 0);
    } else if (upgradeMessageStartTime === millis() && restaurantScore === 0) { // Check if it's the exact moment of an incorrect serve
      text(`Incorrect Order! -$50!`, 0, 0);
    }
  }
  pop();
}
Line-by-line explanation (15 lines)

🔧 Subcomponents:

calculation Restaurant Scene Layout rect(0, height / 2 - 100, width, 200);

Draws the brown counter as a horizontal rectangle across the middle of the screen

conditional Food Cooking Animation if (restaurantCookingItem) {

If a patty or bun is cooking, shows animated color change over 2 seconds as it cooks

for-loop Plate Items Display restaurantPlate.forEach((item, index) => {

Loops through items on the plate and displays their names vertically on-screen

background(180, 200, 220); // Light blue-grey background
Clears the canvas with a light blue-grey color, creating a clean restaurant atmosphere
fill(150, 75, 0); // Brown counter
Sets the fill color to brown for drawing the counter area
rect(0, height / 2 - 100, width, 200);
Draws a brown rectangle from the left edge to right edge, centered vertically—the counter/working surface
fill(100); // Stove
Sets the fill to dark grey for the stove
rect(10, height / 2 - 190, 80, 80);
Draws a grey rectangle above the counter—the stove where food cooks
text(`Customer Order: ${restaurantCustomerName}`, width / 2, height / 2 - 250);
Displays the order name (e.g., 'Cheeseburger') at the top center of the screen
text(restaurantCustomerOrder.join(', '), width / 2, height / 2 - 220);
Joins the order's ingredients with commas and displays them, so the player sees what to build
fill(255); // White plate
Sets the fill to white for drawing the plate
ellipse(width / 2, height / 2, 100, 50);
Draws a white ellipse (oval) representing a plate, 100 pixels wide and 50 tall
restaurantPlate.forEach((item, index) => {
Loops through each item currently on the plate, displaying them vertically
text(item, width / 2, height / 2 - 5 + index * 15);
Displays each item name 15 pixels below the previous one, stacking them visually on the plate
if (restaurantCookingItem) {
If something is cooking (patty or bun), shows an animated cooking progress display
let cookingProgress = map(elapsedCookingTime, 0, COOKING_TIME, 0, 1);
Maps elapsed time to a 0-1 range, where 0 means just started cooking, 1 means done (2 seconds elapsed)
let colorValue = map(cookingProgress, 0, 1, 200, 100);
As cooking progresses from 0 to 1, the color value decreases from 200 (light) to 100 (dark), simulating browning
if (elapsedCookingTime >= COOKING_TIME) {
When cooking time finishes (2 seconds), add the ingredient to the plate and stop cooking

📦 Key Variables

angle number

Incremented each frame to animate rotor/wheel rotation—used to spin helicopter blades and car wheels continuously

let angle = 0;
currentStep number

Tracks which block of the current model has been built—incremented by player taps, determines how many blocks to draw

let currentStep = 0;
sketchState string

Tracks the current game mode: BUILDING, COMPLETED, SELLING, SOLD, OBBY_GAME, BREAK_TIME, RESTAURANT_GAME—controls which draw function runs

let sketchState = 'BUILDING';
moneyEarned number

Total money accumulated from selling vehicles—displayed on-screen and checked against thresholds to unlock upgrades

let moneyEarned = 0;
buildableModels array

Array of 10 vehicle objects, each containing a name, scale factor, lock status, and build steps (blocks with position, color, animation info)

let buildableModels = [{name: '...', buildSteps: [...]}, ...];
currentModel object

The vehicle currently being built—points to one object in buildableModels, contains all blocks and info for that vehicle

let currentModel = buildableModels[0];
upgradeUnlocked, upgrade2Unlocked, upgrade3Unlocked, ... boolean

Flags tracking whether each tier of upgrades has been unlocked—prevent duplicate unlocks and control which vehicles/games appear

let upgradeUnlocked = false;
lastTapTime number

Records the time (in milliseconds) of the last tap, used to debounce rapid taps and prevent double-increments

let lastTapTime = 0;
obbyPlayer object

Stores the AI player's position, velocity, size, and ground state for the obby mini-game

let obbyPlayer = {pos: createVector(...), vel: createVector(...), ...};
obbyPlatforms array

Array of platform objects for the obby game, each with position, size, and color

let obbyPlatforms = [{pos: createVector(...), size: createVector(...), color: [...]}, ...];
restaurantPlate array

Array of ingredient names currently on the plate in the restaurant game—checked against the customer's order

let restaurantPlate = [];
restaurantCustomerOrder array

Array of ingredient names the customer ordered—compared with restaurantPlate to check if the order is correct

let restaurantCustomerOrder = ['Bun', 'Patty', 'Cheese', 'Bun'];
currentPersonSkinTone array

RGB color array for the customer's head—randomly chosen from personSkinTones when each build starts

let currentPersonSkinTone = [100, 50, 0]; // Brown

🔧 Potential Improvements (6)

Here are some ways this code could be enhanced:

PERFORMANCE drawBuildAndSellMode(), buildableModels array initialization

buildableModels is a very large array with 200+ lines of hardcoded block data—initializing it on every sketch run is wasteful, and the sheer size makes the file hard to maintain.

💡 Move buildableModels to an external JSON file and load it in preload() using loadJSON(). This separates data from code and makes vehicles easier to edit without touching the main sketch. Alternatively, define blocks in a more compact format.

BUG drawRestaurantGame(), servePlate() comparison

The order checking compares sorted arrays, but doesn't account for ingredient order in real recipes. A correct burger has Bun on top and bottom, but the code treats [Bun, Patty, Bun] the same as [Patty, Bun, Bun].

💡 Store recipes as an ordered sequence and compare without sorting, or define recipe templates that specify layer order. This makes the game more educational about actual food layering.

STYLE Global variables section

Many game state variables (upgradeUnlocked, upgrade2Unlocked, upgrade3Unlocked, etc.) follow a numbered pattern that doesn't scale well. Adding upgrade 7 requires declaring a new variable and duplicating conditional logic.

💡 Replace individual boolean flags with a single `unlockedUpgrades` array or object: `let unlockedUpgrades = [false, false, false, ...]`. Thresholds can be in a corresponding array, and upgrade checking becomes a loop instead of repeated if-statements.

FEATURE touchStarted() and button interactions

Touch and mouse input are handled separately, making it unclear which input method takes priority on devices that support both (like tablets). Button presses may conflict with canvas taps.

💡 Unify touch and mouse input by checking both in a single handler, or use p5.js's pointerPressed() callback (available in newer versions) which normalizes input across devices.

BUG obbyPlatforms array initialization in initializeObbyGame()

The obby game platforms are hardcoded and never change—a player can replay the same level infinitely without challenge progression.

💡 Generate platforms procedurally or cycle through multiple level layouts. Increase difficulty (wider gaps, smaller platforms) on replays to keep the game engaging over time.

PERFORMANCE draw() main loop, drawBuildAndSellMode() text rendering

Text alignment, size, and fill colors are set repeatedly every frame (textAlign, textSize, fill) even when they don't change, causing unnecessary state changes.

💡 Cache text properties—only change them if the next text differs. For example, store the last textSize and only call textSize() again if it's different.

🔄 Code Flow

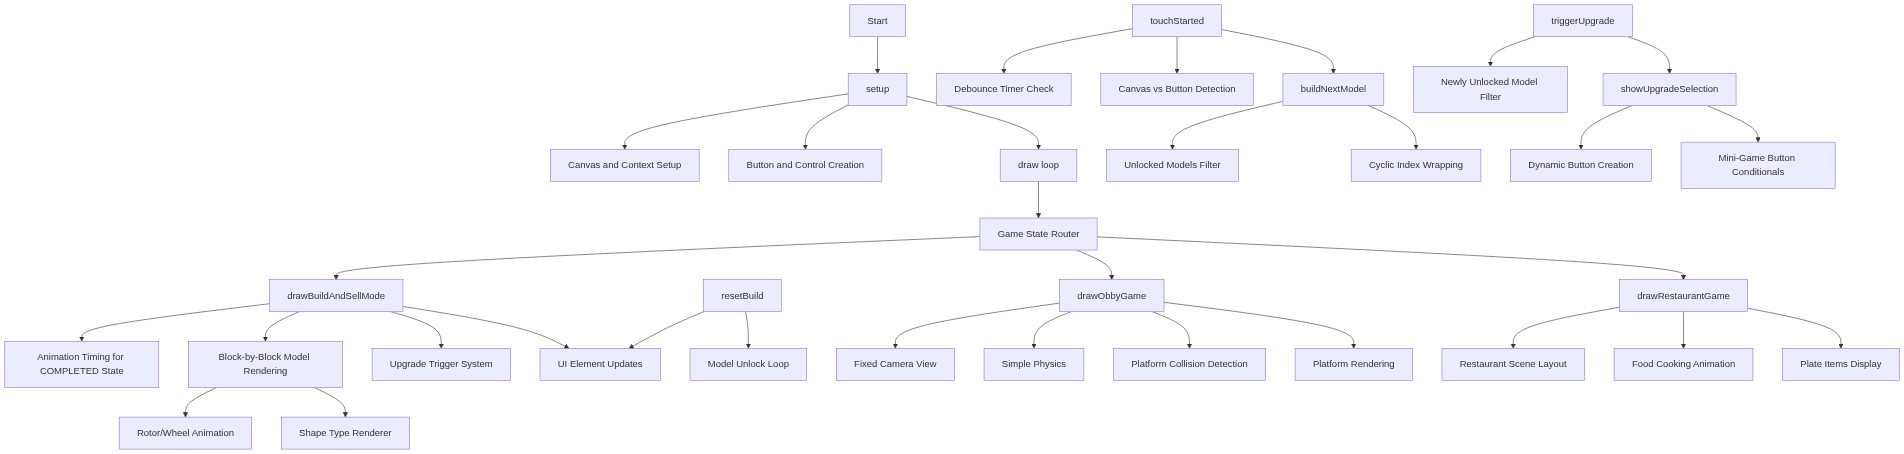
Code flow showing setup, draw, drawbuildandselmode, touchstarted, buildnextmodel, resetbuild, triggerupgrade, showupgradeselection, drawobby, drawrestaurantgame

💡 Click on function names in the diagram to jump to their code

graph TD start[Start] --> setup[setup] setup --> canvas-creation[Canvas and Context Setup] setup --> ui-button-creation[Button and Control Creation] setup --> draw[draw loop] click setup href "#fn-setup" click canvas-creation href "#sub-canvas-creation" click ui-button-creation href "#sub-ui-button-creation" draw --> state-conditional[Game State Router] state-conditional --> drawbuildandselmode[drawBuildAndSellMode] state-conditional --> drawobby[drawObbyGame] state-conditional --> drawrestaurantgame[drawRestaurantGame] click draw href "#fn-draw" click drawbuildandselmode href "#fn-drawbuildandselmode" click drawobby href "#fn-drawobby" click drawrestaurantgame href "#fn-drawrestaurantgame" drawbuildandselmode --> animation-timing[Animation Timing for COMPLETED State] drawbuildandselmode --> model-drawing-loop[Block-by-Block Model Rendering] drawbuildandselmode --> money-threshold-check[Upgrade Trigger System] drawbuildandselmode --> ui-reset[UI Element Updates] click animation-timing href "#sub-animation-timing" click model-drawing-loop href "#sub-model-drawing-loop" click money-threshold-check href "#sub-money-threshold-check" click ui-reset href "#sub-ui-reset" model-drawing-loop --> animated-block-logic[Rotor/Wheel Animation] model-drawing-loop --> shape-type-check[Shape Type Renderer] click animated-block-logic href "#sub-animated-block-logic" click shape-type-check href "#sub-shape-type-check" touchstarted[touchStarted] --> tap-debounce[Debounce Timer Check] touchstarted --> tap-location-check[Canvas vs Button Detection] touchstarted --> buildnextmodel[buildNextModel] click touchstarted href "#fn-touchstarted" click tap-debounce href "#sub-tap-debounce" click tap-location-check href "#sub-tap-location-check" click buildnextmodel href "#fn-buildnextmodel" buildnextmodel --> filter-unlocked[Unlocked Models Filter] buildnextmodel --> cyclic-index[Cyclic Index Wrapping] click filter-unlocked href "#sub-filter-unlocked" click cyclic-index href "#sub-cyclic-index" resetbuild[resetBuild] --> ui-reset resetbuild --> unlock-loop[Model Unlock Loop] click resetbuild href "#fn-resetbuild" click unlock-loop href "#sub-unlock-loop" triggerupgrade[triggerUpgrade] --> filter-newunlocked[Newly Unlocked Model Filter] triggerupgrade --> showupgradeselection[showUpgradeSelection] click triggerupgrade href "#fn-triggerupgrade" click filter-newunlocked href "#sub-filter-newunlocked" click showupgradeselection href "#fn-showupgradeselection" showupgradeselection --> button-creation-loop[Dynamic Button Creation] showupgradeselection --> minigame-conditionals[Mini-Game Button Conditionals] click button-creation-loop href "#sub-button-creation-loop" click minigame-conditionals href "#sub-minigame-conditionals" drawobby --> camera-setup[Fixed Camera View] drawobby --> physics-update[Simple Physics] drawobby --> collision-loop[Platform Collision Detection] drawobby --> drawing-loop[Platform Rendering] click camera-setup href "#sub-camera-setup" click physics-update href "#sub-physics-update" click collision-loop href "#sub-collision-loop" click drawing-loop href "#sub-drawing-loop" drawrestaurantgame --> layout-drawing[Restaurant Scene Layout] drawrestaurantgame --> cooking-animation[Food Cooking Animation] drawrestaurantgame --> plate-contents-loop[Plate Items Display] click layout-drawing href "#sub-layout-drawing" click cooking-animation href "#sub-cooking-animation" click plate-contents-loop href "#sub-plate-contents-loop"

❓ Frequently Asked Questions

What visual elements can users expect to see in the 'Can you beat 12,000' p5.js sketch?

The sketch features a dynamic visual representation of a building process, animated characters, and various vehicles that evolve based on user interactions and game progression.

How can users interact with the 'Can you beat 12,000' sketch?

Users can tap or click to build structures, earn money, and unlock upgrades, while navigating through different game states and animations.

What creative coding techniques are showcased in the 'Can you beat 12,000' sketch?

The sketch demonstrates interactive game mechanics, state management, and animation techniques using p5.js, fostering an engaging user experience.

Preview

Can you beat 12,000 - p5.js creative coding sketch preview
Sketch Preview
Code flow diagram showing the structure of Can you beat 12,000 - Code flow showing setup, draw, drawbuildandselmode, touchstarted, buildnextmodel, resetbuild, triggerupgrade, showupgradeselection, drawobby, drawrestaurantgame
Code Flow Diagram