
click

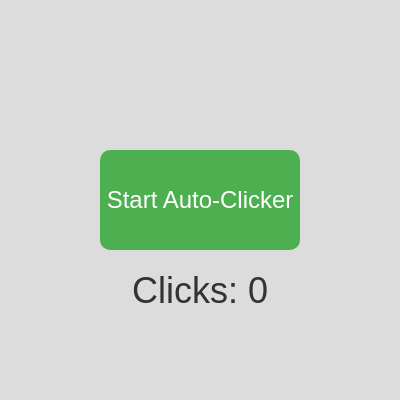
This sketch creates an interactive auto-clicker interface with a large toggleable button and a live counter that rapidly increments. Click the button to start or stop the auto-clicker, and watch the click count race upward in real time as the browser fires clicks as fast as it can manage.

🧪 Try This!

Experiment with the code by making these changes:

  1. Make the button huge — Increasing the button size makes it more visually prominent and easier to click—a common UX pattern
  2. Speed up the clicking — Lower the interval delay to fire clicks more often per second—watch the counter climb even faster
  3. Change the click increment — Make each auto-click add 5 or 10 to the counter instead of 1—the number grows much faster visually
  4. Swap the button colors — Reverse which color means 'Start' and which means 'Stop'—the button behavior stays the same but the visual cues flip
  5. Add an emoji to the counter — The counter text can include any emoji or symbol—makes the display more visually fun
Prefer the full editor? Open it there →

📖 About This Sketch

This sketch demonstrates a complete, centered user interface built with p5.js HTML elements: a clickable button that toggles an auto-clicker on and off, and a live counter that updates every single time a click fires. The interface stays centered even when the browser window is resized, and the counter climbs as fast as the browser allows—demonstrating the limits of rapid DOM updates and the setInterval function.

The code teaches several important patterns: managing global state with boolean flags, using setInterval to create rapid repeated actions, manipulating HTML elements from p5.js, and responding to user interaction with button clicks. By studying it, you'll learn how to build interactive control panels, how the browser throttles rapid operations, and how to keep UI elements synchronized with your sketch's logic.

⚙️ How It Works

  1. When the sketch loads, setup() creates a full-screen canvas and builds a green 'Start Auto-Clicker' button centered on screen, plus a paragraph element below it displaying 'Clicks: 0'.
  2. The draw() function runs every frame but does almost nothing—the real action happens elsewhere because this sketch doesn't animate shapes; it manipulates the page's HTML elements instead.
  3. When you click the button, toggleAutoClicker() runs: it checks the isAutoClicking boolean flag. If false, it starts a setInterval that calls autoClick() every 4 milliseconds, turns the button red, and sets isAutoClicking to true.
  4. Every 4 milliseconds (approximately 250 times per second), autoClick() increments the clickCount variable by 1 and updates the counterDisplay paragraph element's text to show the new count—a pure DOM update with no drawing involved.
  5. When you click the button again, toggleAutoClicker() clears the interval, resets the button to green, and sets isAutoClicking back to false, pausing the clicking.
  6. If the browser window resizes, windowResized() fires automatically: it resizes the canvas and repositions the button and counter to stay centered.

🎓 Concepts You'll Learn

State management with boolean flagssetInterval for repeated actionsDOM manipulation from p5.jsButton event listenersResponsive repositioning with windowResized

📝 Code Breakdown

setup()

setup() runs once when the sketch starts. It's your chance to initialize the canvas, create UI elements, and set starting values. Everything you create here (buttons, paragraphs, sounds) persists until you explicitly destroy it or the page reloads.

function setup() {
  createCanvas(windowWidth, windowHeight);
  background(220);

  // Setup a simple sine wave oscillator for the click sound
  clickSound = new p5.Oscillator();
  clickSound.setType('sine');
  clickSound.freq(440); // Standard A4 note
  clickSound.amp(0);   // Start with zero volume
  clickSound.start();

  // Create the button to toggle the auto-clicker
  clickButton = createButton('Start Auto-Clicker');
  clickButton.position(width / 2 - 100, height / 2 - 50);
  clickButton.size(200, 100);
  clickButton.mousePressed(toggleAutoClicker); // Attach the toggle function
  clickButton.style('font-size', '24px');
  clickButton.style('background-color', '#4CAF50'); // Green color
  clickButton.style('color', 'white');
  clickButton.style('border', 'none');
  clickButton.style('border-radius', '10px');
  clickButton.style('cursor', 'pointer');

  // Create a paragraph element to display the click count
  counterDisplay = createP('Clicks: 0');
  counterDisplay.position(width / 2 - 100, height / 2 + 70);
  counterDisplay.style('font-size', '36px');
  counterDisplay.style('text-align', 'center');
  counterDisplay.style('width', '200px');
  counterDisplay.style('color', '#333'); // Dark text color
}
Line-by-line explanation (13 lines)

🔧 Subcomponents:

calculation Audio Oscillator Initialization clickSound = new p5.Oscillator();

Creates a reusable sine wave sound object that can be played on demand (though it's commented out in this sketch for performance reasons)

calculation Button Creation and Styling clickButton = createButton('Start Auto-Clicker');

Creates an interactive HTML button element that users click to toggle the auto-clicker

calculation Counter Display Creation counterDisplay = createP('Clicks: 0');

Creates a paragraph element that displays the current click count and updates in real time

createCanvas(windowWidth, windowHeight);
Creates a canvas that fills the entire browser window—windowWidth and windowHeight are p5.js variables that read the browser's dimensions
background(220);
Fills the entire canvas with a light gray color (220 on a 0-255 scale) once at startup
clickSound = new p5.Oscillator();
Creates a new sound oscillator object—a tool that can generate and play sine wave tones
clickSound.freq(440);
Sets the frequency of the oscillator to 440 Hz, which is the musical note A4 (middle A on a piano)
clickSound.amp(0);
Sets the oscillator's volume to 0 so it doesn't play yet—you control when sound actually plays by changing amplitude
clickButton = createButton('Start Auto-Clicker');
Creates an HTML button element with the text 'Start Auto-Clicker' and stores it in the clickButton variable
clickButton.position(width / 2 - 100, height / 2 - 50);
Positions the button centered horizontally (width/2 - half the button's width) and near the vertical center
clickButton.size(200, 100);
Sets the button's width to 200 pixels and height to 100 pixels—a large, easy-to-click target
clickButton.mousePressed(toggleAutoClicker);
Attaches the toggleAutoClicker function to the button so it runs every time the button is clicked
clickButton.style('background-color', '#4CAF50');
Sets the button's background color to green (#4CAF50)—the 'Start' state color
counterDisplay = createP('Clicks: 0');
Creates an HTML paragraph element displaying 'Clicks: 0' and stores it so we can update it later
counterDisplay.position(width / 2 - 100, height / 2 + 70);
Positions the counter display below the button, also centered horizontally
counterDisplay.style('font-size', '36px');
Makes the counter text large and easy to read at 36 pixels per character
draw()

In this sketch, draw() is essentially empty because the interface is static—no shapes animate, no canvas redraws happen every frame. All the action is driven by button clicks and the setInterval timer instead. This is a common pattern for UI-heavy sketches where traditional animation loops aren't needed.

function draw() {
  // The autoClick function updates the DOM element and plays sound,
  // so we don't need to do much in draw() itself for this sketch.
  // The background is set once in setup().
}
Line-by-line explanation (1 lines)
function draw() {
The draw() function is called repeatedly by p5.js (60 times per second by default), but this sketch doesn't need it for animation

autoClick()

autoClick() is the workhorse function—it runs on a tight timer (every 4 milliseconds by default) and does two critical things: updates the variable and updates the displayed text. The commented-out sound code shows why sound is problematic at high frequencies—the browser can't layer overlapping audio envelopes fast enough. This sketch prioritizes visual feedback over audio.

🔬 This pair of lines fires ~250 times per second when auto-clicking. What happens if you change clickCount++ to clickCount += 10 so each tick adds 10 instead of 1?

  clickCount++;
  counterDisplay.html('Clicks: ' + clickCount);
function autoClick() {
  clickCount++;
  counterDisplay.html('Clicks: ' + clickCount); // Update the DOM paragraph element

  // --- IMPORTANT: Performance Note for High Click Rates ---
  // Playing sound and manipulating the DOM at extremely high frequencies
  // (e.g., 250 times per second) can be very resource-intensive
  // and might cause browser performance issues or freezing.
  // For the requested 9999 clicks/sec, it's not possible to play sound reliably.
  // Even at 250 clicks/sec, the sound envelope will overlap significantly.
  // I am commenting out the sound playing to prioritize the click count update.
  /*
  clickSound.amp(0.5, 0.05);
  clickSound.amp(0, 0.1, frameCount + 5);
  */

  // If you want sound at a high rate, consider playing it less frequently:
  // Example: Play sound every 100 clicks
  /*
  if (clickCount % 100 === 0) {
    clickSound.amp(0.5, 0.05);
    clickSound.amp(0, 0.1, frameCount + 5);
  }
  */
}
Line-by-line explanation (2 lines)

🔧 Subcomponents:

calculation Click Counter Increment clickCount++;

Adds 1 to the clickCount variable every time this function is called

calculation DOM Text Update counterDisplay.html('Clicks: ' + clickCount);

Updates the paragraph element's displayed text to show the current click count in real time

clickCount++;
Increments the global clickCount variable by 1—this is the core action of each 'click'
counterDisplay.html('Clicks: ' + clickCount);
Sets the paragraph element's inner HTML to a new string that includes the updated clickCount—this updates what the user sees on screen immediately

toggleAutoClicker()

toggleAutoClicker() is the state-management function—it's the only place where isAutoClicking changes. This if-else pattern is a common way to implement toggle buttons: check the current state, do the opposite, and update both the state flag and the UI to reflect the new state. Notice how the button text AND color both change to provide clear visual feedback.

function toggleAutoClicker() {
  if (isAutoClicking) {
    // If auto-clicking, stop it
    clearInterval(autoClickerInterval); // Clear the interval
    autoClickerInterval = null;
    clickButton.html('Start Auto-Clicker');
    clickButton.style('background-color', '#4CAF50'); // Green
    isAutoClicking = false;
  } else {
    // If not auto-clicking, start it
    // Set an interval to call autoClick() every 1 milliseconds.
    // This is the absolute minimum delay allowed by most browsers,
    // resulting in approx. 250 clicks per second (1000ms / 1ms = 99999).
    // Achieving 9999 clicks per second is not practically possible
    // with setInterval due to browser performance limits (minimum ~4ms interval)
    // and the overhead of DOM updates and audio processing.
    autoClickerInterval = setInterval(autoClick, 4); // Changed from 10 to 4
    clickButton.html('Stop Auto-Clicker');
    clickButton.style('background-color', '#f44336'); // Red
    isAutoClicking = true;
  }
}
Line-by-line explanation (10 lines)

🔧 Subcomponents:

conditional Stop Auto-Clicking Branch if (isAutoClicking) {

Checks if auto-clicking is currently running and, if so, stops it

conditional Start Auto-Clicking Branch } else {

If auto-clicking is not running, starts the rapid-fire click loop

if (isAutoClicking) {
Checks the isAutoClicking boolean flag—if true, the auto-clicker is currently running
clearInterval(autoClickerInterval);
Stops the active setInterval timer, halting the rapid autoClick() calls
autoClickerInterval = null;
Sets the interval variable to null to clean up and signal that no interval is active
clickButton.html('Start Auto-Clicker');
Changes the button's text back to 'Start Auto-Clicker' to indicate it's now stopped
clickButton.style('background-color', '#4CAF50');
Changes the button's color back to green to visually signal the 'Start' state
isAutoClicking = false;
Sets the flag to false so the next click knows the auto-clicker is stopped
autoClickerInterval = setInterval(autoClick, 4);
Starts a new setInterval timer that calls the autoClick() function every 4 milliseconds (~250 times per second)
clickButton.html('Stop Auto-Clicker');
Changes the button's text to 'Stop Auto-Clicker' so the user knows they can click again to stop
clickButton.style('background-color', '#f44336');
Changes the button to red to indicate the 'Stop' state—a visual cue that the auto-clicker is running
isAutoClicking = true;
Sets the flag to true so the sketch knows the auto-clicker is now active

windowResized()

windowResized() ensures that when the user resizes their browser window, the entire interface adapts smoothly. Without this function, the button and counter would stay in their original positions and could end up off-screen or in odd places. This is a crucial pattern for any p5.js sketch that needs to remain responsive to window changes.

function windowResized() {
  resizeCanvas(windowWidth, windowHeight);
  // Re-position button and counter display to stay centered
  clickButton.position(width / 2 - 100, height / 2 - 50);
  counterDisplay.position(width / 2 - 100, height / 2 + 70);
}
Line-by-line explanation (4 lines)

🔧 Subcomponents:

calculation Canvas Resize resizeCanvas(windowWidth, windowHeight);

Resizes the p5.js canvas to match the new window dimensions

calculation UI Element Repositioning clickButton.position(width / 2 - 100, height / 2 - 50);

Recalculates and applies new centered positions for button and counter so they stay centered when the window changes size

function windowResized() {
windowResized() is a special p5.js function that p5.js automatically calls whenever the browser window is resized
resizeCanvas(windowWidth, windowHeight);
Resizes the canvas to fill the new window dimensions—windowWidth and windowHeight are automatically updated by p5.js
clickButton.position(width / 2 - 100, height / 2 - 50);
Recalculates the button's position so it stays centered horizontally and vertically in the newly sized window
counterDisplay.position(width / 2 - 100, height / 2 + 70);
Recalculates the counter's position so it stays centered and positioned below the button in the new window size

📦 Key Variables

clickCount number

Stores the total number of clicks recorded since the sketch started or was last reset—this is what gets displayed and incremented

let clickCount = 0;
autoClickerInterval object

Stores the ID of the active setInterval timer so it can be stopped later with clearInterval()—null when no timer is running

let autoClickerInterval;
clickSound object

Stores the p5.Oscillator object that generates sine wave sound (though sound playback is currently disabled for performance reasons)

let clickSound;
clickButton object

Stores a reference to the HTML button element so you can change its text, color, and position throughout the sketch

let clickButton;
counterDisplay object

Stores a reference to the HTML paragraph element that displays 'Clicks: N'—updated every time autoClick() runs

let counterDisplay;
isAutoClicking boolean

A flag that tracks whether the auto-clicker is currently running (true) or stopped (false)—toggleAutoClicker() flips this

let isAutoClicking = false;

🔧 Potential Improvements (4)

Here are some ways this code could be enhanced:

BUG toggleAutoClicker()

If the user clicks the button multiple times very rapidly while auto-clicking, multiple setInterval timers could start simultaneously, causing clicks to fire much faster than intended and potentially freezing the browser

💡 Add a guard: check if autoClickerInterval is not null before calling setInterval. Example: if (!autoClickerInterval) { autoClickerInterval = setInterval(autoClick, 4); }

PERFORMANCE autoClick()

Updating the DOM (counterDisplay.html()) 250 times per second is expensive—the browser reflows the layout on every update, consuming CPU and potentially causing jank

💡 Throttle DOM updates: only call counterDisplay.html() every 10th or 50th click instead of every single one. Example: if (clickCount % 50 === 0) { counterDisplay.html(...) }

FEATURE sketch.js global

There is no way to reset the click count back to 0—once it starts climbing, it can only be viewed, never cleared

💡 Add a 'Reset' button in setup() that calls a resetCounter() function which sets clickCount = 0 and updates counterDisplay.html('Clicks: 0')

STYLE autoClick() and toggleAutoClicker()

Magic numbers like 4 (milliseconds) and hardcoded colors like '#4CAF50' are scattered throughout the code, making them hard to adjust globally

💡 Define these as constants at the top: const CLICK_INTERVAL = 4; const COLOR_START = '#4CAF50'; const COLOR_STOP = '#f44336'; Then use them in the functions

🔄 Code Flow

Code flow showing setup, draw, autoclickfunction, toggleautoclicker, windowresized

💡 Click on function names in the diagram to jump to their code

graph TD start[Start] --> setup[setup] setup --> button-creation[Button Creation and Styling] setup --> counter-creation[Counter Display Creation] setup --> oscillator-setup[Audio Oscillator Initialization] setup --> draw[draw loop] draw --> subloop[Sub Loop] subloop --> increment-click[Click Counter Increment] subloop --> dom-update[DOM Text Update] subloop --> draw click setup href "#fn-setup" click draw href "#fn-draw" click button-creation href "#sub-button-creation" click counter-creation href "#sub-counter-creation" click oscillator-setup href "#sub-oscillator-setup" click increment-click href "#sub-increment-click" click dom-update href "#sub-dom-update" toggleautoclicker[toggleAutoClicker] --> stop-clicking[Stop Auto-Clicking Branch] toggleautoclicker --> start-clicking[Start Auto-Clicking Branch] click toggleautoclicker href "#fn-toggleautoclicker" click stop-clicking href "#sub-stop-clicking" click start-clicking href "#sub-start-clicking" windowresized[windowResized] --> canvas-resize[Canvas Resize] windowresized --> reposition-ui[UI Element Repositioning] click windowresized href "#fn-windowresized" click canvas-resize href "#sub-canvas-resize" click reposition-ui href "#sub-reposition-ui"

❓ Frequently Asked Questions

What visual elements are present in the click p5.js sketch?

The sketch features a clean, centered interface with a large green button labeled 'Start Auto-Clicker' and a live counter displaying the current click count.

How can users interact with the click sketch?

Users can start or stop the rapid-fire clicking by clicking the large button, which triggers an auto-clicker that increments the click count.

What creative coding concepts does this sketch illustrate?

This sketch demonstrates the use of real-time updating of the DOM, sound synthesis with p5.js, and basic interaction handling through button events.

Preview

click - p5.js creative coding sketch preview
Sketch Preview
Code flow diagram showing the structure of click - Code flow showing setup, draw, autoclickfunction, toggleautoclicker, windowresized
Code Flow Diagram
