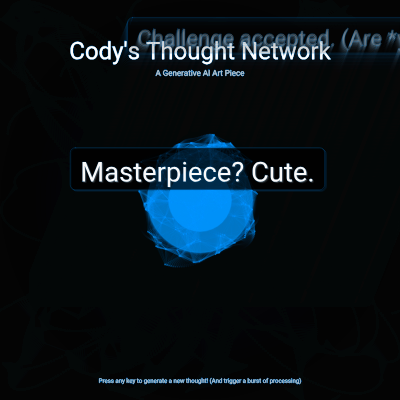
🔬 This gradient loop draws concentric circles. What happens if you change r -= 10 to r -= 2? Or r -= 50? How does step size affect smoothness?
  // Draw a static radial gradient background once in setup
  let c1 = color(10, 10, 20);  // Dark blue-grey
  let c2 = color(0, 0, 0);   // Black
  for (let r = max(width, height); r > 0; r -= 10) {
    fill(lerpColor(c1, c2, r / max(width, height)));
    ellipse(width / 2, height / 2, r, r);
  }
function setup() {
  createCanvas(windowWidth, windowHeight);
  if (loadingError) {
    // If there was a loading error, display the message and stop the sketch
    background(20);
    fill(255, 0, 0); // Red text for error
    textSize(24);
    textAlign(CENTER, CENTER);
    text(loadingErrorMessage, width / 2, height / 2);
    noLoop(); // Stop draw() from looping
    return; // Exit setup
  }

  textFont(font);
  textAlign(CENTER, CENTER);
  noStroke();

  // Draw a static radial gradient background once in setup
  let c1 = color(10, 10, 20);  // Dark blue-grey
  let c2 = color(0, 0, 0);   // Black
  for (let r = max(width, height); r > 0; r -= 10) {
    fill(lerpColor(c1, c2, r / max(width, height)));
    ellipse(width / 2, height / 2, r, r);
  }

  // Create particles
  for (let i = 0; i < particleCount; i++) {
    particles.push(new Particle());
  }

  // Initial generative content (now only text)
  createGenerativeContent();
}
Line-by-line explanation (8 lines)
🔧 Subcomponents:
conditional
Loading Error Check
if (loadingError) {
If the font failed to load, displays an error message and stops the sketch from running
for-loop
Radial Gradient Background
for (let r = max(width, height); r > 0; r -= 10) {
Draws concentric circles from large to small, interpolating color from dark blue-grey at the edges to black at center, creating a cosmic atmosphere
for-loop
Particle Initialization
for (let i = 0; i < particleCount; i++) {
Creates the initial set of particles scattered across the canvas and adds them to the particles array
createCanvas(windowWidth, windowHeight);- Creates a canvas that fills the entire window; using windowWidth and windowHeight makes it responsive to resizing
if (loadingError) {- Checks if the font failed to load in preload(); if true, the sketch stops and shows an error instead
noLoop();- Stops the draw() function from running continuously, effectively freezing the animation if there was an error
textFont(font);- Tells p5.js to use the loaded Roboto font for all text drawn after this line
let c1 = color(10, 10, 20);- Creates a dark blue-grey color for the outer edge of the gradient
for (let r = max(width, height); r > 0; r -= 10) {- Loops from the largest possible radius down to 0, drawing smaller circles each iteration to build a smooth gradient
fill(lerpColor(c1, c2, r / max(width, height)));- Interpolates between c1 and c2 based on the radius; as r shrinks, the color transitions from blue-grey to black
particles.push(new Particle());- Creates a new Particle object and adds it to the particles array; this happens 150 times by default
🔬 Each particle updates, displays, connects, and attracts. What happens if you comment out the p.attract() line? How does the network behave without the core pulling particles inward?
  // --- Particle Network ---
  let connectDistance = width * connectDistanceRatio; // Calculate responsive connection distance
  for (let p of particles) {
    p.update();
    p.display();
    p.connect(particles, connectDistance); // Pass responsive distance
    p.attract(coreX, coreY); // Attract to the central core
  }
🔬 This loop processes thoughts backward. Why might looping backward be important when you're removing items? Try changing i >= 0 to i < generativeContents.length and loop forward instead—what breaks?
  // Update and display contents
  for (let i = generativeContents.length - 1; i >= 0; i--) {
    generativeContents[i].update();
    generativeContents[i].display();
    if (generativeContents[i].isFaded()) {
      generativeContents.splice(i, 1); // Remove faded contents
    }
  }
function draw() {
  // If there was a loading error, setup() would have called noLoop(), so this won't run.
  // Draw background with transparency to create trails
  background(10, 50);

  // --- Title and Author Line ---
  fill(255);
  textSize(min(width * 0.06, 60)); // Responsive title size
  text("Cody's Thought Network", width / 2, height * 0.12);
  fill(200);
  textSize(min(width * 0.02, 20)); // Responsive subtitle size
  text("A Generative AI Art Piece", width / 2, height * 0.18);

  // --- Central Core ---
  let coreX = width / 2;
  let coreY = height / 2;
  let currentCoreSize = coreSize + sin(frameCount * 0.05) * 15; // Pulsating effect
  fill(0, 150, 255, 100); // Blue, semi-transparent
  ellipse(coreX, coreY, currentCoreSize, currentCoreSize);
  fill(0, 150, 255, 200); // Brighter blue
  ellipse(coreX, coreY, currentCoreSize * 0.6, currentCoreSize * 0.6);

  // --- Particle Network ---
  let connectDistance = width * connectDistanceRatio; // Calculate responsive connection distance
  for (let p of particles) {
    p.update();
    p.display();
    p.connect(particles, connectDistance); // Pass responsive distance
    p.attract(coreX, coreY); // Attract to the central core
  }

  // --- Generative Content ---
  // Add new thought every contentFrequency frames
  if (frameCount % contentFrequency === 0) {
    createGenerativeContent();
  }

  // Update and display contents
  for (let i = generativeContents.length - 1; i >= 0; i--) {
    generativeContents[i].update();
    generativeContents[i].display();
    if (generativeContents[i].isFaded()) {
      generativeContents.splice(i, 1); // Remove faded contents
    }
  }

  // --- Instructions ---
  fill(200);
  textSize(min(width * 0.015, 14)); // Responsive instruction size
  text("Press any key to generate a new thought! (And trigger a burst of processing)", width / 2, height - 20);
}
Line-by-line explanation (8 lines)
🔧 Subcomponents:
function-call
Semi-Transparent Background
background(10, 50);
Clears the canvas with dark, semi-transparent color, leaving previous frames slightly visible to create motion trails
function-call
Title and Subtitle Rendering
text("Cody's Thought Network", width / 2, height * 0.12);
Draws the sketch title at the top with responsive sizing based on window width
calculation
Pulsating Core Animation
let currentCoreSize = coreSize + sin(frameCount * 0.05) * 15;
Uses sine wave to smoothly oscillate the core size between coreSize - 15 and coreSize + 15, creating a breathing effect
for-loop
Particle Update and Display
for (let p of particles) {
Iterates through all particles, updating their positions, drawing them, computing connections, and applying attraction forces
conditional
Thought Generation Timing
if (frameCount % contentFrequency === 0) {
Every contentFrequency frames, triggers creation of a new sassy thought to display
for-loop
Content Fade and Removal
for (let i = generativeContents.length - 1; i >= 0; i--) {
Updates all floating thoughts, removes them from the array once fully faded, looping backwards to safely splice while iterating
background(10, 50);- Clears the canvas with a very dark color (RGB 10, 10, 10) at 50% opacity; previous frames remain faintly visible, creating trails
textSize(min(width * 0.06, 60));- Sets the title font size to 6% of screen width, but caps it at 60 pixels so it doesn't get too huge on very large screens
let currentCoreSize = coreSize + sin(frameCount * 0.05) * 15;- Calculates a size that oscillates smoothly using sine; frameCount increases every frame, creating continuous animation
let connectDistance = width * connectDistanceRatio;- Multiplies the screen width by 0.07, so particles 7% of screen width apart will draw lines to each other—scales responsively with window size
for (let p of particles) {- Loops through each particle in the particles array using a for...of loop, the cleanest syntax for iterating collections
if (frameCount % contentFrequency === 0) {- The modulo operator (%) returns the remainder; when frameCount is a multiple of contentFrequency, this is true and a new thought is created
for (let i = generativeContents.length - 1; i >= 0; i--) {- Loops backward through the array (important!) so that when you splice/remove items, the indices of remaining items don't shift unexpectedly
generativeContents.splice(i, 1);- Removes one element at index i from the array; this is safe to do while iterating backward
🔬 This loop tries up to maxAttempts times and skips if the thought is too wide. What happens if you remove the width check entirely (delete the if statement with the 0.9 check)? Will long thoughts cause visual chaos?
  for (let i = 0; i < maxAttempts; i++) {
    newContent = new GenerativeContent(random(thoughts));
    // If text is wider than screen, it will always overlap with itself when centered.
    // Skip creating it if it's too wide.
    if (newContent.getBoundingBox().w > width * 0.9) {
      console.log("Thought too wide, skipping.");
      continue;
    }
function createGenerativeContent() {
  // Now only creates text content
  let newContent;
  let maxAttempts = 10; // Try a few times to find a non-overlapping position

  for (let i = 0; i < maxAttempts; i++) {
    newContent = new GenerativeContent(random(thoughts));
    // If text is wider than screen, it will always overlap with itself when centered.
    // Skip creating it if it's too wide.
    if (newContent.getBoundingBox().w > width * 0.9) {
      console.log("Thought too wide, skipping.");
      continue;
    }

    let overlaps = false;
    // Check for overlap with existing content
    for (let existingContent of generativeContents) {
      if (rectsOverlap(newContent.getBoundingBox(), existingContent.getBoundingBox())) {
        overlaps = true;
        break;
      }
    }
    if (!overlaps) {
      generativeContents.push(newContent);
      return; // Added successfully
    }
  }
  // If we reach here, couldn't find a clear spot after maxAttempts
  console.log("Could not find a non-overlapping position for new thought.");
}
Line-by-line explanation (11 lines)
🔧 Subcomponents:
for-loop
Position Finding Attempts
for (let i = 0; i < maxAttempts; i++) {
Tries up to 10 times to create a new thought; if a position overlaps with existing thoughts, it tries again with a new random position
conditional
Text Width Validation
if (newContent.getBoundingBox().w > width * 0.9) {
Skips creating the thought if it's too wide to fit on screen without extending beyond 90% of the canvas width
for-loop
Overlap Detection
for (let existingContent of generativeContents) {
Checks the new thought against all already-visible thoughts to see if any bounding boxes overlap
let newContent;- Declares a variable to hold the new GenerativeContent object; it will be assigned in the loop
let maxAttempts = 10;- Sets a limit of 10 tries to find a non-overlapping position; prevents infinite loops if the screen is packed with text
for (let i = 0; i < maxAttempts; i++) {- Loops up to 10 times, trying to place a new thought each iteration
newContent = new GenerativeContent(random(thoughts));- Creates a new thought by picking a random phrase from the thoughts array and wrapping it in a GenerativeContent object
if (newContent.getBoundingBox().w > width * 0.9) {- Checks if the thought's width exceeds 90% of the screen; if so, it's too long and we skip this attempt
continue;- Skips the rest of this loop iteration and jumps to the next attempt, without adding the thought
for (let existingContent of generativeContents) {- Loops through all currently visible thoughts to check for collisions with the new one
if (rectsOverlap(newContent.getBoundingBox(), existingContent.getBoundingBox())) {- Calls a helper function to test if two bounding boxes overlap; if true, this position is bad
if (!overlaps) {- If no overlaps were found, the position is clear; add the thought and return early to exit the function
generativeContents.push(newContent);- Adds the new thought to the generativeContents array so it will be displayed and updated each frame
return;- Exits the function immediately after successfully adding a thought, avoiding more attempts
🔬 This loop draws lines between nearby particles and fades them by distance. What happens if you remove the map() call and just use stroke(0, 150, 255, 100) for constant opacity? Will the network look more or less connected?
  connect(particles, connectDistance) { // Added connectDistance parameter
    for (let other of particles) {
      let d = p5.Vector.dist(this.pos, other.pos);
      if (d < connectDistance) { // Connect if within the responsive distance
        stroke(0, 150, 255, map(d, 0, connectDistance, 100, 0)); // Fade connections
        strokeWeight(0.5);
        line(this.pos.x, this.pos.y, other.pos.x, other.pos.y);
      }
    }
🔬 These four lines make particles wrap around edges like a classic Pac-Man screen. What if you changed them to BOUNCE instead? Try replacing the edge-wrap logic with velocity reversal (this.vel.x *= -1 when x goes out of bounds)—what happens visually?
    // Wrap around edges
    if (this.pos.x < 0) this.pos.x = width;
    if (this.pos.x > width) this.pos.x = 0;
    if (this.pos.y < 0) this.pos.y = height;
    if (this.pos.y > height) this.pos.y = 0;
// --- Particle Class ---
class Particle {
  constructor() {
    this.pos = createVector(random(width), random(height));
    this.vel = p5.Vector.random2D();
    this.vel.setMag(random(1, 2));
    this.acc = createVector();
    this.maxSpeed = 3;
    this.maxForce = 0.1;
    this.r = 4;
    this.alpha = random(50, 150);
  }

  update() {
    this.vel.add(this.acc);
    this.vel.limit(this.maxSpeed);
    this.pos.add(this.vel);
    this.acc.mult(0); // Reset acceleration

    // Wrap around edges
    if (this.pos.x < 0) this.pos.x = width;
    if (this.pos.x > width) this.pos.x = 0;
    if (this.pos.y < 0) this.pos.y = height;
    if (this.pos.y > height) this.pos.y = 0;
  }

  display() {
    fill(0, 150, 255, this.alpha);
    noStroke();
    ellipse(this.pos.x, this.pos.y, this.r * 0.5);
  }

  connect(particles, connectDistance) { // Added connectDistance parameter
    for (let other of particles) {
      let d = p5.Vector.dist(this.pos, other.pos);
      if (d < connectDistance) { // Connect if within the responsive distance
        stroke(0, 150, 255, map(d, 0, connectDistance, 100, 0)); // Fade connections
        strokeWeight(0.5);
        line(this.pos.x, this.pos.y, other.pos.x, other.pos.y);
      }
    }
  }

  attract(targetX, targetY) {
    let target = createVector(targetX, targetY);
    let force = p5.Vector.sub(target, this.pos);
    force.setMag(this.maxForce); // Gentle attraction
    this.acc.add(force);
  }

  intensify(factor) {
    this.vel.mult(1 + factor);
    this.vel.limit(this.maxSpeed * 2); // Temporarily increase max speed
    setTimeout(() => this.vel.limit(this.maxSpeed), 500); // Reset after 0.5 seconds
  }
}
Line-by-line explanation (19 lines)
🔧 Subcomponents:
function-call
Particle Initialization
this.pos = createVector(random(width), random(height));
Places the particle at a random position on the canvas using p5.Vector for 2D positioning
calculation
Random Velocity Setup
this.vel = p5.Vector.random2D();
Creates a random direction vector and then sets its magnitude to a random speed between 1 and 2 pixels per frame
conditional
Edge Wrapping Logic
if (this.pos.x < 0) this.pos.x = width;
When particle exits left edge, it reappears on the right edge, creating seamless wraparound instead of bouncing
for-loop
Particle Connection Drawing
for (let other of particles) {
Compares this particle to every other particle and draws a line if they're close enough
calculation
Distance-Based Line Opacity
stroke(0, 150, 255, map(d, 0, connectDistance, 100, 0));
Uses map() to fade the line's alpha from 100 (nearby particles) to 0 (at the edge of connection distance)
this.pos = createVector(random(width), random(height));- Creates a 2D vector at a random x,y position on the canvas; vectors are p5.js's clean way to store and manipulate 2D points
this.vel = p5.Vector.random2D();- Generates a random direction vector (pointing anywhere on the unit circle); the magnitude will be set next
this.vel.setMag(random(1, 2));- Sets the length of the velocity vector to a random value between 1 and 2, so particles move at varying speeds
this.acc = createVector();- Initializes acceleration to zero; forces (like attraction) will add to this every frame
this.maxSpeed = 3;- Sets a speed cap; the velocity vector will never exceed 3 pixels per frame, preventing particles from flying off uncontrollably
this.r = 4;- Sets the particle's radius; it will be drawn as a circle with diameter 4 * 0.5 = 2 pixels
this.vel.add(this.acc);- Applies acceleration to velocity, implementing basic physics: forces change how fast something moves
this.vel.limit(this.maxSpeed);- Caps the velocity's magnitude at maxSpeed; if it exceeds 3, it's scaled down to exactly 3
this.pos.add(this.vel);- Updates position by adding velocity; small increments each frame create smooth animation
this.acc.mult(0);- Resets acceleration to zero each frame; forces are recalculated fresh next frame by the attract() method
if (this.pos.x < 0) this.pos.x = width;- When particle leaves the left edge, teleport it to the right edge, creating seamless looping
let d = p5.Vector.dist(this.pos, other.pos);- Calculates the distance between this particle and another using Euclidean distance; returns a single number
if (d < connectDistance) {- If distance is less than the threshold, the particles are close enough to draw a line between them
stroke(0, 150, 255, map(d, 0, connectDistance, 100, 0));- Uses map() to smoothly fade the line's opacity: at distance 0 it's opaque (alpha 100), at connectDistance it's transparent (alpha 0)
let target = createVector(targetX, targetY);- Creates a vector representing the core's position (the attraction target)
let force = p5.Vector.sub(target, this.pos);- Calculates a vector pointing FROM the particle TO the target by subtracting positions; longer vectors = further away
force.setMag(this.maxForce);- Limits the force to a gentle magnitude (0.1); this prevents particles from jerking abruptly toward the core
this.vel.mult(1 + factor);- Multiplies velocity by 1.1 (when factor is 0.1), speeding up the particle by 10%
this.vel.limit(this.maxSpeed * 2);- Temporarily caps speed at 6 instead of 3, allowing the particle to move faster during the burst
🔬 Thoughts spawn at the center and drift upward. What happens if you change the velocity to random(-1, 1) for both x AND y? Or make the y-velocity positive instead of negative? How does the movement pattern change?
    this.pos = createVector(width / 2, height / 2 + random(-100, 100));
    this.vel = createVector(random(-1, 1), random(-0.5, -1.5));
🔬 This draws a semi-transparent black box around each thought. What if you change 0.7 to 1.0? Or remove the rect() line entirely? How does readability change?
      // Draw semi-transparent black backdrop rectangle
      fill(0, 0, 0, this.alpha * 0.7); // 70% of current text alpha
      rectMode(CENTER);
      rect(this.pos.x, this.pos.y, this.textW + this.padding * 2, this.textH + this.padding, 5); // Rounded corners
// --- GenerativeContent Class (now only handles text) ---
class GenerativeContent {
  constructor(text) {
    this.type = 'text'; // Always text now
    this.text = text;
    this.alpha = 255;
    this.pos = createVector(width / 2, height / 2 + random(-100, 100));
    this.vel = createVector(random(-1, 1), random(-0.5, -1.5));
    this.size = random(20, 30);
    this.fadeRate = random(1, 3);

    // Calculate initial bounding box
    this.calculateBoundingBox();
  }

  update() {
    this.pos.add(this.vel);
    this.alpha -= this.fadeRate;
    // Recalculate bounding box as position changes
    this.calculateBoundingBox();
  }

  display() {
    if (this.alpha > 0) {
      // Draw semi-transparent black backdrop rectangle
      fill(0, 0, 0, this.alpha * 0.7); // 70% of current text alpha
      rectMode(CENTER);
      rect(this.pos.x, this.pos.y, this.textW + this.padding * 2, this.textH + this.padding, 5); // Rounded corners

      // Draw white text on top
      fill(255, this.alpha); // White text fading out
      textSize(this.size);
      text(this.text, this.pos.x, this.pos.y);
    }
  }

  isFaded() {
    return this.alpha <= 0;
  }

  calculateBoundingBox() {
    textSize(this.size); // Set size to get accurate dimensions
    this.textW = textWidth(this.text);
    this.textH = textAscent() + textDescent();
    this.padding = 10; // Padding around the text
    this.bbox = {
      x: this.pos.x - (this.textW + this.padding * 2) / 2,
      y: this.pos.y - (this.textH + this.padding) / 2,
      w: this.textW + this.padding * 2,
      h: this.textH + this.padding
    };
  }

  getBoundingBox() {
    return this.bbox;
  }
}
Line-by-line explanation (18 lines)
🔧 Subcomponents:
calculation
Thought Position Initialization
this.pos = createVector(width / 2, height / 2 + random(-100, 100));
Places the thought at the screen center horizontally, but adds randomness vertically so they don't all spawn in the exact same spot
calculation
Upward Drift Velocity
this.vel = createVector(random(-1, 1), random(-0.5, -1.5));
Makes thoughts drift upward (negative y is up in p5.js) and gently left or right; the range ensures they always move up, not down
function-call
Semi-Transparent Background Rectangle
rect(this.pos.x, this.pos.y, this.textW + this.padding * 2, this.textH + this.padding, 5);
Draws a rounded rectangle behind the text so it's readable even if particles are moving behind it
calculation
Bounding Box Computation
this.bbox = {
Calculates the exact rectangular region the thought occupies, used for overlap detection
this.type = 'text';- Stores the content type; this is a legacy field from when the class also handled images, kept for consistency
this.text = text;- Stores the sassy phrase that was passed to the constructor
this.alpha = 255;- Starts fully opaque (alpha 255 means 100% solid); this will decrease each frame until the thought fades away
this.pos = createVector(width / 2, height / 2 + random(-100, 100));- Centers the thought horizontally (width / 2) and vertically near the middle (height / 2) with ±100 pixel randomness
this.vel = createVector(random(-1, 1), random(-0.5, -1.5));- Creates a velocity vector: x varies randomly between -1 and 1 (slow left/right drift), y is between -0.5 and -1.5 (always drifting upward)
this.fadeRate = random(1, 3);- Each thought fades at a different rate (1-3 alpha units per frame); faster fade means shorter lifespan, slower fade means longer visible time
this.pos.add(this.vel);- Updates the thought's position by adding its velocity; this happens every frame in update()
this.alpha -= this.fadeRate;- Decreases opacity each frame; when alpha reaches 0 or below, the thought becomes invisible and ready to be removed
this.calculateBoundingBox();- Recalculates the bounding box after moving; this keeps the overlap detection accurate as the thought drifts
if (this.alpha > 0) {- Only draws if still visible; saves computation by not rendering fully transparent thoughts
fill(0, 0, 0, this.alpha * 0.7);- Sets the backdrop color to black with alpha of 70% of the text's current alpha, so the backdrop fades along with the text
rectMode(CENTER);- Switches rectangle drawing mode so coordinates specify the CENTER instead of the top-left, making positioning easier
rect(this.pos.x, this.pos.y, this.textW + this.padding * 2, this.textH + this.padding, 5);- Draws a rounded rectangle (5 is the corner radius) centered at the thought's position, sized to fit the text with padding
textSize(this.size);- Sets the font size to this thought's size (randomly 20-30 pixels) before drawing
textWidth(this.text);- Returns how many pixels the text will occupy horizontally at the current font size; stored for bounding box calculation
textAscent() + textDescent();- Calculates total text height by adding the height above the baseline (ascent) and below (descent)
this.bbox = {- Creates a JavaScript object with x, y, w (width), and h (height) properties representing the thought's bounding box
x: this.pos.x - (this.textW + this.padding * 2) / 2,- Calculates the left edge of the bounding box by subtracting half the total width from the center x position