
collect the balls!

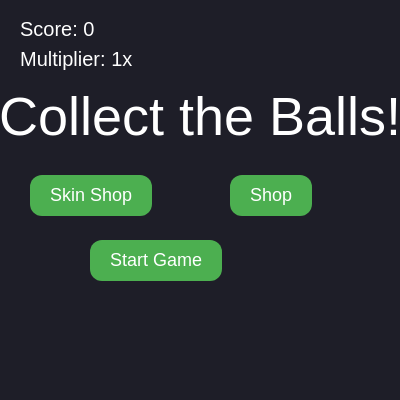
Collect the Balls! is a fast-paced arcade game where players slide a paddle to catch falling balls and earn points. The game features a progression system with score multipliers and paddle skins that can be purchased in shops, plus difficulty that ramps up as the game continues.

🧪 Try This!

Experiment with the code by making these changes:

  1. Make catching harder: spawn balls faster — Change the spawn frequency from every 60 frames to every 40 frames, making balls appear twice as often and the game more challenging
  2. Award more points per catch — Increase the base points from 10 to 25, making progression toward skins and upgrades much faster
  3. Make the paddle easier to use: double its width — Increase the paddle width from 110 to 220 pixels, making the catching area much larger and the game more forgiving
  4. Slow down the balls — Cut ball falling speed in half by changing the random range, making the game easier to manage
  5. Change the background to bright cyan — Replace the dark background with a vibrant cyan color, completely changing the game's visual mood
  6. Make the rainbow paddle cycle faster — Speed up the rainbow animation from changing every 5 frames to every 2 frames for a dizzying effect
Prefer the full editor? Open it there →

📖 About This Sketch

Collect the Balls! is an interactive arcade game built with p5.js that challenges you to slide a colorful paddle back and forth to catch randomized falling balls. Every caught ball increases your score, which you can spend in two shops: one to unlock powerful score multipliers (2x, 4x, 8x, 16x, 32x your points), and another to purchase and equip paddle colors including a special rainbow skin that cycles through colors. The difficulty increases gradually as your score climbs and frames pass, making each round more demanding and rewarding.

The code is organized into distinct game states—menu, playing, shop, skins, and gameOver—that switch based on user interaction. You'll learn how to structure a multi-screen game, manage player progression across play sessions, handle collision detection between a moving paddle and falling objects, implement dynamic difficulty scaling, and coordinate UI button visibility with game state. This is a complete, playable game that teaches both the creative and architectural side of interactive p5.js projects.

⚙️ How It Works

  1. When the sketch loads, setup() creates a canvas, initializes a player paddle object, and builds buttons for the menu, shops, and game over screens. The paddle starts at the bottom center of the screen.
  2. The draw loop runs 60 times per second and switches between five different visual states: menu (title screen), playing (the main arcade action), shop (buy score multipliers), skins (buy and equip paddle colors), and gameOver (loss screen).
  3. During gameplay, balls spawn randomly at the top of the canvas every 60 frames, each with a random size, speed, and color. The difficulty variable increases over time and with score, making new balls fall faster.
  4. The player's paddle follows the mouse horizontally (constrained to the canvas width) and is drawn in the selected skin color or as a rainbow that cycles through colors each frame.
  5. Every frame, each falling ball moves downward by its speed. When a ball overlaps the paddle's rectangle, the ball is removed and the player's score increases by 10 times the current score multiplier.
  6. If any ball passes below the canvas bottom without being caught, the game ends and the gameOver screen appears. Players can then purchase multipliers and skins in the shops, spending their accumulated score for permanent upgrades that persist across game sessions.

🎓 Concepts You'll Learn

Game state managementCollision detectionDynamic difficultyPersistent player progressionButton UI coordinationColor animation and cycling

📝 Code Breakdown

setup()

setup() runs once when the sketch starts. It prepares the canvas, creates all buttons, and initializes all the data structures (upgrades, skins, purchased items) that the game needs. Notice how it creates buttons for game states that don't exist yet—they're hidden until needed, which keeps the code organized.

function setup() {
  createCanvas(windowWidth, windowHeight);
  player = { x: width / 2, y: height - 60, w: 110, h: 25 };

  startButton = createButton('Start Game');
  startButton.mousePressed(startGame);

  shopButton = createButton('Shop');
  shopButton.mousePressed(() => switchState('shop'));

  skinButton = createButton('Skin Shop');
  skinButton.mousePressed(() => switchState('skins'));

  backButton = createButton('Back');
  backButton.mousePressed(() => switchState('menu'));

  playAgainButton = createButton('Play Again');
  playAgainButton.mousePressed(() => {
    resetGame();
    switchState('playing');
  });

  menuButton = createButton('Menu');
  menuButton.mousePressed(() => {
    resetGame();
    switchState('menu');
  });

  upgrades.forEach((upgrade) => {
    const btn = createButton(upgrade.label);
    btn.mousePressed(() => buyMultiplier(upgrade));
    upgradeButtons.push({ btn, upgrade });
  });

  skins.forEach((skin) => {
    const btn = createButton(`${skin.name} (${skin.cost})`);
    btn.mousePressed(() => handleSkinPurchase(skin));
    skinButtons.push({ btn, skin });
    purchasedSkins[skin.name] = skin.name === 'Red';
  });

  styleButtons();
  updateButtons();
}
Line-by-line explanation (8 lines)

🔧 Subcomponents:

calculation Player Paddle Initialization player = { x: width / 2, y: height - 60, w: 110, h: 25 };

Creates the paddle object with starting position at bottom-center and dimensions for collision detection

for-loop Upgrade Button Creation upgrades.forEach((upgrade) => { const btn = createButton(upgrade.label); btn.mousePressed(() => buyMultiplier(upgrade)); upgradeButtons.push({ btn, upgrade }); });

Creates clickable buttons for each score multiplier upgrade and stores them with their upgrade data

for-loop Skin Button Creation skins.forEach((skin) => { const btn = createButton(`${skin.name} (${skin.cost})`); btn.mousePressed(() => handleSkinPurchase(skin)); skinButtons.push({ btn, skin }); purchasedSkins[skin.name] = skin.name === 'Red'; });

Creates clickable buttons for each paddle skin and marks Red as unlocked by default

createCanvas(windowWidth, windowHeight);
Creates a canvas that fills the entire browser window, making the game responsive to screen size
player = { x: width / 2, y: height - 60, w: 110, h: 25 };
Initializes the paddle as an object with x/y position, width w, and height h; centered horizontally and 60 pixels from the bottom
startButton = createButton('Start Game');
Creates a clickable button labeled 'Start Game' that will trigger the startGame function
startButton.mousePressed(startGame);
Attaches the startGame function to run whenever the startButton is clicked
upgrades.forEach((upgrade) => { const btn = createButton(upgrade.label); btn.mousePressed(() => buyMultiplier(upgrade)); upgradeButtons.push({ btn, upgrade }); });
Loops through the upgrades array, creates a button for each one, attaches a click handler, and stores both the button and upgrade data together
skins.forEach((skin) => { const btn = createButton(`${skin.name} (${skin.cost})`); btn.mousePressed(() => handleSkinPurchase(skin)); skinButtons.push({ btn, skin }); purchasedSkins[skin.name] = skin.name === 'Red'; });
Loops through the skins array, creates a button for each skin showing its name and cost, and marks the Red skin as already purchased
styleButtons();
Calls the styleButtons function to apply consistent visual styling (colors, padding, border-radius) to all buttons
updateButtons();
Calls updateButtons to position all buttons and hide/show them based on the current game state
draw()

draw() runs 60 times per second. The first thing it does is clear the background, then it uses a switch statement to route to whichever screen should be visible. This pattern—a central dispatcher that calls specialized drawing functions—scales to games with many screens. The score display always draws last so it appears on top of everything.

🔬 This switch statement is the router of the whole game. What happens if you add a new case 'paused': drawPaused(); break; before the closing brace? You'd need a drawPaused() function too—but what would change in the menus?

  switch (gameState) {
    case 'menu':
      drawMenu();
      break;
    case 'playing':
      drawGame();
      break;
    case 'shop':
      drawShop();
      break;
    case 'skins':
      drawSkins();
      break;
    case 'gameOver':
      drawGameOver();
      break;
  }
function draw() {
  background(30, 30, 40);

  switch (gameState) {
    case 'menu':
      drawMenu();
      break;
    case 'playing':
      drawGame();
      break;
    case 'shop':
      drawShop();
      break;
    case 'skins':
      drawSkins();
      break;
    case 'gameOver':
      drawGameOver();
      break;
  }

  drawScoreDisplay();
}
Line-by-line explanation (3 lines)

🔧 Subcomponents:

switch-case Game State Router switch (gameState) { case 'menu': drawMenu(); break; case 'playing': drawGame(); break; case 'shop': drawShop(); break; case 'skins': drawSkins(); break; case 'gameOver': drawGameOver(); break; }

Routes to the correct drawing function based on which game state is active, ensuring only one screen appears at a time

background(30, 30, 40);
Clears the canvas with a dark blue-gray color every frame, erasing the previous frame's drawings
switch (gameState) {
Checks the current gameState variable and routes to the appropriate drawing function
drawScoreDisplay();
Always draws the score and multiplier in the top-left corner, visible on every screen

drawGame()

drawGame() is where all the action happens. It calculates dynamic difficulty, spawns balls with randomized properties, updates every ball's position, detects collisions between balls and the paddle, and ends the game if the player misses. The backwards loop is a professional technique: when you remove an item during a forward loop, remaining indices shift, causing you to skip items; looping backwards avoids this problem. The collision detection uses four separate comparisons to test bounding-box overlap, a classic technique in game development.

🔬 This loop moves and draws every falling ball. What happens if you change item.y += item.speed to item.y += item.speed * 2? Balls would fall twice as fast. What if you change it to item.y += item.speed * 0.5?

  for (let i = items.length - 1; i >= 0; i--) {
    const item = items[i];
    item.y += item.speed;

    fill(item.color);
    noStroke();
    ellipse(item.x, item.y, item.size);

🔬 These four conditions check if the ball overlaps the paddle. What happens if you change player.x to player.x - 50 on the third condition? The paddle's collision zone would shift left, making it feel like you need to catch from the left side of the visual paddle.

    if (
      item.y + item.size / 2 > player.y &&
      item.y - item.size / 2 < player.y + player.h &&
      item.x > player.x &&
      item.x < player.x + player.w
    ) {
function drawGame() {
  const difficulty = min(12, 1 + frameCount / 900 + score / 2000);

  if (frameCount % 60 === 0) {
    items.push({
      x: random(20, width - 20),
      y: 0,
      size: random(20, 40),
      speed: random(3 + difficulty, 6 + difficulty),
      color: color(random(255), random(255), random(255))
    });
  }

  for (let i = items.length - 1; i >= 0; i--) {
    const item = items[i];
    item.y += item.speed;

    fill(item.color);
    noStroke();
    ellipse(item.x, item.y, item.size);

    if (
      item.y + item.size / 2 > player.y &&
      item.y - item.size / 2 < player.y + player.h &&
      item.x > player.x &&
      item.x < player.x + player.w
    ) {
      score += 10 * scoreMultiplier;
      items.splice(i, 1);
      continue;
    }

    if (item.y - item.size / 2 > height) {
      triggerGameOver();
      return;
    }
  }

  player.x = constrain(mouseX - player.w / 2, 0, width - player.w);
  drawPlayer();
}
Line-by-line explanation (11 lines)

🔧 Subcomponents:

calculation Difficulty Calculation const difficulty = min(12, 1 + frameCount / 900 + score / 2000);

Calculates a dynamic difficulty value that increases over time (frameCount) and with score, capping at 12 to prevent impossible speeds

conditional Ball Spawn Check if (frameCount % 60 === 0) { items.push({ x: random(20, width - 20), y: 0, size: random(20, 40), speed: random(3 + difficulty, 6 + difficulty), color: color(random(255), random(255), random(255)) }); }

Every 60 frames (1 second at 60fps), spawns a new ball with random position, size, speed, and color

for-loop Ball Movement and Collision for (let i = items.length - 1; i >= 0; i--) { ... }

Iterates backwards through all falling balls, updates their positions, draws them, and checks for collisions with the paddle or the bottom edge

conditional Paddle Collision Detection if ( item.y + item.size / 2 > player.y && item.y - item.size / 2 < player.y + player.h && item.x > player.x && item.x < player.x + player.w ) { score += 10 * scoreMultiplier; items.splice(i, 1); continue; }

Tests if the ball's bounding circle overlaps the paddle's rectangle; if yes, awards points and removes the ball

conditional Miss Detection if (item.y - item.size / 2 > height) { triggerGameOver(); return; }

Ends the game immediately if any ball falls below the canvas bottom

const difficulty = min(12, 1 + frameCount / 900 + score / 2000);
Calculates a difficulty multiplier that starts at 1, increases slowly as frames pass (frameCount / 900), and faster as score grows (score / 2000), but never exceeds 12
if (frameCount % 60 === 0) {
Checks if the frame number is evenly divisible by 60 (every 60 frames, or roughly every second at 60fps)
items.push({ x: random(20, width - 20), y: 0, size: random(20, 40), speed: random(3 + difficulty, 6 + difficulty), color: color(random(255), random(255), random(255)) });
Adds a new ball object to the items array with random horizontal position (avoiding edges), random size, speed that increases with difficulty, and a random color
for (let i = items.length - 1; i >= 0; i--) {
Loops backwards through the items array from last to first; this prevents index problems when removing items during the loop
item.y += item.speed;
Moves the ball downward by its speed value each frame, creating the falling animation
ellipse(item.x, item.y, item.size);
Draws the ball as a colored circle at its current position with its current size
if ( item.y + item.size / 2 > player.y && item.y - item.size / 2 < player.y + player.h && item.x > player.x && item.x < player.x + player.w ) {
Checks four conditions: ball's bottom edge is below paddle's top, ball's top edge is above paddle's bottom, ball's x is right of paddle's left edge, and ball's x is left of paddle's right edge—all must be true for collision
score += 10 * scoreMultiplier;
Adds 10 points multiplied by the current scoreMultiplier to the player's total score
items.splice(i, 1);
Removes the caught ball from the items array so it no longer appears on screen
player.x = constrain(mouseX - player.w / 2, 0, width - player.w);
Moves the paddle so its center follows the mouse, but prevents it from moving beyond the left (0) or right (width - player.w) edges of the canvas
drawPlayer();
Calls the drawPlayer function to render the paddle at its current position in the selected skin color

drawPlayer()

drawPlayer() handles two cases: a normal solid color, or the special rainbow skin that animates by cycling through an array of colors. Using the modulo operator (%) to wrap indices is a common pattern for cyclic animations—as frameCount grows infinitely, % rainbow.length keeps the index valid. The rounded rectangle (rect with a fourth corner-radius argument) gives the paddle a polished appearance.

🔬 The rainbow skin cycles through 6 colors, and frameCount / 5 means it changes every 5 frames. What happens if you change / 5 to / 2? The animation would cycle faster. What if you change / 5 to / 15?

  if (selectedSkin.color === 'rainbow') {
    const rainbow = ['#ff595e', '#ffca3a', '#8ac926', '#1982c4', '#6a4c93', '#ff9f1c'];
    const idx = Math.floor(frameCount / 5) % rainbow.length;
    fill(rainbow[idx]);
function drawPlayer() {
  if (selectedSkin.color === 'rainbow') {
    const rainbow = ['#ff595e', '#ffca3a', '#8ac926', '#1982c4', '#6a4c93', '#ff9f1c'];
    const idx = Math.floor(frameCount / 5) % rainbow.length;
    fill(rainbow[idx]);
  } else {
    fill(selectedSkin.color);
  }
  noStroke();
  rect(player.x, player.y, player.w, player.h, 12);
}
Line-by-line explanation (6 lines)

🔧 Subcomponents:

conditional Rainbow Animation if (selectedSkin.color === 'rainbow') { const rainbow = ['#ff595e', '#ffca3a', '#8ac926', '#1982c4', '#6a4c93', '#ff9f1c']; const idx = Math.floor(frameCount / 5) % rainbow.length; fill(rainbow[idx]); }

If the rainbow skin is selected, cycles through an array of colors every 5 frames to create an animated rainbow effect

if (selectedSkin.color === 'rainbow') {
Checks if the currently selected skin is the special 'rainbow' skin (which has color property set to the string 'rainbow', not an actual color)
const rainbow = ['#ff595e', '#ffca3a', '#8ac926', '#1982c4', '#6a4c93', '#ff9f1c'];
Defines an array of six color hex codes representing red, yellow, green, blue, purple, and orange
const idx = Math.floor(frameCount / 5) % rainbow.length;
Calculates which color to show: frameCount / 5 slows down the cycling (changes every 5 frames), and % rainbow.length wraps the index back to 0 when it exceeds the array length
fill(rainbow[idx]);
Sets the fill color to whichever color is at position idx in the rainbow array
noStroke();
Removes the outline from the paddle so only the filled color appears
rect(player.x, player.y, player.w, player.h, 12);
Draws the paddle as a rounded rectangle at its current position, with width player.w, height player.h, and corner radius 12 pixels

buyMultiplier(upgrade)

buyMultiplier() is called whenever a player clicks an upgrade button in the shop. It performs three checks: is the multiplier already active (to avoid buying duplicates), can the player afford it, or is it too expensive. Each case sets uiMessage, a string that drawShop() displays on screen to give the player feedback. This is a simple but effective state-management pattern: store the message in a variable, then display it whenever needed.

function buyMultiplier(upgrade) {
  if (scoreMultiplier >= upgrade.multiplier) {
    uiMessage = `${upgrade.multiplier}x Score already active!`;
  } else if (score >= upgrade.cost) {
    score -= upgrade.cost;
    scoreMultiplier = upgrade.multiplier;
    uiMessage = `${upgrade.multiplier}x Score activated!`;
  } else {
    uiMessage = 'Not enough score.';
  }
}
Line-by-line explanation (8 lines)

🔧 Subcomponents:

conditional Already Active Check if (scoreMultiplier >= upgrade.multiplier) { uiMessage = `${upgrade.multiplier}x Score already active!`; }

Prevents buying a lower multiplier than you already have or buying the same multiplier twice

conditional Affordability Check else if (score >= upgrade.cost) { score -= upgrade.cost; scoreMultiplier = upgrade.multiplier; uiMessage = `${upgrade.multiplier}x Score activated!`; }

If the player has enough score, deduct the cost and activate the new multiplier

if (scoreMultiplier >= upgrade.multiplier) {
Checks if the current multiplier is already at least as high as the one being purchased
uiMessage = `${upgrade.multiplier}x Score already active!`;
Sets a message that will display on the shop screen explaining the purchase was rejected because the multiplier is already active
} else if (score >= upgrade.cost) {
If the multiplier wasn't already active, checks if the player has enough score points to afford the upgrade
score -= upgrade.cost;
Deducts the upgrade's cost from the player's total score
scoreMultiplier = upgrade.multiplier;
Replaces the current score multiplier with the newly purchased one, so all future points are earned at the higher rate
uiMessage = `${upgrade.multiplier}x Score activated!`;
Sets a congratulatory message that displays on the shop screen
} else {
If the multiplier is inactive AND the player can't afford it...
uiMessage = 'Not enough score.';
Sets an error message explaining the purchase failed due to insufficient funds

handleSkinPurchase(skin)

handleSkinPurchase() demonstrates the difference between owning and equipping: a skin can be owned (true in the purchasedSkins object) but not selected. When you click a skin button, this function checks ownership, purchases if affordable, then equips it. The purchasedSkins object persists across game sessions, so once you buy a skin it stays bought. The selectedSkin variable tracks which paddle appearance is currently active.

function handleSkinPurchase(skin) {
  if (purchasedSkins[skin.name]) {
    selectedSkin = skin;
    uiMessage = `${skin.name} equipped!`;
  } else if (score >= skin.cost) {
    score -= skin.cost;
    purchasedSkins[skin.name] = true;
    selectedSkin = skin;
    uiMessage = `${skin.name} purchased & equipped!`;
  } else {
    uiMessage = 'Not enough score.';
  }
}
Line-by-line explanation (9 lines)

🔧 Subcomponents:

conditional Ownership Check if (purchasedSkins[skin.name]) { selectedSkin = skin; uiMessage = `${skin.name} equipped!`; }

If the skin is already owned, immediately equip it without charging the player

conditional Purchase and Equip else if (score >= skin.cost) { score -= skin.cost; purchasedSkins[skin.name] = true; selectedSkin = skin; uiMessage = `${skin.name} purchased & equipped!`; }

If the player can afford it, deduct the cost, mark it as owned, equip it, and show a success message

if (purchasedSkins[skin.name]) {
Checks if the skin has already been purchased by looking it up in the purchasedSkins object (true if owned, undefined/false if not)
selectedSkin = skin;
Sets the selected skin to this one, making it the active paddle color
uiMessage = `${skin.name} equipped!`;
Displays a message confirming the skin is now equipped
} else if (score >= skin.cost) {
If the skin wasn't already purchased, checks if the player has enough score to afford it
score -= skin.cost;
Deducts the skin's cost from the player's total score
purchasedSkins[skin.name] = true;
Records that this skin is now owned by setting it to true in the purchasedSkins object, so future clicks won't charge the player again
uiMessage = `${skin.name} purchased & equipped!`;
Displays a message confirming the purchase and that the skin is now active
} else {
If the skin isn't owned AND the player can't afford it...
uiMessage = 'Not enough score.';
Displays an error message

resetGame()

resetGame() prepares the game state for a fresh round. Notice it does NOT reset score—upgrades and skins stay purchased, so players keep their progression. This design choice encourages playing multiple rounds: each round feels fresh, but your accumulated upgrades make future games more rewarding. Only the active game state (balls, multiplier, messages) resets.

function resetGame() {
  items = [];
  player.x = width / 2;
  scoreMultiplier = 1;
  uiMessage = '';
}
Line-by-line explanation (4 lines)
items = [];
Clears the items array, removing all falling balls from the game and resetting to zero balls
player.x = width / 2;
Resets the paddle to the horizontal center of the canvas
scoreMultiplier = 1;
Resets the score multiplier to 1x, so the next game starts with basic points (no active upgrades)
uiMessage = '';
Clears any lingering messages from the shop or game over screens

switchState(newState)

switchState() is a utility function that handles all screen transitions. Instead of scattered code changing gameState and buttons, every transition goes through this one function, making it easy to ensure consistency. It always clears messages and updates buttons, guaranteeing a clean transition to any new state.

function switchState(newState) {
  gameState = newState;
  uiMessage = '';
  updateButtons();
}
Line-by-line explanation (3 lines)
gameState = newState;
Updates the global gameState variable to the new state, which changes what draw() displays on the next frame
uiMessage = '';
Clears any messages from the previous screen so the new screen starts with a clean message area
updateButtons();
Calls updateButtons() to reposition and show/hide buttons based on the new game state

updateButtons()

updateButtons() is called every time the game state changes. It repositions all buttons and shows/hides them based on which screen is active. This keeps button visibility logic in one place instead of scattered throughout the code. The vertical stacking uses the index i multiplied by a spacing value (52 for upgrades, 44 for skins) to spread buttons down the screen with consistent gaps.

function updateButtons() {
  startButton.position(width / 2 - 110, height / 2 + 40);
  skinButton.position(30, height / 2 - 25);
  shopButton.position(width - 170, height / 2 - 25);
  backButton.position(30, 30);
  playAgainButton.position(width / 2 - 110, height / 2 + 80);
  menuButton.position(width / 2 - 110, height / 2 + 130);

  const onMenu = gameState === 'menu';
  startButton[onMenu ? 'show' : 'hide']();
  skinButton[onMenu ? 'show' : 'hide']();
  shopButton[onMenu ? 'show' : 'hide']();

  (gameState === 'shop' || gameState === 'skins') ? backButton.show() : backButton.hide();
  (gameState === 'gameOver') ? (playAgainButton.show(), menuButton.show()) : (playAgainButton.hide(), menuButton.hide());

  upgradeButtons.forEach(({ btn }, i) => {
    if (gameState === 'shop') {
      btn.show();
      btn.position(width - 280, height / 2 - 110 + i * 52);
    } else {
      btn.hide();
    }
  });

  skinButtons.forEach(({ btn }, i) => {
    if (gameState === 'skins') {
      btn.show();
      btn.position(40, height / 2 - 110 + i * 44);
    } else {
      btn.hide();
    }
  });
}
Line-by-line explanation (5 lines)

🔧 Subcomponents:

calculation Button Positioning startButton.position(width / 2 - 110, height / 2 + 40); skinButton.position(30, height / 2 - 25); shopButton.position(width - 170, height / 2 - 25); backButton.position(30, 30); playAgainButton.position(width / 2 - 110, height / 2 + 80); menuButton.position(width / 2 - 110, height / 2 + 130);

Sets fixed pixel positions for all the main buttons, centering some and placing others in corners

conditional Shop/Skins Navigation Button (gameState === 'shop' || gameState === 'skins') ? backButton.show() : backButton.hide();

Shows the Back button only on shop and skins screens

conditional Game Over Button Visibility (gameState === 'gameOver') ? (playAgainButton.show(), menuButton.show()) : (playAgainButton.hide(), menuButton.hide());

Shows Play Again and Menu buttons only on the game over screen

for-loop Upgrade Button Management upgradeButtons.forEach(({ btn }, i) => { if (gameState === 'shop') { btn.show(); btn.position(width - 280, height / 2 - 110 + i * 52); } else { btn.hide(); } });

Shows and positions upgrade buttons only in the shop, stacking them vertically with 52 pixels between each

for-loop Skin Button Management skinButtons.forEach(({ btn }, i) => { if (gameState === 'skins') { btn.show(); btn.position(40, height / 2 - 110 + i * 44); } else { btn.hide(); } });

Shows and positions skin buttons only in the skin shop, stacking them vertically with 44 pixels between each

startButton.position(width / 2 - 110, height / 2 + 40);
Positions the Start button horizontally centered (width / 2 - 110 subtracts half the button width) and below the vertical center
const onMenu = gameState === 'menu';
Creates a shorthand boolean that is true only when the current game state is 'menu'
startButton[onMenu ? 'show' : 'hide']();
Uses a ternary operator to call either .show() or .hide() on the button depending on whether we're on the menu
upgradeButtons.forEach(({ btn }, i) => { if (gameState === 'shop') { btn.show(); btn.position(width - 280, height / 2 - 110 + i * 52); } else { btn.hide(); } });
Loops through each upgrade button, and if in the shop, shows it and positions it at a vertical offset calculated using its index i (every button is 52 pixels apart)
skinButtons.forEach(({ btn }, i) => { if (gameState === 'skins') { btn.show(); btn.position(40, height / 2 - 110 + i * 44); } else { btn.hide(); } });
Loops through each skin button, and if in the skins state, shows it and positions it vertically with 44 pixels spacing between buttons

triggerGameOver()

triggerGameOver() is called from drawGame() whenever a ball falls below the canvas without being caught. It cleans up by clearing balls and switches to the gameOver state. This is a clean separation of concerns: the game logic detects a loss condition, but the state transition is handled by switchState().

function triggerGameOver() {
  items = [];
  switchState('gameOver');
}
Line-by-line explanation (2 lines)
items = [];
Clears all falling balls from the screen immediately so none are left hanging when the game over screen appears
switchState('gameOver');
Changes the game state to 'gameOver', which makes draw() display the game over screen instead of the game

windowResized()

windowResized() is a special p5.js function that runs automatically whenever the browser window is resized. This sketch uses it to make the game fully responsive: the canvas stretches to fill the window, and all buttons reposition themselves. Without this, buttons would stay fixed at their old positions and become misaligned.

function windowResized() {
  resizeCanvas(windowWidth, windowHeight);
  updateButtons();
}
Line-by-line explanation (2 lines)
resizeCanvas(windowWidth, windowHeight);
Resizes the p5.js canvas to match the browser window's new dimensions when the user resizes their window
updateButtons();
Repositions all buttons to account for the new canvas size, ensuring they remain visible and properly placed

📦 Key Variables

player object

Stores the paddle's position (x, y) and dimensions (w, h) for drawing and collision detection

let player = { x: 200, y: 550, w: 110, h: 25 };
items array

Holds all currently falling balls; each item has x, y, size, speed, and color properties

let items = [];
score number

Tracks the player's total accumulated points across all game sessions; used to purchase upgrades and skins

let score = 0;
scoreMultiplier number

The current active score multiplier (1x, 2x, 4x, etc.); each caught ball awards 10 points times this value

let scoreMultiplier = 1;
gameState string

Controls which screen is displayed: 'menu', 'playing', 'shop', 'skins', or 'gameOver'

let gameState = 'menu';
uiMessage string

Stores feedback messages that appear on shop and skins screens (e.g., 'Not enough score.')

let uiMessage = '';
upgrades array

Array of upgrade objects, each with label, multiplier, and cost; defines all purchasable score multipliers

const upgrades = [ { label: 'Buy 2x Score (1,000)', multiplier: 2, cost: 1000 }, ... ];
skins array

Array of skin objects, each with name, color (hex code or 'rainbow'), and cost; defines all purchasable paddle colors

const skins = [ { name: 'Red', color: '#ff4d4d', cost: 500 }, ... ];
purchasedSkins object

Records which skins have been purchased as key-value pairs where keys are skin names and values are true/false

let purchasedSkins = { 'Red': true, 'Blue': false, ... };
selectedSkin object

The currently active skin object (from the skins array) that determines the paddle's appearance

let selectedSkin = { name: 'Red', color: '#ff4d4d', cost: 500 };
startButton object

p5.js button element for starting a game; created with createButton() and positioned by updateButtons()

let startButton = createButton('Start Game');
upgradeButtons array

Array of objects pairing upgrade buttons with their corresponding upgrade data for easy reference

let upgradeButtons = [ { btn: buttonElement, upgrade: upgradeObject }, ... ];
skinButtons array

Array of objects pairing skin buttons with their corresponding skin data for easy reference

let skinButtons = [ { btn: buttonElement, skin: skinObject }, ... ];

🔧 Potential Improvements (5)

Here are some ways this code could be enhanced:

BUG drawGame() collision detection

The collision check uses the ball's center x-coordinate, but a ball can be caught even if only a small edge overlaps the paddle horizontally

💡 Improve horizontal collision by checking if the ball's circular bounds overlap the paddle's rectangular bounds more accurately: change `item.x > player.x && item.x < player.x + player.w` to include the ball's radius: `item.x - item.size/2 < player.x + player.w && item.x + item.size/2 > player.x`

BUG buyMultiplier() and handleSkinPurchase()

If a player accumulates exactly enough score to buy multiple upgrades, they can spam-click and spend their score on multiple purchases before the score display updates on screen, causing confusion

💡 Add a debounce timer or disable buttons for 200ms after a purchase, or refresh the display immediately after each transaction to reflect the new score

PERFORMANCE drawPlayer() rainbow animation

The rainbow array is recreated on every frame when the rainbow skin is selected, wasting memory and computation

💡 Move the rainbow array outside the function as a constant: `const RAINBOW_COLORS = ['#ff595e', '#ffca3a', '...'];` and reference it inside drawPlayer()

STYLE upgradeButtons and skinButtons initialization in setup()

The button creation loops use identical patterns but are written separately; this duplication makes the code harder to maintain

💡 Extract a helper function createShopButtons(buttonArray, dataArray, onClickCallback) to reduce repetition and make the code more maintainable

FEATURE Global state

The game has no way to pause mid-game or save the current session's progress if the player accidentally closes the browser

💡 Add a 'paused' game state, save score and purchased items to localStorage in buyMultiplier() and handleSkinPurchase(), and restore them in setup() so progress persists across sessions

🔄 Code Flow

Code flow showing setup, draw, drawgame, drawplayer, buymultiplier, handleskinpurchase, resetgame, switchstate, updatebuttons, triggerGameOver, windowresized

💡 Click on function names in the diagram to jump to their code

graph TD start[Start] --> setup[setup] setup --> draw[draw loop] draw --> state-switch[state-switch] state-switch --> drawgame[drawGame] drawgame --> difficulty-calc[difficulty-calc] drawgame --> spawn-loop[spawn-loop] drawgame --> ball-loop[ball-loop] ball-loop --> collision-check[collision-check] ball-loop --> miss-check[miss-check] drawgame --> drawplayer[drawPlayer] drawplayer --> rainbow-check[rainbow-check] draw --> updatebuttons[updateButtons] draw --> triggerGameOver[triggerGameOver] draw --> windowresized[windowResized] click setup href "#fn-setup" click draw href "#fn-draw" click state-switch href "#sub-state-switch" click drawgame href "#fn-drawgame" click difficulty-calc href "#sub-difficulty-calc" click spawn-loop href "#sub-spawn-loop" click ball-loop href "#sub-ball-loop" click collision-check href "#sub-collision-check" click miss-check href "#sub-miss-check" click drawplayer href "#fn-drawplayer" click rainbow-check href "#sub-rainbow-check" click updatebuttons href "#fn-updatebuttons" click triggerGameOver href "#fn-triggerGameOver" click windowresized href "#fn-windowResized" setup --> player-init[player-init] setup --> upgrade-buttons-loop[upgrade-buttons-loop] setup --> skin-buttons-loop[skin-buttons-loop] click player-init href "#sub-player-init" click upgrade-buttons-loop href "#sub-upgrade-buttons-loop" click skin-buttons-loop href "#sub-skin-buttons-loop" ball-loop --> ball-movement[Ball Movement] ball-loop --> ball-draw[Ball Draw] ball-loop --> ball-collision[Ball Collision Check] click ball-movement href "#sub-ball-movement" click ball-draw href "#sub-ball-draw" click ball-collision href "#sub-ball-collision" collision-check --> paddle-collision[Paddle Collision Detection] click paddle-collision href "#sub-paddle-collision" draw --> menu-buttons-show[menu-buttons-show] draw --> shop-skins-buttons-show[shop-skins-buttons-show] draw --> gameover-buttons-show[gameover-buttons-show] click menu-buttons-show href "#sub-menu-buttons-show" click shop-skins-buttons-show href "#sub-shop-skins-buttons-show" click gameover-buttons-show href "#sub-gameover-buttons-show"

❓ Frequently Asked Questions

What visual elements can users expect to see in the Collect the Balls! game?

Users will see a colorful paddle at the bottom of the screen, various falling balls, and a vibrant interface featuring different skins and upgrade options.

How can players interact with the Collect the Balls! game?

Players can move the paddle left and right to catch falling balls, navigate through menus to shop for upgrades and skins, and restart the game after a round.

What creative coding concepts are showcased in the Collect the Balls! game?

This sketch demonstrates concepts such as game state management, user interface design, and dynamic scoring systems through interactive gameplay.

Preview

collect the balls! - p5.js creative coding sketch preview
Sketch Preview
Code flow diagram showing the structure of collect the balls! - Code flow showing setup, draw, drawgame, drawplayer, buymultiplier, handleskinpurchase, resetgame, switchstate, updatebuttons, triggerGameOver, windowresized
Code Flow Diagram