
collect the balls V3

Collect the Balls! is a fast-paced arcade game where players move a paddle to catch falling balls, earn points, and spend their score in a shop to unlock skins and score multipliers. The game features progressive difficulty scaling, a menu system, and persistent cosmetic upgrades that affect both gameplay and visuals.

🧪 Try This!

Experiment with the code by making these changes:

  1. Make balls spawn twice as often — Halving the spawn interval makes the game much harder and faster-paced from the start
  2. Double the paddle width — Wider paddles are easier to use and make the game more forgiving for catching balls
  3. Change the difficulty ramp speed — Dividing frameCount by a smaller number makes balls accelerate faster as the game progresses
  4. Unlock all skins by default — Changing the condition from 'Red' to always true means players start with all cosmetics available
  5. Make the rainbow cycle faster — Dividing frameCount by a smaller number makes the paddle's rainbow animation flicker quicker
Prefer the full editor? Open it there →

📖 About This Sketch

This sketch creates a fully-featured arcade game where falling balls drop from the top of the screen and players must position a paddle at the bottom to catch them. The game combines multiple core p5.js techniques: collision detection to check if balls hit the paddle, the draw loop to animate falling objects, and interactive buttons to navigate between game states. What makes this sketch special is its economy system—players earn score by catching balls and spend it in a shop to buy score multipliers (2x, 4x, 8x, up to 32x) or cosmetic paddle skins, creating a loop where cosmetics and power-ups drive continued play.

The code is organized into state-based drawing functions (drawMenu, drawGame, drawShop, drawSkins, drawGameOver) that respond to a central gameState variable, multiple helper functions for shop logic and collision, and a carefully tuned difficulty system that increases ball speed as score and playtime grow. By studying it, you will learn how to build a complete game with multiple screens, manage persistent player data (purchased skins, score, multipliers), and use buttons to control program flow—skills that scale to any interactive p5.js project.

⚙️ How It Works

  1. When the sketch loads, setup() creates a canvas, initializes a player paddle object in the bottom center, and creates buttons for the menu (Start Game, Shop, Skin Shop) and other screens.
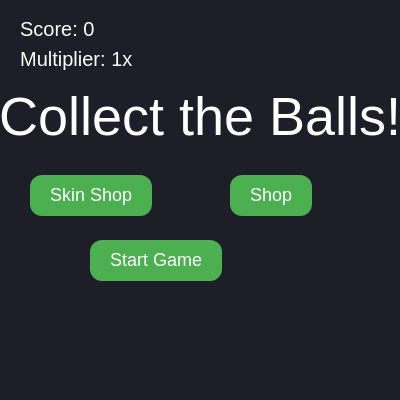
  2. The player sees the menu screen showing the title. Clicking 'Start Game' switches the game state to 'playing' and resets the score and multiplier.
  3. While playing, draw() spawns new falling balls every 60 frames at random x positions with random colors and sizes. A difficulty variable increases ball speed based on elapsed time and current score.
  4. The game loop updates each ball's y position every frame, draws it as a circle, and checks two collision conditions: if the ball overlaps the paddle (collision detected using bounding-box logic), it adds points using getPointsPerCatch() and removes the ball; if the ball falls below the screen, the game ends.
  5. The paddle follows the mouse horizontally and is drawn with the currently selected skin color—either a solid color or a cycling rainbow animation if the Rainbow skin is selected.
  6. Clicking 'Shop' shows score multiplier upgrades the player can buy; clicking 'Skin Shop' displays cosmetic skins. Both check if the player has enough score and update purchasedSkins and selectedSkin accordingly.
  7. When a ball is missed, triggerGameOver() clears the items array and switches to the gameOver screen, where players can restart or return to the menu.

🎓 Concepts You'll Learn

Game state managementCollision detectionMouse interactionButton UI controlsPersistent data (score, purchases)Progressive difficulty scalingConditional rendering based on game stateArrays for game objects

📝 Code Breakdown

setup()

setup() runs once when the sketch loads. It initializes all global state: the canvas size, the player paddle, and every button in the game. Notice how it creates buttons for features (upgrades, skins) that are stored in arrays and then looped through—this pattern scales well if you want to add more upgrades or skins later.

function setup() {
  createCanvas(windowWidth, windowHeight);
  player = { x: width / 2, y: height - 60, w: 110, h: 25 };

  // --- UI buttons ---
  startButton = createButton('Start Game');
  startButton.mousePressed(startGame);

  shopButton = createButton('Shop');
  shopButton.mousePressed(() => switchState('shop'));

  skinButton = createButton('Skin Shop');
  skinButton.mousePressed(() => switchState('skins'));

  backButton = createButton('Back');
  backButton.mousePressed(() => switchState('menu'));

  playAgainButton = createButton('Play Again');
  playAgainButton.mousePressed(() => {
    resetGame();
    switchState('playing');
  });

  menuButton = createButton('Menu');
  menuButton.mousePressed(() => {
    resetGame();
    switchState('menu');
  });

  // Upgrade buttons (right-side shop)
  upgrades.forEach((upgrade) => {
    const btn = createButton(upgrade.label);
    btn.mousePressed(() => buyMultiplier(upgrade));
    upgradeButtons.push({ btn, upgrade });
  });

  // Skin buttons (left-side shop)
  skins.forEach((skin) => {
    const btn = createButton(`${skin.name} (${skin.cost})`);
    btn.mousePressed(() => handleSkinPurchase(skin));
    skinButtons.push({ btn, skin });
    purchasedSkins[skin.name] = skin.name === 'Red';
  });

  styleButtons();
  updateButtons();
}
Line-by-line explanation (9 lines)

🔧 Subcomponents:

initialization Canvas and Player Setup createCanvas(windowWidth, windowHeight); player = { x: width / 2, y: height - 60, w: 110, h: 25 };

Creates a fullscreen canvas and positions the paddle near the bottom center

loop Button Creation and Event Binding startButton = createButton('Start Game'); startButton.mousePressed(startGame);

Creates UI buttons and attaches click handlers to switch game states

for-loop Upgrade Button Generation Loop upgrades.forEach((upgrade) => { const btn = createButton(upgrade.label); btn.mousePressed(() => buyMultiplier(upgrade)); upgradeButtons.push({ btn, upgrade }); });

Creates a button for each score multiplier upgrade and stores it for later layout

for-loop Skin Button Generation and Default Purchase skins.forEach((skin) => { const btn = createButton(`${skin.name} (${skin.cost})`); btn.mousePressed(() => handleSkinPurchase(skin)); skinButtons.push({ btn, skin }); purchasedSkins[skin.name] = skin.name === 'Red'; });

Creates a button for each skin, tracks which skins are purchased, and unlocks Red by default

createCanvas(windowWidth, windowHeight);
Creates a canvas that fills the entire browser window
player = { x: width / 2, y: height - 60, w: 110, h: 25 };
Creates a player paddle object with position, width, and height; x is centered horizontally, y is 60 pixels from the bottom
startButton = createButton('Start Game');
Creates a clickable button labeled 'Start Game'
startButton.mousePressed(startGame);
Attaches the startGame function to the button so it runs when clicked
upgrades.forEach((upgrade) => {
Loops through each upgrade object (2x, 4x, 8x, etc.) defined at the top of the sketch
btn.mousePressed(() => buyMultiplier(upgrade));
Attaches a click handler to each upgrade button that calls buyMultiplier with that upgrade's data
purchasedSkins[skin.name] = skin.name === 'Red';
Sets purchasedSkins['Red'] to true (unlocked by default) and all others to false (locked)
styleButtons();
Calls a function that applies CSS styles to all buttons (color, font size, padding, etc.)
updateButtons();
Calls a function that positions buttons and shows/hides them based on the current game state
draw()

draw() runs 60 times per second and is the heartbeat of your program. This sketch uses draw() to dispatch to different drawing functions based on game state—a clean pattern called the 'state machine' approach. Every screen (menu, game, shop) is a separate function, so draw() stays readable even with five different views.

🔬 This switch statement routes between five different screens. What happens if you add a new case 'credits' and call drawMenu() for it? The state system would need a new button to reach it—can you think of where to add one?

  switch (gameState) {
    case 'menu':
      drawMenu();
      break;
    case 'playing':
      drawGame();
      break;
    case 'shop':
      drawShop();
      break;
    case 'skins':
      drawSkins();
      break;
    case 'gameOver':
      drawGameOver();
      break;
  }
function draw() {
  background(30, 30, 40);

  switch (gameState) {
    case 'menu':
      drawMenu();
      break;
    case 'playing':
      drawGame();
      break;
    case 'shop':
      drawShop();
      break;
    case 'skins':
      drawSkins();
      break;
    case 'gameOver':
      drawGameOver();
      break;
  }

  drawScoreDisplay();
}
Line-by-line explanation (5 lines)

🔧 Subcomponents:

calculation Canvas Clear background(30, 30, 40);

Redraws the background every frame to erase the previous frame's content

switch-case Game State Router switch (gameState) { case 'menu': drawMenu(); break; case 'playing': drawGame(); break; case 'shop': drawShop(); break; case 'skins': drawSkins(); break; case 'gameOver': drawGameOver(); break; }

Routes drawing logic based on current game state—shows the correct screen (menu, game, shop, etc.)

background(30, 30, 40);
Fills the canvas with dark blue-gray (RGB: 30, 30, 40) to erase the previous frame
switch (gameState) {
Begins a switch statement that checks the current value of the gameState variable
case 'menu': drawMenu(); break;
If gameState is 'menu', calls drawMenu() to display the title screen, then break exits the switch
case 'playing': drawGame(); break;
If gameState is 'playing', calls drawGame() to run the actual game logic with falling balls and paddle
drawScoreDisplay();
Draws the score and multiplier text in the top-left corner on every frame, regardless of game state

drawGame()

drawGame() is the core of the sketch. It manages the entire game loop: spawning new balls, updating their positions, drawing them, checking collisions with the paddle, detecting missed balls, and tracking the paddle's position. The difficulty scaling is elegant—it uses frameCount (total frames since start) and score to gradually increase speed, creating a natural difficulty ramp that rewards players for staying alive longer.

🔬 This loop moves each ball down and draws it. What happens if you add item.x += random(-1, 1) inside the loop so balls sway side-to-side as they fall? How does that change the difficulty feel?

  for (let i = items.length - 1; i >= 0; i--) {
    const item = items[i];
    item.y += item.speed;

    fill(item.color);
    noStroke();
    ellipse(item.x, item.y, item.size);

🔬 This four-line condition is the collision detector. What happens if you change > to < in the first condition (item.y + item.size / 2 < player.y)? You'll turn it inside-out—why might that feel strange?

    if (
      item.y + item.size / 2 > player.y &&
      item.y - item.size / 2 < player.y + player.h &&
      item.x > player.x &&
      item.x < player.x + player.w
    ) {
function drawGame() {
  // Difficulty: speed increases as time and score go up
  const difficulty = min(12, 1 + frameCount / 900 + score / 2000);

  if (frameCount % 60 === 0) {
    items.push({
      x: random(20, width - 20),
      y: 0,
      size: random(20, 40),
      // slower base speed, then scale with difficulty
      speed: random(2 + difficulty * 0.8, 4.5 + difficulty * 0.8),
      color: color(random(255), random(255), random(255))
    });
  }

  for (let i = items.length - 1; i >= 0; i--) {
    const item = items[i];
    item.y += item.speed;

    fill(item.color);
    noStroke();
    ellipse(item.x, item.y, item.size);

    // Collision with paddle
    if (
      item.y + item.size / 2 > player.y &&
      item.y - item.size / 2 < player.y + player.h &&
      item.x > player.x &&
      item.x < player.x + player.w
    ) {
      score += getPointsPerCatch(scoreMultiplier);
      items.splice(i, 1);
      continue;
    }

    // Missed a ball → game over
    if (item.y - item.size / 2 > height) {
      triggerGameOver();
      return;
    }
  }

  // Paddle follows mouse
  player.x = constrain(mouseX - player.w / 2, 0, width - player.w);
  drawPlayer();
}
Line-by-line explanation (16 lines)

🔧 Subcomponents:

calculation Difficulty Scaling const difficulty = min(12, 1 + frameCount / 900 + score / 2000);

Calculates an increasing difficulty value based on time elapsed and score, capped at 12 to prevent balls from becoming impossibly fast

conditional Ball Spawn Condition if (frameCount % 60 === 0) {

Spawns a new ball every 60 frames (every second at 60 fps) by checking if the current frame number is divisible by 60

calculation New Ball Object Creation items.push({ x: random(20, width - 20), y: 0, size: random(20, 40), speed: random(2 + difficulty * 0.8, 4.5 + difficulty * 0.8), color: color(random(255), random(255), random(255)) });

Creates a new ball with random position, size, speed, and color, then adds it to the items array

for-loop Ball Update and Collision Loop for (let i = items.length - 1; i >= 0; i--) {

Iterates backward through the items array to update positions, draw balls, and check collisions; backward iteration allows safe removal during iteration

conditional Paddle Collision Detection if ( item.y + item.size / 2 > player.y && item.y - item.size / 2 < player.y + player.h && item.x > player.x && item.x < player.x + player.w ) {

Checks if a ball's bounding circle overlaps the paddle's bounding rectangle using four conditions

conditional Missed Ball Detection if (item.y - item.size / 2 > height) {

Checks if a ball has fallen below the bottom of the screen, triggering game over

calculation Paddle Mouse Following player.x = constrain(mouseX - player.w / 2, 0, width - player.w);

Centers the paddle on the mouse's x position and clamps it to stay within the canvas boundaries

const difficulty = min(12, 1 + frameCount / 900 + score / 2000);
Calculates difficulty as 1 + elapsed time / 900 + score / 2000, but caps it at 12 using min() so balls don't become too fast
if (frameCount % 60 === 0) {
The modulo operator (%) checks if frameCount is divisible by 60—true every 60 frames, roughly once per second at 60 fps
x: random(20, width - 20),
Picks a random x position for the new ball, keeping it at least 20 pixels from each edge
y: 0,
New balls always spawn at the top of the screen (y = 0)
size: random(20, 40),
Each ball gets a random size between 20 and 40 pixels in diameter
speed: random(2 + difficulty * 0.8, 4.5 + difficulty * 0.8),
Speed ranges from roughly 2–4.5 plus a difficulty bonus that scales up, so harder balls fall faster
color: color(random(255), random(255), random(255))
Creates a random RGB color for the ball by picking random values 0–255 for red, green, and blue
for (let i = items.length - 1; i >= 0; i--) {
Loops backward through the items array from the last ball to the first; backward iteration is crucial because we may remove items inside the loop
item.y += item.speed;
Updates the ball's y position by adding its speed, making it fall further down the screen each frame
ellipse(item.x, item.y, item.size);
Draws the ball as a circle at its current position with its current size
if ( item.y + item.size / 2 > player.y && item.y - item.size / 2 < player.y + player.h && item.x > player.x && item.x < player.x + player.w ) {
Checks four conditions to detect collision: ball bottom below paddle top, ball top above paddle bottom, ball left of paddle right edge, and ball right of paddle left edge
score += getPointsPerCatch(scoreMultiplier);
Adds points to the score based on the current multiplier—higher multipliers give more points per catch
items.splice(i, 1);
Removes the caught ball from the items array so it stops being drawn and updated
if (item.y - item.size / 2 > height) {
Checks if the ball's bottom edge has fallen below the bottom of the screen
triggerGameOver();
Calls the triggerGameOver function to end the game and switch to the game over screen
player.x = constrain(mouseX - player.w / 2, 0, width - player.w);
Moves the paddle so its center is under the mouse, using constrain() to prevent it from going off-screen

drawPlayer()

drawPlayer() shows two rendering techniques: solid color fills and animated cycling. The rainbow skin uses modulo arithmetic (%) to loop through an array—a pattern you'll use throughout game development. Notice that the animation speed is controlled by dividing frameCount, not by a separate counter; this ties animation directly to the frame rate and keeps your code in sync.

function drawPlayer() {
  if (selectedSkin.color === 'rainbow') {
    const rainbow = ['#ff595e', '#ffca3a', '#8ac926', '#1982c4', '#6a4c93', '#ff9f1c'];
    const idx = Math.floor(frameCount / 5) % rainbow.length;
    fill(rainbow[idx]);
  } else {
    fill(selectedSkin.color);
  }
  noStroke();
  rect(player.x, player.y, player.w, player.h, 12);
}
Line-by-line explanation (6 lines)

🔧 Subcomponents:

conditional Rainbow Skin Logic if (selectedSkin.color === 'rainbow') {

Checks if the currently selected skin is the rainbow skin and applies animated color cycling

calculation Rainbow Color Array const rainbow = ['#ff595e', '#ffca3a', '#8ac926', '#1982c4', '#6a4c93', '#ff9f1c'];

Defines six colors that cycle through to create a rainbow animation effect

calculation Animated Color Index const idx = Math.floor(frameCount / 5) % rainbow.length;

Calculates which color in the rainbow array to use based on the current frame number, cycling back to the start after the last color

if (selectedSkin.color === 'rainbow') {
Checks whether the currently selected skin's color is the string 'rainbow'
const rainbow = ['#ff595e', '#ffca3a', '#8ac926', '#1982c4', '#6a4c93', '#ff9f1c'];
Creates an array of six hex color codes representing the colors of the rainbow
const idx = Math.floor(frameCount / 5) % rainbow.length;
Divides frameCount by 5 so colors change every 5 frames (slower animation), uses % to wrap the index back to 0 when it exceeds the array length
fill(rainbow[idx]);
Selects a color from the rainbow array using the calculated index and fills the upcoming shape with it
} else { fill(selectedSkin.color); }
If the skin is not rainbow, simply fill with the selected skin's solid color
rect(player.x, player.y, player.w, player.h, 12);
Draws the paddle as a rectangle at (player.x, player.y) with width player.w and height player.h, with 12-pixel rounded corners

buyMultiplier(upgrade)

buyMultiplier() demonstrates conditional logic for purchases: it checks three states (already have it, can afford it, can't afford it) and provides feedback for each. Notice how uiMessage is set in all three branches—this ensures the player always gets feedback about their action.

function buyMultiplier(upgrade) {
  if (scoreMultiplier >= upgrade.multiplier) {
    uiMessage = `${upgrade.multiplier}x Score already active!`;
  } else if (score >= upgrade.cost) {
    score -= upgrade.cost;
    scoreMultiplier = upgrade.multiplier;
    uiMessage = `${upgrade.multiplier}x Score activated!`;
  } else {
    uiMessage = 'Not enough score.';
  }
}
Line-by-line explanation (7 lines)

🔧 Subcomponents:

conditional Duplicate Multiplier Check if (scoreMultiplier >= upgrade.multiplier) {

Prevents purchasing a multiplier that is already active or lower

conditional Cost Affordability Check } else if (score >= upgrade.cost) {

Checks whether the player has enough score to buy this upgrade

conditional Insufficient Score Fallback } else {

Handles the case where the player cannot afford the upgrade

if (scoreMultiplier >= upgrade.multiplier) {
Checks if the current multiplier is already equal to or greater than the upgrade being purchased
uiMessage = `${upgrade.multiplier}x Score already active!`;
Sets a message informing the player they already have this multiplier active
} else if (score >= upgrade.cost) {
If the player doesn't already have the multiplier, checks if their score is high enough to afford it
score -= upgrade.cost;
Subtracts the upgrade's cost from the player's total score
scoreMultiplier = upgrade.multiplier;
Sets the global scoreMultiplier to the new value, so all future catches earn more points
uiMessage = `${upgrade.multiplier}x Score activated!`;
Sets a success message showing which multiplier was just purchased
} else { uiMessage = 'Not enough score.'; }
If the player can't afford the upgrade and doesn't already have it, shows a message asking them to earn more score

handleSkinPurchase(skin)

handleSkinPurchase() is nearly identical to buyMultiplier() but works with cosmetic skins instead of score multipliers. Both follow the same pattern: check if already owned, check if can afford, else fail with a message. This pattern is the foundation of any shop system—you can expand it to weapons, power-ups, or characters.

function handleSkinPurchase(skin) {
  if (purchasedSkins[skin.name]) {
    selectedSkin = skin;
    uiMessage = `${skin.name} equipped!`;
  } else if (score >= skin.cost) {
    score -= skin.cost;
    purchasedSkins[skin.name] = true;
    selectedSkin = skin;
    uiMessage = `${skin.name} purchased & equipped!`;
  } else {
    uiMessage = 'Not enough score.';
  }
}
Line-by-line explanation (7 lines)

🔧 Subcomponents:

conditional Already Owned Skin Check if (purchasedSkins[skin.name]) {

Checks if the player has already purchased this skin

conditional Skin Cost Check } else if (score >= skin.cost) {

Checks if the player has enough score to buy this skin

if (purchasedSkins[skin.name]) {
Checks the purchasedSkins object to see if this skin has already been bought (value is true)
selectedSkin = skin;
Sets the global selectedSkin to the chosen skin object so drawPlayer() will use its color
uiMessage = `${skin.name} equipped!`;
Shows a message that the skin is now active
} else if (score >= skin.cost) {
If the skin is not owned, checks if the player has enough score to buy it
score -= skin.cost;
Deducts the skin's cost from the player's total score
purchasedSkins[skin.name] = true;
Marks this skin as owned in the purchasedSkins object so the player can equip it freely next time
uiMessage = `${skin.name} purchased & equipped!`;
Shows a message confirming both purchase and equipping

getPointsPerCatch(mult)

getPointsPerCatch() defines the game's economy: how many points each catch earns based on the active multiplier. Notice that the 8x case returns 60 instead of 80—this is a deliberate balance choice to make progression feel right. The default case is a safety net for unexpected multiplier values.

function getPointsPerCatch(mult) {
  switch (mult) {
    case 1:  return 10;
    case 2:  return 20;
    case 4:  return 40;
    case 8:  return 60;
    case 16: return 160;
    case 32: return 320;
    default:
      return 10 * mult;
  }
}
Line-by-line explanation (6 lines)

🔧 Subcomponents:

switch-case Multiplier Points Lookup switch (mult) {

Routes to different point values based on the current score multiplier

function getPointsPerCatch(mult) {
Takes a multiplier value (1, 2, 4, 8, 16, or 32) and returns how many points a single catch is worth
switch (mult) {
Starts a switch statement to check the multiplier value and return the corresponding points
case 1: return 10;
If multiplier is 1 (no upgrade), each catch is worth 10 points
case 2: return 20;
If multiplier is 2x, each catch is worth 20 points (2 × the base 10)
case 8: return 60;
If multiplier is 8x, each catch is worth 60 points instead of 80 (slightly less than pure multiplication for balance)
default: return 10 * mult;
If the multiplier is something unexpected, calculate points as 10 times the multiplier as a fallback

switchState(newState)

switchState() is a simple utility function that centralizes state changes. Every time the game switches screens (menu to game, game to shop, etc.), this function is called. It ensures that three things always happen: the state changes, old messages are cleared, and button visibility is updated. This consistency prevents bugs.

function switchState(newState) {
  gameState = newState;
  uiMessage = '';
  updateButtons();
}
Line-by-line explanation (3 lines)
gameState = newState;
Changes the global gameState variable to the new state (e.g., 'playing', 'shop', 'menu')
uiMessage = '';
Clears any previous UI messages so old feedback doesn't appear on the new screen
updateButtons();
Calls updateButtons() to reposition and show/hide buttons appropriate for the new game state

updateButtons()

updateButtons() handles all button positioning and visibility. It runs whenever the game state changes, ensuring buttons appear in the right place for the current screen. Notice how it uses loops to position upgrade and skin buttons vertically—a pattern that scales well if you add more shops or upgrades.

function updateButtons() {
  startButton.position(width / 2 - 110, height / 2 + 40);
  skinButton.position(30, height / 2 - 25);
  shopButton.position(width - 170, height / 2 - 25);
  backButton.position(30, 30);
  playAgainButton.position(width / 2 - 110, height / 2 + 80);
  menuButton.position(width / 2 - 110, height / 2 + 130);

  const onMenu = gameState === 'menu';
  startButton[onMenu ? 'show' : 'hide']();
  skinButton[onMenu ? 'show' : 'hide']();
  shopButton[onMenu ? 'show' : 'hide']();

  (gameState === 'shop' || gameState === 'skins') ? backButton.show() : backButton.hide();
  (gameState === 'gameOver') ? (playAgainButton.show(), menuButton.show()) : (playAgainButton.hide(), menuButton.hide());

  // Upgrade buttons (only in shop)
  upgradeButtons.forEach(({ btn }, i) => {
    if (gameState === 'shop') {
      btn.show();
      btn.position(width - 280, height / 2 - 110 + i * 52);
    } else {
      btn.hide();
    }
  });

  // Skin buttons (only in skins)
  skinButtons.forEach(({ btn }, i) => {
    if (gameState === 'skins') {
      btn.show();
      btn.position(40, height / 2 - 110 + i * 44);
    } else {
      btn.hide();
    }
  });
}
Line-by-line explanation (8 lines)

🔧 Subcomponents:

for-loop Upgrade Button Layout Loop upgradeButtons.forEach(({ btn }, i) => { if (gameState === 'shop') { btn.show(); btn.position(width - 280, height / 2 - 110 + i * 52); } else { btn.hide(); } });

Positions upgrade buttons vertically on the right side of the shop screen, spaced 52 pixels apart

startButton.position(width / 2 - 110, height / 2 + 40);
Centers the Start Game button horizontally and places it below the middle of the screen
skinButton.position(30, height / 2 - 25);
Places the Skin Shop button on the left side of the screen, aligned vertically with the center
shopButton.position(width - 170, height / 2 - 25);
Places the Shop button on the right side of the screen, vertically centered like Skin Shop
const onMenu = gameState === 'menu';
Stores a boolean: true if the player is on the menu, false otherwise
startButton[onMenu ? 'show' : 'hide']();
Uses a ternary operator to call either show() or hide() on the button based on whether onMenu is true
(gameState === 'shop' || gameState === 'skins') ? backButton.show() : backButton.hide();
Shows the Back button on shop and skins screens, hides it elsewhere
upgradeButtons.forEach(({ btn }, i) => {
Loops through each upgrade button, destructuring the button and receiving its array index i
btn.position(width - 280, height / 2 - 110 + i * 52);
Positions each upgrade button on the right side, with each one 52 pixels lower than the previous (i * 52)

drawMenu()

drawMenu() is minimal—it only draws the title. The buttons are positioned and shown by updateButtons(), so this function focuses purely on text. As your game grows, you might add more visual elements here: a background image, instructions, a high-score display, etc.

function drawMenu() {
  fill(255);
  textAlign(CENTER, CENTER);
  textSize(54);
  text('Collect the Balls!', width / 2, height / 2 - 80);
}
Line-by-line explanation (4 lines)
fill(255);
Sets the text color to white (RGB: 255, 255, 255)
textAlign(CENTER, CENTER);
Centers the text both horizontally and vertically at the position specified in the text() call
textSize(54);
Sets the font size to 54 pixels, making the title large and prominent
text('Collect the Balls!', width / 2, height / 2 - 80);
Draws the game title centered horizontally on the screen and 80 pixels above the vertical center

drawShop()

drawShop() demonstrates text layout: it uses baseX to align related text elements, different font sizes for hierarchy (title larger than instructions), and different colors for feedback (white for labels, gray for messages). This pattern keeps your code readable and your layouts consistent.

function drawShop() {
  const baseX = width - 280;
  fill(255);
  textAlign(LEFT, TOP);
  textSize(38);
  text('Shop', baseX, height / 4 - 50);
  textSize(18);
  text('Buy score multipliers with your points.', baseX, height / 4);
  fill(190);
  text(uiMessage, baseX, height / 4 + 120);
}
Line-by-line explanation (8 lines)
const baseX = width - 280;
Stores the left edge position for text, aligning it with the shop buttons (which are at width - 280)
fill(255);
Sets text color to white for the title
textSize(38);
Sets a large font size for the 'Shop' title
text('Shop', baseX, height / 4 - 50);
Draws the 'Shop' heading near the top of its area
textSize(18);
Reduces font size for instructional text
text('Buy score multipliers with your points.', baseX, height / 4);
Draws an instruction line telling the player what the shop does
fill(190);
Sets text color to gray for the feedback message
text(uiMessage, baseX, height / 4 + 120);
Draws the UI message (e.g., 'Not enough score' or 'Multiplier activated!') in gray below the instruction

drawSkins()

drawSkins() is nearly identical to drawShop(), just positioned on the left side instead of the right. Both follow the same text layout pattern: title, instructions, and feedback message at different font sizes and colors. This consistency makes the UI feel cohesive.

function drawSkins() {
  const baseX = 40;
  fill(255);
  textAlign(LEFT, TOP);
  textSize(38);
  text('Skin Shop', baseX, height / 4 - 50);
  textSize(18);
  text('Purchase and equip skins using your score.', baseX, height / 4);
  fill(190);
  text(uiMessage, baseX, height / 4 + 80);
}
Line-by-line explanation (3 lines)
const baseX = 40;
Stores the left edge position for text, aligning with the skin buttons (which are at x = 40)
text('Skin Shop', baseX, height / 4 - 50);
Draws the 'Skin Shop' heading on the left side near the top
text('Purchase and equip skins using your score.', baseX, height / 4);
Draws an instruction line explaining the skin shop's purpose

drawGameOver()

drawGameOver() uses color (red) to signal failure, larger text for the primary message, and smaller text for instructions. This visual hierarchy helps players quickly understand what happened and what to do next.

function drawGameOver() {
  fill(255, 90, 90);
  textAlign(CENTER, CENTER);
  textSize(48);
  text('You missed a ball!', width / 2, height / 2 - 40);
  textSize(24);
  text('Play again or return to the menu.', width / 2, height / 2 + 10);
}
Line-by-line explanation (5 lines)
fill(255, 90, 90);
Sets text color to a red tint (RGB: 255, 90, 90) to emphasize that the game ended
textAlign(CENTER, CENTER);
Centers both the text's horizontal and vertical alignment
text('You missed a ball!', width / 2, height / 2 - 40);
Draws the main message centered horizontally and positioned near the vertical center
textSize(24);
Reduces font size for the secondary message
text('Play again or return to the menu.', width / 2, height / 2 + 10);
Draws an instruction line below the main message

drawScoreDisplay()

drawScoreDisplay() is called from draw() on every frame, regardless of game state. It always shows the current score and multiplier. Notice it uses template literals (backticks with ${variable}) to embed numeric values into strings—a clean way to display dynamic data.

function drawScoreDisplay() {
  fill(255);
  textAlign(LEFT, TOP);
  textSize(20);
  text(`Score: ${score}`, 20, 20);
  text(`Multiplier: ${scoreMultiplier}x`, 20, 50);
}
Line-by-line explanation (5 lines)
fill(255);
Sets text color to white
textAlign(LEFT, TOP);
Aligns text to the top-left, so it draws down and to the right from the specified position
textSize(20);
Sets font size to 20 pixels for readable but not overwhelming text
text(`Score: ${score}`, 20, 20);
Draws the current score in the top-left corner, 20 pixels from both edges, using template literal to embed the score value
text(`Multiplier: ${scoreMultiplier}x`, 20, 50);
Draws the current multiplier 30 pixels below the score line (50 vs 20), showing which multiplier is active

triggerGameOver()

triggerGameOver() is called when a ball reaches the bottom of the screen. It does two things: clears the game board and switches screens. By using switchState(), it also clears old UI messages and updates button visibility automatically.

function triggerGameOver() {
  items = [];
  switchState('gameOver');
}
Line-by-line explanation (2 lines)
items = [];
Clears the items array, removing all falling balls from the game instantly
switchState('gameOver');
Changes the game state to 'gameOver' so the draw loop will show the game over screen

resetGame()

resetGame() prepares for a fresh game session. Notice what it does NOT reset: the score and purchasedSkins are left intact so the player keeps their earnings and purchased cosmetics. This distinction—what resets and what persists—is crucial for any progression system.

function resetGame() {
  items = [];
  player.x = width / 2;
  scoreMultiplier = 1;
  uiMessage = '';
}
Line-by-line explanation (4 lines)
items = [];
Empties the items array so no balls remain on screen
player.x = width / 2;
Resets the paddle's position to the center of the canvas horizontally
scoreMultiplier = 1;
Resets the multiplier to 1x, so the next game starts without any active upgrades
uiMessage = '';
Clears any old UI messages so feedback from the previous game doesn't carry over

styleButtons()

styleButtons() demonstrates CSS styling in p5.js using the style() method. Notice it uses the spread operator (...) and map() to extract buttons from nested arrays—a pattern for working with complex data structures. All buttons start hidden; updateButtons() reveals the ones needed for each screen.

function styleButtons() {
  const buttons = [
    startButton, shopButton, skinButton, backButton,
    playAgainButton, menuButton,
    ...upgradeButtons.map(({ btn }) => btn),
    ...skinButtons.map(({ btn }) => btn)
  ];
  buttons.forEach(btn => {
    btn.style('font-size', '18px');
    btn.style('padding', '10px 20px');
    btn.style('border', 'none');
    btn.style('border-radius', '12px');
    btn.style('background-color', '#4CAF50');
    btn.style('color', '#fff');
    btn.style('cursor', 'pointer');
    btn.hide();
  });
}
Line-by-line explanation (7 lines)

🔧 Subcomponents:

calculation Flattened Button Array Creation const buttons = [ startButton, shopButton, skinButton, backButton, playAgainButton, menuButton, ...upgradeButtons.map(({ btn }) => btn), ...skinButtons.map(({ btn }) => btn) ];

Creates an array of all button objects by extracting btn from the upgradeButtons and skinButtons arrays using spread operators and map()

for-loop Button Styling Loop buttons.forEach(btn => {

Loops through every button and applies consistent CSS styling to each

const buttons = [
Begins creating an array that will hold references to every button
...upgradeButtons.map(({ btn }) => btn),
Uses spread operator (...) to extract and flatten the btn property from each element in the upgradeButtons array
buttons.forEach(btn => {
Loops through every button in the flattened array
btn.style('font-size', '18px');
Sets the button's font size to 18 pixels using the style() method
btn.style('background-color', '#4CAF50');
Sets button background to a green color (hex code #4CAF50)
btn.style('cursor', 'pointer');
Changes the cursor to a pointer (hand) when hovering over the button to indicate it's clickable
btn.hide();
Hides every button by default; updateButtons() will show only the ones appropriate for the current game state

windowResized()

windowResized() is a special p5.js function that runs automatically whenever the browser window is resized. By calling resizeCanvas() and updateButtons(), the sketch stays responsive on mobile devices and when users resize their browser. This is good practice for modern web games.

function windowResized() {
  resizeCanvas(windowWidth, windowHeight);
  updateButtons();
}
Line-by-line explanation (2 lines)
resizeCanvas(windowWidth, windowHeight);
Resizes the canvas to match the current window width and height, responding to screen rotation or window resize
updateButtons();
Repositions all buttons so they stay correctly aligned after the canvas size changes

📦 Key Variables

player object

Stores the paddle's position and dimensions: { x, y, w (width), h (height) }

let player = { x: width / 2, y: height - 60, w: 110, h: 25 };
items array

Holds all currently falling balls; each ball is an object with x, y, size, speed, and color

let items = [];
score number

Tracks the player's total score earned by catching balls; spent in the shop to buy upgrades

let score = 0;
scoreMultiplier number

The active score multiplier (1, 2, 4, 8, 16, or 32); determines how many points each catch is worth

let scoreMultiplier = 1;
gameState string

Tracks which screen is currently active: 'menu', 'playing', 'shop', 'skins', or 'gameOver'

let gameState = 'menu';
uiMessage string

Stores feedback messages shown in the shop and skin shop (e.g., 'Not enough score')

let uiMessage = '';
purchasedSkins object

Tracks which skins have been purchased; keys are skin names, values are true/false

let purchasedSkins = { 'Red': true, 'Blue': false, ... };
selectedSkin object

The currently active skin object; its color property is used to draw the paddle

let selectedSkin = skins[0];
upgrades array of objects

Defines all available score multiplier upgrades with their label, multiplier value, and cost

const upgrades = [{ label: 'Buy 2x Score', multiplier: 2, cost: 1000 }, ...];
skins array of objects

Defines all available paddle skins with their name, color (hex or 'rainbow'), and cost

const skins = [{ name: 'Red', color: '#ff4d4d', cost: 500 }, ...];

🔧 Potential Improvements (6)

Here are some ways this code could be enhanced:

BUG drawGame() collision detection

Ball can collide with the paddle's top surface even when the paddle is below the ball, allowing balls to get 'stuck' briefly

💡 Add a check for item.y - item.size / 2 to ensure the ball is actually above the paddle before counting a collision: if (item.y + item.size / 2 > player.y && item.y - item.size / 2 < player.y + player.h && item.y - item.size / 2 < player.y && ...)

PERFORMANCE drawPlayer() rainbow mode

Calculating Math.floor(frameCount / 5) every frame is wasteful when the color only changes every 5 frames

💡 Cache the index so it updates only when frameCount changes significantly: let rainbowIndex = Math.floor(frameCount / 5) % rainbow.length; then use rainbowIndex directly

STYLE updateButtons() ternary operators

Complex ternary operators like (gameState === 'gameOver') ? (playAgainButton.show(), menuButton.show()) : (playAgainButton.hide(), menuButton.hide()) are hard to read

💡 Extract into helper functions: function showGameOverButtons() { playAgainButton.show(); menuButton.show(); } then call it clearly from updateButtons()

FEATURE gameState machine

Game doesn't track high score, so players have no long-term goal beyond the current session

💡 Add a highScore variable and persist it to localStorage on game over: let highScore = localStorage.getItem('collectBallsHighScore') || 0; and update it when score > highScore

FEATURE Difficulty scaling

Balls can become impossibly fast (capped at difficulty 12), but there's no feedback to the player about how close they are to the max

💡 Add a difficulty display in drawScoreDisplay() that shows the current difficulty level alongside score and multiplier, giving players a sense of progression

STYLE Button positioning

Hard-coded pixel values (e.g., width / 2 - 110) are fragile; if button width changes, layout breaks

💡 Define button dimensions as constants at the top and calculate positions relative to them: const BTN_WIDTH = 220; then use width / 2 - BTN_WIDTH / 2 for centering

🔄 Code Flow

Code flow showing setup, draw, drawgame, drawplayer, buymultiplier, handleskinpurchase, getpointsperatch, switchstate, updatebuttons, drawmenu, drawshop, drawskins, drawgameover, drawscoreisplay, triggergameover, resetgame, stylebuttons, windowresized

💡 Click on function names in the diagram to jump to their code

graph TD start[Start] --> setup[setup] setup --> canvas-creation[Canvas Creation] setup --> button-creation[Button Creation] button-creation --> upgrade-loop[Upgrade Button Generation Loop] button-creation --> skin-loop[Skin Button Generation Loop] setup --> draw[draw loop] click setup href "#fn-setup" click canvas-creation href "#sub-canvas-creation" click button-creation href "#sub-button-creation" click upgrade-loop href "#sub-upgrade-loop" click skin-loop href "#sub-skin-loop" draw --> background-clear[Canvas Clear] draw --> state-switch[Game State Router] state-switch --> drawmenu[drawMenu] state-switch --> drawgame[drawGame] state-switch --> drawshop[drawShop] state-switch --> drawskins[drawSkins] state-switch --> drawgameover[drawGameOver] click draw href "#fn-draw" click background-clear href "#sub-background-clear" click state-switch href "#sub-state-switch" click drawmenu href "#fn-drawmenu" click drawgame href "#fn-drawgame" click drawshop href "#fn-drawshop" click drawskins href "#fn-drawskins" click drawgameover href "#fn-drawgameover" drawgame --> difficulty-calc[Difficulty Scaling] drawgame --> spawn-check[Ball Spawn Condition] spawn-check --> spawn-object[New Ball Object Creation] drawgame --> item-loop[Ball Update and Collision Loop] item-loop --> collision-check[Paddle Collision Detection] item-loop --> missed-check[Missed Ball Detection] click drawgame href "#fn-drawgame" click difficulty-calc href "#sub-difficulty-calc" click spawn-check href "#sub-spawn-check" click spawn-object href "#sub-spawn-object" click item-loop href "#sub-item-loop" click collision-check href "#sub-collision-check" click missed-check href "#sub-missed-check" item-loop --> paddle-follow[Paddle Mouse Following] item-loop --> rainbow-conditional[Rainbow Skin Logic] rainbow-conditional --> rainbow-array[Rainbow Color Array] rainbow-array --> color-index[Animated Color Index] click paddle-follow href "#sub-paddle-follow" click rainbow-conditional href "#sub-rainbow-conditional" click rainbow-array href "#sub-rainbow-array" click color-index href "#sub-color-index" drawshop --> menu-button-positions[Menu Button Positioning] drawshop --> menu-visibility[Menu Screen Visibility] click drawshop href "#fn-drawshop" click menu-button-positions href "#sub-menu-button-positions" click menu-visibility href "#sub-menu-visibility" drawskins --> upgrade-loop[Upgrade Button Layout Loop] drawskins --> button-array[Flattened Button Array Creation] click drawskins href "#fn-drawskins" click upgrade-loop href "#sub-upgrade-loop" click button-array href "#sub-button-array" buymultiplier --> duplicate-check[Duplicate Multiplier Check] buymultiplier --> afford-check[Cost Affordability Check] afford-check --> insufficient-score[Insufficient Score Fallback] click buymultiplier href "#fn-buymultiplier" click duplicate-check href "#sub-duplicate-check" click afford-check href "#sub-afford-check" click insufficient-score href "#sub-insufficient-score" handleskinpurchase --> already-owned[Already Owned Skin Check] handleskinpurchase --> afford-skin[Skin Cost Check] click handleskinpurchase href "#fn-handleskinpurchase" click already-owned href "#sub-already-owned" click afford-skin href "#sub-afford-skin" getpointsperatch --> points-switch[Multiplier Points Lookup] click getpointsperatch href "#fn-getpointsperatch" click points-switch href "#sub-points-switch" switchstate --> updatebuttons[Update Buttons] click switchstate href "#fn-switchstate" click updatebuttons href "#sub-updatebuttons" drawscoreisplay --> drawscoreisplay[drawScoreDisplay] click drawscoreisplay href "#fn-drawscoreisplay" triggergameover --> resetgame[resetGame] click triggergameover href "#fn-triggergameover" click resetgame href "#fn-resetgame" stylebuttons --> style-loop[Button Styling Loop] click stylebuttons href "#fn-stylebuttons" click style-loop href "#sub-style-loop" windowresized --> updatebuttons click windowresized href "#fn-windowresized"

❓ Frequently Asked Questions

What visual experience does the Collect the Balls! sketch offer?

The sketch creates a vibrant and dynamic game environment where players control a paddle to catch colorful falling balls, with various skins and score multipliers enhancing the visual appeal.

How can players engage with the Collect the Balls! game?

Players interact by moving the paddle to catch falling balls, accumulating points, and spending their scores in the shop to unlock new skins and score multipliers.

What creative coding concepts are showcased in this p5.js sketch?

This sketch demonstrates concepts such as game state management, dynamic UI elements, and incremental gameplay mechanics that increase difficulty and reward player progress.

Preview

collect the balls V3 - p5.js creative coding sketch preview
Sketch Preview
Code flow diagram showing the structure of collect the balls V3 - Code flow showing setup, draw, drawgame, drawplayer, buymultiplier, handleskinpurchase, getpointsperatch, switchstate, updatebuttons, drawmenu, drawshop, drawskins, drawgameover, drawscoreisplay, triggergameover, resetgame, stylebuttons, windowresized
Code Flow Diagram