color pattern animation detected - xelsed.ai

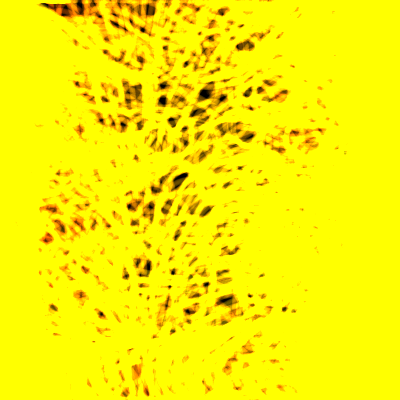
This sketch creates a mesmerizing flow field particle animation where 1000 tiny particles drift along invisible currents generated by Perlin noise, leaving glowing colorful trails behind them. The ADD blend mode makes overlapping particle paths bloom into bright, fiery colors that shift smoothly over time.

🧪 Try This!

Experiment with the code by making these changes:

  1. Make trails last much longer — Lowering the background alpha value slows how quickly old particle trails fade, creating longer glowing streaks.
  2. Speed up the color cycling — Increasing the multiplier makes the base hue rotate through the rainbow much faster, changing the overall color mood more quickly.
  3. Supercharge the particle count — Raising particleCount fills the screen with far more particles, creating a denser, richer flow visualization (at the cost of performance).
Prefer the full editor? Open it there →

📖 About This Sketch

This sketch builds a classic flow field particle system: an invisible grid of vectors, generated from 3D Perlin noise, silently pushes a thousand tiny particles around the canvas so they swirl and drift like smoke or water currents. What makes it visually striking is the combination of HSB color mode for smooth rainbow hue shifts, ADD blend mode for glowing overlapping trails, and a semi-transparent background that fades old trails instead of erasing them instantly.

The code is organized around a Particle class that encapsulates position, velocity, acceleration and color, plus a draw() loop that recalculates the flow field every frame and steps every particle through it. By studying this sketch you'll learn how Perlin noise can drive organic-looking motion, how vectors represent force and direction, how blend modes and low-alpha backgrounds create glow and motion trails, and how object-oriented classes keep particle logic clean and reusable.

⚙️ How It Works

  1. When the sketch loads, setup() creates a full-window canvas, switches to HSB color mode for easy hue control, calculates how many grid cells fit on screen, and spawns 1000 Particle objects at random positions
  2. Every frame, draw() paints a nearly-transparent black rectangle over the whole canvas instead of a solid background - this is what makes previous particle positions fade slowly into glowing trails rather than vanishing
  3. draw() then walks through every cell of the invisible grid, samples 3D Perlin noise (using x, y and a slowly incrementing z value called zoff) to produce an angle, and stores a unit vector pointing in that direction - this grid of vectors is the 'flow field'
  4. Each particle looks up the flow field vector at its current grid cell, adds it as a force to its acceleration, updates its velocity and position, wraps around the screen edges if it exits, and finally draws itself as a small glowing dot
  5. Because zoff keeps incrementing, the noise pattern itself slowly evolves over time, so the flow field is never static - the currents twist and reshape continuously, creating endless, non-repeating motion
  6. baseHue is recalculated every frame from frameCount, and each particle blends baseHue with its own noise-based offset, so colors slowly cycle through the rainbow while still varying particle to particle

🎓 Concepts You'll Learn

Perlin noiseFlow fieldsVectors and forcesHSB color modeBlend modesES6 classes2D arrays as gridsScreen wrapping

📝 Code Breakdown

setup()

setup() runs once when the sketch starts, and is the right place to prepare data structures like the flowfield array and particles array before draw() begins using them every frame.

function setup() {
  createCanvas(windowWidth, windowHeight);
  colorMode(HSB, 360, 100, 100, 100); // Use HSB for vibrant colors and easy hue manipulation
  noFill(); // Particles are drawn with stroke

  cols = floor(width / resolution);
  rows = floor(height / resolution);
  flowfield = new Array(cols * rows);

  // Initialize particles with random positions
  for (let i = 0; i < particleCount; i++) {
    particles[i] = new Particle(random(width), random(height));
  }

  background(0); // Initial black background
}
Line-by-line explanation (8 lines)

🔧 Subcomponents:

for-loop Particle Initialization Loop for (let i = 0; i < particleCount; i++) {

Creates particleCount Particle objects at random starting positions and stores them in the particles array

createCanvas(windowWidth, windowHeight);
Makes the canvas fill the entire browser window.
colorMode(HSB, 360, 100, 100, 100);
Switches from default RGB to Hue-Saturation-Brightness color mode, with hue 0-360, saturation/brightness 0-100, and alpha 0-100 - this makes it easy to smoothly rotate through rainbow colors by just changing the hue number.
noFill();
Tells p5 not to fill shapes with color - particles will only show their stroke (outline), which is how the circles appear as glowing dots.
cols = floor(width / resolution);
Calculates how many grid columns fit across the canvas width, based on the resolution (cell size).
rows = floor(height / resolution);
Calculates how many grid rows fit down the canvas height.
flowfield = new Array(cols * rows);
Creates an empty array big enough to hold one vector per grid cell - this will store the flow field.
particles[i] = new Particle(random(width), random(height));
Creates a new Particle object at a random x,y position and stores it in the particles array.
background(0);
Paints the canvas solid black once at the start, before the trail-fading effect takes over in draw().

draw()

draw() runs 60 times per second and is where all the real-time computation happens: regenerating the flow field from evolving noise, then updating and rendering every particle. Understanding this loop is key to understanding any animated p5.js sketch.

🔬 The noise value is multiplied by TWO_PI * 4, giving particles lots of swirling variation. What happens if you change the 4 to just 1 (a single full rotation) or up to 8?

      let angle = noise(xoff, yoff, zoff) * TWO_PI * 4;
      let v = p5.Vector.fromAngle(angle);
      v.setMag(1); // Normalize force vector

🔬 This loop runs the full particle lifecycle every frame. What happens if you comment out particles[i].edges() - can you see particles disappearing off-screen instead of wrapping?

  for (let i = 0; i < particles.length; i++) {
    particles[i].follow(flowfield);
    particles[i].update();
    particles[i].edges();
    particles[i].show();
  }
function draw() {
  // Use ADD blend mode for glowing trails
  // A semi-transparent black background fades old trails slowly
  blendMode(ADD);
  background(0, 0, 0, 10); // Alpha value controls trail length (lower = longer)

  // Update base hue for dynamic color changes
  baseHue = (frameCount * 0.1) % 360;

  // Generate the flow field for this frame
  let yoff = 0;
  for (let y = 0; y < rows; y++) {
    let xoff = 0;
    for (let x = 0; x < cols; x++) {
      let index = x + y * cols;
      // Map Perlin noise value (0-1) to an angle (0 to TWO_PI * 4 for more variation)
      let angle = noise(xoff, yoff, zoff) * TWO_PI * 4;
      let v = p5.Vector.fromAngle(angle);
      v.setMag(1); // Normalize force vector
      flowfield[index] = v;
      xoff += noiseScale;
    }
    yoff += noiseScale;
  }
  zoff += 0.005; // Increment zoff to evolve the noise pattern over time

  // Update and display all particles
  for (let i = 0; i < particles.length; i++) {
    particles[i].follow(flowfield);
    particles[i].update();
    particles[i].edges();
    particles[i].show();
  }
}
Line-by-line explanation (12 lines)

🔧 Subcomponents:

for-loop Flow Field Generation (nested loop) for (let y = 0; y < rows; y++) {

Walks through every cell in the grid, samples Perlin noise, and converts the result into a direction vector stored in the flowfield array

for-loop Particle Update Loop for (let i = 0; i < particles.length; i++) {

Calls follow(), update(), edges() and show() on every particle each frame, driving their motion and rendering

blendMode(ADD);
Switches drawing so new colors are added to existing pixel colors instead of replacing them - overlapping particles brighten toward white, creating a glow effect.
background(0, 0, 0, 10);
Draws a nearly-transparent black rectangle over everything. Instead of erasing the frame, this slightly fades old particle trails, leaving faint streaks behind.
baseHue = (frameCount * 0.1) % 360;
Slowly cycles a hue value from 0 to 360 based on how many frames have played, so the overall color scheme drifts through the rainbow over time.
let angle = noise(xoff, yoff, zoff) * TWO_PI * 4;
Perlin noise returns a smooth value between 0 and 1; multiplying by TWO_PI * 4 converts it into an angle (with extra multiples of a full circle for more dramatic swirling).
let v = p5.Vector.fromAngle(angle);
Creates a vector pointing in the direction of that angle - this becomes the 'wind' direction for particles in this grid cell.
v.setMag(1);
Sets the vector's length to exactly 1, so it represents pure direction without adding extra force strength.
flowfield[index] = v;
Stores the direction vector into the flat 1D array at the calculated index for this grid cell.
zoff += 0.005;
Nudges the z-coordinate used for 3D noise forward slightly every frame, which makes the entire noise pattern - and therefore the flow field - slowly morph over time.
particles[i].follow(flowfield);
Tells the particle to look up the flow field vector at its current position and steer toward it.
particles[i].update();
Moves the particle according to its velocity and acceleration, and updates its color.
particles[i].edges();
Wraps the particle back onto the canvas if it has drifted off any edge.
particles[i].show();
Draws the particle as a small colored circle at its current position.

Particle (class)

This class packages everything a single particle needs - position, velocity, acceleration, and color - into one reusable object. Studying it teaches the classic 'physics' pattern used in almost every particle system: apply forces to acceleration, add acceleration to velocity, add velocity to position, then reset acceleration.

🔬 This wraps particles around the screen like Pac-Man. What happens if you replace the wrap with a bounce instead, by flipping this.vel.x or this.vel.y when a particle hits an edge?

  edges() {
    if (this.pos.x > width) this.pos.x = 0;
    if (this.pos.x < 0) this.pos.x = width;
    if (this.pos.y > height) this.pos.y = 0;
    if (this.pos.y < 0) this.pos.y = height;
  }
class Particle {
  constructor(x, y) {
    this.pos = createVector(x, y);
    this.vel = createVector(0, 0);
    this.acc = createVector(0, 0);
    this.maxSpeed = maxSpeed;
    // Initial color based on baseHue with noise offset and low alpha for trails
    this.color = {
      h: (baseHue + noise(x * noiseScale, y * noiseScale, zoff) * 60) % 360,
      s: 100,
      b: 100,
      a: 10,
    };
  }

  // Apply a force vector to the particle's acceleration
  applyForce(force) {
    this.acc.add(force);
  }

  // Follow the flow field
  follow(vectors) {
    let x = floor(this.pos.x / resolution);
    let y = floor(this.pos.y / resolution);
    let index = x + y * cols;
    if (index >= 0 && index < vectors.length) { // Ensure index is within bounds
      let force = vectors[index];
      this.applyForce(force);
    }
  }

  // Update particle's position and velocity
  update() {
    this.vel.add(this.acc);
    this.vel.limit(this.maxSpeed); // Limit velocity to prevent particles from moving too fast
    this.pos.add(this.vel);
    this.acc.mult(0); // Reset acceleration each frame

    // Update particle hue dynamically based on baseHue and a noise offset
    this.color.h = (baseHue + noise(this.pos.x * noiseScale, this.pos.y * noiseScale, zoff) * 60) % 360;
  }

  // Display the particle
  show() {
    strokeWeight(particleSize);
    stroke(this.color.h, this.color.s, this.color.b, this.color.a);
    circle(this.pos.x, this.pos.y, particleSize);
  }

  // Wrap particle around the screen edges
  edges() {
    if (this.pos.x > width) this.pos.x = 0;
    if (this.pos.x < 0) this.pos.x = width;
    if (this.pos.y > height) this.pos.y = 0;
    if (this.pos.y < 0) this.pos.y = height;
  }
}
Line-by-line explanation (16 lines)

🔧 Subcomponents:

conditional Edge Wrap Checks if (this.pos.x > width) this.pos.x = 0;

Teleports the particle to the opposite edge when it exits the canvas, so it never disappears

conditional Flow Field Index Bounds Check if (index >= 0 && index < vectors.length) {

Prevents an out-of-bounds array access if a particle's calculated grid index falls outside the flowfield array

this.pos = createVector(x, y);
Stores the particle's position as a p5.Vector, so x and y can be manipulated together with vector math.
this.vel = createVector(0, 0);
Starts the particle with zero velocity - it will speed up as flow field forces push it.
this.acc = createVector(0, 0);
Acceleration starts at zero and gets refreshed each frame from applied forces.
this.maxSpeed = maxSpeed;
Copies the global maxSpeed value onto the particle so each particle instance has its own speed cap.
h: (baseHue + noise(x * noiseScale, y * noiseScale, zoff) * 60) % 360,
Calculates a starting hue by combining the current global baseHue with a noise-based offset (up to 60 degrees), so nearby particles get similar but not identical colors.
this.acc.add(force);
Adds an incoming force vector onto the particle's acceleration - this is how the flow field 'pushes' particles.
let x = floor(this.pos.x / resolution);
Converts the particle's pixel position into a grid column index by dividing by the cell size.
let index = x + y * cols;
Converts the 2D grid column/row into a single index for the flat flowfield array (standard 2D-to-1D array conversion).
this.vel.add(this.acc);
Applies the accumulated acceleration to velocity, speeding up or changing direction.
this.vel.limit(this.maxSpeed);
Caps the velocity's length so particles never move faster than maxSpeed, keeping motion smooth and controlled.
this.pos.add(this.vel);
Moves the particle by adding velocity to its position - this is the actual motion step.
this.acc.mult(0);
Resets acceleration to zero after applying it, so forces don't accumulate infinitely across frames.
strokeWeight(particleSize);
Sets how thick the outline (and therefore the visible dot) will be drawn.
stroke(this.color.h, this.color.s, this.color.b, this.color.a);
Sets the drawing color using this particle's current HSB values, including a low alpha for a soft glowing look.
circle(this.pos.x, this.pos.y, particleSize);
Draws the particle as a tiny circle at its current position (since noFill() is active, only the colored stroke shows).
if (this.pos.x > width) this.pos.x = 0;
If the particle drifts past the right edge, teleport it to the left edge instead of letting it disappear.

windowResized()

windowResized() is a special p5.js function that's automatically triggered when the browser window changes size. This sketch uses it to keep the flow field grid and particle positions consistent with the new canvas dimensions, avoiding stretched or broken visuals.

function windowResized() {
  resizeCanvas(windowWidth, windowHeight);
  cols = floor(width / resolution);
  rows = floor(height / resolution);
  flowfield = new Array(cols * rows); // Reinitialize flowfield

  // Reinitialize particles with new random positions
  particles = [];
  for (let i = 0; i < particleCount; i++) {
    particles[i] = new Particle(random(width), random(height));
  }
  background(0); // Clear background on resize
}
Line-by-line explanation (6 lines)

🔧 Subcomponents:

for-loop Particle Re-creation Loop for (let i = 0; i < particleCount; i++) {

Rebuilds the entire particles array from scratch with new random positions matching the resized canvas

resizeCanvas(windowWidth, windowHeight);
Automatically called by p5 whenever the browser window changes size; this resizes the canvas to match the new window dimensions.
cols = floor(width / resolution);
Recalculates the number of grid columns since width has changed.
rows = floor(height / resolution);
Recalculates the number of grid rows since height has changed.
flowfield = new Array(cols * rows);
Creates a fresh, correctly-sized array for the flow field, since the old one no longer matches the new grid dimensions.
particles = [];
Empties the particles array completely so old particles (from the previous canvas size) are discarded.
background(0);
Paints a fresh black background so leftover trails from before the resize don't awkwardly linger at the wrong size.

📦 Key Variables

particles array

Holds all the Particle objects currently animating on screen.

let particles = [];
flowfield array

A flat array storing one direction vector per grid cell, representing the invisible 'wind' that pushes particles around.

let flowfield = [];
zoff number

The z-coordinate used when sampling 3D Perlin noise; incrementing it each frame makes the flow field pattern slowly evolve over time.

let zoff = 0;
noiseScale number

Controls how zoomed-in the Perlin noise sampling is, determining whether the flow field looks broad and smooth or tight and chaotic.

let noiseScale = 0.005;
particleCount number

The total number of particles spawned and animated in the sketch.

let particleCount = 1000;
particleSize number

The diameter in pixels used when drawing each particle's circle.

let particleSize = 3;
maxSpeed number

The maximum velocity magnitude a particle can reach, keeping motion controlled rather than erratic.

let maxSpeed = 1.5;
resolution number

The pixel size of each flow field grid cell, used to convert particle positions into grid indices.

let resolution = 10;
cols number

The number of columns in the flow field grid, calculated from canvas width and resolution.

let cols;
rows number

The number of rows in the flow field grid, calculated from canvas height and resolution.

let rows;
baseHue number

A slowly-cycling hue value (0-360) used as the base color for all particles, driving the overall shifting color scheme.

let baseHue = 0;

🔧 Potential Improvements (4)

Here are some ways this code could be enhanced:

PERFORMANCE draw() - flow field generation loop

The entire cols x rows flow field is recalculated from scratch every single frame using noise(), which is relatively expensive and runs thousands of times per frame (e.g. ~40x44 = 1760 calls at default settings).

💡 Consider only regenerating the flow field every few frames, or caching angle values and blending them smoothly, to reduce per-frame noise() calls while still looking fluid.

PERFORMANCE draw() and Particle.show()

With particleCount at 1000, calling strokeWeight() and stroke() individually for every particle every frame adds overhead since these are relatively costly p5 state-change calls.

💡 Group particles by similar color/size and batch draw calls, or use a p5.Graphics buffer / WebGL points for large particle counts to improve frame rate.

BUG Particle.constructor

this.maxSpeed is set from the global maxSpeed at creation time, but if maxSpeed is changed later (e.g., via a UI slider), already-created particles won't reflect the new value since it's copied rather than referenced.

💡 Reference the global maxSpeed directly in update() (this.vel.limit(maxSpeed)) instead of storing a per-particle copy, so runtime changes apply to all particles immediately.

STYLE windowResized()

This function duplicates almost all the setup logic from setup() (grid calculation and particle creation), making the code harder to maintain if that logic changes.

💡 Extract the shared grid/particle initialization code into a helper function like initSketch() and call it from both setup() and windowResized().

🔄 Code Flow

Code flow showing setup, draw, particle, windowresized

💡 Click on function names in the diagram to jump to their code

graph TD start[Start] --> setup[setup] setup --> setup-particle-loop[Particle Initialization Loop] setup-particle-loop --> draw[draw loop] draw --> flowfield-grid-loop[Flow Field Generation] flowfield-grid-loop --> particle-update-loop[Particle Update Loop] particle-update-loop --> particle-edges-checks[Edge Wrap Checks] particle-edges-checks --> particle-bounds-check[Flow Field Index Bounds Check] particle-bounds-check --> draw click setup href "#fn-setup" click draw href "#fn-draw" click setup-particle-loop href "#sub-setup-particle-loop" click flowfield-grid-loop href "#sub-flowfield-grid-loop" click particle-update-loop href "#sub-particle-update-loop" click particle-edges-checks href "#sub-particle-edges-checks" click particle-bounds-check href "#sub-particle-bounds-check" draw --> windowresized[windowResized] windowresized --> resize-particle-loop[Particle Re-creation Loop] resize-particle-loop --> draw

❓ Frequently Asked Questions

What kind of visual effects can I expect from the color pattern animation sketch?

The sketch creates a mesmerizing display of colorful particles that move smoothly, forming dynamic patterns with glowing trails against a dark background.

Is there any user interaction available in this p5.js sketch?

The sketch does not include user interaction; it automatically generates the animation based on the programmed parameters.

What creative coding concepts are showcased in this animated sketch?

This sketch demonstrates techniques such as flow field generation using Perlin noise and HSB color manipulation for vibrant visual effects.

Preview

color pattern animation detected - xelsed.ai - p5.js creative coding sketch preview
Sketch Preview
Code flow diagram showing the structure of color pattern animation detected - xelsed.ai - Code flow showing setup, draw, particle, windowresized
Code Flow Diagram