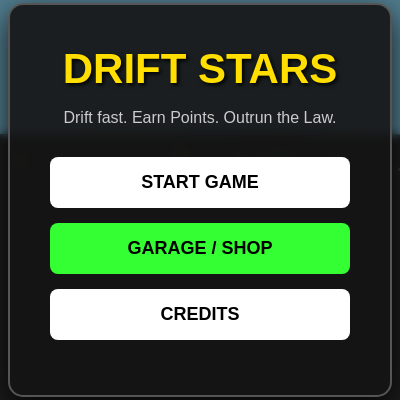
DRIFT STARS (FULL RELEASE)

This sketch is a full 3D open-world driving game built entirely in p5.js WEBGL mode: you drift a customizable car through a neon-lit city, dodge traffic cones and NPC drivers, and outrun an escalating police force. It also lets you step out of the car into a first-person, pointer-locked mode to explore on foot, all backed by a procedural synth soundtrack and engine noise generated live with p5.Oscillator.

🧪 Try This!

Experiment with the code by making these changes:

  1. Supercharge the car — Raising the default top speed makes both the player's starting car and any car that inherits this base value noticeably faster.
  2. Never-ending skidmarks — Skidmarks are normally trimmed to the last 30 points - raising that cap lets long, dramatic drift trails pile up across the whole map.
  3. Start every chase at max heat — Instead of easing into a 1-star chase, jump straight to the full 5-star police response the moment you first get wanted.
Prefer the full editor? Open it there →

📖 About This Sketch

Drift Stars turns p5.js into a tiny GTA-style sandbox: a WEBGL scene with a drivable car, a smooth chase camera, drifting physics, traffic cones, wandering NPC cars, and a five-star wanted system that spawns increasingly heavy police units the longer you cause chaos. You can also exit the car and walk around in a first-person view using the browser's Pointer Lock API for mouse-look. Under the hood it leans on p5.Vector for all position/velocity math, custom camera() calls for both chase-cam and FPS views, and p5.Oscillator/p5.Envelope/p5.Noise to synthesize engine hum, tire squeal, crash bursts, and a simple bassline entirely in code - no audio files.

The code is organized around a single gameState string that switches the sketch between HOME, SHOP, PLAYING, ON_FOOT and GAMEOVER modes, a reusable Car class used for the player, NPCs, and every cop type, and a SoundManager class that wraps all the p5.sound objects. By studying it you'll learn how to drive a whole game off one state variable, how to fake drifting physics with vector lerping, how distance-squared checks keep collision and rendering-culling code fast, and how to wire p5.js canvas logic together with regular HTML buttons and DOM elements for menus and HUD.

⚙️ How It Works

  1. On load, setup() creates a WEBGL canvas, sets a wide perspective, builds the SoundManager, wires up menu/shop buttons and mobile touch controls, and calls initGameWorld() to place the player car, camera, obstacles, and starting NPCs.
  2. Every frame, draw() checks gameState: while PLAYING it reads keyboard/touch input into gas and steer values, smoothly lerps a chase camera behind the car, calls car.update(), and escalates the wanted system if you're being chased.
  3. While ON_FOOT it instead reads mouse-look via Pointer Lock and WASD movement to drive a first-person camera, letting you walk back up to the parked car to re-enter it.
  4. Inside Car.update(), velocity is built from acceleration and friction, then blended ('lerp') toward a grip-based desired velocity - when the blend amount (traction) is low during a hard turn, the car's real velocity lags behind its facing direction, which is what creates the drift look, spawns skidmarks, and puffs smoke.
  5. Drifting near cops or colliding with an NPC calls triggerWanted(), after which processWantedEscalation() raises the star level over time and spawnCop() creates progressively tougher police (COP, SHERIFF, SWAT, MILITARY, SPECIAL_FORCES) that chase the player using simple angle-based steering AI.
  6. Cash earned from drifting and busting through obstacles can be spent in the Shop screen (plain HTML/CSS overlay) to buy speed/armor upgrades or unlock new cars, all read back into playerStats when a new game starts.

🎓 Concepts You'll Learn

WEBGL 3D rendering & camera()Finite state machine (gameState)Vector math with p5.VectorProcedural audio with p5.Oscillator/Envelope/NoiseObject-oriented classes (Car, SoundManager)Distance-squared collision & culling checksPointer Lock first-person cameraDOM/UI integration with p5.js canvas

📝 Code Breakdown

setup()

setup() runs once when the sketch starts. Here it prepares the 3D rendering settings and hands off to a handful of initializer functions so the rest of the file can stay organized around single responsibilities.

function setup() {
  createCanvas(windowWidth, windowHeight, WEBGL);
  perspective(PI / 1.8, width / height, 10, 50000);
  
  sfx = new SoundManager(); 
  
  setupMenuInteractions();
  setupMobileControls();
  initGameWorld();
  updateShopUI();
}
Line-by-line explanation (7 lines)
createCanvas(windowWidth, windowHeight, WEBGL);
Creates a full-window canvas using the WEBGL renderer, which is required for 3D drawing like box(), camera(), and cylinder().
perspective(PI / 1.8, width / height, 10, 50000);
Sets the field of view (how wide the lens is), the aspect ratio, and the near/far clipping planes (10 to 50000 units) so distant city objects don't get cut off.
sfx = new SoundManager();
Creates the procedural audio engine object that will generate engine hum, tire squeal, crashes, and music - no sound files needed.
setupMenuInteractions();
Attaches click handlers to all the HTML menu/shop buttons defined in index.html.
setupMobileControls();
Attaches touch/mouse handlers to the on-screen D-pad buttons so mobile players can drive with their thumbs.
initGameWorld();
Builds the actual game world: creates the player's car, resets arrays, and spawns obstacles and NPCs.
updateShopUI();
Writes the current cash and upgrade levels into the shop screen's text so it's accurate even before the player opens it.

initGameWorld()

This function acts as the game's 'reset' routine - it's called both on first load and every time you press START, which is why all state (cash aside) gets rebuilt from scratch here rather than in setup().

function initGameWorld() {
  car = new Car(0, 0, color(playerStats.color));
  car.isPlayer = true;
  car.maxSpeed = playerStats.maxSpeed;
  car.accel = playerStats.accel;
  
  camPos = createVector(0, -300);
  playerPos = createVector(0, -30, 0);
  
  obstacles = [];
  skidmarks = [];
  smokeParticles = [];
  npcs = [];
  cops = [];
  
  wantedStars = 0;
  chaseFrames = 0;
  
  // Safely update UI
  updateWantedUI();
  updateHealthUI(100);
  updateCashUI();
  
  let wantedAlert = document.getElementById('wanted-alert');
  let crosshair = document.getElementById('crosshair');
  if (wantedAlert) wantedAlert.style.display = 'none';
  if (crosshair) crosshair.style.display = 'none';
  
  for (let i = 0; i < 40; i++) {
    let angle = random(TWO_PI);
    let radius = random(400, 3500);
    obstacles.push({
      x: cos(angle) * radius,
      z: sin(angle) * radius,
      color: color(255, 150, 0)
    });
  }
  for (let i = 0; i < 5; i++) spawnNPC();
}
Line-by-line explanation (6 lines)

🔧 Subcomponents:

for-loop Obstacle Placement Loop for (let i = 0; i < 40; i++) {

Scatters 40 orange traffic cones at random angles and distances around the origin using trigonometry (cos/sin) to convert an angle+radius into x/z coordinates.

for-loop Initial NPC Loop for (let i = 0; i < 5; i++) spawnNPC();

Creates 5 starting traffic cars by calling the spawnNPC() helper repeatedly.

car = new Car(0, 0, color(playerStats.color));
Builds the player's Car object at the world origin, using whatever color is currently saved in playerStats (so shop purchases persist across restarts).
car.maxSpeed = playerStats.maxSpeed;
Applies the player's purchased engine upgrade to this specific car instance.
camPos = createVector(0, -300);
Resets the chase-camera's smoothed position vector; negative Y is 'up' in this WEBGL Y-down coordinate setup.
obstacles = []; skidmarks = []; smokeParticles = []; npcs = []; cops = [];
Clears every dynamic array so a fresh game doesn't carry over cones, skidmarks, smoke, or cars from a previous run.
for (let i = 0; i < 40; i++) { ... }
Loops 40 times, each time picking a random angle and radius and converting them into x/z coordinates with cos()/sin() to scatter cones in a circle around the start point.
for (let i = 0; i < 5; i++) spawnNPC();
Calls the spawnNPC() helper five times to populate the world with initial traffic.

draw()

draw() is the heart of every p5.js sketch, running ~60 times per second. Here a single if/else if/else chain on gameState turns one draw loop into three completely different experiences (driving, walking, and idle menu camera) without needing three separate sketches.

🔬 These four lines merge keyboard and touch input into gas/steer. What happens if you swap the values in the first two lines (gas = 1 and gas = -1) so the UP arrow brakes and DOWN accelerates?

    if (keyIsDown(UP_ARROW) || keyIsDown(87) || touchInput.up) gas = 1;
    if (keyIsDown(DOWN_ARROW) || keyIsDown(83) || touchInput.down) gas = -1;
    if (keyIsDown(LEFT_ARROW) || keyIsDown(65) || touchInput.left) steer = -1;
    if (keyIsDown(RIGHT_ARROW) || keyIsDown(68) || touchInput.right) steer = 1;
function draw() {
  background(135, 206, 235);
  
  let gas = 0;
  let steer = 0;
  
  if (gameState === 'PLAYING') {
    if (keyIsDown(UP_ARROW) || keyIsDown(87) || touchInput.up) gas = 1;
    if (keyIsDown(DOWN_ARROW) || keyIsDown(83) || touchInput.down) gas = -1;
    if (keyIsDown(LEFT_ARROW) || keyIsDown(65) || touchInput.left) steer = -1;
    if (keyIsDown(RIGHT_ARROW) || keyIsDown(68) || touchInput.right) steer = 1;
    
    let forward = createVector(cos(car.angle), sin(car.angle));
    let desiredCamPos = p5.Vector.sub(car.pos, p5.Vector.mult(forward, 250));
    camPos.x = lerp(camPos.x, desiredCamPos.x, 0.1);
    camPos.y = lerp(camPos.y, desiredCamPos.y, 0.1); 
    camera(camPos.x, -200, camPos.y, car.pos.x, 0, car.pos.y, 0, 1, 0);
    
    car.update(gas, steer);
    updateSpeedText(round(car.vel.mag() * 3) + " mph");
    
    if (wantedStars > 0) processWantedEscalation();
    
    sfx.update(gas, car.vel.mag(), car.isDrifting);
    sfx.playMusic();
    
  } else if (gameState === 'ON_FOOT') {
    car.update(0, 0); 
    updatePlayerFPS();
    
    let dSq = distSq(playerPos.x, playerPos.z, car.pos.x, car.pos.y);
    if (dSq < 22500) updateSpeedText("Press E to Enter Car");
    else updateSpeedText("ON FOOT (Click to look)");
    
    sfx.update(0, 0, false); 
    sfx.playMusic();
    
  } else {
    car.update(0, 0);
    let camRadius = 600;
    let cx = car.pos.x + cos(millis() * 0.0003) * camRadius;
    let cz = car.pos.y + sin(millis() * 0.0003) * camRadius;
    camera(cx, -250, cz, car.pos.x, 0, car.pos.y, 0, 1, 0);
    sfx.muteAll(); 
  }

  ambientLight(150);
  directionalLight(255, 255, 255, -1, 1, -1);
  
  drawGround(); 
  drawSkidmarks();
  drawObstacles();
  drawSmoke();
  
  updateNPCs();
  updateCops();
  
  if (gameState === 'PLAYING' || gameState === 'ON_FOOT') checkCollisions();
  
  car.display();
}
Line-by-line explanation (10 lines)

🔧 Subcomponents:

conditional PLAYING State Branch if (gameState === 'PLAYING') {

Reads driving input, positions the chase camera behind the car, updates physics, and drives the audio engine.

conditional ON_FOOT State Branch } else if (gameState === 'ON_FOOT') {

Updates the first-person camera and checks whether the player is close enough to the parked car to re-enter it.

conditional Keyboard/Touch Input Reads if (keyIsDown(UP_ARROW) || keyIsDown(87) || touchInput.up) gas = 1;

Combines keyboard key codes and touch-button booleans into single gas/steer values so the same physics code works for both control schemes.

background(135, 206, 235);
Repaints the whole canvas sky-blue every frame, which is what erases the previous frame's drawing in a WEBGL sketch.
if (keyIsDown(UP_ARROW) || keyIsDown(87) || touchInput.up) gas = 1;
Checks the up arrow, the 'W' key (keycode 87), or the mobile gas button - any one of them sets gas to 1 (forward).
let desiredCamPos = p5.Vector.sub(car.pos, p5.Vector.mult(forward, 250));
Calculates a point 250 units behind the car (opposite its forward direction) - this is where the camera 'wants' to be.
camPos.x = lerp(camPos.x, desiredCamPos.x, 0.1);
Smoothly moves the camera's actual position 10% of the way toward the desired position each frame, which is what makes the chase cam glide instead of snapping instantly.
camera(camPos.x, -200, camPos.y, car.pos.x, 0, car.pos.y, 0, 1, 0);
p5's camera() function takes an eye position (first 3 args), a look-at target (next 3), and an 'up' vector (last 3) - here the eye is the smoothed chase position and the target is always the car.
car.update(gas, steer);
Runs the car's physics for this frame using the input we just read.
if (wantedStars > 0) processWantedEscalation();
Only runs the wanted-level escalation logic while actively being chased, saving a function call otherwise.
let dSq = distSq(playerPos.x, playerPos.z, car.pos.x, car.pos.y);
Measures the squared distance between the on-foot player and the parked car to decide whether to show the 'Press E to Enter Car' prompt.
let cx = car.pos.x + cos(millis() * 0.0003) * camRadius;
Uses millis() (milliseconds since start) inside cos() to make the idle menu camera slowly orbit around the car over time.
if (gameState === 'PLAYING' || gameState === 'ON_FOOT') checkCollisions();
Collision checks only matter while the game is actually being played, so they're skipped on menu screens for performance.

processWantedEscalation()

This function shows a common game-design pattern: derive a target state (neededLevel) from a timer, then only apply it if it's actually higher, keeping escalation one-directional and easy to reason about.

🔬 This ladder controls how fast the chase intensifies. What happens if you change 60 * 15 to 60 * 3 so you hit 2 stars after just 3 seconds?

  if (chaseFrames > 60 * 15) neededLevel = 2; // 15 secs
  if (chaseFrames > 60 * 35) neededLevel = 3; // 35 secs
  if (chaseFrames > 60 * 60) neededLevel = 4; // 60 secs
  if (chaseFrames > 60 * 90) neededLevel = 5; // 90 secs
function processWantedEscalation() {
  chaseFrames++;
  let neededLevel = 1;
  
  // Time-based escalation (60 frames = 1 second roughly)
  if (chaseFrames > 60 * 15) neededLevel = 2; // 15 secs
  if (chaseFrames > 60 * 35) neededLevel = 3; // 35 secs
  if (chaseFrames > 60 * 60) neededLevel = 4; // 60 secs
  if (chaseFrames > 60 * 90) neededLevel = 5; // 90 secs
  
  if (neededLevel > wantedStars) {
    wantedStars = neededLevel;
    updateWantedUI();
  }
  
  // Spawn rate manager
  let maxCops = 2 + (wantedStars * 2); // 1*=4, 2*=6, 3*=8, 4*=10, 5*=12
  if (cops.length < maxCops && frameCount % 60 === 0) {
    spawnCop();
  }
}
Line-by-line explanation (6 lines)

🔧 Subcomponents:

conditional Time-Based Star Ladder if (chaseFrames > 60 * 15) neededLevel = 2; // 15 secs

Each condition checks how many frames the chase has lasted and raises the required star level - since they all run in sequence, the highest matching threshold wins.

conditional Cop Spawn Rate Limiter if (cops.length < maxCops && frameCount % 60 === 0) {

Only tries to spawn a new cop once per second (frameCount % 60 === 0) and only if the current cop count is under the cap for this star level.

chaseFrames++;
Counts up by 1 every frame this function runs, effectively acting as a stopwatch for how long the player has been wanted.
let neededLevel = 1;
Starts by assuming the minimum wanted level, then the ladder of ifs below may raise it.
if (chaseFrames > 60 * 15) neededLevel = 2; // 15 secs
Since roughly 60 frames pass per second, 60*15 means 15 seconds - once that much time passes, the required level becomes 2.
if (neededLevel > wantedStars) { wantedStars = neededLevel; updateWantedUI(); }
Only updates the global wantedStars (and refreshes the on-screen star display) when the needed level is actually higher than the current one, so stars never quietly decrease here.
let maxCops = 2 + (wantedStars * 2);
Calculates how many cops are allowed on screen at once based on the current star level - more stars, more cops.
if (cops.length < maxCops && frameCount % 60 === 0) { spawnCop(); }
Adds one new cop roughly once per second, but only while under the cap, preventing an overwhelming flood of cars.

updateWantedUI()

This is a small but classic example of building a display string procedurally with a loop and a ternary operator instead of hardcoding five separate cases.

function updateWantedUI() {
  let starStr = "";
  for (let i=0; i<5; i++) starStr += (i < wantedStars) ? "★" : "☆";
  let wAlert = document.getElementById('wanted-alert');
  if (wAlert) wAlert.innerText = "WANTED " + starStr;
}
Line-by-line explanation (3 lines)

🔧 Subcomponents:

for-loop Star String Builder for (let i=0; i<5; i++) starStr += (i < wantedStars) ? "★" : "☆";

Builds a 5-character string of filled and empty stars, filling in as many ★ as the current wantedStars value.

let starStr = "";
Starts with an empty string that the loop below will fill with star characters.
for (let i=0; i<5; i++) starStr += (i < wantedStars) ? "★" : "☆";
Loops 5 times (the max star rating); for each position it appends a filled star if that index is below the current wanted level, otherwise an empty star outline.
if (wAlert) wAlert.innerText = "WANTED " + starStr;
Writes the finished star string into the HUD's wanted-alert HTML element, but only if that element actually exists on the page.

spawnCop()

This function demonstrates weighted random selection by simply duplicating entries in an array (like pushing 'COP' twice) to make certain outcomes more likely without needing a separate probability system.

🔬 What happens if you change the SWAT threshold from wantedStars >= 3 to wantedStars >= 1, so the toughest early units show up almost immediately?

  let pool = ['COP'];
  if (wantedStars >= 2) pool.push('SHERIFF', 'COP');
  if (wantedStars >= 3) pool.push('SWAT');
  if (wantedStars >= 4) pool.push('MILITARY');
  if (wantedStars >= 5) pool.push('SPECIAL_FORCES', 'SPECIAL_FORCES');
function spawnCop() {
  let angle = car.angle + PI + random(-1.5, 1.5);
  let cx = car.pos.x + cos(angle) * 1500;
  let cz = car.pos.y + sin(angle) * 1500;
  
  // Determine spawn pool based on stars
  let pool = ['COP'];
  if (wantedStars >= 2) pool.push('SHERIFF', 'COP');
  if (wantedStars >= 3) pool.push('SWAT');
  if (wantedStars >= 4) pool.push('MILITARY');
  if (wantedStars >= 5) pool.push('SPECIAL_FORCES', 'SPECIAL_FORCES');
  
  let type = random(pool);
  let cop = new Car(cx, cz, color(255));
  cop.isCop = true;
  cop.copType = type;
  
  // Setup Stats based on type
  if (type === 'COP') { cop.maxSpeed = 38; cop.accel = 0.8; cop.mass = 1.0; }
  else if (type === 'SHERIFF') { cop.maxSpeed = 39; cop.accel = 0.85; cop.mass = 1.1; }
  else if (type === 'SWAT') { cop.maxSpeed = 34; cop.accel = 0.9; cop.mass = 2.5; }
  else if (type === 'MILITARY') { cop.maxSpeed = 32; cop.accel = 0.7; cop.mass = 3.5; }
  else if (type === 'SPECIAL_FORCES') { cop.maxSpeed = 46; cop.accel = 1.1; cop.mass = 1.5; }
  
  cops.push(cop);
}
Line-by-line explanation (6 lines)

🔧 Subcomponents:

conditional Enemy Pool Builder if (wantedStars >= 2) pool.push('SHERIFF', 'COP');

Adds tougher cop types to the random-choice pool as the wanted level rises, so higher stars gradually introduce SWAT, MILITARY, and SPECIAL_FORCES units.

conditional Cop Stat Assignment if (type === 'COP') { cop.maxSpeed = 38; cop.accel = 0.8; cop.mass = 1.0; }

Gives each cop type its own speed, acceleration, and mass so heavier units like MILITARY feel slower but more solid in collisions.

let angle = car.angle + PI + random(-1.5, 1.5);
Picks a random angle roughly opposite (PI radians = 180°) the player's current heading, with some randomness, so cops usually spawn from behind or the sides rather than directly ahead.
let cx = car.pos.x + cos(angle) * 1500;
Converts that angle and a fixed 1500-unit distance into an actual x world coordinate using cos().
let pool = ['COP'];
Starts the array of possible enemy types with the basic COP, then more types get added below depending on wantedStars.
let type = random(pool);
p5's random() can pick a random element from an array - here it picks one entry from the pool built above.
let cop = new Car(cx, cz, color(255));
Creates a new Car instance at the spawn position; the color(255) is mostly overridden visually since cop colors are set inside display() by copType.
cops.push(cop);
Adds the finished cop car into the global cops array so updateCops() and drawing code will start tracking it.

triggerWanted()

triggerWanted() is called both from drifting and from crashing into NPCs, showing how the same helper function can be reused as an entry point for different in-game triggers.

function triggerWanted() {
  if (wantedStars === 0) {
    wantedStars = 1;
    let wAlert = document.getElementById('wanted-alert');
    if (wAlert) wAlert.style.display = 'block';
    updateWantedUI();
    for(let i=0; i<3; i++) spawnCop();
  }
}
Line-by-line explanation (4 lines)

🔧 Subcomponents:

conditional First-Trigger Guard if (wantedStars === 0) {

Ensures this only fires once per chase - if the player is already wanted, calling triggerWanted() again does nothing.

if (wantedStars === 0) {
Only runs the setup below if there's currently no active chase, preventing this from restarting the chase every single frame it's called.
wantedStars = 1;
Immediately sets the wanted level to its first star.
if (wAlert) wAlert.style.display = 'block';
Makes the flashing 'WANTED' HUD element visible (it starts hidden via CSS/JS).
for(let i=0; i<3; i++) spawnCop();
Immediately spawns 3 cops so the chase feels instant rather than trickling in.

class SoundManager

SoundManager wraps p5.sound's synthesis objects (Oscillator, Envelope, Noise) into one class so the rest of the game can just call sfx.update(...) or sfx.playCrash() without worrying about low-level audio setup.

class SoundManager {
  constructor() {
    this.started = false;
    this.engineOsc = new p5.Oscillator('sawtooth');
    this.engineOsc.amp(0);
    this.engineOsc.freq(60);
    this.skidOsc = new p5.Oscillator('square');
    this.skidOsc.amp(0);
    this.skidOsc.freq(800);
    this.crashNoise = new p5.Noise('white');
    this.crashEnv = new p5.Envelope();
    this.crashEnv.setADSR(0.01, 0.1, 0.2, 0.3);
    this.crashEnv.setRange(0.6, 0);
    this.crashNoise.amp(this.crashEnv);
    this.musicOsc = new p5.Oscillator('square');
    this.musicOsc.amp(0);
    this.musicEnv = new p5.Envelope();
    this.musicEnv.setADSR(0.05, 0.1, 0.0, 0.0);
    this.musicEnv.setRange(0.08, 0);
    this.musicOsc.amp(this.musicEnv);
    this.notes = [130.81, 155.56, 196.00, 155.56]; 
    this.musicStep = 0;
  }
  start() {
    if (!this.started) {
      this.engineOsc.start(); this.skidOsc.start();
      this.crashNoise.start(); this.musicOsc.start();
      this.started = true;
    }
  }
  update(gas, speed, isDrifting) {
    if (!this.started) return;
    let targetFreq = map(speed, 0, 45, 50, 260);
    let targetAmp = abs(gas) > 0 ? 0.15 : 0.05;
    this.engineOsc.freq(targetFreq, 0.1);
    this.engineOsc.amp(targetAmp, 0.1);
    
    if (isDrifting) {
      this.skidOsc.amp(0.08, 0.05);
      this.skidOsc.freq(random(700, 1000));
    } else {
      this.skidOsc.amp(0, 0.2);
    }
  }
  playCrash() { if (this.started) this.crashEnv.play(); }
  playMusic() {
    if (!this.started) return;
    if (frameCount % 12 === 0) {
      let f = this.notes[this.musicStep % this.notes.length];
      if (wantedStars > 0) f *= (1 + (wantedStars * 0.1)); // Gets more intense
      this.musicOsc.freq(f);
      this.musicEnv.play();
      this.musicStep++;
    }
  }
  muteAll() {
    if (!this.started) return;
    this.engineOsc.amp(0, 0.5);
    this.skidOsc.amp(0, 0.5);
  }
}
Line-by-line explanation (5 lines)

🔧 Subcomponents:

conditional Drift Sound Toggle if (isDrifting) {

Fades the tire-squeal oscillator's volume up when the car is drifting and fades it out otherwise, using amp()'s built-in ramp time.

conditional Bassline Step Sequencer if (frameCount % 12 === 0) {

Only advances the looping bassline every 12 frames, turning a continuous frame counter into a rhythmic beat.

this.engineOsc = new p5.Oscillator('sawtooth');
Creates a sawtooth wave oscillator to act as the engine sound - sawtooth waves sound buzzy and mechanical, good for engines.
this.crashEnv.setADSR(0.01, 0.1, 0.2, 0.3);
Configures the crash sound's Attack/Decay/Sustain/Release envelope - a fast attack (0.01s) makes the crash hit instantly, then it decays.
let targetFreq = map(speed, 0, 45, 50, 260);
Maps the car's speed (0-45) onto a frequency range (50-260 Hz), so the engine pitch rises as the car goes faster - just like a real engine revving.
this.engineOsc.freq(targetFreq, 0.1);
Smoothly glides the oscillator's frequency to the target over 0.1 seconds instead of jumping instantly, avoiding a harsh 'zap' sound.
if (wantedStars > 0) f *= (1 + (wantedStars * 0.1));
Raises the pitch of the looping bassline note as the wanted level increases, making the music feel more intense during a chase.

updateSpeedText()

This 'cache the last value' pattern shows up four times in this sketch (speed, cash, health, stars) - it's a simple but effective performance technique for any sketch that mixes a fast draw loop with slower DOM updates.

function updateSpeedText(text) {
  if (lastSpeedText !== text) {
    let sd = document.getElementById('speed-display');
    if (sd) sd.innerText = text;
    lastSpeedText = text;
  }
}
Line-by-line explanation (3 lines)

🔧 Subcomponents:

conditional Change Detection Guard if (lastSpeedText !== text) {

Only touches the DOM (a relatively slow operation) when the text has actually changed since last frame, instead of writing to it 60 times a second.

if (lastSpeedText !== text) {
Compares the new text to what was last displayed - skips the update entirely if nothing changed.
if (sd) sd.innerText = text;
Safely updates the speed HUD element's text, only if the element was actually found in the page.
lastSpeedText = text;
Remembers what was just displayed so next frame's comparison works correctly.

updateHealthUI()

Rather than drawing a health bar with p5 shapes, this game reuses an HTML div and controls it with plain CSS width percentages - a handy trick for mixing canvas games with DOM-based UI.

function updateHealthUI(health) {
  let pct = max(0, health);
  if (pct !== lastHealth) {
    let hFill = document.getElementById('health-fill');
    if (hFill) hFill.style.width = pct + '%';
    lastHealth = pct;
  }
}
Line-by-line explanation (2 lines)
let pct = max(0, health);
Clamps health so it never displays as a negative percentage width, even if the car's health value dropped below zero.
if (hFill) hFill.style.width = pct + '%';
Directly sets the CSS width of the health bar's fill div, which is how the visual bar shrinks as health drops.

updateCashUI()

This function keeps two separate HTML elements in sync with a single game-state variable (cash), which is a common pattern once a game has multiple screens that all need to reflect the same data.

function updateCashUI() {
  if (cash !== lastCash) {
    let cashDisp = document.getElementById('cash-display');
    let shopCash = document.getElementById('shop-cash-display'); // FIXED BUG HERE
    
    if (cashDisp) cashDisp.innerText = "$" + cash;
    if (shopCash) shopCash.innerText = cash;
    
    lastCash = cash;
  }
}
Line-by-line explanation (3 lines)
if (cash !== lastCash) {
Only updates the two cash displays when the cash total has actually changed since the last check.
if (cashDisp) cashDisp.innerText = "$" + cash;
Updates the in-game HUD cash counter with a dollar sign prefix.
if (shopCash) shopCash.innerText = cash;
Updates the separate cash counter shown on the Shop screen, without the dollar sign since the shop's HTML already includes one.

distSq()

distSq() is used throughout the game for collision and range checks. Since sqrt() is relatively expensive and comparing 'a < b' works the same whether or not you square-root both sides, skipping it is a classic game-programming optimization.

function distSq(x1, y1, x2, y2) { return (x1 - x2) ** 2 + (y1 - y2) ** 2; }
Line-by-line explanation (1 lines)
return (x1 - x2) ** 2 + (y1 - y2) ** 2;
Calculates squared distance between two points - skipping the square root that p5's dist() normally performs makes this much faster when you only need to compare distances, not know the exact value.

updatePlayerFPS()

This function is a compact example of first-person camera math: yaw and pitch angles are converted into a look-at point using trigonometry, exactly the same technique used in many 3D engines.

function updatePlayerFPS() {
  if (document.pointerLockElement) {
    playerYaw += movedX * 0.003;
    playerPitch -= movedY * 0.003;
    playerPitch = constrain(playerPitch, -PI/2 + 0.1, PI/2 - 0.1);
  } else {
    if (touchInput.left) playerYaw -= 0.05;
    if (touchInput.right) playerYaw += 0.05;
  }
  let speed = 8;
  let moveX = 0; let moveZ = 0;

  if (keyIsDown(87) || keyIsDown(UP_ARROW) || touchInput.up) { moveX += cos(playerYaw) * speed; moveZ += sin(playerYaw) * speed; }
  if (keyIsDown(83) || keyIsDown(DOWN_ARROW) || touchInput.down) { moveX -= cos(playerYaw) * speed; moveZ -= sin(playerYaw) * speed; }
  if (keyIsDown(65)) { moveX += cos(playerYaw - HALF_PI) * speed; moveZ += sin(playerYaw - HALF_PI) * speed; }
  if (keyIsDown(68)) { moveX += cos(playerYaw + HALF_PI) * speed; moveZ += sin(playerYaw + HALF_PI) * speed; }

  playerPos.x += moveX; playerPos.z += moveZ;

  let lookX = playerPos.x + cos(playerYaw) * cos(playerPitch);
  let lookY = playerPos.y + sin(playerPitch);
  let lookZ = playerPos.z + sin(playerYaw) * cos(playerPitch);
  camera(playerPos.x, playerPos.y, playerPos.z, lookX, lookY, lookZ, 0, 1, 0);
}
Line-by-line explanation (5 lines)

🔧 Subcomponents:

conditional Pointer Lock Mouse-Look if (document.pointerLockElement) {

While the mouse is locked to the canvas, uses raw mouse movement (movedX/movedY) to rotate the view; otherwise falls back to touch buttons for turning.

conditional WASD Movement Checks if (keyIsDown(87) || keyIsDown(UP_ARROW) || touchInput.up) { moveX += cos(playerYaw) * speed; moveZ += sin(playerYaw) * speed; }

Converts the player's facing angle (playerYaw) and held movement keys into an actual X/Z movement vector using cos()/sin().

playerYaw += movedX * 0.003;
Turns the player's left/right look angle based on horizontal mouse movement since the last frame; movedX is a built-in p5 variable.
playerPitch = constrain(playerPitch, -PI/2 + 0.1, PI/2 - 0.1);
Clamps up/down look angle so the camera can't flip completely upside down when looking straight up or down.
if (keyIsDown(87) || keyIsDown(UP_ARROW) || touchInput.up) { moveX += cos(playerYaw) * speed; moveZ += sin(playerYaw) * speed; }
If moving forward, adds a movement vector pointing in the direction the player is currently facing (again using cos/sin of the yaw angle).
let lookX = playerPos.x + cos(playerYaw) * cos(playerPitch);
Calculates a point slightly in front of the player's eye in the direction they're looking, combining yaw and pitch - this becomes the 'target' for camera().
camera(playerPos.x, playerPos.y, playerPos.z, lookX, lookY, lookZ, 0, 1, 0);
Positions the 3D camera at the player's exact eye position and points it at the calculated look target, creating the first-person view.

mousePressed()

mousePressed() is a built-in p5.js event function that automatically runs whenever the mouse is clicked, without needing to check mouseIsPressed manually inside draw().

function mousePressed() { if (gameState === 'ON_FOOT') requestPointerLock(); }
Line-by-line explanation (1 lines)
if (gameState === 'ON_FOOT') requestPointerLock();
requestPointerLock() is a browser API that hides the cursor and gives raw, unbounded mouse movement - it's only requested while walking, since the car doesn't need mouse-look.

keyPressed()

keyPressed() is another built-in p5.js event function, fired once per key press (unlike keyIsDown(), which is checked continuously inside draw()).

function keyPressed() { if (key === 'e' || key === 'E') toggleVehicle(); }
Line-by-line explanation (1 lines)
if (key === 'e' || key === 'E') toggleVehicle();
p5's built-in 'key' variable holds the last pressed character; checking both cases handles Caps Lock being on or off.

toggleVehicle()

This function shows how to safely transition between very different camera/control modes by relying on the single gameState variable, and how p5.Vector.fromAngle() turns an angle into a usable direction vector.

function toggleVehicle() {
  if (gameState === 'PLAYING') {
    gameState = 'ON_FOOT';
    let crosshair = document.getElementById('crosshair');
    if (crosshair) crosshair.style.display = 'block';
    let exitOffset = p5.Vector.fromAngle(car.angle - HALF_PI).mult(80);
    playerPos.x = car.pos.x + exitOffset.x; playerPos.z = car.pos.y + exitOffset.y; playerPos.y = -40; 
    playerYaw = car.angle; playerPitch = 0;
  } else if (gameState === 'ON_FOOT') {
    if (distSq(playerPos.x, playerPos.z, car.pos.x, car.pos.y) < 22500) {
      gameState = 'PLAYING';
      let crosshair = document.getElementById('crosshair');
      if (crosshair) crosshair.style.display = 'none';
      exitPointerLock();
    }
  }
}
Line-by-line explanation (3 lines)

🔧 Subcomponents:

conditional Exit Car Branch if (gameState === 'PLAYING') {

Switches to on-foot mode and places the player just to the side of the car using p5.Vector.fromAngle() to compute an offset perpendicular to the car's facing direction.

conditional Enter Car Branch } else if (gameState === 'ON_FOOT') {

Only lets the player re-enter the car if they're within range (distSq < 22500, i.e. within 150 units), preventing teleporting into a distant car.

let exitOffset = p5.Vector.fromAngle(car.angle - HALF_PI).mult(80);
Creates a unit vector rotated 90° from the car's facing angle (HALF_PI = 90° in radians), then scales it to 80 units - this places the exiting player beside the car's door rather than inside it.
if (distSq(playerPos.x, playerPos.z, car.pos.x, car.pos.y) < 22500) {
22500 is 150 squared, so this checks if the player is within 150 units of the car before allowing them to get back in.
exitPointerLock();
Releases the mouse cursor back to normal browser behavior when returning to driving mode, since the car doesn't use mouse-look.

handleCrash()

This is a simplified elastic-collision response: instead of full physics, it just pushes both cars apart proportional to their relative mass, which feels convincing without needing a full physics engine.

function handleCrash(c1, c2) {
  let bounceDir = p5.Vector.sub(c1.pos, c2.pos).normalize();
  let m1 = c1.mass || 1;
  let m2 = c2.mass || 1;
  
  c1.vel.add(p5.Vector.mult(bounceDir, 8 * (m2 / m1)));
  c2.vel.sub(p5.Vector.mult(bounceDir, 8 * (m1 / m2)));
  
  if (c1.isPlayer || c2.isPlayer) sfx.playCrash(); 
  
  if (c1.isPlayer) c1.takeDamage(15 * m2);
  if (c2.isPlayer) c2.takeDamage(15 * m1);
}
Line-by-line explanation (3 lines)
let bounceDir = p5.Vector.sub(c1.pos, c2.pos).normalize();
Finds the direction pointing from car 2 to car 1 and normalizes it to length 1, giving a pure direction for the bounce-apart force.
c1.vel.add(p5.Vector.mult(bounceDir, 8 * (m2 / m1)));
Pushes car 1 away along the bounce direction, scaled by the other car's mass relative to its own - heavier opponents (m2) push you harder, while your own mass (m1) resists it.
if (c1.isPlayer) c1.takeDamage(15 * m2);
Only the player actually takes health damage from crashes (NPCs/cops don't lose health here), scaled by how heavy the thing they hit was.

spawnNPC()

Spawning NPCs ahead of the player's travel direction (rather than at fixed world positions) keeps traffic feeling present no matter which way the player drives.

function spawnNPC() {
  let aheadVec = p5.Vector.fromAngle(car.angle).mult(random(1000, 2000));
  let spawnPos = p5.Vector.add(car.pos, aheadVec);
  spawnPos.add(createVector(random(-500, 500), random(-500, 500)));
  
  let npcColor = color(random(50, 255), random(50, 255), random(50, 255));
  let npc = new Car(spawnPos.x, spawnPos.y, npcColor);
  npc.aiTimer = random(0, 1000);
  npcs.push(npc);
}
Line-by-line explanation (3 lines)
let aheadVec = p5.Vector.fromAngle(car.angle).mult(random(1000, 2000));
Creates a vector pointing in the player's current facing direction, scaled to a random distance so NPCs mostly appear ahead of the player as they drive.
let npcColor = color(random(50, 255), random(50, 255), random(50, 255));
Picks a random RGB color for variety among traffic cars, avoiding very dark values (minimum 50) so they stay visible.
npc.aiTimer = random(0, 1000);
Gives each NPC a different starting point in its steering wave (used later in updateNPCs), so they don't all swerve in sync.

updateNPCs()

Recycling far-away objects instead of destroying and recreating them (object pooling in spirit) is a common performance pattern in games with lots of moving entities.

function updateNPCs() {
  for (let npc of npcs) {
    if (distSq(car.pos.x, car.pos.y, npc.pos.x, npc.pos.y) > 12250000) {
      let aheadVec = p5.Vector.fromAngle(car.angle).mult(random(1500, 2500));
      npc.pos = p5.Vector.add(car.pos, aheadVec);
      npc.pos.add(createVector(random(-1000, 1000), random(-1000, 1000)));
      npc.vel.set(0, 0);
    }
    npc.aiTimer += 1;
    let aiSteer = sin(npc.aiTimer * 0.02) * 1.5; 
    npc.update(1, constrain(aiSteer, -1, 1));
    npc.display();
  }
}
Line-by-line explanation (4 lines)

🔧 Subcomponents:

conditional Far-Away NPC Recycling if (distSq(car.pos.x, car.pos.y, npc.pos.x, npc.pos.y) > 12250000) {

Instead of deleting NPCs that drift too far away, it teleports them to a new spot ahead of the player - cheaper than constantly creating/destroying objects.

for (let npc of npcs) {
Loops through every active traffic NPC once per frame to update and draw it.
if (distSq(car.pos.x, car.pos.y, npc.pos.x, npc.pos.y) > 12250000) {
12250000 is 3500 squared - if an NPC gets more than 3500 units away from the player, it gets recycled rather than left to wander uselessly off-screen.
let aiSteer = sin(npc.aiTimer * 0.02) * 1.5;
Uses a sine wave over time to create a smooth, wandering steering value that swings between roughly -1.5 and 1.5, giving NPCs a lazy weaving driving style.
npc.update(1, constrain(aiSteer, -1, 1));
Drives the NPC forward at full gas while applying the wobbling steer value, clamped to the -1..1 range that the Car class expects.

updateCops()

This is a simple but effective 'seek' AI: rather than pathfinding, cops just constantly recalculate the angle to their target and steer toward it, which is enough to feel like a real chase when combined with the Car class's own physics.

🔬 The '* 3' controls how aggressively cops steer toward you. What happens if you lower it to '* 1' for lazier cops, or raise it to '* 8' for twitchy ones?

    let desiredAngle = atan2(targetY - c.pos.y, targetX - c.pos.x);
    let angleDiff = desiredAngle - c.angle;
    
    while (angleDiff > PI) angleDiff -= TWO_PI;
    while (angleDiff < -PI) angleDiff += TWO_PI;
    
    c.update(1, constrain(angleDiff * 3, -1, 1));
function updateCops() {
  for (let c of cops) {
    let targetX = (gameState === 'ON_FOOT') ? playerPos.x : car.pos.x;
    let targetY = (gameState === 'ON_FOOT') ? playerPos.z : car.pos.y;
    
    let desiredAngle = atan2(targetY - c.pos.y, targetX - c.pos.x);
    let angleDiff = desiredAngle - c.angle;
    
    while (angleDiff > PI) angleDiff -= TWO_PI;
    while (angleDiff < -PI) angleDiff += TWO_PI;
    
    c.update(1, constrain(angleDiff * 3, -1, 1));
    c.display();
  }
}
Line-by-line explanation (4 lines)

🔧 Subcomponents:

while-loop Angle Wrapping Loops while (angleDiff > PI) angleDiff -= TWO_PI;

Keeps the angle difference between -PI and PI so the cop always turns the shortest way toward the player instead of sometimes spinning the long way around.

let targetX = (gameState === 'ON_FOOT') ? playerPos.x : car.pos.x;
Cops chase whichever target makes sense for the current mode - the on-foot player, or the player's car.
let desiredAngle = atan2(targetY - c.pos.y, targetX - c.pos.x);
atan2() calculates the angle from the cop to its target, which is the classic way to get a 'look at' direction in 2D.
while (angleDiff > PI) angleDiff -= TWO_PI;
If the raw angle difference is more than 180°, subtracting a full circle (TWO_PI) brings it back into the -180°..180° range representing the same direction.
c.update(1, constrain(angleDiff * 3, -1, 1));
Always applies full gas while steering proportionally to how far off-angle the cop is from its target, clamped to the Car class's expected -1..1 steering range.

checkCollisions()

All collision checks here rely on distSq() rather than actual shape overlap, which is a common simplification in games - treating everything as a circle radius is much cheaper than precise 3D box collision and looks fine at this scale.

function checkCollisions() {
  for (let npc of npcs) {
    if (distSq(car.pos.x, car.pos.y, npc.pos.x, npc.pos.y) < 2500) {
      handleCrash(car, npc);
      if (wantedStars === 0) triggerWanted();
    }
  }
  for (let c of cops) {
    if (distSq(car.pos.x, car.pos.y, c.pos.x, c.pos.y) < 3000) handleCrash(car, c);
    
    if (gameState === 'ON_FOOT') {
      if (distSq(playerPos.x, playerPos.z, c.pos.x, c.pos.y) < 4000) {
        triggerGameOver('BUSTED!', 'A cop tackled you to the ground!');
      }
    }
  }
}
Line-by-line explanation (3 lines)

🔧 Subcomponents:

for-loop NPC Collision Loop if (distSq(car.pos.x, car.pos.y, npc.pos.x, npc.pos.y) < 2500) {

Checks if the player's car is close enough (within 50 units) to any NPC to count as a crash, then applies the crash response and starts a chase.

for-loop Cop Collision & Bust Loop if (gameState === 'ON_FOOT') {

While on foot, checks if any cop has gotten close enough to physically catch the player, ending the game with a 'BUSTED!' screen.

if (distSq(car.pos.x, car.pos.y, npc.pos.x, npc.pos.y) < 2500) {
2500 is 50 squared, so this triggers when the player's car gets within 50 units of an NPC - close enough to count as a fender-bender.
if (wantedStars === 0) triggerWanted();
Crashing into traffic starts a police chase if one isn't already underway - a consequence for reckless driving.
if (distSq(playerPos.x, playerPos.z, c.pos.x, c.pos.y) < 4000) {
Checks distance between the on-foot player and each cop; getting caught this close ends the game.

class Car

The Car class is reused for the player, every NPC, and every cop - the only differences between them are which stats are set (maxSpeed, accel, mass) and a couple of boolean flags (isPlayer, isCop) checked inside update() and display(). This 'one flexible class' approach avoids duplicating physics code three times.

🔬 The 'speed > 15' condition is the minimum speed needed to start drifting. What happens if you lower it to 'speed > 2' so the car drifts at almost any speed?

    let currentTraction = this.grip;
    
    if (abs(steerInput) > 0 && speed > 15) currentTraction = this.driftGrip;
    
    this.vel.lerp(desiredVel, currentTraction);
class Car {
  constructor(x, z, carColor) {
    this.pos = createVector(x, z);
    this.vel = createVector(0, 0); 
    this.angle = 0;                
    this.steerAngle = 0;           
    
    this.color = carColor;
    this.isCop = false;
    this.copType = 'NONE';
    this.isPlayer = false;
    this.health = 100;
    this.isDrifting = false;
    this.mass = 1.0;
    
    this.accel = 0.6;
    this.maxSpeed = 35;
    this.friction = 0.97;
    this.turnSpeed = 0.06;
    this.grip = 0.15;
    this.driftGrip = 0.03;
  }

  takeDamage(amount) {
    let dmgMultiplier = (this.isPlayer) ? (1.3 - (playerStats.armorTier * 0.3)) : 1;
    this.health -= amount * dmgMultiplier;
    
    updateHealthUI(this.health);
    if (this.health <= 0 && gameState === 'PLAYING') {
      triggerGameOver('TOTALED!', 'Your car took too much damage during the chase.');
    }
  }

  update(gas, steerInput) {
    this.steerAngle = lerp(this.steerAngle, steerInput * PI / 4, 0.2);
    let speed = this.vel.mag();
    let forward = createVector(cos(this.angle), sin(this.angle));
    let isMovingForward = this.vel.dot(forward) >= 0;

    this.vel.add(p5.Vector.mult(forward, gas * this.accel));
    this.vel.mult(this.friction);

    if (speed > 1.0) {
      let turnEffect = steerInput * this.turnSpeed;
      if (!isMovingForward) turnEffect *= -1; 
      turnEffect *= map(speed, 0, this.maxSpeed, 1.2, 0.5);
      this.angle += turnEffect;
    }

    forward = createVector(cos(this.angle), sin(this.angle));
    let desiredVel = p5.Vector.mult(forward, speed * (isMovingForward ? 1 : -1));
    let currentTraction = this.grip;
    
    if (abs(steerInput) > 0 && speed > 15) currentTraction = this.driftGrip;
    
    this.vel.lerp(desiredVel, currentTraction);

    let slipAmount = p5.Vector.dist(this.vel, desiredVel);
    this.isDrifting = (slipAmount > 2.5 && speed > 5);
    
    if (this.isDrifting) {
      this.generateSkidmarks();
      if (random() > 0.6 && smokeParticles.length < 20) this.generateSmoke();
      
      if (this.isPlayer) {
        cash += 2; // Earn drift points!
        updateCashUI();
        if (wantedStars === 0) triggerWanted(); // Instantly trigger cops on drift!
      }
    }

    this.pos.add(this.vel);
    this.vel.limit(this.maxSpeed);
    
    this.checkObstacleCollisions();
  }

  generateSkidmarks() {
    let forward = createVector(cos(this.angle), sin(this.angle));
    let right = createVector(-sin(this.angle), cos(this.angle));
    let rearCenter = p5.Vector.sub(this.pos, p5.Vector.mult(forward, 40));
    let rl = p5.Vector.sub(rearCenter, p5.Vector.mult(right, 22));
    let rr = p5.Vector.add(rearCenter, p5.Vector.mult(right, 22));
    skidmarks.push({ x: rl.x, z: rl.y }); skidmarks.push({ x: rr.x, z: rr.y });
    if (skidmarks.length > 30) skidmarks.splice(0, 2);
  }

  generateSmoke() {
    let forward = createVector(cos(this.angle), sin(this.angle));
    let rc = p5.Vector.sub(this.pos, p5.Vector.mult(forward, 45));
    smokeParticles.push({
      x: rc.x + random(-20, 20), y: -5, z: rc.y + random(-20, 20),
      vx: this.vel.x * 0.2 + random(-1, 1), vy: random(-3, -1), vz: this.vel.y * 0.2 + random(-1, 1),
      life: 255, size: random(10, 25)
    });
  }

  checkObstacleCollisions() {
    for (let obs of obstacles) {
      if (distSq(this.pos.x, this.pos.y, obs.x, obs.z) < 1600) {
        let bounceDir = createVector(this.pos.x - obs.x, this.pos.y - obs.z).normalize();
        this.vel.add(bounceDir.mult(6));
        this.vel.mult(0.5);
        if (this.isPlayer) { this.takeDamage(2); sfx.playCrash(); }
      }
    }
  }

  display() {
    push();
    translate(this.pos.x, -15, this.pos.y);
    rotateY(-this.angle); 

    noStroke();
    let chassisH = 20, chassisW = 50, chassisL = 100;
    
    if (this.isCop) {
      if (this.copType === 'COP') fill(15);
      else if (this.copType === 'SHERIFF') fill(139, 115, 85);
      else if (this.copType === 'SWAT') { fill(25, 25, 50); chassisW = 60; chassisH = 35; }
      else if (this.copType === 'MILITARY') { fill(75, 83, 32); chassisW = 65; chassisL = 110; chassisH = 40; }
      else if (this.copType === 'SPECIAL_FORCES') fill(5);
    } else {
      fill(this.color);
    }
    box(chassisL, chassisH, chassisW);

    push();
    translate(-10, -(chassisH/2 + 9), 0);
    if (this.isCop) {
      if (this.copType === 'COP') fill(240);
      else if (this.copType === 'SHERIFF') fill(210, 180, 140);
      else fill(15);
    } else {
      fill(red(this.color)*0.8, green(this.color)*0.8, blue(this.color)*0.8);
    }
    box(chassisL*0.45, 18, chassisW * 0.88);
    
    fill(20);
    box(chassisL*0.47, 14, chassisW * 0.92);
    pop();
    
    if (this.isCop) {
      push();
      translate(-10, -(chassisH + 12), 0);
      if (this.copType === 'MILITARY') {
        fill(255, 100, 0);
        if (millis() % 500 < 250) box(10, 8, 10);
      } else {
        if (millis() % 300 < 150) fill(255, 0, 0); else fill(0, 0, 255);
        box(8, 6, 30);
      }
      pop();
    }

    fill(30);
    let wb = chassisL*0.32, tw = chassisW*0.52;
    push(); translate(wb, chassisH/2, -tw); rotateY(-this.steerAngle); rotateX(HALF_PI); cylinder(12, 10, 6, 1); pop();
    push(); translate(wb, chassisH/2, tw); rotateY(-this.steerAngle); rotateX(HALF_PI); cylinder(12, 10, 6, 1); pop();
    push(); translate(-wb, chassisH/2, -tw); rotateX(HALF_PI); cylinder(12, 10, 6, 1); pop();
    push(); translate(-wb, chassisH/2, tw); rotateX(HALF_PI); cylinder(12, 10, 6, 1); pop();
    pop();
  }
}

Line-by-line explanation (12 lines)

🔧 Subcomponents:

conditional Grip vs Drift Traction if (abs(steerInput) > 0 && speed > 15) currentTraction = this.driftGrip;

Switches between strong grip (normal driving) and weak grip (drifting) based on whether the car is turning at speed - this single line is the core of the drift mechanic.

switch-case Cop Type Color Chain if (this.copType === 'COP') fill(15);

An if/else-if chain acting like a switch statement, giving each cop type a distinct chassis color and, for heavier units, a bigger chassis size.

for-loop Obstacle Collision Loop for (let obs of obstacles) {

Checks this car's distance against every cone in the world and bounces it away with damage if it's too close - runs once per car per frame.

this.pos = createVector(x, z);
Stores the car's world position as a 2D vector - even though the game is 3D, cars only move along the ground plane (x and z), so a 2D vector is enough; the .y of this vector actually represents the world's z-axis.
this.vel.add(p5.Vector.mult(forward, gas * this.accel));
Adds acceleration in the direction the car is currently facing, scaled by the gas input and the car's accel stat - this is basic Newtonian 'force applied' motion.
this.vel.mult(this.friction);
Multiplies velocity by a number just under 1 (0.97) every frame, gradually slowing the car down like real-world friction/drag.
let desiredVel = p5.Vector.mult(forward, speed * (isMovingForward ? 1 : -1));
Calculates what the velocity 'should' be if the car had perfect grip - moving at its current speed exactly along its facing direction.
if (abs(steerInput) > 0 && speed > 15) currentTraction = this.driftGrip;
While turning at speed above 15, traction drops to the much lower driftGrip value, meaning the car's real velocity will lag noticeably behind its facing direction - this is the drift.
this.vel.lerp(desiredVel, currentTraction);
Blends the car's actual velocity toward the 'ideal' desiredVel by the traction amount - high traction snaps velocity to match facing quickly, low traction lets it slide.
let slipAmount = p5.Vector.dist(this.vel, desiredVel);
Measures how far apart the real velocity and ideal velocity are - a big gap means the car is sliding sideways, which is used to detect drifting.
if (this.isDrifting) { ... cash += 2; ... }
Rewards the player with cash for every frame spent drifting, and can trigger the wanted system, tying the core driving mechanic directly into the game's economy and chase system.
this.vel.limit(this.maxSpeed);
Caps the velocity vector's length so the car never exceeds its top speed stat, regardless of how much acceleration was applied.
if (distSq(this.pos.x, this.pos.y, obs.x, obs.z) < 1600) {
1600 is 40 squared, so cones within 40 units count as a hit; bounceDir then pushes the car away from the cone's center.
if (this.isCop) { if (this.copType === 'COP') fill(15); ... }
Chooses a different chassis fill color (and sometimes size) for each type of police unit before drawing its box body, giving each enemy type a distinct silhouette.
push(); translate(wb, chassisH/2, -tw); rotateY(-this.steerAngle); rotateX(HALF_PI); cylinder(12, 10, 6, 1); pop();
Draws one front wheel: push()/pop() isolate the transform, translate() moves to the wheel's corner position, rotateY applies the steering angle visually, and rotateX orients the cylinder to lie flat like a wheel.

drawGround()

push()/pop() around this call ensures the rotateX() only affects the ground plane, not any other 3D objects drawn afterward in the same frame.

function drawGround() {
  push(); fill(45); noStroke(); rotateX(HALF_PI); plane(30000, 30000, 2, 2); pop();
}
Line-by-line explanation (2 lines)
rotateX(HALF_PI);
plane() is normally drawn facing the camera (vertical); rotating it 90° around the X axis lays it flat to act as the ground.
plane(30000, 30000, 2, 2);
Draws a massive 30,000 x 30,000 unit flat plane so the ground always extends past the visible horizon no matter how far the player drives.

drawObstacles()

This function demonstrates 'frustum-style' culling by distance: even though there are only 40 obstacles here, the same pattern is essential in bigger worlds where drawing everything at once would tank the frame rate.

🔬 The culling distance (4000000, which is 2000²) decides how far away cones start rendering. What happens if you shrink it to 250000 (500²) so cones only appear very close to you?

  for (let obs of obstacles) {
    if (distSq(checkPos.x, checkPos.y, obs.x, obs.z) < 4000000) {
      push(); translate(obs.x, -20, obs.z); fill(obs.color); cone(12, 40, 6, 1); translate(0, -10, 0); fill(255); cylinder(8, 10, 6, 1); pop();
    }
  }
function drawObstacles() {
  noStroke();
  let checkPos = gameState === 'ON_FOOT' ? playerPos : createVector(car.pos.x, car.pos.y, car.pos.y);
  for (let obs of obstacles) {
    if (distSq(checkPos.x, checkPos.y, obs.x, obs.z) < 4000000) {
      push(); translate(obs.x, -20, obs.z); fill(obs.color); cone(12, 40, 6, 1); translate(0, -10, 0); fill(255); cylinder(8, 10, 6, 1); pop();
    }
  }
}
Line-by-line explanation (3 lines)

🔧 Subcomponents:

conditional Distance Culling Check if (distSq(checkPos.x, checkPos.y, obs.x, obs.z) < 4000000) {

Only draws cones within 2000 units of the player, skipping the 3D drawing calls for anything far away to keep frame rate smooth.

let checkPos = gameState === 'ON_FOOT' ? playerPos : createVector(car.pos.x, car.pos.y, car.pos.y);
Chooses which position to measure distance from - the walking player or the car - depending on the current mode.
if (distSq(checkPos.x, checkPos.y, obs.x, obs.z) < 4000000) {
4000000 is 2000 squared, so only cones within 2000 units get drawn - this is a simple but effective render-distance optimization.
push(); translate(obs.x, -20, obs.z); fill(obs.color); cone(12, 40, 6, 1); translate(0, -10, 0); fill(255); cylinder(8, 10, 6, 1); pop();
Draws each visible obstacle as an orange cone topped with a small white cylinder, resembling a traffic cone with a reflective band.

drawSkidmarks()

Skidmarks are just an array of simple {x, z} points pushed by the Car class whenever it's drifting - this function's only job is to render whatever is currently in that array, keeping data and drawing cleanly separated.

function drawSkidmarks() { fill(25); noStroke(); for(let s of skidmarks) { push(); translate(s.x, -0.5, s.z); rotateX(HALF_PI); plane(12, 12, 1, 1); pop(); } }
Line-by-line explanation (2 lines)

🔧 Subcomponents:

for-loop Skidmark Draw Loop for(let s of skidmarks) { push(); translate(s.x, -0.5, s.z); rotateX(HALF_PI); plane(12, 12, 1, 1); pop(); }

Draws a small dark flat square just above the ground for every recorded skidmark position, building up a trail of tire marks.

translate(s.x, -0.5, s.z);
Moves to the stored skidmark position, slightly above ground level (-0.5) to avoid Z-fighting flicker with the ground plane.
plane(12, 12, 1, 1);
Draws a small 12x12 unit flat square to represent one tire skid mark patch.

drawSmoke()

This is a classic particle-system pattern: an array of simple data objects (position, velocity, life, size) updated and drawn each frame, with expired entries removed by iterating backwards so splice() doesn't disrupt the loop.

function drawSmoke() {
  noStroke();
  for (let i = smokeParticles.length - 1; i >= 0; i--) {
    let s = smokeParticles[i];
    s.x += s.vx; s.y += s.vy; s.z += s.vz; s.life -= 15; s.size += 0.8;
    push(); translate(s.x, s.y, s.z); fill(220, 220, 220, constrain(s.life, 0, 150)); rotateX(HALF_PI); plane(s.size, s.size, 1, 1); pop();
    if (s.life <= 0) smokeParticles.splice(i, 1);
  }
}
Line-by-line explanation (3 lines)

🔧 Subcomponents:

for-loop Backward Smoke Update Loop for (let i = smokeParticles.length - 1; i >= 0; i--) {

Loops from the end of the array backward so that splicing out expired particles mid-loop doesn't skip over the next item, a common pattern when removing items from an array you're iterating.

s.x += s.vx; s.y += s.vy; s.z += s.vz; s.life -= 15; s.size += 0.8;
Moves each smoke puff by its stored velocity, fades its life value down, and slowly grows its size, mimicking real smoke dispersing and expanding.
fill(220, 220, 220, constrain(s.life, 0, 150));
Uses the particle's remaining life as its alpha (transparency) value, clamped to 150 max, so smoke fades out smoothly as it ages.
if (s.life <= 0) smokeParticles.splice(i, 1);
Removes a smoke particle from the array entirely once its life reaches zero, keeping the array from growing forever.

windowResized()

windowResized() is a built-in p5.js callback that automatically fires when the browser window changes size - essential for any full-window sketch, especially 3D ones where aspect ratio affects perspective distortion.

function windowResized() { resizeCanvas(windowWidth, windowHeight); perspective(PI / 1.8, width / height, 10, 50000); }
Line-by-line explanation (2 lines)
resizeCanvas(windowWidth, windowHeight);
Resizes the canvas to match the browser window whenever it changes size, so the game stays full-screen.
perspective(PI / 1.8, width / height, 10, 50000);
Re-applies the 3D perspective settings using the new aspect ratio, since resizing the canvas would otherwise distort the 3D view.

showScreen()

This function centralizes all screen-switching logic in one place, so every menu button just calls showScreen('some-id') instead of manually hiding/showing elements everywhere.

function showScreen(id) {
  document.querySelectorAll('.screen, #ui-layer').forEach(el => el.style.display = 'none');
  let tgt = document.getElementById(id);
  if (tgt) tgt.style.display = (id === 'ui-layer') ? 'block' : 'flex';
}
Line-by-line explanation (2 lines)

🔧 Subcomponents:

for-loop Hide All Screens document.querySelectorAll('.screen, #ui-layer').forEach(el => el.style.display = 'none');

Selects every menu screen element plus the HUD layer and hides them all before showing only the requested one, guaranteeing only one screen is visible at a time.

document.querySelectorAll('.screen, #ui-layer').forEach(el => el.style.display = 'none');
Grabs every element with the .screen class plus the #ui-layer HUD and hides them all using a forEach loop, resetting the UI before switching.
if (tgt) tgt.style.display = (id === 'ui-layer') ? 'block' : 'flex';
Shows only the target screen, using a different CSS display mode for the HUD ('block') versus the centered menu screens ('flex').

setupMenuInteractions()

This function is where p5.js meets ordinary DOM programming: instead of drawing buttons with p5 shapes, it grabs real HTML <button> elements and attaches .onclick handlers to them, which is often simpler for menu-heavy games.

function setupMenuInteractions() {
  let btnStart = document.getElementById('btn-start');
  if (btnStart) btnStart.onclick = () => {
    userStartAudio().then(() => sfx.start());
    initGameWorld(); gameState = 'PLAYING'; showScreen('ui-layer');
  };
  
  let btnShop = document.getElementById('btn-shop');
  if (btnShop) btnShop.onclick = () => { gameState = 'SHOP'; updateShopUI(); showScreen('shop-screen'); };
  
  let btnCred = document.getElementById('btn-credits');
  if (btnCred) btnCred.onclick = () => { gameState = 'CREDITS'; showScreen('credits-screen'); };
  
  let btnBack = document.getElementById('btn-back');
  if (btnBack) btnBack.onclick = () => { gameState = 'HOME'; showScreen('home-screen'); };
  
  let btnSBack = document.getElementById('btn-shop-back');
  if (btnSBack) btnSBack.onclick = () => { gameState = 'HOME'; showScreen('home-screen'); };
  
  let btnRest = document.getElementById('btn-restart');
  if (btnRest) btnRest.onclick = () => { gameState = 'HOME'; showScreen('home-screen'); };
  
  let bSpeed = document.getElementById('buy-speed');
  if (bSpeed) bSpeed.onclick = () => buyUpgrade('speed', 1000);
  
  let bArmor = document.getElementById('buy-armor');
  if (bArmor) bArmor.onclick = () => buyUpgrade('armor', 1000);
  
  let bSports = document.getElementById('buy-sportscar');
  if (bSports) bSports.onclick = () => buyCar('Sports Car', [0, 100, 255], 38, 0.8, 5000);
  
  let bHyper = document.getElementById('buy-hypercar');
  if (bHyper) bHyper.onclick = () => buyCar('Hypercar', [255, 200, 0], 45, 1.1, 15000);
}
Line-by-line explanation (3 lines)
if (btnStart) btnStart.onclick = () => { userStartAudio().then(() => sfx.start()); initGameWorld(); gameState = 'PLAYING'; showScreen('ui-layer'); };
userStartAudio() satisfies the browser's rule that audio can't play until a user gesture happens; only once that resolves does sfx.start() actually start the oscillators, then the game world resets and the HUD becomes visible.
if (bSpeed) bSpeed.onclick = () => buyUpgrade('speed', 1000);
Wires the Engine Upgrade shop button to call buyUpgrade() with a fixed $1000 cost.
if (bSports) bSports.onclick = () => buyCar('Sports Car', [0, 100, 255], 38, 0.8, 5000);
Wires the Sports Car button to call buyCar() with its specific color, stats, and price baked directly into the click handler.

buyUpgrade()

playerStats is the bridge between the shop and the actual gameplay: purchases here don't touch the car directly, they just update this shared object, which initGameWorld() reads from whenever a new car is created.

function buyUpgrade(type, cost) {
  if (cash >= cost) {
    if (type === 'speed' && playerStats.maxSpeed < 50) { cash -= cost; playerStats.maxSpeed += 2; playerStats.accel += 0.05; }
    else if (type === 'armor' && playerStats.armorTier < 3) { cash -= cost; playerStats.armorTier++; }
    updateShopUI(); updateCashUI();
  }
}
Line-by-line explanation (3 lines)

🔧 Subcomponents:

conditional Affordability Check if (cash >= cost) {

Prevents any purchase from happening unless the player has enough cash.

conditional Upgrade Cap Checks if (type === 'speed' && playerStats.maxSpeed < 50) { cash -= cost; playerStats.maxSpeed += 2; playerStats.accel += 0.05; }

Caps how far each stat can be upgraded (max speed under 50, armor tier under 3) so the shop can't be spammed infinitely.

if (cash >= cost) {
Only allows any purchase logic to run if the player can actually afford it.
if (type === 'speed' && playerStats.maxSpeed < 50) { cash -= cost; playerStats.maxSpeed += 2; playerStats.accel += 0.05; }
Deducts the cost and permanently boosts both max speed and acceleration in the shared playerStats object, which gets applied to the car next time initGameWorld() runs.
else if (type === 'armor' && playerStats.armorTier < 3) { cash -= cost; playerStats.armorTier++; }
Increments the armor tier by one, up to a maximum of 3, which reduces damage taken according to the formula in Car.takeDamage().

buyCar()

Notice this function takes the car's name, color, and stats directly as parameters from setupMenuInteractions() rather than looking them up from a shared list - a simple approach that works fine for a small, fixed set of unlockable cars.

function buyCar(name, col, speed, acc, cost) {
  if (cash >= cost) {
    cash -= cost;
    playerStats.color = col; playerStats.maxSpeed = speed; playerStats.accel = acc;
    updateShopUI(); updateCashUI();
  }
}
Line-by-line explanation (2 lines)
if (cash >= cost) {
Guards the purchase so a car can't be bought without enough cash.
playerStats.color = col; playerStats.maxSpeed = speed; playerStats.accel = acc;
Overwrites the player's saved color, max speed, and acceleration with the new car's stats - this fully replaces the previous vehicle's identity.

updateShopUI()

Template literals (backtick strings with ${...}) make it easy to build dynamic UI text without messy string concatenation - useful whenever a button's label needs to reflect live game state.

function updateShopUI() {
  let scDisp = document.getElementById('shop-cash-display');
  if (scDisp) scDisp.innerText = cash;
  
  let bSpd = document.getElementById('buy-speed');
  if (bSpd) bSpd.innerText = `Engine Upgrade ($1000) [Lvl ${playerStats.maxSpeed}]`;
  
  let bArm = document.getElementById('buy-armor');
  if (bArm) bArm.innerText = `Armor Plating ($1000) [Tier ${playerStats.armorTier}/3]`;
  
  let bSport = document.getElementById('buy-sportscar');
  if (bSport) bSport.innerText = `Unlock Sports Car ($5000)`;
  
  let bHyp = document.getElementById('buy-hypercar');
  if (bHyp) bHyp.innerText = `Unlock Hypercar ($15000)`;
}
Line-by-line explanation (2 lines)
if (bSpd) bSpd.innerText = `Engine Upgrade ($1000) [Lvl ${playerStats.maxSpeed}]`;
Uses a JavaScript template literal (backticks) to embed the current maxSpeed value directly inside the button's label text, so players can see their current stat level.
if (bArm) bArm.innerText = `Armor Plating ($1000) [Tier ${playerStats.armorTier}/3]`;
Shows the current armor tier out of the maximum of 3 directly on the button.

triggerGameOver()

Passing a custom title and description into a single reusable game-over function means both 'BUSTED!' (caught on foot) and 'TOTALED!' (car destroyed) can share all the same cleanup logic without duplicating code.

function triggerGameOver(title, description) {
  gameState = 'GAMEOVER'; exitPointerLock();
  let crosshair = document.getElementById('crosshair');
  if (crosshair) crosshair.style.display = 'none';
  
  let bTitle = document.getElementById('busted-title');
  if (bTitle) bTitle.innerText = title;
  
  let bDesc = document.getElementById('busted-desc');
  if (bDesc) bDesc.innerText = description;
  
  showScreen('busted-screen');
}
Line-by-line explanation (3 lines)
gameState = 'GAMEOVER'; exitPointerLock();
Switches the game to its end state and releases the mouse cursor lock in case the player was walking around in first-person.
if (bTitle) bTitle.innerText = title;
Sets the game-over screen's headline (e.g. 'BUSTED!' or 'TOTALED!') dynamically based on which parameter was passed in.
showScreen('busted-screen');
Reuses the shared showScreen() helper to hide everything else and display just the game-over overlay.

setupMobileControls()

This function demonstrates using both touchstart/touchend and mousedown/mouseup/mouseleave listeners together so the same on-screen buttons work correctly whether the game is played on a touchscreen or with a mouse (useful for testing on desktop).

function setupMobileControls() {
  const bindBtn = (id, key) => {
    let el = document.getElementById(id); if (!el) return;
    el.addEventListener('touchstart', (e) => { e.preventDefault(); touchInput[key] = true; }, { passive: false });
    el.addEventListener('touchend', (e) => { e.preventDefault(); touchInput[key] = false; }, { passive: false });
    el.addEventListener('mousedown', (e) => { e.preventDefault(); touchInput[key] = true; });
    el.addEventListener('mouseup', (e) => { e.preventDefault(); touchInput[key] = false; });
    el.addEventListener('mouseleave', (e) => { e.preventDefault(); touchInput[key] = false; });
  };
  bindBtn('btn-left', 'left'); bindBtn('btn-right', 'right');
  bindBtn('btn-gas', 'up'); bindBtn('btn-brake', 'down');
  
  let exitBtn = document.getElementById('btn-exit');
  if (exitBtn) {
    exitBtn.addEventListener('touchstart', (e) => { e.preventDefault(); toggleVehicle(); });
    exitBtn.addEventListener('mousedown', (e) => { e.preventDefault(); toggleVehicle(); });
  }
}
Line-by-line explanation (3 lines)

🔧 Subcomponents:

calculation bindBtn Helper Function const bindBtn = (id, key) => {

A locally-defined helper function that wires up both touch and mouse events for a single on-screen button, avoiding repeating the same 5 lines for every D-pad button.

const bindBtn = (id, key) => {
Defines a small reusable function inside setupMobileControls() that takes an HTML element id and a touchInput key name, then wires up all the events needed to make that button work like a joystick button.
el.addEventListener('touchstart', (e) => { e.preventDefault(); touchInput[key] = true; }, { passive: false });
Listens for a finger touching the button and sets the matching touchInput flag (e.g. touchInput.up) to true; preventDefault() stops the browser's default touch behaviors like scrolling.
bindBtn('btn-left', 'left'); bindBtn('btn-right', 'right');
Calls the helper once per D-pad button, binding the HTML element id to the corresponding key in the shared touchInput object that draw() reads from.

📦 Key Variables

gameState string

The single source of truth for which mode the game is in ('HOME', 'SHOP', 'CREDITS', 'PLAYING', 'ON_FOOT', 'GAMEOVER') - draw() and many functions branch on this value.

let gameState = 'HOME';
car object

The Car instance controlled by the player; also referenced constantly by cops, NPCs, and the camera as the thing to chase or follow.

let car;
camPos object

A smoothed p5.Vector storing the chase camera's current position, lerped toward the ideal position each frame for smooth follow-cam motion.

let camPos;
obstacles array

Stores plain objects ({x, z, color}) representing traffic cones scattered around the world for the player to dodge or crash into.

let obstacles = [];
skidmarks array

Stores {x, z} points left behind whenever the car drifts, capped at 30 entries and drawn as dark ground decals.

let skidmarks = [];
smokeParticles array

Stores particle objects (position, velocity, life, size) for the tire-smoke effect spawned during drifting.

let smokeParticles = [];
cash number

The player's earned currency, gained by drifting, spent in the Shop screen on upgrades and new cars.

let cash = 0;
playerStats object

Persists the player's purchased upgrades (maxSpeed, accel, armorTier, color) across game restarts, applied to the Car in initGameWorld().

let playerStats = { maxSpeed: 35, accel: 0.6, armorTier: 1, color: [220, 30, 30] };
playerPos object

A 3D p5.Vector storing the on-foot player's position when walking around outside the car.

let playerPos;
playerYaw number

The on-foot player's horizontal look angle, updated by mouse movement (pointer lock) or touch turning.

let playerYaw = 0;
playerPitch number

The on-foot player's vertical look angle, clamped so the camera can't flip upside down.

let playerPitch = 0;
npcs array

Holds Car instances representing wandering traffic that the player can crash into to trigger a chase.

let npcs = [];
cops array

Holds Car instances representing police units currently chasing the player, spawned and scaled by the wanted system.

let cops = [];
wantedStars number

The current police wanted level (0-5), driving how many/what type of cops spawn and how intense the music becomes.

let wantedStars = 0;
chaseFrames number

Counts frames since the current chase began, used by processWantedEscalation() to raise the star level over time.

let chaseFrames = 0;
sfx object

The single SoundManager instance that generates and controls all procedural audio (engine, tires, crashes, music).

let sfx;
touchInput object

A simple set of boolean flags (up/down/left/right) toggled by on-screen touch buttons, read alongside keyboard input in draw().

let touchInput = { up: false, down: false, left: false, right: false };
lastSpeedText string

Caches the last speed/status text written to the HUD so updateSpeedText() can skip redundant DOM writes.

let lastSpeedText = "";
lastCash number

Caches the last cash value written to the HUD/shop so updateCashUI() only touches the DOM when cash actually changes.

let lastCash = -1;
lastHealth number

Caches the last health percentage applied to the health bar so updateHealthUI() avoids unnecessary style updates.

let lastHealth = -1;

🔧 Potential Improvements (4)

Here are some ways this code could be enhanced:

BUG global variables / updateWantedUI()

The lastStars global variable is declared at the top of the file but never actually used anywhere - updateWantedUI() rebuilds and writes the star string every single call instead of checking for a change first.

💡 Cache the last wantedStars value in lastStars and skip the DOM write (and string rebuild) when it hasn't changed, matching the pattern already used by updateSpeedText/updateHealthUI/updateCashUI.

PERFORMANCE drawObstacles()

A new p5.Vector is created every single frame via createVector(car.pos.x, car.pos.y, car.pos.y) just to have an x/y to compare against, even though car.pos already has the needed x and y values.

💡 Skip the vector creation and just pass car.pos.x/car.pos.y directly into distSq() when gameState isn't 'ON_FOOT', avoiding an unnecessary object allocation 60 times a second.

FEATURE processWantedEscalation() / wantedStars system

The wanted level only ever escalates over time and never decreases - there's no way to 'lose the cops' and cool down back to 0 stars, so once triggered a chase can only end via crashing or getting busted.

💡 Add a check for how long it's been since the last cop was near the player (or since the last collision) and gradually reduce wantedStars back toward 0 after enough time has passed without contact, similar to classic open-world driving games.

BUG Car.checkObstacleCollisions()

Every car in the game (player, NPCs, and cops) calls checkObstacleCollisions() against the full obstacles array each frame, but only the player actually takes damage or plays a sound - NPCs and cops still pay the full distSq() cost for no gameplay benefit.

💡 Skip the obstacle collision loop entirely for non-player cars, or only run it for cars within a certain range of the player, to reduce the number of distance checks per frame.

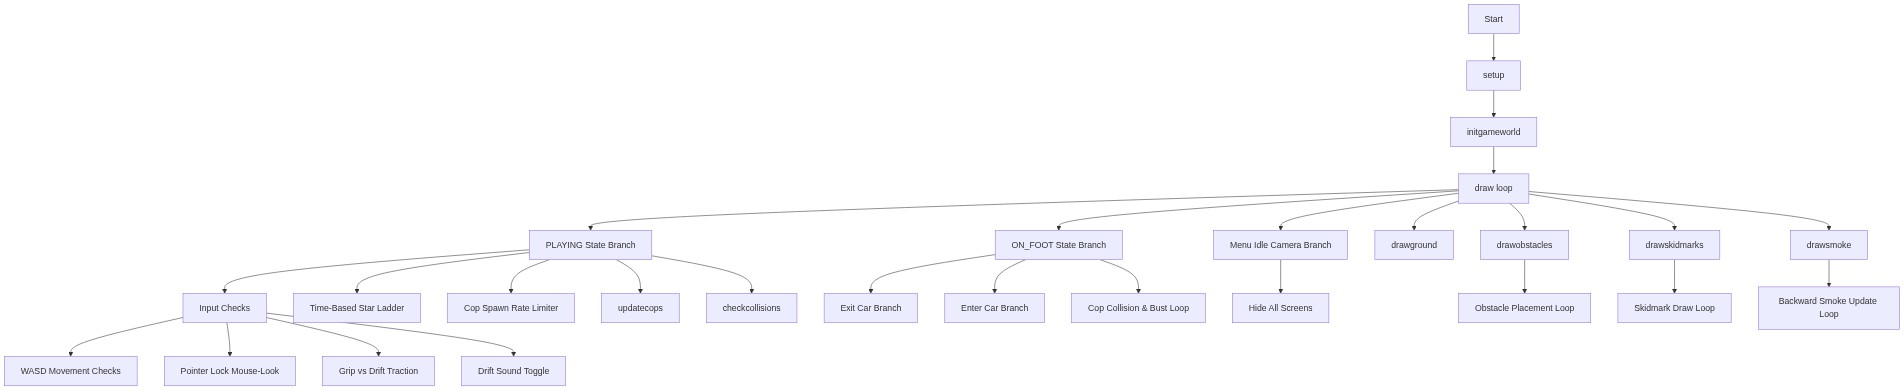
🔄 Code Flow

Code flow showing setup, initgameworld, draw, processwantedescalation, updatewantedui, spawncop, triggerwanted, soundmanager, updatespeedtext, updatehealthui, updatecashui, distsq, updateplayerfps, mousepressed, keypressed, togglevehicle, handlecrash, spawnnpc, updatenpcs, updatecops, checkcollisions, car, drawground, drawobstacles, drawskidmarks, drawsmoke, windowresized, showscreen, setupmenuinteractions, buyupgrade, buycar, updateshopui, triggergameover, setupmobilecontrols

💡 Click on function names in the diagram to jump to their code

graph TD start[Start] --> setup[setup] setup --> initgameworld[initgameworld] initgameworld --> draw[draw loop] draw --> playing-branch[PLAYING State Branch] draw --> onfoot-branch[ON_FOOT State Branch] draw --> menu-branch[Menu Idle Camera Branch] playing-branch --> input-checks[Input Checks] input-checks --> wasd-movement[WASD Movement Checks] input-checks --> pointerlock-check[Pointer Lock Mouse-Look] input-checks --> traction-check[Grip vs Drift Traction] input-checks --> drift-sound-check[Drift Sound Toggle] playing-branch --> escalation-ladder[Time-Based Star Ladder] playing-branch --> spawn-rate-check[Cop Spawn Rate Limiter] playing-branch --> updatecops[updatecops] playing-branch --> checkcollisions[checkcollisions] onfoot-branch --> exit-car-branch[Exit Car Branch] onfoot-branch --> enter-car-branch[Enter Car Branch] onfoot-branch --> cop-collision-loop[Cop Collision & Bust Loop] menu-branch --> hide-all-loop[Hide All Screens] draw --> drawground[drawground] draw --> drawobstacles[drawobstacles] draw --> drawskidmarks[drawskidmarks] draw --> drawsmoke[drawsmoke] drawobstacles --> obstacle-spawn-loop[Obstacle Placement Loop] drawskidmarks --> skid-loop[Skidmark Draw Loop] drawsmoke --> smoke-backward-loop[Backward Smoke Update Loop] click setup href "#fn-setup" click initgameworld href "#fn-initgameworld" click draw href "#fn-draw" click playing-branch href "#sub-playing-branch" click onfoot-branch href "#sub-onfoot-branch" click menu-branch href "#sub-menu-branch" click input-checks href "#sub-input-checks" click wasd-movement href "#sub-wasd-movement" click pointerlock-check href "#sub-pointerlock-check" click traction-check href "#sub-traction-check" click drift-sound-check href "#sub-drift-sound-check" click escalation-ladder href "#sub-escalation-ladder" click spawn-rate-check href "#sub-spawn-rate-check" click updatecops href "#fn-updatecops" click checkcollisions href "#fn-checkcollisions" click exit-car-branch href "#sub-exit-car-branch" click enter-car-branch href "#sub-enter-car-branch" click cop-collision-loop href "#sub-cop-collision-loop" click hide-all-loop href "#sub-hide-all-loop" click drawground href "#fn-drawground" click drawobstacles href "#fn-drawobstacles" click drawskidmarks href "#fn-drawskidmarks" click drawsmoke href "#fn-drawsmoke" click obstacle-spawn-loop href "#sub-obstacle-spawn-loop" click skid-loop href "#sub-skid-loop" click smoke-backward-loop href "#sub-smoke-backward-loop"

❓ Frequently Asked Questions

What visual experience does the DRIFT STARS sketch offer?

The DRIFT STARS sketch creates a vibrant 3D city environment where users can race through bright streets, surrounded by dynamic elements like NPCs, cops, and drifting cars.

How can players control their experience in the DRIFT STARS game?

Players can interact with the game using responsive keyboard or touch controls, allowing them to customize their car, drift around obstacles, and explore the city on foot or in their vehicle.

What creative coding concepts are showcased in the DRIFT STARS sketch?

This sketch demonstrates 3D rendering techniques, dynamic object manipulation, and real-time user input handling, showcasing the power of p5.js for creating interactive game experiences.

Preview

DRIFT STARS (FULL RELEASE) - p5.js creative coding sketch preview
Sketch Preview
Code flow diagram showing the structure of DRIFT STARS (FULL RELEASE) - Code flow showing setup, initgameworld, draw, processwantedescalation, updatewantedui, spawncop, triggerwanted, soundmanager, updatespeedtext, updatehealthui, updatecashui, distsq, updateplayerfps, mousepressed, keypressed, togglevehicle, handlecrash, spawnnpc, updatenpcs, updatecops, checkcollisions, car, drawground, drawobstacles, drawskidmarks, drawsmoke, windowresized, showscreen, setupmenuinteractions, buyupgrade, buycar, updateshopui, triggergameover, setupmobilecontrols
Code Flow Diagram