
Falling Snow with Accumulation - xelsed.ai

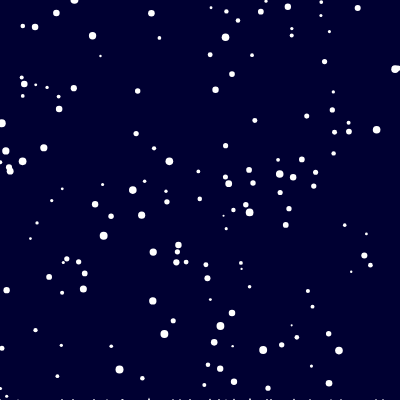
This sketch creates a peaceful winter night scene where 200 snowflakes drift and sway downward from a dark blue sky. Each flake lands wherever it touches the ground (or a pile of earlier snow) and adds to a growing snowdrift, so the accumulation visibly builds up over time across the bottom of the screen.

🧪 Try This!

Experiment with the code by making these changes:

  1. Turn it into a heavy blizzard — Increasing the number of snowflakes created at startup makes the sky feel much thicker and busier with snow.
  2. Shift the sky to twilight purple — The background() call sets the sky color every frame - swapping its RGB values changes the whole mood of the scene.
  3. Speed up the storm — Raising the fall speed range makes every flake drop faster, giving the impression of a windy, urgent snowstorm.
Prefer the full editor? Open it there →

📖 About This Sketch

This sketch simulates gentle snowfall over a dark winter sky, with each flake swaying left and right as it falls using a sine wave, then settling into a snowdrift that keeps growing at the bottom of the screen. It's a great sketch to study because it combines several core p5.js ideas at once: an ES6 class to represent each snowflake as a reusable object, an array that tracks pixel-by-pixel snow height, sin() for organic wavy motion, and beginShape()/vertex()/endShape() to draw a smooth, ever-changing snowdrift shape.

The code is organized around a Snowflake class with reset(), update(), and show() methods, plus the standard p5.js setup(), draw(), and windowResized() functions. By reading it you'll learn how to model many independent objects with a class, how a simple array can act as a 'height map' for procedural terrain, and how object methods and global functions work together every frame to animate hundreds of particles at once.

⚙️ How It Works

  1. When the sketch loads, setup() creates a canvas that fills the browser window, builds 200 Snowflake objects (each starting at a random position above the screen), and creates a snowHeight array with one entry per horizontal pixel, all starting at zero.
  2. Every frame, draw() paints a dark blue background, then loops through every snowflake, calling update() to move it and show() to draw it as a white circle.
  3. Inside update(), each snowflake falls downward by its own speed and sways side to side using sin(this.y * this.driftFactor), which makes the horizontal wiggle change as the flake falls further.
  4. Each snowflake checks the snowHeight array at its current x position to see if it has touched the snow pile below it; if so, it adds to that pile's height and resets itself back to the top of the screen to fall again.
  5. After all snowflakes are updated, draw() uses beginShape()/vertex()/endShape() to trace the top edge of the snowHeight array across the whole width of the canvas, filling in a solid white polygon that visually represents the growing snowdrift.
  6. If the browser window is resized, windowResized() resizes the canvas and wipes the snowHeight array back to zero so it matches the new width.

🎓 Concepts You'll Learn

Object-oriented programming with ES6 classesPer-pixel arrays as a procedural height mapSine wave motion for organic animationbeginShape / vertex / endShape custom polygon drawingSimple particle system with reset-and-reuse objectsResponsive canvas with windowResized()

📝 Code Breakdown

Snowflake() constructor

In JavaScript classes, the constructor runs once per 'new' object. Delegating the actual setup work to a separate reset() method is a handy pattern - it lets you reuse the same initialization logic both when the object is first created and later when you want to recycle it (as this sketch does when a snowflake lands).

  constructor() {
    this.reset();
  }
Line-by-line explanation (2 lines)
constructor() {
This special method runs automatically whenever you write 'new Snowflake()' - it's where a new object gets set up.
this.reset();
Instead of duplicating setup code, the constructor just calls reset(), which assigns all the starting properties (position, size, speed). This means a snowflake can be 'reborn' later by calling reset() again without creating a brand new object.
reset()

reset() is called both from the constructor (to set up a brand-new flake) and from update() (to recycle a flake that just landed). This 'reset instead of recreate' pattern is common in particle systems - it avoids constantly allocating new objects, which keeps the animation fast even with hundreds of flakes.

  reset() {
    this.x = random(width); // Start at a random horizontal position
    this.y = random(-height, 0); // Start randomly above the canvas
    this.size = random(2, 8); // Random size for varying snowflakes
    this.speedY = random(1, 3); // Vertical fall speed
    this.speedX = random(-0.5, 0.5); // Initial horizontal drift speed
    this.driftFactor = random(0.01, 0.05); // How much y position affects wavy drift
  }
Line-by-line explanation (6 lines)
this.x = random(width);
Picks a random horizontal starting point anywhere across the canvas width.
this.y = random(-height, 0);
Starts the flake somewhere above the visible canvas (a negative y value), so flakes appear to drift in from off-screen at staggered times instead of all starting at y=0 together.
this.size = random(2, 8);
Gives each flake a random diameter between 2 and 8 pixels, so some look like tiny specks and others like big fluffy flakes.
this.speedY = random(1, 3);
Sets how many pixels the flake falls per frame - a random value means flakes fall at slightly different speeds, adding visual variety.
this.speedX = random(-0.5, 0.5);
Gives the flake a small constant leftward or rightward push, on top of the wavy sine-based sway added later in update().
this.driftFactor = random(0.01, 0.05);
Controls how quickly the sine wave oscillates as the flake falls - a bigger factor makes the flake wiggle back and forth more rapidly relative to its height.

update(snowHeight)

update() is the heart of the simulation - it runs once per snowflake per frame and is responsible for both motion (falling and swaying) and state changes (landing and resetting). Notice how it reads from and writes to the shared snowHeight array that's passed in as a parameter, which is how hundreds of independent snowflake objects can all affect the same shared snow pile.

🔬 These two lines make flakes reappear on the opposite side instead of disappearing. What happens if you delete both lines - will flakes eventually vanish off the edges, and how would that change the density of snow you see?

    // Wrap around horizontally if it drifts off screen
    if (this.x < 0) this.x = width;
    if (this.x > width) this.x = 0;

🔬 Snow builds up faster when this division is smaller. What happens if you change 'this.size / 5' to 'this.size / 1' - how quickly does the snowdrift grow now?

        // Landed! Add to snow accumulation
        snowHeight[xIndex] += this.size / 5; // Accumulation amount based on snowflake size
        this.reset(); // Reset snowflake to top for a new fall
  update(snowHeight) {
    this.y += this.speedY; // Fall downwards

    // Add horizontal drift with a wavy motion
    this.x += this.speedX + sin(this.y * this.driftFactor) * 0.5;

    // Wrap around horizontally if it drifts off screen
    if (this.x < 0) this.x = width;
    if (this.x > width) this.x = 0;

    // Check for landing on accumulated snow
    const xIndex = floor(this.x); // Get the integer x-coordinate for snowHeight array
    if (xIndex >= 0 && xIndex < width) {
      // If the bottom of the snowflake touches the snow level at its x-position
      if (this.y + this.size / 2 >= height - snowHeight[xIndex]) {
        // Landed! Add to snow accumulation
        snowHeight[xIndex] += this.size / 5; // Accumulation amount based on snowflake size
        this.reset(); // Reset snowflake to top for a new fall
      }
    } else {
      // If somehow out of bounds (e.g., due to rapid drift), reset
      this.reset();
    }

    // If it falls completely off the bottom without landing (e.g., if snowHeight is very low), reset
    if (this.y > height + this.size) {
      this.reset();
    }
  }
Line-by-line explanation (10 lines)

🔧 Subcomponents:

conditional Wrap Left Edge if (this.x < 0) this.x = width;

If the flake drifts off the left edge, teleport it to the right edge so it never disappears.

conditional Wrap Right Edge if (this.x > width) this.x = 0;

If the flake drifts off the right edge, teleport it to the left edge, keeping it visible.

conditional Landing Detection if (this.y + this.size / 2 >= height - snowHeight[xIndex]) {

Checks whether the bottom edge of the flake has reached the current snow height at its x-position, meaning it should land.

conditional Out-of-Bounds Safety Reset } else {

Handles the rare case where the x index falls outside the array bounds, resetting the flake instead of crashing.

conditional Off-Bottom Safety Reset if (this.y > height + this.size) {

A backup check that resets any flake that somehow falls past the bottom of the screen without triggering the landing logic.

this.y += this.speedY;
Moves the flake down by its fall speed - this happens every single frame, which is what creates continuous downward motion.
this.x += this.speedX + sin(this.y * this.driftFactor) * 0.5;
Moves the flake horizontally by a constant drift (speedX) plus a wavy amount from sin(). Since sin() is fed the flake's current y position, the sideways push oscillates smoothly as the flake falls, producing the swaying motion.
if (this.x < 0) this.x = width;
If the flake has drifted past the left edge, snap it to the right edge instead of letting it vanish forever.
if (this.x > width) this.x = 0;
Same idea for the right edge - this wrap-around keeps the total number of visible flakes constant.
const xIndex = floor(this.x);
Converts the flake's precise (decimal) x position into a whole number so it can be used as an array index into snowHeight.
if (xIndex >= 0 && xIndex < width) {
A safety check to make sure the index is actually a valid position inside the snowHeight array before reading from it.
if (this.y + this.size / 2 >= height - snowHeight[xIndex]) {
Compares the bottom of the flake (its y position plus half its size) to the current snow surface height at that x-position. If the flake has reached the snow, it has 'landed'.
snowHeight[xIndex] += this.size / 5;
Raises the snow pile at that exact x-position. Bigger flakes add more height, since this.size is divided by a constant to control how much each landing contributes.
this.reset();
Sends the flake back to a random position above the canvas so it can fall again - this is what keeps the snowfall going forever with a fixed number of flakes.
if (this.y > height + this.size) {
A fallback: if a flake somehow slips past the landing check (for example if snowHeight is still zero everywhere), this makes sure it still resets once it's fully off-screen instead of falling forever.

show()

show() is deliberately kept separate from update() - this is a common p5.js pattern where one method handles logic/state and another handles only drawing. Keeping them separate makes it easy to change how something looks without touching how it behaves, and vice versa.

  show() {
    fill(255); // White color
    noStroke(); // No outline
    circle(this.x, this.y, this.size); // Draw as a circle
  }
Line-by-line explanation (3 lines)
fill(255);
Sets the fill color to pure white for whatever shape is drawn next.
noStroke();
Removes the outline around the shape so the flake looks like a soft solid dot instead of having a visible border.
circle(this.x, this.y, this.size);
Draws a circle centered at the flake's current position, using its randomly assigned size as the diameter.

setup()

setup() runs exactly once, right when the sketch starts. It's the right place to build your initial data structures - here that means both the array of Snowflake objects and the parallel snowHeight array that will track the ground's rising snow level.

function setup() {
  createCanvas(windowWidth, windowHeight); // Create a full-window canvas

  // Initialize snowflakes
  for (let i = 0; i < numSnowflakes; i++) {
    snowflakes.push(new Snowflake());
  }

  // Initialize snow accumulation array to all zeros
  for (let i = 0; i < width; i++) {
    snowHeight[i] = 0;
  }
}
Line-by-line explanation (5 lines)

🔧 Subcomponents:

for-loop Create Snowflakes for (let i = 0; i < numSnowflakes; i++) {

Creates numSnowflakes new Snowflake objects and adds each one to the snowflakes array.

for-loop Initialize Snow Height Array for (let i = 0; i < width; i++) {

Fills the snowHeight array with a zero for every horizontal pixel, meaning no snow has accumulated anywhere yet.

createCanvas(windowWidth, windowHeight);
Creates a canvas that exactly matches the browser window's current size, so the snow scene fills the whole screen.
for (let i = 0; i < numSnowflakes; i++) {
Loops numSnowflakes times (200 by default) to build the initial batch of snowflakes.
snowflakes.push(new Snowflake());
Creates a brand-new Snowflake object (which runs its constructor and resets its position/size/speed) and adds it to the end of the snowflakes array.
for (let i = 0; i < width; i++) {
Loops once for every horizontal pixel across the canvas width.
snowHeight[i] = 0;
Sets the accumulated snow height at pixel column i to zero, since no snow has fallen yet when the sketch starts.

draw()

draw() is called automatically about 60 times per second. Notice the two very different drawing techniques used here in one function: individual circle() calls for each snowflake, and a single beginShape()/endShape() polygon for the entire snowdrift - the second approach is much more efficient than drawing hundreds of separate rectangles for the snow.

🔬 This loop traces the snow's exact height at every pixel. What happens if you multiply snowHeight[i] by 3 inside the vertex call - does the visible snowdrift look taller than the snowflakes actually piled up?

  beginShape();
  vertex(0, height); // Start at the bottom-left corner
  for (let i = 0; i < width; i++) {
    // Draw the top contour of the snow based on snowHeight array
    vertex(i, height - snowHeight[i]);
  }
  vertex(width, height); // End at the bottom-right corner
  endShape(CLOSE); // Close the shape to form a solid polygon
function draw() {
  background(0, 0, 50); // Dark blue night sky background

  // Update and show snowflakes
  for (let snowflake of snowflakes) {
    snowflake.update(snowHeight); // Pass snowHeight array for landing check
    snowflake.show();
  }

  // Draw accumulated snow at the bottom
  fill(255); // White color for snow
  noStroke(); // No outline

  // Use beginShape/endShape for efficient drawing of the snow accumulation
  beginShape();
  vertex(0, height); // Start at the bottom-left corner
  for (let i = 0; i < width; i++) {
    // Draw the top contour of the snow based on snowHeight array
    vertex(i, height - snowHeight[i]);
  }
  vertex(width, height); // End at the bottom-right corner
  endShape(CLOSE); // Close the shape to form a solid polygon
}
Line-by-line explanation (10 lines)

🔧 Subcomponents:

for-loop Update and Draw Every Snowflake for (let snowflake of snowflakes) {

Moves and redraws every single snowflake once per frame, which is what animates the whole scene.

for-loop Trace Snowdrift Surface for (let i = 0; i < width; i++) {

Adds one vertex per horizontal pixel to trace the current top edge of the accumulated snow, so the polygon exactly matches the snowHeight array.

background(0, 0, 50);
Repaints the entire canvas with a dark navy blue every frame, which both sets the night-sky mood and erases the previous frame's snowflake positions so they appear to move smoothly instead of leaving trails.
for (let snowflake of snowflakes) {
A for-of loop that visits every Snowflake object in the array, one at a time.
snowflake.update(snowHeight);
Calls that flake's update() method, passing in the shared snowHeight array so it can check whether it has landed on the snow pile.
snowflake.show();
Draws that flake at its (possibly just-updated) position as a white circle.
fill(255);
Sets the fill color to white for the snowdrift shape that's about to be drawn.
beginShape();
Starts defining a custom polygon - every vertex() call after this adds one more corner point to the shape.
vertex(0, height);
Adds the very first point of the polygon at the bottom-left corner of the canvas, so the shape has a solid base.
vertex(i, height - snowHeight[i]);
For each horizontal pixel, adds a point at the current snow surface height - subtracting snowHeight[i] from height moves the point upward as snow builds up at that column.
vertex(width, height);
Adds a final point at the bottom-right corner, closing off the bottom of the shape.
endShape(CLOSE);
Finishes the shape and connects the last point back to the first, filling in the enclosed area (all the collected vertices) as one solid white polygon representing the snow.

windowResized()

windowResized() is a special p5.js function that's automatically called whenever the browser window changes size. It's important to keep any size-dependent data structures - like this per-pixel snowHeight array - in sync with the canvas dimensions, otherwise you'd get array-index errors or a snowdrift that doesn't span the full width.

function windowResized() {
  resizeCanvas(windowWidth, windowHeight);
  // Re-initialize snow accumulation array to match new canvas width
  snowHeight = [];
  for (let i = 0; i < width; i++) {
    snowHeight[i] = 0;
  }
}
Line-by-line explanation (4 lines)

🔧 Subcomponents:

for-loop Rebuild Snow Height Array for (let i = 0; i < width; i++) {

Refills the snowHeight array with zeros so it has exactly one entry for every pixel of the new, resized canvas width.

resizeCanvas(windowWidth, windowHeight);
This is a built-in p5.js function that changes the canvas size to match the browser window whenever it's resized.
snowHeight = [];
Throws away the old snowHeight array completely - this is necessary because the old array's length was tied to the old canvas width.
for (let i = 0; i < width; i++) {
Loops across the new canvas width to rebuild the array from scratch.
snowHeight[i] = 0;
Sets each new array slot back to zero, meaning the visible snow accumulation resets to nothing after a resize.

📦 Key Variables

snowflakes array

Holds all Snowflake objects in the scene; setup() fills it once, and draw() loops over it every frame to update and render each flake.

let snowflakes = [];
numSnowflakes number

The total number of Snowflake objects created in setup() - controls how dense the snowfall looks.

let numSnowflakes = 200;
snowHeight array

A per-pixel height map with one entry per horizontal canvas column, tracking how much snow has accumulated at each x-position; both the snowflakes and draw()'s polygon read/write this shared array.

let snowHeight = [];

🔧 Potential Improvements (4)

Here are some ways this code could be enhanced:

BUG Snowflake.update() / snowHeight accumulation

snowHeight[xIndex] has no upper limit, so a pile can keep growing indefinitely and eventually overtake the entire visible canvas (snow height exceeding the window height), clipping into or above the sky.

💡 Clamp the value with something like snowHeight[xIndex] = min(snowHeight[xIndex] + this.size / 5, height - someBuffer); so the pile stops growing once it nears the top of the screen.

BUG windowResized()

Resizing the browser window completely wipes out all accumulated snow by rebuilding snowHeight from scratch as zeros, so a carefully built-up snowdrift instantly vanishes.

💡 Instead of resetting to zero, copy over as much of the old snowHeight data as fits in the new width (e.g. using array slicing) so existing snow is preserved when possible.

PERFORMANCE draw() vertex loop

The snowdrift-drawing loop runs once per horizontal pixel of the canvas every single frame, so on a very wide or high-resolution window this can mean thousands of vertex() calls per frame, which is more expensive than necessary.

💡 Sample every 2-4 pixels instead of every single one (e.g. for (let i = 0; i < width; i += 3)) and still get a visually smooth snow contour at a fraction of the cost.

STYLE Snowflake.update()

The accumulation formula 'this.size / 5' uses a magic number with no explanation of why 5 was chosen, making it hard to tune later.

💡 Extract it into a named constant like const ACCUMULATION_RATE = 5; declared near the top of the file, and use this.size / ACCUMULATION_RATE instead.

🔄 Code Flow

Code flow showing snowflake, reset, update, show, setup, draw, windowresized

💡 Click on function names in the diagram to jump to their code

graph TD start[Start] --> setup[setup] setup --> create-flakes-loop[create-flakes-loop] create-flakes-loop --> init-snowheight-loop[init-snowheight-loop] init-snowheight-loop --> draw[draw loop] draw --> update-show-loop[update-show-loop] update-show-loop --> landing-check[landing-check] landing-check --> wrap-x-left[wrap-x-left] landing-check --> wrap-x-right[wrap-x-right] landing-check --> out-of-bounds-reset[out-of-bounds-reset] landing-check --> offscreen-reset[offscreen-reset] update-show-loop --> show[show] show --> vertex-contour-loop[vertex-contour-loop] draw --> windowresized[windowresized] windowresized --> reinit-snowheight-loop[reinit-snowheight-loop] click setup href "#fn-setup" click create-flakes-loop href "#sub-create-flakes-loop" click init-snowheight-loop href "#sub-init-snowheight-loop" click draw href "#fn-draw" click update-show-loop href "#sub-update-show-loop" click landing-check href "#sub-landing-check" click wrap-x-left href "#sub-wrap-x-left" click wrap-x-right href "#sub-wrap-x-right" click out-of-bounds-reset href "#sub-out-of-bounds-reset" click offscreen-reset href "#sub-offscreen-reset" click show href "#fn-show" click vertex-contour-loop href "#sub-vertex-contour-loop" click windowresized href "#fn-windowresized" click reinit-snowheight-loop href "#sub-reinit-snowheight-loop"

❓ Frequently Asked Questions

What visual effects can I expect from the Falling Snow with Accumulation sketch?

The sketch creates a serene winter scene where snowflakes fall gently from a dark blue sky, swaying side to side, and accumulate at the bottom to form a growing layer of snow.

Is there any way for users to interact with the Falling Snow with Accumulation sketch?

The sketch is primarily a visual experience with no direct user interaction, allowing viewers to enjoy the peaceful animation of falling snowflakes.

What creative coding concepts are demonstrated in the Falling Snow with Accumulation sketch?

This sketch showcases concepts like object-oriented programming through the Snowflake class, as well as physics-based motion with randomization for realistic snowfall effects.

Preview

Falling Snow with Accumulation - xelsed.ai - p5.js creative coding sketch preview
Sketch Preview
Code flow diagram showing the structure of Falling Snow with Accumulation - xelsed.ai - Code flow showing snowflake, reset, update, show, setup, draw, windowresized
Code Flow Diagram