
Fatal ape redux

This is a side-scrolling platformer game where you navigate a red square character through connected rooms, climbing through vents to escape procedurally-drawn yellow monsters. Simple geometric shapes and touch controls create a minimalist horror experience with jumpscare mechanics when caught.

🧪 Try This!

Experiment with the code by making these changes:

  1. Change player color
  2. Make monsters move faster — Increase the MONSTER_SPEED constant to make all monsters move and chase more quickly, making the game harder.
  3. Reduce gravity for floaty movement — Lower the GRAVITY constant so the player falls more slowly and jumps feel floatier and longer.
  4. Paint monsters purple
  5. Increase monster chase detection range — Make monsters see the player from farther away by raising MONSTER_CHASE_RANGE—now they will begin chasing from a greater distance.
  6. Make jump button large — Increase the jump button's width and height so it is easier to tap on mobile—instantly see the button grow on screen.
Prefer the full editor? Open it there →

📖 About This Sketch

This sketch creates a complete playable platformer game built entirely with p5.js procedural graphics—no image files. You control a red square, jump between colored rooms, climb through vents, and evade yellow AI monsters that chase you across the screen. The game teaches core game development concepts: physics simulation with gravity and jump force, collision detection for platforms and enemies, multi-room level design with camera following, and event-driven input handling for touch and keyboard.

The code is organized into distinct systems: a player update loop that handles gravity, jumping, climbing, and room transitions; a Monster class that implements AI behavior (roaming and chasing); and UI functions for on-screen buttons and a joystick. By studying it, you will learn how to structure a complete game, manage game state across multiple rooms, implement intelligent enemy behavior, and handle both touch and keyboard input on the same device.

⚙️ How It Works

  1. When the sketch loads, setup() creates a canvas filling the entire screen and defines three rooms (safe zone and two labs) as objects in a rooms dictionary. It also initializes the player as a red 30×50 pixel square at the safe zone spawn point, creates up to 5 Monster instances in the lab rooms, and positions the joystick and button UI elements based on screen size.
  2. On every frame, draw() calls updatePlayer() to apply gravity, handle movement input from the joystick, check collisions with room walls and vents, and detect room transitions. It also updates all monsters via updateMonster(), which makes them roam normally or chase the player if they are in the same room and within chase range.
  3. The camera is updated to center on the player while staying within the current room bounds, then the game world is drawn with camera translation applied: rooms as colored rectangles, vents and staircases with procedural detail, the player and monsters as geometric shapes, and a green boundary showing the safe zone.
  4. UI elements (joystick, buttons, and a monster tracker compass) are drawn on top without camera translation so they stay fixed on screen. Touch input on the joystick left side moves the player, buttons trigger jump or climb actions, and climbing is only active when overlapping a vent.
  5. When the player collides with a monster in a non-safe room, triggerJumpscare() activates a flashing red screen with 'YOU DIED!' text for 2 seconds, then resetGame() respawns the player in the safe zone and recreates all monsters.
  6. Monsters follow simple AI: they roam back and forth in their assigned room, but if the player enters the same room and comes within 200 pixels, they switch to chasing mode and move toward the player. If the player leaves or distance exceeds range, they resume roaming after a cooldown.

🎓 Concepts You'll Learn

Physics simulation and gravityCollision detection (AABB rectangles)Game state managementRoom-based level designAI pathfinding and behaviorTouch and keyboard input handlingCamera followingProcedural graphicsObject-oriented programming with classesMulti-touch event tracking

📝 Code Breakdown

setup()

setup() runs once when the sketch first loads. It initializes the canvas, defines all game objects and their initial state, and positions UI elements. This is where you define your game's structure, rooms, and starting conditions.

function setup() {
  createCanvas(windowWidth, windowHeight);
  noStroke();
  textAlign(CENTER, CENTER);

  rooms = {
    safeZone: { x: 0, y: 0, w: 800, h: 600, color: '#333333' },
    floor1Lab: { x: 800, y: 0, w: 600, h: 600, color: '#554444' },
    floor2Lab: { x: -600, y: 0, w: 600, h: 600, color: '#445544' }
  };

  vents = [
    { x: rooms.safeZone.x + 200, y: rooms.safeZone.y + 100, w: 80, h: 40, targetRoom: "floor2Lab", targetPlayerX: rooms.floor2Lab.x + 300, targetPlayerY: rooms.floor2Lab.y + 100 },
    { x: rooms.safeZone.x + 200, y: rooms.safeZone.y + rooms.safeZone.h - 140, w: 80, h: 40, targetRoom: "floor1Lab", targetPlayerX: rooms.floor1Lab.x + 300, targetPlayerY: rooms.floor1Lab.y + rooms.floor1Lab.h - 140 },
    { x: rooms.floor1Lab.x + 500, y: rooms.floor1Lab.y + rooms.floor1Lab.h - 140, w: 80, h: 40, targetRoom: "safeZone", targetPlayerX: rooms.safeZone.x + 600, targetPlayerY: rooms.safeZone.y + rooms.safeZone.h - 140 },
    { x: rooms.floor2Lab.x + 10, y: rooms.floor2Lab.y + 100, w: 80, h: 40, targetRoom: "safeZone", targetPlayerX: rooms.safeZone.x + 100, targetPlayerY: rooms.safeZone.y + 100 },
  ];

  staircases = [
    { x: rooms.floor1Lab.x + 10, y: rooms.floor1Lab.y + rooms.floor1Lab.h - 200, w: 80, h: 100, targetRoom: "safeZone", targetPlayerX: rooms.safeZone.x + rooms.safeZone.w - 100, targetPlayerY: rooms.safeZone.y + rooms.safeZone.h - 100 },
    { x: rooms.floor2Lab.x + rooms.floor2Lab.w - 100, y: rooms.floor2Lab.y + rooms.floor2Lab.h - 200, w: 80, h: 100, targetRoom: "safeZone", targetPlayerX: rooms.safeZone.x + 100, targetPlayerY: rooms.safeZone.y + rooms.safeZone.h - 100 }
  ];

  player = {
    x: rooms.safeZone.x + 100,
    y: rooms.safeZone.y + rooms.safeZone.h - 50,
    w: 30,
    h: 50,
    vx: 0,
    vy: 0,
    isJumping: false,
    isClimbing: false,
    onGround: false
  };

  joystick = {
    baseX: width * 0.2,
    baseY: height * 0.8,
    radius: 60,
    knobX: width * 0.2,
    knobY: height * 0.8,
    active: false,
    touchId: -1,
    maxX: width * 0.4
  };

  jumpButton.x = width * 0.8 - jumpButton.w / 2;
  jumpButton.y = height * 0.8 - jumpButton.h / 2;

  climbUpButton.x = jumpButton.x;
  climbUpButton.y = jumpButton.y - jumpButton.h - 10;

  climbDownButton.x = jumpButton.x;
  climbDownButton.y = jumpButton.y + jumpButton.h + 10;

  for (let i = 0; i < MAX_MONSTERS; i++) {
    spawnMonster();
  }
}
Line-by-line explanation (9 lines)

🔧 Subcomponents:

calculation Canvas setup createCanvas(windowWidth, windowHeight);

Creates a full-screen canvas that fills the entire browser window

calculation Define game rooms rooms = { safeZone: { x: 0, y: 0, w: 800, h: 600, color: '#333333' }, floor1Lab: { x: 800, y: 0, w: 600, h: 600, color: '#554444' }, floor2Lab: { x: -600, y: 0, w: 600, h: 600, color: '#445544' } };

Creates three rooms as objects with position, size, and color—the safe zone is in the center, with labs positioned to the left and right

calculation Initialize player player = { x: rooms.safeZone.x + 100, y: rooms.safeZone.y + rooms.safeZone.h - 50, w: 30, h: 50, vx: 0, vy: 0, isJumping: false, isClimbing: false, onGround: false };

Creates the player object with position, size, velocity, and state flags for jumping and climbing

for-loop Spawn initial monsters for (let i = 0; i < MAX_MONSTERS; i++) { spawnMonster(); }

Creates MAX_MONSTERS enemy instances in lab rooms at the start of the game

createCanvas(windowWidth, windowHeight);
Creates a canvas that fills the entire browser window, allowing the game to adapt to any screen size
noStroke();
Disables outlines on all shapes drawn after this—only filled colors are used
textAlign(CENTER, CENTER);
Sets text alignment so that text() positions anchor at the center of text strings, not the top-left
rooms = { safeZone: { x: 0, y: 0, w: 800, h: 600, color: '#333333' }, floor1Lab: { x: 800, y: 0, w: 600, h: 600, color: '#554444' }, floor2Lab: { x: -600, y: 0, w: 600, h: 600, color: '#445544' } };
Defines three rooms as a dictionary—each room has x, y position in world space, width, height, and a background color hex code
vents = [ { x: rooms.safeZone.x + 200, y: rooms.safeZone.y + 100, w: 80, h: 40, targetRoom: "floor2Lab", targetPlayerX: rooms.floor2Lab.x + 300, targetPlayerY: rooms.floor2Lab.y + 100 }, ... ];
Creates an array of vent objects that act as doorways—each has a position, size, and a target room and player spawn position
player = { x: rooms.safeZone.x + 100, y: rooms.safeZone.y + rooms.safeZone.h - 50, w: 30, h: 50, vx: 0, vy: 0, isJumping: false, isClimbing: false, onGround: false };
Initializes the player as an object with position (x, y), size (w, h), velocity (vx, vy), and boolean flags tracking jump and climb state
joystick = { baseX: width * 0.2, baseY: height * 0.8, radius: 60, knobX: width * 0.2, knobY: height * 0.8, active: false, touchId: -1, maxX: width * 0.4 };
Creates a joystick object positioned at 20% from the left and 80% from the top, with a base circle and a movable knob for directional input
jumpButton.x = width * 0.8 - jumpButton.w / 2;
Positions the jump button horizontally at 80% of the screen width (far right), centered
for (let i = 0; i < MAX_MONSTERS; i++) { spawnMonster(); }
Loops MAX_MONSTERS times, calling spawnMonster() each time to create enemy instances in the lab rooms
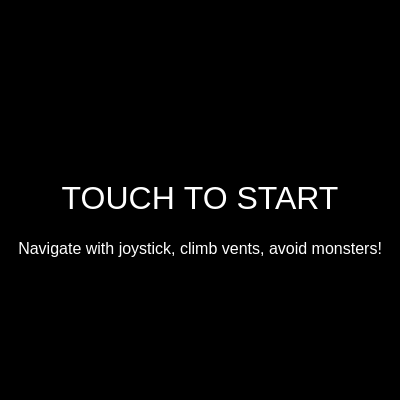
draw()

draw() runs continuously at 60 frames per second. It is the heartbeat of the game, clearing the screen, updating game state, and redrawing everything. The pattern of update → render is fundamental to all real-time games.

function draw() {
  background(0);

  if (!gameStart) {
    drawStartScreen();
    return;
  }

  if (jumpscare.isActive) {
    drawJumpscare();
    return;
  }

  updatePlayer();
  updateMonsters();
  updateCamera();

  push();
  translate(-cameraX, 0);

  drawRooms();
  drawVents();
  drawStaircases();
  drawPlayer();
  drawMonsters();
  drawSafeZoneBoundary();

  pop();

  drawJoystick();
  drawMonsterTracker();
  drawButtons();
}
Line-by-line explanation (18 lines)

🔧 Subcomponents:

conditional Start screen display if (!gameStart) { drawStartScreen(); return; }

Before the player taps to start, shows an intro screen and prevents game logic from running

conditional Jumpscare display if (jumpscare.isActive) { drawJumpscare(); return; }

When hit by a monster, displays a flashing red death screen instead of normal gameplay

calculation Update game state updatePlayer(); updateMonsters(); updateCamera();

Moves the player, updates all monsters, and recalculates camera position every frame

calculation Apply camera offset push(); translate(-cameraX, 0);

Saves the current drawing state and shifts all world objects by cameraX pixels, making the camera follow the player

calculation Draw game world drawRooms(); drawVents(); drawStaircases(); drawPlayer(); drawMonsters(); drawSafeZoneBoundary();

Draws all game objects in the world with camera translation applied—rooms, doors, platforms, player, and enemies

calculation Draw fixed UI drawJoystick(); drawMonsterTracker(); drawButtons();

Draws joystick, buttons, and tracker after pop() so they are NOT translated by the camera and stay fixed on screen

background(0);
Clears the canvas with black, erasing the previous frame so animation appears smooth
if (!gameStart) { drawStartScreen(); return; }
If the player has not tapped yet, draw the start screen and skip all game logic—return prevents further code in this frame
if (jumpscare.isActive) { drawJumpscare(); return; }
If a monster caught the player, draw the death jumpscare screen with flashing red and skip game updates
updatePlayer();
Applies gravity, moves the player based on joystick input, checks collisions, and processes room transitions
updateMonsters();
Updates all monsters: applies gravity, moves them based on AI behavior, checks if they should chase the player, and handles safe zone boundaries
updateCamera();
Calculates the camera x offset so it centers on the player while staying within the current room boundaries
push();
Saves the current drawing state (transformations, colors, etc.) so we can restore it later with pop()
translate(-cameraX, 0);
Shifts all subsequent drawings left by cameraX pixels—this makes the world move while the camera stays centered
drawRooms();
Draws the three colored room backgrounds as rectangles in world space
drawVents();
Draws all vent objects as grey rectangles with vertical lines, positioned in world space
drawStaircases();
Draws all staircase objects as light grey rectangles with step lines, positioned in world space
drawPlayer();
Draws the player as a red rectangle at the player's current position in world space
drawMonsters();
Draws all monsters that are in the current room as yellow rectangles with an eye indicator
drawSafeZoneBoundary();
Draws a green outline around the safe zone to show where monsters cannot enter
pop();
Restores the drawing state from before push(), removing the camera translation so subsequent draws are on-screen fixed
drawJoystick();
Draws the joystick UI (base and knob circles) at a fixed screen position, not affected by camera
drawMonsterTracker();
Draws a compass arrow pointing toward the nearest monster if in a lab room
drawButtons();
Draws the jump, climb up, and climb down buttons in fixed screen positions

updatePlayer()

updatePlayer() is called every frame and handles all physics and collision logic for the player character. It applies gravity (unless climbing), updates position based on velocity, checks collisions with room boundaries and vents, detects room transitions, and manages the onGround flag. This is where the 'feel' of movement is defined.

function updatePlayer() {
  if (!player.isClimbing) {
    player.vy += GRAVITY;
  }

  player.x += player.vx;
  player.y += player.vy;

  let onFloor = false;
  let currentRoomData = rooms[currentRoom];
  if (player.y + player.h >= currentRoomData.y + currentRoomData.h) {
    player.y = currentRoomData.y + currentRoomData.h - player.h;
    player.vy = 0;
    player.isJumping = false;
    player.onGround = true;
    onFloor = true;
  } else {
    player.onGround = false;
  }

  if (player.x < currentRoomData.x) {
    player.x = currentRoomData.x;
    player.vx = 0;
  }
  if (player.x + player.w > currentRoomData.x + currentRoomData.w) {
    player.x = currentRoomData.x + currentRoomData.w - player.w;
    player.vx = 0;
  }

  let foundClimbableVent = false;
  for (let vent of vents) {
    if (rectCollision(player.x, player.y, player.w, player.h, vent.x, vent.y, vent.w, vent.h)) {
      player.isClimbing = true;
      player.vy = 0;
      player.x = vent.x + vent.w / 2 - player.w / 2;
      foundClimbableVent = true;
      break;
    }
  }

  if (!foundClimbableVent && player.isClimbing) {
    player.isClimbing = false;
    player.vy = 0;
  }

  let hasTransitioned = false;

  for (let vent of vents) {
    if (rectCollision(player.x, player.y, player.w, player.h, vent.x, vent.y, vent.w, vent.h)) {
      if (currentRoom !== vent.targetRoom) {
        currentRoom = vent.targetRoom;
        player.x = vent.targetPlayerX;
        player.y = vent.targetPlayerY;
        player.vx = 0;
        player.vy = 0;
        player.isJumping = false;
        player.isClimbing = false;
        hasTransitioned = true;
        break;
      }
    }
  }

  if (hasTransitioned) {
    return;
  }

  for (let staircase of staircases) {
    if (rectCollision(player.x, player.y, player.w, player.h, staircase.x, staircase.y, staircase.w, staircase.h)) {
      if (currentRoom !== staircase.targetRoom) {
        currentRoom = staircase.targetRoom;
        player.x = staircase.targetPlayerX;
        player.y = staircase.targetPlayerY;
        player.vx = 0;
        player.vy = 0;
        player.isJumping = false;
        player.isClimbing = false;
        hasTransitioned = true;
        break;
      }
    }
  }

  if (hasTransitioned) {
    return;
  }

  currentRoomData = rooms[currentRoom];
  player.x = constrain(player.x, currentRoomData.x, currentRoomData.x + currentRoomData.w - player.w);
  player.y = constrain(player.y, currentRoomData.y, currentRoomData.y + currentRoomData.h - player.h);

  if (!joystick.active && player.onGround) {
    player.vx = 0;
  }
}
Line-by-line explanation (13 lines)

🔧 Subcomponents:

conditional Apply gravity if (!player.isClimbing) { player.vy += GRAVITY; }

Accelerates the player downward every frame unless climbing, creating the feel of falling

conditional Floor collision detection if (player.y + player.h >= currentRoomData.y + currentRoomData.h) { player.y = currentRoomData.y + currentRoomData.h - player.h; player.vy = 0; player.isJumping = false; player.onGround = true; }

When the player's bottom reaches the floor, stop downward movement and mark them as on the ground so they can jump again

conditional Wall boundary clamping if (player.x < currentRoomData.x) { player.x = currentRoomData.x; player.vx = 0; }

Prevents the player from moving left past the room's left edge

for-loop Detect vent collision for climbing for (let vent of vents) { if (rectCollision(player.x, player.y, player.w, player.h, vent.x, vent.y, vent.w, vent.h)) { ... } }

Checks each vent to see if the player is overlapping it, and if so, enables climbing mode and centers the player on the vent

for-loop Check vent room transitions for (let vent of vents) { if (rectCollision(...) && currentRoom !== vent.targetRoom) { ... } }

When the player overlaps a vent leading to a different room, teleports them to the target room and resets their state

for-loop Check staircase room transitions for (let staircase of staircases) { if (rectCollision(...) && currentRoom !== staircase.targetRoom) { ... } }

Similar to vents but for staircase-based transitions between rooms

if (!player.isClimbing) { player.vy += GRAVITY; }
Every frame, add GRAVITY (0.5) to vertical velocity to simulate falling. This is skipped while climbing so the player can stay in place
player.x += player.vx;
Update horizontal position by the joystick's horizontal velocity—this moves the player left or right
player.y += player.vy;
Update vertical position by vertical velocity—this moves the player down (falling) or up (climbing)
let currentRoomData = rooms[currentRoom];
Get the current room's object so we can access its boundaries (x, y, w, h) for collision checking
if (player.y + player.h >= currentRoomData.y + currentRoomData.h) { player.y = currentRoomData.y + currentRoomData.h - player.h; player.vy = 0; player.isJumping = false; player.onGround = true; }
If the player's bottom edge hits the room floor, clamp their position to the floor, zero out vertical velocity, and set onGround to true so they can jump
if (player.x < currentRoomData.x) { player.x = currentRoomData.x; player.vx = 0; }
If the player moves past the left boundary, push them back and zero velocity so they stop at the wall
if (player.x + player.w > currentRoomData.x + currentRoomData.w) { player.x = currentRoomData.x + currentRoomData.w - player.w; player.vx = 0; }
If the player moves past the right boundary, push them back and zero velocity so they stop at the wall
for (let vent of vents) { if (rectCollision(player.x, player.y, player.w, player.h, vent.x, vent.y, vent.w, vent.h)) { player.isClimbing = true; player.vy = 0; player.x = vent.x + vent.w / 2 - player.w / 2; foundClimbableVent = true; break; } }
Loop through all vents and use rectCollision() to check if the player overlaps any. If yes, enable climbing, snap the player's x to the vent's center, and stop gravity
if (!foundClimbableVent && player.isClimbing) { player.isClimbing = false; player.vy = 0; }
If the player was climbing but is no longer touching a vent, disable climbing mode and reset velocity
for (let vent of vents) { if (rectCollision(...)) { if (currentRoom !== vent.targetRoom) { currentRoom = vent.targetRoom; player.x = vent.targetPlayerX; player.y = vent.targetPlayerY; player.vx = 0; player.vy = 0; player.isJumping = false; player.isClimbing = false; hasTransitioned = true; break; } } }
Check vents again for transitions. If the player overlaps a vent leading to a different room, change currentRoom, teleport the player to the target coordinates, and reset all velocity and state
if (hasTransitioned) { return; }
After a room transition, exit the function immediately to skip further movement calculations that frame—prevents clipping through walls
player.x = constrain(player.x, currentRoomData.x, currentRoomData.x + currentRoomData.w - player.w);
Final safety check: clamp player x position between the room's left and right boundaries to ensure they cannot leave the room
if (!joystick.active && player.onGround) { player.vx = 0; }
If the joystick is not being touched and the player is on the ground, stop horizontal movement so the player doesn't keep sliding

drawPlayer()

drawPlayer() is called from draw() every frame after camera translation. It is a simple procedural rendering function—all the complexity is in updatePlayer(), which calculates position. Here we just draw a red rectangle at that position.

function drawPlayer() {
  fill(255, 0, 0);
  rect(player.x, player.y, player.w, player.h);
}
Line-by-line explanation (2 lines)
fill(255, 0, 0);
Sets the fill color to pure red (RGB: 255, 0, 0) for all shapes drawn after this until fill() is called again
rect(player.x, player.y, player.w, player.h);
Draws a rectangle at the player's (x, y) position with width player.w and height player.h—this is the visible player character

playerJump()

playerJump() is called when the player presses the jump button or spacebar. It is guarded by a check to ensure the player is grounded and not already jumping, which prevents infinite mid-air jumps. The jump works by setting a negative vertical velocity; gravity then pulls the player back down.

function playerJump() {
  if (player.onGround && !player.isJumping) {
    player.vy = JUMP_FORCE;
    player.isJumping = true;
    player.onGround = false;
  }
}
Line-by-line explanation (4 lines)

🔧 Subcomponents:

conditional Jump eligibility check if (player.onGround && !player.isJumping)

Only allow jumping if the player is touching the ground and is not already jumping—prevents double-jumping

if (player.onGround && !player.isJumping) {
Check that the player is on the ground (onGround is true) AND not already in a jump (!player.isJumping)—both must be true to jump
player.vy = JUMP_FORCE;
Set vertical velocity to JUMP_FORCE (-22), which is negative so the player moves upward. Gravity then gradually reduces this speed
player.isJumping = true;
Set isJumping flag to true so another jump cannot be initiated until the player lands again
player.onGround = false;
Set onGround to false since the player is now in the air and no longer touching the floor

playerClimb()

playerClimb() is called with direction -1 (up) or 1 (down) when the player touches the climb buttons or arrow keys. It only works if isClimbing is true, which is set in updatePlayer() when the player overlaps a vent.

function playerClimb(direction) {
  if (player.isClimbing) {
    player.vy = direction * WALL_CLIMB_SPEED;
  }
}
Line-by-line explanation (2 lines)

🔧 Subcomponents:

conditional Climbing state validation if (player.isClimbing)

Only allow climbing movement if the player is currently in contact with a vent

if (player.isClimbing) {
Only execute climbing if the player is overlapping a vent (isClimbing is true)
player.vy = direction * WALL_CLIMB_SPEED;
Set vertical velocity to direction * WALL_CLIMB_SPEED. If direction is -1 (up), velocity is -2 (negative moves up). If direction is 1 (down), velocity is 2 (positive moves down)

Monster (class)

The Monster class encapsulates all enemy behavior: constructor initializes a new monster, update() handles physics and AI every frame, and draw() renders it. The AI has two states: roaming (walking back and forth) and chasing (pursuing the player). This separation of data and behavior is a core pattern in game development.

class Monster {
  constructor(x, y, roomName) {
    this.x = x;
    this.y = y;
    this.w = 40;
    this.h = 60;
    this.vx = random([-MONSTER_SPEED, MONSTER_SPEED]);
    this.vy = 0;
    this.room = roomName;
    this.state = "roaming";
    this.chaseTimer = 0;
    this.chaseDuration = 120;
    this.roamTimer = 0;
    this.roamDuration = random(60, 240);
  }

  update() {
    let roomData = rooms[this.room];

    this.vy += GRAVITY;
    this.x += this.vx;
    this.y += this.vy;

    if (this.y + this.h >= roomData.y + roomData.h) {
      this.y = roomData.y + roomData.h - this.h;
      this.vy = 0;
    }

    if (this.x < roomData.x || this.x + this.w > roomData.x + roomData.w) {
      this.vx *= -1;
      this.x = constrain(this.x, roomData.x, roomData.x + roomData.w - this.w);
    }

    if (this.room === currentRoom && currentRoom !== "safeZone") {
      let d = dist(this.x, this.y, player.x, player.y);
      if (d < MONSTER_CHASE_RANGE) {
        this.state = "chasing";
        this.chaseTimer = this.chaseDuration;
      } else if (this.state === "chasing") {
        this.chaseTimer--;
        if (this.chaseTimer <= 0) {
          this.state = "roaming";
          this.vx = random([-MONSTER_SPEED, MONSTER_SPEED]);
          this.roamTimer = 0;
        }
      }
    } else {
      this.state = "roaming";
      this.vx = random([-MONSTER_SPEED, MONSTER_SPEED]);
      this.roamTimer = 0;
    }

    if (this.state === "roaming") {
      this.roamTimer++;
      if (this.roamTimer > this.roamDuration) {
        this.vx *= -1;
        this.roamTimer = 0;
        this.roamDuration = random(60, 240);
      }
    } else if (this.state === "chasing") {
      this.vx = (player.x > this.x ? MONSTER_SPEED : -MONSTER_SPEED);
    }

    let safeZone = rooms.safeZone;
    if (this.room !== "safeZone" && rectCollision(this.x, this.y, this.w, this.h, safeZone.x, safeZone.y, safeZone.w, safeZone.h)) {
      if (this.vx > 0) {
        this.x = safeZone.x - this.w;
      } else {
        this.x = safeZone.x + safeZone.w;
      }
      this.vx *= -1;
      this.state = "roaming";
      this.roamTimer = 0;
    }

    if (currentRoom === this.room && rectCollision(player.x, player.y, player.w, player.h, this.x, this.y, this.w, this.h)) {
      triggerJumpscare();
    }
  }

  draw() {
    fill(255, 255, 0);
    rect(this.x, this.y, this.w, this.h);

    fill(0);
    ellipse(this.x + this.w / 2 + (this.vx > 0 ? 10 : -10), this.y + this.h / 3, 8);
  }
}
Line-by-line explanation (21 lines)

🔧 Subcomponents:

calculation Monster initialization constructor(x, y, roomName) { this.x = x; this.y = y; this.w = 40; this.h = 60; this.vx = random([-MONSTER_SPEED, MONSTER_SPEED]); this.vy = 0; this.room = roomName; this.state = "roaming"; this.chaseTimer = 0; this.chaseDuration = 120; this.roamTimer = 0; this.roamDuration = random(60, 240); }

Sets up a new monster with position, size, initial direction, room assignment, and AI state variables

calculation Monster gravity and movement this.vy += GRAVITY; this.x += this.vx; this.y += this.vy;

Applies gravity and updates position every frame—monsters fall and move horizontally like the player

conditional Monster floor collision if (this.y + this.h >= roomData.y + roomData.h) { this.y = roomData.y + roomData.h - this.h; this.vy = 0; }

Keeps the monster from falling through the floor by clamping it to the room floor

conditional Monster wall bouncing if (this.x < roomData.x || this.x + this.w > roomData.x + roomData.w) { this.vx *= -1; this.x = constrain(this.x, roomData.x, roomData.x + roomData.w - this.w); }

When a monster hits a wall, reverse its direction and clamp it within the room

conditional Chase state transition if (this.room === currentRoom && currentRoom !== "safeZone") { let d = dist(this.x, this.y, player.x, player.y); if (d < MONSTER_CHASE_RANGE) { this.state = "chasing"; this.chaseTimer = this.chaseDuration; } }

If the monster and player are in the same non-safe room and within 200 pixels, the monster switches to chase mode

conditional Roaming movement if (this.state === "roaming") { this.roamTimer++; if (this.roamTimer > this.roamDuration) { this.vx *= -1; this.roamTimer = 0; this.roamDuration = random(60, 240); } }

While roaming, the monster walks back and forth, changing direction randomly every 60–240 frames

conditional Chasing movement else if (this.state === "chasing") { this.vx = (player.x > this.x ? MONSTER_SPEED : -MONSTER_SPEED); }

While chasing, the monster moves directly toward the player's x position

conditional Safe zone boundary enforcement if (this.room !== "safeZone" && rectCollision(this.x, this.y, this.w, this.h, safeZone.x, safeZone.y, safeZone.w, safeZone.h)) { if (this.vx > 0) { this.x = safeZone.x - this.w; } else { this.x = safeZone.x + safeZone.w; } this.vx *= -1; this.state = "roaming"; this.roamTimer = 0; }

If a monster touches the safe zone, bounce it back and make it roam again—prevents monsters from entering the safe zone

conditional Player-monster collision if (currentRoom === this.room && rectCollision(player.x, player.y, player.w, player.h, this.x, this.y, this.w, this.h)) { triggerJumpscare(); }

If the monster and player occupy the same space in the same room, trigger the jumpscare death animation

class Monster {
Defines a class named Monster—a template for creating enemy objects with shared properties and methods
constructor(x, y, roomName) {
The constructor runs when a new Monster is created, accepting position (x, y) and the room name the monster starts in
this.x = x; this.y = y; this.w = 40; this.h = 60;
Sets up the monster's position and size—40 pixels wide, 60 pixels tall
this.vx = random([-MONSTER_SPEED, MONSTER_SPEED]);
Picks either MONSTER_SPEED (1.5) or -MONSTER_SPEED (-1.5) randomly for the initial horizontal direction
this.state = "roaming";
Initializes the monster's behavior state to roaming—it will walk back and forth until detecting the player
this.roamDuration = random(60, 240);
Sets a random walk duration between 60 and 240 frames before changing direction
update() {
The update method is called every frame to move the monster, apply physics, and check AI logic
this.vy += GRAVITY;
Apply gravity to the monster just like the player, so it falls when not on the ground
this.x += this.vx; this.y += this.vy;
Update position by adding velocity—this moves the monster horizontally and vertically
if (this.y + this.h >= roomData.y + roomData.h) { this.y = roomData.y + roomData.h - this.h; this.vy = 0; }
If the monster's bottom hits the floor, clamp it to the floor and zero vertical velocity
if (this.x < roomData.x || this.x + this.w > roomData.x + roomData.w) { this.vx *= -1; ... }
If the monster hits a wall, reverse its horizontal velocity to bounce back and stay in the room
if (this.room === currentRoom && currentRoom !== "safeZone") {
Only check for the player if the monster and player are in the same room and it is not the safe zone
let d = dist(this.x, this.y, player.x, player.y);
Calculate the distance between the monster and the player
if (d < MONSTER_CHASE_RANGE) { this.state = "chasing"; this.chaseTimer = this.chaseDuration; }
If the distance is less than 200 pixels, switch to chasing and reset the chase timer
if (this.state === "roaming") { this.roamTimer++; if (this.roamTimer > this.roamDuration) { this.vx *= -1; ... } }
In roaming state, count frames. When the count exceeds the roam duration, reverse direction and reset the timer
else if (this.state === "chasing") { this.vx = (player.x > this.x ? MONSTER_SPEED : -MONSTER_SPEED); }
In chase state, compare positions: if the player is to the right, move right; if to the left, move left
if (this.room !== "safeZone" && rectCollision(...)) { ... this.vx *= -1; this.state = "roaming"; ... }
If the monster touches the safe zone boundary, push it back and switch to roaming mode—the safe zone is a no-monster zone
if (currentRoom === this.room && rectCollision(player.x, player.y, player.w, player.h, this.x, this.y, this.w, this.h)) { triggerJumpscare(); }
If the monster and player occupy the same space in the same room, they collide and the jumpscare is triggered
draw() {
The draw method renders the monster as a visual shape on the canvas
fill(255, 255, 0); rect(this.x, this.y, this.w, this.h);
Draw the monster as a yellow (255, 255, 0) rectangle at its position with its size
fill(0); ellipse(this.x + this.w / 2 + (this.vx > 0 ? 10 : -10), this.y + this.h / 3, 8);
Draw a small black circle for an eye that points in the direction the monster is moving, offset left if moving left or right if moving right

spawnMonster()

spawnMonster() is called from setup() to create the initial monsters, and again from resetGame() after the player dies. It encapsulates the logic of picking a room and position, then creating the monster object. By keeping this in a separate function, the code is cleaner and easier to modify.

function spawnMonster() {
  let targetRoomName = random(["floor1Lab", "floor2Lab"]);
  let targetRoomData = rooms[targetRoomName];
  let x = random(targetRoomData.x, targetRoomData.x + targetRoomData.w - 40);
  let y = targetRoomData.y + targetRoomData.h - 60;
  monsters.push(new Monster(x, y, targetRoomName));
}
Line-by-line explanation (5 lines)

🔧 Subcomponents:

calculation Random room selection let targetRoomName = random(["floor1Lab", "floor2Lab"]);

Picks either floor1Lab or floor2Lab randomly—monsters never spawn in the safe zone

calculation Random spawn position let x = random(targetRoomData.x, targetRoomData.x + targetRoomData.w - 40);

Picks a random horizontal position within the chosen room, accounting for the monster's 40-pixel width so it doesn't spawn outside

calculation Create monster instance monsters.push(new Monster(x, y, targetRoomName));

Creates a new Monster object and adds it to the monsters array so it will be updated and drawn each frame

let targetRoomName = random(["floor1Lab", "floor2Lab"]);
Use random() to pick either "floor1Lab" or "floor2Lab" from the array—monsters never spawn in the safe zone
let targetRoomData = rooms[targetRoomName];
Look up the chosen room's object in the rooms dictionary to get its boundaries
let x = random(targetRoomData.x, targetRoomData.x + targetRoomData.w - 40);
Pick a random x position within the room's horizontal range, subtracting 40 (monster width) from the max so the monster doesn't spawn partially outside the room
let y = targetRoomData.y + targetRoomData.h - 60;
Place the monster 60 pixels from the bottom of the room (its height)—this spawns it on the floor
monsters.push(new Monster(x, y, targetRoomName));
Create a new Monster instance with the calculated position and room name, then add it to the monsters array so it will be updated and drawn

updateMonsters()

updateMonsters() is a simple wrapper that calls update() on every monster each frame. It keeps draw() clean by moving the monster loop into its own function. This pattern scales well: if you add projectiles, particles, or other actors, you'd make similar updateProjectiles() or updateParticles() functions.

function updateMonsters() {
  for (let monster of monsters) {
    monster.update();
  }
}
Line-by-line explanation (2 lines)

🔧 Subcomponents:

for-loop Update each monster for (let monster of monsters)

Iterates through the monsters array and calls update() on each monster to apply physics and AI

for (let monster of monsters) {
Loop through every monster in the monsters array—this is a for...of loop that works with arrays
monster.update();
Call the update() method on each monster, which applies gravity, moves it, updates AI, and checks collisions

drawMonsters()

drawMonsters() filters the monsters array by current room before drawing. This is an optimization: we still update all monsters' logic every frame (in updateMonsters), but we only render those the player can see. This keeps rendering fast even with many monsters.

function drawMonsters() {
  for (let monster of monsters) {
    if (monster.room === currentRoom) {
      monster.draw();
    }
  }
}
Line-by-line explanation (3 lines)

🔧 Subcomponents:

for-loop Render visible monsters for (let monster of monsters) { if (monster.room === currentRoom) { monster.draw(); } }

Loops through all monsters and draws only those in the current room—monsters in other rooms are invisible to avoid visual clutter

for (let monster of monsters) {
Loop through every monster in the monsters array
if (monster.room === currentRoom) {
Only draw the monster if it is in the same room as the player—monsters in other rooms are not visible on screen
monster.draw();
Call the draw() method on the monster to render it as a yellow rectangle with an eye

updateCamera()

updateCamera() implements smooth camera following. The key idea is that draw() later calls translate(-cameraX, 0), which shifts the world coordinates so everything is drawn relative to the camera. By updating cameraX based on player position and constraining it to room bounds, we create a cinematic camera that stays on the player but never shows the void.

function updateCamera() {
  let room = rooms[currentRoom];
  cameraX = player.x - width / 2;
  cameraX = constrain(cameraX, room.x, room.x + room.w - width);
}
Line-by-line explanation (3 lines)

🔧 Subcomponents:

calculation Center on player cameraX = player.x - width / 2;

Calculate camera position so the player is centered on the screen (player.x is shifted left by half the screen width)

calculation Clamp to room boundaries cameraX = constrain(cameraX, room.x, room.x + room.w - width);

Prevents the camera from scrolling beyond the room edges—ensures the screen never shows outside the current room

let room = rooms[currentRoom];
Get the current room's object to access its boundaries
cameraX = player.x - width / 2;
Set cameraX so that the world is shifted left by this amount, centering the player on screen. If player.x is 400 and width is 800, cameraX becomes 0 (no shift)
cameraX = constrain(cameraX, room.x, room.x + room.w - width);
Clamp cameraX between the room's left edge (room.x) and its right edge minus screen width. This prevents the camera from showing blank areas outside the room

drawRooms()

drawRooms() iterates through the rooms dictionary and draws each room as a procedural background. The rooms themselves don't move—it is the camera translation in draw() that makes them scroll relative to the player. This separation of room definition and rendering keeps the code modular.

function drawRooms() {
  for (let roomName in rooms) {
    let room = rooms[roomName];
    fill(room.color);
    rect(room.x, room.y, room.w, room.h);

    stroke(0);
    strokeWeight(10);
    line(room.x, room.y + room.h, room.x + room.w, room.y + room.h);
    noStroke();
  }
}
Line-by-line explanation (6 lines)

🔧 Subcomponents:

for-loop Draw room backgrounds for (let roomName in rooms) { let room = rooms[roomName]; fill(room.color); rect(room.x, room.y, room.w, room.h); }

Loops through all rooms and draws each as a colored rectangle in world space

calculation Draw floor outlines stroke(0); strokeWeight(10); line(room.x, room.y + room.h, room.x + room.w, room.y + room.h); noStroke();

Draws a thick black line at the bottom of each room to emphasize the floor

for (let roomName in rooms) {
Loop through the rooms object—this is a for...in loop that iterates over object keys (room names)
let room = rooms[roomName];
Get the room object for the current iteration
fill(room.color);
Set the fill color to the room's color (e.g., '#333333' for the safe zone)
rect(room.x, room.y, room.w, room.h);
Draw the room as a rectangle at its world position with its width and height
stroke(0); strokeWeight(10); line(...);
Draw a thick black (0) line along the bottom of the room to emphasize the floor
noStroke();
Turn off strokes again so subsequent shapes in draw() are filled-only

drawVents()

drawVents() draws the vent doorways with procedural detail lines. The rectCollision check is an optimization—we skip drawing vents that are outside the camera view to save rendering time. The detail loop creates a visual grille pattern inside the vent.

function drawVents() {
  fill(100);
  for (let vent of vents) {
    if (rectCollision(vent.x, vent.y, vent.w, vent.h, cameraX, 0, width, height)) {
      rect(vent.x, vent.y, vent.w, vent.h);
      stroke(50);
      strokeWeight(2);
      for (let i = 0; i < vent.w; i += 10) {
        line(vent.x + i, vent.y, vent.x + i, vent.y + vent.h);
      }
      noStroke();
    }
  }
}
Line-by-line explanation (5 lines)

🔧 Subcomponents:

conditional On-screen vent rendering if (rectCollision(vent.x, vent.y, vent.w, vent.h, cameraX, 0, width, height))

Only draw vents that are currently visible on screen—skips drawing off-screen vents for performance

for-loop Draw vent detail lines for (let i = 0; i < vent.w; i += 10) { line(vent.x + i, vent.y, vent.x + i, vent.y + vent.h); }

Draws vertical lines spaced 10 pixels apart to create a grille pattern inside the vent

fill(100);
Set fill color to grey (100) for all vents
for (let vent of vents) {
Loop through all vents in the vents array
if (rectCollision(vent.x, vent.y, vent.w, vent.h, cameraX, 0, width, height)) {
Check if the vent's rectangle overlaps the camera's view. cameraX is the camera offset, and (width, height) is the screen size
rect(vent.x, vent.y, vent.w, vent.h);
Draw the vent as a grey rectangle if it is on screen
for (let i = 0; i < vent.w; i += 10) { line(vent.x + i, vent.y, vent.x + i, vent.y + vent.h); }
Draw vertical lines every 10 pixels across the vent's width to create a grille detail pattern

drawStaircases()

drawStaircases() is similar to drawVents() but creates a different procedural pattern. It divides the staircase area into a 4×4 grid of horizontal and vertical lines to suggest steps. This demonstrates how procedural graphics can be built from simple loops and math.

function drawStaircases() {
  fill(150);
  for (let staircase of staircases) {
    if (rectCollision(staircase.x, staircase.y, staircase.w, staircase.h, cameraX, 0, width, height)) {
      rect(staircase.x, staircase.y, staircase.w, staircase.h);
      stroke(100);
      strokeWeight(2);
      let stepHeight = staircase.h / 4;
      for (let i = 0; i < 4; i++) {
        line(staircase.x, staircase.y + i * stepHeight, staircase.x + staircase.w, staircase.y + i * stepHeight);
        line(staircase.x + i * (staircase.w / 4), staircase.y + staircase.h, staircase.x + i * (staircase.w / 4), staircase.y + (i + 1) * stepHeight);
      }
      noStroke();
    }
  }
}
Line-by-line explanation (5 lines)

🔧 Subcomponents:

conditional On-screen staircase rendering if (rectCollision(staircase.x, staircase.y, staircase.w, staircase.h, cameraX, 0, width, height))

Only draw staircases that are on screen—an optimization to skip off-screen geometry

for-loop Draw staircase steps for (let i = 0; i < 4; i++) { line(...); line(...); }

Draws 4 horizontal lines and 4 vertical lines to create a procedural staircase step pattern

fill(150);
Set fill color to light grey (150) for all staircases
for (let staircase of staircases) {
Loop through all staircases in the staircases array
if (rectCollision(...)) {
Only draw staircases that overlap the camera view to save rendering time
let stepHeight = staircase.h / 4;
Divide the staircase height by 4 to create 4 evenly-spaced steps
for (let i = 0; i < 4; i++) { line(...); line(...); }
Loop 4 times to draw horizontal and vertical lines that form a grid pattern inside the staircase, creating a visual stair-step effect

drawSafeZoneBoundary()

drawSafeZoneBoundary() draws a green outline around the safe zone. This is partly visual feedback for the player (showing where the safe area is) and partly a debugging aid. The outline is drawn using noFill() and stroke() instead of fill() and rect(), which creates an outline-only effect.

function drawSafeZoneBoundary() {
  let safeZone = rooms.safeZone;
  stroke(0, 255, 0);
  strokeWeight(2);
  noFill();
  rect(safeZone.x, safeZone.y, safeZone.w, safeZone.h);
  noStroke();
}
Line-by-line explanation (6 lines)
let safeZone = rooms.safeZone;
Get the safe zone room object from the rooms dictionary
stroke(0, 255, 0);
Set stroke color to bright green—this will outline the safe zone boundary
strokeWeight(2);
Set stroke thickness to 2 pixels
noFill();
Turn off fill so only the outline is drawn, not a solid rectangle
rect(safeZone.x, safeZone.y, safeZone.w, safeZone.h);
Draw a rectangle outline (no fill) around the safe zone to show its boundaries to the player
noStroke();
Turn off strokes again so subsequent shapes are not outlined

drawJoystick()

drawJoystick() renders the on-screen joystick as two circles: a static base and a dynamic knob. The knob position is updated in touchMoved() based on finger position, and the visual feedback helps the player see their input direction. This is a simple but effective UI pattern for mobile games.

function drawJoystick() {
  fill(100);
  ellipse(joystick.baseX, joystick.baseY, joystick.radius * 2);

  fill(200);
  ellipse(joystick.knobX, joystick.knobY, joystick.radius * 1.2);
}
Line-by-line explanation (4 lines)

🔧 Subcomponents:

calculation Draw base circle fill(100); ellipse(joystick.baseX, joystick.baseY, joystick.radius * 2);

Draws a dark grey circle representing the joystick's background and interaction area

calculation Draw knob circle fill(200); ellipse(joystick.knobX, joystick.knobY, joystick.radius * 1.2);

Draws a lighter grey circle that moves as the player drags, showing current joystick input direction

fill(100);
Set fill color to dark grey (100) for the joystick base
ellipse(joystick.baseX, joystick.baseY, joystick.radius * 2);
Draw a circle at the joystick's base position with diameter joystick.radius * 2 (120 pixels)—this is the static background
fill(200);
Set fill color to light grey (200) for the knob
ellipse(joystick.knobX, joystick.knobY, joystick.radius * 1.2);
Draw a circle at the knob's position (which changes with touch input) with diameter joystick.radius * 1.2 (72 pixels)

drawMonsterTracker()

drawMonsterTracker() implements a danger compass that helps the player locate monsters in lab rooms. It finds the nearest monster in the current room, calculates the angle toward it, and draws a rotating red arrow. This is a common game UI pattern for adding tactical information without cluttering the main view.

function drawMonsterTracker() {
  if (currentRoom === "safeZone") return;

  let nearestMonster = null;
  let minDistance = Infinity;

  for (let monster of monsters) {
    if (monster.room === currentRoom) {
      let d = dist(player.x, player.y, monster.x, monster.y);
      if (d < minDistance) {
        minDistance = d;
        nearestMonster = monster;
      }
    }
  }

  if (nearestMonster) {
    let trackerX = width * 0.8;
    let trackerY = height * 0.8;
    let trackerSize = 50;
    let trackerIconSize = 20;

    fill(50);
    ellipse(trackerX, trackerY, trackerSize);

    let dx = nearestMonster.x - player.x;
    let dy = nearestMonster.y - player.y;
    let angle = atan2(dy, dx);

    push();
    translate(trackerX, trackerY);
    rotate(angle);
    fill(255, 0, 0);
    triangle(-trackerIconSize / 2, -trackerIconSize / 2,
             -trackerIconSize / 2, trackerIconSize / 2,
             trackerIconSize / 2, 0);
    pop();

    fill(255);
    textSize(12);
    text(round(minDistance) + "m", trackerX, trackerY + trackerSize / 2 + 10);
  }
}
Line-by-line explanation (8 lines)

🔧 Subcomponents:

conditional Safe zone exclusion if (currentRoom === "safeZone") return;

The tracker is not shown in the safe zone, making that area feel truly safe

for-loop Find nearest monster for (let monster of monsters) { if (monster.room === currentRoom) { let d = dist(...); if (d < minDistance) { minDistance = d; nearestMonster = monster; } } }

Loops through all monsters in the current room and finds the closest one by distance

calculation Draw compass arrow let angle = atan2(dy, dx); push(); translate(trackerX, trackerY); rotate(angle); ... triangle(...); pop();

Calculates the angle toward the nearest monster and draws a red arrow pointing in that direction

if (currentRoom === "safeZone") return;
Exit early if in the safe zone—the tracker is not shown there
let nearestMonster = null; let minDistance = Infinity;
Initialize variables to track the closest monster. Infinity ensures the first monster will be closer
for (let monster of monsters) { if (monster.room === currentRoom) { let d = dist(player.x, player.y, monster.x, monster.y); if (d < minDistance) { minDistance = d; nearestMonster = monster; } } }
Loop through all monsters in the current room and update nearestMonster and minDistance whenever a closer monster is found
if (nearestMonster) {
Only render the tracker if a monster was found in the current room
fill(50); ellipse(trackerX, trackerY, trackerSize);
Draw a dark circle background for the tracker at the top-right corner of the screen
let dx = nearestMonster.x - player.x; let dy = nearestMonster.y - player.y; let angle = atan2(dy, dx);
Calculate the displacement vector from player to monster, then use atan2() to get the angle in radians
push(); translate(trackerX, trackerY); rotate(angle); ... triangle(...); pop();
Save the state, move to the tracker center, rotate by the angle toward the monster, draw a red triangle (arrow), then restore the state
text(round(minDistance) + "m", trackerX, trackerY + trackerSize / 2 + 10);
Display the distance to the nearest monster as text below the compass circle

drawButtons()

drawButtons() renders three on-screen buttons: jump (always blue and active), climb up, and climb down (green when climbing, grey otherwise). The conditional coloring provides visual feedback showing the player when climbing is available. Buttons are drawn with rectMode(CENTER) and rounded corners for a polished feel.

function drawButtons() {
  fill(0, 0, 150);
  rectMode(CENTER);
  rect(jumpButton.x, jumpButton.y, jumpButton.w, jumpButton.h, 10);
  fill(255);
  textSize(18);
  text(jumpButton.text, jumpButton.x, jumpButton.y);

  if (player.isClimbing) {
    fill(0, 150, 0);
  } else {
    fill(50);
  }
  rect(climbUpButton.x, climbUpButton.y, climbUpButton.w, climbUpButton.h, 10);
  fill(255);
  textSize(18);
  text(climbUpButton.text, climbUpButton.x, climbUpButton.y);

  if (player.isClimbing) {
    fill(0, 100, 0);
  } else {
    fill(50);
  }
  rect(climbDownButton.x, climbDownButton.y, climbDownButton.w, climbDownButton.h, 10);
  fill(255);
  textSize(18);
  text(climbDownButton.text, climbDownButton.x, climbDownButton.y);

  rectMode(CORNER);
}
Line-by-line explanation (9 lines)

🔧 Subcomponents:

calculation Jump button fill(0, 0, 150); rect(jumpButton.x, jumpButton.y, jumpButton.w, jumpButton.h, 10); fill(255); text(jumpButton.text, ...);

Draws the blue jump button with white text—always visible and active

conditional Climb up button with state if (player.isClimbing) { fill(0, 150, 0); } else { fill(50); } rect(climbUpButton.x, climbUpButton.y, climbUpButton.w, climbUpButton.h, 10);

Draws the climb up button, green when climbing, dark grey when not—provides visual feedback on whether climbing is possible

conditional Climb down button with state if (player.isClimbing) { fill(0, 100, 0); } else { fill(50); }

Draws the climb down button with slightly darker green when climbing, grey when not—matches climb up styling

fill(0, 0, 150);
Set fill color to blue (0, 0, 150) for the jump button
rectMode(CENTER);
Change rectangle mode so rect() positions from the center instead of the top-left—makes it easier to center buttons on a point
rect(jumpButton.x, jumpButton.y, jumpButton.w, jumpButton.h, 10);
Draw the jump button as a blue rectangle with rounded corners (radius 10)
fill(255); textSize(18); text(jumpButton.text, jumpButton.x, jumpButton.y);
Change fill to white, set text size to 18, and draw the 'JUMP' label centered on the button
if (player.isClimbing) { fill(0, 150, 0); } else { fill(50); }
If climbing, use bright green; otherwise use dark grey. This provides visual feedback on whether climbing is active
rect(climbUpButton.x, climbUpButton.y, climbUpButton.w, climbUpButton.h, 10);
Draw the climb up button with the selected color and rounded corners
fill(255); textSize(18); text(climbUpButton.text, climbUpButton.x, climbUpButton.y);
Draw white 'CLIMB UP' text on the button
if (player.isClimbing) { fill(0, 100, 0); } else { fill(50); }
Similar climb state check, but use a darker green (0, 100, 0) for the down button to distinguish it from the up button
rectMode(CORNER);
Restore rectMode to CORNER so subsequent rect() calls use the default top-left positioning

triggerJumpscare()

triggerJumpscare() is called when a monster collides with the player. It activates the death screen and schedules an automatic game reset. The setTimeout ensures the jumpscare plays for exactly 2 seconds before resetGame() is called, creating a fixed-duration death sequence.

function triggerJumpscare() {
  if (jumpscare.isActive) return;

  jumpscare.isActive = true;
  jumpscare.timer = jumpscare.duration;
  jumpscare.animationFrame = 0;

  setTimeout(resetGame, jumpscare.duration * (1000 / 60));
}
Line-by-line explanation (5 lines)

🔧 Subcomponents:

conditional Prevent duplicate jumpscare if (jumpscare.isActive) return;

If a jumpscare is already active, exit immediately to prevent multiple simultaneous jumpscares

calculation Initialize jumpscare state jumpscare.isActive = true; jumpscare.timer = jumpscare.duration; jumpscare.animationFrame = 0;

Sets jumpscare flags to activate the death screen and resets counters for the animation

calculation Schedule game reset setTimeout(resetGame, jumpscare.duration * (1000 / 60));

Schedules resetGame() to run after 2 seconds (120 frames at 60 FPS), automatically restarting the game after the jumpscare

if (jumpscare.isActive) return;
If a jumpscare is already playing, exit immediately—this prevents multiple jumpscares from stacking
jumpscare.isActive = true;
Set isActive to true, which causes draw() to call drawJumpscare() instead of the normal game loop
jumpscare.timer = jumpscare.duration;
Reset the timer to 120 frames so the jumpscare lasts 2 seconds (120 / 60 FPS)
jumpscare.animationFrame = 0;
Reset the animation frame counter so the flashing red effect starts from the beginning
setTimeout(resetGame, jumpscare.duration * (1000 / 60));
Schedule resetGame() to run after 120 frames worth of milliseconds (2000 ms / 2 seconds). This automatically restarts the game after the jumpscare animation finishes

drawJumpscare()

drawJumpscare() renders the death screen with a pulsing red background and white text. The sin() oscillation creates a hypnotic flashing effect that communicates danger and finality. This is called from draw() when jumpscare.isActive is true, replacing the normal game loop entirely.

function drawJumpscare() {
  let redFlash = map(sin(jumpscare.animationFrame * 0.1), -1, 1, 100, 255);
  background(redFlash, 0, 0);
  fill(255);
  textSize(64);
  text("YOU DIED!", width / 2, height / 2);
  textSize(24);
  text("Beware the shadows...", width / 2, height / 2 + 70);

  jumpscare.animationFrame++;
  jumpscare.timer--;

  if (jumpscare.timer <= 0) {
    jumpscare.isActive = false;
  }
}
Line-by-line explanation (6 lines)

🔧 Subcomponents:

calculation Flashing red effect let redFlash = map(sin(jumpscare.animationFrame * 0.1), -1, 1, 100, 255); background(redFlash, 0, 0);

Uses sin() to oscillate the red channel between 100 and 255, creating a pulsing red background

calculation Death text fill(255); textSize(64); text("YOU DIED!", ...); textSize(24); text("Beware the shadows...", ...);

Displays large 'YOU DIED!' text and smaller warning text centered on screen in white

calculation Count down jumpscare jumpscare.animationFrame++; jumpscare.timer--;

Increments the animation frame counter (for the sin wave) and decrements the timer until it reaches zero

let redFlash = map(sin(jumpscare.animationFrame * 0.1), -1, 1, 100, 255);
Use sin() on animationFrame to create a smooth oscillation between -1 and 1. map() converts this to a red channel value between 100 and 255, creating a pulsing effect
background(redFlash, 0, 0);
Fill the entire screen with a red color (redFlash for red, 0 for green, 0 for blue) that pulses with the sin wave
fill(255); textSize(64); text("YOU DIED!", width / 2, height / 2);
Set fill to white, text size to 64, and display 'YOU DIED!' centered on screen
textSize(24); text("Beware the shadows...", width / 2, height / 2 + 70);
Smaller text (24) displaying an ominous message below the main text
jumpscare.animationFrame++; jumpscare.timer--;
Increment animation frame to advance the sin wave (making the red flash pulse), and decrement the countdown timer
if (jumpscare.timer <= 0) { jumpscare.isActive = false; }
When the timer reaches zero, set isActive to false so draw() returns to normal gameplay (though resetGame() will have already been called by setTimeout)

resetGame()

resetGame() is the master reset function called automatically by setTimeout after a jumpscare. It clears the death animation, restores the player to starting state, and recreates all monsters. This pattern keeps the code clean: triggerJumpscare() schedules the reset, and resetGame() handles all the reinitializations without duplicating logic from setup().

function resetGame() {
  jumpscare.isActive = false;
  jumpscare.timer = 0;
  jumpscare.animationFrame = 0;

  player.x = rooms.safeZone.x + 100;
  player.y = rooms.safeZone.y + rooms.safeZone.h - player.h;
  player.vx = 0;
  player.vy = 0;
  player.isJumping = false;
  player.isClimbing = false;
  player.onGround = false;
  currentRoom = "safeZone";

  monsters = [];
  for (let i = 0; i < MAX_MONSTERS; i++) {
    spawnMonster();
  }
}
Line-by-line explanation (8 lines)

🔧 Subcomponents:

calculation Reset jumpscare state jumpscare.isActive = false; jumpscare.timer = 0; jumpscare.animationFrame = 0;

Clears all jumpscare animation state so the game returns to normal rendering

calculation Reset player state player.x = rooms.safeZone.x + 100; player.y = ...; player.vx = 0; player.vy = 0; player.isJumping = false; player.isClimbing = false; player.onGround = false; currentRoom = "safeZone";

Restores the player to the starting position and state in the safe zone

calculation Respawn monsters monsters = []; for (let i = 0; i < MAX_MONSTERS; i++) { spawnMonster(); }

Clears the monsters array and creates a fresh set of MAX_MONSTERS enemies in new random positions

jumpscare.isActive = false; jumpscare.timer = 0; jumpscare.animationFrame = 0;
Reset all jumpscare state so the pulsing red screen is disabled and the game loop resumes
player.x = rooms.safeZone.x + 100;
Teleport the player back to the safe zone spawn position (100 pixels from the left edge)
player.y = rooms.safeZone.y + rooms.safeZone.h - player.h;
Position the player on the floor of the safe zone
player.vx = 0; player.vy = 0;
Stop all player velocity so they are not moving when respawning
player.isJumping = false; player.isClimbing = false; player.onGround = false;
Reset all movement state flags to neutral. Setting onGround to false ensures the player can jump on the next frame
currentRoom = "safeZone";
Set the current room back to the safe zone so the camera and game logic focus on that area
monsters = [];
Clear the monsters array, removing all enemy instances
for (let i = 0; i < MAX_MONSTERS; i++) { spawnMonster(); }
Loop MAX_MONSTERS times to create new monsters at fresh random positions in the lab rooms

touchStarted()

touchStarted() is a p5.js callback that fires when the user first touches the screen. It handles the start game input and then routes subsequent touches to appropriate handlers: jump/climb buttons or the joystick. By tracking touchIds, the code can manage multiple simultaneous touches and know which touch corresponds to which control.

function touchStarted() {
  if (!gameStart) {
    gameStart = true;
    return false;
  }

  if (rectCollision(mouseX, mouseY, 1, 1, jumpButton.x - jumpButton.w / 2, jumpButton.y - jumpButton.h / 2, jumpButton.w, jumpButton.h)) {
    playerJump();
    jumpButton.touchId = touches[0] ? touches[0].id : -1;
    return false;
  }

  if (player.isClimbing && rectCollision(mouseX, mouseY, 1, 1, climbUpButton.x - climbUpButton.w / 2, climbUpButton.y - climbUpButton.h / 2, climbUpButton.w, climbUpButton.h)) {
    playerClimb(-1);
    climbUpButton.touchId = touches[0] ? touches[0].id : -1;
    return false;
  }

  if (player.isClimbing && rectCollision(mouseX, mouseY, 1, 1, climbDownButton.x - climbDownButton.w / 2, climbDownButton.y - climbDownButton.h / 2, climbDownButton.w, climbDownButton.h)) {
    playerClimb(1);
    climbDownButton.touchId = touches[0] ? touches[0].id : -1;
    return false;
  }

  if (mouseX < joystick.maxX) {
    joystick.active = true;
    joystick.touchId = touches[0] ? touches[0].id : -1;
    joystick.knobX = mouseX;
    joystick.knobY = mouseY;
  }

  return false;
}
Line-by-line explanation (8 lines)

🔧 Subcomponents:

conditional Start game on first touch if (!gameStart) { gameStart = true; return false; }

On first touch anywhere, set gameStart to true, enabling the game loop and hiding the start screen

conditional Jump button collision if (rectCollision(mouseX, mouseY, 1, 1, jumpButton.x - jumpButton.w / 2, jumpButton.y - jumpButton.h / 2, jumpButton.w, jumpButton.h)) { playerJump(); ... }

Detects if the touch is on the jump button and triggers a jump

conditional Climb up button collision if (player.isClimbing && rectCollision(...climbUpButton...)) { playerClimb(-1); ... }

Detects if climbing and the touch is on the climb up button, then climbs up

conditional Climb down button collision if (player.isClimbing && rectCollision(...climbDownButton...)) { playerClimb(1); ... }

Detects if climbing and the touch is on the climb down button, then climbs down

conditional Joystick activation if (mouseX < joystick.maxX) { joystick.active = true; ... }

If touch is on the left side of the screen, activate the joystick and update its knob position

if (!gameStart) { gameStart = true; return false; }
If the game has not started, set gameStart to true and exit. This hides the start screen and begins the game loop
if (rectCollision(mouseX, mouseY, 1, 1, jumpButton.x - jumpButton.w / 2, jumpButton.y - jumpButton.h / 2, jumpButton.w, jumpButton.h))
Check if the touch point (mouseX, mouseY as a 1×1 collision box) overlaps the jump button. The button's rect is offset by half width and height because rectMode is CENTER
playerJump(); jumpButton.touchId = touches[0] ? touches[0].id : -1;
Call playerJump() and store the touch ID so we can track when this specific finger is released
if (player.isClimbing && rectCollision(...))
Only respond to climb buttons if the player is currently climbing
playerClimb(-1);
Call playerClimb with direction -1 to move up
playerClimb(1);
Call playerClimb with direction 1 to move down
if (mouseX < joystick.maxX) { joystick.active = true; joystick.touchId = touches[0] ? touches[0].id : -1; joystick.knobX = mouseX; joystick.knobY = mouseY; }
If touch is on the left side of the screen (x < maxX), activate the joystick, store the touch ID, and set the knob position to the touch point
return false;
Return false to prevent the browser's default touch behavior (scrolling, zooming) from interfering with the game

touchMoved()

touchMoved() is a p5.js callback that fires continuously as the user moves their finger on screen. It tracks the active joystick touch, calculates its angle and distance, and applies player velocity based on that direction. The dead zone prevents tiny movements from causing unintended drift, and the radius clamping keeps the visual feedback responsive.

function touchMoved() {
  if (joystick.active) {
    let touch = touches.find(t => t.id === joystick.touchId);
    if (touch) {
      let dx = touch.x - joystick.baseX;
      let dy = touch.y - joystick.baseY;
      let distance = dist(joystick.baseX, joystick.baseY, touch.x, touch.y);
      let angle = atan2(dy, dx);

      if (distance > joystick.radius) {
        joystick.knobX = joystick.baseX + joystick.radius * cos(angle);
        joystick.knobY = joystick.baseY + joystick.radius * sin(angle);
      } else {
        joystick.knobX = touch.x;
        joystick.knobY = touch.y;
      }

      if (distance > joystick.radius * 0.1) {
        player.vx = PLAYER_SPEED * cos(angle);
        if (player.isClimbing) {
          player.vy = PLAYER_SPEED * sin(angle);
        }
      } else {
        player.vx = 0;
        if (player.isClimbing) player.vy = 0;
      }
    }
  }
  return false;
}
Line-by-line explanation (9 lines)

🔧 Subcomponents:

calculation Find matching touch let touch = touches.find(t => t.id === joystick.touchId);

Locates the specific touch that is controlling the joystick by matching touch IDs

calculation Calculate joystick displacement let dx = touch.x - joystick.baseX; let dy = touch.y - joystick.baseY; let distance = dist(...); let angle = atan2(dy, dx);

Calculates the vector from the joystick base to the touch point, then the distance and angle of that vector

conditional Clamp knob within radius if (distance > joystick.radius) { joystick.knobX = joystick.baseX + joystick.radius * cos(angle); joystick.knobY = joystick.baseY + joystick.radius * sin(angle); } else { joystick.knobX = touch.x; joystick.knobY = touch.y; }

Constrains the knob to stay within the circular joystick radius for visual feedback and gameplay feel

conditional Dead zone input filtering if (distance > joystick.radius * 0.1) { player.vx = PLAYER_SPEED * cos(angle); ... } else { player.vx = 0; ... }

Only applies player velocity if the touch is beyond a small dead zone (10% of radius), preventing drift from accidental touches

if (joystick.active) {
Only process joystick movement if the joystick is currently active (a touch started on it)
let touch = touches.find(t => t.id === joystick.touchId);
Find the touch in the touches array that matches the joystick's touchId—this lets us track the same finger across frames
if (touch) {
Only update if the touch still exists (user has not lifted their finger)
let dx = touch.x - joystick.baseX; let dy = touch.y - joystick.baseY;
Calculate the horizontal and vertical distance from the joystick base to the current touch position
let distance = dist(joystick.baseX, joystick.baseY, touch.x, touch.y); let angle = atan2(dy, dx);
dist() gives the Euclidean distance. atan2(dy, dx) gives the angle in radians pointing toward the touch
if (distance > joystick.radius) { joystick.knobX = joystick.baseX + joystick.radius * cos(angle); joystick.knobY = joystick.baseY + joystick.radius * sin(angle); } else { joystick.knobX = touch.x; joystick.knobY = touch.y; }
If the touch is beyond the radius, clamp the knob to the edge (use cos/sin to stay on the circle). Otherwise, let the knob follow the touch directly
if (distance > joystick.radius * 0.1) { player.vx = PLAYER_SPEED * cos(angle); if (player.isClimbing) { player.vy = PLAYER_SPEED * sin(angle); } }
If distance exceeds the dead zone (10% of radius), set player velocity using cos/sin of the angle. Horizontal velocity is always applied; vertical velocity is only applied while climbing
else { player.vx = 0; if (player.isClimbing) player.vy = 0; }
Within the dead zone, zero out velocity to prevent unintended movement from jitter
return false;
Return false to prevent the browser's default touch behavior

touchEnded()

touchEnded() is a p5.js callback that fires when a touch is lifted. It checks each tracked touch ID and performs cleanup: deactivating the joystick, resetting button states, and zeroing velocity as appropriate. This multi-touch tracking allows the player to hold one button while moving the joystick simultaneously.

function touchEnded() {
  if (joystick.active && touches.every(t => t.id !== joystick.touchId)) {
    joystick.active = false;
    joystick.knobX = joystick.baseX;
    joystick.knobY = joystick.baseY;
    player.vx = 0;
    if (player.isClimbing) player.vy = 0;
  }

  if (jumpButton.touchId !== -1 && touches.every(t => t.id !== jumpButton.touchId)) {
    jumpButton.touchId = -1;
  }

  if (climbUpButton.touchId !== -1 && touches.every(t => t.id !== climbUpButton.touchId)) {
    climbUpButton.touchId = -1;
    if (player.isClimbing) {
      player.vy = 0;
    }
  }

  if (climbDownButton.touchId !== -1 && touches.every(t => t.id !== climbDownButton.touchId)) {
    climbDownButton.touchId = -1;
    if (player.isClimbing) {
      player.vy = 0;
    }
  }

  if (player.isClimbing && touches.every(t => t.id !== joystick.touchId) && climbUpButton.touchId === -1 && climbDownButton.touchId === -1) {
    player.vy = 0;
  }

  return false;
}
Line-by-line explanation (9 lines)

🔧 Subcomponents:

conditional Joystick deactivation if (joystick.active && touches.every(t => t.id !== joystick.touchId)) { joystick.active = false; ... player.vx = 0; ... }

When the joystick touch ends, deactivate the joystick and zero the player's horizontal velocity

conditional Jump button release if (jumpButton.touchId !== -1 && touches.every(t => t.id !== jumpButton.touchId)) { jumpButton.touchId = -1; }

When the jump button touch ends, reset the button's touchId so it can be triggered again

conditional Climb button releases if (climbUpButton.touchId !== -1 && touches.every(...)) { climbUpButton.touchId = -1; if (player.isClimbing) { player.vy = 0; } }

When climb buttons are released, zero vertical velocity to stop climbing movement

if (joystick.active && touches.every(t => t.id !== joystick.touchId))
Check if the joystick is active AND the joystick's touch ID no longer exists in the touches array (meaning that finger was lifted)
joystick.active = false; joystick.knobX = joystick.baseX; joystick.knobY = joystick.baseY; player.vx = 0;
Deactivate the joystick, reset the knob to center, and zero horizontal velocity
if (player.isClimbing) player.vy = 0;
If climbing, also zero vertical velocity when the joystick is released
if (jumpButton.touchId !== -1 && touches.every(t => t.id !== jumpButton.touchId))
If the jump button was pressed (touchId is not -1) and that touch no longer exists, the button has been released
jumpButton.touchId = -1;
Reset the button's touchId to -1 (unused) so it can be pressed again on the next touch
if (climbUpButton.touchId !== -1 && touches.every(...))
Similar check for the climb up button
climbUpButton.touchId = -1; if (player.isClimbing) { player.vy = 0; }
Reset the button and zero vertical velocity to stop climbing
if (player.isClimbing && touches.every(t => t.id !== joystick.touchId) && climbUpButton.touchId === -1 && climbDownButton.touchId === -1)
Final safety check: if climbing but no joystick touch and no climb buttons are held, zero vertical velocity
return false;
Return false to prevent browser default behavior

keyPressed()

keyPressed() is a p5.js callback that fires when a key is pressed. It handles desktop keyboard input for testing the game without touch. The spacebar jumps, and arrow keys control climbing. Returning false prevents the browser from processing these keys (e.g., scrolling with arrow keys).

function keyPressed() {
  if (!gameStart) {
    gameStart = true;
    return false;
  }

  if (keyCode === 32) {
    playerJump();
  }
  if (player.isClimbing && keyCode === UP_ARROW) {
    playerClimb(-1);
  }
  if (player.isClimbing && keyCode === DOWN_ARROW) {
    playerClimb(1);
  }
  return false;
}
Line-by-line explanation (4 lines)

🔧 Subcomponents:

conditional Start game on key if (!gameStart) { gameStart = true; return false; }

On first key press, start the game (same as touchStarted)

conditional Space bar jump if (keyCode === 32) { playerJump(); }

Spacebar (ASCII 32) triggers a jump

conditional Arrow key climbing if (player.isClimbing && keyCode === UP_ARROW) { playerClimb(-1); } if (player.isClimbing && keyCode === DOWN_ARROW) { playerClimb(1); }

Up/down arrow keys control climbing when the player is on a vent

if (!gameStart) { gameStart = true; return false; }
If the game hasn't started, any key press starts it (matches touchStarted behavior)
if (keyCode === 32) { playerJump(); }
keyCode 32 is the spacebar. Pressing space calls playerJump()
if (player.isClimbing && keyCode === UP_ARROW) { playerClimb(-1); }
If the player is climbing (on a vent) and UP_ARROW is pressed, climb upward
if (player.isClimbing && keyCode === DOWN_ARROW) { playerClimb(1); }
If the player is climbing and DOWN_ARROW is pressed, climb downward

keyReleased()

keyReleased() is a p5.js callback that fires when a key is released. It zeroes the player's climbing velocity when climb keys are released, creating responsive feel. This separation of key-down and key-up logic is typical in games: press to start a motion, release to stop.

function keyReleased() {
  if (keyCode === 32) {
    if (player.isClimbing) {
      player.vy = 0;
    }
  }
  if (player.isClimbing && (keyCode === UP_ARROW || keyCode === DOWN_ARROW)) {
    player.vy = 0;
  }
  return false;
}
Line-by-line explanation (2 lines)

🔧 Subcomponents:

conditional Stop climbing on space release if (keyCode === 32) { if (player.isClimbing) { player.vy = 0; } }

When spacebar is released and player is climbing, stop vertical motion

conditional Stop climbing on arrow release if (player.isClimbing && (keyCode === UP_ARROW || keyCode === DOWN_ARROW)) { player.vy = 0; }

When any arrow key is released and player is climbing, stop vertical motion

if (keyCode === 32) { if (player.isClimbing) { player.vy = 0; } }
When spacebar is released, if the player is climbing, zero vertical velocity to stop climbing movement
if (player.isClimbing && (keyCode === UP_ARROW || keyCode === DOWN_ARROW)) { player.vy = 0; }
When up or down arrow is released and the player is climbing, zero vertical velocity to stop climbing

windowResized()

windowResized() is a p5.js callback that fires whenever the browser window is resized. It recalculates all UI positions proportionally so the joystick and buttons stay in relative positions on the screen. This is essential for responsive mobile games that work across different device sizes.

function windowResized() {
  resizeCanvas(windowWidth, windowHeight);
  joystick.baseX = width * 0.2;
  joystick.baseY = height * 0.8;
  joystick.knobX = joystick.baseX;
  joystick.knobY = joystick.baseY;
  joystick.maxX = width * 0.4;

  jumpButton.x = width * 0.8 - jumpButton.w / 2;
  jumpButton.y = height * 0.8 - jumpButton.h / 2;

  climbUpButton.x = jumpButton.x;
  climbUpButton.y = jumpButton.y - jumpButton.h - 10;

  climbDownButton.x = jumpButton.x;
  climbDownButton.y = jumpButton.y + jumpButton.h + 10;
}
Line-by-line explanation (7 lines)

🔧 Subcomponents:

calculation Resize canvas resizeCanvas(windowWidth, windowHeight);

Updates the canvas size to match the new window dimensions

calculation Reposition joystick joystick.baseX = width * 0.2; joystick.baseY = height * 0.8; ... joystick.maxX = width * 0.4;

Recalculates joystick position based on new screen dimensions so it stays in the same relative position

calculation Reposition buttons jumpButton.x = width * 0.8 - jumpButton.w / 2; jumpButton.y = height * 0.8 - jumpButton.h / 2; ... climbUpButton... climbDownButton...

Recalculates button positions based on new screen size so they scale responsively

resizeCanvas(windowWidth, windowHeight);
p5.js function that resizes the canvas to the new window width and height
joystick.baseX = width * 0.2; joystick.baseY = height * 0.8;
Repositions the joystick base 20% from the left and 80% from the top, relative to new screen size
joystick.knobX = joystick.baseX; joystick.knobY = joystick.baseY;
Resets the knob to the center of the base
joystick.maxX = width * 0.4;
Updates the joystick interaction area width to 40% of the new screen width
jumpButton.x = width * 0.8 - jumpButton.w / 2; jumpButton.y = height * 0.8 - jumpButton.h / 2;
Repositions the jump button to 80% from left, 80% from top, accounting for button size
climbUpButton.x = jumpButton.x; climbUpButton.y = jumpButton.y - jumpButton.h - 10;
Positions climb up button directly above the jump button with a 10-pixel gap
climbDownButton.x = jumpButton.x; climbDownButton.y = jumpButton.y + jumpButton.h + 10;
Positions climb down button directly below the jump button with a 10-pixel gap

rectCollision()

rectCollision() implements AABB (axis-aligned bounding box) collision detection—the simplest and fastest method for rectangular overlap. All four conditions must be true for rectangles to overlap: if any is false, the rectangles are separate. This function is called throughout the game for vent detection, button presses, monster collisions, and camera culling.

function rectCollision(x1, y1, w1, h1, x2, y2, w2, h2) {
  return x1 < x2 + w2 &&
         x1 + w1 > x2 &&
         y1 < y2 + h2 &&
         y1 + h1 > y2;
}
Line-by-line explanation (4 lines)

🔧 Subcomponents:

calculation AABB overlap test return x1 < x2 + w2 && x1 + w1 > x2 && y1 < y2 + h2 && y1 + h1 > y2;

Tests whether two axis-aligned bounding boxes (AABBs) overlap using four inequality checks

x1 < x2 + w2
Rect 1's left edge is to the left of Rect 2's right edge
x1 + w1 > x2
Rect 1's right edge is to the right of Rect 2's left edge
y1 < y2 + h2
Rect 1's top edge is above Rect 2's bottom edge
y1 + h1 > y2
Rect 1's bottom edge is below Rect 2's top edge

📦 Key Variables

player object

Stores the player character's position (x, y), size (w, h), velocity (vx, vy), and state flags (isJumping, isClimbing, onGround)

let player = { x: 100, y: 500, w: 30, h: 50, vx: 0, vy: 0, isJumping: false, isClimbing: false, onGround: false };
monsters array

Holds all Monster instances currently in the game—updated and drawn each frame

let monsters = [ new Monster(100, 500, 'floor1Lab'), new Monster(300, 500, 'floor2Lab') ];
currentRoom string

Tracks which room the player is currently in ('safeZone', 'floor1Lab', or 'floor2Lab')—used for camera, rendering, and AI logic

let currentRoom = 'safeZone';
rooms object

Dictionary of room definitions, each with position (x, y), size (w, h), and background color

let rooms = { safeZone: { x: 0, y: 0, w: 800, h: 600, color: '#333333' }, ... };
vents array

Array of vent objects that act as doorways between rooms—each has position, size, target room, and target spawn position

let vents = [ { x: 200, y: 100, w: 80, h: 40, targetRoom: 'floor2Lab', targetPlayerX: 300, targetPlayerY: 100 }, ... ];
staircases array

Array of staircase objects similar to vents—used as alternate room transition triggers

let staircases = [ { x: 10, y: 400, w: 80, h: 100, targetRoom: 'safeZone', ... }, ... ];
cameraX number

The horizontal offset for the camera, calculated to center on the player while staying within room bounds

let cameraX = 0;
joystick object

Stores the joystick's base position, knob position, radius, active state, and associated touch ID

let joystick = { baseX: 160, baseY: 640, knobX: 160, knobY: 640, radius: 60, active: false, touchId: -1, maxX: 320 };
jumpButton object

UI button object for jumping—stores position, size, and touch ID

let jumpButton = { x: 960, y: 640, w: 120, h: 60, touchId: -1, text: 'JUMP' };
climbUpButton object

UI button object for climbing up—stores position, size, and touch ID

let climbUpButton = { x: 960, y: 570, w: 120, h: 60, touchId: -1, text: 'CLIMB UP' };
climbDownButton object

UI button object for climbing down—stores position, size, and touch ID

let climbDownButton = { x: 960, y: 710, w: 120, h: 60, touchId: -1, text: 'CLIMB DOWN' };
jumpscare object

Manages the death jumpscare state: isActive boolean, timer frame count, duration, and animation frame for the flashing effect

let jumpscare = { isActive: false, timer: 0, duration: 120, animationFrame: 0 };
gameStart boolean

Flag indicating whether the player has started the game (touched or pressed a key)—prevents game logic before start

let gameStart = false;

🔧 Potential Improvements (6)

Here are some ways this code could be enhanced:

BUG rectCollision() and boundary checking

Player and monsters can get stuck on walls if velocity is very high, because position updates happen all at once before collisions are checked. Ballistic movement without continuous collision detection can cause tunneling.

💡 Use step-based collision checking or clamp collisions to the actual collision point: e.g., `if (player.y + player.h >= floor) { player.y = floor - player.h; }` happens BEFORE subsequent boundary checks.

PERFORMANCE drawVents() and drawStaircases()

These functions use nested loops to draw detail lines every frame, even for off-screen geometry. The detail loops run every frame even if the vent/staircase is on-screen, which is wasteful.

💡 Move the detail line drawing into a separate procedural texture or cache the results—draw the detail grid once and reuse it, rather than recalculating every frame. Or reduce the detail line frequency (e.g., every 20 pixels instead of every 10).

STYLE Monster class and update logic

The Monster class mixes roaming and chasing logic inline in the update() method, making the state machine hard to follow. The roaming timer is checked every frame with a random duration, but the duration can be re-randomized mid-transition.

💡 Extract roaming and chasing into separate methods: update_roaming() and update_chasing(). Use a state machine pattern with explicit transitions (e.g., IDLE → CHASE → IDLE) rather than checking conditions inline.

FEATURE Room transitions (vents and staircases)

Room transitions are instant teleports. If a player is moving fast, they could theoretically collide with a monster right after teleporting before seeing the room.

💡 Add a brief invulnerability window (e.g., 30 frames) after room transitions during which monster collisions are ignored. Or add a fade-to-black transition animation to sell the vent travel experience.

FEATURE Player movement

The player's horizontal velocity is set directly by the joystick angle and only zeroed when the joystick is released. There is no momentum or acceleration—movement is purely input-driven.

💡 Add acceleration and deceleration: `player.vx = lerp(player.vx, targetVx, 0.1);` so the player slides to a stop rather than stopping instantly. This makes movement feel heavier and more game-like.

BUG jumpButton and other buttons in touchStarted()

Button collision detection uses `mouseX, mouseY` instead of `touches[0].x, touches[0].y`. On some touch systems, mouseX/mouseY may not be synchronized with the actual touch position, causing missed button presses.

💡 Use `touches[0].x` and `touches[0].y` for button collision detection instead of mouseX/mouseY to ensure accurate touch position.

🔄 Code Flow

Code flow showing setup, draw, updateplayer, drawplayer, playerjump, playerclimb, monster, spawnmonster, updatemonsters, drawmonsters, updatecamera, drawrooms, drawvents, drawstaircases, drawsafezoneboundary, drawjoystick, drawmonstertracker, drawbuttons, triggerjumpscare, drawjumpscare, resetgame, touchstarted, touchmoved, touchended, keypressed, keyreleased, windowresized, rectcollision

💡 Click on function names in the diagram to jump to their code

graph TD start[Start] --> setup[setup] setup --> canvascreation[canvas-creation] setup --> roomdefinitions[room-definitions] setup --> playerinit[player-init] setup --> monsterspawnloop[monster-spawn-loop] setup --> draw[draw loop] click setup href "#fn-setup" click canvascreation href "#sub-canvas-creation" click roomdefinitions href "#sub-room-definitions" click playerinit href "#sub-player-init" click monsterspawnloop href "#sub-monster-spawn-loop" draw --> startscreencheck[start-screen-check] draw --> jumpscarecheck[jumpscare-check] draw --> gameupdatecalls[game-update-calls] draw --> cameratranslation[camera-translation] draw --> worlddrawing[world-drawing] draw --> uidrawing[ui-drawing] click draw href "#fn-draw" click startscreencheck href "#sub-start-screen-check" click jumpscarecheck href "#sub-jumpscare-check" click gameupdatecalls href "#sub-game-update-calls" click cameratranslation href "#sub-camera-translation" click worlddrawing href "#sub-world-drawing" click uidrawing href "#sub-ui-drawing" gameupdatecalls --> updateplayer[updateplayer] gameupdatecalls --> updatemonsters[updatemonsters] gameupdatecalls --> updatecamera[updatecamera] click updateplayer href "#fn-updateplayer" click updatemonsters href "#fn-updatemonsters" click updatecamera href "#fn-updatecamera" updateplayer --> gravityapplication[gravity-application] updateplayer --> groundcollision[ground-collision] updateplayer --> wallcollision[wall-collision] updateplayer --> ventdetectionloop[vent-detection-loop] updateplayer --> venttransitionloop[vent-transition-loop] updateplayer --> staircasetransitionloop[staircase-transition-loop] updateplayer --> jumpvalidation[jump-validation] updateplayer --> climbstatecheck[climb-state-check] click gravityapplication href "#sub-gravity-application" click groundcollision href "#sub-ground-collision" click wallcollision href "#sub-wall-collision" click ventdetectionloop href "#sub-vent-detection-loop" click venttransitionloop href "#sub-vent-transition-loop" click staircasetransitionloop href "#sub-staircase-transition-loop" click jumpvalidation href "#sub-jump-validation" click climbstatecheck href "#sub-climb-state-check" updatemonsters --> monsterloop[monster-loop] click monsterloop href "#sub-monster-loop" monsterloop --> monsterconstructor[monster-constructor] monsterloop --> monsterphysics[monster-physics] monsterloop --> monsterfloorcollision[monster-floor-collision] monsterloop --> monsterwallcollision[monster-wall-collision] monsterloop --> monsterchasedetection[monster-chase-detection] monsterloop --> monsterroamingbehavior[monster-roaming-behavior] monsterloop --> monsterchasingbehavior[monster-chasing-behavior] monsterloop --> monstersafezoneboundary[monster-safe-zone-boundary] monsterloop --> monsterplayercollision[monster-player-collision] click monsterconstructor href "#sub-monster-constructor" click monsterphysics href "#sub-monster-physics" click monsterfloorcollision href "#sub-monster-floor-collision" click monsterwallcollision href "#sub-monster-wall-collision" click monsterchasedetection href "#sub-monster-chase-detection" click monsterroamingbehavior href "#sub-monster-roaming-behavior" click monsterchasingbehavior href "#sub-monster-chasing-behavior" click monstersafezoneboundary href "#sub-monster-safe-zone-boundary" click monsterplayercollision href "#sub-monster-player-collision" cameratranslation --> cameracenter[camera-center] cameratranslation --> cameraclamp[camera-clamp] click cameracenter href "#sub-camera-center" click cameraclamp href "#sub-camera-clamp" worlddrawing --> roomfillloop[room-fill-loop] worlddrawing --> floorlineloop[floor-line-loop] worlddrawing --> ventculling[vent-culling] worlddrawing --> ventdetailloop[vent-detail-loop] worlddrawing --> staircaseculling[staircase-culling] worlddrawing --> staircasedetailloop[staircase-detail-loop] click roomfillloop href "#sub-room-fill-loop" click floorlineloop href "#sub-floor-line-loop" click ventculling href "#sub-vent-culling" click ventdetailloop href "#sub-vent-detail-loop" click staircaseculling href "#sub-staircase-culling" click staircasedetailloop href "#sub-staircase-detail-loop" uidrawing --> joystickbase[joystick-base] uidrawing --> joystickknob[joystick-knob] uidrawing --> trackerroomcheck[tracker-room-check] uidrawing --> nearestmonsterloop[nearest-monster-loop] uidrawing --> trackercompass[tracker-compass] uidrawing --> jumpbuttondraw[jump-button-draw] uidrawing --> climbupbuttondraw[climb-up-button-draw] uidrawing --> climbdownbuttondraw[climb-down-button-draw] click joystickbase href "#sub-joystick-base" click joystickknob href "#sub-joystick-knob" click trackerroomcheck href "#sub-tracker-room-check" click nearestmonsterloop href "#sub-nearest-monster-loop" click trackercompass href "#sub-tracker-compass" click jumpbuttondraw href "#sub-jump-button-draw" click climbupbuttondraw href "#sub-climb-up-button-draw" click climbdownbuttondraw href "#sub-climb-down-button-draw" jumpscarecheck --> jumpscareguard[jumpscare-guard] jumpscarecheck --> jumpscarereset[jumpscare-reset] jumpscarecheck --> jumpscaretimeout[jumpscare-timeout] click jumpscareguard href "#sub-jumpscare-guard" click jumpscarereset href "#sub-jumpscare-reset" click jumpscaretimeout href "#sub-jumpscare-timeout" jumpscarereset --> redflashcalculation[red-flash-calculation] jumpscarereset --> jumpscaretext[jumpscare-text] jumpscarereset --> jumpscaretimerdecrement[jumpscare-timer-decrement] jumpscarereset --> jumpscarereset[jumpscare-reset] click redflashcalculation href "#sub-red-flash-calculation" click jumpscaretext href "#sub-jumpscare-text" click jumpscaretimerdecrement href "#sub-jumpscare-timer-decrement" click jumpscarereset href "#sub-jumpscare-reset" resetgame --> playerreset[player-reset] resetgame --> monsterrespawn[monster-respawn] click playerreset href "#sub-player-reset" click monsterrespawn href "#sub-monster-respawn" touchstarted --> gamestartcheck[game-start-check] touchstarted --> jumpbuttoncheck[jump-button-check] touchstarted --> climbupbuttoncheck[climb-up-button-check] touchstarted --> climbdownbuttoncheck[climb-down-button-check] touchstarted --> joystickactivation[joystick-activation] click gamestartcheck href "#sub-game-start-check" click jumpbuttoncheck href "#sub-jump-button-check" click climbupbuttoncheck href "#sub-climb-up-button-check" click climbdownbuttoncheck href "#sub-climb-down-button-check" click joystickactivation href "#sub-joystick-activation" joystickactivation --> touchtracking[touch-tracking] joystickactivation --> joystickdistancecalc[joystick-distance-calc] joystickactivation --> joystickclamp[joystick-clamp] joystickactivation --> deadzonecheck[dead-zone-check] click touchtracking href "#sub-touch-tracking" click joystickdistancecalc href "#sub-joystick-distance-calc" click joystickclamp href "#sub-joystick-clamp" click deadzonecheck href "#sub-dead-zone-check" joystickrelease --> joystickrelease[joystick-release] jumpbuttonrelease --> jumpbuttonrelease[jump-button-release] climbcontrolsrelease --> climbcontrolsrelease[climb-controls-release] click joystickrelease href "#sub-joystick-release" click jumpbuttonrelease href "#sub-jump-button-release" click climbcontrolsrelease href "#sub-climb-controls-release" keypressed --> keyboardstart[keyboard-start] keypressed --> spacejump[space-jump] keypressed --> arrowclimbing[arrow-climbing] click keyboardstart href "#sub-keyboard-start" click spacejump href "#sub-space-jump" click arrowclimbing href "#sub-arrow-climbing" keyreleased --> spacerelease[space-release] keyreleased --> arrowrelease[arrow-release] click spacerelease href "#sub-space-release" click arrowrelease href "#sub-arrow-release" windowresized --> canvasresize[canvas-resize] windowresized --> joystickreposition[joystick-reposition] windowresized --> buttonreposition[button-reposition] click canvasresize href "#sub-canvas-resize" click joystickreposition href "#sub-joystick-reposition" click buttonreposition href "#sub-button-reposition" rectcollision --> aabbcollision[aabb-collision] click aabbcollision href "#sub-aabb-collision"

❓ Frequently Asked Questions

What kind of visual experience does the Fatal Ape Redux sketch offer?

The sketch creates a moody, abstract visual environment with colorful, procedural drawings representing different rooms and simple geometric monsters chasing the player.

How can players interact with the Fatal Ape Redux game?

Players can interact using on-screen buttons to perform actions like jumping and climbing, navigating through various rooms and avoiding monsters.

What creative coding principles are showcased in the Fatal Ape Redux sketch?

This sketch demonstrates procedural generation techniques by creating visuals and room layouts programmatically, along with basic game mechanics like physics and user interaction.

Preview

Fatal ape redux - p5.js creative coding sketch preview
Sketch Preview
Code flow diagram showing the structure of Fatal ape redux - Code flow showing setup, draw, updateplayer, drawplayer, playerjump, playerclimb, monster, spawnmonster, updatemonsters, drawmonsters, updatecamera, drawrooms, drawvents, drawstaircases, drawsafezoneboundary, drawjoystick, drawmonstertracker, drawbuttons, triggerjumpscare, drawjumpscare, resetgame, touchstarted, touchmoved, touchended, keypressed, keyreleased, windowresized, rectcollision
Code Flow Diagram