
FNAF lol

This sketch recreates the tense security office from Five Nights at Freddy's with four animated blocky animatronics that move through connected rooms, attack doors on timers, and jumpscare you if left undefended. You manage power consumption by closing doors and monitoring cameras while trying to survive until 6 AM.

🧪 Try This!

Experiment with the code by making these changes:

  1. Speed up the game timer — Change the division factor from 30000 to 15000 so each in-game hour takes only 15 real seconds instead of 30—the game becomes much shorter and more frantic.
  2. Make Foxy much more dangerous — Reduce Foxy's door timer from 2000 to 500 milliseconds so he attacks 4x faster than normal—Foxy becomes an instant threat.
  3. Remove the monitor's jumpscare protection — Change the monitor-check logic so watching cameras doesn't save you from Bonnie, Chica, and Freddy—only closed doors matter.
  4. Give yourself unlimited power — Disable power drain by commenting out the line that subtracts from power—you'll have infinite resources and can focus on strategy.
  5. Make all animatronics move at maximum speed — Change every animatronic's difficulty to 20 so they move toward the door almost every AI tick—the game becomes chaotic.
Prefer the full editor? Open it there →

📖 About This Sketch

This sketch builds a fully playable security office simulator inspired by Five Nights at Freddy's. Four unique blocky animatronics—Bonnie, Chica, Freddy, and Foxy—each follow their own AI pathways through numbered rooms, and will attack your doors on timers unless you close them or watch the right camera. The sketch demonstrates game state machines, procedural animation, AI behavior trees, procedural audio synthesis, and DOM-driven UI—all the patterns that power real indie games.

The code is organized into a setup phase that initializes audio and UI, a draw loop that updates game logic and renders the security office or camera feeds, and a collection of specialized functions for AI processing, collision detection, rendering animatronics, and sound playback. By studying it you will learn how to build a complete game loop with multiple screens, manage complex entity state (animatronics with locations, timers, and attack flags), create convincing 2D characters from basic shapes, and trigger timed events that feel genuinely threatening.

⚙️ How It Works

  1. When you click Start Night, the game initializes all animatronics in room 1A, sets power to 100%, and starts an ambient low-frequency hum. The timer counts real-world milliseconds, converting every 30 seconds into one in-game hour.
  2. Every frame, draw() checks the game state. If PLAY, it updates animatronic positions, checks for door attacks, and drains power based on which doors are closed and whether the monitor is open. If the monitor is closed, you see the 3D office with flickering lighting; if open, you see static-heavy camera feeds of five rooms.
  3. Every 3.5 seconds, processAI() runs: each animatronic has a random chance (based on its difficulty level) to move one room closer to your position. When they reach a doorway, they stay HIDDEN and trigger a door timer—if you haven't closed that door and aren't watching the monitor within 2–6 seconds, they jumpscare you.
  4. If you close a door before an animatronic reaches it, it bounces back, drains power, and returns to an earlier room. Closing doors uses power, watching cameras uses power, and opening both doors consumes power fastest.
  5. When power hits zero, the office goes dark and Freddy appears in 6 seconds with a guaranteed jumpscare. If you survive until timeHour >= 6, you win. Pressing keys 4 and 5 together opens an admin panel where you can force animatronics to spawn or jumpscare yourself for testing.

🎓 Concepts You'll Learn

Game state machinesAI pathfinding and timersCollision detection (door attacks)Procedural audio synthesisCanvas transforms and 2D shape renderingDOM UI overlay managementProcedural animation (animatronics movement)

📝 Code Breakdown

setup()

setup() runs exactly once when the sketch starts. Use it to initialize canvas, load assets, and call helper functions that set up your game world.

function setup() {
  createCanvas(windowWidth, windowHeight);
  
  loadImage('https://encrypted-tbn0.gstatic.com/images?q=tbn:ANd9GcQoFui8C0lSswDQTAffLhIUuAA9Ca2J_F5Uiw&s', 
    img => posterImg = img, 
    err => console.log('Poster image blocked by CORS, using fallback.')
  );
  
  setupUI();
  setupAudio();
}
Line-by-line explanation (6 lines)

🔧 Subcomponents:

function-call Create Canvas createCanvas(windowWidth, windowHeight);

Creates a full-screen canvas that fills the browser window

async-load Load Poster Image loadImage('https://encrypted-tbn0.gstatic.com/images?q=tbn:ANd9GcQoFui8C0lSswDQTAffLhIUuAA9Ca2J_F5Uiw&s',

Attempts to load a poster image from the internet; if blocked by CORS, falls back to a drawn rectangle

createCanvas(windowWidth, windowHeight);
Creates a canvas that matches the current window dimensions. This runs once at startup and resizes automatically when windowResized() is called.
loadImage('https://encrypted-tbn0.gstatic.com/images?q=tbn:ANd9GcQoFui8C0lSswDQTAffLhIUuAA9Ca2J_F5Uiw&s',
Attempts to load an image from Google's servers. The callback function runs if successful; the error handler runs if CORS blocks the load (which it usually does).
img => posterImg = img,
Arrow function that stores the loaded image in the global posterImg variable so drawRoom() can display it.
err => console.log('Poster image blocked by CORS, using fallback.')
Arrow function that logs a message if the image fails to load—the sketch continues normally and uses a gray rectangle instead.
setupUI();
Calls the setupUI function to create all HTML buttons and text displays (start screen, HUD, camera buttons, admin panel).
setupAudio();
Calls the setupAudio function to initialize all procedural oscillators, envelopes, and noise generators for sound effects.

draw()

draw() runs 60 times per second and is your main game loop. It checks the current gameState and renders different visuals and updates depending on what state you're in. This is the heartbeat of the entire game.

function draw() {
  background(0);

  if (gameState === 'PLAY') {
    if (!adminOpen) {
      updateGameLogic();
    }
    
    if (monitorOpen) {
      drawCameraView();
      select('#static-overlay').addClass('heavy-static');
    } else {
      updateCamera();
      drawRoom();
      drawLighting();
      select('#static-overlay').removeClass('heavy-static');
    }
    
    updateHUD();
  } 
  else if (gameState === 'POWEROUT') {
    monitorOpen = false;
    camUI.addClass('hidden');
    drawPowerOut();
    if (millis() - lastAITick > 6000) triggerJumpscare('freddy');
  }
  else if (gameState === 'JUMPSCARE') {
    background(0);
  }
}
Line-by-line explanation (8 lines)

🔧 Subcomponents:

conditional PLAY State Handler if (gameState === 'PLAY') {

When the game is running, update AI, render the office or cameras, and display the HUD

conditional Skip Logic If Admin Open if (!adminOpen) { updateGameLogic(); }

Pauses game updates (timers, AI moves) while the admin panel is visible

conditional Monitor vs Office View if (monitorOpen) { drawCameraView(); ... } else { updateCamera(); drawRoom(); ... }

Switches between camera-feed view (static-heavy, shows animatronic positions) and office view (3D room with lighting)

conditional POWEROUT State Handler else if (gameState === 'POWEROUT') {

When power dies, hide UI and show a dark room; after 6 seconds, trigger Freddy's guaranteed jumpscare

background(0);
Clears the canvas with black, erasing everything drawn in the previous frame.
if (gameState === 'PLAY') {
Checks if the game is currently running (not on start screen, not game over, not in a jumpscare).
if (!adminOpen) { updateGameLogic(); }
Only updates game state (power drain, AI movement, door timers) if the admin panel is closed. This pauses the game while debugging.
if (monitorOpen) { drawCameraView(); select('#static-overlay').addClass('heavy-static'); }
If the monitor is open, draw the five camera feeds and add a heavy-static CSS class to the static overlay for a grainy effect.
else { updateCamera(); drawRoom(); drawLighting(); select('#static-overlay').removeClass('heavy-static'); }
If the monitor is closed, update the camera pan based on mouse position, draw the 3D office room, apply darkness around the edges, and remove the heavy static effect.
updateHUD();
Updates the on-screen time display and power percentage.
else if (gameState === 'POWEROUT') {
When power runs out, switch to the powerout sequence.
if (millis() - lastAITick > 6000) triggerJumpscare('freddy');
After 6000 milliseconds (6 real seconds), Freddy jumps you guaranteed—you cannot defend against him during a blackout.

updateGameLogic()

updateGameLogic() is called every frame and handles the core game mechanics: time passing, power draining, AI ticking, and win/loss conditions. It's the engine that makes the game tick.

🔬 This builds up the usage counter by checking which systems are on. What happens if you change one of the if statements to always add to usage (e.g., always add 1 for the left door, whether it's closed or not)? The game will drain power much faster.

  let usage = 1;
  if (leftDoorClosed) usage++;
  if (rightDoorClosed) usage++;
  if (monitorOpen) usage++;
function updateGameLogic() {
  let now = millis();
  
  timeHour = Math.floor((now - lastAITick) / 30000);
  if (timeHour >= 6) { triggerWin(); return; }
  
  let usage = 1;
  if (leftDoorClosed) usage++;
  if (rightDoorClosed) usage++;
  if (monitorOpen) usage++;
  
  power -= (0.05 * usage) * (deltaTime / 1000);
  if (power <= 0) { power = 0; triggerPowerOut(); return; }
  
  if (now % 3500 < 50) processAI(now);
  checkDoors(now);
}
Line-by-line explanation (11 lines)

🔧 Subcomponents:

calculation Time Calculation timeHour = Math.floor((now - lastAITick) / 30000);

Converts elapsed real-world milliseconds since game start into in-game hours (30 real seconds = 1 hour)

conditional Win Condition if (timeHour >= 6) { triggerWin(); return; }

Ends the game with a win screen if you survive until 6 AM

calculation Power Drain Calculator let usage = 1; if (leftDoorClosed) usage++; if (rightDoorClosed) usage++; if (monitorOpen) usage++;

Tallies how many systems are active (doors + monitor) to determine drain rate

calculation Power Depletion power -= (0.05 * usage) * (deltaTime / 1000);

Subtracts power based on usage rate and frame delta time so drain is frame-rate independent

conditional AI Tick Trigger if (now % 3500 < 50) processAI(now);

Runs AI movement logic approximately every 3.5 seconds (when elapsed milliseconds mod 3500 is small)

let now = millis();
Captures the current elapsed time in milliseconds since the sketch started.
timeHour = Math.floor((now - lastAITick) / 30000);
Divides elapsed time by 30000 to convert milliseconds to hours. lastAITick is set when the game starts, so this always counts from game start (not 0).
if (timeHour >= 6) { triggerWin(); return; }
If you've survived 6 in-game hours (180 real seconds), you win and the function exits early.
let usage = 1;
Starts a counter at 1 (base power drain for just being alive).
if (leftDoorClosed) usage++;
If the left door is closed, add 1 to the usage counter (closing doors costs power).
if (rightDoorClosed) usage++;
If the right door is closed, add 1 more to usage.
if (monitorOpen) usage++;
If you're watching cameras, add 1 more (cameras use power too).
power -= (0.05 * usage) * (deltaTime / 1000);
Drains power proportional to usage. deltaTime is the milliseconds since last frame, divided by 1000 to convert to seconds. This makes power drain frame-rate independent.
if (power <= 0) { power = 0; triggerPowerOut(); return; }
If power hits zero or below, clamp it to 0 and trigger the powerout sequence (blackout + guaranteed jumpscare).
if (now % 3500 < 50) processAI(now);
Uses modulo arithmetic: every 3500 milliseconds, now % 3500 resets to a small number (0-49), triggering the AI update. This is a compact way to trigger periodic events.
checkDoors(now);
Checks if any animatronic has been waiting at a door long enough to attack.

processAI(now)

processAI() runs every ~3.5 seconds and updates each animatronic's location or attack state based on random chances and predetermined pathways. This is a simple finite-state machine—each animatronic has fixed states (rooms) and moves through them based on difficulty and randomness.

🔬 Bonnie follows a fixed path 1A → 1B → 2B → Door. What happens if you change the third condition so he goes directly from 2B back to 1A instead of attacking? (He'll reset and start over, never reaching the door.)

  // BONNIE AI 
  if (!animatronics.bonnie.atDoor && random(20) < animatronics.bonnie.diff) {
    if (animatronics.bonnie.loc === '1A') animatronics.bonnie.loc = '1B';
    else if (animatronics.bonnie.loc === '1B') animatronics.bonnie.loc = '2B';
    else if (animatronics.bonnie.loc === '2B') {
      animatronics.bonnie.atDoor = true;
      animatronics.bonnie.doorTimer = now;
      animatronics.bonnie.loc = 'HIDDEN';
    }
  }
function processAI(now) {
  // BONNIE AI 
  if (!animatronics.bonnie.atDoor && random(20) < animatronics.bonnie.diff) {
    if (animatronics.bonnie.loc === '1A') animatronics.bonnie.loc = '1B';
    else if (animatronics.bonnie.loc === '1B') animatronics.bonnie.loc = '2B';
    else if (animatronics.bonnie.loc === '2B') {
      animatronics.bonnie.atDoor = true;
      animatronics.bonnie.doorTimer = now;
      animatronics.bonnie.loc = 'HIDDEN';
    }
  }

  // CHICA AI 
  if (!animatronics.chica.atDoor && random(20) < animatronics.chica.diff) {
    if (animatronics.chica.loc === '1A') animatronics.chica.loc = '1B';
    else if (animatronics.chica.loc === '1B') animatronics.chica.loc = '4B';
    else if (animatronics.chica.loc === '4B') {
      animatronics.chica.atDoor = true;
      animatronics.chica.doorTimer = now;
      animatronics.chica.loc = 'HIDDEN';
    }
  }

  // FOXY AI
  if (!animatronics.foxy.atDoor && random(20) < animatronics.foxy.diff) {
    if (!monitorOpen || currentCam !== '1C') {
      if (animatronics.foxy.state < 3) animatronics.foxy.state++;
      else if (animatronics.foxy.state === 3) {
        animatronics.foxy.atDoor = true; 
        animatronics.foxy.doorTimer = now;
      }
    }
  }

  // FREDDY AI 
  if (!animatronics.freddy.atDoor && random(20) < animatronics.freddy.diff) {
    if (animatronics.freddy.loc === '1A' && animatronics.bonnie.loc !== '1A' && animatronics.chica.loc !== '1A') {
      animatronics.freddy.loc = '1B';
    }
    else if (animatronics.freddy.loc === '1B') animatronics.freddy.loc = '4B';
    else if (animatronics.freddy.loc === '4B') {
      animatronics.freddy.atDoor = true;
      animatronics.freddy.doorTimer = now;
      animatronics.freddy.loc = 'HIDDEN';
    }
  }
}
Line-by-line explanation (7 lines)

🔧 Subcomponents:

conditional Bonnie Pathfinding if (!animatronics.bonnie.atDoor && random(20) < animatronics.bonnie.diff) {

Bonnie has a random chance (based on difficulty) to move; follows a path 1A → 1B → 2B → Door

conditional Chica Pathfinding if (!animatronics.chica.atDoor && random(20) < animatronics.chica.diff) {

Chica has a random chance to move; follows a path 1A → 1B → 4B → Door

conditional Foxy Stage Progression if (!animatronics.foxy.atDoor && random(20) < animatronics.foxy.diff) { if (!monitorOpen || currentCam !== '1C') {

Foxy progresses through attack stages (0, 1, 2, 3) unless you're actively watching camera 1C; becomes more dangerous with each stage

conditional Freddy Smart Movement if (animatronics.freddy.loc === '1A' && animatronics.bonnie.loc !== '1A' && animatronics.chica.loc !== '1A') {

Freddy only enters room 1A if Bonnie and Chica are not there—he avoids crowding, making him harder to predict

if (!animatronics.bonnie.atDoor && random(20) < animatronics.bonnie.diff) {
Only move Bonnie if he's not already at the door. random(20) returns 0–20; if it's less than his difficulty (4), he moves. Higher difficulty = more likely to move.
if (animatronics.bonnie.loc === '1A') animatronics.bonnie.loc = '1B';
If Bonnie is in room 1A, move him to 1B (one step closer to your left door).
else if (animatronics.bonnie.loc === '1B') animatronics.bonnie.loc = '2B';
If he's already in 1B, move him to 2B (another step closer).
else if (animatronics.bonnie.loc === '2B') { animatronics.bonnie.atDoor = true; animatronics.bonnie.doorTimer = now; animatronics.bonnie.loc = 'HIDDEN'; }
When Bonnie reaches 2B (directly outside the left door), set atDoor to true, record the exact time, and hide him (he's now pounding on the door outside).
if (!monitorOpen || currentCam !== '1C') {
Foxy only progresses if you're NOT watching camera 1C. If you ARE watching 1C, Foxy gets stuck in his current stage. This rewards careful camera management.
if (animatronics.foxy.state < 3) animatronics.foxy.state++;
If Foxy is in stage 0, 1, or 2, advance him by 1. Stage 3 is his final attack stage.
if (animatronics.freddy.loc === '1A' && animatronics.bonnie.loc !== '1A' && animatronics.chica.loc !== '1A') {
Freddy is smart: he only enters 1A if both Bonnie and Chica are elsewhere. This prevents all three from crowding the same room and makes Freddy unpredictable.

checkDoors(now)

checkDoors() is called every frame and enforces the consequence of each animatronic reaching a door: if you've closed the door in time, they bounce back; if not, you lose. Different animatronics have different timers and special rules (Foxy is faster, Freddy takes longer, monitor blocks some but not all).

🔬 This checks if the left door is closed to block Bonnie. What happens if you change !leftDoorClosed to always true (making it impossible to block)? (Bonnie will always jumpscare you after 5 seconds, no matter what.)

  if (animatronics.bonnie.atDoor && now - animatronics.bonnie.doorTimer > 5000) {
    if (!leftDoorClosed && !monitorOpen) triggerJumpscare('bonnie');
    else if (leftDoorClosed) { animatronics.bonnie.atDoor = false; animatronics.bonnie.loc = '1B'; playDoorSlam(); }
  }
function checkDoors(now) {
  if (animatronics.bonnie.atDoor && now - animatronics.bonnie.doorTimer > 5000) {
    if (!leftDoorClosed && !monitorOpen) triggerJumpscare('bonnie');
    else if (leftDoorClosed) { animatronics.bonnie.atDoor = false; animatronics.bonnie.loc = '1B'; playDoorSlam(); }
  }
  
  if (animatronics.foxy.atDoor && now - animatronics.foxy.doorTimer > 2000) {
    if (!leftDoorClosed) triggerJumpscare('foxy');
    else { animatronics.foxy.atDoor = false; animatronics.foxy.state = 0; power -= 5; playDoorSlam(); }
  }

  if (animatronics.chica.atDoor && now - animatronics.chica.doorTimer > 5000) {
    if (!rightDoorClosed && !monitorOpen) triggerJumpscare('chica');
    else if (rightDoorClosed) { animatronics.chica.atDoor = false; animatronics.chica.loc = '1B'; playDoorSlam(); }
  }
  
  if (animatronics.freddy.atDoor && now - animatronics.freddy.doorTimer > 6000) {
    if (!rightDoorClosed && !monitorOpen) triggerJumpscare('freddy');
    else if (rightDoorClosed) { animatronics.freddy.atDoor = false; animatronics.freddy.loc = '1B'; playDoorSlam(); }
  }
}
Line-by-line explanation (6 lines)

🔧 Subcomponents:

conditional Bonnie Door Timer if (animatronics.bonnie.atDoor && now - animatronics.bonnie.doorTimer > 5000) {

After Bonnie has been at the door for 5 seconds, either he jumpscares you or bounces back off the door

conditional Foxy Fast Timer if (animatronics.foxy.atDoor && now - animatronics.foxy.doorTimer > 2000) {

Foxy attacks faster (2 seconds) than others, making him more dangerous; also drains 5 power when blocked

conditional Chica Door Timer if (animatronics.chica.atDoor && now - animatronics.chica.doorTimer > 5000) {

Chica attacks the right door after 5 seconds; conditions for blocking are the same as Bonnie

conditional Freddy Longest Timer if (animatronics.freddy.atDoor && now - animatronics.freddy.doorTimer > 6000) {

Freddy takes 6 seconds to break through, the longest of all animatronics—but he's the most dangerous

if (animatronics.bonnie.atDoor && now - animatronics.bonnie.doorTimer > 5000) {
Check if Bonnie is at the door AND if more than 5000 milliseconds (5 real seconds) have passed since he arrived.
if (!leftDoorClosed && !monitorOpen) triggerJumpscare('bonnie');
If the left door is open AND you're not watching the monitor, Bonnie jumps you. The monitor blocks jumpscares even with doors open.
else if (leftDoorClosed) { animatronics.bonnie.atDoor = false; animatronics.bonnie.loc = '1B'; playDoorSlam(); }
If the left door IS closed, Bonnie bounces back: set atDoor to false, move him back to 1B, and play a door-slam sound.
if (animatronics.foxy.atDoor && now - animatronics.foxy.doorTimer > 2000) {
Foxy's timer is only 2 seconds—he attacks much faster than Bonnie or Chica, making him the scariest threat.
if (!leftDoorClosed) triggerJumpscare('foxy');
Foxy does NOT check for monitor—he only cares if the door is closed. An open door means he gets you regardless.
else { animatronics.foxy.atDoor = false; animatronics.foxy.state = 0; power -= 5; playDoorSlam(); }
If you block Foxy, he resets to state 0 (giving you time to recover), but he drains 5 extra power as penalty.

drawRoom()

drawRoom() creates the 3D perspective of the office by drawing a back wall, pillars for depth, a floor, and furniture. It uses translate() and panX to respond to mouse movement, creating a parallax effect where the room shifts as you look around.

🔬 This loop draws pillars every 100 pixels. What happens if you change the step from 100 to 200? (Pillars will be twice as far apart, making the room look more open.) What if you change it to 50? (Pillars will be twice as dense.)

  fill(30); for(let i = -800; i < 800; i += 100) rect(i, -height/4, 50, height/2);
function drawRoom() {
  push();
  translate(width / 2 + panX, height / 2);
  rectMode(CENTER);
  noStroke();

  fill(40); rect(0, 0, 1600, height);
  fill(30); for(let i = -800; i < 800; i += 100) rect(i, -height/4, 50, height/2);
  fill(15); rect(0, height / 3, 1600, height / 2);

  if (posterImg) {
    imageMode(CENTER);
    image(posterImg, 0, -100, 150, 200);
  } else {
    fill(200); rect(0, -100, 150, 200);
    fill(0); textAlign(CENTER, CENTER); textSize(24); text("CELEBRATE", 0, -150);
  }
  
  drawDoorway(-500, leftDoorClosed, 'left');
  drawDoorway(500, rightDoorClosed, 'right');

  fill(60, 40, 20); rect(0, height / 4 + 50, 800, 250);
  fill(10); rect(-150, height / 4 - 20, 160, 120);
  fill(30, 100, 30); rect(-150, height / 4 - 20, 140, 100);
  pop();
}
Line-by-line explanation (11 lines)

🔧 Subcomponents:

calculation Back Wall fill(40); rect(0, 0, 1600, height);

Draws the large back wall of the office (dark gray)

for-loop Pillar Loop for(let i = -800; i < 800; i += 100) rect(i, -height/4, 50, height/2);

Draws vertical pillars across the room in a loop, creating depth

calculation Floor fill(15); rect(0, height / 3, 1600, height / 2);

Draws the dark floor at the bottom of the office

conditional Poster or Fallback if (posterImg) { imageMode(CENTER); image(posterImg, 0, -100, 150, 200); } else { fill(200); rect(0, -100, 150, 200); ... }

Shows the loaded poster image if available; otherwise draws a gray rectangle with fallback text

calculation Desk and Monitor fill(60, 40, 20); rect(0, height / 4 + 50, 800, 250); fill(10); rect(-150, height / 4 - 20, 160, 120); fill(30, 100, 30); rect(-150, height / 4 - 20, 140, 100);

Draws the wooden desk, dark monitor frame, and glowing green screen of the office console

push(); translate(width / 2 + panX, height / 2); rectMode(CENTER); noStroke();
Saves the current transform state, then moves the origin to the center of the screen plus the camera pan offset. rectMode(CENTER) means all rectangles draw from their center. noStroke() removes outlines.
fill(40); rect(0, 0, 1600, height);
Draws the back wall: a large dark gray rectangle spanning the full width and height.
fill(30); for(let i = -800; i < 800; i += 100) rect(i, -height/4, 50, height/2);
Loops from -800 to 800 in steps of 100, drawing vertical pillars at each position. This creates the impression of depth and structure.
fill(15); rect(0, height / 3, 1600, height / 2);
Draws the floor: a very dark rectangle that takes up the bottom third of the visible space.
if (posterImg) { imageMode(CENTER); image(posterImg, 0, -100, 150, 200); }
If the poster image loaded successfully, set imageMode to CENTER and draw it at position (0, -100) with size 150x200.
else { fill(200); rect(0, -100, 150, 200); fill(0); textAlign(CENTER, CENTER); textSize(24); text("CELEBRATE", 0, -150); }
If the image failed to load (CORS block), draw a light gray rectangle and write "CELEBRATE" above it in black text.
drawDoorway(-500, leftDoorClosed, 'left'); drawDoorway(500, rightDoorClosed, 'right');
Calls drawDoorway() twice: once for the left door (x offset -500, closed state) and once for the right (x offset 500, closed state).
fill(60, 40, 20); rect(0, height / 4 + 50, 800, 250);
Draws the desk: a large brown rectangle positioned in the lower center.
fill(10); rect(-150, height / 4 - 20, 160, 120);
Draws the monitor frame: a dark rectangle on top of the desk.
fill(30, 100, 30); rect(-150, height / 4 - 20, 140, 100);
Draws the monitor screen: a glowing green rectangle slightly smaller than the frame, creating a bezel effect.
pop();
Restores the previous transform state, undoing the translate and any other changes.

drawDoorway(xOffset, isClosed, side)

drawDoorway() is called twice per frame (left and right) and handles all the visuals for each door: the open void, the attacking animatronic (if any), the closed metal door with caution stripes, and the wooden frame. It's a good example of conditional rendering based on game state.

🔬 The left door shows Bonnie if open, the right shows Chica or Freddy. What happens if you change the condition so Bonnie can also appear in the right doorway? (You'd see Bonnie attacking from both sides, which breaks the game logic.)

    if (side === 'left') {
      if (animatronics.bonnie.atDoor) drawBunny(0, 100, 1);
    } else {
      if (animatronics.chica.atDoor) drawChicken(0, 100, 1);
      else if (animatronics.freddy.atDoor) drawBear(0, 100, 1);
    }
function drawDoorway(xOffset, isClosed, side) {
  push();
  translate(xOffset, 0);
  rectMode(CENTER);
  
  fill(5); rect(0, 50, 250, 450); 

  if (!isClosed) {
    if (side === 'left') {
      if (animatronics.bonnie.atDoor) drawBunny(0, 100, 1);
    } else {
      if (animatronics.chica.atDoor) drawChicken(0, 100, 1);
      else if (animatronics.freddy.atDoor) drawBear(0, 100, 1);
    }
  }

  if (isClosed) {
    fill(90, 95, 100); rect(0, 50, 250, 450);
    fill(200, 200, 0); for(let i = -150; i < 250; i += 60) rect(0, i, 250, 20);
  }

  fill(50);
  rect(-140, 50, 30, 450); rect(140, 50, 30, 450); rect(0, -190, 310, 30);
  pop();
}
Line-by-line explanation (9 lines)

🔧 Subcomponents:

calculation Doorway Opening fill(5); rect(0, 50, 250, 450);

Draws the dark void of the open doorway (where animatronics appear if not blocked)

conditional Visible Animatronic if (!isClosed) { if (side === 'left') { if (animatronics.bonnie.atDoor) drawBunny(0, 100, 1); } else { if (animatronics.chica.atDoor) drawChicken(0, 100, 1); else if (animatronics.freddy.atDoor) drawBear(0, 100, 1); } }

Shows the attacking animatronic in the doorway if the door is open

conditional Closed Door Visual if (isClosed) { fill(90, 95, 100); rect(0, 50, 250, 450); fill(200, 200, 0); for(let i = -150; i < 250; i += 60) rect(0, i, 250, 20); }

Draws the metal door frame and yellow caution stripes when the door is closed

calculation Door Frame and Lintel fill(50); rect(-140, 50, 30, 450); rect(140, 50, 30, 450); rect(0, -190, 310, 30);

Draws the wooden door frame: two vertical sides and a top beam

push(); translate(xOffset, 0); rectMode(CENTER);
Saves state and translates to the door's x position (either -500 or 500). All drawing after this will be relative to that position.
fill(5); rect(0, 50, 250, 450);
Draws the dark opening: a very dark rectangle that represents the void of the open doorway.
if (!isClosed) {
Only show animatronics in the doorway if the door is open.
if (side === 'left') { if (animatronics.bonnie.atDoor) drawBunny(0, 100, 1); }
If this is the left doorway and Bonnie is attacking, draw him at position (0, 100) with scale 1.
else { if (animatronics.chica.atDoor) drawChicken(0, 100, 1); else if (animatronics.freddy.atDoor) drawBear(0, 100, 1); }
If this is the right doorway, check if Chica or Freddy is attacking and draw the appropriate one.
if (isClosed) { fill(90, 95, 100); rect(0, 50, 250, 450);
If the door IS closed, draw a metal gray rectangle covering the doorway.
fill(200, 200, 0); for(let i = -150; i < 250; i += 60) rect(0, i, 250, 20);
Draw yellow caution stripes across the closed door by looping and drawing small rectangles at regular intervals.
fill(50); rect(-140, 50, 30, 450); rect(140, 50, 30, 450); rect(0, -190, 310, 30);
Draw the wooden door frame: left vertical (x -140), right vertical (x 140), and top horizontal beam. These form a rectangular frame around the doorway.
pop();
Restore the previous transform, undoing the translate.

drawCameraView()

drawCameraView() renders a static-filled CRT monitor showing five different rooms. Each room displays the animatronics that are currently located there. The green scanlines and dark background create the classic FNAF security office aesthetic.

🔬 This block checks each animatronic's location and only draws them if they're in room 1A. What happens if you remove the location check and draw them unconditionally? (All animatronics would appear in every camera view, no matter where they actually are.)

  if (currentCam === '1A') {
    if (animatronics.freddy.loc === '1A') drawBear(0, 0, 0.8);
    if (animatronics.bonnie.loc === '1A') drawBunny(-150, 20, 0.8);
    if (animatronics.chica.loc === '1A') drawChicken(150, 20, 0.8);
  }
function drawCameraView() {
  push();
  rectMode(CORNER);
  fill(20); rect(0, 0, width, height);
  
  push();
  translate(width/2 - 200, height/2);
  
  if (currentCam === '1A') {
    if (animatronics.freddy.loc === '1A') drawBear(0, 0, 0.8);
    if (animatronics.bonnie.loc === '1A') drawBunny(-150, 20, 0.8);
    if (animatronics.chica.loc === '1A') drawChicken(150, 20, 0.8);
  }
  else if (currentCam === '1B') {
    if (animatronics.freddy.loc === '1B') drawBear(-100, 0, 0.9);
    if (animatronics.bonnie.loc === '1B') drawBunny(0, 50, 1);
    if (animatronics.chica.loc === '1B') drawChicken(150, 50, 1);
  }
  else if (currentCam === '1C') {
    fill(80, 20, 100); rect(-200, -100, 400, 300); 
    if (animatronics.foxy.state === 1) drawFox(-50, 50, 0.8); 
    if (animatronics.foxy.state === 2) drawFox(0, 100, 1);  
    if (animatronics.foxy.state === 3) { fill(255); textAlign(CENTER); textSize(40); text("IT'S ME", 0, 0); }
  }
  else if (currentCam === '2B') {
    if (animatronics.bonnie.loc === '2B') drawBunny(0, 50, 1.2);
  }
  else if (currentCam === '4B') {
    if (animatronics.chica.loc === '4B') drawChicken(0, 50, 1.2);
    if (animatronics.freddy.loc === '4B') drawBear(50, 20, 1.3);
  }
  pop();
  
  fill(0, 255, 0, 20);
  for (let i = 0; i < height; i += 10) rect(0, i, width, 2);
  
  fill(255); textSize(30); textAlign(LEFT, TOP);
  text(`CAM ${currentCam}`, 30, 30);
  pop();
}
Line-by-line explanation (11 lines)

🔧 Subcomponents:

calculation Camera Feed Background fill(20); rect(0, 0, width, height);

Fills the entire screen with dark gray (the CRT monitor background)

switch-like-conditional Camera Room Selector if (currentCam === '1A') { ... } else if (currentCam === '1B') { ... } else if (currentCam === '1C') { ... }

Draws different animatronics depending on which room is being monitored

for-loop CRT Scanlines for (let i = 0; i < height; i += 10) rect(0, i, width, 2);

Draws thin horizontal lines across the screen to simulate a CRT monitor effect

calculation Camera Label text(`CAM ${currentCam}`, 30, 30);

Displays the current camera ID (1A, 1B, 1C, 2B, or 4B) in the top-left corner

push(); rectMode(CORNER); fill(20); rect(0, 0, width, height);
Saves state, sets rect drawing mode to CORNER (top-left), and fills the entire screen with dark gray.
push(); translate(width/2 - 200, height/2);
Saves state again and translates to a viewport in the center of the screen (offset by -200 to center the animatronics).
if (currentCam === '1A') { ... }
If you're watching camera 1A, draw all animatronics that are located in that room.
if (animatronics.freddy.loc === '1A') drawBear(0, 0, 0.8);
If Freddy is in room 1A, draw him at position (0, 0) with scale 0.8 (slightly smaller than life-size).
if (animatronics.bonnie.loc === '1A') drawBunny(-150, 20, 0.8);
If Bonnie is in room 1A, draw him to the left at x=-150.
else if (currentCam === '1C') { fill(80, 20, 100); rect(-200, -100, 400, 300);
Camera 1C shows the pirate room (Foxy's lair). Fill it with a purple background.
if (animatronics.foxy.state === 1) drawFox(-50, 50, 0.8);
If Foxy is in stage 1, draw him at x=-50 with scale 0.8 (partially visible, building tension).
if (animatronics.foxy.state === 3) { fill(255); textAlign(CENTER); textSize(40); text("IT'S ME", 0, 0); }
If Foxy reaches stage 3 (final attack), draw the text "IT'S ME" in white at the center of the screen (creepy reference).
fill(0, 255, 0, 20); for (let i = 0; i < height; i += 10) rect(0, i, width, 2);
Draw semi-transparent green horizontal lines across the entire screen to simulate CRT scanlines—a classic monitor effect.
text(`CAM ${currentCam}`, 30, 30);
Display the camera ID (e.g., "CAM 1A") in white text at the top-left.
pop(); pop();
Restore both transform states.

drawBear(x, y, s)

drawBear() creates Freddy from six ellipses: body, two arms/ears, head, snout, and eyes with pupils. It's a good example of composing complex shapes from simple primitives. The push()/pop() wrapper isolates all transforms so the bear doesn't affect other drawings.

function drawBear(x, y, s) {
  push(); translate(x, y); scale(s); noStroke();
  fill(100, 50, 20); ellipse(0, 150, 180, 200); 
  ellipse(-60, -80, 50, 50); ellipse(60, -80, 50, 50); 
  ellipse(0, 0, 150, 130); 
  fill(140, 90, 50); ellipse(0, 30, 80, 60); fill(0); ellipse(0, 15, 30, 20); 
  fill(0); ellipse(-35, -20, 35, 35); ellipse(35, -20, 35, 35); 
  fill(255); ellipse(-35, -20, 8, 8); ellipse(35, -20, 8, 8); 
  pop();
}
Line-by-line explanation (9 lines)

🔧 Subcomponents:

calculation Bear Body Parts fill(100, 50, 20); ellipse(0, 150, 180, 200); ellipse(-60, -80, 50, 50); ellipse(60, -80, 50, 50); ellipse(0, 0, 150, 130);

Draws the main body, legs, and arms of Freddy using four ellipses

calculation Bear Face fill(140, 90, 50); ellipse(0, 30, 80, 60); fill(0); ellipse(0, 15, 30, 20);

Draws the snout and nose to give Freddy a distinctive blocky face

calculation Bear Eyes fill(0); ellipse(-35, -20, 35, 35); ellipse(35, -20, 35, 35); fill(255); ellipse(-35, -20, 8, 8); ellipse(35, -20, 8, 8);

Draws large black eye sockets with tiny white pupils (glowing effect)

push(); translate(x, y); scale(s); noStroke();
Saves state, moves to position (x, y), scales all subsequent drawing by factor s, and disables outlines.
fill(100, 50, 20); ellipse(0, 150, 180, 200);
Draws Freddy's body: a brown ellipse at y=150 with width 180 and height 200.
ellipse(-60, -80, 50, 50); ellipse(60, -80, 50, 50);
Draws two arm ellipses: one on the left (-60) and one on the right (60), both at y=-80.
ellipse(0, 0, 150, 130);
Draws the head: an ellipse at the center (0, 0) with width 150 and height 130.
fill(140, 90, 50); ellipse(0, 30, 80, 60);
Draws the snout: a lighter brown ellipse below the head at y=30.
fill(0); ellipse(0, 15, 30, 20);
Draws the nose: a small black ellipse at y=15.
fill(0); ellipse(-35, -20, 35, 35); ellipse(35, -20, 35, 35);
Draws two large black eye sockets at y=-20 (left and right).
fill(255); ellipse(-35, -20, 8, 8); ellipse(35, -20, 8, 8);
Draws tiny white pupils in each eye socket, creating a glowing effect.
pop();
Restores the saved state, undoing translate, scale, and noStroke.

drawBunny(x, y, s)

drawBunny() follows the same structure as drawBear() but uses purple colors and taller ears to make Bonnie distinctive.

function drawBunny(x, y, s) {
  push(); translate(x, y); scale(s); noStroke();
  fill(80, 60, 160); ellipse(0, 150, 160, 220); 
  ellipse(-40, -120, 40, 100); ellipse(40, -120, 40, 100); 
  ellipse(0, 0, 130, 150); 
  fill(120, 100, 200); ellipse(0, 40, 90, 60); fill(0); ellipse(0, 25, 20, 15); 
  fill(0); ellipse(-30, -30, 30, 30); ellipse(30, -30, 30, 30);
  fill(255); ellipse(-30, -30, 6, 6); ellipse(30, -30, 6, 6);
  pop();
}
Line-by-line explanation (3 lines)
push(); translate(x, y); scale(s); noStroke();
Saves state and prepares transforms like drawBear().
fill(80, 60, 160); ellipse(0, 150, 160, 220); ellipse(-40, -120, 40, 100); ellipse(40, -120, 40, 100);
Draws Bonnie's body in purple-blue, plus two tall ear ellipses extending upward at y=-120.
fill(120, 100, 200); ellipse(0, 40, 90, 60); fill(0); ellipse(0, 25, 20, 15);
Draws the snout in lighter purple and a small black nose.

drawChicken(x, y, s)

drawChicken() is yellow and includes an arc() to create Chica's distinctive chest marking, making her recognizable from Bonnie and Freddy.

function drawChicken(x, y, s) {
  push(); translate(x, y); scale(s); noStroke();
  fill(220, 200, 40); ellipse(0, 150, 170, 210); 
  fill(255); arc(0, 120, 140, 120, 0, PI); 
  fill(220, 200, 40); ellipse(0, 0, 140, 140); 
  fill(240, 120, 20); ellipse(0, 30, 80, 40); 
  ellipse(0, 50, 60, 30); 
  fill(0); ellipse(-35, -20, 35, 35); ellipse(35, -20, 35, 35);
  fill(255); ellipse(-35, -20, 8, 8); ellipse(35, -20, 8, 8);
  pop();
}
Line-by-line explanation (3 lines)
fill(220, 200, 40); ellipse(0, 150, 170, 210);
Draws Chica's body in yellow-gold.
fill(255); arc(0, 120, 140, 120, 0, PI);
Draws a white arc (upper half of a circle) to represent Chica's beak or chest plate—a unique feature.
fill(240, 120, 20); ellipse(0, 30, 80, 40); ellipse(0, 50, 60, 30);
Draws the snout/bill area in orange using two ellipses.

drawFox(x, y, s)

drawFox() is red and has distinctive asymmetrical eyes (one black, one white), making him look wild and unpredictable.

function drawFox(x, y, s) {
  push(); translate(x, y); scale(s); noStroke();
  fill(180, 50, 50); ellipse(0, 150, 150, 180); 
  ellipse(-50, -80, 40, 60); ellipse(50, -80, 40, 60); 
  ellipse(0, 0, 140, 120); 
  fill(220, 150, 150); ellipse(0, 40, 90, 50); fill(0); ellipse(0, 20, 25, 15); 
  fill(0); ellipse(-30, -20, 30, 30); 
  fill(255); ellipse(30, -20, 30, 30); fill(0); ellipse(30, -20, 6, 6); 
  pop();
}
Line-by-line explanation (2 lines)
fill(180, 50, 50); ellipse(0, 150, 150, 180); ellipse(-50, -80, 40, 60); ellipse(50, -80, 40, 60);
Draws Foxy's body in reddish-brown and two pointed ear/horn shapes at the top.
fill(0); ellipse(-30, -20, 30, 30); fill(255); ellipse(30, -20, 30, 30); fill(0); ellipse(30, -20, 6, 6);
Draws uneven eyes: left eye is pure black, right eye is white with a black pupil. This asymmetry makes Foxy look menacing.

triggerJumpscare(who)

triggerJumpscare() is the most important game-over function. It stops the game, plays an external GIF and a procedural sound, and after 3.5 seconds shows the game-over screen. It's a good example of coordinating animation, sound, and DOM updates.

function triggerJumpscare(who) {
  if (gameState === 'JUMPSCARE') return;
  killer = who; gameState = 'JUMPSCARE';
  hud.addClass('hidden'); camUI.addClass('hidden');
  playJumpscareSound();
  
  jumpscareContainer.removeClass('hidden');
  jumpscareGifs[who].elt.src = jumpscareGifs[who].elt.src; 
  jumpscareGifs[who].removeClass('hidden');
  
  setTimeout(() => { 
    gameOverScreen.removeClass('hidden'); 
    stopJumpscareSound(); 
    jumpscareContainer.addClass('hidden');
    jumpscareGifs[who].addClass('hidden');
  }, 3500); 
}
Line-by-line explanation (7 lines)

🔧 Subcomponents:

conditional Duplicate Jumpscare Guard if (gameState === 'JUMPSCARE') return;

Prevents multiple jumpscares from triggering at the same time

calculation State and Sound Setup killer = who; gameState = 'JUMPSCARE'; hud.addClass('hidden'); camUI.addClass('hidden'); playJumpscareSound();

Records which animatronic attacked, changes game state, hides UI, and starts the jumpscare sound

calculation Gif Display and Restart jumpscareContainer.removeClass('hidden'); jumpscareGifs[who].elt.src = jumpscareGifs[who].elt.src; jumpscareGifs[who].removeClass('hidden');

Shows the jumpscare gif and forces it to restart by re-assigning its src

calculation Delayed Gameover setTimeout(() => { gameOverScreen.removeClass('hidden'); stopJumpscareSound(); jumpscareContainer.addClass('hidden'); jumpscareGifs[who].addClass('hidden'); }, 3500);

After 3.5 seconds, hides the gif and shows the game-over screen

if (gameState === 'JUMPSCARE') return;
If a jumpscare is already happening, exit early to prevent overlapping jumpscares.
killer = who; gameState = 'JUMPSCARE';
Records which animatronic attacked and sets the game state to JUMPSCARE so draw() knows to display the GIF.
hud.addClass('hidden'); camUI.addClass('hidden');
Hides the HUD and camera UI by adding the 'hidden' CSS class.
playJumpscareSound();
Starts the terrifying jumpscare sound effect (modulating oscillators + noise).
jumpscareContainer.removeClass('hidden'); jumpscareGifs[who].elt.src = jumpscareGifs[who].elt.src;
Shows the jumpscare container and forces the GIF to restart by re-assigning its src property. This ensures the GIF animation plays from the beginning.
jumpscareGifs[who].removeClass('hidden');
Shows the specific jumpscare GIF for the attacking animatronic (bonnie, freddy, etc.).
setTimeout(() => { gameOverScreen.removeClass('hidden'); stopJumpscareSound(); jumpscareContainer.addClass('hidden'); jumpscareGifs[who].addClass('hidden'); }, 3500);
Schedules a callback after 3500 milliseconds: shows the game-over screen, stops the sound, and hides the GIF and container.

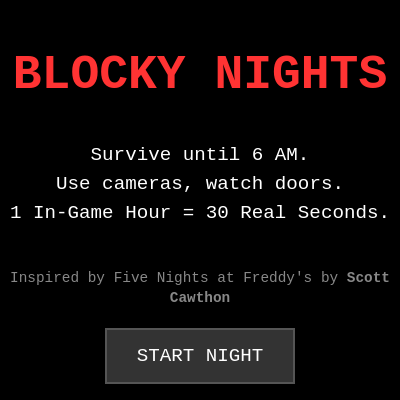
setupUI()

setupUI() is called once in setup() and creates all the DOM elements (buttons, text displays, screens, GIFs) that overlay the p5.js canvas. It's a good example of working with p5.js DOM functions and organizing complex UI.

function setupUI() {
  let startHTML = `
    <h1>BLOCKY NIGHTS</h1>
    <p>Survive until 6 AM.<br>Use cameras, watch doors.<br>1 In-Game Hour = 30 Real Seconds.</p>
    <div style="font-size:0.9rem; color:#888; margin-bottom: 20px; text-align:center; line-height:1.4;">
      Inspired by Five Nights at Freddy's by <b>Scott Cawthon</b><br>
    
    <div>
  `;
  startScreen = createDiv(startHTML);
  startScreen.addClass('screen');
  createButton('Start Night').parent(startScreen).mousePressed(startGame);
  
  hud = createDiv('').id('hud').addClass('hidden');
  timeDisplay = createDiv('12 AM').id('time-display').parent(hud);
  powerDisplay = createDiv('Power: 100%').id('power-display').parent(hud);
  
  leftBtn = createButton('DOOR').id('left-btn').addClass('door-btn').parent(hud).mousePressed(toggleLeftDoor);
  rightBtn = createButton('DOOR').id('right-btn').addClass('door-btn').parent(hud).mousePressed(toggleRightDoor);
  monitorBtn = createButton('MONITOR').id('monitor-btn').parent(hud).mousePressed(toggleMonitor);

  camUI = createDiv('').id('cam-ui').addClass('hidden');
  ['1A', '1B', '1C', '2B', '4B'].forEach(id => {
    camBtns[id] = createButton(id).id(`btn-${id}`).addClass('cam-btn').parent(camUI).mousePressed(() => setCam(id));
  });
  camBtns['1A'].addClass('active');

  gameOverScreen = createDiv('<h1>YOU DIED</h1>').addClass('screen hidden');
  createButton('Try Again').parent(gameOverScreen).mousePressed(startGame);

  let winHTML = `
    <h1>6 AM</h1>
    <p>You survived!</p>
    <div style="font-size:0.9rem; color:#888; margin-bottom: 20px; text-align:center; line-height:1.4;">
      Inspired by Five Nights at Freddy's by <b>Scott Cawthon</b><br>
      Credits to <b>corbun from cdww</b>
    </div>
  `;
  winScreen = createDiv(winHTML).addClass('screen hidden');
  createButton('Play Again').parent(winScreen).mousePressed(startGame);
  
  jumpscareContainer = createDiv('').id('jumpscare-container').addClass('hidden');
  jumpscareGifs = {
    bonnie: createImg('https://c.tenor.com/qz9ox5I1L08AAAAC/tenor.gif', 'bonnie jumpscare').parent(jumpscareContainer).addClass('jumpscare-gif hidden'),
    freddy: createImg('https://c.tenor.com/ZO1_WS7f-4YAAAAC/tenor.gif', 'freddy jumpscare').parent(jumpscareContainer).addClass('jumpscare-gif hidden'),
    foxy: createImg('https://c.tenor.com/-RqKfXN5wQoAAAAC/tenor.gif', 'foxy jumpscare').parent(jumpscareContainer).addClass('jumpscare-gif hidden'),
    chica: createImg('https://c.tenor.com/XxiDSgjvNhgAAAAC/tenor.gif', 'chica jumpscare').parent(jumpscareContainer).addClass('jumpscare-gif hidden')
  };

  createDiv('').id('static-overlay');
  
  adminPanel = createDiv('').id('admin-panel').addClass('hidden');
  createDiv('ADMIN PANEL').addClass('admin-title').parent(adminPanel);
  
  let spawnRow = createDiv('').addClass('admin-row').parent(adminPanel);
  createDiv('Spawn at Door:').addClass('admin-label').parent(spawnRow);
  createButton('Bonnie').addClass('admin-btn').parent(spawnRow).mousePressed(() => forceSpawn('bonnie'));
  createButton('Chica').addClass('admin-btn').parent(spawnRow).mousePressed(() => forceSpawn('chica'));
  createButton('Freddy').addClass('admin-btn').parent(spawnRow).mousePressed(() => forceSpawn('freddy'));
  createButton('Foxy').addClass('admin-btn').parent(spawnRow).mousePressed(() => forceSpawn('foxy'));
  
  let jumpRow = createDiv('').addClass('admin-row').parent(adminPanel);
  createDiv('Force Scare:').addClass('admin-label').parent(jumpRow);
  createButton('Bonnie').addClass('admin-btn').parent(jumpRow).mousePressed(() => forceJumpscare('bonnie'));
  createButton('Chica').addClass('admin-btn').parent(jumpRow).mousePressed(() => forceJumpscare('chica'));
  createButton('Freddy').addClass('admin-btn').parent(jumpRow).mousePressed(() => forceJumpscare('freddy'));
  createButton('Foxy').addClass('admin-btn').parent(jumpRow).mousePressed(() => forceJumpscare('foxy'));
}
Line-by-line explanation (9 lines)

🔧 Subcomponents:

DOM-creation Start Screen let startHTML = ...; startScreen = createDiv(startHTML); startScreen.addClass('screen'); createButton('Start Night').parent(startScreen).mousePressed(startGame);

Creates the title screen with instructions and a Start button

DOM-creation HUD Elements hud = createDiv('').id('hud').addClass('hidden'); timeDisplay = createDiv(...); powerDisplay = createDiv(...); leftBtn = createButton(...); rightBtn = createButton(...); monitorBtn = createButton(...);

Creates the in-game HUD: time, power, and door/monitor buttons

DOM-creation Camera Button Grid camUI = createDiv('').id('cam-ui').addClass('hidden'); ['1A', '1B', '1C', '2B', '4B'].forEach(id => { camBtns[id] = createButton(id)... })

Creates five camera buttons that appear when the monitor is open

DOM-creation Game Over Screen gameOverScreen = createDiv('<h1>YOU DIED</h1>').addClass('screen hidden'); createButton('Try Again').parent(gameOverScreen).mousePressed(startGame);

Creates the death screen shown after a jumpscare

DOM-creation Win Screen winScreen = createDiv(winHTML).addClass('screen hidden'); createButton('Play Again').parent(winScreen).mousePressed(startGame);

Creates the victory screen shown if you survive until 6 AM

DOM-creation Jumpscare GIFs jumpscareGifs = { bonnie: createImg(...), freddy: createImg(...), ... };

Preloads four jumpscare GIFs from Tenor and stores them for instant playback

DOM-creation Admin Panel adminPanel = createDiv('').id('admin-panel').addClass('hidden'); ... createButton('Bonnie').addClass('admin-btn').parent(spawnRow).mousePressed(() => forceSpawn('bonnie'));

Creates a debugging panel with buttons to spawn animatronics or trigger jumpscares manually

let startHTML = `...`;
Defines the HTML content for the start screen as a template string.
startScreen = createDiv(startHTML); startScreen.addClass('screen');
Creates a DIV with that HTML and adds the 'screen' CSS class (which centers and sizes it).
createButton('Start Night').parent(startScreen).mousePressed(startGame);
Creates a button inside startScreen that calls startGame() when clicked.
hud = createDiv('').id('hud').addClass('hidden');
Creates the HUD container (starts hidden, shown when gameplay begins).
timeDisplay = createDiv('12 AM').id('time-display').parent(hud);
Creates the time display as a child of the HUD.
['1A', '1B', '1C', '2B', '4B'].forEach(id => { camBtns[id] = createButton(id).id(`btn-${id}`).addClass('cam-btn').parent(camUI).mousePressed(() => setCam(id)); });
Loops through the five camera IDs and creates a button for each. Each button calls setCam() with its ID.
camBtns['1A'].addClass('active');
Marks camera 1A as initially active (highlighted) so players know which camera they're viewing.
jumpscareGifs = { bonnie: createImg('https://c.tenor.com/...', 'bonnie jumpscare').parent(jumpscareContainer).addClass('jumpscare-gif hidden'), ... };
Preloads four GIFs from Tenor and stores them in an object keyed by animatronic name. They start hidden.
createButton('Bonnie').addClass('admin-btn').parent(spawnRow).mousePressed(() => forceSpawn('bonnie'));
Creates an admin button that forces Bonnie to spawn at the door when clicked.

setupAudio()

setupAudio() initializes all procedural audio generators using p5.sound library. Instead of loading audio files, these generators create sounds on-the-fly: oscillators make tones, noise generators make hiss, and envelopes control how sounds evolve over time. This is a great introduction to synthesis.

function setupAudio() {
  ambHum = new p5.Oscillator('triangle'); ambHum.freq(45); ambHum.amp(0); ambHum.start();
  doorSlamNoise = new p5.Noise('white'); doorSlamEnv = new p5.Envelope();
  doorSlamEnv.setADSR(0.01, 0.1, 0.2, 0.1); doorSlamEnv.setRange(0.6, 0);
  doorSlamNoise.amp(doorSlamEnv); doorSlamNoise.start();
  camNoise = new p5.Noise('pink'); camNoise.amp(0); camNoise.start();

  scareOsc1 = new p5.Oscillator('sawtooth'); scareOsc2 = new p5.Oscillator('square'); scareNoise = new p5.Noise('white');
  scareOsc1.amp(0); scareOsc2.amp(0); scareNoise.amp(0);
  scareOsc1.start(); scareOsc2.start(); scareNoise.start();
}
Line-by-line explanation (7 lines)

🔧 Subcomponents:

audio-setup Ambient Hum ambHum = new p5.Oscillator('triangle'); ambHum.freq(45); ambHum.amp(0); ambHum.start();

Creates a low 45 Hz triangle-wave drone that plays during gameplay to build tension

audio-setup Door Slam Sound doorSlamNoise = new p5.Noise('white'); doorSlamEnv = new p5.Envelope(); doorSlamEnv.setADSR(0.01, 0.1, 0.2, 0.1); doorSlamEnv.setRange(0.6, 0); doorSlamNoise.amp(doorSlamEnv); doorSlamNoise.start();

Creates a white-noise burst with an ADSR envelope that plays when a door is closed

audio-setup Camera Static camNoise = new p5.Noise('pink'); camNoise.amp(0); camNoise.start();

Creates pink noise (softer, more natural than white) for camera blip sounds

audio-setup Jumpscare Sound scareOsc1 = new p5.Oscillator('sawtooth'); scareOsc2 = new p5.Oscillator('square'); scareNoise = new p5.Noise('white'); scareOsc1.amp(0); scareOsc2.amp(0); scareNoise.amp(0); scareOsc1.start(); scareOsc2.start(); scareNoise.start();

Creates two oscillators and white noise that will be modulated rapidly during jumpscares to create a terrifying effect

ambHum = new p5.Oscillator('triangle'); ambHum.freq(45); ambHum.amp(0); ambHum.start();
Creates a triangle-wave oscillator at 45 Hz (very low, subsonic-feeling). Amplitude starts at 0 (silent) and is turned up when the game starts.
doorSlamNoise = new p5.Noise('white'); doorSlamEnv = new p5.Envelope();
Creates white noise and an ADSR envelope to control its amplitude over time.
doorSlamEnv.setADSR(0.01, 0.1, 0.2, 0.1); doorSlamEnv.setRange(0.6, 0);
Sets attack=0.01s, decay=0.1s, sustain=0.2, release=0.1s. The envelope will go from 0 to peak (0.6) and back to 0 over ~0.4 seconds.
doorSlamNoise.amp(doorSlamEnv); doorSlamNoise.start();
Links the noise to the envelope and starts the noise (it will stay silent until the envelope plays).
camNoise = new p5.Noise('pink'); camNoise.amp(0); camNoise.start();
Creates pink noise (1/f noise, softer and more natural sounding than white) for camera blip effects.
scareOsc1 = new p5.Oscillator('sawtooth'); scareOsc2 = new p5.Oscillator('square'); scareNoise = new p5.Noise('white');
Creates two oscillators (sawtooth and square wave) plus white noise. Together they'll create a chaotic, terrifying sound when modulated.
scareOsc1.amp(0); scareOsc2.amp(0); scareNoise.amp(0); scareOsc1.start(); scareOsc2.start(); scareNoise.start();
Sets all amplitudes to 0 (silent) and starts all three sound sources. They'll be turned up and modulated when a jumpscare is triggered.

📦 Key Variables

gameState string

Tracks the current game phase: 'START' (title screen), 'PLAY' (active game), 'POWEROUT' (blackout), 'JUMPSCARE' (attacked), or 'WIN' (survived)

let gameState = 'START';
leftDoorClosed boolean

True if the left door is closed (blocking Bonnie and Foxy); False if open

let leftDoorClosed = false;
rightDoorClosed boolean

True if the right door is closed (blocking Chica and Freddy); False if open

let rightDoorClosed = false;
monitorOpen boolean

True if the camera monitor is being viewed; False if viewing the office. Used to block jumpscares and consume power

let monitorOpen = false;
power number

Current power percentage (0–100). Drains over time based on door and camera usage. Game ends when power <= 0

let power = 100;
timeHour number

Current in-game hour (0–6). Increments every 30 real seconds. Win condition is timeHour >= 6

let timeHour = 0;
currentCam string

Currently viewed camera ID: '1A', '1B', '1C', '2B', or '4B'. Determines which animatronics are displayed in monitor view

let currentCam = '1A';
animatronics object

Stores the state of all four animatronics: location, difficulty level, whether they're at a door, and door arrival time. Keys: bonnie, chica, freddy, foxy

let animatronics = { bonnie: { loc: '1A', diff: 4, atDoor: false, doorTimer: 0 }, ... };
panX number

Current horizontal camera pan offset based on mouse position. Allows the player to look left/right in the office

let panX = 0;
targetPanX number

Target pan offset calculated from mouse position. panX lerps toward this value for smooth camera motion

let targetPanX = 0;
adminOpen boolean

True if the admin panel is open (pauses game logic for debugging). Activated by pressing keys 4 and 5

let adminOpen = false;
key4 boolean

True if key '4' is currently pressed. Used to detect the 4+5 combo for opening the admin panel

let key4 = false;
key5 boolean

True if key '5' is currently pressed. Used to detect the 4+5 combo for opening the admin panel

let key5 = false;
lastAITick number

Timestamp (in milliseconds) of when the game started. Used to calculate elapsed time for the in-game timer

let lastAITick = 0;
killer string

Name of the animatronic that attacked you ('bear', 'bonnie', 'chica', 'foxy'). Used to display the correct jumpscare GIF

let killer = 'bear';

🔧 Potential Improvements (6)

Here are some ways this code could be enhanced:

BUG timeHour calculation in updateGameLogic()

timeHour is calculated every frame but only checked once at the start of updateGameLogic(). If the game lags or update skips, timeHour could jump multiple hours in one frame and skip the win condition check.

💡 Move the win-condition check to the end of the function after all game logic completes, or use a flag to track whether the win has been triggered.

BUG playDoorSlam() function

playDoorSlam() calls doorSlamEnv.play(), but the envelope is never explicitly reset. If door is slammed rapidly, the envelope might not re-trigger correctly.

💡 Add doorSlamEnv.stop() before doorSlamEnv.play() to ensure the envelope resets: function playDoorSlam() { doorSlamEnv.stop(); doorSlamEnv.play(); }

PERFORMANCE drawRoom() pillar loop

The for-loop that draws pillars runs every frame even though the pillars never change. This is wasteful CPU usage.

💡 Pre-calculate or cache the pillar positions, or use a single large rectangle with a pattern fill instead of looping.

PERFORMANCE draw() function

select('#static-overlay').addClass() / removeClass() is called every frame, which is inefficient because the static-overlay state usually doesn't change.

💡 Track the previous state and only add/remove the class if it actually changes: if (monitorOpen !== wasMonitorOpen) { /* update class */ }

STYLE AI movement logic

Bonnie, Chica, and Freddy use nearly identical path-following code with lots of repetition. This is hard to maintain if you want to add a new animatronic.

💡 Refactor into a helper function: function moveAnimatronic(name, path) { ... } where path is an array like ['1A', '1B', '2B'].

FEATURE Animatronic rendering

All animatronics are static blocky shapes. They don't animate (blink, move limbs, look at camera).

💡 Add a simple animation loop: track a frame counter and use it to rotate the scale or change the y position slightly each frame to give them life.

🔄 Code Flow

Code flow showing setup, draw, updategamelogic, processai, checkdoors, drawroom, drawdoorway, drawcameraview, drawbear, drawbunny, drawchicken, drawfox, triggerjumpscare, setupui, setupaudio

💡 Click on function names in the diagram to jump to their code

graph TD start[Start] --> setup[setup] setup --> canvas-creation[Create Canvas] setup --> load-poster[Load Poster Image] setup --> setupui[setupUI] setup --> setupaudio[setupAudio] setup --> draw[draw loop] click setup href "#fn-setup" click canvas-creation href "#sub-canvas-creation" click load-poster href "#sub-load-poster" click setupui href "#fn-setupui" click setupaudio href "#fn-setupaudio" draw --> updategamelogic[updateGameLogic] draw --> processai[processAI] draw --> checkdoors[checkDoors] draw --> drawroom[drawRoom] draw --> drawdoorway[drawDoorway] draw --> drawcameraview[drawCameraView] click draw href "#fn-draw" click updategamelogic href "#fn-updategamelogic" click processai href "#fn-processai" click checkdoors href "#fn-checkdoors" click drawroom href "#fn-drawroom" click drawdoorway href "#fn-drawdoorway" click drawcameraview href "#fn-drawcameraview" updategamelogic --> time-calc[Time Calculation] updategamelogic --> power-usage[Power Usage] updategamelogic --> power-drain[Power Depletion] updategamelogic --> win-check[Win Condition] updategamelogic --> ai-tick[AI Tick Trigger] click time-calc href "#sub-time-calc" click power-usage href "#sub-power-usage" click power-drain href "#sub-power-drain" click win-check href "#sub-win-check" click ai-tick href "#sub-ai-tick" ai-tick --> bonnie-ai[Bonnie Pathfinding] ai-tick --> chica-ai[Chica Pathfinding] ai-tick --> foxy-ai[Foxy Stage Progression] ai-tick --> freddy-ai[Freddy Smart Movement] click bonnie-ai href "#sub-bonnie-ai" click chica-ai href "#sub-chica-ai" click foxy-ai href "#sub-foxy-ai" click freddy-ai href "#sub-freddy-ai" checkdoors --> bonnie-door-check[Bonnie Door Timer] checkdoors --> foxy-door-check[Foxy Fast Timer] checkdoors --> chica-door-check[Chica Door Timer] checkdoors --> freddy-door-check[Freddy Longest Timer] click bonnie-door-check href "#sub-bonnie-door-check" click foxy-door-check href "#sub-foxy-door-check" click chica-door-check href "#sub-chica-door-check" click freddy-door-check href "#sub-freddy-door-check" drawroom --> room-back[Back Wall] drawroom --> room-pillars[Pillar Loop] drawroom --> room-floor[Floor] drawroom --> poster-display[Poster or Fallback] drawroom --> desk-and-console[Desk and Monitor] click room-back href "#sub-room-back" click room-pillars href "#sub-room-pillars" click room-floor href "#sub-room-floor" click poster-display href "#sub-poster-display" click desk-and-console href "#sub-desk-and-console" drawdoorway --> doorway-open-space[Doorway Opening] drawdoorway --> doorway-animatronics[Visible Animatronic] drawdoorway --> doorway-closed[Closed Door Visual] drawdoorway --> doorway-frame[Door Frame and Lintel] click doorway-open-space href "#sub-doorway-open-space" click doorway-animatronics href "#sub-doorway-animatronics" click doorway-closed href "#sub-doorway-closed" click doorway-frame href "#sub-doorway-frame" drawcameraview --> camera-background[Camera Feed Background] drawcameraview --> room-selector[Camera Room Selector] drawcameraview --> scanlines[CRT Scanlines] drawcameraview --> camera-label[Camera Label] click camera-background href "#sub-camera-background" click room-selector href "#sub-room-selector" click scanlines href "#sub-scanlines" click camera-label href "#sub-camera-label" triggerjumpscare[triggerJumpscare] --> jumpscare-guard[Jumpscare Guard] triggerjumpscare --> jumpscare-state-setup[State and Sound Setup] triggerjumpscare --> jumpscare-gif-display[Gif Display and Restart] triggerjumpscare --> jumpscare-timeout[Delayed Gameover] click triggerjumpscare href "#fn-triggerjumpscare" click jumpscare-guard href "#sub-jumpscare-guard" click jumpscare-state-setup href "#sub-jumpscare-state-setup" click jumpscare-gif-display href "#sub-jumpscare-gif-display" click jumpscare-timeout href "#sub-jumpscare-timeout" setupui --> start-screen[Start Screen] setupui --> hud-setup[HUD Elements] setupui --> camera-ui[Camera Button Grid] setupui --> game-over-screen[Game Over Screen] setupui --> win-screen[Win Screen] setupui --> jumpscare-gifs[Jumpscare GIFs] setupui --> admin-panel[Admin Panel] click start-screen href "#sub-start-screen" click hud-setup href "#sub-hud-setup" click camera-ui href "#sub-camera-ui" click game-over-screen href "#sub-game-over-screen" click win-screen href "#sub-win-screen" click jumpscare-gifs href "#sub-jumpscare-gifs" click admin-panel href "#sub-admin-panel" setupaudio --> ambient-hum[Ambient Hum] setupaudio --> door-slam[Door Slam Sound] setupaudio --> camera-noise[Camera Static] setupaudio --> jumpscare-sound[Jumpscare Sound] click ambient-hum href "#sub-ambient-hum" click door-slam href "#sub-door-slam" click camera-noise href "#sub-camera-noise" click jumpscare-sound href "#sub-jumpscare-sound"

❓ Frequently Asked Questions

What visual experience does the FNAF lol sketch provide?

The sketch creates a tense, flickering security office atmosphere filled with blocky animatronics that move through various rooms, enhancing the sense of suspense.

How can users interact with the FNAF lol sketch?

Users can click on UI buttons to manage doors, switch camera feeds, open a monitor, and access an admin panel while trying to survive until 6 AM.

What creative coding concepts are showcased in the FNAF lol sketch?

The sketch demonstrates game state management, procedural audio, and dynamic UI elements, all contributing to an engaging interactive experience.

Preview

FNAF lol - p5.js creative coding sketch preview
Sketch Preview
Code flow diagram showing the structure of FNAF lol - Code flow showing setup, draw, updategamelogic, processai, checkdoors, drawroom, drawdoorway, drawcameraview, drawbear, drawbunny, drawchicken, drawfox, triggerjumpscare, setupui, setupaudio
Code Flow Diagram