gta6 current state

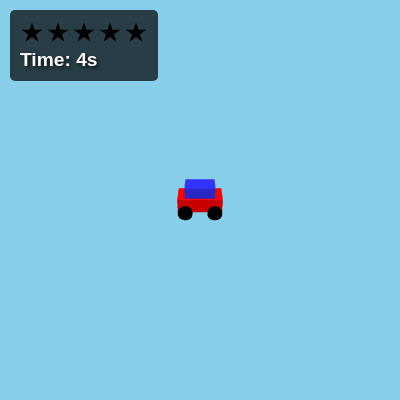
This sketch creates a GTA-inspired 3D city sandbox where you drive a car or run on foot through an endless procedurally-generated world. As your wanted level (star meter) increases over time, cop cars chase you and eventually tanks arrive to fire projectiles—survive 7 seconds of continuous collision or a tank hit to trigger game over.

🧪 Try This!

Experiment with the code by making these changes:

  1. Make your car faster — Increase carMaxSpeed to 10—your red car will zoom much faster through the city.
  2. Speed up the cops — Raise copCarSpeed so cop cars catch up to you quicker, making the game harder.
  3. Make the city busier — Spawn more NPCs per chunk so the streets feel crowded.
  4. Taller buildings — Change the building height range so skyscrapers dominate the skyline.
  5. Reduce star requirement — Reach 5 stars faster by shortening the survival milestones—get tanks after only 30 seconds.
  6. Change the sky color — Modify the background color from sky blue to another shade—0xff0000 is red, 0xffffff is white.
Prefer the full editor? Open it there →

📖 About This Sketch

This sketch builds a playable GTA-like game using three.js for 3D graphics and p5.js for sound and timing. You drive a red car through an endless procedurally-generated city made of repeating chunks, with cop cars that chase you and tanks that arrive at 5-star wanted level to rain bullets. The world continuously builds chunks around you as you move and removes them when you leave—a clever memory optimization. Switch to on-foot mode with 'E' to run around and shoot pedestrians with your mouse.

The code is organized into three main pillars: three.js 3D setup and rendering (camera, lighting, shapes), a chunk-based world system that streams terrain around the player, and AI logic for cop cars and tanks that hunt you with pathfinding and shooting. By reading this you'll learn how to blend three.js into p5.js, manage procedural world generation, implement basic enemy AI, and create a time-based game state system (wanted levels triggered by survival time).

⚙️ How It Works

  1. On load, setup() hides the p5.js canvas and initializes three.js with a scene, camera, and WebGL renderer. It creates reusable geometries (boxes, cylinders) and materials once, then spawns your red car at the origin with a third-person camera behind it.
  2. Every frame, the animate() loop updates your car position based on W/A/S/D keys and rotates the camera to follow from above and behind. The chunk system constantly checks which 200×200 unit tile you're in and loads or unloads surrounding chunks (ground, roads, 15 buildings, 8 NPCs per chunk).
  3. Cop cars spawn in nearby chunks and use simple AI: they calculate the direction to you, gradually rotate toward you, and move forward at constant speed. Collision detection measures distance; touch a cop car for 7 seconds straight and game over.
  4. Every minute you survive, you earn a star (up to 5). At 5 stars, 5 tank units spawn that shoot projectiles at you—if a projectile hits your car, instant game over. You can press 'E' to switch to on-foot mode (first-person view), run around with W/A/S/D, and left-click your mouse to shoot pedestrians with raycasting.
  5. The world wraps: your position modulos to a large worldSize, so cop cars chasing you don't get confused when you cross wrapping boundaries. UI shows your star meter (filled and outline star images) and elapsed survival time in seconds.
  6. Tank turrets rotate to face you, and on-foot shooting uses raycasting from your camera through the center of the screen to detect NPC hits, spawning a temporary yellow flash effect and removing the NPC from the scene.

🎓 Concepts You'll Learn

three.js 3D scene, camera, rendererProcedural chunk-based world generationEnemy AI with pathfinding and chasingRaycasting for shooting/hit detectionGame state and wanted level systemProjectile physics and collisionFirst-person and third-person camera modesPosition wrapping for infinite worldsReusable geometries and materials for performanceDOM UI integration with canvas game

📝 Code Breakdown

preload()

preload() runs once before setup(). Here we create a synthetic sound so the game never waits for a network request. When you shoot, the shoot() function will pulse this oscillator to create the gunshot effect.

function preload() {
  // IMPORTANT: External sound URLs have proven unreliable.
  // Falling back to a synthetic gunshot sound using p5.Oscillator
  // to guarantee sound playback without external server dependencies.
  gunshotSound = new p5.Oscillator('triangle');
  gunshotSound.freq(3000); // High frequency for a sharp sound
  gunshotSound.amp(0.5);   // Initial amplitude
  gunshotSound.start();    // Start the oscillator (but with 0 volume initially)
  gunshotSound.amp(0, 0);  // Set amplitude to 0 immediately after starting
}
Line-by-line explanation (4 lines)
gunshotSound = new p5.Oscillator('triangle');
Creates a triangle-wave sound generator instead of loading an external file—guarantees the sound will play without server dependency.
gunshotSound.freq(3000);
Sets the oscillator to 3000 Hz, a high frequency that sounds sharp and gun-like.
gunshotSound.start();
Starts the oscillator running internally (but at 0 volume initially, so you won't hear it yet).
gunshotSound.amp(0, 0);
Immediately sets amplitude to 0, silencing the oscillator so it's ready to be triggered later in the shoot() function.

setup()

setup() runs once when the sketch loads. Here we hide the p5.js canvas (since three.js provides the 3D view), grab UI elements from the HTML, and kick off the three.js rendering pipeline.

function setup() {
  // Create a p5.js canvas, but immediately hide it, as three.js will create its own
  createCanvas(windowWidth, windowHeight);
  noCanvas(); // Hide the p5.js canvas

  // Get the crosshair DOM element
  crosshairElement = document.getElementById('crosshair');
  crosshairElement.style.display = 'none'; // Initially hidden

  // Get UI elements
  starsElement = document.getElementById('starsDisplay');
  timerElement = document.getElementById('timerDisplay');
  // Initial star display with outline stars
  updateStarDisplay();
  timerElement.innerHTML = `Time: ${nf(survivalTimer / 1000, 1, 0)}s`;


  // --- three.js Initialization ---
  initThreeJS();
  animate(); // Start the three.js animation loop

  // Initialize mouse coordinates for raycasting
  mouse.x = 0; // Center of screen
  mouse.y = 0; // Center of screen
}
Line-by-line explanation (6 lines)
createCanvas(windowWidth, windowHeight);
p5.js normally creates its own canvas, but we hide it immediately—three.js will take over rendering.
noCanvas();
Hides the p5.js canvas element, freeing up the screen for three.js.
crosshairElement = document.getElementById('crosshair');
Grabs the HTML crosshair div so we can show/hide it when switching between driving and on-foot mode.
updateStarDisplay();
Populates the star meter UI with 5 empty star outline images.
initThreeJS();
Calls the function that sets up the three.js scene, camera, renderer, car, cop cars, and chunk system.
animate();
Starts the three.js animation loop running—this will call itself 60 times per second with requestAnimationFrame.

initThreeJS()

initThreeJS() is the heart of the setup. It creates the 3D world's foundation: scene, camera, lights, and all the reusable shapes and colors. By creating geometries and materials once and reusing them, the code stays fast even with hundreds of buildings and cop cars on screen.

function initThreeJS() {
  // 1. Scene
  scene = new THREE.Scene();
  scene.background = new THREE.Color(0x87ceeb); // Sky blue background

  // 2. Camera
  camera = new THREE.PerspectiveCamera(75, window.innerWidth / window.innerHeight, 0.1, 1000);
  camera.position.set(0, 10, 20); // Initial camera position

  // 3. Renderer
  renderer = new THREE.WebGLRenderer({ antialias: true });
  renderer.setSize(window.innerWidth, window.innerHeight);
  renderer.setPixelRatio(window.devicePixelRatio); // Handle retina displays
  renderer.domElement.id = 'threejs-canvas'; // Add an ID for CSS styling
  document.body.appendChild(renderer.domElement);

  // 4. OrbitControls (for debugging camera, remove or comment out for game-like experience)
  // controls = new THREE.OrbitControls(camera, renderer.domElement);
  // controls.enableDamping = true; // Smooth camera movement
  // controls.dampingFactor = 0.05;
  // controls.screenSpacePanning = false;
  // controls.maxPolarAngle = Math.PI / 2; // Prevent camera from going below ground

  // 5. Lighting
  const ambientLight = new THREE.AmbientLight(0x404040); // Soft white light
  scene.add(ambientLight);

  const directionalLight = new THREE.DirectionalLight(0xffffff, 1); // White directional light
  directionalLight.position.set(5, 10, 7);
  directionalLight.castShadow = true; // Enable shadows
  directionalLight.shadow.mapSize.width = 1024; // Default 512
  directionalLight.shadow.mapSize.height = 1024; // Default 512
  directionalLight.shadow.camera.near = 0.5; // Default 0.5
  directionalLight.shadow.camera.far = chunkSize * visibleRadius * 2; // Adjust far plane for visible chunks
  directionalLight.shadow.camera.left = -chunkSize * visibleRadius; // Adjust frustum for visible chunks
  directionalLight.shadow.camera.right = chunkSize * visibleRadius;
  directionalLight.shadow.camera.top = chunkSize * visibleRadius;
  directionalLight.shadow.camera.bottom = -chunkSize * visibleRadius;
  scene.add(directionalLight);

  // --- Create Reusable Geometries and Materials Here (ONE TIME!) ---
  groundGeometry = new THREE.PlaneGeometry(chunkSize, chunkSize);
  roadGeometry = new THREE.PlaneGeometry(10, chunkSize);
  sirenLightGeometry = new THREE.CylinderGeometry(0.2, 0.2, 0.5, 8);

  groundMaterial = new THREE.MeshLambertMaterial({ color: 0x33aa33 });
  roadMaterial = new THREE.MeshLambertMaterial({ color: 0x555555 });
  buildingMaterial = new THREE.MeshLambertMaterial({ color: 0xaaaaaa });
  npcMaterial = new THREE.MeshLambertMaterial({ color: 0x00ff00 });
  redSirenMaterial = new THREE.MeshLambertMaterial({ color: 0xff0000 });
  blueSirenMaterial = new THREE.MeshLambertMaterial({ color: 0x0000ff });

  // Car parts
  carBodyGeometry = new THREE.BoxGeometry(3, 1, 1.5);
  carBodyMaterial = new THREE.MeshLambertMaterial({ color: 0xff0000 });
  carCabinGeometry = new THREE.BoxGeometry(2, 0.8, 1.2);
  carCabinMaterial = new THREE.MeshLambertMaterial({ color: 0x3333ff });
  carWheelGeometry = new THREE.CylinderGeometry(0.5, 0.5, 0.4, 16);
  carWheelMaterial = new THREE.MeshLambertMaterial({ color: 0x000000 });

  // Cop Car parts (reusing some car geometries/materials)
  copCarBodyGeometry = new THREE.BoxGeometry(3, 1, 1.5); // Same as car body
  copCarBodyMaterial = new THREE.MeshLambertMaterial({ color: 0x0000ff }); // Blue body
  copCarCabinGeometry = new THREE.BoxGeometry(2, 0.8, 1.2); // Same as car cabin
  copCarCabinMaterial = new THREE.MeshLambertMaterial({ color: 0x3333ff }); // Blue cabin
  copCarWheelGeometry = new THREE.CylinderGeometry(0.5, 0.5, 0.4, 16); // Same as car wheel
  copCarWheelMaterial = new THREE.MeshLambertMaterial({ color: 0x000000 }); // Black wheels

  // Player parts
  playerBodyGeometry = new THREE.CylinderGeometry(0.5, 0.5, 1.8, 16);
  playerBodyMaterial = new THREE.MeshLambertMaterial({ color: 0x00ff00 });

  // Gun parts
  gunGeometry = new THREE.CylinderGeometry(0.1, 0.2, 0.8, 8);
  gunMaterial = new THREE.MeshLambertMaterial({ color: 0x333333 });

  // Tank parts
  tankBodyGeometry = new THREE.BoxGeometry(4, 2, 2.5);
  tankBodyMaterial = new THREE.MeshLambertMaterial({ color: 0x444444 }); // Dark grey/green for tank
  turretGeometry = new THREE.CylinderGeometry(0.8, 1.2, 1, 16);
  turretMaterial = new THREE.MeshLambertMaterial({ color: 0x666666 });
  cannonGeometry = new THREE.CylinderGeometry(0.3, 0.4, 2, 8);
  cannonMaterial = new THREE.MeshLambertMaterial({ color: 0x333333 });
  tankWheelGeometry = new THREE.BoxGeometry(0.8, 1.5, 0.5); // Tank tracks


  // 6. Create Car (using reusable parts)
  createCar();

  // 7. Create On-Foot Player and Gun (using reusable parts)
  createPlayer();
  createGun(); // Create the gun and attach it to the player's view

  // 8. Position player at car's initial position
  player.position.copy(car.position);
  player.visible = false; // Player is initially driving

  // 9. Initial chunk generation
  updateChunks();

  // 10. Add Keyboard and Mouse Event Listeners for Car & Player Control
  document.addEventListener('keydown', onKeyDown);
  document.addEventListener('keyup', onKeyUp);
  document.addEventListener('mousedown', onMouseDown); // For shooting
}

Line-by-line explanation (13 lines)

🔧 Subcomponents:

initialization Scene, Camera, Renderer Creation scene = new THREE.Scene(); camera = new THREE.PerspectiveCamera(...); renderer = new THREE.WebGLRenderer(...)

Creates the three.js core objects: the scene (container for all 3D objects), perspective camera (first-person or third-person view), and WebGL renderer (draws to the canvas).

initialization Ambient and Directional Lighting const ambientLight = new THREE.AmbientLight(0x404040); const directionalLight = new THREE.DirectionalLight(0xffffff, 1);

Adds soft ambient light so nothing is pitch black, and a directional light that casts shadows to give depth to the world.

initialization Reusable Geometries and Materials groundGeometry = new THREE.PlaneGeometry(chunkSize, chunkSize); groundMaterial = new THREE.MeshLambertMaterial({ color: 0x33aa33 });

Creates shapes (boxes, cylinders, planes) and colors once, then reuses them for many objects—huge performance win versus creating new geometry/material for every building and NPC.

scene = new THREE.Scene();
Creates an empty 3D scene—this is the container where all 3D objects (camera, lights, car, buildings, cops) will live.
scene.background = new THREE.Color(0x87ceeb);
Sets the background to sky blue (hex color 0x87ceeb)—this is what you see when you look at empty sky.
camera = new THREE.PerspectiveCamera(75, window.innerWidth / window.innerHeight, 0.1, 1000);
Creates a camera with a 75° field of view, aspect ratio matching your screen, and near/far clipping planes (objects closer than 0.1 or farther than 1000 won't render).
renderer = new THREE.WebGLRenderer({ antialias: true });
Creates a WebGL renderer that will draw the 3D scene onto an HTML canvas—antialias: true makes edges smoother.
renderer.setSize(window.innerWidth, window.innerHeight);
Makes the three.js canvas fill the entire window.
document.body.appendChild(renderer.domElement);
Adds the three.js canvas to the page so you can see it.
const ambientLight = new THREE.AmbientLight(0x404040);
Creates a soft light that illuminates all objects equally from all directions—prevents pitch-black shadows.
directionalLight.castShadow = true;
Tells three.js to calculate shadows for this light—more realistic but more expensive computationally.
groundGeometry = new THREE.PlaneGeometry(chunkSize, chunkSize);
Creates a flat square plane geometry that will be reused for every chunk's ground. Instead of creating new geometry 100 times, we create it once and clone the material.
groundMaterial = new THREE.MeshLambertMaterial({ color: 0x33aa33 });
Creates a grass-green material (0x33aa33) that will be shared by all ground planes—ONE material for many objects saves huge amounts of memory.
createCar();
Builds your red player car from reusable geometries and adds it to the scene.
createPlayer();
Creates the on-foot player character (a green cylinder) for when you exit the car.
updateChunks();
Generates the first set of chunks around your starting position.

createChunkContent()

createChunkContent() is called whenever you move to a new chunk. It builds one 200×200 tile of the city: ground plane, 3 roads running through it, 15 random-height buildings, 8 NPCs, and (if you have fewer than 5 stars) 3 cop cars. Each chunk is identical in structure but with different random positions, creating the illusion of an infinite, varied city.

🔬 This do-while loop keeps picking random positions until it finds one away from the road (x must be less than -5 or greater than 5). What happens if you change the condition to `x > -20 && x < 20`? Will the road be clearer or blocked?

    do {
      x = (Math.random() * chunkSize - halfChunk);
      z = (Math.random() * chunkSize - halfChunk);
    } while (x > -5 && x < 5); // Avoid main road at x=0
function createChunkContent(chunkX, chunkZ) {
  // console.time(`Create Chunk ${chunkX},${chunkZ}`); // Start timer for chunk creation
  const chunkGroup = new THREE.Group();
  const offsetX = chunkX * chunkSize;
  const offsetZ = chunkZ * chunkSize;

  // Ground Plane (Roads and Grass)
  const ground = new THREE.Mesh(groundGeometry, groundMaterial); // Reusing geometry and material
  ground.rotation.x = -Math.PI / 2; // Rotate to be flat
  ground.position.y = -0.5; // Slightly below buildings
  ground.position.x = offsetX;
  ground.position.z = offsetZ;
  ground.receiveShadow = true;
  chunkGroup.add(ground);

  // Roads (simple texture or color)
  const road1 = new THREE.Mesh(roadGeometry, roadMaterial); // Reusing
  road1.rotation.x = -Math.PI / 2;
  road1.position.y = -0.49; // Slightly above ground
  road1.position.x = offsetX;
  road1.position.z = offsetZ;
  road1.receiveShadow = true;
  chunkGroup.add(road1);

  const road2 = new THREE.Mesh(roadGeometry, roadMaterial); // Reusing
  road2.rotation.x = -Math.PI / 2;
  road2.position.y = -0.49;
  road2.position.x = offsetX + 20; // Another road
  road2.position.z = offsetZ;
  road2.receiveShadow = true;
  chunkGroup.add(road2);

  const road3 = new THREE.Mesh(roadGeometry, roadMaterial); // Reusing
  road3.rotation.x = -Math.PI / 2;
  road3.position.y = -0.49;
  road3.position.x = offsetX - 20; // Another road
  road3.position.z = offsetZ;
  road3.receiveShadow = true;
  chunkGroup.add(road3);

  // Simple Cube Buildings (randomly placed within the chunk)
  const numBuildingsPerChunk = 15; // Slightly reduced buildings for performance
  const halfChunk = chunkSize / 2;
  for (let i = 0; i < numBuildingsPerChunk; i++) {
    const height = Math.random() * 20 + 5;
    const building = new THREE.Mesh(carBodyGeometry.clone(), buildingMaterial); // Reusing body geometry, clone to adjust height
    building.geometry.applyMatrix4(new THREE.Matrix4().makeScale(1, height / 1, 1)); // Scale height
    building.position.y = height / 2; // Position above ground based on new height

    // Random position within the chunk, avoiding the main road
    let x, z;
    do {
      x = (Math.random() * chunkSize - halfChunk);
      z = (Math.random() * chunkSize - halfChunk);
    } while (x > -5 && x < 5); // Avoid main road at x=0

    building.position.x = offsetX + x;
    building.position.z = offsetZ + z;
    building.castShadow = true;
    building.receiveShadow = true;
    chunkGroup.add(building);
  }

  // NPCs (People) - Simple cylinders (randomly placed within the chunk)
  const numNpcsPerChunk = 8; // Slightly reduced NPCs for performance
  for (let i = 0; i < numNpcsPerChunk; i++) {
    const npcHeight = 1.8;
    const npc = new THREE.Mesh(playerBodyGeometry.clone(), npcMaterial); // Reusing player body geometry, clone to adjust height
    npc.geometry.applyMatrix4(new THREE.Matrix4().makeScale(1, npcHeight / 1.8, 1)); // Scale height
    npc.position.y = npcHeight / 2; // Position above ground based on new height

    // Random position within the chunk, avoiding roads
    let x, z;
    do {
      x = (Math.random() * chunkSize - halfChunk);
      z = (Math.random() * chunkSize - halfChunk);
    } while (x > -10 && x < 10); // Avoid main roads

    npc.position.x = offsetX + x;
    npc.position.z = offsetZ + z;
    npc.castShadow = true;
    npc.receiveShadow = true;
    chunkGroup.add(npc);
    npcs.push(npc); // Add to global NPCs array for shooting detection
    npc.chunkCoords = { x: chunkX, z: chunkZ }; // Mark NPC with its chunk
  }

  // Create Regular Cop Cars within this chunk (only if stars < 5)
  const spawnRadius = 2; // Spawn cop cars in chunks within 2 chunks of player
  if (stars < 5 &&
      Math.abs(chunkX - currentChunkX) <= spawnRadius &&
      Math.abs(chunkZ - currentChunkZ) <= spawnRadius) {
    for (let i = 0; i < numCopCarsPerChunk; i++) { // Loop to create multiple cop cars per chunk
      const copCar = createCopCarModel(); // No speed parameter passed
      // Random position within the chunk, avoiding main roads
      let x, z;
      do {
        x = (Math.random() * chunkSize - halfChunk);
        z = (Math.random() * chunkSize - halfChunk);
      } while (x > -30 && x < 30); // Avoid initial player area and main road x=0

      copCar.position.set(offsetX + x, 0, offsetZ + z); // Y position is 0 to be on the ground
      chunkGroup.add(copCar);
      copCars.push(copCar);
      copCar.chunkCoords = { x: chunkX, z: chunkZ }; // Mark cop car with its chunk
    }
  }

  // console.timeEnd(`Create Chunk ${chunkX},${chunkZ}`); // End timer for chunk creation
  return chunkGroup;
}
Line-by-line explanation (9 lines)

🔧 Subcomponents:

for-loop Building Generation Loop for (let i = 0; i < numBuildingsPerChunk; i++) {

Creates 15 random-height buildings in each chunk, repositioning them away from the main road.

for-loop NPC Spawning Loop for (let i = 0; i < numNpcsPerChunk; i++) {

Creates 8 pedestrians (NPCs) per chunk that can be shot in on-foot mode.

conditional Cop Car Spawn Condition if (stars < 5 && Math.abs(chunkX - currentChunkX) <= spawnRadius && Math.abs(chunkZ - currentChunkZ) <= spawnRadius) {

Only spawns regular cop cars if you have fewer than 5 stars AND you're within 2 chunks of this chunk—prevents cops spawning too far away.

const chunkGroup = new THREE.Group();
Creates a container (Group) to hold all objects in this chunk (ground, roads, buildings, NPCs, cop cars). When the chunk unloads, we delete the entire group at once.
const offsetX = chunkX * chunkSize;
Converts chunk grid coordinates (e.g., chunk 0,0 or chunk 1,2) into world coordinates—chunk 1 starts at x=200, chunk 2 at x=400, etc.
ground.rotation.x = -Math.PI / 2;
Rotates the plane 90° so it lies flat on the ground instead of standing vertical (planes default to vertical orientation).
const height = Math.random() * 20 + 5;
Picks a random building height between 5 and 25 units—taller buildings look more varied.
building.geometry.applyMatrix4(new THREE.Matrix4().makeScale(1, height / 1, 1));
Scales the cloned geometry to the random height—this stretches the building taller without stretching its width or depth.
} while (x > -5 && x < 5);
Keeps picking random positions until we find one that avoids the main road (between x = -5 and x = 5)—the road must stay clear for driving.
npcs.push(npc);
Adds the NPC to the global npcs array so the shoot() function can raycast against it later.
npc.chunkCoords = { x: chunkX, z: chunkZ };
Marks the NPC with its chunk coordinates so we know which chunk to remove it from when that chunk unloads.
if (stars < 5 && ...) {
Only spawn regular cops if wanted level is below 5 stars—at 5 stars, tanks spawn instead.

createCar()

createCar() builds the player's red car from four parts: a red body, blue cabin, and four black wheels. It uses a three.js Group to bundle all parts so they move and rotate together. The reusable geometries and materials from initThreeJS() keep memory low.

function createCar() {
  car = new THREE.Group(); // Use a Group to hold car parts

  const carBody = new THREE.Mesh(carBodyGeometry, carBodyMaterial); // Reusing
  carBody.castShadow = true;
  carBody.receiveShadow = true;
  car.add(carBody);

  const carCabin = new THREE.Mesh(carCabinGeometry, carCabinMaterial); // Reusing
  carCabin.position.set(0, 0.9, 0); // Position above body
  carCabin.castShadow = true;
  carCabin.receiveShadow = true;
  car.add(carCabin);

  // Wheels (simple cylinders)
  const wheelPositions = [
    { x: -1, y: -0.5, z: 0.8 },
    { x: 1, y: -0.5, z: 0.8 },
    { x: -1, y: -0.5, z: -0.8 },
    { x: 1, y: -0.5, z: -0.8 },
  ];

  wheelPositions.forEach(pos => {
    const wheel = new THREE.Mesh(carWheelGeometry, carWheelMaterial); // Reusing
    wheel.position.set(pos.x, pos.y, pos.z);
    wheel.rotation.x = Math.PI / 2; // Rotate to be vertical
    wheel.castShadow = true;
    wheel.receiveShadow = true;
    car.add(wheel);
  });

  scene.add(car);
}
Line-by-line explanation (6 lines)

🔧 Subcomponents:

forEach-loop Wheel Positioning Loop wheelPositions.forEach(pos => {

Loops through the 4 wheel positions and creates a wheel mesh at each location.

car = new THREE.Group();
Creates a Group to hold all car parts (body, cabin, wheels). This way, rotating or moving the car rotates/moves all its parts together.
const carBody = new THREE.Mesh(carBodyGeometry, carBodyMaterial);
Creates the red main body box from the reusable red box geometry and material made in initThreeJS().
carBody.castShadow = true;
Tells three.js this object casts a shadow (a shadow falls from it onto the ground).
carCabin.position.set(0, 0.9, 0);
Positions the blue cabin above the red body—0.9 units up so it sits on top without overlapping.
wheel.rotation.x = Math.PI / 2;
Rotates each wheel 90° so it stands vertically (wheels default to lying flat like a disc).
scene.add(car);
Adds the complete car (with all its parts) to the scene so it renders and can be moved by player input.

createCopCarModel()

createCopCarModel() builds a cop car from reusable geometries. It's similar to createCar(), but blue instead of red, with a white stripe down the middle and red/blue siren lights on the roof. Cop cars all move at the same global copCarSpeed and use simple pathfinding AI to chase the player.

function createCopCarModel() { // No speed parameter passed
  const copCar = new THREE.Group(); // Use a Group to hold cop car parts

  // No individual speed property assigned here; will use global copCarSpeed

  // Body - Blue and White
  const carBody = new THREE.Mesh(copCarBodyGeometry, copCarBodyMaterial); // Reusing
  carBody.castShadow = true;
  carBody.receiveShadow = true;
  copCar.add(carBody);

  const whiteStripeGeometry = new THREE.BoxGeometry(3.1, 0.5, 1.6);
  const whiteStripeMaterial = new THREE.MeshLambertMaterial({ color: 0xffffff });
  const whiteStripe = new THREE.Mesh(whiteStripeGeometry, whiteStripeMaterial);
  whiteStripe.position.set(0, 0, 0); // Overlay on body
  whiteStripe.castShadow = true;
  whiteStripe.receiveShadow = true;
  copCar.add(whiteStripe);

  const carCabin = new THREE.Mesh(copCarCabinGeometry, copCarCabinMaterial); // Reusing
  carCabin.position.set(0, 0.9, 0); // Position above body
  carCabin.castShadow = true;
  carCabin.receiveShadow = true;
  copCar.add(carCabin);

  // Wheels (simple cylinders)
  const wheelPositions = [
    { x: -1, y: -0.5, z: 0.8 },
    { x: 1, y: -0.5, z: 0.8 },
    { x: -1, y: -0.5, z: -0.8 },
    { x: 1, y: -0.5, z: -0.8 },
  ];

  wheelPositions.forEach(pos => {
    const wheel = new THREE.Mesh(copCarWheelGeometry, copCarWheelMaterial); // Reusing
    wheel.position.set(pos.x, pos.y, pos.z);
    wheel.rotation.x = Math.PI / 2; // Rotate to be vertical
    wheel.castShadow = true;
    wheel.receiveShadow = true;
    copCar.add(wheel);
  });

  // Siren Light (simple red/blue cylinders)
  const redSiren = new THREE.Mesh(sirenLightGeometry, redSirenMaterial); // Reusing
  redSiren.position.set(-0.5, 1.4, 0);
  redSiren.rotation.x = Math.PI / 2;
  copCar.add(redSiren);

  const blueSiren = new THREE.Mesh(sirenLightGeometry, blueSirenMaterial); // Reusing
  blueSiren.position.set(0.5, 1.4, 0);
  blueSiren.rotation.x = Math.PI / 2;
  copCar.add(blueSiren);

  // Keep car on the ground
  copCar.position.y = 0;

  return copCar;
}
Line-by-line explanation (4 lines)
const copCar = new THREE.Group();
Creates a Group to hold all cop car parts so they move together as one unit.
const whiteStripe = new THREE.Mesh(whiteStripeGeometry, whiteStripeMaterial);
Creates a white stripe overlay on the blue body to make the cop car visually distinct from the player's red car—police paint scheme.
const redSiren = new THREE.Mesh(sirenLightGeometry, redSirenMaterial);
Adds a red cylinder on top of the cop car to represent a siren light—visual indicator that it's a police vehicle.
blueSiren.position.set(0.5, 1.4, 0);
Positions the blue siren next to the red one (offset by 0.5 units to the right) on top of the roof.

createTankCopCarModel()

createTankCopCarModel() builds a tank at 5-star wanted level. Unlike regular cop cars, tanks have a rotating turret and cannon that aim at you, plus properties for speed and shooting cooldown. Tanks spawn in the same area as you when you hit 5 stars and fire projectiles to end your run.

function createTankCopCarModel() {
  const tank = new THREE.Group();

  // Store tank properties
  tank.speed = tankCopCarSpeed; // Faster speed for tanks
  tank.turnSpeed = tankCopCarTurnSpeed; // Tanks turn slightly slower than player car
  tank.shootingTimer = 0; // Tank's shooting cooldown timer

  // Base body
  const tankBody = new THREE.Mesh(tankBodyGeometry, tankBodyMaterial); // Reusing
  tankBody.castShadow = true;
  tankBody.receiveShadow = true;
  tank.add(tankBody);

  // Turret (simple cylinder on top)
  const tankTurret = new THREE.Mesh(turretGeometry, turretMaterial); // Reusing
  tankTurret.position.set(0, 1.5, 0); // Position on top of the body
  tankTurret.rotation.x = Math.PI / 2; // Point forward
  tankTurret.castShadow = true;
  tankTurret.receiveShadow = true;
  tank.add(tankTurret);

  // Cannon (simple cylinder extending from turret)
  const tankCannon = new THREE.Mesh(cannonGeometry, cannonMaterial); // Reusing
  tankCannon.position.set(0, 0, -1.5); // Extend from turret
  tankCannon.rotation.x = Math.PI / 2; // Point forward
  tankCannon.castShadow = true;
  tankCannon.receiveShadow = true;
  tankTurret.add(tankCannon); // Add cannon to turret so it rotates with it

  // Wheels (simple boxes or cylinders on the sides)
  const wheelPositions = [
    { x: -1.7, y: -0.5, z: 1.2 },
    { x: 1.7, y: -0.5, z: 1.2 },
    { x: -1.7, y: -0.5, z: -1.2 },
    { x: 1.7, y: -0.5, z: -1.2 },
  ];

  wheelPositions.forEach(pos => {
    const wheel = new THREE.Mesh(tankWheelGeometry, tankWheelMaterial); // Reusing
    wheel.position.set(pos.x, pos.y, pos.z);
    wheel.castShadow = true;
    wheel.receiveShadow = true;
    tank.add(wheel);
  });

  // Keep tank on the ground
  tank.position.y = 0;

  return tank;
}
Line-by-line explanation (4 lines)
tank.speed = tankCopCarSpeed;
Stores the tank's speed as a property on the tank object—unlike regular cop cars, tanks have individual speed properties.
tank.shootingTimer = 0;
Initializes the tank's shooting cooldown timer to 0—used to throttle how often the tank shoots at you.
tankTurret.position.set(0, 1.5, 0);
Places the turret on top of the tank body (1.5 units up)—the turret can rotate independently to aim.
tankTurret.add(tankCannon);
Attaches the cannon to the turret (not the tank body) so the cannon rotates with the turret when the tank aims.

createPlayer()

createPlayer() builds your on-foot character—a simple green cylinder. It's created but hidden during setup; when you press 'E' to exit the car, the player becomes visible and the car hides. The player uses WASD to move and left-mouse to shoot.

function createPlayer() {
  player = new THREE.Group(); // Player group for movement and rotation

  const playerBody = new THREE.Mesh(playerBodyGeometry, playerBodyMaterial); // Reusing
  playerBody.position.y = 0.9; // Half height to stand on ground
  playerBody.castShadow = true;
  playerBody.receiveShadow = true;
  player.add(playerBody);

  scene.add(player);
}
Line-by-line explanation (3 lines)
player = new THREE.Group();
Creates a Group to hold the on-foot player character so it can be rotated and moved as one unit.
const playerBody = new THREE.Mesh(playerBodyGeometry, playerBodyMaterial);
Creates a green cylinder to represent your character when running on foot (as opposed to driving the car).
playerBody.position.y = 0.9;
Positions the body so the bottom sits on the ground (y=0)—0.9 is half the cylinder's height (1.8 units).

createGun()

createGun() creates the gun model that appears in your hand during on-foot mode. By attaching it directly to the camera with `camera.add(gun)`, it stays fixed in the first-person view—a classic FPS technique.

function createGun() {
  gun = new THREE.Mesh(gunGeometry, gunMaterial); // Reusing
  gun.position.set(0.5, -0.3, -1); // Position relative to camera (first-person view)
  gun.rotation.x = Math.PI / 2; // Point forward
  gun.castShadow = true;
  gun.receiveShadow = true;
  gun.visible = false; // Gun is initially hidden (player is driving)
  camera.add(gun); // Attach gun directly to the camera for first-person view
}
Line-by-line explanation (3 lines)
gun = new THREE.Mesh(gunGeometry, gunMaterial);
Creates a dark gray cylinder to represent your gun when on foot.
gun.position.set(0.5, -0.3, -1);
Positions the gun 0.5 units to the right, 0.3 units below eye level, and 1 unit in front of your view—typical first-person gun placement.
camera.add(gun);
Attaches the gun directly to the camera so it moves and rotates with your view—when you look around, the gun stays in your hand.

createProjectile()

createProjectile() creates a red sphere that tanks fire at you. It stores a velocity (direction) so the animate() loop can move it forward each frame. If a projectile hits your car, game over.

function createProjectile(startPosition, direction) {
    const projectileGeometry = new THREE.SphereGeometry(projectileRadius, 8, 8);
    const projectileMaterial = new THREE.MeshBasicMaterial({ color: 0xff0000 }); // Red projectile
    const projectile = new THREE.Mesh(projectileGeometry, projectileMaterial);
    projectile.position.copy(startPosition);
    projectile.velocity = direction.clone(); // Store direction as velocity
    return projectile;
}
Line-by-line explanation (3 lines)
const projectileGeometry = new THREE.SphereGeometry(projectileRadius, 8, 8);
Creates a small red sphere (radius 0.5 units) to represent a tank bullet—8 segments gives it a smooth rounded shape.
projectile.velocity = direction.clone();
Stores the direction vector as the projectile's velocity—every frame in animate(), the projectile moves in this direction at projectileSpeed.
return projectile;
Returns the finished projectile so it can be added to the scene and the projectiles array.

onKeyDown()

onKeyDown() is called every time you press a key. It records the key press in the keys object so animate() can check it continuously, and handles the special case of 'E' to toggle between driving and on-foot mode. When you toggle, the car and player swap positions and visibility.

function onKeyDown(event) {
  if (gameOver) return; // Prevent input if game is over

  keys[event.key.toLowerCase()] = true;

  // Toggle player state with 'e' key
  if (event.key.toLowerCase() === 'e') {
    if (playerState === 'driving') {
      playerState = 'onFoot';
      player.position.copy(car.position); // Move player to car's position
      player.rotation.copy(car.rotation); // Match player rotation to car
      car.visible = false; // Hide the car
      gun.visible = true; // Show the gun
      carSpeed = 0; // Stop the car
      if (crosshairElement) crosshairElement.style.display = 'block'; // Show crosshair
    } else {
      playerState = 'driving';
      car.position.copy(player.position); // Move car to player's position
      car.rotation.copy(player.rotation); // Match car rotation to player
      car.visible = true; // Show the car
      gun.visible = false; // Hide the gun
      if (crosshairElement) crosshairElement.style.display = 'none'; // Hide crosshair
    }
  }
}
Line-by-line explanation (6 lines)

🔧 Subcomponents:

conditional Player State Toggle (E Key) if (event.key.toLowerCase() === 'e') {

Switches between driving and on-foot mode when you press E, hiding/showing the car and gun accordingly.

keys[event.key.toLowerCase()] = true;
Records which key was pressed in the keys object (e.g., keys['w'] = true when W is held)—animate() checks this object to move the car/player.
if (event.key.toLowerCase() === 'e') {
Specifically checks for the 'E' key to toggle between driving and on-foot modes.
playerState = 'onFoot';
Changes the state flag so animate() knows to use on-foot controls instead of car controls.
player.position.copy(car.position);
Teleports the player to where the car is—so you don't suddenly jump when exiting the vehicle.
car.visible = false; // Hide the car
Hides the car so it's not rendered on screen—you're now on foot and can't see your vehicle.
gun.visible = true; // Show the gun
Shows the gun in your hand for shooting.

onKeyUp()

onKeyUp() is called when you release a key. It marks the key as unpressed in the keys object, which animate() checks to stop car acceleration or player movement.

function onKeyUp(event) {
  keys[event.key.toLowerCase()] = false;
}
Line-by-line explanation (1 lines)
keys[event.key.toLowerCase()] = false;
Records that the key was released (e.g., keys['w'] = false when you let go of W)—so the car slows down when you stop holding forward.

onMouseDown()

onMouseDown() triggers when you left-click. It checks if you're on foot and if enough time has passed since your last shot (cooldown throttling), then calls shoot() to fire a ray from your camera through the center of the screen to check for NPC hits.

function onMouseDown(event) {
  if (gameOver) return; // Prevent shooting if game is over

  if (playerState === 'onFoot' && event.button === 0) { // Left mouse button
    const currentTime = Date.now();
    if (currentTime - lastShotTime > shootingCooldown) {
      lastShotTime = currentTime;
      shoot();
    }
  }
}
Line-by-line explanation (4 lines)

🔧 Subcomponents:

conditional Shooting Cooldown Throttle if (currentTime - lastShotTime > shootingCooldown) {

Prevents shooting faster than every 300ms—throttles your fire rate so you can't spam bullets.

if (playerState === 'onFoot' && event.button === 0) {
Only allows shooting if you're on foot (not driving) and you clicked the left mouse button (button 0).
const currentTime = Date.now();
Gets the current time in milliseconds since the browser started.
if (currentTime - lastShotTime > shootingCooldown) {
Checks if at least 300ms (shootingCooldown) have passed since your last shot—prevents shooting too fast.
lastShotTime = currentTime;
Updates the last shot time so the next shot must wait another 300ms.

shoot()

shoot() uses raycasting (a three.js technique) to fire an invisible ray from your camera through the center of the screen. If the ray hits an NPC, the NPC is removed from the scene and arrays, memory is freed, and a temporary yellow flash appears. A gunshot sound plays using the p5.Oscillator oscillator, and a brief orange muzzle flash appears at the gun barrel.

🔬 These four lines envelope the gunshot sound: attack (loud), decay, sustain, and release. What happens if you change `0.5` (attack volume) to `1.0`? Will the shot sound louder or quieter?

      gunshotSound.amp(0, 0.01); // Quick decay
      gunshotSound.amp(0.5, 0.05); // Attack
      gunshotSound.amp(0.2, 0.05); // Decay to a lower amp
      gunshotSound.amp(0, 0.2); // Release
function shoot() {
  // Update the picking ray with the camera and mouse position
  // For center of screen, mouse coordinates are (0, 0)
  raycaster.setFromCamera(mouse, camera);

  // Play gunshot sound
  if (gunshotSound) {
    // If it's a synthetic oscillator, re-trigger it
    if (gunshotSound instanceof p5.Oscillator) {
      gunshotSound.amp(0, 0.01); // Quick decay
      gunshotSound.amp(0.5, 0.05); // Attack
      gunshotSound.amp(0.2, 0.05); // Decay to a lower amp
      gunshotSound.amp(0, 0.2); // Release
    } else {
      // If it's a loaded sound file, play it
      gunshotSound.play();
    }
  }

  // Calculate objects intersecting the picking ray
  const intersects = raycaster.intersectObjects(npcs);

  if (intersects.length > 0) {
    // Hit an NPC!
    const hitNpc = intersects[0].object;
    console.log('Hit NPC:', hitNpc);

    // Remove NPC from scene and global array
    scene.remove(hitNpc);
    npcs = npcs.filter(npc => npc !== hitNpc);

    // Dispose of geometry and material to prevent memory leaks
    hitNpc.geometry.dispose(); // Dispose of the cloned geometry
    // Note: hitNpc.material is a shared material, DO NOT dispose of it here!
    // If NPCs had unique materials, you would dispose of them.

    // Optional: Add a temporary visual effect at the hit point
    const hitEffectGeometry = new THREE.SphereGeometry(0.1, 8, 8);
    const hitEffectMaterial = new THREE.MeshBasicMaterial({ color: 0xffff00 });
    const hitEffect = new THREE.Mesh(hitEffectGeometry, hitEffectMaterial);
    hitEffect.position.copy(intersects[0].point);
    scene.add(hitEffect);

    // Remove hit effect after a short delay
    setTimeout(() => {
      scene.remove(hitEffect);
      hitEffectGeometry.dispose(); // Dispose of the temporary geometry
      hitEffectMaterial.dispose(); // Dispose of the temporary material
    }, 100);
  }

  // Optional: Add a temporary flash at the gun barrel
  const gunFlashGeometry = new THREE.CylinderGeometry(0.1, 0.2, 0.2, 8);
  const gunFlashMaterial = new THREE.MeshBasicMaterial({ color: 0xffa500 }); // Orange flash
  const gunFlash = new THREE.Mesh(gunFlashGeometry, gunFlashMaterial);
  gunFlash.position.copy(gun.position);
  gunFlash.position.z -= 0.5; // Slightly in front of gun barrel
  gunFlash.rotation.x = Math.PI / 2;
  camera.add(gunFlash); // Add to camera to move with view

  setTimeout(() => {
    camera.remove(gunFlash);
    gunFlashGeometry.dispose();
    gunFlashMaterial.dispose();
  }, 50);
}
Line-by-line explanation (7 lines)

🔧 Subcomponents:

calculation Raycast and Hit Detection const intersects = raycaster.intersectObjects(npcs);

Fires a ray from the camera through the center of the screen and checks which NPCs it hits.

conditional NPC Hit and Cleanup if (intersects.length > 0) {

If the ray hit an NPC, removes it from the scene and the global array, then disposes of its memory.

raycaster.setFromCamera(mouse, camera);
Creates an invisible ray that starts at your camera and shoots through the center of the screen (mouse.x=0, mouse.y=0)—like firing a bullet down the center of your crosshair.
gunshotSound.amp(0.5, 0.05); // Attack
Raises the oscillator volume to 0.5 over 0.05 seconds—the attack phase of the sound envelope (the initial loud pop).
const intersects = raycaster.intersectObjects(npcs);
Checks which NPCs in the npcs array the ray hit, returning an array sorted by distance (closest first).
const hitNpc = intersects[0].object;
Gets the closest NPC that was hit—the first element in the intersects array.
npcs = npcs.filter(npc => npc !== hitNpc);
Removes the hit NPC from the global npcs array by creating a new array without it—so it won't be rendered or raycast against anymore.
hitNpc.geometry.dispose();
Frees the NPC's cloned geometry from GPU memory—prevents memory leaks when you shoot many NPCs.
hitEffect.position.copy(intersects[0].point);
Spawns a temporary yellow flash at the exact point where the ray hit—visual feedback that you shot something.

updateChunks()

updateChunks() is the heart of streaming: it tracks which chunk you're in, loads new chunks around you (3×3 grid by default), and unloads chunks when you leave them. It carefully disposes of only non-shared geometries and materials to prevent memory leaks while keeping reused objects alive. This technique lets the game world be infinitely large while using finite memory.

function updateChunks() {
  const newChunkX = Math.floor(car.position.x / chunkSize);
  const newChunkZ = Math.floor(car.position.z / chunkSize);

  if (newChunkX !== currentChunkX || newChunkZ !== currentChunkZ) {
    console.time('Chunk Update'); // Start timer for chunk update
    currentChunkX = newChunkX;
    currentChunkZ = newChunkZ;

    const activeChunkKeys = new Set();

    // Generate new chunks and track active ones
    for (let cx = currentChunkX - visibleRadius; cx <= currentChunkX + visibleRadius; cx++) {
      for (let cz = currentChunkZ - visibleRadius; cz <= currentChunkZ + visibleRadius; cz++) {
        const key = `${cx},${cz}`;
        activeChunkKeys.add(key);

        if (!chunks.has(key)) {
          const chunkGroup = createChunkContent(cx, cz);
          chunks.set(key, chunkGroup);
          scene.add(chunkGroup);
        }
      }
    }

    // Remove old chunks
    const sharedGeometries = new Set([
        groundGeometry, roadGeometry, sirenLightGeometry,
        carBodyGeometry, carCabinGeometry, carWheelGeometry,
        copCarBodyGeometry, copCarCabinGeometry, copCarWheelGeometry,
        playerBodyGeometry, gunGeometry,
        tankBodyGeometry, turretGeometry, cannonGeometry
    ]);

    const sharedMaterials = new Set([
        groundMaterial, roadMaterial, buildingMaterial, npcMaterial,
        redSirenMaterial, blueSirenMaterial,
        carBodyMaterial, carCabinMaterial, carWheelMaterial,
        copCarBodyMaterial, copCarCabinMaterial, copCarWheelMaterial,
        playerBodyMaterial, gunMaterial,
        tankBodyMaterial, turretMaterial, cannonMaterial, tankWheelMaterial
    ]);

    chunks.forEach((chunkGroup, key) => {
      if (!activeChunkKeys.has(key)) {
        scene.remove(chunkGroup);

        // Dispose of chunk resources
        chunkGroup.children.forEach(object => {
          if (object.geometry && !sharedGeometries.has(object.geometry)) {
            object.geometry.dispose();
          }
          if (object.material && !sharedMaterials.has(object.material)) {
            // Only dispose if it's a unique material not in our shared list (e.g., whiteStripeMaterial)
            object.material.dispose();
          }
        });

        // Remove associated NPCs and cop cars from global arrays
        npcs = npcs.filter(npc => npc.chunkCoords && (npc.chunkCoords.x !== chunkX || npc.chunkCoords.z !== chunkZ));
        copCars = copCars.filter(copCar => copCar.chunkCoords && (copCar.chunkCoords.x !== chunkX || copCar.chunkCoords.z !== chunkZ));

        chunks.delete(key);
      }
    });
    console.timeEnd('Chunk Update'); // End timer for chunk update
  }
}
Line-by-line explanation (6 lines)

🔧 Subcomponents:

calculation Calculate Current Chunk Grid Coordinates const newChunkX = Math.floor(car.position.x / chunkSize);

Converts the car's world position into grid coordinates—which 200×200 tile are you in.

nested-for-loop Generate Visible Chunks for (let cx = currentChunkX - visibleRadius; cx <= currentChunkX + visibleRadius; cx++) {

Loops through a 3×3 grid of chunks around the player (or larger if visibleRadius is higher) and loads each one.

forEach-loop Remove and Dispose Old Chunks chunks.forEach((chunkGroup, key) => {

Loops through all active chunks and removes those that are too far away, freeing their memory.

const newChunkX = Math.floor(car.position.x / chunkSize);
Divides the car's x position by 200 (chunkSize) and rounds down to find which chunk column (0, 1, 2, etc.) the car is in.
if (newChunkX !== currentChunkX || newChunkZ !== currentChunkZ) {
Only updates chunks if you've moved to a new chunk—prevents redundant work every frame.
for (let cx = currentChunkX - visibleRadius; cx <= currentChunkX + visibleRadius; cx++) {
Loops from 1 chunk before to 1 chunk after your current chunk (visibleRadius=1 means a 3×3 grid)—creates a 3D grid of visible chunks.
if (!chunks.has(key)) {
Only creates the chunk if it doesn't already exist—prevents duplicates.
if (!sharedGeometries.has(object.geometry)) {
Only disposes of geometry if it's NOT in the shared set—we never dispose shared geometries because other objects still use them.
npcs = npcs.filter(npc => npc.chunkCoords && (npc.chunkCoords.x !== chunkX || npc.chunkCoords.z !== chunkZ));
Removes NPCs from the global array if they belong to a chunk being unloaded—keeps the npcs array clean so raycasting is fast.

wrapPosition()

wrapPosition() implements toroidal wrapping: when you travel far enough in one direction, you wrap around to the opposite side. This lets cop cars chase you continuously without getting confused by world boundaries, and keeps position values manageable.

function wrapPosition(position, worldSize) {
  position.x = (position.x + worldSize / 2) % worldSize - worldSize / 2;
  position.z = (position.z + worldSize / 2) % worldSize - worldSize / 2;
}
Line-by-line explanation (1 lines)
position.x = (position.x + worldSize / 2) % worldSize - worldSize / 2;
Uses modulo arithmetic to wrap the x position: if you go past worldSize/2, you wrap back to -worldSize/2—like a toroidal (donut-shaped) world that loops on itself.

updateStarDisplay()

updateStarDisplay() updates the wanted level UI: it builds HTML with filled and empty star images based on your current stars, then updates the DOM to show your wanted level. Called whenever you earn a new star.

function updateStarDisplay() {
    let starImagesHTML = "";
    for (let i = 1; i <= 5; i++) {
        if (i <= stars) {
            starImagesHTML += `<img src="${FILLED_STAR_URL}" alt="Filled Star">`;
        } else {
            starImagesHTML += `<img src="${EMPTY_STAR_URL}" alt="Empty Star">`;
        }
    }
    starsElement.innerHTML = starImagesHTML;
}
Line-by-line explanation (4 lines)

🔧 Subcomponents:

for-loop Star Image Loop for (let i = 1; i <= 5; i++) {

Creates 5 star images, filled for your current stars and outlined for remaining stars.

for (let i = 1; i <= 5; i++) {
Loops 5 times to create 5 star images.
if (i <= stars) {
If the loop counter is less than or equal to your current stars, use a filled star image.
starImagesHTML += `<img src="${FILLED_STAR_URL}" alt="Filled Star">`;
Appends HTML code to display a filled star image—building up the star meter display.
starsElement.innerHTML = starImagesHTML;
Sets the HTML of the starsDisplay div to the star images, updating the UI on screen.

animate()

animate() is the master game loop called 60 times per second. It handles all game logic: car/player movement, collision detection, cop car AI, tank shooting, star progression, and game over conditions. It's split into two branches (driving vs. on-foot mode) with completely different control schemes and camera angles. When the game ends, it stops updating and just renders a black screen.

🔬 This code awards a new star each time you survive past a milestone (1 min, 2 min, 3 min, etc.). What would happen if you changed the condition to just `if (survivalTimer >= survivalMilestones[i])`—removing the `&& stars <= i` part?

      if (survivalTimer >= survivalMilestones[i] && stars <= i) {
              stars = i + 1;
              updateStarDisplay();
function animate() {
  requestAnimationFrame(animate);

  if (gameOver) {
    renderer.render(scene, camera); // Continue rendering the black screen
    return; // Stop all further game logic
  }

  // --- Survival Timer and Star Meter Update ---
  if (!gameOver) {
      survivalTimer += deltaTime; // Using p5.js deltaTime for time-based updates
      timerElement.innerHTML = `Time: ${nf(survivalTimer / 1000, 1, 0)}s`;

      for (let i = 0; i < survivalMilestones.length; i++) {
          if (survivalTimer >= survivalMilestones[i] && stars <= i) {
              stars = i + 1;
              updateStarDisplay(); // Call new function to update star images
              console.log(`Reached ${stars} stars!`);

              if (stars === 5) {
                  console.log("5 Stars! Spawning Tank Police Cars!");
                  const spawnRadius = 2; // Spawn tanks in chunks within 2 chunks of player
                  const halfChunk = chunkSize / 2;
                  for (let j = 0; j < numTankCopCars; j++) {
                      let x, z;
                      do {
                          x = (Math.random() * chunkSize - halfChunk);
                          z = (Math.random() * chunkSize - halfChunk);
                      } while (x > -30 && x < 30); // Avoid initial player area and main road x=0

                      const tankCar = createTankCopCarModel(); // New function for tank model
                      tankCar.position.set(currentChunkX * chunkSize + x, 0, currentChunkZ * chunkSize + z);
                      tankCar.isTank = true; // Mark as tank
                      tankCar.shootingTimer = 0; // Tank's shooting cooldown timer
                      scene.add(tankCar);
                      copCars.push(tankCar); // Add to general copCars array
                  }
              }
              break; // Only award one star per milestone
          }
      }  
  }


  if (playerState === 'driving') {
    // --- Car Controls ---
    // Update car speed based on input
    if (keys['w']) { // Accelerate
      carSpeed += carAcceleration;
      carSpeed = Math.min(carSpeed, carMaxSpeed);
    } else if (keys['s']) { // Brake/Reverse
      if (carSpeed > 0) {
        carSpeed -= carBrakeDeceleration;
        carSpeed = Math.max(carSpeed, 0);
      } else {
        carSpeed -= carAcceleration / 2; // Reverse slower
        carSpeed = Math.max(carSpeed, -carMaxSpeed / 2);
      }
    } else { // Decelerate if no input
      if (carSpeed > 0) {
        carSpeed -= carDeceleration;
        carSpeed = Math.max(carSpeed, 0);
      } else if (carSpeed < 0) {
        carSpeed += carDeceleration;
        carSpeed = Math.min(carSpeed, 0);
      }
    }

    // Update car rotation based on input and speed
    if (carSpeed !== 0) {
      if (keys['a']) { // Turn left
        car.rotation.y += carTurnSpeed * (carSpeed > 0 ? 1 : -1);
      }
      if (keys['d']) { // Turn right
        car.rotation.y -= carTurnSpeed * (carSpeed > 0 ? 1 : -1);
      }
    }

    // Move car based on speed and rotation
    const forwardVector = new THREE.Vector3(0, 0, -1); // Car's local forward direction
    forwardVector.applyQuaternion(car.quaternion); // Apply car's rotation
    car.position.addScaledVector(forwardVector, carSpeed);

    // Keep car on the ground
    car.position.y = 0;

    // Wrap car position
    wrapPosition(car.position, worldSize);

    // Update camera to follow the car
    const cameraOffset = new THREE.Vector3(0, 10, 15); // Offset from the car
    const rotatedOffset = cameraOffset.clone().applyQuaternion(car.quaternion); // Apply car's rotation to offset
    camera.position.copy(car.position).add(rotatedOffset);
    camera.lookAt(car.position); // Always look at the car

    // Update chunks based on car's new position
    updateChunks();

    // --- Cop Car AI Chasing Logic (only when player is driving and cop car is active) ---
    for (const copCar of copCars) {
      let playerPos = car.position;
      let copCarPos = copCar.position;

      // Calculate direction from cop car to player, considering world wrapping
      let direction = playerPos.clone().sub(copCarPos);
      direction.y = 0; // Keep chase on horizontal plane

      // If the player is on the other side of the world wrap, adjust direction
      if (Math.abs(direction.x) > worldSize / 2) {
        direction.x -= Math.sign(direction.x) * worldSize;
      }
      if (Math.abs(direction.z) > worldSize / 2) {
        direction.z -= Math.sign(direction.z) * worldSize;
      }
      direction.normalize();

      let desiredAngle = Math.atan2(direction.x, direction.z);
      let currentAngle = copCar.rotation.y;

      // Calculate the shortest angle difference
      let angleDiff = desiredAngle - currentAngle;
      if (angleDiff > Math.PI) angleDiff -= 2 * Math.PI;
      if (angleDiff < -Math.PI) angleDiff += 2 * Math.PI;

      // Turn gradually
      copCar.rotation.y += Math.sign(angleDiff) * Math.min(Math.abs(angleDiff), (copCar.isTank ? copCar.turnSpeed : copCarTurnSpeed));

      // Move forward, using the copCar's individual speed property if it's a tank, otherwise global copCarSpeed
      copCar.position.addScaledVector(direction, (copCar.isTank ? copCar.speed : copCarSpeed));

      // Keep cop car on the ground
      copCar.position.y = 0;

      // Wrap cop car position
      wrapPosition(copCar.position, worldSize);

      // --- Tank Shooting Logic ---
      if (copCar.isTank) {
        const distanceToPlayer = copCar.position.distanceTo(car.position);
        if (distanceToPlayer < tankShootingRange && carSpeed !== 0) { // Only shoot if player is moving and in range
            // Assuming turret is the second child of the tank group (index 1)
            const tankTurret = copCar.children[1];
            const tankTurretPos = new THREE.Vector3();
            tankTurret.getWorldPosition(tankTurretPos);

            const targetPos = car.position.clone();
            targetPos.y += 0.5; // Aim slightly at car body

            const tankDirection = targetPos.clone().sub(tankTurretPos).normalize();

            // Rotate turret to face target
            const desiredTurretAngle = Math.atan2(tankDirection.x, tankDirection.z);
            let currentTurretAngle = tankTurret.rotation.y;
            let turretAngleDiff = desiredTurretAngle - currentTurretAngle;
            if (turretAngleDiff > Math.PI) turretAngleDiff -= 2 * Math.PI;
            if (turretAngleDiff < -Math.PI) turretAngleDiff += 2 * Math.PI;
            tankTurret.rotation.y += Math.sign(turretAngleDiff) * 0.08; // Turret turns faster

            // Check shooting cooldown
            const currentTime = Date.now();
            if (currentTime - copCar.shootingTimer > tankShootingCooldown) {
                copCar.shootingTimer = currentTime;
                // Create projectile
                const projectile = createProjectile(tankTurretPos, tankDirection);
                projectiles.push(projectile);
                scene.add(projectile);
            }
        }
      }
    }

    // --- Collision Detection with Cop Cars (7-second timer) ---
    inCollision = false; // Reset collision state for this frame
    for (const copCar of copCars) {
      if (car.position.distanceTo(copCar.position) < collisionDistance) {
        inCollision = true; // Player is touching at least one cop car
        break; // No need to check other cop cars this frame
      }
    }

    if (inCollision) {
      if (collisionTimer === 0) {
        collisionTimer = Date.now(); // Start the timer
        console.log('Collision started. Timer at 0.');
      } else {
        const elapsed = Date.now() - collisionTimer;
        console.log('Collision ongoing. Elapsed:', elapsed, 'ms');
        if (elapsed >= 7000) { // 7 seconds
          gameOver = true;
          carSpeed = 0; // Stop player car
          // Optionally, stop all cop cars too
          // copCars.forEach(cc => cc.speed = 0); // Cop cars don't have individual speed, use global
          scene.background = new THREE.Color(0x000000); // Darken screen
          document.getElementById('gameOverImage').style.display = 'block'; // Show game over image
          document.getElementById('crosshair').style.display = 'none'; // Hide crosshair
          console.log('Game Over! You were caught by a cop car for 7 seconds!');
          return; // Exit animate loop immediately after game over
        }
      }
    } else {
      collisionTimer = 0; // Reset timer if no longer colliding
      console.log('Collision ended. Timer reset.');
    }

    // --- Projectile Updates and Collision ---
    for (let i = projectiles.length - 1; i >= 0; i--) {
        const projectile = projectiles[i];
        projectile.position.addScaledVector(projectile.velocity, projectileSpeed);

        // Check collision with player's car
        if (projectile.position.distanceTo(car.position) < (projectileRadius + collisionDistance / 2)) {
            gameOver = true;
            carSpeed = 0; // Stop player car
            scene.background = new THREE.Color(0x000000); // Darken screen
            document.getElementById('gameOverImage').style.display = 'block'; // Show game over image
            document.getElementById('crosshair').style.display = 'none'; // Hide crosshair
            console.log('Game Over! You were hit by a tank projectile!');
            // Dispose of projectile
            scene.remove(projectile);
            projectile.geometry.dispose();
            projectile.material.dispose();
            projectiles.splice(i, 1);
            return; // Exit animate loop immediately after game over
        }

        // Remove projectiles out of bounds
        if (Math.abs(projectile.position.x) > worldSize / 2 || Math.abs(projectile.position.z) > worldSize / 2) {
            scene.remove(projectile);
            projectile.geometry.dispose();
            projectile.material.dispose();
            projectiles.splice(i, 1);
        }
    }

  } else if (playerState === 'onFoot') {
    // --- On-Foot Controls ---
    // Move player based on input
    const playerForwardVector = new THREE.Vector3(0, 0, -1);
    playerForwardVector.applyQuaternion(player.quaternion);
    const playerRightVector = new THREE.Vector3(1, 0, 0);
    playerRightVector.applyQuaternion(player.quaternion);

    if (keys['w']) { // Move forward
      player.position.addScaledVector(playerForwardVector, playerSpeed);
    }
    if (keys['s']) { // Move backward
      player.position.addScaledVector(playerForwardVector, -playerSpeed);
    }
    if (keys['a']) { // Turn left
      player.rotation.y += playerTurnSpeed;
    }
    if (keys['d']) { // Turn right
      player.rotation.y -= playerTurnSpeed;
    }

    // Keep player on the ground
    player.position.y = 0;

    // Wrap player position
    wrapPosition(player.position, worldSize);

    // Update camera to follow the player (first-person view)
    const playerCameraOffset = new THREE.Vector3(0, 1.6, 0); // Eye level offset
    const rotatedPlayerOffset = playerCameraOffset.clone().applyQuaternion(player.quaternion);
    camera.position.copy(player.position).add(rotatedPlayerOffset);
    camera.lookAt(player.position.clone().add(playerForwardVector.multiplyScalar(10))); // Look in player's forward direction
  }

  // If OrbitControls are enabled, update them
  // if (controls) controls.update(); // Only required if controls.enableDamping is set to true

  renderer.render(scene, camera);
}
Line-by-line explanation (16 lines)

🔧 Subcomponents:

calculation Survival Timer and Star Progression survivalTimer += deltaTime;

Increments the survival timer and checks for star milestones (every minute you get a new star up to 5).

conditional-block Driving Mode Controls (W/A/S/D) if (keys['w']) { carSpeed += carAcceleration; ... }

Reads keyboard input and updates car speed, rotation, and position based on acceleration/deceleration/turning.

for-loop Cop Car Chasing AI Loop for (const copCar of copCars) {

Each cop car calculates the direction to the player, gradually rotates toward them, and moves forward to chase.

conditional-block Collision Detection and 7-Second Timer if (inCollision) { if (collisionTimer === 0) { ... } }

Tracks continuous collision with cop cars; game over if you stay touching one for 7 seconds.

for-loop Tank Projectile Movement and Collision for (let i = projectiles.length - 1; i >= 0; i--) {

Updates each projectile's position, checks if it hits the player, and removes it if out of bounds.

conditional-block On-Foot Mode Controls (W/A/S/D + Mouse) if (playerState === 'onFoot') { ... }

Reads keyboard input and updates player position and rotation for first-person walking.

requestAnimationFrame(animate);
Schedules the next call to animate() on the next frame—creates the game loop that runs ~60 times per second.
if (gameOver) { ... return; }
If the game is over, still render the black screen but skip all game logic—freezes the game state.
survivalTimer += deltaTime;
Adds the time since the last frame (p5.js deltaTime in milliseconds) to the survival timer—tracks total play time.
if (survivalTimer >= survivalMilestones[i] && stars <= i) {
Checks if you've survived long enough for the next star milestone (60s, 120s, 180s, etc.) AND you haven't earned this star yet.
if (stars === 5) { ... createTankCopCarModel() ... }
When you reach 5 stars, spawns 5 tank police cars near you—they'll start chasing and shooting projectiles.
if (keys['w']) { carSpeed += carAcceleration; ... }
If W is held, increases car speed by carAcceleration (0.05) each frame, capped at carMaxSpeed (5).
forwardVector.applyQuaternion(car.quaternion);
Rotates the forward vector by the car's rotation so the car moves in the direction it's facing, not always north.
camera.position.copy(car.position).add(rotatedOffset);
Positions the camera 10 units up and 15 units behind the car—third-person chase camera that rotates with the car.
let direction = playerPos.clone().sub(copCarPos);
Calculates the vector from the cop car to the player—the direction the cop should turn and chase.
if (Math.abs(direction.x) > worldSize / 2) { direction.x -= Math.sign(direction.x) * worldSize; }
Handles world wrapping: if the player is way off to the right but actually wraps to the left side, adjust the direction vector so the cop chases the correct path.
copCar.rotation.y += Math.sign(angleDiff) * Math.min(Math.abs(angleDiff), copCarTurnSpeed);
Rotates the cop car gradually toward the desired angle—doesn't snap instantly, making the chase look more natural.
if (car.position.distanceTo(copCar.position) < collisionDistance) {
Checks if you're within 3.5 units of a cop car—close enough to trigger the 7-second collision timer.
if (elapsed >= 7000) { gameOver = true; ... }
If you've been touching a cop car for 7 seconds straight, you're caught and the game ends.
projectile.position.addScaledVector(projectile.velocity, projectileSpeed);
Moves the projectile forward in its stored direction at projectileSpeed (10 units per frame).
if (projectile.position.distanceTo(car.position) < (projectileRadius + collisionDistance / 2)) {
Checks if the projectile has hit your car—immediate game over if it has.
camera.lookAt(player.position.clone().add(playerForwardVector.multiplyScalar(10)));
Makes the camera look straight ahead in the direction you're facing—true first-person view.

draw()

draw() is p5.js's standard animation loop function, but in this sketch it's empty and unused because three.js's animate() loop does all the work. It's left here for educational clarity—this sketch is a hybrid of p5.js (for sound and deltaTime) and three.js (for 3D graphics).

function draw() {
  // three.js handles rendering via its animate() loop
}
Line-by-line explanation (1 lines)
// three.js handles rendering via its animate() loop
p5.js still calls draw() every frame (by default), but it's empty because three.js's animate() function takes over all rendering.

windowResized()

windowResized() is called by p5.js whenever the browser window is resized. It ensures the three.js camera and renderer stay properly proportioned and fill the screen, preventing distortion or letterboxing.

function windowResized() {
  // Update three.js camera aspect and renderer size
  if (camera && renderer) {
    camera.aspect = window.innerWidth / window.innerHeight;
    camera.updateProjectionMatrix();
    renderer.setSize(window.innerWidth, window.innerHeight);
  }
  // p5.js resizeCanvas would go here if we were using it for rendering
}
Line-by-line explanation (3 lines)
camera.aspect = window.innerWidth / window.innerHeight;
Updates the camera's aspect ratio to match the new window size—prevents stretching.
camera.updateProjectionMatrix();
Recalculates the camera's internal projection matrix based on the new aspect ratio.
renderer.setSize(window.innerWidth, window.innerHeight);
Resizes the three.js canvas to fill the new window dimensions.

📦 Key Variables

scene THREE.Scene

The 3D world container—all visible 3D objects are added to this scene.

scene = new THREE.Scene();
camera THREE.PerspectiveCamera

The player's viewpoint into the 3D world—positioned behind the car in driving mode or in the player's head in on-foot mode.

camera = new THREE.PerspectiveCamera(75, width/height, 0.1, 1000);
renderer THREE.WebGLRenderer

The three.js graphics engine that draws the scene to a canvas—handles all rendering.

renderer = new THREE.WebGLRenderer({ antialias: true });
car THREE.Group

The player's red vehicle—a group containing body, cabin, and wheels. Controlled by WASD input.

car = new THREE.Group();
keys object

Tracks which keys are currently pressed (e.g., keys['w'] = true when W is held)—used to control movement.

let keys = {}; keys['w'] = true;
carSpeed number

Current velocity of the car in the forward direction—positive is forward, negative is reverse.

let carSpeed = 0;
player THREE.Group

The on-foot player character (a green cylinder)—visible when you press E to exit the car.

player = new THREE.Group();
gun THREE.Mesh

The player's weapon in first-person mode—a dark gray cylinder attached to the camera.

gun = new THREE.Mesh(gunGeometry, gunMaterial);
npcs array

Array of all pedestrian characters in the world—used for raycasting when you shoot.

let npcs = []; npcs.push(npc);
playerState string

Current game state: 'driving' (in car) or 'onFoot' (running around)—controls which input scheme is active.

let playerState = 'driving';
copCars array

Array of all cop cars (and tanks at 5 stars) actively chasing the player—used for AI and collision detection.

let copCars = []; copCars.push(copCar);
chunks Map

Map of all loaded chunks (key: 'x,z' chunk coordinates, value: THREE.Group of chunk contents)—enables streaming world.

let chunks = new Map(); chunks.set('0,0', chunkGroup);
currentChunkX number

Grid X coordinate of the chunk the player is currently in.

let currentChunkX = 0;
currentChunkZ number

Grid Z coordinate of the chunk the player is currently in.

let currentChunkZ = 0;
gameOver boolean

Flag that becomes true when the game ends (7-second cop car catch or tank projectile hit)—stops all updates.

let gameOver = false;
stars number

Current wanted level (0–5 stars)—increases over time and triggers tank spawning at 5.

let stars = 0;
survivalTimer number

Milliseconds elapsed since the game started—drives star progression and displayed on screen.

let survivalTimer = 0;
projectiles array

Array of all tank projectiles currently flying through the world—updated and checked for collisions each frame.

let projectiles = []; projectiles.push(projectile);
inCollision boolean

Flag indicating if the player is currently touching a cop car—used to track the 7-second timer.

let inCollision = false;
collisionTimer number

Timestamp (in milliseconds) when a collision with a cop car started—used to detect 7-second catches.

let collisionTimer = 0;

🔧 Potential Improvements (6)

Here are some ways this code could be enhanced:

BUG updateChunks() chunk cleanup loop

The filter for removing old NPCs and cop cars from arrays uses undefined variables `chunkX` and `chunkZ` instead of the iterator key `cx` and `cz` from the outer forEach—this will fail silently and not properly clean up entities.

💡 Change the filter line to: `npcs = npcs.filter(npc => !npc.chunkCoords || (npc.chunkCoords.x !== cx || npc.chunkCoords.z !== cz));` And similarly for copCars. Extract `cx` and `cz` from the `key` string if needed.

PERFORMANCE animate() projectile loop

The projectile loop uses a backwards for loop (i--) which is correct, but there's no limit on how many projectiles can exist—if tanks fire for a long time, hundreds of projectiles could pile up in memory even if they're off-screen.

💡 Add a cleanup check: if a projectile is older than 10 seconds or travels more than 500 units, remove it. Store creation time or distance traveled on each projectile.

STYLE initThreeJS() geometry/material creation

Geometries and materials are created inline without clear naming or organization—it's hard to see which geometries are shared versus unique.

💡 Group all geometry creation into a createGeometries() function and all material creation into createMaterials()—improves readability and makes it easier to swap or tune rendering settings.

FEATURE game state

There's no pause or restart functionality—once you game over, you must reload the page to play again.

💡 Add a key (like 'R' or spacebar on the game over screen) that resets stars, survival timer, clears all cop cars and projectiles, resets car/player position, and sets gameOver back to false.

BUG updateChunks() NPCs/cop car cleanup

When a chunk unloads, NPCs and cop cars are filtered out of the global arrays, but if they're in the middle of being rendered or used by raycasting, removing them can cause undefined reference errors.

💡 Mark entities for deletion and remove them at the end of the animate frame, or use a safe set difference to ensure no double-removals.

PERFORMANCE createChunkContent() building loop

Every building clones the carBodyGeometry and applies a scale matrix—cloning is expensive. With 15 buildings per chunk and many chunks loaded, this adds up.

💡 Create a single tall building geometry at initThreeJS() and reuse it for all buildings (or use CylinderGeometry which is cheaper to scale). Alternatively, use GPU instancing for identical buildings.

🔄 Code Flow

Code flow showing preload, setup, initthreejs, createchunkcontent, createcar, createcopcarmodel, createtankcopcarmodel, createplayer, creategun, createprojectile, onkeydown, onkeyup, onmousedown, shoot, updatechunks, wrapposition, updatestardisplay, animate, draw, windowresized

💡 Click on function names in the diagram to jump to their code

graph TD start[Start] --> setup[setup] setup --> draw[draw loop] draw --> scene_setup[Scene Setup] draw --> lighting_setup[Lighting Setup] draw --> geometry_material_creation[Geometry & Material Creation] draw --> createchunkcontent[createChunkContent] createchunkcontent --> building_loop[Building Generation Loop] building_loop --> npc_loop[NPC Spawning Loop] npc_loop --> cop_car_spawn_check[Cop Car Spawn Condition] draw --> createcar[createCar] createcar --> wheel_loop[Wheel Positioning Loop] draw --> createplayer[createPlayer] draw --> creategun[createGun] draw --> updatechunks[updateChunks] updatechunks --> chunk_grid_calc[Chunk Grid Calculation] updatechunks --> chunk_generation_loop[Chunk Generation Loop] chunk_generation_loop --> chunk_cleanup_loop[Chunk Cleanup Loop] draw --> animate[animate] animate --> state_toggle[Player State Toggle] animate --> cooldown_check[Shooting Cooldown Throttle] animate --> car_controls[Driving Mode Controls] animate --> onfoot_controls[On-Foot Mode Controls] animate --> cop_chase_ai[Cop Car Chasing AI Loop] animate --> survival_timer[Survival Timer and Star Progression] animate --> collision_timer[Collision Detection Timer] animate --> projectile_loop[Tank Projectile Movement] draw --> updatestardisplay[updateStarDisplay] click setup href "#fn-setup" click draw href "#fn-draw" click scene_setup href "#sub-scene-setup" click lighting_setup href "#sub-lighting-setup" click geometry_material_creation href "#sub-geometry-material-creation" click createchunkcontent href "#fn-createchunkcontent" click building_loop href "#sub-building-loop" click npc_loop href "#sub-npc-loop" click cop_car_spawn_check href "#sub-cop-car-spawn-check" click createcar href "#fn-createcar" click wheel_loop href "#sub-wheel-loop" click createplayer href "#fn-createplayer" click creategun href "#fn-creategun" click updatechunks href "#fn-updatechunks" click chunk_grid_calc href "#sub-chunk-grid-calc" click chunk_generation_loop href "#sub-chunk-generation-loop" click chunk_cleanup_loop href "#sub-chunk-cleanup-loop" click animate href "#fn-animate" click state_toggle href "#sub-state-toggle" click cooldown_check href "#sub-cooldown-check" click car_controls href "#sub-car-controls" click onfoot_controls href "#sub-onfoot-controls" click cop_chase_ai href "#sub-cop-chase-ai" click survival_timer href "#sub-survival-timer" click collision_timer href "#sub-collision-timer" click projectile_loop href "#sub-projectile-loop" click updatestardisplay href "#fn-updatestardisplay"

❓ Frequently Asked Questions

What visual experience does the 'gta6 current state' sketch provide?

The sketch creates a dynamic, endless city environment composed of repeating chunks, featuring cop cars, tanks, and a chaotic atmosphere as players navigate through it.

How can players interact with the 'gta6 current state' sketch?

Users can switch between driving a car and running on foot, aim with the mouse, and shoot to fend off pursuing enemies while managing their wanted level.

What creative coding concepts are showcased in the 'gta6 current state' sketch?

This sketch demonstrates procedural generation through its chunk-based world building, along with real-time player interactions and game mechanics like collision detection.

Preview

gta6 current state - p5.js creative coding sketch preview
Sketch Preview
Code flow diagram showing the structure of gta6 current state - Code flow showing preload, setup, initthreejs, createchunkcontent, createcar, createcopcarmodel, createtankcopcarmodel, createplayer, creategun, createprojectile, onkeydown, onkeyup, onmousedown, shoot, updatechunks, wrapposition, updatestardisplay, animate, draw, windowresized
Code Flow Diagram