
HOLY PEAK

This interactive sketch lets you splatter rotten tomatoes across full-screen images by clicking anywhere on the canvas. Each tomato flies in a curved arc and leaves permanent, colorful stains on the target, with screen shake effects on every hit. You can switch between three different target faces and clear the splats whenever you want.

🧪 Try This!

Experiment with the code by making these changes:

  1. Make tomatoes fly faster — Lowering the speed value makes each tomato take more frames to reach its target, appearing to move in slow motion.
  2. Create gigantic splats — Increasing the splat particle count fills each impact with more circles, creating bigger, fuller stains.
  3. Make the screen shake much harder — Higher shakeAmount values push the screen further off-center, creating a more dramatic impact when tomatoes land.
  4. Give splats more mold (green color) — Lowering the threshold from 0.8 to 0.5 makes the random mold color appear twice as often, creating more green in every splat.
  5. Make throws slower to arc higher — Multiplying the arc height by a larger factor (like 0.6 instead of 0.3) creates exaggerated parabolic arcs, making throws feel more powerful.
  6. Extend screen shake decay (longer rumble) — Multiplying by 0.95 instead of 0.9 makes the shake fade more slowly, creating a longer rumble effect on impact.
Prefer the full editor? Open it there →

📖 About This Sketch

This sketch creates an interactive splatter game where every click launches a rotten tomato that flies in a realistic arc toward your cursor and leaves a permanent stain on the screen. The visual appeal comes from the curved projectile motion, the organic splat particles that accumulate over time, and the satisfying screen shake that happens on every hit. It combines three powerful p5.js techniques: the draw loop for animation, persistent graphics using createGraphics() to preserve splats, and physics simulation with lerp() and sine curves to create arcs.

The code is organized into two main screens—a home screen and a play screen—managed by a gameState variable that tracks which view to show. You'll find a FlyingTomato class that encapsulates the arc math and rotation logic, helper functions that handle UI buttons and splat rendering, and event listeners for both mouse and touch input. By studying this sketch, you'll learn how to build a complete interactive experience with persistent effects, multi-image switching, and responsive screen shake feedback.

⚙️ How It Works

  1. When the sketch loads, setup() creates a full-screen canvas, loads three target images from Google, and creates a hidden splatBuffer using createGraphics()—this buffer will store all the permanent splat marks.
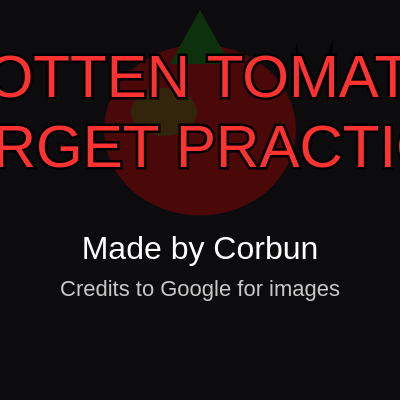
  2. The home screen displays a decorative tomato, title text, and flashing start instructions. Clicking anywhere switches gameState to PLAY.
  3. On the play screen, the current target image is drawn full-screen, then the splatBuffer (containing all previous hits) is drawn on top, creating the illusion of permanent stains.
  4. When you click, throwTomato() checks if you hit a UI button (to switch images or clear splats) or if you're clicking in the game area. Clicking in the game area creates a new FlyingTomato object that stores your target coordinates.
  5. Every frame, each flying tomato updates its progress (0 to 1) and angle, then draw() calculates its current position using lerp() for linear motion and sin() for a parabolic arc. The tomato shrinks as it flies.
  6. When a tomato reaches its target (progress >= 1), checkHit() is called, which triggers screen shake and calls addSplatToBuffer() to paint random red and green circles onto the splatBuffer at the impact point—these splats remain forever because they're drawn to a persistent graphics object.

🎓 Concepts You'll Learn

Full-screen canvasGame state managementPersistent graphics buffersProjectile motion with arcImage loading and switchingMouse and touch eventsScreen shake feedbackClass-based animationUI button collision detectionParticle effects

📝 Code Breakdown

setup()

setup() runs exactly once when the sketch starts. It's where you initialize variables, load resources, and configure the canvas. The createGraphics() function is key here—it creates a layer that persists between frames, making splats permanent.

function setup() {
  createCanvas(windowWidth, windowHeight);
  cursor(CROSS);
  
  // Canvas for the permanent splats
  splatBuffer = createGraphics(windowWidth, windowHeight);

  // Load all three images with tracking so we know when they are ready
  let url1 = "https://encrypted-tbn0.gstatic.com/images?q=tbn:ANd9GcQqBiqGS05DirD1Ek79Jt29YKY_YvXW7zgJ7g&s";
  let url2 = "https://encrypted-tbn0.gstatic.com/images?q=tbn:ANd9GcSjM-gYw5UQrnxOOr-xOFksPpF8bWNc8ea5hA&s";
  let url3 = "https://encrypted-tbn0.gstatic.com/images?q=tbn:ANd9GcQ6viABUZkfkI_89OhRG1nc7cQ9uXRMoIiZCg&s";
  
  img1 = loadImage(url1, () => img1Loaded = true);
  img2 = loadImage(url2, () => img2Loaded = true);
  img3 = loadImage(url3, () => img3Loaded = true);
}
Line-by-line explanation (4 lines)

🔧 Subcomponents:

calculation Canvas and cursor initialization createCanvas(windowWidth, windowHeight); cursor(CROSS);

Creates a full-screen canvas and changes the cursor to a crosshair for targeting

calculation Persistent graphics buffer creation splatBuffer = createGraphics(windowWidth, windowHeight);

Creates a hidden graphics layer that will store all tomato splats permanently

calculation Image loading with callbacks img1 = loadImage(url1, () => img1Loaded = true);

Loads an image from a URL and sets a flag when it's ready to draw

createCanvas(windowWidth, windowHeight);
Creates a canvas that fills the entire browser window—windowWidth and windowHeight are p5.js variables that automatically detect screen size
cursor(CROSS);
Changes the mouse cursor to a crosshair, giving visual feedback that you're aiming at targets
splatBuffer = createGraphics(windowWidth, windowHeight);
Creates a hidden graphics layer—like a second canvas—that will store permanent splat marks. Drawing to this buffer instead of the main canvas means splats stay visible every frame
img1 = loadImage(url1, () => img1Loaded = true);
Loads an image from a URL and runs a callback function when ready. The callback sets img1Loaded to true so the draw function knows it can display the image
draw()

This is the main animation loop that p5.js calls 60 times per second. Instead of writing all the drawing code here, this draw() uses gameState as a simple state machine to delegate to different screen functions. This pattern keeps complex sketches organized.

function draw() {
  if (gameState === "HOME") {
    drawHomeScreen();
  } else if (gameState === "PLAY") {
    drawPlayScreen();
  }
}
Line-by-line explanation (4 lines)

🔧 Subcomponents:

conditional Game state routing if (gameState === "HOME") { drawHomeScreen(); } else if (gameState === "PLAY") { drawPlayScreen(); }

Routes rendering to the correct screen function based on gameState variable

if (gameState === "HOME") {
Checks if gameState is set to HOME (the start screen)
drawHomeScreen();
If on HOME, call the function that draws the title and start instructions
} else if (gameState === "PLAY") {
Otherwise, check if gameState is PLAY (the active game)
drawPlayScreen();
If PLAY, call the function that draws the game world, buttons, and updates tomatoes

drawHomeScreen()

This function draws a complete title screen that plays before the game starts. It demonstrates push/pop for transformations, shape drawing with precise positioning, and the clever frameCount % 60 trick for creating repeating cycles without tracking time yourself.

function drawHomeScreen() {
  background(30, 30, 35);
  
  // Draw a giant decorative tomato in the background
  push();
  translate(width/2, height/2 - 70);
  scale(3.0);
  noStroke();
  fill(180, 20, 20); 
  ellipse(0, 0, 64, 57);
  fill(100, 120, 30, 180); 
  ellipse(-12, -6, 22, 16);
  fill(30, 120, 30); // stem
  triangle(-10, -22, 10, -22, 0, -40);
  pop();

  // Darken the background slightly so text pops
  fill(0, 0, 0, 150);
  rect(0, 0, width, height);

  textAlign(CENTER, CENTER);
  
  // Title
  stroke(0);
  strokeWeight(5);
  fill(255, 50, 50);
  textSize(60);
  text("ROTTEN TOMATO", width/2, height/2 - 120);
  text("TARGET PRACTICE", width/2, height/2 - 50);
  
  // Credits
  noStroke();
  fill(255);
  textSize(32);
  text("Made by Corbun", width/2, height/2 + 50);
  
  fill(200);
  textSize(22);
  text("Credits to Google for images", width/2, height/2 + 90);
  
  // Flashing Start Text
  if (frameCount % 60 < 30) {
    fill(255, 255, 0);
    stroke(0);
    strokeWeight(3);
    textSize(35);
    text("CLICK ANYWHERE TO START", width/2, height/2 + 200);
  }
}
Line-by-line explanation (8 lines)

🔧 Subcomponents:

calculation Decorative tomato drawing push(); translate(width/2, height/2 - 70); scale(3.0); noStroke(); fill(180, 20, 20); ellipse(0, 0, 64, 57); fill(100, 120, 30, 180); ellipse(-12, -6, 22, 16); fill(30, 120, 30); triangle(-10, -22, 10, -22, 0, -40); pop();

Draws a large rotten tomato using shapes and transformations, then restores the coordinate system with pop()

conditional Flashing start instruction if (frameCount % 60 < 30) {

Uses frameCount modulo to make text appear and disappear every 30 frames, creating a blinking effect

background(30, 30, 35);
Fills the entire canvas with a dark gray color, setting the base for the home screen
push();
Saves the current transformation state (position, scale, rotation) so changes don't affect other drawings
translate(width/2, height/2 - 70);
Moves the coordinate origin to near the center of the screen—all shapes drawn next will be relative to this new origin
scale(3.0);
Multiplies all coordinates by 3.0, making everything drawn next three times larger
ellipse(0, 0, 64, 57);
Draws a red oval at the origin (which is now the center)—this is the tomato's main body
if (frameCount % 60 < 30) {
frameCount is the number of frames drawn since the sketch started. Dividing by 60 and checking if the remainder is less than 30 creates a cycle: true for the first 30 frames, false for the next 30
text("CLICK ANYWHERE TO START", width/2, height/2 + 200);
If the condition is true (on the first half of the 60-frame cycle), draw the start text in yellow
pop();
Restores the transformation state saved by push()—translate and scale no longer apply to new shapes

drawPlayScreen()

This is the main game rendering function. It layers visuals (target, splats, UI, flying tomatoes) and orchestrates the core game loop. The screen shake effect demonstrates how translate() can affect everything drawn after it, and the backward loop pattern is a common pattern for safely removing array items during iteration.

🔬 The screen shake happens because the entire screen is translated by a random amount every frame. What happens if you remove the random() call and just use translate(shakeAmount, shakeAmount) instead? What if you change multiply by 0.9 to multiply by 0.99 or 0.5?

  if (shakeAmount > 0) {
    translate(random(-shakeAmount, shakeAmount), random(-shakeAmount, shakeAmount));
    shakeAmount *= 0.9;
    if (shakeAmount < 0.5) shakeAmount = 0;
  }
function drawPlayScreen() {
  background(30, 30, 35);
  
  // Screen shake effect on hit
  push();
  if (shakeAmount > 0) {
    translate(random(-shakeAmount, shakeAmount), random(-shakeAmount, shakeAmount));
    shakeAmount *= 0.9;
    if (shakeAmount < 0.5) shakeAmount = 0;
  }
  
  // 1. Draw the Full Screen Image
  let imgToDraw = (currentTarget === 1) ? img1 : (currentTarget === 2) ? img2 : img3;
  let isReady = (currentTarget === 1) ? img1Loaded : (currentTarget === 2) ? img2Loaded : img3Loaded;
  
  if (isReady) {
    image(imgToDraw, 0, 0, width, height); // Stretch to fill the whole screen
  } else {
    fill(100);
    rect(0, 0, width, height);
    fill(255);
    noStroke();
    textAlign(CENTER, CENTER);
    textSize(32);
    text("Loading Image...", width/2, height/2);
  }

  // 2. Draw the Splats over the image
  imageMode(CORNER);
  image(splatBuffer, 0, 0);

  // 3. Draw On-Screen Buttons for switching images
  stroke(255);
  strokeWeight(3);
  
  // Button 1
  if (currentTarget === 1) fill(100, 255, 100); else fill(220);
  rect(20, 20, 120, 50, 10);
  
  // Button 2
  if (currentTarget === 2) fill(100, 255, 100); else fill(220);
  rect(160, 20, 120, 50, 10);

  // Button 3
  if (currentTarget === 3) fill(100, 255, 100); else fill(220);
  rect(300, 20, 120, 50, 10);
  
  // Button 4: Clear Screen
  fill(255, 100, 100); // Red clear button
  rect(440, 20, 120, 50, 10);

  noStroke();
  fill(0); // BLACK TEXT
  textSize(22);
  textAlign(CENTER, CENTER);
  text("Pic 1", 80, 45);
  text("Pic 2", 220, 45);
  text("Pic 3", 360, 45);
  text("Clear", 500, 45);

  // 4. Draw Instructions at the bottom
  fill(0); // BLACK TEXT
  stroke(255); // White outline so it's readable
  strokeWeight(4);
  textSize(28);
  textAlign(CENTER, BOTTOM);
  text("CLICK to throw! Click 'Clear' to wipe the screen clean.", width / 2, height - 20);
  noStroke();

  // 5. Update & Draw all flying tomatoes
  for (let i = tomatoes.length - 1; i >= 0; i--) {
    let t = tomatoes[i];
    let isFlying = t.update();
    t.draw();
    
    // If the tomato has reached its destination, splat it!
    if (!isFlying) {
      checkHit(t.targetX, t.targetY);
      tomatoes.splice(i, 1); 
    }
  }
  
  pop(); // End screen shake
}
Line-by-line explanation (13 lines)

🔧 Subcomponents:

conditional Screen shake effect if (shakeAmount > 0) { translate(random(-shakeAmount, shakeAmount), random(-shakeAmount, shakeAmount)); shakeAmount *= 0.9; if (shakeAmount < 0.5) shakeAmount = 0; }

Displaces the entire screen randomly if shakeAmount is above zero, then reduces it each frame for a decay effect

conditional Dynamic target image selection let imgToDraw = (currentTarget === 1) ? img1 : (currentTarget === 2) ? img2 : img3;

Uses a ternary operator chain to pick which image to display based on currentTarget

calculation Persistent splat rendering imageMode(CORNER); image(splatBuffer, 0, 0);

Draws the splatBuffer (containing all previous hits) on top of the current target image

for-loop Tomato update and removal loop for (let i = tomatoes.length - 1; i >= 0; i--) { let t = tomatoes[i]; let isFlying = t.update(); t.draw(); if (!isFlying) { checkHit(t.targetX, t.targetY); tomatoes.splice(i, 1); } }

Loops backwards through the tomatoes array, updates and draws each tomato, then removes it when it lands

background(30, 30, 35);
Clears the canvas to dark gray each frame—without this, old frames would layer on top of each other
push();
Saves the current transformation state before applying screen shake
if (shakeAmount > 0) {
Only shake if shakeAmount is positive—triggered by checkHit() when a tomato lands
translate(random(-shakeAmount, shakeAmount), random(-shakeAmount, shakeAmount));
Shifts everything on screen by a random amount within ±shakeAmount—each frame picks a different random offset, creating jitter
shakeAmount *= 0.9;
Multiplies shakeAmount by 0.9 each frame, making the shake gradually weaker (0.9, 0.81, 0.729...) until it's barely noticeable
let imgToDraw = (currentTarget === 1) ? img1 : (currentTarget === 2) ? img2 : img3;
Ternary operator chain: if currentTarget is 1, use img1; else if 2, use img2; else use img3. This selects which image to display
image(imgToDraw, 0, 0, width, height);
Draws the selected image at the top-left corner (0, 0) and stretches it to fill the entire canvas
image(splatBuffer, 0, 0);
Draws the splatBuffer (the hidden graphics layer with all permanent splats) on top of the target image
for (let i = tomatoes.length - 1; i >= 0; i--) {
Loops backward through the tomatoes array (important for safely removing items during iteration). i starts at the last index and counts down
let isFlying = t.update();
Calls the tomato's update() method, which returns true if still flying, false if reached its target
if (!isFlying) {
If the tomato has landed, splat it and remove it from the array
tomatoes.splice(i, 1);
Removes the tomato at index i from the array—splice(index, count) removes 'count' items starting at 'index'
pop(); // End screen shake
Restores the coordinate system, ending the screen shake effect

keyPressed()

p5.js calls keyPressed() automatically whenever the user presses a key. The 'key' variable holds the character pressed. This function is a simple keyboard shortcut handler.

function keyPressed() {
  if (gameState === "PLAY") {
    if (key === '1') switchTarget(1);
    if (key === '2') switchTarget(2);
    if (key === '3') switchTarget(3);
  }
}
Line-by-line explanation (2 lines)

🔧 Subcomponents:

conditional Number key routing if (key === '1') switchTarget(1); if (key === '2') switchTarget(2); if (key === '3') switchTarget(3);

Calls switchTarget() when user presses 1, 2, or 3

if (gameState === "PLAY") {
Only respond to key presses when the game is active (not on the home screen)
if (key === '1') switchTarget(1);
If the pressed key is '1', switch to target image 1

mousePressed()

p5.js calls mousePressed() automatically when the user clicks. mouseX and mouseY are p5.js variables that update every frame with the current cursor position. Returning false prevents the browser's default click behavior.

function mousePressed() {
  if (gameState === "HOME") {
    gameState = "PLAY";
    return false;
  }
  
  throwTomato(mouseX, mouseY);
  return false;
}
Line-by-line explanation (4 lines)

🔧 Subcomponents:

conditional Home screen transition if (gameState === "HOME") { gameState = "PLAY"; return false; }

Switches from home screen to play screen when clicked

if (gameState === "HOME") {
Check if we're on the home screen
gameState = "PLAY";
If so, change gameState to PLAY, which makes the next draw() render the game instead
return false;
Return false to prevent the browser's default mouse behavior (like highlighting text)
throwTomato(mouseX, mouseY);
If already playing, throw a tomato toward the mouse position

touchStarted()

p5.js calls touchStarted() when the user touches the screen on mobile. The 'touches' array holds all active touch points. This makes the sketch playable on tablets and phones, not just desktop with a mouse.

function touchStarted() {
  if (gameState === "HOME") {
    gameState = "PLAY";
    return false;
  }
  
  if (touches.length > 0) {
    throwTomato(touches[0].x, touches[0].y);
  }
  return false;
}
Line-by-line explanation (3 lines)

🔧 Subcomponents:

conditional Touch point handling if (touches.length > 0) { throwTomato(touches[0].x, touches[0].y); }

Uses the first touch point's coordinates to throw a tomato

if (gameState === "HOME") {
If on the home screen, transition to play (same as mousePressed)
if (touches.length > 0) {
touches is an array of current touch points. Check if there's at least one touch
throwTomato(touches[0].x, touches[0].y);
Use the first touch point's x and y coordinates to throw a tomato

switchTarget(num)

This helper function changes which target image is displayed and clears the splats when switching. The guard condition (if currentTarget !== num) prevents unnecessary operations if the user clicks the same button twice.

function switchTarget(num) {
  if (currentTarget !== num) {
    currentTarget = num;
    splatBuffer.clear(); // Wipes the splats clean when changing pictures
  }
}
Line-by-line explanation (3 lines)

🔧 Subcomponents:

conditional Conditional splat clearing if (currentTarget !== num) { currentTarget = num; splatBuffer.clear(); }

Only clears splats if switching to a different target (avoids unnecessary clearing)

if (currentTarget !== num) {
Only execute the block if we're actually switching to a different target (not clicking the same button twice)
currentTarget = num;
Set currentTarget to the new target number
splatBuffer.clear();
Clears all pixels from the splatBuffer, erasing all accumulated splats—this way, each target image starts clean

throwTomato(tx, ty)

This function handles all click input: it first checks for button clicks by testing rectangular bounding boxes, and if no button was hit, it creates a new tomato. This pattern (check UI first, then game logic) is common in interactive sketches.

🔬 This code detects a click in the first button by checking two rectangular bounds (y and x). What happens if you change the button's bounds, like if (tx > 20 && tx < 200)? The button visually stays the same but the clickable area grows—can you feel the mismatch?

  if (ty > 20 && ty < 70) {
    if (tx > 20 && tx < 140) {
      switchTarget(1);
      return; 
    }
function throwTomato(tx, ty) {
  // Check if they clicked the UI buttons first
  if (ty > 20 && ty < 70) {
    if (tx > 20 && tx < 140) {
      switchTarget(1);
      return; 
    }
    if (tx > 160 && tx < 280) {
      switchTarget(2);
      return; 
    }
    if (tx > 300 && tx < 420) {
      switchTarget(3);
      return; 
    }
    if (tx > 440 && tx < 560) {
      splatBuffer.clear(); // Clear all splats
      return;
    }
  }

  // Otherwise, throw a tomato!
  tomatoes.push(new FlyingTomato(tx, ty));
}
Line-by-line explanation (4 lines)

🔧 Subcomponents:

conditional UI button hit detection if (ty > 20 && ty < 70) { if (tx > 20 && tx < 140) { switchTarget(1); return; } // ...more buttons... }

Checks if click is within any of the four UI buttons and handles them, returning early to avoid creating a tomato

if (ty > 20 && ty < 70) {
Check if the click is in the button row (y between 20 and 70). This is the top band of buttons
if (tx > 20 && tx < 140) {
Check if the click is in the first button's x range (20 to 140). If so, switch to target 1
return;
Exit the function early—don't create a tomato if a button was clicked
tomatoes.push(new FlyingTomato(tx, ty));
If no button was clicked, create a new FlyingTomato object headed toward (tx, ty) and add it to the tomatoes array

checkHit(tx, ty)

This function is called whenever a tomato lands. It updates game state (score and shake) and triggers the visual splat effect. It's where you could add sound, particle effects, or other feedback.

function checkHit(tx, ty) {
  score++;
  shakeAmount = 15;
  addSplatToBuffer(splatBuffer, tx, ty, 2.0); 
}
Line-by-line explanation (3 lines)
score++;
Increments the score counter by 1 (though the score isn't currently displayed on screen—you could add it)
shakeAmount = 15;
Sets shakeAmount to 15, which triggers the screen shake effect in drawPlayScreen()
addSplatToBuffer(splatBuffer, tx, ty, 2.0);
Calls the splat function to paint random red and green circles on the splatBuffer at the impact point

addSplatToBuffer(buffer, x, y, sizeMultiplier)

This function demonstrates how to create organic, irregular effects by drawing many small random shapes. By offsetting each circle slightly and randomizing its size and color, the result looks like a real splat rather than a perfect blob. This is a fundamental technique for procedural graphics.

🔬 These two lines control the splat color. The first line creates a random red with random transparency. The second line (20% of the time) overrides it with green mold. What happens if you change random() > 0.8 to random() > 0.5 so green appears more often? Or what if you always use the green color by removing the if statement?

    buffer.fill(random(130, 200), random(0, 30), random(0, 30), random(150, 255));
    if (random() > 0.8) buffer.fill(50, 100, 20, 150);
function addSplatToBuffer(buffer, x, y, sizeMultiplier) {
  buffer.noStroke();
  for (let i = 0; i < 12; i++) {
    buffer.fill(random(130, 200), random(0, 30), random(0, 30), random(150, 255));
    if (random() > 0.8) buffer.fill(50, 100, 20, 150); 
    
    let offsetX = random(-30, 30) * sizeMultiplier;
    let offsetY = random(-30, 30) * sizeMultiplier;
    let size = random(15, 45) * sizeMultiplier; 
    buffer.ellipse(x + offsetX, y + offsetY, size, size);
  }
}
Line-by-line explanation (6 lines)

🔧 Subcomponents:

for-loop Splat particle generation loop for (let i = 0; i < 12; i++) { buffer.fill(random(130, 200), random(0, 30), random(0, 30), random(150, 255)); if (random() > 0.8) buffer.fill(50, 100, 20, 150); let offsetX = random(-30, 30) * sizeMultiplier; let offsetY = random(-30, 30) * sizeMultiplier; let size = random(15, 45) * sizeMultiplier; buffer.ellipse(x + offsetX, y + offsetY, size, size); }

Draws 12 random circles in different shades of red and green around the impact point to create an organic splat

conditional Random mold color if (random() > 0.8) buffer.fill(50, 100, 20, 150);

20% of the time, uses green instead of red to add visual variety (mold spots)

buffer.noStroke();
Draw circles without outlines (stroke) so they blend into each other
for (let i = 0; i < 12; i++) {
Loop 12 times to draw 12 particles per splat
buffer.fill(random(130, 200), random(0, 30), random(0, 30), random(150, 255));
Set the fill color to a random shade of red (R is 130–200, G and B are near 0) with random transparency
if (random() > 0.8) buffer.fill(50, 100, 20, 150);
20% of the time (random() > 0.8 happens 1 in 5 times on average), override the color to a dark green (mold)
let offsetX = random(-30, 30) * sizeMultiplier;
Pick a random offset within ±30 pixels (scaled by sizeMultiplier) to spread the splat particles around the impact point
buffer.ellipse(x + offsetX, y + offsetY, size, size);
Draw a circle at (x + offsetX, y + offsetY) with diameter 'size', all to the splatBuffer so it persists

FlyingTomato (class)

The FlyingTomato class is the heart of the animation. It encapsulates all the math for projectile motion: linear interpolation (lerp) for position, sinusoidal curves for arc shape, and rotation. The constructor pre-calculates the arc height based on throw distance, which is why longer throws arc higher.

🔬 These three lines build the tomato's position: currentX and baseY are linear interpolations, but currentY subtracts a sine curve to create an arc. What happens if you remove the sine part and just use currentY = baseY? Or if you change the sine to cosine?

    let currentX = lerp(this.startX, this.targetX, this.progress);
    let baseY = lerp(this.startY, this.targetY, this.progress);
    let currentY = baseY - sin(this.progress * PI) * this.arcHeight;
class FlyingTomato {
  constructor(targetX, targetY) {
    this.startX = width / 2;
    this.startY = height + 50; 
    this.targetX = targetX;
    this.targetY = targetY;
    
    this.progress = 0;
    this.speed = 0.08; 
    
    let distToTarget = dist(this.startX, this.startY, targetX, targetY);
    this.arcHeight = distToTarget * 0.3;
    
    this.angle = random(TWO_PI);
    this.rotSpeed = random(-0.2, 0.2);
  }

  update() {
    this.progress += this.speed;
    this.angle += this.rotSpeed;
    
    if (this.progress >= 1) return false; 
    return true; 
  }

  draw() {
    let currentX = lerp(this.startX, this.targetX, this.progress);
    let baseY = lerp(this.startY, this.targetY, this.progress);
    let currentY = baseY - sin(this.progress * PI) * this.arcHeight;
    
    let currentScale = lerp(3.0, 0.8, this.progress); 

    push();
    translate(currentX, currentY);
    scale(currentScale);
    rotate(this.angle);

    let r = 32;
    noStroke();
    fill(180, 20, 20); 
    ellipse(0, 0, r * 2, r * 1.8);

    // Mold spots
    fill(100, 120, 30, 180); 
    ellipse(-r * 0.4, -r * 0.2, r * 0.7, r * 0.5);
    fill(80, 90, 20, 150);
    ellipse(r * 0.3, r * 0.4, r * 0.5, r * 0.4);

    // Green stem
    fill(30, 120, 30);
    triangle(-r * 0.3, -r * 0.7, r * 0.3, -r * 0.7, 0, -r * 1.3);
    
    pop();
  }
}
Line-by-line explanation (14 lines)

🔧 Subcomponents:

calculation Tomato initialization constructor(targetX, targetY) { this.startX = width / 2; this.startY = height + 50; this.targetX = targetX; this.targetY = targetY; this.progress = 0; this.speed = 0.08; let distToTarget = dist(this.startX, this.startY, targetX, targetY); this.arcHeight = distToTarget * 0.3; this.angle = random(TWO_PI); this.rotSpeed = random(-0.2, 0.2); }

Sets up all properties needed for the tomato to fly: start/target positions, animation progress, arc shape, and rotation

calculation Parabolic arc calculation let currentX = lerp(this.startX, this.targetX, this.progress); let baseY = lerp(this.startY, this.targetY, this.progress); let currentY = baseY - sin(this.progress * PI) * this.arcHeight;

Uses lerp for linear motion and sin() for a parabolic arc, creating realistic projectile motion

calculation Scale shrinking let currentScale = lerp(3.0, 0.8, this.progress);

Lerps the tomato from 3x size to 0.8x size as it flies, making it appear to get closer

this.startX = width / 2;
The tomato always starts from the horizontal center of the screen
this.startY = height + 50;
The tomato starts below the screen (height + 50) so it flies up and into view
this.progress = 0;
progress tracks how far along the journey the tomato is, from 0 (start) to 1 (landed)
this.speed = 0.08;
Each frame, progress increases by 0.08, so the tomato takes about 12-13 frames (60 / 0.08) to reach its target
let distToTarget = dist(this.startX, this.startY, targetX, targetY);
Calculates the straight-line distance from start to target using p5.js's dist() function
this.arcHeight = distToTarget * 0.3;
The arc height is 30% of the distance—longer throws have higher arcs, which looks more realistic
this.angle = random(TWO_PI);
TWO_PI is 2π, covering all angles. This gives the tomato a random starting rotation (0 to 2π radians)
this.rotSpeed = random(-0.2, 0.2);
Each frame, angle increases by rotSpeed, making the tomato spin as it flies
this.progress += this.speed;
In update(), increase progress by speed each frame, moving the tomato along its path
if (this.progress >= 1) return false;
When progress reaches 1, the tomato has landed—return false to signal it's done flying
let currentX = lerp(this.startX, this.targetX, this.progress);
lerp() blends between two values: at progress=0 it returns startX, at progress=1 it returns targetX, and in between it interpolates
let currentY = baseY - sin(this.progress * PI) * this.arcHeight;
sin(progress * PI) creates a sine wave from 0 to 1 and back to 0. Multiplying by arcHeight and subtracting from baseY lifts the tomato above the straight line, creating a parabolic arc
let currentScale = lerp(3.0, 0.8, this.progress);
As progress goes from 0 to 1, scale shrinks from 3.0 to 0.8, making the tomato appear to move away from you (perspective)
rotate(this.angle);
Rotates the entire tomato drawing by angle radians, and each frame angle increases, making it spin

windowResized()

This function handles responsive design. When the browser window is resized, p5.js automatically calls windowResized(). We must resize both the main canvas and the splatBuffer, and transfer the old splats to the new buffer so they're not lost.

function windowResized() {
  resizeCanvas(windowWidth, windowHeight);
  let oldBuffer = splatBuffer;
  splatBuffer = createGraphics(windowWidth, windowHeight);
  splatBuffer.image(oldBuffer, 0, 0);
}
Line-by-line explanation (4 lines)
resizeCanvas(windowWidth, windowHeight);
p5.js automatically calls windowResized() when the browser window is resized. This line adjusts the main canvas to the new window size
let oldBuffer = splatBuffer;
Save a reference to the old splatBuffer before creating a new one
splatBuffer = createGraphics(windowWidth, windowHeight);
Create a new splatBuffer at the new window size
splatBuffer.image(oldBuffer, 0, 0);
Draw the old buffer's contents onto the new buffer, preserving all the splats from before the resize

📦 Key Variables

gameState string

Tracks whether the sketch is showing the home screen ('HOME') or playing ('PLAY'), determining which render function to call

let gameState = 'HOME';
tomatoes array

Holds all currently flying FlyingTomato objects; new tomatoes are added when you click, and removed when they land

let tomatoes = [];
splatBuffer p5.Renderer (graphics layer)

A persistent graphics buffer that stores all permanent splat marks—drawn on top of the target image each frame so splats accumulate

splatBuffer = createGraphics(windowWidth, windowHeight);
img1, img2, img3 p5.Image

Store the three target images loaded from URLs, used as full-screen backgrounds

let img1, img2, img3;
img1Loaded, img2Loaded, img3Loaded boolean

Flags that track whether each image has finished loading, used to show 'Loading Image...' while waiting

let img1Loaded = false;
currentTarget number

Stores which target image is currently displayed (1, 2, or 3), changed by clicking buttons or pressing keys

let currentTarget = 1;
score number

Incremented every time a tomato lands, tracking total hits (not currently displayed but could be)

let score = 0;
shakeAmount number

Controls the intensity of screen shake after a hit; decays each frame via multiplication by 0.9

let shakeAmount = 0;

🔧 Potential Improvements (6)

Here are some ways this code could be enhanced:

FEATURE drawPlayScreen()

Score is incremented but never displayed on screen—players can't see their progress

💡 Add text("Score: " + score, width - 100, 45) to display the current score in the top-right corner

PERFORMANCE setup(), loadImage calls

Images are loaded from external Google URLs on every sketch run, creating network latency and external dependency

💡 Host the images locally or use a data URL to avoid network requests and ensure images load instantly

STYLE throwTomato() button detection

Button hit detection uses hard-coded pixel values (20, 140, 160, 280, etc.) making it fragile and hard to maintain if buttons move

💡 Define button positions and sizes as constants or objects at the top of the file, then reference them in both drawing and collision detection

BUG windowResized()

If the canvas is resized while tomatoes are flying, the splats may shift incorrectly because they're drawn to a buffer with the old dimensions

💡 Clear the splats on resize, or scale the old buffer's contents appropriately when copying to the new buffer

FEATURE FlyingTomato class

All tomatoes follow the same speed and arc formula, making trajectories predictable

💡 Randomize speed and arcHeight slightly in the constructor so each throw feels unique and less scripted

STYLE drawHomeScreen()

The decorative tomato is drawn with hard-coded ellipse sizes and positions relative to an origin, making it hard to adjust proportions

💡 Extract tomato-drawing logic into a separate drawTomato(x, y, size) function that can be reused and easily scaled

🔄 Code Flow

Code flow showing setup, draw, drawhomescreen, drawplayscreen, keypressed, mousepressed, touchstarted, switchtarget, throwtomato, checkhit, addsplattobuffer, flyingtomato, windowresized

💡 Click on function names in the diagram to jump to their code

graph TD start[Start] --> setup[setup] setup --> canvas-setup[canvas-setup] setup --> splatbuffer-creation[splatbuffer-creation] setup --> image-loading[image-loading] setup --> draw[draw loop] click setup href "#fn-setup" click canvas-setup href "#sub-canvas-setup" click splatbuffer-creation href "#sub-splatbuffer-creation" click image-loading href "#sub-image-loading" draw --> state-check[state-check] state-check --> drawhomescreen[drawhomescreen] state-check --> drawplayscreen[drawplayscreen] click draw href "#fn-draw" click state-check href "#sub-state-check" click drawhomescreen href "#fn-drawhomescreen" click drawplayscreen href "#fn-drawplayscreen" drawhomescreen --> decorative-tomato[decorative-tomato] decorative-tomato --> flashing-text[flashing-text] flashing-text --> drawhomescreen click decorative-tomato href "#sub-decorative-tomato" click flashing-text href "#sub-flashing-text" drawplayscreen --> screen-shake[screen-shake] screen-shake --> splat-buffer-draw[splat-buffer-draw] splat-buffer-draw --> tomato-loop[tomato-loop] tomato-loop --> key-routing[key-routing] key-routing --> home-to-play[home-to-play] home-to-play --> drawplayscreen click screen-shake href "#sub-screen-shake" click splat-buffer-draw href "#sub-splat-buffer-draw" click tomato-loop href "#sub-tomato-loop" click key-routing href "#sub-key-routing" click home-to-play href "#sub-home-to-play" tomato-loop --> button-collision[button-collision] button-collision --> throwtomato[throwtomato] click button-collision href "#sub-button-collision" click throwtomato href "#fn-throwtomato" throwtomato --> touch-detection[touch-detection] touch-detection --> checkhit[checkhit] checkhit --> addsplattobuffer[addsplattobuffer] addsplattobuffer --> throwtomato click touch-detection href "#sub-touch-detection" click checkhit href "#fn-checkhit" click addsplattobuffer href "#fn-addsplattobuffer" addsplattobuffer --> splat-loop[splat-loop] splat-loop --> color-randomization[color-randomization] color-randomization --> addsplattobuffer click splat-loop href "#sub-splat-loop" click color-randomization href "#sub-color-randomization" flyingtomato --> constructor[constructor] constructor --> arc-motion[arc-motion] arc-motion --> scale-animation[scale-animation] scale-animation --> flyingtomato click flyingtomato href "#fn-flyingtomato" click constructor href "#sub-constructor" click arc-motion href "#sub-arc-motion" click scale-animation href "#sub-scale-animation" windowresized --> draw click windowresized href "#fn-windowresized"

❓ Frequently Asked Questions

What visual experience does the HOLY PEAK sketch provide?

The sketch creates a humorous visual by splattering rotten tomatoes across funny full-screen faces, leaving permanent, juicy stains on the screen.

How can users engage with the HOLY PEAK sketch?

Users can interact with the sketch by clicking or tapping anywhere to launch a tomato, creating a dynamic and entertaining splat effect.

What creative coding techniques are showcased in the HOLY PEAK sketch?

The sketch demonstrates techniques such as interactive graphics, image loading, and the use of a graphics buffer for permanent effects on the canvas.

Preview

HOLY PEAK - p5.js creative coding sketch preview
Sketch Preview
Code flow diagram showing the structure of HOLY PEAK - Code flow showing setup, draw, drawhomescreen, drawplayscreen, keypressed, mousepressed, touchstarted, switchtarget, throwtomato, checkhit, addsplattobuffer, flyingtomato, windowresized
Code Flow Diagram