
HOLY PEAK SCHOOL VERSION

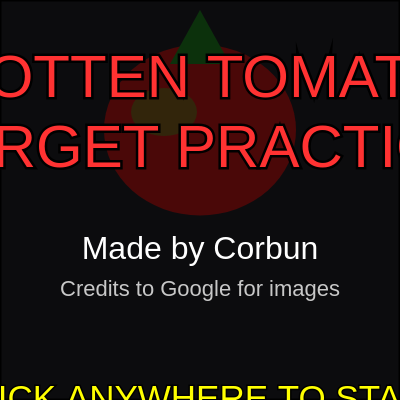
This sketch transforms your screen into a full-screen target practice game where you click to hurl rotten tomatoes at images, leaving messy splatter effects that accumulate on screen. The game features multiple target images you can switch between, screen shake on impact, and a persistent splat buffer that remembers every hit.

🧪 Try This!

Experiment with the code by making these changes:

  1. Make splats bigger — Splats are created with a size multiplier; increasing it makes each splatter mark much larger and messier
  2. Speed up the tomatoes — Decreasing progress increment makes tomatoes fly slower; increasing it makes them zip toward targets instantly
  3. Remove screen shake — Comment out the shake line to remove the jitter feedback when a tomato hits—the game feels less punchy
  4. Display the score — The score variable is incremented but never shown on screen; add text to the play screen to see how many hits you've made
  5. Make tomatoes spin faster — Rotation speed is random between -0.2 and 0.2; increase these numbers to see tomatoes whirling dramatically
Prefer the full editor? Open it there →

📖 About This Sketch

This sketch creates an interactive tomato-throwing game displayed fullscreen, where each click launches a flying tomato that splatters red mold onto whatever image you're targeting. The visual design combines arcaic trajectory animation, persistent graphics buffers, screen shake feedback, and a home screen with game state management—teaching you multiple intermediate p5.js techniques working together to create a polished, playable experience.

The code is organized around two main game states (HOME and PLAY) that are drawn differently each frame. You'll learn how to manage game flow with state variables, use createGraphics() to accumulate permanent splat marks, animate objects with lerp() and trigonometry, handle UI buttons and touch input, and trigger visual feedback like screen shake. Reading this sketch teaches you the architecture behind simple games and interactive experiences.

⚙️ How It Works

  1. When the sketch loads, setup() creates a fullscreen canvas, loads three target images from the internet, and creates a hidden graphics buffer called splatBuffer that will store permanent splat marks
  2. draw() runs continuously and branches based on gameState: if HOME, it draws a decorative tomato and flashing start prompt; if PLAY, it draws the current target image, the accumulated splats on top, UI buttons, and all flying tomatoes
  3. When you click the HOME screen, gameState switches to PLAY. When you click during PLAY, throwTomato() checks if you hit a UI button (to switch images or clear); if not, it creates a new FlyingTomato object and adds it to the tomatoes array
  4. Each frame, every FlyingTomato updates its progress (0 to 1), follows a parabolic arc from bottom-center to your click point, scales down, and rotates. When progress reaches 1, the tomato stops flying
  5. As soon as a tomato lands, checkHit() triggers: the score increases, shakeAmount is set to 15 (which makes the screen jitter for several frames), and addSplatToBuffer() draws 12 random reddish circles onto splatBuffer to create the splat effect
  6. The splatBuffer is drawn on top of the target image every frame, so all previous splats stay visible—your messy masterpiece accumulates. Screen shake decays by multiplying by 0.9 each frame until it vanishes

🎓 Concepts You'll Learn

Game state managementGraphics buffers (createGraphics)Persistent drawingProjectile animation with lerp and trigonometryUI button detectionTouch and mouse inputScreen shake feedbackFullscreen responsive canvas

📝 Code Breakdown

setup()

setup() runs once when the sketch starts. Here we initialize the canvas, the off-screen graphics buffer where splats accumulate, and load the three target images. The boolean flags (img1Loaded, etc.) let us know when images are ready to display, since network loading takes time.

function setup() {
  createCanvas(windowWidth, windowHeight);
  cursor(CROSS);
  
  // Canvas for the permanent splats
  splatBuffer = createGraphics(windowWidth, windowHeight);

  // Load all three images with tracking so we know when they are ready
  let url1 = "https://encrypted-tbn0.gstatic.com/images?q=tbn:ANd9GcQqBiqGS05DirD1Ek79Jt29YKY_YvXW7zgJ7g&s";
  let url2 = "https://encrypted-tbn0.gstatic.com/images?q=tbn:ANd9GcSjM-gYw5UQrnxOOr-xOFksPpF8bWNc8ea5hA&s";
  let url3 = "https://encrypted-tbn0.gstatic.com/images?q=tbn:ANd9GcQYep0cyzg9ywfQILSBMn4-Fp7NMaeO7M7lyQ&s";
  
  img1 = loadImage(url1, () => img1Loaded = true);
  img2 = loadImage(url2, () => img2Loaded = true);
  img3 = loadImage(url3, () => img3Loaded = true);
}
Line-by-line explanation (4 lines)

🔧 Subcomponents:

function-call Canvas Setup createCanvas(windowWidth, windowHeight);

Creates a fullscreen canvas that matches the browser window size

function-call Splat Buffer Creation splatBuffer = createGraphics(windowWidth, windowHeight);

Creates a hidden drawing surface where splats accumulate permanently each frame

for-loop Image Loading with Callbacks img1 = loadImage(url1, () => img1Loaded = true);

Loads images asynchronously from URLs and sets boolean flags when each finishes loading

createCanvas(windowWidth, windowHeight);
Creates the main p5.js canvas the full width and height of the browser window
cursor(CROSS);
Changes the mouse cursor to a crosshair, giving the aiming-based game visual feedback
splatBuffer = createGraphics(windowWidth, windowHeight);
Creates an off-screen graphics buffer (like a transparent layer) where splats are drawn and persist between frames
img1 = loadImage(url1, () => img1Loaded = true);
Loads an image from a URL asynchronously; the arrow function callback sets img1Loaded to true when the download finishes
draw()

draw() is the main animation loop, running 60 times per second. Rather than putting all the drawing code here, it delegates to helper functions (drawHomeScreen and drawPlayScreen) based on gameState. This keeps the code clean and easy to manage multiple screens.

function draw() {
  if (gameState === "HOME") {
    drawHomeScreen();
  } else if (gameState === "PLAY") {
    drawPlayScreen();
  }
}
Line-by-line explanation (4 lines)

🔧 Subcomponents:

conditional Game State Switch if (gameState === "HOME") { drawHomeScreen(); } else if (gameState === "PLAY") { drawPlayScreen(); }

Routes between two completely different visual modes based on the current game state

if (gameState === "HOME") {
Checks if the game is in HOME state (the start screen before playing)
drawHomeScreen();
If HOME, calls the function that draws the title, decorative tomato, and 'click to start' prompt
} else if (gameState === "PLAY") {
Otherwise, checks if the game is in PLAY state (active gameplay)
drawPlayScreen();
If PLAY, calls the function that draws the target image, splats, buttons, and flying tomatoes

drawHomeScreen()

drawHomeScreen() creates the title screen players see before clicking to start. It demonstrates push/pop for isolated transforms, frameCount for animation without variables, and conditional rendering to create a flashing effect. The decorative tomato is made from simple shapes to teach that complex visuals can be built from ellipses and triangles.

🔬 This code draws the tomato body, then the mold spots, then the stem. What happens if you swap the order of these three shapes—for example, draw the stem first, then the mold, then the body? How does layering change the visual?

  fill(180, 20, 20); 
  ellipse(0, 0, 64, 57);
  fill(100, 120, 30, 180); 
  ellipse(-12, -6, 22, 16);
  fill(30, 120, 30); // stem
  triangle(-10, -22, 10, -22, 0, -40);
function drawHomeScreen() {
  background(30, 30, 35);
  
  // Draw a giant decorative tomato in the background
  push();
  translate(width/2, height/2 - 70);
  scale(3.0);
  noStroke();
  fill(180, 20, 20); 
  ellipse(0, 0, 64, 57);
  fill(100, 120, 30, 180); 
  ellipse(-12, -6, 22, 16);
  fill(30, 120, 30); // stem
  triangle(-10, -22, 10, -22, 0, -40);
  pop();

  // Darken the background slightly so text pops
  fill(0, 0, 0, 150);
  rect(0, 0, width, height);

  textAlign(CENTER, CENTER);
  
  // Title
  stroke(0);
  strokeWeight(5);
  fill(255, 50, 50);
  textSize(60);
  text("ROTTEN TOMATO", width/2, height/2 - 120);
  text("TARGET PRACTICE", width/2, height/2 - 50);
  
  // Credits
  noStroke();
  fill(255);
  textSize(32);
  text("Made by Corbun", width/2, height/2 + 50);
  
  fill(200);
  textSize(22);
  text("Credits to Google for images", width/2, height/2 + 90);
  
  // Flashing Start Text
  if (frameCount % 60 < 30) {
    fill(255, 255, 0);
    stroke(0);
    strokeWeight(3);
    textSize(35);
    text("CLICK ANYWHERE TO START", width/2, height/2 + 200);
  }
}
Line-by-line explanation (9 lines)

🔧 Subcomponents:

calculation Decorative Tomato Drawing translate(width/2, height/2 - 70); scale(3.0); noStroke(); fill(180, 20, 20); ellipse(0, 0, 64, 57);

Uses push/pop and transforms to draw a large, centered tomato made from an ellipse body, mold spots, and a green stem

conditional Flashing Start Prompt if (frameCount % 60 < 30) { fill(255, 255, 0); stroke(0); strokeWeight(3); textSize(35); text("CLICK ANYWHERE TO START", width/2, height/2 + 200); }

Makes the 'click to start' text blink by showing it only half the time (every 60 frames, show for 30, hide for 30)

background(30, 30, 35);
Clears the canvas with a dark blue-gray color to start fresh each frame
push();
Saves the current transform state (position, rotation, scale) so we can modify it without affecting later drawing
translate(width/2, height/2 - 70);
Moves the origin to the center of the screen, shifted up 70 pixels, so the tomato draws there
scale(3.0);
Magnifies the tomato 3 times larger than its base size
fill(180, 20, 20);
Sets the fill color to red for the tomato body
ellipse(0, 0, 64, 57);
Draws an ellipse (oval) at the origin, slightly taller than wide, as the main tomato shape
if (frameCount % 60 < 30) {
Checks if the current frame number modulo 60 is less than 30—true for the first 30 frames of every 60-frame cycle
text("CLICK ANYWHERE TO START", width/2, height/2 + 200);
Draws the yellow 'click to start' text centered on screen, only when the condition is true (creating the blink effect)
pop();
Restores the transform state saved by push(), so subsequent drawing is not affected by the translate and scale

drawPlayScreen()

drawPlayScreen() is the core of the game, demonstrating multiple intermediate p5.js techniques: screen shake using translate and decay, image loading and conditional display, a persistent graphics buffer for accumulated splats, UI button drawing with conditional highlighting, and a backward-iterating loop that safely removes elements. The push/pop sandwich around the shake effect isolates the transform so buttons and text aren't jittered.

🔬 Each button uses an if-else to change color when selected (green if active, light gray if not). What happens if you add a fourth button for a fourth image at around rect(440, 20, 120, 50, 10)? Do you need to also load a fourth image in setup()?

  // 3. Draw On-Screen Buttons for switching images
  stroke(255);
  strokeWeight(3);
  
  // Button 1
  if (currentTarget === 1) fill(100, 255, 100); else fill(220);
  rect(20, 20, 120, 50, 10);
function drawPlayScreen() {
  background(30, 30, 35);
  
  // Screen shake effect on hit
  push();
  if (shakeAmount > 0) {
    translate(random(-shakeAmount, shakeAmount), random(-shakeAmount, shakeAmount));
    shakeAmount *= 0.9;
    if (shakeAmount < 0.5) shakeAmount = 0;
  }
  
  // 1. Draw the Full Screen Image
  let imgToDraw = (currentTarget === 1) ? img1 : (currentTarget === 2) ? img2 : img3;
  let isReady = (currentTarget === 1) ? img1Loaded : (currentTarget === 2) ? img2Loaded : img3Loaded;
  
  if (isReady) {
    image(imgToDraw, 0, 0, width, height); // Stretch to fill the whole screen
  } else {
    fill(100);
    rect(0, 0, width, height);
    fill(255);
    noStroke();
    textAlign(CENTER, CENTER);
    textSize(32);
    text("Loading Image...", width/2, height/2);
  }

  // 2. Draw the Splats over the image
  imageMode(CORNER);
  image(splatBuffer, 0, 0);

  // 3. Draw On-Screen Buttons for switching images
  stroke(255);
  strokeWeight(3);
  
  // Button 1
  if (currentTarget === 1) fill(100, 255, 100); else fill(220);
  rect(20, 20, 120, 50, 10);
  
  // Button 2
  if (currentTarget === 2) fill(100, 255, 100); else fill(220);
  rect(160, 20, 120, 50, 10);

  // Button 3
  if (currentTarget === 3) fill(100, 255, 100); else fill(220);
  rect(300, 20, 120, 50, 10);
  
  // Button 4: Clear Screen
  fill(255, 100, 100); // Red clear button
  rect(440, 20, 120, 50, 10);

  noStroke();
  fill(0); // BLACK TEXT
  textSize(22);
  textAlign(CENTER, CENTER);
  text("Pic 1", 80, 45);
  text("Pic 2", 220, 45);
  text("Pic 3", 360, 45);
  text("Clear", 500, 45);

  // 4. Draw Instructions at the bottom
  fill(0); // BLACK TEXT
  stroke(255); // White outline so it's readable
  strokeWeight(4);
  textSize(28);
  textAlign(CENTER, BOTTOM);
  text("CLICK to throw! Click 'Clear' to wipe the screen clean.", width / 2, height - 20);
  noStroke();

  // 5. Update & Draw all flying tomatoes
  for (let i = tomatoes.length - 1; i >= 0; i--) {
    let t = tomatoes[i];
    let isFlying = t.update();
    t.draw();
    
    // If the tomato has reached its destination, splat it!
    if (!isFlying) {
      checkHit(t.targetX, t.targetY);
      tomatoes.splice(i, 1); 
    }
  }
  
  pop(); // End screen shake
}
Line-by-line explanation (13 lines)

🔧 Subcomponents:

conditional Screen Shake Effect if (shakeAmount > 0) { translate(random(-shakeAmount, shakeAmount), random(-shakeAmount, shakeAmount)); shakeAmount *= 0.9; if (shakeAmount < 0.5) shakeAmount = 0; }

When a tomato hits, shifts the entire screen randomly for a few frames, decaying the shake effect each frame

conditional Current Target Image Selection let imgToDraw = (currentTarget === 1) ? img1 : (currentTarget === 2) ? img2 : img3;

Uses nested ternary operators to select which of the three loaded images to display based on currentTarget

function-call Render Accumulated Splats image(splatBuffer, 0, 0);

Draws the graphics buffer (which contains all previous splats) on top of the target image to show accumulated damage

for-loop Tomato Animation Loop for (let i = tomatoes.length - 1; i >= 0; i--) { let t = tomatoes[i]; let isFlying = t.update(); t.draw(); // If the tomato has reached its destination, splat it! if (!isFlying) { checkHit(t.targetX, t.targetY); tomatoes.splice(i, 1); } }

Iterates backward through the tomatoes array, updating and drawing each flying tomato, and removing it when it lands

background(30, 30, 35);
Clears the canvas with the dark blue-gray color to start a fresh frame
push();
Saves the transform state before applying screen shake, so the shake doesn't affect subsequent non-shaken drawing
if (shakeAmount > 0) {
Checks if there is active shake (shakeAmount > 0), meaning a tomato recently hit
translate(random(-shakeAmount, shakeAmount), random(-shakeAmount, shakeAmount));
Jitters the entire screen by a random offset up to ±shakeAmount pixels in both axes
shakeAmount *= 0.9;
Reduces shake intensity to 90% each frame, causing the jitter to gradually stop over several frames
let imgToDraw = (currentTarget === 1) ? img1 : (currentTarget === 2) ? img2 : img3;
Picks which image to draw based on currentTarget using ternary operators (if-then-else in one line)
if (isReady) { image(imgToDraw, 0, 0, width, height); }
If the image has loaded, draws it stretched to fill the entire canvas; if not, shows a loading message instead
image(splatBuffer, 0, 0);
Draws the graphics buffer (containing all accumulated splats) on top of the target image, making splats visible
for (let i = tomatoes.length - 1; i >= 0; i--) {
Loops backward through the tomatoes array (important: backward so removing elements doesn't skip any)
let isFlying = t.update();
Updates the tomato's position and rotation; returns true if still flying, false if it has landed
t.draw();
Draws the tomato at its current position and rotation
if (!isFlying) { checkHit(t.targetX, t.targetY); tomatoes.splice(i, 1); }
When the tomato lands (isFlying is false), triggers the splat effect and removes it from the array
pop(); // End screen shake
Restores the transform state, canceling the screen shake effect for buttons and text drawn after this

keyPressed()

keyPressed() is called whenever the user presses a key. This function implements keyboard shortcuts (1, 2, 3) to switch images faster than clicking buttons. The check for gameState ensures keys only work during gameplay, not on the home screen.

function keyPressed() {
  if (gameState === "PLAY") {
    if (key === '1') switchTarget(1);
    if (key === '2') switchTarget(2);
    if (key === '3') switchTarget(3);
  }
}
Line-by-line explanation (2 lines)

🔧 Subcomponents:

conditional Number Key Handler if (key === '1') switchTarget(1); if (key === '2') switchTarget(2); if (key === '3') switchTarget(3);

Checks if the user pressed 1, 2, or 3 and switches the target image accordingly

if (gameState === "PLAY") {
Only processes key presses during gameplay; ignores them on the home screen
if (key === '1') switchTarget(1);
If the user pressed the '1' key, calls switchTarget(1) to change to the first image

mousePressed()

mousePressed() is called when the user clicks. It branches on gameState: if HOME, start the game; if PLAY, throw a tomato. The return false statements prevent the browser from interfering with the game.

function mousePressed() {
  if (gameState === "HOME") {
    gameState = "PLAY";
    return false;
  }
  
  throwTomato(mouseX, mouseY);
  return false;
}
Line-by-line explanation (4 lines)

🔧 Subcomponents:

conditional Home Screen Click if (gameState === "HOME") { gameState = "PLAY"; return false; }

When clicking on the home screen, switches to PLAY state and prevents default browser behavior

if (gameState === "HOME") {
Checks if the player is on the home screen
gameState = "PLAY";
Changes the game state to PLAY, which makes draw() switch to drawPlayScreen()
return false;
Prevents the browser from handling the click event (stops default behavior like text selection)
throwTomato(mouseX, mouseY);
During gameplay, throws a tomato toward the click coordinates

touchStarted()

touchStarted() handles touch input for mobile and tablet devices, just like mousePressed() handles clicks. The touches array contains all active touch points; we use touches[0] for single-finger taps. Returning false prevents default browser touch behavior.

function touchStarted() {
  if (gameState === "HOME") {
    gameState = "PLAY";
    return false;
  }
  
  if (touches.length > 0) {
    throwTomato(touches[0].x, touches[0].y);
  }
  return false;
}
Line-by-line explanation (4 lines)

🔧 Subcomponents:

conditional Touch Input Detection if (touches.length > 0) { throwTomato(touches[0].x, touches[0].y); }

Checks if at least one finger is touching the screen and throws a tomato toward that position

if (gameState === "HOME") {
Checks if the player is on the home screen
gameState = "PLAY";
Transitions to gameplay when the home screen is touched
if (touches.length > 0) {
Checks if at least one finger is touching the screen (touches is an array of active touch points)
throwTomato(touches[0].x, touches[0].y);
Throws a tomato toward the first touch point's coordinates (touches[0])

switchTarget()

switchTarget() changes the displayed image and wipes the splat buffer clean. It only executes if the target is actually different (currentTarget !== num), avoiding redundant work. This teaches the pattern of checking for real state changes before acting.

function switchTarget(num) {
  if (currentTarget !== num) {
    currentTarget = num;
    splatBuffer.clear(); // Wipes the splats clean when changing pictures
  }
}
Line-by-line explanation (3 lines)

🔧 Subcomponents:

function-call Splat Buffer Reset splatBuffer.clear();

Erases all accumulated splats from the graphics buffer when switching to a new image

if (currentTarget !== num) {
Only switches if the target is actually different (avoids unnecessary work)
currentTarget = num;
Updates the current target to the new image number
splatBuffer.clear();
Clears the splat buffer so all previous splats disappear when switching images

throwTomato()

throwTomato() first checks whether the click landed on a UI button by testing rectangular bounds (a simple form of collision detection). If it hit a button, the function executes that button's action and returns early. Otherwise, it creates a new FlyingTomato and adds it to the array. This teaches the pattern of checking UI before game logic.

🔬 These bounds define clickable rectangular regions for buttons. If you changed the rect() calls in drawPlayScreen() to different positions, would these bounds need to change too? Try changing 20 to 50 and 140 to 200—does Button 1 still work?

    if (tx > 20 && tx < 140) {
      switchTarget(1);
      return; 
    }
    if (tx > 160 && tx < 280) {
      switchTarget(2);
      return; 
    }
function throwTomato(tx, ty) {
  // Check if they clicked the UI buttons first
  if (ty > 20 && ty < 70) {
    if (tx > 20 && tx < 140) {
      switchTarget(1);
      return; 
    }
    if (tx > 160 && tx < 280) {
      switchTarget(2);
      return; 
    }
    if (tx > 300 && tx < 420) {
      switchTarget(3);
      return; 
    }
    if (tx > 440 && tx < 560) {
      splatBuffer.clear(); // Clear all splats
      return;
    }
  }

  // Otherwise, throw a tomato!
  tomatoes.push(new FlyingTomato(tx, ty));
}
Line-by-line explanation (5 lines)

🔧 Subcomponents:

conditional UI Button Collision if (ty > 20 && ty < 70) { if (tx > 20 && tx < 140) { switchTarget(1); return; } if (tx > 160 && tx < 280) { switchTarget(2); return; } if (tx > 300 && tx < 420) { switchTarget(3); return; } if (tx > 440 && tx < 560) { splatBuffer.clear(); return; } }

Tests whether the click landed inside any button's rectangular bounds; if so, executes the button's action instead of throwing a tomato

if (ty > 20 && ty < 70) {
Checks if the click's y-coordinate is in the button bar (between pixels 20 and 70)
if (tx > 20 && tx < 140) {
If y is in range, checks if x is within Button 1's bounds (Picture 1)
switchTarget(1);
Switches to image 1 and clears splats
return;
Exits the function early so a tomato is NOT thrown
tomatoes.push(new FlyingTomato(tx, ty));
If the click wasn't on any button, creates a new FlyingTomato object targeting the click coordinates and adds it to the tomatoes array

checkHit()

checkHit() runs whenever a tomato lands. It increments score (feedback the player can collect later), triggers screen shake (immediate visual feedback), and adds splats to the buffer (permanent visual consequence). This function demonstrates how a single event can cascade multiple effects.

function checkHit(tx, ty) {
  score++;
  shakeAmount = 15;
  addSplatToBuffer(splatBuffer, tx, ty, 2.0); 
}
Line-by-line explanation (3 lines)

🔧 Subcomponents:

calculation Score Update score++;

Increments the score variable (though currently displayed nowhere on screen)

calculation Screen Shake Trigger shakeAmount = 15;

Sets shakeAmount to 15, which drawPlayScreen() detects and uses for screen jitter feedback

score++;
Adds 1 to the score (tracking successful hits, though not displayed on screen currently)
shakeAmount = 15;
Sets the shake intensity to 15 pixels, which will decay in drawPlayScreen() each frame
addSplatToBuffer(splatBuffer, tx, ty, 2.0);
Calls addSplatToBuffer() to draw 12 reddish circles around the impact point onto the splatBuffer

addSplatToBuffer()

addSplatToBuffer() demonstrates drawing to an off-screen graphics buffer (not the main canvas). It uses a loop to create 12 overlapping circles with randomized colors (mostly red, occasionally green mold), positions, and sizes around the impact point. This scattering creates the organic, messy appearance of a real splat. The sizeMultiplier parameter lets the same function create different-sized splats.

🔬 The first fill() makes splatters mostly red; the second line occasionally overrides it with green for mold. What if you swapped these around and made mold the default, red the override? How would the splat look?

    buffer.fill(random(130, 200), random(0, 30), random(0, 30), random(150, 255));
    if (random() > 0.8) buffer.fill(50, 100, 20, 150);
function addSplatToBuffer(buffer, x, y, sizeMultiplier) {
  buffer.noStroke();
  for (let i = 0; i < 12; i++) {
    buffer.fill(random(130, 200), random(0, 30), random(0, 30), random(150, 255));
    if (random() > 0.8) buffer.fill(50, 100, 20, 150); 
    
    let offsetX = random(-30, 30) * sizeMultiplier;
    let offsetY = random(-30, 30) * sizeMultiplier;
    let size = random(15, 45) * sizeMultiplier; 
    buffer.ellipse(x + offsetX, y + offsetY, size, size);
  }
}
Line-by-line explanation (6 lines)

🔧 Subcomponents:

for-loop Splat Circle Generation for (let i = 0; i < 12; i++) { buffer.fill(random(130, 200), random(0, 30), random(0, 30), random(150, 255)); if (random() > 0.8) buffer.fill(50, 100, 20, 150); let offsetX = random(-30, 30) * sizeMultiplier; let offsetY = random(-30, 30) * sizeMultiplier; let size = random(15, 45) * sizeMultiplier; buffer.ellipse(x + offsetX, y + offsetY, size, size); }

Draws 12 randomized circles (with mostly red tones, occasionally green mold) scattered around the impact point to create a messy splat effect

buffer.noStroke();
Disables outlines for the splat circles so they blend smoothly together
for (let i = 0; i < 12; i++) {
Loops 12 times, creating 12 overlapping circles for each splat
buffer.fill(random(130, 200), random(0, 30), random(0, 30), random(150, 255));
Sets a random reddish color: red between 130–200, green and blue between 0–30 (very little), and alpha (transparency) between 150–255 (mostly opaque)
if (random() > 0.8) buffer.fill(50, 100, 20, 150);
20% of the time (when random() > 0.8), overrides the color with dark greenish (mold spots) for visual variety
let offsetX = random(-30, 30) * sizeMultiplier;
Scatters each circle randomly left/right from the impact point, scaled by sizeMultiplier
buffer.ellipse(x + offsetX, y + offsetY, size, size);
Draws a circle on the buffer at the scattered position with the randomized size

FlyingTomato class

FlyingTomato is a class that represents a single flying tomato in mid-air. The constructor sets up its trajectory: start position (bottom-center), target position (where the player clicked), and arc height (proportional to distance). The update() method advances progress each frame and returns a boolean indicating if still flying. The draw() method uses lerp() to interpolate position, sin() to create a parabolic arc, and scale/rotate to shrink and spin the tomato realistically. This class demonstrates object-oriented design and smooth animation using trigonometry.

🔬 These three lines calculate the tomato's position: currentX and baseY interpolate linearly, but currentY adds a sine wave on top for the arc. What happens if you remove the third line (the arc) and just use currentY = baseY? Does the tomato still reach the target, or does the arc matter for the collision?

    let currentX = lerp(this.startX, this.targetX, this.progress);
    let baseY = lerp(this.startY, this.targetY, this.progress);
    let currentY = baseY - sin(this.progress * PI) * this.arcHeight;
class FlyingTomato {
  constructor(targetX, targetY) {
    this.startX = width / 2;
    this.startY = height + 50; 
    this.targetX = targetX;
    this.targetY = targetY;
    
    this.progress = 0;
    this.speed = 0.08; 
    
    let distToTarget = dist(this.startX, this.startY, targetX, targetY);
    this.arcHeight = distToTarget * 0.3;
    
    this.angle = random(TWO_PI);
    this.rotSpeed = random(-0.2, 0.2);
  }

  update() {
    this.progress += this.speed;
    this.angle += this.rotSpeed;
    
    if (this.progress >= 1) return false; 
    return true; 
  }

  draw() {
    let currentX = lerp(this.startX, this.targetX, this.progress);
    let baseY = lerp(this.startY, this.targetY, this.progress);
    let currentY = baseY - sin(this.progress * PI) * this.arcHeight;
    
    let currentScale = lerp(3.0, 0.8, this.progress); 

    push();
    translate(currentX, currentY);
    scale(currentScale);
    rotate(this.angle);

    let r = 32;
    noStroke();
    fill(180, 20, 20); 
    ellipse(0, 0, r * 2, r * 1.8);

    // Mold spots
    fill(100, 120, 30, 180); 
    ellipse(-r * 0.4, -r * 0.2, r * 0.7, r * 0.5);
    fill(80, 90, 20, 150);
    ellipse(r * 0.3, r * 0.4, r * 0.5, r * 0.4);

    // Green stem
    fill(30, 120, 30);
    triangle(-r * 0.3, -r * 0.7, r * 0.3, -r * 0.7, 0, -r * 1.3);
    
    pop();
  }
}
Line-by-line explanation (13 lines)

🔧 Subcomponents:

calculation Constructor Setup constructor(targetX, targetY) { this.startX = width / 2; this.startY = height + 50; this.targetX = targetX; this.targetY = targetY; this.progress = 0; this.speed = 0.08; let distToTarget = dist(this.startX, this.startY, targetX, targetY); this.arcHeight = distToTarget * 0.3; this.angle = random(TWO_PI); this.rotSpeed = random(-0.2, 0.2); }

Initializes all properties of a flying tomato: start position (bottom-center), target position (where clicked), animation progress (0 to 1), and rotation state

calculation Parabolic Arc Trajectory let currentY = baseY - sin(this.progress * PI) * this.arcHeight;

Uses sin() to create a smooth parabolic arc, peaking at progress=0.5 and returning to baseline at progress=1

calculation Perspective Scaling let currentScale = lerp(3.0, 0.8, this.progress);

Shrinks the tomato as it travels, from 3x size at start to 0.8x at landing, creating a sense of perspective

this.startX = width / 2;
All tomatoes start at the horizontal center of the screen
this.startY = height + 50;
All tomatoes start below the visible canvas (off-screen), so they appear to fly UP into the scene
this.progress = 0;
Tracks animation progress from 0 (start) to 1 (finish), incremented each frame by speed
let distToTarget = dist(this.startX, this.startY, targetX, targetY);
Calculates the distance from start to target using p5.js's dist() function
this.arcHeight = distToTarget * 0.3;
Makes the arc height proportional to distance: farther targets get taller arcs for visual consistency
this.angle = random(TWO_PI);
Sets a random starting rotation angle (0 to 2π radians) so tomatoes spin unpredictably
this.rotSpeed = random(-0.2, 0.2);
Sets a random rotation speed (between -0.2 and 0.2 radians per frame) so each tomato spins at a different rate
this.progress += this.speed;
Advances the animation each frame (speed is 0.08, so it takes ~12 frames to go from 0 to 1)
if (this.progress >= 1) return false;
When progress reaches 1, the tomato has landed; return false to signal it's done flying
let currentX = lerp(this.startX, this.targetX, this.progress);
Interpolates the horizontal position: at progress=0, currentX=startX; at progress=1, currentX=targetX
let currentY = baseY - sin(this.progress * PI) * this.arcHeight;
Creates a parabolic arc: sin() peaks at 0.5π and returns to 0 at π, creating the upward bounce and smooth landing
let currentScale = lerp(3.0, 0.8, this.progress);
Shrinks the tomato from 3x to 0.8x as it travels, simulating perspective distance
rotate(this.angle);
Rotates the tomato by its current angle, which changes each frame by rotSpeed

windowResized()

windowResized() is called automatically by p5.js whenever the browser window is resized. It resizes the main canvas and creates a new graphics buffer. The clever part is preserving accumulated splats: it saves the old buffer, creates a new one, and draws the old contents onto it. Without this, splats would be lost on resize.

function windowResized() {
  resizeCanvas(windowWidth, windowHeight);
  let oldBuffer = splatBuffer;
  splatBuffer = createGraphics(windowWidth, windowHeight);
  splatBuffer.image(oldBuffer, 0, 0);
}
Line-by-line explanation (4 lines)

🔧 Subcomponents:

calculation Splat Buffer Preservation let oldBuffer = splatBuffer; splatBuffer = createGraphics(windowWidth, windowHeight); splatBuffer.image(oldBuffer, 0, 0);

When the window resizes, preserves accumulated splats by drawing the old buffer onto a newly-sized buffer

resizeCanvas(windowWidth, windowHeight);
Resizes the main canvas to match the new window dimensions
let oldBuffer = splatBuffer;
Saves a reference to the old graphics buffer before replacing it
splatBuffer = createGraphics(windowWidth, windowHeight);
Creates a new graphics buffer with the new canvas dimensions
splatBuffer.image(oldBuffer, 0, 0);
Draws the old buffer's contents (all accumulated splats) onto the new buffer, preserving them

📦 Key Variables

gameState string

Tracks the current game mode: 'HOME' shows the title screen, 'PLAY' shows the game

let gameState = "HOME";
tomatoes array

Stores all currently flying tomatoes; each element is a FlyingTomato object

let tomatoes = [];
splatBuffer p5.Renderer

An off-screen graphics buffer where all splat marks are drawn and accumulated permanently

let splatBuffer; // initialized in setup()
img1, img2, img3 p5.Image

Store the three target images loaded from URLs

let img1, img2, img3;
img1Loaded, img2Loaded, img3Loaded boolean

Flags indicating whether each image has finished loading from the internet

let img1Loaded = false;
currentTarget number

Tracks which image is currently displayed (1, 2, or 3)

let currentTarget = 1;
score number

Counts successful hits (incremented each time a tomato lands), though not displayed on screen

let score = 0;
shakeAmount number

Controls the intensity of screen shake after impact; decays each frame until 0

let shakeAmount = 0;

🔧 Potential Improvements (5)

Here are some ways this code could be enhanced:

FEATURE drawPlayScreen()

The score variable is incremented but never displayed on screen, so players never see their progress

💡 Add text("Score: " + score, ...) in drawPlayScreen() to display the running score on the canvas

STYLE throwTomato()

Button hit detection uses hard-coded pixel coordinates (20, 70, 140, etc.) that must match rect() calls in drawPlayScreen(); if buttons move, both functions must be edited

💡 Extract button bounds into constants (e.g., const BUTTON_TOP = 20) at the top of the file so they can be changed in one place

PERFORMANCE FlyingTomato.draw()

Every frame, the tomato graphic is redrawn by repeatedly calling ellipse() and triangle()—no performance issue for a few tomatoes, but scales poorly with 100+ simultaneous tomatoes

💡 Pre-draw the tomato shape to a p5.Graphics buffer once in the constructor, then reuse that buffer with image() and transforms in draw()

BUG drawPlayScreen() image loading

If an image fails to load from the URL (network error, broken link), the code shows 'Loading Image...' forever instead of showing an error message

💡 Add a timeout or error callback to loadImage() to detect and display a failure message if images don't load within a reasonable time

FEATURE setup()

Image URLs are hard-coded in the sketch; changing target images requires editing the source code

💡 Load image URLs from URL parameters or a config object so users can customize targets without touching code

🔄 Code Flow

Code flow showing setup, draw, drawhomescreen, drawplayscreen, keypressed, mousepressed, touchstarted, switchtarget, throwtomato, checkhit, addsplattobuffer, flyingtomato, windowresized

💡 Click on function names in the diagram to jump to their code

graph TD start[Start] --> setup[setup] setup --> canvas-creation[Canvas Setup] setup --> graphics-buffer[Splat Buffer Creation] setup --> image-loading[Image Loading with Callbacks] setup --> draw[draw loop] click setup href "#fn-setup" click canvas-creation href "#sub-canvas-creation" click graphics-buffer href "#sub-graphics-buffer" click image-loading href "#sub-image-loading" draw --> state-branch[Game State Switch] state-branch --> drawhomescreen[drawHomeScreen] state-branch --> drawplayscreen[drawPlayScreen] click draw href "#fn-draw" click state-branch href "#sub-state-branch" drawhomescreen --> tomato-graphic[Decorative Tomato Drawing] drawhomescreen --> flashing-text[Flashing Start Prompt] click drawhomescreen href "#fn-drawhomescreen" click tomato-graphic href "#sub-tomato-graphic" click flashing-text href "#sub-flashing-text" drawplayscreen --> screen-shake[Screen Shake Effect] drawplayscreen --> image-selection[Current Target Image Selection] drawplayscreen --> splat-buffer-draw[Render Accumulated Splats] drawplayscreen --> button-loop[Tomato Animation Loop] click drawplayscreen href "#fn-drawplayscreen" click screen-shake href "#sub-screen-shake" click image-selection href "#sub-image-selection" click splat-buffer-draw href "#sub-splat-buffer-draw" click button-loop href "#sub-button-loop" button-loop --> key-routing[Number Key Handler] button-loop --> state-transition[Home Screen Click] button-loop --> touch-check[Touch Input Detection] click key-routing href "#sub-key-routing" click state-transition href "#sub-state-transition" click touch-check href "#sub-touch-check" key-routing --> keypressed[keyPressed] click keypressed href "#fn-keypressed" state-transition --> mousepressed[mousePressed] click mousepressed href "#fn-mousepressed" touch-check --> touchstarted[touchStarted] click touchstarted href "#fn-touchstarted" mousepressed --> switchtarget[switchTarget] mousepressed --> throwtomato[throwTomato] click switchtarget href "#fn-switchtarget" click throwtomato href "#fn-throwtomato" throwtomato --> button-hit-detection[UI Button Collision] throwtomato --> score-increment[Score Update] click button-hit-detection href "#sub-button-hit-detection" click score-increment href "#sub-score-increment" checkhit[checkHit] --> shake-trigger[Screen Shake Trigger] checkhit --> addsplattobuffer[addSplatToBuffer] click checkhit href "#fn-checkhit" click shake-trigger href "#sub-shake-trigger" click addsplattobuffer href "#fn-addsplattobuffer" addsplattobuffer --> splat-loop[Splat Circle Generation] click splat-loop href "#sub-splat-loop" flyingtomato[FlyingTomato] --> constructor[Constructor Setup] flyingtomato --> parabolic-arc[Parabolic Arc Trajectory] flyingtomato --> scaling[Perspective Scaling] click flyingtomato href "#fn-flyingtomato" click constructor href "#sub-constructor" click parabolic-arc href "#sub-parabolic-arc" click scaling href "#sub-scaling" windowresized[windowResized] --> buffer-transfer[Splat Buffer Preservation] click windowresized href "#fn-windowresized" click buffer-transfer href "#sub-buffer-transfer"

❓ Frequently Asked Questions

What visual experience does the HOLY PEAK SCHOOL VERSION sketch create?

This sketch creates a playful visual experience where users can splatter rotten tomatoes across full-screen images, leaving colorful splats that animate the target image.

How can users interact with the HOLY PEAK SCHOOL VERSION sketch?

Users can interact with the sketch by clicking or tapping anywhere on the screen to throw rotten tomatoes, which creates splat effects and shakes the target image.

What creative coding techniques are showcased in the HOLY PEAK SCHOOL VERSION sketch?

The sketch demonstrates techniques such as image loading, canvas manipulation, and interactive graphics to create an engaging and dynamic user experience.

Preview

HOLY PEAK SCHOOL VERSION - p5.js creative coding sketch preview
Sketch Preview
Code flow diagram showing the structure of HOLY PEAK SCHOOL VERSION - Code flow showing setup, draw, drawhomescreen, drawplayscreen, keypressed, mousepressed, touchstarted, switchtarget, throwtomato, checkhit, addsplattobuffer, flyingtomato, windowresized
Code Flow Diagram