
Hypnotic Lava Lamp - xelsed.ai

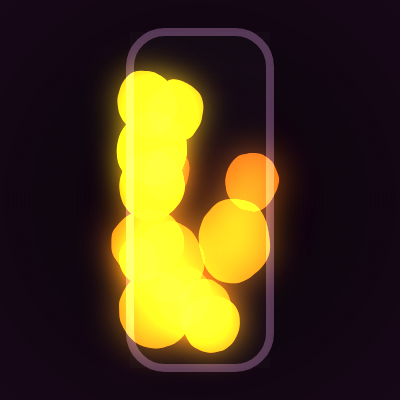
This sketch simulates a classic lava lamp: soft, glowing orange-yellow blobs made of noisy, wobbling blob shapes drift slowly upward and downward inside a dark purple glass tube. The blobs use Perlin noise to squash, stretch, and wobble organically, and glow via canvas shadow blur combined with additive blending to make overlapping blobs brighten each other.

🧪 Try This!

Experiment with the code by making these changes:

  1. Fill the lamp with blobs — Increasing NUM_BLOBS crowds the tube with far more glowing shapes, making the lamp look busier and brighter.
  2. Switch to a cool color palette — Changing the hue range swaps the warm orange/yellow lava look for cool blues and purples.
  3. Speed up the lava flow — Increasing the speed range makes blobs rise and fall much faster, turning the calm lamp into a fast-moving effect.
Prefer the full editor? Open it there →

📖 About This Sketch

This sketch recreates the slow, mesmerizing motion of a real lava lamp using nothing but math and light blending tricks. Warm orange and yellow blobs rise from the bottom and fall from the top of a dark purple glass container, each one wobbling and squashing organically thanks to Perlin noise sampled around its edge. The glow comes from the canvas's native shadowBlur property combined with p5's ADD blend mode, so overlapping blobs brighten each other just like real light does.

The code is organized around a LavaBlob class that stores each blob's position, speed, color, and noise parameters, with update() and draw() methods that move and render it every frame. Outside the class, setup() prepares the canvas and lamp dimensions, createBlobs() spawns the LavaBlob objects, and draw() calls a small pipeline of helper functions (drawBackground, drawLampGlass, then each blob's update/draw) every frame. Studying this sketch teaches you how to build a reusable class for animated particles, how noise() creates organic wobble instead of random jitter, and how blend modes and shadowBlur combine to fake glowing light.

⚙️ How It Works

  1. When the page loads, setup() creates a full-window canvas, switches to HSB color mode (so hue, saturation, and brightness can be controlled independently), and calls updateLampBounds() to calculate where the glass tube sits on screen.
  2. createBlobs() then builds an array of LavaBlob objects - half start near the bottom moving upward, half start near the top moving downward, each with a random warm hue, size, speed, and noise seed.
  3. Every frame, draw() first paints the dark purple vignette background and the glass tube outline and gradient, then switches to ADD blend mode before looping through every blob to update its position and draw its glowing shape.
  4. Inside each blob's update(), its vertical position shifts by its speed and direction, a small noise-driven horizontal drift is applied, and if it drifts too far outside the tube it's gently pulled back with lerp().
  5. When a rising blob drifts above the top of the tube (or a falling blob drops below the bottom), resetPosition() teleports it back to the opposite end so the cycle repeats endlessly.
  6. Each blob's draw() method samples Perlin noise around a circle of points to build a wobbly, ever-changing outline with beginShape()/vertex(), then applies a canvas shadowBlur glow so it appears to radiate warm light.

🎓 Concepts You'll Learn

HSB color modePerlin noise for organic motionCanvas glow via shadowBlurAdditive blend modeObject-oriented design with classesVectors (createVector)Procedural shapes with beginShape/vertexResponsive canvas with windowResized

📝 Code Breakdown

setup()

setup() runs once when the sketch starts. It's the right place to configure global settings like canvas size and color mode before any drawing happens.

function setup() {
  createCanvas(windowWidth, windowHeight); // https://p5js.org/reference/#/p5/createCanvas
  colorMode(HSB, 360, 100, 100, 100);
  noStroke();
  noiseDetail(3, 0.5);

  updateLampBounds();
  createBlobs();
}
Line-by-line explanation (6 lines)
createCanvas(windowWidth, windowHeight);
Creates a canvas that fills the entire browser window.
colorMode(HSB, 360, 100, 100, 100);
Switches p5's color system to Hue/Saturation/Brightness (with alpha up to 100) instead of the default RGB, making it easy to pick warm hues and adjust brightness independently.
noStroke();
Turns off outlines by default so shapes are filled without a border unless stroke() is called again later.
noiseDetail(3, 0.5);
Configures how Perlin noise blends multiple octaves - this controls how detailed/textured the noise patterns look when sampled later for wobble.
updateLampBounds();
Calculates where the glass tube's edges are based on the current canvas size.
createBlobs();
Builds the initial array of LavaBlob objects that will animate throughout the sketch.
updateLampBounds()

This function recalculates the tube's boundaries whenever the canvas size changes, keeping the layout responsive across window sizes.

function updateLampBounds() {
  lampWidth = min(width * 0.35, 420);
  lampLeft = (width - lampWidth) / 2;
  lampRight = lampLeft + lampWidth;
  lampTop = height * 0.08;
  lampBottom = height * 0.92;
}
Line-by-line explanation (5 lines)
lampWidth = min(width * 0.35, 420);
Makes the tube 35% of the window's width, but never wider than 420 pixels, so it stays a reasonable tube shape even on very wide screens.
lampLeft = (width - lampWidth) / 2;
Centers the tube horizontally by calculating the left edge position.
lampRight = lampLeft + lampWidth;
Calculates the right edge of the tube from the left edge plus its width.
lampTop = height * 0.08;
Places the top of the tube 8% down from the top of the window.
lampBottom = height * 0.92;
Places the bottom of the tube 92% down from the top, leaving small margins above and below.

createBlobs()

This function acts as a factory for particle-like objects - a common pattern in creative coding where you loop a fixed number of times, randomize parameters, and store the results in an array for later use.

🔬 This splits blobs into risers and fallers 50/50. What happens if you change the split to `i < NUM_BLOBS * 0.8` so 80% of blobs rise instead?

    const isRising = i < NUM_BLOBS / 2;
    const dir = isRising ? -1 : 1; // -1 up, 1 down
function createBlobs() {
  blobs = [];
  // First half rise from bottom, second half fall from top
  for (let i = 0; i < NUM_BLOBS; i++) {
    const isRising = i < NUM_BLOBS / 2;
    const dir = isRising ? -1 : 1; // -1 up, 1 down

    // Warm colors: reds → oranges → yellows
    const hue = random(10, 55); // 10-55 in HSB is red/orange/yellow
    const baseRadius = random(40, 90) * (height / 800);

    let startY;
    if (isRising) {
      startY = random(height * 0.5, lampBottom + 40);
    } else {
      startY = random(lampTop - 40, height * 0.5);
    }

    const x = random(lampLeft + baseRadius * 0.7, lampRight - baseRadius * 0.7);
    const blob = new LavaBlob(x, startY, baseRadius, hue, dir);
    blobs.push(blob);
  }
}
Line-by-line explanation (10 lines)

🔧 Subcomponents:

for-loop Blob Creation Loop for (let i = 0; i < NUM_BLOBS; i++) {

Runs once per blob to decide its direction, color, size, and starting position, then instantiates a LavaBlob object.

conditional Rising vs Falling Split const isRising = i < NUM_BLOBS / 2;

Splits the blobs into two equal groups - the first half rise from the bottom, the second half fall from the top.

blobs = [];
Empties the blobs array so old blobs are discarded (important when the sketch is resized and blobs are rebuilt).
const isRising = i < NUM_BLOBS / 2;
The first half of the loop iterations are marked as 'rising' blobs, the rest as 'falling'.
const dir = isRising ? -1 : 1; // -1 up, 1 down
Converts the rising/falling flag into a direction multiplier used to move the blob up or down each frame.
const hue = random(10, 55); // 10-55 in HSB is red/orange/yellow
Picks a random warm hue in the red-orange-yellow range using HSB color mode.
const baseRadius = random(40, 90) * (height / 800);
Chooses a random blob size, scaled relative to the window height so blobs look proportional on any screen.
startY = random(height * 0.5, lampBottom + 40);
For rising blobs, picks a random starting height somewhere in the bottom half of the lamp.
startY = random(lampTop - 40, height * 0.5);
For falling blobs, picks a random starting height somewhere in the top half of the lamp.
const x = random(lampLeft + baseRadius * 0.7, lampRight - baseRadius * 0.7);
Chooses a random horizontal starting position that keeps the blob mostly inside the tube's width.
const blob = new LavaBlob(x, startY, baseRadius, hue, dir);
Creates a new LavaBlob object with all the randomized properties decided above.
blobs.push(blob);
Adds the newly created blob to the blobs array so it gets updated and drawn every frame.

draw()

draw() is the animation heartbeat of any p5.js sketch, running ~60 times per second. Here it orchestrates the whole scene by calling smaller helper functions in a specific order, which is a great pattern for keeping complex sketches organized.

🔬 This draws every blob with additive glow. What happens if you comment out `blendMode(ADD)` entirely so blobs use normal blending instead?

  blendMode(ADD); // https://p5js.org/reference/#/p5/blendMode
  for (const b of blobs) {
    b.update();
    b.draw();
  }
function draw() {
  blendMode(BLEND); // reset to normal blending

  drawBackground();
  drawLampGlass();

  // Draw blobs with additive blending to enhance glow overlap
  blendMode(ADD); // https://p5js.org/reference/#/p5/blendMode
  for (const b of blobs) {
    b.update();
    b.draw();
  }

  // Reset blend mode for any future drawing
  blendMode(BLEND);
}
Line-by-line explanation (8 lines)

🔧 Subcomponents:

for-loop Update And Draw Blobs for (const b of blobs) {

Loops through every blob in the array, updating its position/noise state then drawing its glowing shape.

blendMode(BLEND); // reset to normal blending
Ensures the background and glass tube are drawn with normal (non-additive) blending so colors look correct.
drawBackground();
Paints the dark purple vignette background.
drawLampGlass();
Draws the gradient and outline of the glass tube.
blendMode(ADD); // https://p5js.org/reference/#/p5/blendMode
Switches to additive blending so overlapping blob colors add their brightness together, creating a glowing effect where blobs overlap.
for (const b of blobs) {
Loops through every blob object stored in the blobs array.
b.update();
Moves the blob and updates its internal noise time before drawing.
b.draw();
Renders the blob's wobbly, glowing shape at its current position.
blendMode(BLEND); // Reset blend mode for any future drawing
Restores normal blending after all blobs are drawn, so it doesn't affect anything drawn in a later frame before this reset runs again.

drawBackground()

This function shows a simple technique for faking a radial gradient/vignette in p5.js by layering many semi-transparent circles - useful when you don't want to touch raw pixels or WebGL shaders.

🔬 This loop shrinks by 4 pixels each step. What happens visually (and to performance) if you change the step to `r -= 20`?

  for (let r = maxR; r > 0; r -= 4) {
    const t = r / maxR;
    const b = lerp(4, 10, t);
    const a = lerp(0, 40, t);
    fill(300, 60, b, a);
    ellipse(centerX, centerY, r * 2, r * 2);
  }
function drawBackground() {
  // Deep purple/maroon background
  background(290, 70, 8); // HSB: dark purple

  // Very subtle vignette
  noStroke();
  const centerX = width / 2;
  const centerY = height / 2;
  const maxR = max(width, height) * 0.8;

  for (let r = maxR; r > 0; r -= 4) {
    const t = r / maxR;
    const b = lerp(4, 10, t);
    const a = lerp(0, 40, t);
    fill(300, 60, b, a);
    ellipse(centerX, centerY, r * 2, r * 2);
  }
}
Line-by-line explanation (8 lines)

🔧 Subcomponents:

for-loop Vignette Rings Loop for (let r = maxR; r > 0; r -= 4) {

Draws many overlapping, slightly transparent ellipses from largest to smallest to fake a soft radial vignette darkening toward the edges.

background(290, 70, 8); // HSB: dark purple
Fills the whole canvas with a dark purple color (hue 290, high saturation, low brightness), clearing the previous frame.
const maxR = max(width, height) * 0.8;
Calculates the largest ellipse radius needed to cover the screen, based on whichever canvas dimension is bigger.
for (let r = maxR; r > 0; r -= 4) {
Loops from the largest radius down to zero in steps of 4 pixels, drawing one ellipse per step.
const t = r / maxR;
Converts the current radius into a 0-1 progress value used to interpolate colors.
const b = lerp(4, 10, t);
Interpolates brightness so the center ellipses are slightly brighter than the outer ones.
const a = lerp(0, 40, t);
Interpolates transparency so outer rings are more visible, building up a darker edge (vignette).
fill(300, 60, b, a);
Sets the fill color for this ring using the interpolated brightness and alpha.
ellipse(centerX, centerY, r * 2, r * 2);
Draws a circle centered on the canvas with a diameter of r*2, layering many of these to build the vignette effect.

drawLampGlass()

This function demonstrates building a gradient by stacking thin rectangles - a technique that works anywhere in p5.js when you don't have access to CSS gradients or shaders.

function drawLampGlass() {
  // Subtle vertical gradient inside lamp outline
  const gradientSteps = max(80, int(lampBottom - lampTop));

  noStroke();
  for (let i = 0; i < gradientSteps; i++) {
    const y = map(i, 0, gradientSteps, lampTop, lampBottom);
    const t = i / gradientSteps;

    // Slightly lighter center band, darker near top/bottom
    const brightness = lerp(14, 10, abs(t - 0.5) * 2);
    const alpha = 40;

    fill(300, 40, brightness, alpha);
    rect(lampLeft, y, lampWidth, 1);
  }

  // Glass outline
  noFill();
  stroke(300, 30, 60, 50);
  strokeWeight(8);
  rect(
    lampLeft,
    lampTop,
    lampWidth,
    lampBottom - lampTop,
    lampWidth * 0.25 // corner radius
  );
  noStroke();
}
Line-by-line explanation (7 lines)

🔧 Subcomponents:

for-loop Vertical Gradient Loop for (let i = 0; i < gradientSteps; i++) {

Draws thin horizontal strips from top to bottom of the tube, each with a slightly different brightness, to fake a soft vertical gradient inside the glass.

const gradientSteps = max(80, int(lampBottom - lampTop));
Decides how many thin strips to draw - at least 80, or one per pixel of tube height if the tube is taller than 80 pixels, so the gradient stays smooth.
const y = map(i, 0, gradientSteps, lampTop, lampBottom);
Converts the loop counter into an actual y position between the tube's top and bottom edges.
const brightness = lerp(14, 10, abs(t - 0.5) * 2);
Makes the middle of the tube slightly brighter than the top and bottom by measuring how far t is from the center (0.5) and interpolating brightness accordingly.
rect(lampLeft, y, lampWidth, 1);
Draws a 1-pixel-tall rectangle spanning the tube's width at this y position - stacking hundreds of these creates the gradient illusion.
stroke(300, 30, 60, 50);
Sets the color used for the glass tube's outline - a muted purple-pink.
strokeWeight(8);
Makes the outline 8 pixels thick so the glass tube reads as a solid border.
rect(lampLeft, lampTop, lampWidth, lampBottom - lampTop, lampWidth * 0.25 // corner radius );
Draws a rounded rectangle outlining the tube, using a corner radius proportional to the tube's width so it looks like a capsule shape.

windowResized()

windowResized() is a special p5.js function that runs automatically whenever the browser window changes size, letting you keep responsive sketches in sync with the viewport.

function windowResized() {
  resizeCanvas(windowWidth, windowHeight);
  updateLampBounds();
  createBlobs();
}
Line-by-line explanation (3 lines)
resizeCanvas(windowWidth, windowHeight);
A built-in p5.js function that automatically resizes the canvas to match the new browser window size.
updateLampBounds();
Recalculates the glass tube's position and size to fit the new canvas dimensions.
createBlobs();
Rebuilds all the blobs from scratch so they're proportioned and positioned correctly for the new window size.

LavaBlob constructor

The constructor runs once when a LavaBlob object is created with `new LavaBlob(...)`. It's where you set up all the starting properties an object needs before it starts animating.

constructor(x, y, baseRadius, hue, dir) {
    this.pos = createVector(x, y);
    this.baseRadius = baseRadius;
    this.hue = hue;          // 0–360 (HSB)
    this.dir = dir;          // -1 = up, 1 = down
    this.speed = random(0.15, 0.35); // base speed (px per frame)
    this.time = random(1000);
    this.noiseSpeed = random(0.003, 0.007);
    this.wobbleAmount = random(0.18, 0.32); // how lumpy the edge is
    this.noiseSeed = random(1000);
    this.glowStrength = random(25, 40);
  }
Line-by-line explanation (8 lines)
this.pos = createVector(x, y);
Stores the blob's position as a p5.Vector, which bundles x and y together and makes movement math simpler.
this.hue = hue; // 0–360 (HSB)
Stores the blob's color hue, which was randomly chosen in createBlobs().
this.dir = dir; // -1 = up, 1 = down
Stores whether this blob rises or falls, used every frame to move it in the right direction.
this.speed = random(0.15, 0.35); // base speed (px per frame)
Gives each blob its own slightly different speed so they don't all move in perfect unison.
this.time = random(1000);
Gives each blob a random starting point in 'noise time' so their wobbles aren't synchronized.
this.noiseSpeed = random(0.003, 0.007);
Controls how quickly this blob's noise time advances each frame, affecting how fast it wobbles.
this.wobbleAmount = random(0.18, 0.32); // how lumpy the edge is
Controls how much the blob's radius varies around its edge - higher values make lumpier, more irregular blobs.
this.glowStrength = random(25, 40);
Sets how far this blob's glow spreads, used later as the canvas shadowBlur amount.

resetPosition()

This is a classic 'recycling' pattern used in particle systems - instead of deleting and creating new objects (which is slower), you just reset an existing object's properties and reuse it.

resetPosition() {
    const margin = 80;
    // keep blobs inside the lamp horizontally
    this.pos.x = random(lampLeft + this.baseRadius * 0.7, lampRight - this.baseRadius * 0.7);

    if (this.dir === -1) {
      // rising from bottom
      this.pos.y = lampBottom + random(20, margin);
    } else {
      // falling from top
      this.pos.y = lampTop - random(20, margin);
    }
  }
Line-by-line explanation (4 lines)

🔧 Subcomponents:

conditional Rising Vs Falling Reset if (this.dir === -1) {

Chooses whether to respawn the blob just below the tube (for rising blobs) or just above it (for falling blobs).

const margin = 80;
Defines how far outside the tube the blob can respawn, giving it room to smoothly re-enter the visible area.
this.pos.x = random(lampLeft + this.baseRadius * 0.7, lampRight - this.baseRadius * 0.7);
Picks a new random horizontal position within the tube's width, accounting for the blob's size so it doesn't spawn poking out the sides.
this.pos.y = lampBottom + random(20, margin);
For rising blobs, respawns them just below the bottom of the tube so they can rise back into view.
this.pos.y = lampTop - random(20, margin);
For falling blobs, respawns them just above the top of the tube so they can fall back into view.

update()

update() shows the core difference between random() and noise(): noise() produces smoothly changing values over time, which is exactly what's needed for believable organic drift instead of jittery randomness.

🔬 This noise() call maps to a drift range of -0.4 to 0.4 pixels per frame. What happens if you widen that range to -3 and 3?

    const drift = map(
      noise(this.noiseSeed * 2 + this.time * 0.5),
      0,
      1,
      -0.4,
      0.4
    );
    this.pos.x += drift;
update() {
    this.time += this.noiseSpeed;

    // Move slowly up or down
    this.pos.y += this.speed * this.dir;

    // Small horizontal drift using noise
    const drift = map(
      noise(this.noiseSeed * 2 + this.time * 0.5),
      0,
      1,
      -0.4,
      0.4
    );
    this.pos.x += drift;

    // Soft constraint to stay roughly inside the lamp horizontally
    if (this.pos.x < lampLeft + this.baseRadius * 0.6) {
      this.pos.x = lerp(this.pos.x, lampLeft + this.baseRadius * 0.8, 0.02);
    } else if (this.pos.x > lampRight - this.baseRadius * 0.6) {
      this.pos.x = lerp(this.pos.x, lampRight - this.baseRadius * 0.8, 0.02);
    }

    // Recycle when leaving the lamp vertically
    const margin = 80;
    if (this.dir === -1 && this.pos.y < lampTop - margin) {
      this.resetPosition();
    }
    if (this.dir === 1 && this.pos.y > lampBottom + margin) {
      this.resetPosition();
    }
  }
Line-by-line explanation (7 lines)

🔧 Subcomponents:

conditional Soft Horizontal Constraint if (this.pos.x < lampLeft + this.baseRadius * 0.6) {

Gently nudges blobs back toward the tube's interior using lerp() instead of a hard clamp, so the correction looks smooth rather than snappy.

conditional Recycle Off-Screen Blobs if (this.dir === -1 && this.pos.y < lampTop - margin) {

Detects when a rising blob has drifted above the tube and calls resetPosition() to send it back to the bottom.

this.time += this.noiseSpeed;
Advances this blob's personal 'noise clock' each frame, which is what makes its noise-based wobble animate over time.
this.pos.y += this.speed * this.dir;
Moves the blob vertically - dir is either -1 (up) or 1 (down), so multiplying flips the direction of movement.
const drift = map(noise(this.noiseSeed * 2 + this.time * 0.5), 0, 1, -0.4, 0.4);
Samples Perlin noise and maps its 0-1 output to a small range (-0.4 to 0.4), producing smooth, organic side-to-side drift instead of jittery random movement.
this.pos.x += drift;
Applies the noise-based horizontal drift to the blob's x position each frame.
this.pos.x = lerp(this.pos.x, lampLeft + this.baseRadius * 0.8, 0.02);
If the blob has drifted too far left, this smoothly eases its x position back toward the inside of the tube by moving 2% of the way there each frame.
if (this.dir === -1 && this.pos.y < lampTop - margin) {
Checks whether a rising blob has moved far enough above the tube's top edge that it should be recycled.
this.resetPosition();
Calls resetPosition() to teleport the blob back to the opposite end of the tube, creating a continuous, looping cycle.

draw() (LavaBlob method)

This method is the heart of the sketch's organic look: instead of drawing a perfect circle, it samples noise() at many angles to build a custom polygon whose radius wobbles smoothly, combined with a canvas shadow for glow.

🔬 This maps noise to a squash range of 0.9-1.35. What happens if you widen it to 0.5-2.0 for much more dramatic stretching?

    const squash = map(
      noise(this.noiseSeed + this.time * 0.7),
      0,
      1,
      0.9,
      1.35
    );
draw() {
    const ctx = drawingContext; // 2D canvas context

    // Set up a subtle glow using canvas shadows
    ctx.save();
    const glowColor = color(this.hue, 95, 100, 90); // HSB color
    ctx.shadowBlur = this.glowStrength;
    ctx.shadowColor = glowColor.toString();

    // Inner fill color: slightly transparent and bright
    noStroke();
    fill(this.hue, 95, 100, 75);

    beginShape(); // https://p5js.org/reference/#/p5/beginShape
    const steps = 80; // number of points around the blob

    // Extra squash/stretch for organic lava look
    const squash = map(
      noise(this.noiseSeed + this.time * 0.7),
      0,
      1,
      0.9,
      1.35
    );

    for (let i = 0; i <= steps; i++) {
      const angle = (TWO_PI * i) / steps;

      // Sample noise in a circular pattern around the blob
      const nx = cos(angle) * 0.9 + this.noiseSeed;
      const ny = sin(angle) * 0.9 + this.noiseSeed;
      const n = noise(nx + this.time, ny + this.time * 0.6); // https://p5js.org/reference/#/p5/noise

      // Radius wobbles over time
      const radius = this.baseRadius * (0.8 + this.wobbleAmount * n);

      const vx = this.pos.x + cos(angle) * radius;
      const vy = this.pos.y + sin(angle) * radius * squash;

      vertex(vx, vy); // https://p5js.org/reference/#/p5/vertex
    }
    endShape(CLOSE); // https://p5js.org/reference/#/p5/endShape

    ctx.restore();
  }
Line-by-line explanation (15 lines)

🔧 Subcomponents:

for-loop Blob Outline Loop for (let i = 0; i <= steps; i++) {

Walks around a full circle (0 to TWO_PI), sampling noise at each angle to compute a wobbly radius, and adds a vertex point there - together these points form the blob's organic outline.

const ctx = drawingContext; // 2D canvas context
Grabs the raw HTML5 canvas 2D context so this code can use native canvas properties (shadowBlur, shadowColor) that p5.js doesn't expose directly.
ctx.save();
Saves the canvas's current drawing settings so the glow effect applied here can be safely undone afterward without affecting other drawing.
ctx.shadowBlur = this.glowStrength;
Sets how far the glow spreads around anything drawn next, using this blob's personal glow strength.
ctx.shadowColor = glowColor.toString();
Sets the color of the glow to match the blob's hue, converting the p5 color object into a CSS color string the canvas API understands.
fill(this.hue, 95, 100, 75);
Sets the blob's fill color using its hue with high saturation and brightness, and some transparency (75 out of 100 alpha) so overlapping blobs blend nicely.
beginShape(); // https://p5js.org/reference/#/p5/beginShape
Starts defining a custom shape from a series of vertex() points, rather than drawing a fixed shape like circle() or rect().
const squash = map(noise(this.noiseSeed + this.time * 0.7), 0, 1, 0.9, 1.35);
Uses noise to compute a vertical stretch factor between 0.9 and 1.35 that changes slowly over time, making the blob squash and stretch like a real lava blob.
for (let i = 0; i <= steps; i++) {
Loops around a full circle in small angle increments to place points along the blob's outline.
const angle = (TWO_PI * i) / steps;
Converts the loop counter into an angle in radians, spreading points evenly around a full circle (TWO_PI radians = 360 degrees).
const n = noise(nx + this.time, ny + this.time * 0.6); // https://p5js.org/reference/#/p5/noise
Samples 2D Perlin noise using coordinates based on the current angle and the blob's noise time, producing a smooth, ever-changing value unique to each point on the outline.
const radius = this.baseRadius * (0.8 + this.wobbleAmount * n);
Uses the noise value to vary the blob's radius at this angle, creating lumps and bulges that shift smoothly over time.
const vy = this.pos.y + sin(angle) * radius * squash;
Calculates the vertical coordinate of this outline point, applying the squash factor to stretch the blob vertically.
vertex(vx, vy); // https://p5js.org/reference/#/p5/vertex
Adds this calculated point to the custom shape being built.
endShape(CLOSE); // https://p5js.org/reference/#/p5/endShape
Finishes the custom shape and closes it by connecting the last point back to the first, then fills it in.
ctx.restore();
Restores the canvas's saved settings, removing the shadow/glow effect so it doesn't leak into whatever is drawn next.

📦 Key Variables

blobs array

Holds every LavaBlob object currently animating in the scene; rebuilt whenever the window is resized.

let blobs = [];
NUM_BLOBS number

Constant controlling how many blobs are created - half rise, half fall.

const NUM_BLOBS = 14;
lampLeft number

The x-coordinate of the glass tube's left edge, used to keep blobs and drawing inside the tube.

let lampLeft;
lampRight number

The x-coordinate of the glass tube's right edge.

let lampRight;
lampTop number

The y-coordinate of the glass tube's top edge, used to recycle falling blobs and draw the tube.

let lampTop;
lampBottom number

The y-coordinate of the glass tube's bottom edge, used to recycle rising blobs and draw the tube.

let lampBottom;
lampWidth number

The width of the glass tube, recalculated whenever the window resizes.

let lampWidth;

🔧 Potential Improvements (5)

Here are some ways this code could be enhanced:

PERFORMANCE drawBackground()

The vignette loop draws a full-screen ellipse every 4 pixels of radius (up to hundreds of ellipses) every single frame, even though the vignette never changes shape - this is significant repeated overdraw, especially on large or high-DPI screens.

💡 Render the vignette once into an offscreen buffer with createGraphics() (or as a radial gradient via the raw canvas context) in setup()/windowResized(), then just image() it each frame instead of redrawing hundreds of ellipses.

PERFORMANCE drawLampGlass()

The gradient loop draws one rect() per pixel of tube height (often 500+ rectangles) every frame, but the gradient itself never changes unless the window is resized.

💡 Precompute the gradient into a small createGraphics() buffer once (in updateLampBounds or windowResized) and draw it with a single image() call inside draw().

BUG LavaBlob.update()

The soft horizontal constraint uses lerp(..., 0.02), which pulls a blob back very slowly; if wobbleAmount or drift pushes it further out per frame than the correction pulls it in, a blob can visually clip outside the glass tube for a long stretch of time.

💡 Increase the lerp factor when the blob is far outside the bounds (e.g. scale the factor by how far it has drifted) or add a hard clamp as a safety net using constrain().

STYLE Throughout drawBackground(), drawLampGlass(), and createBlobs()

Many magic numbers (290, 70, 8, 0.35, 420, 0.08, 0.92, etc.) are scattered through the code with only inline comments explaining them, making the sketch harder to tune consistently.

💡 Extract frequently reused values (like the background hue, tube margins, and color ranges) into named constants near the top of the file so they're easier to find and tweak together.

FEATURE draw() / new interaction function

The sketch is currently non-interactive - the mouse and keyboard have no effect on the animation.

💡 Add a mousePressed() or mouseMoved() handler that lets users nudge blobs away from the cursor, or map mouseX to the hue range in createBlobs() so the lamp's color can be changed live.

🔄 Code Flow

Code flow showing setup, updatelampbounds, createblobs, draw, drawbackground, drawlampglass, windowresized, constructor, resetposition, update, blobdraw

💡 Click on function names in the diagram to jump to their code

graph TD start[Start] --> setup[setup] setup --> updatelampbounds[updatelampbounds] setup --> createblobs[createblobs] setup --> draw[draw loop] draw --> drawbackground[drawbackground] draw --> drawlampglass[drawlampglass] draw --> draw-blob-loop[draw-blob-loop] draw-blob-loop --> blob-vertex-loop[blob-vertex-loop] draw-blob-loop --> update[update] draw-blob-loop --> recycle-check[recycle-check] draw-blob-loop --> horizontal-soft-constraint[horizontal-soft-constraint] draw --> vignette-loop[vignette-loop] vignette-loop --> draw draw --> gradient-loop[gradient-loop] gradient-loop --> draw click setup href "#fn-setup" click updatelampbounds href "#fn-updatelampbounds" click createblobs href "#fn-createblobs" click draw href "#fn-draw" click drawbackground href "#fn-drawbackground" click drawlampglass href "#fn-drawlampglass" click draw-blob-loop href "#sub-draw-blob-loop" click blob-vertex-loop href "#sub-blob-vertex-loop" click update href "#fn-update" click recycle-check href "#sub-recycle-check" click horizontal-soft-constraint href "#sub-horizontal-soft-constraint" click vignette-loop href "#sub-vignette-loop" click gradient-loop href "#sub-gradient-loop" createblobs --> createblobs-loop[createblobs-loop] createblobs-loop --> createblobs-direction[createblobs-direction] createblobs-direction --> createblobs click createblobs-loop href "#sub-createblobs-loop" click createblobs-direction href "#sub-createblobs-direction" reset-direction-check[reset-direction-check] --> resetposition[resetposition] click reset-direction-check href "#sub-reset-direction-check" resetposition --> draw-blob-loop blob-vertex-loop --> draw-blob-loop draw-blob-loop --> draw

❓ Frequently Asked Questions

What visual experience does the Hypnotic Lava Lamp sketch provide?

The sketch creates a mesmerizing lava lamp simulation featuring soft glowing blobs that rise and fall with organic wobbles, set against a dark purple glass container.

Is there any user interaction available in the Hypnotic Lava Lamp sketch?

The current version of the sketch does not include user interaction; it is designed for passive viewing and relaxation.

What creative coding techniques are showcased in the Hypnotic Lava Lamp sketch?

This sketch demonstrates the use of HSB color mode and Perlin noise to create smooth, organic movement and glowing effects for the blobs.

Preview

Hypnotic Lava Lamp - xelsed.ai - p5.js creative coding sketch preview
Sketch Preview
Code flow diagram showing the structure of Hypnotic Lava Lamp - xelsed.ai - Code flow showing setup, updatelampbounds, createblobs, draw, drawbackground, drawlampglass, windowresized, constructor, resetposition, update, blobdraw
Code Flow Diagram