
Lethal ape redux app lab

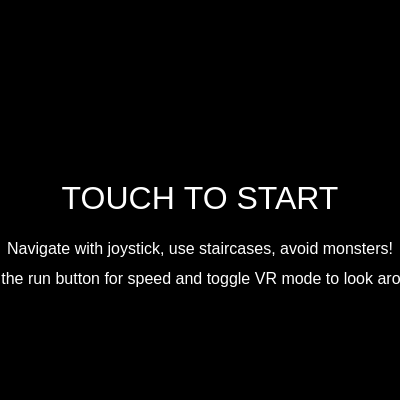
This is a spooky top-down maze game where you navigate through shadowy procedural rooms while being hunted by geometric monsters. Control your character with a joystick, climb staircases between floors, collect keys, and survive the horror—but beware: touching a monster triggers a terrifying jumpscare animation with procedural screams.

🧪 Try This!

Experiment with the code by making these changes:

  1. Speed up the player's run — Increasing PLAYER_RUN_SPEED makes the player sprint faster when the run button is held—let you outrun monsters more easily.
  2. Make monsters more aggressive — Increasing MONSTER_CHASE_SPEED makes monsters move faster when chasing the player, creating more tension and urgency.
  3. Expand the monster's detection range — Increasing MONSTER_CHASE_RANGE makes monsters spot the player from farther away, starting chases sooner and making the game scarier.
  4. Add more monsters to the world — Increasing MAX_MONSTERS spawns more creatures at setup, making the game more densely populated and terrifying.
  5. Change the main room color — The main room's color affects the visual atmosphere. Try dark blues, purples, or even blood red for a different horror mood.
  6. Make the footstep sounds happen less often — Increasing FOOTSTEP_INTERVAL makes footstep sounds play less frequently, creating a slower, heavier walk.
Prefer the full editor? Open it there →

📖 About This Sketch

This sketch creates a haunting maze-exploration game rendered entirely from procedural shapes and colors. You guide a red player character through a safe main room and five procedurally-colored floors below, using a touch joystick (or keyboard) to move and a run button to sprint. What makes it visually arresting is the constant threat: geometric green monsters patrol each floor with eerie AI that chases you when you're close, and touching one triggers a full-screen jumpscare sequence with animated text, scaling monster graphics, and procedurally-generated screeching audio. The sketch demonstrates p5.js techniques like the draw loop, collision detection, camera translation, touch input handling, procedural sound synthesis with p5.sound, and multi-room game state management—all working together to create genuine tension.

The code is organized around three core systems: game state (loading screen, start screen, active game, jumpscare), player and monster physics with room-based confinement, and a camera system that follows the player while optionally supporting device orientation head-tracking for mobile VR. You will learn by studying how the game world is divided into named rooms with boundaries, how monsters use multi-floor pathfinding to hunt the player across different levels, how touch inputs are tracked with unique IDs to support simultaneous joystick and button control, and how audio oscillators and envelopes create horror atmosphere and feedback sounds.

⚙️ How It Works

  1. When the sketch loads, preload() sets up all procedural audio sources (oscillators, noise generators, filters, envelopes) that will play throughout the game. setup() then initializes the canvas, defines six rooms (one safe main room plus five floors laid out horizontally), spawns the player in the main room, places five monsters randomly across the floors, and creates UI buttons for joystick and run control.
  2. The draw loop cycles through three main game phases: a loading screen (3 seconds with fade-in audio), a start screen (waiting for first touch), and the main game. In the game phase, updatePlayer() moves the character based on joystick input, triggers footstep sounds while walking, checks for staircase transitions between rooms, and controls boombox music volume based on proximity. updateMonsters() makes each monster either roam slowly in their current room or chase the player at higher speed if nearby—monsters can even navigate between floors using staircases to hunt you across the entire map.
  3. The camera follows the player's position while smoothly interpolating toward it, and if VR mode is toggled on (via a button or 'V' key), device orientation data (gamma for left-right head tilt, beta for forward-back tilt) offsets the camera to create a head-tracking effect on mobile devices. Every frame, rooms and staircases are drawn in their world positions, then translated by the camera offset so they appear to move smoothly under the player's view.
  4. Collision detection uses axis-aligned bounding boxes (AABB) to check when the player overlaps staircases (triggering room transitions with a 500ms cooldown to prevent rapid re-triggering), when the player touches collectible keys (adding them to inventory and playing a chime sound), and critically, when the player touches a monster—which immediately triggers the jumpscare sequence.
  5. When a jumpscare is triggered, the game state switches to 'jumpscare' mode, ambient sounds fade out instantly, and a procedural screech oscillator sweeps upward in frequency while noise bursts. The screen animates through three phases: a monster body that scales up and flashes red text ('YOU DIED!'), a blood-red screen overlay, and finally a fade to black before resetting the game back to the start screen.
  6. Throughout all of this, touch inputs are handled via touchStarted/touchMoved/touchEnded, which track individual touches by ID so you can hold the joystick with one finger while pressing the run button with another. On desktop, keyboard input (WASD or arrow keys) controls movement, Shift toggles running, and V toggles VR mode.

🎓 Concepts You'll Learn

Top-down camera and viewport translationMulti-room game world with state managementAABB collision detection for gameplay mechanicsProcedural audio synthesis with p5.sound oscillators and envelopesTouch input tracking with unique ID assignmentDevice orientation for mobile VR head-trackingAI pathfinding across multiple interconnected roomsFinite state machines for game phases and monster behavior

📝 Code Breakdown

preload()

preload() runs once before setup() and is the perfect place to load or create audio sources. All the oscillators and noise generators are created silent (amp=0) and started so they're ready to play instantly when needed—this is much faster than creating them mid-game. The audio chain (noise → filter → output) is a core Web Audio pattern: you create sources, route them through processors (filters, delays, envelopes), and finally connect to the output.

🔬 The ADSR values shape how the jumpscare sound hits you: 0.01 is a snappy attack (shocking), 0.2 is a quick decay (scary drop), and 0.5 is a long release (lingering fear). What happens if you increase the attack to 0.5 or the release to 2? How does that change the emotional impact?

  jumpscareEnvelope.setADSR(0.01, 0.2, 0.0, 0.5); // Fast attack, short decay, NO sustain, short release
  jumpscareEnvelope.setRange(1.0, 0); // Full volume to silent
function preload() {
  // --- Procedural Ambient Sound ---
  // A low, rumbling oscillator (sine wave)
  ambientSoundOsc = new p5.Oscillator('sine');
  ambientSoundOsc.freq(50); // Low frequency for a drone
  ambientSoundOsc.amp(0); // Start silent
  ambientSoundOsc.start(); // Start the oscillator (will be silent until amp() is called)

  // White noise for a subtle hiss/static
  ambientSoundNoise = new p5.Noise('white');
  ambientSoundNoise.amp(0); // Start silent
  ambientSoundNoise.start(); // Start the noise (will be silent until amp() is called)

  // Low-pass filter for the noise to make it less harsh
  ambientFilter = new p5.Filter('lowpass');
  ambientFilter.freq(500); // Only let low frequencies through
  ambientFilter.res(2); // Some resonance for a "whoosh" effect
  ambientSoundNoise.disconnect(); // Disconnect noise from master output
  ambientSoundNoise.connect(ambientFilter); // Connect noise to filter
  ambientFilter.connect(); // Connect filter to master output (default)

  // --- Procedural Jumpscare Sound ---
  jumpscareNoise = new p5.Noise('white');
  jumpscareNoise.amp(0); // Start silent
  jumpscareNoise.start(); // Start the noise

  // Fast frequency sweep oscillator (sawtooth) for a screech
  jumpscareOsc = new p5.Oscillator('sawtooth'); // Sawtooth for a harsh sound
  jumpscareOsc.freq(1); // Start at 1 Hz (not 0 to avoid exponential ramp error)
  jumpscareOsc.amp(0); // Start silent
  jumpscareOsc.start(); // Start the oscillator

  // Envelope for the jumpscare noise burst
  jumpscareEnvelope = new p5.Envelope();
  jumpscareEnvelope.setADSR(0.01, 0.2, 0.0, 0.5); // Fast attack, short decay, NO sustain, short release
  jumpscareEnvelope.setRange(1.0, 0); // Full volume to silent

  // Connect jumpscare noise to master output via its envelope
  jumpscareNoise.amp(jumpscareEnvelope);

  // --- Procedural Footstep Sound (re-added for top-down) ---
  footstepOsc = new p5.Oscillator('sine');
  footstepOsc.amp(0); // Start silent
  footstepOsc.start();
  footstepEnvelope = new p5.Envelope();
  footstepEnvelope.setADSR(0.01, 0.1, 0, 0.1); // Quick attack, decay, no sustain, quick release
  footstepOsc.amp(footstepEnvelope);

  // --- Procedural Collect Sound ---
  collectOsc = new p5.Oscillator('triangle');
  collectOsc.amp(0); // Start silent
  collectOsc.start();
  collectEnvelope = new p5.Envelope();
  collectEnvelope.setADSR(0.01, 0.05, 0, 0.2); // Very fast, short chime
  collectOsc.amp(collectEnvelope);

  // --- Procedural Boombox Echo Music ---
  boombox = {
    osc: new p5.Oscillator('triangle'), // A triangle wave for a melodic, slightly harsh sound
    delay: new p5.Delay(),
    nearbyThreshold: 100, // Distance to start hearing boombox music
    fadeZone: 50 // Distance over which to fade out
  };
  boombox.osc.freq(220); // A4 note
  boombox.osc.amp(0); // Start silent
  boombox.osc.start();
  boombox.osc.disconnect(); // Disconnect from master output

  boombox.delay.process(boombox.osc, 0.5, 0.7, 2300); // 0.5 seconds delay, 70% feedback, 2300 Hz low-pass filter
  boombox.delay.amp(0); // Start silent
  // Delay will automatically connect to master output unless otherwise specified

  // --- Procedural Loading Sound ---
  loadingSoundOsc = new p5.Oscillator('sine');
  loadingSoundOsc.freq(100); // Low frequency
  loadingSoundOsc.amp(0); // Start silent
  loadingSoundOsc.start();
  loadingSoundEnv = new p5.Envelope();
  loadingSoundEnv.setADSR(0.1, 0.5, 0, 0.5); // Slow attack, medium decay, no sustain, medium release
  loadingSoundEnv.setRange(0.5, 0); // Max volume 0.5
  loadingSoundOsc.amp(loadingSoundEnv);
}
Line-by-line explanation (17 lines)

🔧 Subcomponents:

initialization Ambient Sound Chain ambientSoundOsc = new p5.Oscillator('sine'); ... ambientFilter.connect();

Creates a low-frequency drone (sine oscillator) and adds white noise through a low-pass filter to build atmospheric horror tension

initialization Jumpscare Audio Setup jumpscareNoise = new p5.Noise('white'); ... jumpscareNoise.amp(jumpscareEnvelope);

Configures white noise and a sawtooth oscillator with an ADSR envelope to create the ear-piercing screech that plays when a monster catches you

initialization Sound Effects (Footsteps, Collect, Music) footstepOsc = new p5.Oscillator('sine'); ... loadingSoundOsc.amp(loadingSoundEnv);

Sets up oscillators and envelopes for footstep feedback, key collection chime, boombox echo music, and loading screen drone

ambientSoundOsc = new p5.Oscillator('sine');
Creates a sine wave oscillator that will produce a low, atmospheric drone sound. Sine waves are smooth and pure-sounding, perfect for ambient horror tones.
ambientSoundOsc.freq(50);
Sets the oscillator's frequency to 50 Hz—very low, below most human speech, creating a felt rumble rather than a heard pitch.
ambientSoundOsc.amp(0);
Starts the oscillator silent (amplitude 0); we'll fade it in later when the game starts.
ambientSoundOsc.start();
Begins the oscillator running, but it produces no audible sound yet because amplitude is 0. This must happen before we can control it with amp().
ambientSoundNoise = new p5.Noise('white');
Creates white noise (all frequencies at equal intensity), which sounds like static and adds texture to the ambient soundscape.
ambientFilter = new p5.Filter('lowpass');
Creates a low-pass filter that will let only low frequencies through the noise, softening the harsh static into a whoosh.
ambientFilter.freq(500);
Sets the filter cutoff to 500 Hz—frequencies above 500 Hz are attenuated, leaving only the deep rumbling part of the noise.
ambientSoundNoise.disconnect();
Disconnects the noise from the default audio output chain so we can route it through our filter instead.
ambientSoundNoise.connect(ambientFilter);
Plugs the noise into the filter's input, so the filter processes it before it reaches speakers.
ambientFilter.connect();
Connects the filter's output to the master audio output (speakers), completing the audio chain: noise → filter → speakers.
jumpscareOsc = new p5.Oscillator('sawtooth');
Creates a sawtooth wave oscillator for the jumpscare screech. Sawtooth waves are harsh and rich with high-frequency harmonics, perfect for terrifying sounds.
jumpscareOsc.freq(1);
Starts at 1 Hz (a very low, barely audible frequency) so we can sweep it upward when the jumpscare happens without triggering Web Audio errors.
jumpscareEnvelope = new p5.Envelope();
Creates an ADSR (Attack, Decay, Sustain, Release) envelope object that will shape the jumpscare sound—controlling how it fades in, decays, and fades out.
jumpscareEnvelope.setADSR(0.01, 0.2, 0.0, 0.5);
Sets the envelope timing: 0.01s attack (snappy start), 0.2s decay (quick drop), 0.0s sustain (no held level), 0.5s release (long fade out), making a sharp, shocking spike.
jumpscareNoise.amp(jumpscareEnvelope);
Links the noise's amplitude directly to the envelope, so when the envelope plays, it controls the noise's volume automatically.
boombox.delay.process(boombox.osc, 0.5, 0.7, 2300);
Connects the boombox oscillator to a delay effect: 0.5s delay time (echo repeats after half a second), 0.7 feedback (echoes decay slowly), 2300 Hz filter (keeps echoes from getting too harsh).
loadingSoundOsc.amp(loadingSoundEnv);
Links the loading sound oscillator to its envelope, so the envelope controls its volume when played.

setup()

setup() runs once at the start of the sketch, right after preload(). Use it to initialize your game world—define rooms, spawn objects, set up UI, and configure event listeners. Notice how rooms are stored in a named object (like a dictionary) so we can refer to them by name throughout the code. This multi-room approach is fundamental to building larger games: instead of one massive canvas, you divide it into logical zones, each with its own color and rules.

function setup() {
  createCanvas(windowWidth, windowHeight);
  noStroke();
  textAlign(CENTER, CENTER);

  // Define rooms (x, y, width, height) relative to the entire game world
  // Main Room (safe zone) is at y=0, floors 0-4 are laid out horizontally below it.
  rooms = {
    mainRoom: { x: 0, y: 0, w: 600, h: 400, color: '#333333', floor: -1 }, // Safe Zone
    floor0: { x: 0, y: 400, w: 800, h: 600, color: '#554444', floor: 0 },
    floor1: { x: 800, y: 400, w: 800, h: 600, color: '#445544', floor: 1 },
    floor2: { x: 1600, y: 400, w: 800, h: 600, color: '#665555', floor: 2 },
    floor3: { x: 2400, y: 400, w: 800, h: 600, color: '#556655', floor: 3 },
    floor4: { x: 3200, y: 400, w: 800, h: 600, color: '#776666', floor: 4 }
  };

  // Initialize player in the safe zone (main room) with fixed dimensions
  player = {
    x: rooms.mainRoom.x + 100,
    y: rooms.mainRoom.y + 100, // Spawn in main room, not just on floor
    w: 30, // Fixed width for procedural player
    h: 30, // Fixed height for procedural player (top-down, square is fine)
    vx: 0,
    vy: 0,
    isMoving: false, // Replaced onGround
    isRunning: false // New: Player running state
  };

  // Set boombox position in the main room
  boombox.x = rooms.mainRoom.x + rooms.mainRoom.w / 2;
  boombox.y = rooms.mainRoom.y + rooms.mainRoom.h / 2;
  boombox.w = 80;
  boombox.h = 60;

  // Define staircases (x, y, w, h, targetRoom, targetPlayerX, targetPlayerY)
  // Coordinates are relative to the entire game world
  staircases = [
    // Main Room <-> Floor 0 (vertical connection)
    { x: rooms.mainRoom.x + 200, y: rooms.mainRoom.y + rooms.mainRoom.h - 50, w: 200, h: 50, targetRoom: "floor0", targetPlayerX: rooms.floor0.x + 300, targetPlayerY: rooms.floor0.y + 50 },
    { x: rooms.floor0.x + 300, y: rooms.floor0.y, w: 200, h: 50, targetRoom: "mainRoom", targetPlayerX: rooms.mainRoom.x + 300, targetPlayerY: rooms.mainRoom.y + rooms.mainRoom.h - player.h },

    // Floor 0 <-> Floor 1 (horizontal connection)
    { x: rooms.floor0.x + rooms.floor0.w - 50, y: rooms.floor0.y + 200, w: 50, h: 200, targetRoom: "floor1", targetPlayerX: rooms.floor1.x + 50, targetPlayerY: rooms.floor1.y + 300 },
    { x: rooms.floor1.x, y: rooms.floor1.y + 200, w: 50, h: 200, targetRoom: "floor0", targetPlayerX: rooms.floor0.x + rooms.floor0.w - 50, targetPlayerY: rooms.floor0.y + 300 },

    // Floor 1 <-> Floor 2 (horizontal connection)
    { x: rooms.floor1.x + rooms.floor1.w - 50, y: rooms.floor1.y + 200, w: 50, h: 200, targetRoom: "floor2", targetPlayerX: rooms.floor2.x + 50, targetPlayerY: rooms.floor2.y + 300 },
    { x: rooms.floor2.x, y: rooms.floor2.y + 200, w: 50, h: 200, targetRoom: "floor1", targetPlayerX: rooms.floor1.x + rooms.floor1.w - 50, targetPlayerY: rooms.floor1.y + 300 },

    // Floor 2 <-> Floor 3 (horizontal connection)
    { x: rooms.floor2.x + rooms.floor2.w - 50, y: rooms.floor2.y + 200, w: 50, h: 200, targetRoom: "floor3", targetPlayerX: rooms.floor3.x + 50, targetPlayerY: rooms.floor3.y + 300 },
    { x: rooms.floor3.x, y: rooms.floor3.y + 200, w: 50, h: 200, targetRoom: "floor2", targetPlayerX: rooms.floor2.x + rooms.floor2.w - 50, targetPlayerY: rooms.floor2.y + 300 },

    // Floor 3 <-> Floor 4 (horizontal connection)
    { x: rooms.floor3.x + rooms.floor3.w - 50, y: rooms.floor3.y + 200, w: 50, h: 200, targetRoom: "floor4", targetPlayerX: rooms.floor4.x + 50, targetPlayerY: rooms.floor4.y + 300 },
    { x: rooms.floor4.x, y: rooms.floor4.y + 200, w: 50, h: 200, targetRoom: "floor3", targetPlayerX: rooms.floor3.x + rooms.floor3.w - 50, targetPlayerY: rooms.floor3.y + 300 },
  ];


  // Initialize joystick (position, radius)
  joystick = {
    baseX: width * 0.2, // Left side
    baseY: height * 0.8,
    radius: 60,
    knobX: width * 0.2,
    knobY: height * 0.8,
    active: false,
    touchId: -1, // New: Track which touch initiated the joystick
    maxX: width * 0.4 // Max x for joystick interaction on mobile
  };

  // New: Initialize run button
  runButton = {
    x: width * 0.8, // Right side
    y: height * 0.8,
    w: 80,
    h: 80,
    active: false,
    touchId: -1 // New: Track which touch initiated the run button
  };

  // Spawn monsters (up to MAX_MONSTERS)
  for (let i = 0; i < MAX_MONSTERS; i++) {
    spawnMonster();
  }

  // Spawn collectibles
  spawnCollectibles();

  // Add event listener for device orientation
  if (typeof DeviceOrientationEvent !== 'undefined' && typeof DeviceOrientationEvent.requestPermission === 'function') {
    // Permission will be requested in touchStarted()
  } else {
    // Device does not support DeviceOrientationEvent.requestPermission or is desktop.
    // Proceed without head tracking, but still add the listener for data.
    window.addEventListener('deviceorientation', handleDeviceOrientation);
    deviceOrientationGranted = true; // Assume granted for non-iOS devices or desktop
  }

  // Set initial game state to loading
  gameState = "loading";
  loadingTimer = 0;
}
Line-by-line explanation (21 lines)

🔧 Subcomponents:

initialization Canvas and Text Settings createCanvas(windowWidth, windowHeight); ... textAlign(CENTER, CENTER);

Creates a full-screen canvas and configures text to be centered for UI elements

initialization Multi-Room World Layout rooms = { mainRoom: { x: 0, y: 0, w: 600, h: 400, color: '#333333', floor: -1 }, ... };

Defines six interconnected rooms by their world coordinates, sizes, and procedural colors, establishing the game's spatial structure

initialization Player Object player = { x: rooms.mainRoom.x + 100, y: rooms.mainRoom.y + 100, ... };

Creates the player object with position, dimensions, velocity, and state flags (moving, running)

initialization Staircase Network staircases = [ { x: rooms.mainRoom.x + 200, y: rooms.mainRoom.y + ... }, ... ];

Defines bidirectional connections between rooms, allowing the player and monsters to transition between floors

initialization UI Controls (Joystick and Run Button) joystick = { baseX: width * 0.2, ... }; ... runButton = { x: width * 0.8, ... };

Creates the touch joystick (left side) and run button (right side) with position and state tracking

for-loop Monster Spawning Loop for (let i = 0; i < MAX_MONSTERS; i++) { spawnMonster(); }

Populates the game world with the maximum number of monsters across random floor rooms

createCanvas(windowWidth, windowHeight);
Creates a canvas that fills the entire browser window. This will be the drawing surface for all game graphics.
noStroke();
Disables outlines on all shapes drawn after this line, giving the procedural graphics a cleaner look.
textAlign(CENTER, CENTER);
Centers all text both horizontally and vertically around the position specified when text() is called—useful for UI labels and jumpscare text.
rooms = {
Creates an object to store all room definitions. Each room knows its position (x, y), size (w, h), color, and which floor it's on (floor: -1 for safe zone, 0–4 for the actual levels).
mainRoom: { x: 0, y: 0, w: 600, h: 400, color: '#333333', floor: -1 },
Defines the safe main room at world position (0, 0) with size 600×400 pixels. This is the starting location and refuge from monsters.
floor0: { x: 0, y: 400, w: 800, h: 600, color: '#554444', floor: 0 },
Defines Floor 0 starting at y=400 (directly below the main room) with a brownish procedural color. Each floor is larger (800×600) to give room for monsters and exploration.
player = {
Creates the player object with all properties: position (x, y), dimensions (w, h), velocity (vx, vy), and state flags (isMoving, isRunning).
x: rooms.mainRoom.x + 100,
Sets the player's starting X position 100 pixels to the right of the main room's left edge, placing them near the entrance to the floors.
w: 30, // Fixed width for procedural player
The player's width and height are both 30 pixels—small enough to fit through corridors but large enough to see clearly.
vx: 0, vy: 0,
Velocity components start at zero—the player is stationary until the joystick or keyboard input changes these values.
isRunning: false // New: Player running state
A boolean flag that tracks whether the player is sprinting. When true, player movement uses PLAYER_RUN_SPEED instead of PLAYER_SPEED.
boombox.x = rooms.mainRoom.x + rooms.mainRoom.w / 2;
Places the boombox (an audio-emitting decoration) at the horizontal center of the main room.
staircases = [
Creates an array of staircase objects. Each staircase is a rectangular trigger zone that teleports the player to another room when touched.
{ x: rooms.mainRoom.x + 200, y: rooms.mainRoom.y + rooms.mainRoom.h - 50, w: 200, h: 50, targetRoom: "floor0", targetPlayerX: rooms.floor0.x + 300, targetPlayerY: rooms.floor0.y + 50 },
Defines a staircase at the bottom of the main room (y + height - 50, the last 50 pixels). When the player touches this 200×50 zone, they're teleported to floor0 at the specified target coordinates.
joystick = {
Creates the mobile joystick object with base position (where the circle is drawn), radius (how far you can drag), and current knob position (updated by touch movement).
baseX: width * 0.2, // Left side
Places the joystick base 20% from the left edge of the screen, positioning it on the left side for your thumb to reach.
active: false, touchId: -1,
The joystick starts inactive (not being touched). When a touch begins, touchId stores the unique identifier of that touch so we can track it through touchMoved and touchEnded.
runButton = { x: width * 0.8, y: height * 0.8, w: 80, h: 80, active: false, touchId: -1 };
Creates the run button on the right side (80% from left) at the same height as the joystick, with similar touch tracking as the joystick.
for (let i = 0; i < MAX_MONSTERS; i++) { spawnMonster(); }
Loops 5 times (MAX_MONSTERS = 5), calling spawnMonster() each time to create 5 monsters distributed randomly across the floor rooms.
if (typeof DeviceOrientationEvent !== 'undefined' && typeof DeviceOrientationEvent.requestPermission === 'function') {
Checks if the browser supports the device orientation API (iOS requires explicit permission). On Android and desktop, the API is available without requesting permission.
gameState = "loading"; loadingTimer = 0;
Initializes the game to show the loading screen first. The loading timer counts up until loadingScreenDuration (180 frames ≈ 3 seconds) is reached, then transitions to the start screen.

draw()

draw() is the core animation loop, called ~60 times per second. It's divided into three conceptual phases: (1) Game state routing—check which phase (loading, start, game, jumpscare) we're in and bail out early if not in the main game; (2) Update logic—call functions that modify positions and check collisions; (3) Rendering—draw everything in world space (inside push/pop with translate) and then screen space (fixed UI). This separation is crucial: update first, render after, repeat. Never render during updates or you'll see inconsistent state.

🔬 These three lines are the heartbeat of the game—they update state before rendering. What happens if you comment out updateMonsters() (add // before it)? The monsters will freeze in place. What if you comment out updateCamera()? The camera stays locked at the top-left. Try commenting out updatePlayer()—the player gets stuck but the world still updates around them. What does each update do for the game feel?

  updatePlayer();
  updateMonsters();
  updateCamera();
function draw() {
  background(0); // Dark background for horror theme

  if (gameState === "loading") {
    drawLoadingScreen();
    return;
  }

  if (gameState === "startScreen") {
    drawStartScreen();
    return;
  }

  if (gameState === "jumpscare") {
    drawJumpscare();
    return; // Stop game logic during jumpscare
  }

  // Main game loop (gameState === "game")
  // --- Update Game State ---
  updatePlayer();
  updateMonsters();
  updateCamera();

  // --- Render Game World (with camera translation) ---
  push();
  translate(-cameraX, -cameraY); // Apply camera offset for top-down

  // Draw rooms (procedural colors)
  drawRooms();

  // Draw staircases (procedural)
  drawStaircases();

  // Draw Boombox (only if in mainRoom)
  if (currentRoom === "mainRoom") {
    drawBoombox(boombox.x, boombox.y, boombox.w, boombox.h);
  }

  // Draw player (procedural)
  drawPlayer();

  // Draw monsters (procedural)
  drawMonsters();

  // Draw collectibles (keys)
  drawCollectibles();

  pop(); // End camera translation

  // --- Render UI (always on top of camera) ---
  drawJoystick();
  drawMonsterTracker();
  drawInventory(); // Draw player's inventory
  drawVRToggleButton(); // Draw the VR toggle button
  drawRunButton(); // New: Draw the run button
}
Line-by-line explanation (20 lines)

🔧 Subcomponents:

switch-case Game State Router if (gameState === "loading") { ... } else if (gameState === "startScreen") { ... } else if (gameState === "jumpscare") { ... }

Directs the draw loop to different rendering functions based on which phase the game is in, ensuring only relevant visuals and logic execute per frame

calculation Game Logic Updates updatePlayer(); updateMonsters(); updateCamera();

Calls the three main update functions that modify game state (movement, collision, pursuit) before rendering anything

calculation World Rendering with Camera Translation push(); translate(-cameraX, -cameraY); ... pop();

Groups all world-space drawing (rooms, monsters, player) within a camera translation, so the viewport follows the player smoothly

calculation Screen-Space UI drawJoystick(); drawMonsterTracker(); drawInventory(); drawVRToggleButton(); drawRunButton();

Draws UI elements that stay fixed on screen (not affected by camera), like buttons and status indicators

background(0);
Clears the canvas with black every frame. This erases the previous frame so you don't see motion trails—essential for crisp animation.
if (gameState === "loading") { drawLoadingScreen(); return; }
If the game is loading, draw the loading screen and skip all other logic for this frame. The 'return' exits the draw function immediately.
if (gameState === "startScreen") { drawStartScreen(); return; }
Similarly, if waiting for the player to touch to start, show the start screen and skip the game loop.
if (gameState === "jumpscare") { drawJumpscare(); return; }
When a jumpscare is active, switch to jumpscare rendering and halt normal game updates so the monster animation dominates the screen.
updatePlayer();
Calls the function that reads input (joystick/keyboard), moves the player, checks for collisions, plays footstep sounds, and detects room transitions.
updateMonsters();
Calls the function that updates each monster's position, checks if they should chase the player, handles their room transitions, and detects collisions with the player.
updateCamera();
Adjusts the camera position to follow the player (and optionally apply device orientation head-tracking offsets), then clamps the camera to the world boundaries.
push();
Saves the current graphics state (transformations, colors, etc.) so that the upcoming translate() doesn't affect UI drawn after pop().
translate(-cameraX, -cameraY);
Shifts the coordinate system by the negative camera offset. This makes world objects appear to move under a fixed camera, simulating the viewport following the player.
drawRooms();
Draws all room backgrounds (with their procedural colors) at their world positions. The translate() makes them appear in the right place relative to the camera.
drawStaircases();
Draws all staircase rectangles and labels them with target floor names, only rendering ones that are visible on screen.
if (currentRoom === "mainRoom") { drawBoombox(boombox.x, boombox.y, boombox.w, boombox.h); }
Draws the boombox decoration only if the player is in the main room, reducing clutter and focusing attention on exploration.
drawPlayer();
Draws the procedural player character (a red face with eyes and mouth) at its current position.
drawMonsters();
Iterates through all monsters and draws only those in the current room, making their procedural green forms visible.
drawCollectibles();
Draws all keys that are in the current room as golden procedural shapes, allowing the player to collect them.
pop();
Restores the graphics state, undoing the translate() so the following UI elements draw in screen space (fixed position, not affected by camera).
drawJoystick();
Draws the joystick UI (base circle and knob) in a fixed screen position (lower left), letting the player see their input immediately.
drawMonsterTracker();
Draws an arrow pointing toward the nearest monster if one is in the current room, giving the player constant awareness of danger.
drawVRToggleButton();
Draws a button in the upper left that toggles head-tracking (VR mode) on/off, showing its current state with color.
drawRunButton();
Draws the sprint button (lower right) with a label that changes color based on whether the player is currently running.

updatePlayer()

updatePlayer() is where player-centric game logic happens: movement, collision detection (with items and staircases), audio feedback, and physics. The function checks collision with each item backward through the array (so removal doesn't skip items), teleports the player through staircases with a cooldown, and maintains boundary constraints. The proximity-based boombox audio is a nice example of continuous gameplay audio design—instead of playing a sound once, it modulates its amplitude based on distance, creating dynamic atmosphere.

🔬 These two lines apply movement each frame. The player's velocity (vx, vy) is between -1 and 1 (from the joystick), and currentSpeed is either 3 (walking) or 5 (running). What if you changed currentSpeed to 1 for very slow sneaking motion? What if you multiplied by 10 for super-fast sprinting? How does speed change the horror feel—slower is scarier because you're trapped?

  // Apply movement from joystick
  player.x += player.vx * currentSpeed;
  player.y += player.vy * currentSpeed;
function updatePlayer() {
  let currentSpeed = player.isRunning ? PLAYER_RUN_SPEED : PLAYER_SPEED;

  // Apply movement from joystick
  player.x += player.vx * currentSpeed;
  player.y += player.vy * currentSpeed;

  // Check if player is moving
  player.isMoving = (abs(player.vx) > 0.1 || abs(player.vy) > 0.1);

  // --- Footstep Sounds ---
  if (player.isMoving) {
    footstepCounter++;
    if (footstepCounter >= FOOTSTEP_INTERVAL) {
      footstepOsc.freq(random(100, 150)); // Vary pitch slightly
      footstepEnvelope.play(footstepOsc);
      footstepCounter = 0;
    }
  } else {
    footstepCounter = 0; // Reset counter if not moving
  }

  // --- Collectible Items Collision ---
  for (let i = collectibles.length - 1; i >= 0; i--) {
    let item = collectibles[i];
    if (item.room === currentRoom && rectCollision(player.x, player.y, player.w, player.h, item.x, item.y, item.w, item.h)) {
      // Player grabbed an item!
      playerInventory.push(item);
      collectibles.splice(i, 1); // Remove item from game world
      collectOsc.freq(random(600, 800)); // Play collect sound
      collectEnvelope.play(collectOsc);
      console.log(`Grabbed a ${item.type}! Inventory:`, playerInventory);
      // You could add a UI message here
    }
  }

  // --- Handle Room Transitions (Staircases) ---
  // Only allow transition if cooldown is not active
  if (canTransition) {
    let hasTransitioned = false;
    for (let staircase of staircases) {
      if (rectCollision(player.x, player.y, player.w, player.h, staircase.x, staircase.y, staircase.w, staircase.h)) {
        // Transition to new room if the staircase leads to a different room
        if (currentRoom !== staircase.targetRoom) {
          currentRoom = staircase.targetRoom;
          player.x = staircase.targetPlayerX;
          player.y = staircase.targetPlayerY;
          player.vx = 0;
          player.vy = 0;
          player.isRunning = false; // Stop running after transition
          hasTransitioned = true;
          canTransition = false; // Disable transitions
          setTimeout(() => { canTransition = true; }, TRANSITION_COOLDOWN); // Re-enable after cooldown
          break; // Only transition once per frame
        }
      }
    }

    // If we transitioned rooms, skip further movement/clamping for this frame
    if (hasTransitioned) {
      return;
    }
  }

  // Clamp player position to current room boundaries
  let currentRoomData = rooms[currentRoom]; // Re-get current room data in case of transition
  player.x = constrain(player.x, currentRoomData.x, currentRoomData.x + currentRoomData.w - player.w);
  player.y = constrain(player.y, currentRoomData.y, currentRoomData.y + currentRoomData.h - player.h);

  // Stop movement if joystick is inactive
  if (!joystick.active) {
    player.vx = 0;
    player.vy = 0;
  }

  // --- Boombox Echo Music Control ---
  if (currentRoom === "mainRoom") {
    let d = dist(player.x, player.y, boombox.x, boombox.y);
    let targetAmp = 0;
    let targetDelayAmp = 0;

    if (d < boombox.nearbyThreshold) {
      // Player is nearby or entering fade zone
      targetAmp = map(d, boombox.nearbyThreshold - boombox.fadeZone, boombox.nearbyThreshold, 1, 0, true);
      targetDelayAmp = map(d, boombox.nearbyThreshold - boombox.fadeZone, boombox.nearbyThreshold, 1, 0, true);
    } else {
      // Player is far away
      targetAmp = 0;
      targetDelayAmp = 0;
    }

    // Reduced boombox music amplitude
    boombox.osc.amp(targetAmp * 0.2, 0.5); // Fade oscillator amp over 0.5 seconds
    boombox.delay.amp(targetDelayAmp * 0.3, 0.5); // Fade delay amp over 0.5 seconds
  } else {
    // Player is not in main room, silence boombox
    boombox.osc.amp(0, 0.5);
    boombox.delay.amp(0, 0.5);
  }
}
Line-by-line explanation (25 lines)

🔧 Subcomponents:

calculation Position Update let currentSpeed = player.isRunning ? PLAYER_RUN_SPEED : PLAYER_SPEED; ... player.x += player.vx * currentSpeed;

Reads the run state and applies the appropriate speed multiplier, then updates the player's x and y position each frame based on velocity

conditional Footstep Sound Loop if (player.isMoving) { footstepCounter++; if (footstepCounter >= FOOTSTEP_INTERVAL) { ... } }

Increments a counter each frame the player moves, and when the counter reaches the interval (every 25 frames), plays a varied footstep tone and resets

for-loop Item Collection Check for (let i = collectibles.length - 1; i >= 0; i--) { ... rectCollision(player.x, ..., item.x, ...) ... }

Loops backward through collectibles so removing items doesn't skip any, checks collision with player, and if hit, adds to inventory and plays collect sound

for-loop Room Transition Logic for (let staircase of staircases) { if (rectCollision(player.x, ..., staircase.x, ...)) { ... currentRoom = staircase.targetRoom; ... } }

Checks if the player is touching any staircase, and if so (and cooldown allows), teleports them to the target room

calculation Position Clamping player.x = constrain(player.x, currentRoomData.x, currentRoomData.x + currentRoomData.w - player.w);

Keeps the player within the room boundaries by clamping their position if they try to walk off the edge

conditional Proximity-Based Music Control if (currentRoom === "mainRoom") { let d = dist(...); ... boombox.osc.amp(targetAmp * 0.2, 0.5); }

Calculates distance from player to boombox and fades the echo music up/down based on proximity, creating dynamic audio atmosphere

let currentSpeed = player.isRunning ? PLAYER_RUN_SPEED : PLAYER_SPEED;
Uses a ternary operator: if isRunning is true, use PLAYER_RUN_SPEED (5); otherwise use PLAYER_SPEED (3). This one line determines whether the player glides or sprints.
player.x += player.vx * currentSpeed;
Moves the player horizontally by multiplying their velocity (vx, from joystick input) by the current speed. Each frame, this small increment creates smooth motion.
player.isMoving = (abs(player.vx) > 0.1 || abs(player.vy) > 0.1);
Sets isMoving to true if either velocity component is large enough (0.1 or more), accounting for floating-point precision by checking absolute values above a small threshold.
if (player.isMoving) { footstepCounter++; }
Only counts footstep frames when the player is actively moving. If they stop, the counter resets to prevent stuttering sounds.
if (footstepCounter >= FOOTSTEP_INTERVAL) {
Every FOOTSTEP_INTERVAL frames (25 frames ≈ 0.4 seconds), a footstep sound triggers. This interval controls the cadence of footsteps.
footstepOsc.freq(random(100, 150));
Sets the footstep pitch to a random frequency between 100 and 150 Hz each time one plays, making footsteps varied so they don't sound robotic.
for (let i = collectibles.length - 1; i >= 0; i--) {
Loops backward through the collectibles array (from last to first). This is important: when you remove an item with splice(i, 1), later indices don't shift, so you won't skip any.
if (item.room === currentRoom && rectCollision(...)) {
Only checks collision if the item is in the room the player is currently in, avoiding false collisions with items in other rooms.
playerInventory.push(item);
Adds the collected item object to the playerInventory array, storing it for display in the UI.
collectibles.splice(i, 1);
Removes the item from the collectibles array so it disappears from the world and can't be collected twice.
collectEnvelope.play(collectOsc);
Triggers the collection sound by playing the envelope, which controls the amplitude of the triangle-wave oscillator and creates a chime effect.
if (canTransition) {
Only allows room transitions if the cooldown flag is true. When a transition happens, canTransition is set to false for 500ms (TRANSITION_COOLDOWN) to prevent rapid re-triggering.
if (rectCollision(player.x, player.y, player.w, player.h, staircase.x, staircase.y, staircase.w, staircase.h)) {
Checks if the player's bounding box overlaps with this staircase's bounding box. If true, the player has stepped on the staircase.
if (currentRoom !== staircase.targetRoom) {
Only transitions if the staircase leads to a different room. This prevents wasting a transition on a staircase that leads nowhere (though each staircase pair is designed to connect two different rooms).
currentRoom = staircase.targetRoom;
Updates the global currentRoom variable to the target room, effectively moving the player to a new logical location in the game world.
player.x = staircase.targetPlayerX;
Teleports the player's position to the entry point of the new room. Without this, the player would appear at the staircase's world coordinates, which might be outside the new room's boundaries.
player.isRunning = false;
Stops the player from running after transitioning rooms, giving them a moment to reorient before sprinting again.
setTimeout(() => { canTransition = true; }, TRANSITION_COOLDOWN);
Uses JavaScript's setTimeout() to re-enable transitions after 500 milliseconds. This prevents the player from immediately transitioning back through the same staircase or triggering it multiple times per frame.
if (hasTransitioned) { return; }
Exits updatePlayer() early if a transition occurred, skipping boundary clamping and velocity checks. This prevents the player from being pushed out of the new room by clamping logic.
player.x = constrain(player.x, currentRoomData.x, currentRoomData.x + currentRoomData.w - player.w);
Clamps the player's x-position between the room's left edge and the room's right edge minus the player's width. This prevents the player from walking through walls.
if (!joystick.active) { player.vx = 0; player.vy = 0; }
If the joystick isn't being touched, zero out the velocity. This allows the player to stop moving instantly when they release the joystick.
let d = dist(player.x, player.y, boombox.x, boombox.y);
Calculates the Euclidean distance from the player to the boombox. This is used to determine how loud the echo music should be (proximity-based audio).
if (d < boombox.nearbyThreshold) {
If the player is within 100 pixels of the boombox, start fading the music in. The closer they get, the louder it gets.
targetAmp = map(d, boombox.nearbyThreshold - boombox.fadeZone, boombox.nearbyThreshold, 1, 0, true);
Maps the distance to an amplitude value between 0 and 1. At the far edge of the fade zone (150 pixels), amplitude is 1 (full). At the threshold (100 pixels), amplitude is 0 (silent). The 'true' clamps the result so it doesn't go below 0 or above 1.
boombox.osc.amp(targetAmp * 0.2, 0.5);
Sets the boombox oscillator's amplitude to targetAmp * 0.2 (reduced to 20% to avoid overpowering), fading over 0.5 seconds for smooth transitions.

updateMonsters()

updateMonsters() is a simple wrapper that calls update() on every monster in the array. The real logic is in the Monster class. Using a class-based approach (instead of procedural code) keeps the code organized: each monster knows its own state and how to update itself. This scales well—adding more monsters just means more iterations of this loop, and each monster's code remains self-contained.

function updateMonsters() {
  for (let monster of monsters) {
    monster.update();
  }
}
Line-by-line explanation (2 lines)
for (let monster of monsters) {
Iterates through the monsters array using a for-of loop, which is cleaner than a traditional for loop when you just need each element.
monster.update();
Calls the update() method on each Monster instance, which handles its movement, state logic (roaming vs. chasing), AI pathfinding, and collision detection with the player.

drawPlayer()

drawPlayer() shows how to build a complex character from simple shapes (ellipses and lines). By centering with translate() and scaling all dimensions relative to player.w and player.h, the character scales automatically with the player object's size without needing separate code—change player.w = 50 in setup() and the entire character grows proportionally. This procedural approach avoids sprite sheets entirely, making the character fully modifiable and scalable.

🔬 The eyes are drawn at positions with -player.w * 0.2 (left) and +player.w * 0.2 (right), making them symmetric. What if you changed both to -player.w * 0.3, so both eyes are on the left side of the head? What if you increased the eye size from player.w * 0.2 to player.w * 0.4? How does eye position and size affect how menacing or cute the character looks?

  // Eyes (white with red pupils)
  fill(255);
  ellipse(-player.w * 0.2, -player.h * 0.8, player.w * 0.2, player.h * 0.2);
  ellipse(player.w * 0.2, -player.h * 0.8, player.w * 0.2, player.h * 0.2);
function drawPlayer() {
  // Draw procedural player (a red rectangle)
  // More detailed procedural player model
  push();
  translate(player.x + player.w / 2, player.y + player.h / 2); // Center player for drawing

  // Body
  fill(200, 0, 0); // Dark red body
  ellipse(0, 0, player.w * 1.2, player.h * 1.5);

  // Head
  fill(150, 0, 0); // Even darker red head
  ellipse(0, -player.h * 0.7, player.w * 0.8, player.h * 0.8);

  // Eyes (white with red pupils)
  fill(255);
  ellipse(-player.w * 0.2, -player.h * 0.8, player.w * 0.2, player.h * 0.2);
  ellipse(player.w * 0.2, -player.h * 0.8, player.w * 0.2, player.h * 0.2);
  fill(255, 0, 0);
  ellipse(-player.w * 0.2, -player.h * 0.8, player.w * 0.1, player.h * 0.1);
  ellipse(player.w * 0.2, -player.h * 0.8, player.w * 0.1, player.h * 0.1);

  // Mouth
  stroke(255, 0, 0);
  strokeWeight(2);
  line(-player.w * 0.2, -player.h * 0.6, player.w * 0.2, -player.h * 0.6); // Simple line mouth
  noStroke();

  // Arms (simple lines)
  stroke(200, 0, 0);
  strokeWeight(4);
  line(-player.w * 0.6, -player.h * 0.3, -player.w * 0.2, 0);
  line(player.w * 0.6, -player.h * 0.3, player.w * 0.2, 0);
  noStroke();

  pop();
}
Line-by-line explanation (16 lines)

🔧 Subcomponents:

calculation Body and Head Shapes ellipse(0, 0, player.w * 1.2, player.h * 1.5); ... ellipse(0, -player.h * 0.7, player.w * 0.8, player.h * 0.8);

Draws the player's torso and head using ellipses scaled relative to the player's width and height, creating a simple character silhouette

calculation Eyes with Pupils ellipse(-player.w * 0.2, -player.h * 0.8, player.w * 0.2, player.h * 0.2); ... ellipse(-player.w * 0.2, -player.h * 0.8, player.w * 0.1, player.h * 0.1);

Draws white eye scleras and red pupils positioned symmetrically on the head, giving the character personality and a forward-facing direction

calculation Mouth and Arms line(-player.w * 0.2, -player.h * 0.6, player.w * 0.2, -player.h * 0.6); ... line(-player.w * 0.6, -player.h * 0.3, -player.w * 0.2, 0);

Adds a simple horizontal mouth and two angled arm lines, completing a minimalist character design that's instantly readable at a distance

push();
Saves the current graphics state (fill color, stroke, transformation matrix) so the translate() in the next line doesn't affect other drawings after pop().
translate(player.x + player.w / 2, player.y + player.h / 2);
Shifts the coordinate system to the center of the player, so all shapes are drawn relative to the center. This makes the character face upward by default (head at top, body below).
fill(200, 0, 0); // Dark red body
Sets the fill color to a dark red (R=200, G=0, B=0). This red hue gives the player an eerie or ape-like appearance.
ellipse(0, 0, player.w * 1.2, player.h * 1.5);
Draws the body as an ellipse centered at (0, 0) (the player's center). It's 1.2× the player width and 1.5× the player height, making it slightly larger and taller than a circle.
fill(150, 0, 0); // Even darker red head
Darkens the red (R=150) so the head is visually distinct from the body and looks like a separate feature.
ellipse(0, -player.h * 0.7, player.w * 0.8, player.h * 0.8);
Draws the head above the body (at y = -player.h * 0.7, which is negative, moving up). It's smaller than the body (0.8× dimensions) and positioned as a circle.
fill(255);
Switches fill to white, preparing to draw the white scleras (whites of the eyes).
ellipse(-player.w * 0.2, -player.h * 0.8, player.w * 0.2, player.h * 0.2);
Draws the left eye white at (-player.w * 0.2, -player.h * 0.8), which is to the left and above the center, on the head.
fill(255, 0, 0);
Switches back to red for the pupils, making them stand out and look bloodshot or menacing.
ellipse(-player.w * 0.2, -player.h * 0.8, player.w * 0.1, player.h * 0.1);
Draws a red pupil inside the white eye sclera (same position, but smaller), giving the eye depth and life.
stroke(255, 0, 0);
Switches to stroke mode (outline) in red, preparing to draw the mouth and arms as lines instead of filled shapes.
strokeWeight(2);
Sets the line thickness to 2 pixels for the mouth—a thin, delicate line.
line(-player.w * 0.2, -player.h * 0.6, player.w * 0.2, -player.h * 0.6);
Draws a horizontal line across the face for the mouth, slightly below the eyes, at the same y-position for both endpoints (making it perfectly horizontal).
strokeWeight(4);
Increases line thickness to 4 pixels for the arms, making them more prominent and visible than the mouth.
line(-player.w * 0.6, -player.h * 0.3, -player.w * 0.2, 0);
Draws the left arm as a diagonal line from the upper-left shoulder (-player.w * 0.6, -player.h * 0.3) down to the lower-left side of the body.
pop();
Restores the graphics state, undoing the translate() so that subsequent drawings are in the original coordinate system.

updateCamera()

updateCamera() handles two distinct features: (1) A smoothed follow camera that keeps the player centered on screen, and (2) optional VR head-tracking that applies device orientation data as camera offsets. The smoothing using lerp() is crucial for gameplay feel—an instant snap camera is disorienting, while a smooth lag feels cinematic. The dead-zone prevents jitter when the device is still, and clamping prevents the viewport from showing empty space beyond the world bounds.

🔬 These two lines center the player on screen by subtracting half the screen dimensions. What if you subtracted width / 3 instead of width / 2 on the first line? The player would be off-center, closer to the left edge. Try different fractions (1/4, 2/5, 3/4) to see how camera positioning affects the player's sense of the world—off-center cameras can feel tense or focused.

  targetCameraX = player.x - width / 2;
  targetCameraY = player.y - height / 2;
function updateCamera() {
  // Calculate base camera position centered on player
  targetCameraX = player.x - width / 2;
  targetCameraY = player.y - height / 2; // New: Y camera target

  // Apply device orientation (gamma for X, beta for Y) to offset camera horizontally ONLY if VR mode is active
  if (vrMode && deviceOrientationGranted) {
    let gammaOffset = 0;
    if (abs(deviceGamma) > GAMMA_DEAD_ZONE) {
      gammaOffset = map(deviceGamma, -90, 90, -GAMMA_SENSITIVITY * width, GAMMA_SENSITIVITY * width);
    }
    targetCameraX += gammaOffset;

    let betaOffset = 0; // New: Beta offset
    if (abs(deviceBeta) > BETA_DEAD_ZONE) {
      betaOffset = map(deviceBeta, -180, 180, -BETA_SENSITIVITY * height, BETA_SENSITIVITY * height);
    }
    targetCameraY += betaOffset;
  }

  // Determine total game world width and height for clamping
  let minWorldX = rooms.mainRoom.x;
  let maxWorldX = rooms.floor4.x + rooms.floor4.w; // Max X is right edge of floor 4
  let minWorldY = rooms.mainRoom.y;
  let maxWorldY = rooms.floor4.y + rooms.floor4.h; // Max Y is bottom edge of floor 4

  // Clamp the target camera position to the total game world boundaries
  targetCameraX = constrain(targetCameraX, minWorldX, maxWorldX - width);
  targetCameraY = constrain(targetCameraY, minWorldY, maxWorldY - height);

  // Smoothly interpolate the camera to the target position
  smoothedCameraX = lerp(smoothedCameraX, targetCameraX, 0.1); // Adjust 0.1 for desired smoothing
  smoothedCameraY = lerp(smoothedCameraY, targetCameraY, 0.1); // New: Smooth Y camera
  cameraX = smoothedCameraX;
  cameraY = smoothedCameraY;
}
Line-by-line explanation (11 lines)

🔧 Subcomponents:

calculation Camera Position Calculation targetCameraX = player.x - width / 2; targetCameraY = player.y - height / 2;

Calculates where the camera should be to center the player on screen (camera follows the player as the focal point)

conditional Device Orientation Head-Tracking if (vrMode && deviceOrientationGranted) { ... gammaOffset = map(deviceGamma, ...); ... targetCameraX += gammaOffset; }

If VR mode is enabled and permission is granted, applies the device's gamma (left-right tilt) and beta (forward-back tilt) as camera offsets, creating a head-tracking effect

calculation Boundary Clamping targetCameraX = constrain(targetCameraX, minWorldX, maxWorldX - width);

Prevents the camera from panning beyond the game world edges, ensuring the viewport stays within the total map bounds

calculation Camera Smoothing smoothedCameraX = lerp(smoothedCameraX, targetCameraX, 0.1);

Interpolates the camera position smoothly toward the target using lerp(), avoiding instant jumps and creating fluid, natural camera movement

targetCameraX = player.x - width / 2;
Calculates the camera's target X position so the player is centered horizontally on screen. The player's position minus half the screen width puts the player at the center.
targetCameraY = player.y - height / 2;
Similarly, calculates the target Y position so the player is centered vertically on screen.
if (vrMode && deviceOrientationGranted) {
Only applies head-tracking if VR mode is toggled ON and the device has given permission to access orientation data.
if (abs(deviceGamma) > GAMMA_DEAD_ZONE) {
Checks if the device's left-right tilt (gamma) is large enough to matter, ignoring tiny jitters below 3 degrees. This prevents the camera from drifting when the device is held still.
gammaOffset = map(deviceGamma, -90, 90, -GAMMA_SENSITIVITY * width, GAMMA_SENSITIVITY * width);
Maps the device's gamma angle (-90 to 90 degrees: left to right) to a camera offset in pixels. Tilting left maps to negative (moves camera left), tilting right maps to positive (moves camera right). The multiplier (GAMMA_SENSITIVITY) controls how sensitive the effect is.
targetCameraX += gammaOffset;
Adds the head-tracking offset to the target camera position, so tilting your head left shifts what you see to the left, simulating a first-person look-around.
let minWorldX = rooms.mainRoom.x;
Determines the leftmost edge of the game world (x=0 where the main room starts). The camera can't pan further left than this.
let maxWorldX = rooms.floor4.x + rooms.floor4.w;
Determines the rightmost edge of the game world (the right edge of floor 4). The camera can't pan further right than this.
targetCameraX = constrain(targetCameraX, minWorldX, maxWorldX - width);
Clamps the target camera X between the world's left edge (minWorldX) and a right edge that accounts for the screen width (maxWorldX - width ensures the right edge of the screen doesn't go past the world's right edge).
smoothedCameraX = lerp(smoothedCameraX, targetCameraX, 0.1);
Uses linear interpolation (lerp) to smoothly move the camera from its current position toward the target. The 0.1 factor (10%) means the camera moves 10% of the distance toward the target each frame, creating lag and smoothness.
cameraX = smoothedCameraX;
Copies the smoothed camera position to the global cameraX variable, which is used in the translate() call in draw() to shift the world view.

triggerJumpscare()

triggerJumpscare() is where the terror happens. It immediately stops all ambient audio (creating silence before the scream), activates a multi-phase animation, and triggers a carefully orchestrated procedural screech using Web Audio frequency and amplitude scheduling. The screech is created by chaining freq() and amp() calls with specific timestamps, so the oscillator knows to sweep at precise moments relative to the current playback time. This is professional audio design: rather than playing a pre-recorded sound, the game synthesizes the jumpscare sound in real time, making it unique and algorithmically terrifying.

function triggerJumpscare() {
  if (jumpscare.isActive) return;

  jumpscare.isActive = true;
  jumpscare.timer = jumpscare.duration;
  jumpscare.animationFrame = 0;
  jumpscare.phase = "monster"; // Start with monster phase
  gameState = "jumpscare"; // Set game state to jumpscare

  // Silence ambient sounds and boombox music
  ambientSoundOsc.amp(0, 0.1); // Fade out drone quickly
  ambientSoundNoise.amp(0, 0.1); // Fade out hiss quickly
  boombox.osc.amp(0, 0.1); // Silence boombox
  boombox.delay.amp(0, 0.1); // Silence boombox delay

  // Play procedural jumpscare noise burst controlled by envelope
  jumpscareEnvelope.play(jumpscareNoise);

  let currentTime = getAudioContext().currentTime; // Get current Web Audio time

  // Fast frequency sweep oscillator (sawtooth) for a screech
  if (isFinite(2000) && isFinite(0.2) && isFinite(500) && isFinite(0.5) && isFinite(0.8) && isFinite(0.05)) {
      jumpscareOsc.amp(0.8, 0.05, currentTime); // Fade in screech quickly from currentTime
      jumpscareOsc.freq(2000, 0.2, currentTime); // Sweep screech to 2000 Hz from currentTime
      jumpscareOsc.freq(500, 0.5, currentTime + 0.2); // Sweep screech down to 500 Hz after 0.2 seconds
      jumpscareOsc.amp(0, 0.5, currentTime + 0.2); // Fade out screech after 0.2 seconds
      jumpscareOsc.amp(0, 0.1, currentTime + 0.2 + 0.5); // Ensure it's off after the fade-out
  } else {
      console.error("Jumpscare Oscillator parameters are not finite. Skipping screech effect.");
      jumpscareOsc.amp(0);
  }
}
Line-by-line explanation (12 lines)

🔧 Subcomponents:

initialization Jumpscare State Setup jumpscare.isActive = true; ... jumpscare.phase = "monster"; gameState = "jumpscare";

Activates the jumpscare sequence and sets the game state to jumpscare mode, which tells the draw loop to show the jumpscare instead of normal gameplay

calculation Ambient Audio Fade-Out ambientSoundOsc.amp(0, 0.1); ... boombox.delay.amp(0, 0.1);

Quickly silences all ambient and background music (oscillators and delay effects) over 0.1 seconds, making space for the terrifying jumpscare sounds

calculation Procedural Screech Synthesis jumpscareOsc.amp(0.8, 0.05, currentTime); ... jumpscareOsc.freq(500, 0.5, currentTime + 0.2);

Programs a series of frequency and amplitude changes to the sawtooth oscillator, creating an ear-piercing upward sweep followed by a downward swoop—the classic jumpscare screech

if (jumpscare.isActive) return;
Guard clause: if a jumpscare is already happening, exit early and do nothing. This prevents multiple jumpscare events from stacking and playing over each other.
jumpscare.isActive = true;
Sets the jumpscare flag to true, marking that a jumpscare sequence is now in progress.
gameState = "jumpscare";
Changes the global game state to 'jumpscare', which tells the draw() function to switch to drawJumpscare() and stop normal game updates.
jumpscare.phase = "monster";
Initializes the jumpscare animation to the 'monster' phase, which displays the enlarged monster head and animated text.
ambientSoundOsc.amp(0, 0.1);
Fades the ambient drone to silence over 0.1 seconds (100 milliseconds). The second parameter is the fade duration in seconds.
jumpscareEnvelope.play(jumpscareNoise);
Triggers the ADSR envelope, which controls the white noise's amplitude. This plays a quick burst of static as the monster screams.
let currentTime = getAudioContext().currentTime;
Gets the current Web Audio API time in seconds. This is needed to schedule frequency and amplitude changes at precise moments relative to the current playback time.
if (isFinite(2000) && isFinite(0.2) && isFinite(500) && isFinite(0.5) && isFinite(0.8) && isFinite(0.05)) {
Safety check: verifies that all the parameters are finite numbers (not Infinity or NaN). Web Audio operations can throw errors if given invalid values.
jumpscareOsc.amp(0.8, 0.05, currentTime);
Sets the oscillator's amplitude to 0.8 over 0.05 seconds starting now. This creates a snappy fade-in of the screech, making it shocking.
jumpscareOsc.freq(2000, 0.2, currentTime);
Sweeps the frequency upward to 2000 Hz over 0.2 seconds, creating that characteristic rising-pitch screech of horror.
jumpscareOsc.freq(500, 0.5, currentTime + 0.2);
After the upward sweep (0.2 seconds in), sweeps the frequency downward to 500 Hz over 0.5 seconds, creating a descending 'woop' effect that's equally scary.
jumpscareOsc.amp(0, 0.5, currentTime + 0.2);
Fades the screech's amplitude to 0 starting at currentTime + 0.2 (after the upward sweep), creating a long, lingering fade-out.

touchStarted()

touchStarted() is called once when a new touch begins. It's responsible for routing that touch to the appropriate handler: VR button, run button, joystick, or game transition. The key insight is tracking each touch by its unique ID (newTouch.id), so when that touch moves or ends in later frames, we know which UI element it belongs to. This allows simultaneous multi-touch input—your left hand can drag the joystick while your right hand holds the run button. The device orientation permission request (for VR head-tracking on iOS) happens here, blocking until the user grants permission.

🔬 These lines grab the newest touch and check if it's in the VR button. But what if multiple fingers are placed at the same time? The code always uses the newest one (touches[touches.length - 1]). What happens if you change it to use the oldest touch (touches[0])? Or what if you iterate through ALL touches and process each one? How would that change the multi-touch experience?

  let newTouch = touches[touches.length - 1]; // This is typically the newest touch

  if (gameState === "game" && rectCollision(newTouch.x, newTouch.y, 1, 1, vrButtonX - vrButtonW / 2, vrButtonY - vrButtonH / 2, vrButtonW, vrButtonH)) {
function touchStarted() {
  // If loading, do nothing
  if (gameState === "loading") return false;

  // Check for VR toggle button first (always active once game starts)
  let vrButtonX = width * 0.1;
  let vrButtonY = height * 0.1;
  let vrButtonW = 120;
  let vrButtonH = 60;

  // Iterate through all new touches that just started
  // The 'touches' array in touchStarted contains all touches that are currently active.
  // We need to find the touch that *just* started this frame and hasn't been assigned yet.
  let newTouch = touches[touches.length - 1]; // This is typically the newest touch

  if (gameState === "game" && rectCollision(newTouch.x, newTouch.y, 1, 1, vrButtonX - vrButtonW / 2, vrButtonY - vrButtonH / 2, vrButtonW, vrButtonH)) {
    vrMode = !vrMode;
    console.log(`VR Mode: ${vrMode ? "ON" : "OFF"}`);
    // If turning VR mode on, request permission if not already granted
    if (vrMode && !deviceOrientationGranted) {
      if (typeof DeviceOrientationEvent !== 'undefined' && typeof DeviceOrientationEvent.requestPermission === 'function') {
        DeviceOrientationEvent.requestPermission()
          .then(permissionState => {
            if (permissionState === 'granted') {
              deviceOrientationGranted = true;
              window.addEventListener('deviceorientation', handleDeviceOrientation);
              console.log('Device orientation permission granted.');
            } else {
              console.warn('Device orientation permission denied.');
              deviceOrientationGranted = false;
              vrMode = false; // Turn VR mode off if permission denied
            }
          })
          .catch(console.error);
      } else {
        // For non-iOS devices or desktop, permission is not required/available
        window.addEventListener('deviceorientation', handleDeviceOrientation);
        deviceOrientationGranted = true;
      }
    }
    return false; // Prevent default browser behavior
  }

  // Handle run button activation
  // Assign touchId to the run button if a touch is within its bounds
  if (gameState === "game" && rectCollision(newTouch.x, newTouch.y, 1, 1, runButton.x - runButton.w / 2, runButton.y - runButton.h / 2, runButton.w, runButton.h)) {
    if (!runButton.active) { // Only activate if not already active
      player.isRunning = true; // Player starts running immediately
      runButton.active = true;
      runButton.touchId = newTouch.id; // Assign the ID of the latest touch
      console.log(`Running: ${player.isRunning}`);
    }
    return false; // Prevent default browser behavior
  }


  if (gameState === "startScreen") {
    gameState = "game"; // Transition to game state
    userStartAudio(); // Start p5.sound audio context

    // Request device orientation permission on iOS (only if VR mode is on initially)
    if (vrMode && typeof DeviceOrientationEvent !== 'undefined' && typeof DeviceOrientationEvent.requestPermission === 'function') {
      DeviceOrientationEvent.requestPermission()
        .then(permissionState => {
          if (permissionState === 'granted') {
            deviceOrientationGranted = true;
            window.addEventListener('deviceorientation', handleDeviceOrientation);
            console.log('Device orientation permission granted.');
          } else {
            console.warn('Device orientation permission denied.');
            // Fallback: Continue game without head tracking
            deviceOrientationGranted = false;
            vrMode = false; // Turn VR mode off if permission denied
          }
        })
        .catch(console.error);
    } else if (vrMode) {
      // For non-iOS or desktop, permission is not required/available
      window.addEventListener('deviceorientation', handleDeviceOrientation);
      deviceOrientationGranted = true;
    }

    // Start ambient sound loop (fade in)
    // Reduced ambient drone and hiss volume
    ambientSoundOsc.amp(0.2, 1); // Fade in drone over 1 second
    ambientSoundNoise.amp(0.1, 1); // Fade in hiss over 1 second
    // Boombox will fade in automatically based on player proximity in updatePlayer()

    return false;
  }

  // Handle joystick activation (left side of screen)
  // Assign touchId to the joystick if a touch is within its bounds
  if (gameState === "game" && newTouch.x < joystick.maxX) {
    if (!joystick.active) { // Only activate if not already active
      joystick.active = true;
      joystick.touchId = newTouch.id; // Assign the ID of the latest touch
      joystick.knobX = newTouch.x;
      joystick.knobY = newTouch.y;
    }
  }
  // Jump and Climb buttons are removed, so no 'else' needed here.

  return false; // Prevent default browser behavior (scrolling/zooming)
}
Line-by-line explanation (17 lines)

🔧 Subcomponents:

conditional Loading State Guard if (gameState === "loading") return false;

Prevents any touch input during the loading screen, ensuring the game initializes before the player can interact

conditional VR Toggle Button Handling if (gameState === "game" && rectCollision(newTouch.x, newTouch.y, 1, 1, vrButtonX - vrButtonW / 2, vrButtonY - vrButtonH / 2, vrButtonW, vrButtonH)) { vrMode = !vrMode; ... }

Checks if the touch is within the VR button bounds, toggles VR mode, and requests device orientation permission if necessary

conditional Run Button Handling if (gameState === "game" && rectCollision(newTouch.x, newTouch.y, 1, 1, runButton.x - runButton.w / 2, runButton.y - runButton.h / 2, runButton.w, runButton.h)) { player.isRunning = true; ... }

Checks if the touch is within the run button bounds, activates running, and tracks the touch ID for proper release detection

conditional Start Screen to Game Transition if (gameState === "startScreen") { gameState = "game"; userStartAudio(); ... }

On any touch during the start screen, transitions to the game state, initializes audio, and requests device orientation permission if VR is on

conditional Joystick Touch Detection if (gameState === "game" && newTouch.x < joystick.maxX) { joystick.active = true; joystick.touchId = newTouch.id; ... }

Activates the joystick if a touch begins on the left side of the screen, tracking its unique ID for movement updates

if (gameState === "loading") return false;
Exit immediately if still loading—don't process touch input until the game is ready.
let newTouch = touches[touches.length - 1];
Gets the most recent touch from the touches array. In touchStarted(), this is the touch that just began this frame.
if (gameState === "game" && rectCollision(newTouch.x, newTouch.y, 1, 1, vrButtonX - vrButtonW / 2, vrButtonY - vrButtonH / 2, vrButtonW, vrButtonH)) {
Checks if the new touch is within the VR button's rectangular bounds. If true and we're in the game, toggle VR mode.
vrMode = !vrMode;
Flips the vrMode boolean—if it was true, it becomes false; if false, it becomes true. The ! operator inverts the boolean.
if (vrMode && !deviceOrientationGranted) {
Only request permission if VR is being turned ON (!deviceOrientationGranted checks if we DON'T already have permission).
if (typeof DeviceOrientationEvent !== 'undefined' && typeof DeviceOrientationEvent.requestPermission === 'function') {
Checks if the browser supports the device orientation API and if requestPermission is available (iOS 13+). This is a safety check to avoid errors on browsers or devices that don't support it.
DeviceOrientationEvent.requestPermission()
Requests explicit user permission to access device orientation data (only needed on iOS). Returns a promise that resolves with 'granted' or 'denied'.
.then(permissionState => { if (permissionState === 'granted') { ... } })
If the promise resolves (permission was granted or denied), check the permissionState. If 'granted', set deviceOrientationGranted to true and add the event listener.
if (gameState === "game" && rectCollision(newTouch.x, newTouch.y, 1, 1, runButton.x - runButton.w / 2, runButton.y - runButton.h / 2, runButton.w, runButton.h)) {
Checks if the touch is within the run button's bounds. If true, activate running.
player.isRunning = true;
Sets the player's running flag to true, causing updatePlayer() to use PLAYER_RUN_SPEED instead of PLAYER_SPEED.
runButton.touchId = newTouch.id;
Stores this touch's unique ID so touchMoved() and touchEnded() can identify when this specific touch ends and stop running.
if (gameState === "startScreen") { gameState = "game"; userStartAudio(); ... }
On the start screen, any touch transitions the game to 'game' state and starts the audio context (required for p5.sound to work).
ambientSoundOsc.amp(0.2, 1);
Fades the ambient oscillator in to 0.2 amplitude over 1 second, creating the eerie drone as the game begins.
if (gameState === "game" && newTouch.x < joystick.maxX) {
If in the game and the touch is on the left side of the screen (x < 40% of width), activate the joystick.
joystick.active = true;
Marks the joystick as active, so touchMoved() will update the player's velocity based on the touch position.
joystick.touchId = newTouch.id;
Stores this touch's ID so we can track it through its lifetime and deactivate the joystick when this specific touch ends.
return false;
Returns false to prevent the browser's default touch behavior (scrolling, zooming), ensuring the game captures all touches.

keyPressed()

keyPressed() is called once when a key is first pressed (after being released). It's used for event-like inputs: toggling modes, starting transitions, or setting directional velocities. keyReleased() (which runs when a key is released) clears those velocities, allowing instant stop when you let go. This key-by-key approach is simpler than checking p5.js's key[] array (which tracks all keys held), but works well for this game. Note that keyCode varies by keyboard layout and browser, so p5.js provides constants like SHIFT, LEFT_ARROW, etc. for cross-platform reliability.

function keyPressed() {
  // If loading, do nothing
  if (gameState === "loading") return false;

  if (gameState === "startScreen") {
    gameState = "game"; // Transition to game state
    userStartAudio(); // Start p5.sound audio context for desktop
    // Start ambient sound loop (fade in)
    // Reduced ambient drone and hiss volume
    ambientSoundOsc.amp(0.2, 1); // Fade in drone over 1 second
    ambientSoundNoise.amp(0.1, 1); // Fade in hiss over 1 second
    // Boombox will fade in automatically based on player proximity in updatePlayer()
    return false;
  }

  // Toggle VR mode with 'V' key (for desktop testing)
  if (keyCode === 86 && gameState === "game") { // 'V' key, only in game state
    vrMode = !vrMode;
    console.log(`VR Mode: ${vrMode ? "ON" : "OFF"}`);
    return false;
  }

  // Toggle run with 'Shift' key (for desktop testing)
  if (keyCode === SHIFT && gameState === "game") { // Shift key, only in game state
    player.isRunning = true;
    console.log("Running: true");
    return false;
  }

  // Keyboard controls for desktop (WASD or Arrow Keys)
  if (gameState === "game") { // Only allow keyboard movement in game state
    if (keyCode === LEFT_ARROW || keyCode === 65) { // Left arrow or 'A'
      player.vx = -1;
    } else if (keyCode === RIGHT_ARROW || keyCode === 68) { // Right arrow or 'D'
      player.vx = 1;
    }

    if (keyCode === UP_ARROW || keyCode === 87) { // Up arrow or 'W'
      player.vy = -1;
    } else if (keyCode === DOWN_ARROW || keyCode === 83) { // Down arrow or 'S'
      player.vy = 1;
    }
  }

  return false; // Prevent default browser behavior
}
Line-by-line explanation (10 lines)

🔧 Subcomponents:

conditional Loading State Guard if (gameState === "loading") return false;

Ignores keyboard input during loading, ensuring the player can't interfere with initialization

conditional Start Screen to Game if (gameState === "startScreen") { gameState = "game"; userStartAudio(); ... }

On any key press during the start screen, transitions to the game state and initializes audio

conditional VR Mode Toggle (V key) if (keyCode === 86 && gameState === "game") { vrMode = !vrMode; ... }

Pressing 'V' toggles VR head-tracking mode on/off for desktop testing

conditional Run Toggle (Shift key) if (keyCode === SHIFT && gameState === "game") { player.isRunning = true; ... }

Holding Shift activates running mode for faster movement

conditional Movement Input (WASD or Arrows) if (keyCode === LEFT_ARROW || keyCode === 65) { player.vx = -1; } ... else if (keyCode === DOWN_ARROW || keyCode === 83) { player.vy = 1; }

Maps arrow keys and WASD to player velocity (horizontal and vertical), allowing movement in all four directions

if (gameState === "loading") return false;
During the loading screen, ignore all keyboard input to prevent the player from starting the game early.
if (gameState === "startScreen") { gameState = "game"; userStartAudio(); ... }
On the start screen, any key press (including spacebar, Enter, or any letter) transitions to the game. userStartAudio() initializes the Web Audio context, which is required before playing sounds.
if (keyCode === 86 && gameState === "game") {
Checks if the 'V' key was pressed (keyCode 86). Only in game state. The keyCode for each key is a constant—'V' is 86, 'A' is 65, etc.
vrMode = !vrMode;
Toggles VR mode on desktop. This allows testing head-tracking behavior without a real device (though deviceOrientationGranted will likely stay false).
if (keyCode === SHIFT && gameState === "game") {
Checks if Shift was pressed. SHIFT is a p5.js constant for the Shift key's keyCode.
player.isRunning = true;
Sets running to true immediately when Shift is pressed. The flag stays true until keyReleased() is called for the Shift key.
if (keyCode === LEFT_ARROW || keyCode === 65) { // Left arrow or 'A'
Checks if either the left arrow key or the 'A' key was pressed. Both 65 (A) and LEFT_ARROW (37 or similar) control left movement.
player.vx = -1;
Sets the horizontal velocity to -1 (moving left). In updatePlayer(), this is multiplied by currentSpeed to determine how far the player moves each frame.
if (keyCode === UP_ARROW || keyCode === 87) { // Up arrow or 'W'
Checks if the up arrow or 'W' key was pressed, setting vertical velocity to -1 (moving up, since lower y is up on screen).
return false;
Returns false to prevent default browser behavior (like scrolling when arrow keys are pressed).

📦 Key Variables

gameState string

Tracks the current phase of the game: 'loading' (loading screen), 'startScreen' (title screen), 'game' (active gameplay), or 'jumpscare' (monster attack sequence). Controls which content the draw loop renders.

let gameState = "loading";
currentRoom string

The name of the room the player is currently in (e.g., 'mainRoom', 'floor0'). Used to render only monsters, items, and backgrounds visible in that room and check collision events.

let currentRoom = "mainRoom";
rooms object

A dictionary mapping room names to objects containing their world position (x, y), dimensions (w, h), visual color, and floor level. Defines the entire spatial structure of the game world.

let rooms = { mainRoom: { x: 0, y: 0, w: 600, h: 400, color: '#333333', floor: -1 }, floor0: { ... } };
player object

The player character object containing position (x, y), dimensions (w, h), velocity (vx, vy), and state flags (isMoving, isRunning). Updated each frame by updatePlayer().

let player = { x: 100, y: 100, w: 30, h: 30, vx: 0, vy: 0, isMoving: false, isRunning: false };
monsters array

An array of Monster instances, each with their own position, room, AI state, and movement. updateMonsters() calls update() on each one every frame.

let monsters = [Monster(...), Monster(...), ...];
joystick object

The touch joystick UI element's state: baseX/Y (center position), radius (max reach), knobX/Y (current finger position), active flag, and touchId to track which touch controls it.

let joystick = { baseX: 0.2 * width, baseY: 0.8 * height, radius: 60, knobX: ..., knobY: ..., active: false, touchId: -1 };
cameraX number

The horizontal offset of the camera in world coordinates. Used in the translate(-cameraX, -cameraY) call to shift the viewport, making the world appear to move under a fixed camera.

let cameraX = 0;
jumpscare object

The state of the jumpscare animation: isActive (whether a jumpscare is happening), timer, duration, phase ('monster', 'blood', 'fadeToBlack'), and animationFrame count.

let jumpscare = { isActive: false, timer: 0, duration: 120, phase: "monster", animationFrame: 0 };
deviceGamma number

The device's left-right tilt angle in degrees (from the deviceorientation event). Maps to horizontal camera offset when VR mode is on.

let deviceGamma = 0; // Range: -90 to 90 degrees
vrMode boolean

Flag that enables/disables device orientation head-tracking for VR-like camera control. Toggled by pressing 'V' on desktop or tapping the VR button on mobile.

let vrMode = false;
playerInventory array

Array of collectible items (keys, etc.) the player has picked up. Displayed in the top-left UI and affects game state.

let playerInventory = []; // Items are added when player collides with collectibles
collectibles array

Array of all collectible items (keys) currently in the game world. Each item has a position (x, y), room name, and type. Items are removed when collected.

let collectibles = [{ x: 150, y: 150, w: 20, h: 30, type: "key", room: "floor0" }, ...];
staircases array

Array of staircase objects that connect rooms. Each staircase is a rectangle that, when touched, teleports the player to a target room at a target position.

let staircases = [{ x: ..., y: ..., w: ..., h: ..., targetRoom: "floor0", targetPlayerX: ..., targetPlayerY: ... }, ...];
boombox object

A decorative audio-emitting object in the main room. Contains an oscillator and delay effect that fade in/out based on player distance.

let boombox = { osc: p5.Oscillator, delay: p5.Delay, x: ..., y: ..., w: 80, h: 60, nearbyThreshold: 100, fadeZone: 50 };
PLAYER_SPEED number

The number of pixels the player moves per frame while walking (when not running). Base movement speed.

const PLAYER_SPEED = 3;
PLAYER_RUN_SPEED number

The number of pixels the player moves per frame while sprinting (when running flag is true).

const PLAYER_RUN_SPEED = 5;
MONSTER_SPEED number

The number of pixels each monster moves per frame while roaming slowly in their room.

const MONSTER_SPEED = 1.5;
MONSTER_CHASE_SPEED number

The number of pixels each monster moves per frame while actively chasing the player.

const MONSTER_CHASE_SPEED = 2.5;
MONSTER_CHASE_RANGE number

The distance in pixels within which a monster detects and starts chasing the player. Beyond this range, monsters just roam.

const MONSTER_CHASE_RANGE = 200;
MAX_MONSTERS number

The maximum number of monsters to spawn in the game world at setup time.

const MAX_MONSTERS = 5;

🔧 Potential Improvements (6)

Here are some ways this code could be enhanced:

BUG drawMonsterTracker()

The tracker uses 'this.x' and 'this.y' which don't exist in the function scope—should be player.x and player.y. The distance calculation will be NaN.

💡 Change 'let d = dist(this.x, this.y, player.x, player.y);' to 'let d = dist(player.x, player.y, nearestMonster.x, nearestMonster.y);' to correctly calculate the distance from the player to the nearest monster.

PERFORMANCE updatePlayer() collectibles loop

The loop checks every collectible every frame, even those in distant rooms. For large numbers of items, this becomes wasteful.

💡 Filter collectibles to only those in the current room before looping: 'let itemsInRoom = collectibles.filter(item => item.room === currentRoom);' then loop through itemsInRoom instead. This avoids checking items in other rooms.

STYLE Monster class update() method

The chasing AI logic is complex and nested, with multiple condition checks for multi-floor pathfinding. This makes the code hard to follow.

💡 Extract the pathfinding logic into a separate function (e.g., 'updateChasingBehavior()') to reduce nesting and improve readability. Each responsibility (roaming, chasing, transitioning) could be its own function.

FEATURE Game world

The game has only one collectible type (keys) and they don't appear to do anything when collected. Inventory fills but has no purpose.

💡 Add a win condition that checks if the player has collected all keys on a particular floor, or add a locked door that requires a key to open. This gives collection meaningful gameplay impact instead of just UI feedback.

BUG Monster room transitions

If a monster is on a staircase at the exact moment a transition cooldown is still active, the monster gets stuck or behaves unpredictably.

💡 Add a check in the monster's staircase collision code to ensure it doesn't try to transition while still in cooldown: 'if (this.monsterCanTransition && rectCollision(...))' instead of just checking rectCollision.

PERFORMANCE draw() rendering

Staircases are drawn every frame even if they're off-screen. The on-screen check exists but is applied to all staircases sequentially.

💡 Move the rectCollision() check earlier so off-screen staircases skip all drawing and labeling: check at the start of the loop and 'continue' if off-screen, avoiding unnecessary fill/rect/text calls.

🔄 Code Flow

Code flow showing preload, setup, draw, updateplayer, updatemonsters, drawplayer, updatecamera, trigerJumpscare, touchstarted, keyPressed

💡 Click on function names in the diagram to jump to their code

graph TD start[Start] --> setup[setup] setup --> draw[draw loop] click setup href "#fn-setup" click draw href "#fn-draw" setup --> ambient-setup[Ambient Sound Chain] setup --> jumpscare-setup[Jumpscare Audio Setup] setup --> sfx-setup[Sound Effects] setup --> canvas-setup[Canvas and Text Settings] setup --> room-definitions[Multi-Room World Layout] setup --> player-init[Player Object] setup --> staircase-definitions[Staircase Network] setup --> ui-init[UI Controls] click ambient-setup href "#sub-ambient-setup" click jumpscare-setup href "#sub-jumpscare-setup" click sfx-setup href "#sub-sfx-setup" click canvas-setup href "#sub-canvas-setup" click room-definitions href "#sub-room-definitions" click player-init href "#sub-player-init" click staircase-definitions href "#sub-staircase-definitions" click ui-init href "#sub-ui-init" draw --> game-state-check[Game State Router] draw --> update-calls[Game Logic Updates] draw --> world-render[World Rendering] draw --> ui-render[Screen-Space UI] click game-state-check href "#sub-game-state-check" click update-calls href "#sub-update-calls" click world-render href "#sub-world-render" click ui-render href "#sub-ui-render" game-state-check --> loading-guard[Loading State Guard] game-state-check --> start-screen-transition[Start Screen Transition] game-state-check --> start-transition[Start Transition] click loading-guard href "#sub-loading-guard" click start-screen-transition href "#sub-start-screen-transition" click start-transition href "#sub-start-transition" update-calls --> updateplayer[updatePlayer] update-calls --> updatemonsters[updateMonsters] click updateplayer href "#fn-updateplayer" click updatemonsters href "#fn-updatemonsters" updateplayer --> movement-calc[Position Update] updateplayer --> collectible-collision[Item Collection Check] updateplayer --> staircase-transition[Room Transition Logic] updateplayer --> boundary-clamp[Position Clamping] updateplayer --> boombox-audio[Proximity-Based Music Control] updateplayer --> footstep-sfx[Footstep Sound Loop] click movement-calc href "#sub-movement-calc" click collectible-collision href "#sub-collectible-collision" click staircase-transition href "#sub-staircase-transition" click boundary-clamp href "#sub-boundary-clamp" click boombox-audio href "#sub-boombox-audio" click footstep-sfx href "#sub-footstep-sfx" updatemonsters --> monster-spawn[Monster Spawning Loop] click monster-spawn href "#sub-monster-spawn" world-render --> base-target[Camera Position Calculation] world-render --> smoothing[Camera Smoothing] world-render --> clamping[Boundary Clamping] click base-target href "#sub-base-target" click smoothing href "#sub-smoothing" click clamping href "#sub-clamping" ui-render --> body-draw[Body and Head Shapes] ui-render --> eyes-draw[Eyes with Pupils] ui-render --> mouth-arms[Mouth and Arms] click body-draw href "#sub-body-draw" click eyes-draw href "#sub-eyes-draw" click mouth-arms href "#sub-mouth-arms" draw --> updatecamera[updateCamera] click updatecamera href "#fn-updatecamera" updatecamera --> vr-offset[Device Orientation Head-Tracking] click vr-offset href "#sub-vr-offset" triggerJumpscare --> state-init[Jumpscare State Setup] triggerJumpscare --> audio-fade[Ambient Audio Fade-Out] triggerJumpscare --> screech-effect[Procedural Screech Synthesis] click state-init href "#sub-state-init" click audio-fade href "#sub-audio-fade" click screech-effect href "#sub-screech-effect" touchstarted --> vr-button-check[VR Toggle Button Handling] touchstarted --> run-button-check[Run Button Handling] touchstarted --> joystick-activation[Joystick Touch Detection] click vr-button-check href "#sub-vr-button-check" click run-button-check href "#sub-run-button-check" click joystick-activation href "#sub-joystick-activation" keyPressed --> vr-toggle-key[VR Mode Toggle] keyPressed --> run-toggle-key[Run Toggle] keyPressed --> movement-keys[Movement Input] click vr-toggle-key href "#sub-vr-toggle-key" click run-toggle-key href "#sub-run-toggle-key" click movement-keys href "#sub-movement-keys"

❓ Frequently Asked Questions

What visual experience does the Lethal Ape Redux app lab provide?

The sketch creates a spooky, maze-like environment viewed from above, where players navigate through dark rooms while being pursued by geometric monsters.

How can users interact with the Lethal Ape Redux app lab?

Users can tilt their device or use on-screen controls to move their character, triggering sounds and jump scares as they explore the maze.

What creative coding concepts are explored in the Lethal Ape Redux app lab?

This sketch demonstrates procedural sound generation and animation techniques, alongside game mechanics like player movement and monster AI.

Preview

Lethal ape redux app lab - p5.js creative coding sketch preview
Sketch Preview
Code flow diagram showing the structure of Lethal ape redux app lab - Code flow showing preload, setup, draw, updateplayer, updatemonsters, drawplayer, updatecamera, trigerJumpscare, touchstarted, keyPressed
Code Flow Diagram