
lowkee sick game ngl

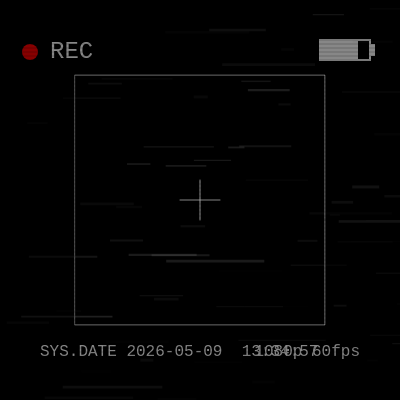
This sketch transforms your webcam feed into a dreamy VHS-style viewfinder with chromatic aberration glitches, flickering scanlines, and a retro camera UI overlay. The result feels like watching yourself through an old-school home movie camera with rolling tracking distortion and analog noise effects.

🧪 Try This!

Experiment with the code by making these changes:

  1. Intensify the red fringe — Increasing the red tint alpha makes the color bleeding glitch more prominent and aggressive
  2. Slow the rolling distortion — Lower tracking band speed makes the VHS artifact roll more gracefully, less frantically
  3. Double the scanline density — Tighter scanlines intensify the old CRT monitor appearance
  4. Make the vignette less intense — Lower alpha in the vignette stroke lets more of the center shine through
Prefer the full editor? Open it there →

📖 About This Sketch

This sketch uses p5.js to capture your webcam and overlay it with a suite of analog video effects: chromatic aberration (RGB color fringing), VHS scanlines, rolling tracking distortion, and a retro camera UI with a blinking REC light and live timestamp. The mirrored camera feed sits at the center while procedurally generated static noise and a darkening vignette frame the edges, creating an immersive analog horror aesthetic that feels like you are starring in a grainy home video.

The code is organized into three main tasks: setup() initializes the webcam, draw() handles the animation loop, and three helper functions manage the camera feed rendering, the UI overlay, and the VHS effects respectively. By studying this sketch you will learn how to capture live video with createCapture(), apply chromatic effects using blendMode() and tint(), animate procedural noise and geometric UI elements, and handle canvas resizing on responsive screens.

⚙️ How It Works

  1. When the sketch loads, setup() creates a full-window canvas and calls createCapture(VIDEO) to request access to your webcam, then hides the default video element so the sketch can draw it custom.
  2. Every frame, draw() clears the canvas black and adds random jitter values to simulate camera shake, then checks if the webcam video has loaded metadata to know its dimensions.
  3. The camera feed is scaled to cover the entire canvas without stretching by calculating aspect ratios, then mirrored horizontally using translate() and scale(-1, 1) so you see a self-view like a mirror.
  4. Chromatic aberration is created by drawing the camera image three times with different tints (red, blue/cyan) and slight horizontal offsets, using blendMode(SCREEN) to layer them with additive blending that creates the color fringing effect.
  5. The camera UI is drawn on top with a blinking REC dot (using frameCount % 60 to pulse), a battery icon outline, crosshairs at the center, and a live timestamp that updates every frame using hour(), minute(), second().
  6. Finally, VHS effects are layered: horizontal scanlines drawn every 4 pixels, random static rectangles for grain noise, a rolling tracking band that moves down the screen and resets, and a dark vignette around all edges.

🎓 Concepts You'll Learn

Webcam capture and video streamingChromatic aberration and color blendingAspect ratio scaling and responsive canvasMatrix transforms (translate, scale, mirror)Blend modes for additive color effectsProcedural noise and animated distortionUI overlay rendering with typographyFrame-based animation and timing

📝 Code Breakdown

setup()

setup() runs once when the sketch starts. It is the perfect place to initialize the webcam and prepare the canvas. The createCapture(VIDEO) function prompts the user to allow camera access—this is a browser security feature.

function setup() {
  createCanvas(windowWidth, windowHeight);
  
  // Initialize the webcam
  cam = createCapture(VIDEO);
  cam.hide(); // Hide the default HTML video element
}
Line-by-line explanation (3 lines)
createCanvas(windowWidth, windowHeight);
Creates a canvas that fills the entire browser window, making the video effect immersive and full-screen
cam = createCapture(VIDEO);
Requests access to your webcam and creates a video object that stores the live camera feed frame-by-frame
cam.hide();
Hides the default HTML video element that p5.js creates, because we will draw the camera feed ourselves with custom effects

draw()

draw() is called 60 times per second and is where all animation happens. Every frame we clear the canvas, calculate new jitter values, render the camera with chromatic effects, and layer UI and VHS effects on top. The aspect ratio scaling logic ensures the camera fills the canvas nicely on any screen size.

🔬 These two lines create the chromatic aberration by drawing offset color layers. What happens if you change the + 5 and - 5 to + 15 and - 15? How does the color fringe spread further apart?

    // Red ghosting offset
    tint(255, 50, 50, 80);
    image(cam, -x + jitterX + 5, y + jitterY, drawW, drawH);
    
    // Blue/Cyan ghosting offset
    tint(50, 150, 255, 80);
    image(cam, -x + jitterX - 5, y + jitterY, drawW, drawH);

🔬 SCREEN blend mode adds the colors together to make bright overlaps. What happens if you change SCREEN to MULTIPLY or OVERLAY? (Try different blend modes to see which looks scarier.)

    blendMode(SCREEN);
    
    // Red ghosting offset
    tint(255, 50, 50, 80);
    image(cam, -x + jitterX + 5, y + jitterY, drawW, drawH);
function draw() {
  background(0);
  
  // Slight camera jitter
  let jitterX = random(-2, 2);
  let jitterY = random(-1, 1);
  
  // 1. Draw the Camera Feed with Chromatic Aberration
  if (cam.loadedmetadata) {
    let camAspect = cam.width / cam.height;
    let canvasAspect = width / height;
    let drawW, drawH;
    
    // Scale the video to completely cover the screen without stretching
    if (canvasAspect > camAspect) {
      drawW = width;
      drawH = width / camAspect;
    } else {
      drawH = height;
      drawW = height * camAspect;
    }
    
    let x = (width - drawW) / 2;
    let y = (height - drawH) / 2;
    
    push();
    // Mirror the camera horizontally
    translate(width, 0);
    scale(-1, 1);
    
    // Base image
    image(cam, -x + jitterX, y + jitterY, drawW, drawH);
    
    // RGB Color Bleed Effect (Chromatic Aberration)
    blendMode(SCREEN);
    
    // Red ghosting offset
    tint(255, 50, 50, 80);
    image(cam, -x + jitterX + 5, y + jitterY, drawW, drawH);
    
    // Blue/Cyan ghosting offset
    tint(50, 150, 255, 80);
    image(cam, -x + jitterX - 5, y + jitterY, drawW, drawH);
    
    pop();
  }
  
  // 2. Draw the Camera Interface Overlay
  drawCameraUI();
  
  // 3. Draw the VHS Visual Effects
  drawVHSEffects();
}
Line-by-line explanation (20 lines)

🔧 Subcomponents:

conditional Webcam Loaded Check if (cam.loadedmetadata) {

Waits until the webcam video has fully loaded before trying to draw it, preventing errors on the first frame

calculation Aspect Ratio Scaling if (canvasAspect > camAspect) {

Calculates whether to scale by width or height to cover the entire canvas without stretching or leaving black bars

calculation Horizontal Mirroring translate(width, 0); scale(-1, 1);

Flips the camera feed horizontally so it acts like a mirror instead of a webcam (which normally flips the image)

loop Chromatic Aberration Layers image(cam, -x + jitterX + 5, y + jitterY, drawW, drawH); // Blue/Cyan ghosting offset tint(50, 150, 255, 80); image(cam, -x + jitterX - 5, y + jitterY, drawW, drawH);

Draws offset copies of the camera feed with red and blue tints, creating the classic chromatic aberration glitch effect where color channels separate

background(0);
Clears the canvas to solid black every frame, preparing it for the new camera frame and effects
let jitterX = random(-2, 2);
Generates a random value between -2 and 2 pixels to simulate camera shake horizontally, making the feed feel unstable and dreamy
let jitterY = random(-1, 1);
Generates a smaller random vertical shake to add to the camera movement, amplifying the hand-held effect
if (cam.loadedmetadata) {
Checks that the webcam has finished loading before drawing—prevents crashes on the first frame when camera info is not yet available
let camAspect = cam.width / cam.height;
Calculates the camera's width-to-height ratio (e.g., 1.33 for a 4:3 video), needed to scale it properly to the canvas
let canvasAspect = width / height;
Calculates the canvas's aspect ratio, needed to decide whether to scale by width or by height
if (canvasAspect > camAspect) { drawW = width; drawH = width / camAspect; } else { drawH = height; drawW = height * camAspect; }
This logic scales the camera to completely fill the canvas: if the canvas is wider than the camera, stretch the camera to canvas width and calculate the height; otherwise stretch to canvas height and calculate width. This avoids stretching and black bars.
let x = (width - drawW) / 2; let y = (height - drawH) / 2;
Calculates how much to offset the camera image so it is centered on the canvas
push();
Saves the current drawing state (transformations, fill, stroke, etc.) so we can mirror the image without affecting other drawings
translate(width, 0);
Moves the origin (0, 0 point) to the right edge of the canvas, preparing for the horizontal flip
scale(-1, 1);
Flips the x-axis by scaling it by -1, mirroring the camera feed horizontally so you see yourself like in a mirror
image(cam, -x + jitterX, y + jitterY, drawW, drawH);
Draws the base camera image at the jittered position, with the jitter creating the camera shake effect every frame
blendMode(SCREEN);
Sets the blend mode to SCREEN, which adds colors together instead of replacing them—perfect for creating glowing, overlapping chromatic effects
tint(255, 50, 50, 80);
Tints the next image() call red with low alpha (80), creating a semi-transparent red ghosting effect
image(cam, -x + jitterX + 5, y + jitterY, drawW, drawH);
Draws the camera feed again, shifted 5 pixels to the right and tinted red—this offset creates the color separation glitch at the edge of motion
tint(50, 150, 255, 80);
Tints the next image() call cyan/blue with low alpha, creating the blue ghosting layer
image(cam, -x + jitterX - 5, y + jitterY, drawW, drawH);
Draws the camera feed a third time, shifted 5 pixels to the left and tinted blue—the combination of three offset layers creates full chromatic aberration
pop();
Restores the drawing state, undoing the mirror transformation so other drawings are not flipped
drawCameraUI();
Calls the helper function that draws the retro camera UI: REC light, battery, crosshairs, and timestamp
drawVHSEffects();
Calls the helper function that applies all the VHS analog effects: scanlines, static noise, rolling distortion, and vignette

drawCameraUI()

drawCameraUI() draws all the retro camera interface elements on top of the video feed. It uses push() and pop() to isolate its styling, and demonstrates text alignment, shape geometry, and the use of p5.js time functions (hour, minute, second, year, month, day) to display a live clock. The REC blink is a clever use of the modulo operator (%) to create periodic timing.

🔬 These lines draw the center crosshairs. What happens if you change 250 to 500, and the line lengths (20) to 50? How do the crosshairs grow?

  // Center Focus Crosshairs
  stroke(255, 150);
  noFill();
  strokeWeight(1);
  rectMode(CENTER);
  rect(width/2, height/2, 250, 250);
  line(width/2 - 20, height/2, width/2 + 20, height/2);
  line(width/2, height/2 - 20, width/2, height/2 + 20);
function drawCameraUI() {
  push();
  fill(255);
  noStroke();
  textFont("Courier New");
  
  // REC text
  textSize(24);
  textAlign(LEFT, TOP);
  text("REC", 50, 40);
  
  // Blinking red recording dot
  if (frameCount % 60 < 30) {
    fill(255, 0, 0);
    circle(30, 52, 16);
  }
  
  // Battery Icon
  noFill();
  stroke(255);
  strokeWeight(2);
  rect(width - 80, 40, 50, 20); // battery outline
  fill(255);
  rect(width - 78, 42, 35, 16); // battery level
  rect(width - 30, 45, 4, 10);  // battery tip
  
  // Center Focus Crosshairs
  stroke(255, 150);
  noFill();
  strokeWeight(1);
  rectMode(CENTER);
  rect(width/2, height/2, 250, 250);
  line(width/2 - 20, height/2, width/2 + 20, height/2);
  line(width/2, height/2 - 20, width/2, height/2 + 20);
  
  // Timestamps / Meta
  fill(255);
  noStroke();
  textSize(16);
  textAlign(RIGHT, BOTTOM);
  text("1080p 60fps", width - 40, height - 40);
  
  // Live running clock
  textAlign(LEFT, BOTTOM);
  let h = nf(hour(), 2);
  let m = nf(minute(), 2);
  let s = nf(second(), 2);
  text(`SYS.DATE ${year()}-${nf(month(),2)}-${nf(day(),2)}  ${h}:${m}:${s}`, 40, height - 40);
  pop();
}
Line-by-line explanation (33 lines)

🔧 Subcomponents:

calculation Battery Icon Geometry rect(width - 80, 40, 50, 20); fill(255); rect(width - 78, 42, 35, 16); rect(width - 30, 45, 4, 10);

Draws three rectangles to create a battery outline, fill level, and charging nub—simple and iconic

calculation Center Focus Crosshairs line(width/2 - 20, height/2, width/2 + 20, height/2); line(width/2, height/2 - 20, width/2, height/2 + 20);

Draws two perpendicular lines at the center of the screen to form crosshairs, simulating a camera focus point

calculation Live Timestamp let h = nf(hour(), 2); let m = nf(minute(), 2); let s = nf(second(), 2); text(`SYS.DATE ${year()}-${nf(month(),2)}-${nf(day(),2)} ${h}:${m}:${s}`, 40, height - 40);

Uses p5.js time functions (hour, minute, second, etc.) to display a live timestamp that updates every frame, adding authenticity to the retro camera feel

push();
Saves the current drawing settings (fill, stroke, font, etc.) so our UI styling does not affect other functions
fill(255);
Sets the fill color to white (255 in grayscale), used for all UI elements unless changed
noStroke();
Disables outlines for most UI elements, keeping them clean and simple
textFont("Courier New");
Sets the font to Courier New, a monospaced retro typeface that fits the analog camera aesthetic
textSize(24);
Sets the text size to 24 pixels for the large REC label
textAlign(LEFT, TOP);
Aligns text to the top-left corner so the position (50, 40) represents the top-left corner of the text, not the center
text("REC", 50, 40);
Draws the white "REC" text at position (50, 40) in the top-left corner
if (frameCount % 60 < 30) {
This blink logic works because frameCount is the total frame number and cycles every 60 frames: when it is less than 30 (first half second), the dot appears; when it is 30–59 (second half second), it disappears, creating a 1Hz blink
fill(255, 0, 0);
Changes the fill color to pure red for the blinking recording indicator
circle(30, 52, 16);
Draws a red circle with diameter 16 pixels at (30, 52), positioned next to the REC text
noFill();
Disables fill for the next shapes (the battery outline), so only the stroke is drawn
stroke(255);
Sets the stroke (outline) color to white
strokeWeight(2);
Sets the stroke thickness to 2 pixels, making the battery outline clearly visible
rect(width - 80, 40, 50, 20);
Draws the battery outline rectangle (just the border, no fill) positioned in the top-right area of the canvas
fill(255);
Re-enables white fill for the battery level bar
rect(width - 78, 42, 35, 16);
Draws the battery fill level bar (a white rectangle inside the outline), suggesting the battery is nearly full
rect(width - 30, 45, 4, 10);
Draws the small battery tip (the bump on the right side of the battery icon)
stroke(255, 150);
Sets the stroke to white with 150 alpha (semi-transparent), making the crosshairs subtle
noFill();
Disables fill for the crosshair elements
strokeWeight(1);
Sets stroke thickness to 1 pixel for thin, delicate crosshairs
rectMode(CENTER);
Changes the rect() drawing mode so that the position argument is the center, not the top-left corner
rect(width/2, height/2, 250, 250);
Draws a 250x250 square centered on the screen, creating the outer frame of the focus crosshairs
line(width/2 - 20, height/2, width/2 + 20, height/2);
Draws a horizontal line across the center of the screen (40 pixels long), forming the horizontal part of the crosshair
line(width/2, height/2 - 20, width/2, height/2 + 20);
Draws a vertical line through the center (40 pixels long), forming the vertical part of the crosshair
textSize(16);
Reduces text size to 16 pixels for the small metadata text at the bottom
textAlign(RIGHT, BOTTOM);
Aligns text to the bottom-right so the position (width - 40, height - 40) represents the bottom-right corner of the text
text("1080p 60fps", width - 40, height - 40);
Draws the resolution and frame rate spec in the bottom-right, adding technical authenticity
textAlign(LEFT, BOTTOM);
Aligns text to the bottom-left for the timestamp
let h = nf(hour(), 2);
Gets the current hour and formats it with nf() to always be 2 digits (e.g., "05" instead of "5")
let m = nf(minute(), 2);
Gets the current minute formatted to 2 digits
let s = nf(second(), 2);
Gets the current second formatted to 2 digits
text(`SYS.DATE ${year()}-${nf(month(),2)}-${nf(day(),2)} ${h}:${m}:${s}`, 40, height - 40);
Displays a full timestamp string with the current date (YYYY-MM-DD) and time (HH:MM:SS) in the bottom-left, using a template literal to format the output
pop();
Restores the drawing state, undoing all the text and color settings so they do not bleed into other functions

drawVHSEffects()

drawVHSEffects() layers all the analog video artifacts that make the sketch feel retro: scanlines (from CRT monitors), static grain (from VHS tape noise), a rolling tracking band (from video head misalignment), and a vignette (from cheap lens optics). The tracking band uses a global variable trackingPos that is updated every frame, demonstrating how state can persist across function calls. Each effect is drawn with random() to create organic, non-repeating noise.

🔬 This loop draws one horizontal line every 4 pixels. What happens if you change the spacing from 4 to 8, and the stroke color from (0, 30) to (0, 150)? Which makes the CRT look more intense?

  // Scanlines
  stroke(0, 30); // Faint black lines
  strokeWeight(2);
  for (let i = 0; i < height; i += 4) {
    line(0, i, width, i);
  }

🔬 This loop draws 70 random noise rectangles. What happens if you change 70 to 150? What about changing random(10, 40) to random(100, 200)—how does the noise look different?

  // Static Noise (Streaks)
  noStroke();
  for (let i = 0; i < 70; i++) {
    // Random mix of bright and dark grain
    fill(random(255), random(10, 40));
    rect(random(width), random(height), random(10, 100), random(1, 3));
  }
function drawVHSEffects() {
  push();
  
  // Scanlines
  stroke(0, 30); // Faint black lines
  strokeWeight(2);
  for (let i = 0; i < height; i += 4) {
    line(0, i, width, i);
  }
  
  // Static Noise (Streaks)
  noStroke();
  for (let i = 0; i < 70; i++) {
    // Random mix of bright and dark grain
    fill(random(255), random(10, 40));
    rect(random(width), random(height), random(10, 100), random(1, 3));
  }
  
  // Rolling Tracking Band
  trackingPos += 2; // Speed of the roll
  if (trackingPos > height + 100) {
    trackingPos = -100; // Reset to top
  }
  
  // Draw the distortion band
  fill(255, 15);
  rect(0, trackingPos, width, 50);
  for (let i = 0; i < 40; i++) {
    fill(random(150, 255), random(40, 90));
    rect(random(width), trackingPos + random(50), random(30, 200), random(2, 6));
  }
  
  // Retro Vignette (darken edges to simulate a cheap lens)
  noFill();
  stroke(0, 120);
  strokeWeight(150); // Draws a thick dark border that leaks into the frame
  rect(0, 0, width, height);
  
  pop();
}
Line-by-line explanation (22 lines)

🔧 Subcomponents:

for-loop Horizontal Scanlines for (let i = 0; i < height; i += 4) { line(0, i, width, i); }

Draws horizontal lines every 4 pixels from top to bottom, simulating the scan pattern of old CRT monitors and VHS tapes

for-loop Static Grain Noise for (let i = 0; i < 70; i++) { // Random mix of bright and dark grain fill(random(255), random(10, 40)); rect(random(width), random(height), random(10, 100), random(1, 3)); }

Draws 70 random rectangles across the canvas with varying brightness and opacity to simulate video tape static and grain artifacts

calculation Rolling Tracking Band Motion trackingPos += 2; if (trackingPos > height + 100) { trackingPos = -100; }

Moves the tracking distortion band down the screen each frame and resets it when it goes off-screen, creating the illusion of a looping video head position

for-loop Tracking Band Noise for (let i = 0; i < 40; i++) { fill(random(150, 255), random(40, 90)); rect(random(width), trackingPos + random(50), random(30, 200), random(2, 6)); }

Fills the tracking band with random bright streaks, simulating the visual noise that appears when a VHS tape loses sync

push();
Saves the current drawing state so the VHS effects do not interfere with other parts of the sketch
stroke(0, 30);
Sets the stroke color to black with very low alpha (30), making the scanlines faint and ghostly
strokeWeight(2);
Sets the stroke thickness to 2 pixels, making scanlines visible but not overwhelming
for (let i = 0; i < height; i += 4) {
Loops from 0 to the canvas height, incrementing by 4 each time—this draws a line every 4 pixels vertically
line(0, i, width, i);
Draws a horizontal line from the left edge to the right edge at height position i, creating one scanline
noStroke();
Disables stroke for the noise rectangles so they are filled shapes only
for (let i = 0; i < 70; i++) {
Loops 70 times to draw 70 random noise rectangles, creating a heavy static effect
fill(random(255), random(10, 40));
Sets the fill to a random grayscale value (0–255) with semi-random alpha (10–40), making each noise rectangle different shades of dark with varying transparency
rect(random(width), random(height), random(10, 100), random(1, 3));
Draws a rectangle at a random position with random width (10–100 pixels) and random height (1–3 pixels), creating thin, grainy streaks
trackingPos += 2;
Increments the tracking band position by 2 pixels every frame, making it scroll downward continuously
if (trackingPos > height + 100) {
Checks if the tracking band has moved past the bottom of the screen; if so, reset it
trackingPos = -100;
Resets the tracking band to -100 (above the top of the canvas), creating a seamless loop as it rolls down
fill(255, 15);
Sets the fill to white with very low alpha (15), making the tracking band itself nearly invisible—just a ghost band
rect(0, trackingPos, width, 50);
Draws the tracking band rectangle: full width, 50 pixels tall, at the current trackingPos position—this is the background of the distortion band
for (let i = 0; i < 40; i++) {
Loops 40 times to fill the tracking band with random bright streaks, making it visually noisy
fill(random(150, 255), random(40, 90));
Sets the fill to a random bright color (150–255 grayscale) with medium alpha (40–90), making the streaks glow within the tracking band
rect(random(width), trackingPos + random(50), random(30, 200), random(2, 6));
Draws a random streak rectangle within the tracking band zone, positioned at trackingPos + a random offset so it stays within the band
noFill();
Disables fill for the vignette rectangle so only the stroke (border) is drawn
stroke(0, 120);
Sets the stroke to black with medium alpha (120), creating a semi-transparent dark border
strokeWeight(150);
Sets the stroke thickness to 150 pixels—this creates a very thick border that leaks inward, darkening the edges of the canvas
rect(0, 0, width, height);
Draws the vignette rectangle covering the entire canvas; because strokeWeight is so thick and noFill is enabled, only the dark border/stroke is visible, darkening the edges
pop();
Restores the drawing state, undoing all the stroke and fill settings

windowResized()

windowResized() is a p5.js callback that fires whenever the browser window is resized. By calling resizeCanvas() inside it, we ensure the sketch always fills the full screen, which is important for an immersive full-screen effect like this VHS camera.

function windowResized() {
  resizeCanvas(windowWidth, windowHeight);
}
Line-by-line explanation (1 lines)
resizeCanvas(windowWidth, windowHeight);
When the browser window is resized, this p5.js function automatically adjusts the canvas size to match the new window dimensions, keeping the sketch full-screen

📦 Key Variables

cam object

Stores the webcam video object created by createCapture(VIDEO), providing frame-by-frame access to the live camera feed

let cam;
trackingPos number

Tracks the vertical position of the rolling VHS distortion band; incremented each frame to scroll downward and reset when it goes off-screen

let trackingPos = 0;

🔧 Potential Improvements (5)

Here are some ways this code could be enhanced:

PERFORMANCE drawVHSEffects()

Every frame, the function creates 70 new random noise rectangles and 40 new random tracking streaks (110 total random calls per frame). This is computationally wasteful for a static visual effect.

💡 Cache the noise rectangles in an array or use p5.js noise() function to create more coherent, efficiently-generated patterns. Alternatively, render VHS effects to an off-screen buffer once and reuse it with slight modifications.

BUG draw() chromatic aberration

The chromatic aberration offsets (+5 and -5) are hardcoded in pixels, so on very high-resolution displays or when the canvas is extremely large, the offset may be imperceptibly small relative to the image size.

💡 Scale the offset proportionally to canvas size: use a percentage or ratio like `5 * (width / 400)` instead of a fixed pixel value.

STYLE drawCameraUI()

Magic numbers like (50, 40), (width - 80, 40), and (250, 250) for UI positions and sizes make the code hard to maintain. If you want to reposition elements, you have to hunt through the code.

💡 Define constants at the top of the sketch like `const REC_X = 50, REC_Y = 40, CROSSHAIR_SIZE = 250;` and use them throughout the function.

FEATURE setup()

The sketch assumes the user's webcam is available and permissioned, but provides no feedback if the user denies camera access or if no camera is detected.

💡 Add error handling: `cam = createCapture(VIDEO, (err) => { if (err) console.log('Camera access denied'); });` and display a message on-screen if the camera is unavailable.

PERFORMANCE draw()

The aspect ratio calculation happens every single frame even though the camera dimensions never change after the first frame.

💡 Move the aspect ratio calculation into setup() or cache the values in variables that are only recalculated when the camera metadata changes or the window is resized.

🔄 Code Flow

Code flow showing setup, draw, drawcameraui, drawvhseffects, windowresized

💡 Click on function names in the diagram to jump to their code

graph TD start[Start] --> setup[setup] setup --> draw[draw loop] draw --> metadata-check[Webcam Loaded Check] draw --> aspect-ratio-calc[Aspect Ratio Scaling] draw --> mirror-transform[Horizontal Mirroring] draw --> chromatic-layers[Chromatic Aberration Layers] draw --> rec-blink[Blinking REC Indicator] draw --> battery-shapes[Battery Icon Geometry] draw --> crosshair-lines[Center Focus Crosshairs] draw --> live-clock[Live Timestamp] draw --> drawvhseffects[drawVHSEffects] drawvhseffects --> scanline-loop[Horizontal Scanlines] drawvhseffects --> noise-loop[Static Grain Noise] drawvhseffects --> tracking-update[Rolling Tracking Band Motion] drawvhseffects --> tracking-distortion[Tracking Band Noise] draw --> windowresized[windowResized] click setup href "#fn-setup" click draw href "#fn-draw" click metadata-check href "#sub-metadata-check" click aspect-ratio-calc href "#sub-aspect-ratio-calc" click mirror-transform href "#sub-mirror-transform" click chromatic-layers href "#sub-chromatic-layers" click rec-blink href "#sub-rec-blink" click battery-shapes href "#sub-battery-shapes" click crosshair-lines href "#sub-crosshair-lines" click live-clock href "#sub-live-clock" click drawvhseffects href "#fn-drawvhseffects" click scanline-loop href "#sub-scanline-loop" click noise-loop href "#sub-noise-loop" click tracking-update href "#sub-tracking-update" click tracking-distortion href "#sub-tracking-distortion" click windowresized href "#fn-windowresized"

❓ Frequently Asked Questions

What visual effects does the 'lowkee sick game ngl' sketch produce?

The sketch creates a dreamy, VHS-style video feed of the user with chromatic glitches, scanlines, and a retro camera interface overlay, mimicking the feel of an old-school home movie.

How can users interact with the webcam feature in this sketch?

Users can turn on their webcam to see themselves in the mirrored video feed, experiencing the unique visual effects in real-time.

What creative coding concepts are showcased in this p5.js sketch?

The sketch demonstrates techniques such as chromatic aberration, video manipulation, and layering of visual effects to create an immersive retro aesthetic.

Preview

lowkee sick game ngl - p5.js creative coding sketch preview
Sketch Preview
Code flow diagram showing the structure of lowkee sick game ngl - Code flow showing setup, draw, drawcameraui, drawvhseffects, windowresized
Code Flow Diagram