
run run run

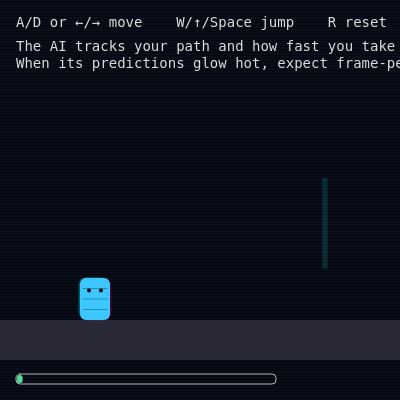
This sketch creates an adaptive platformer where an AI learns your fastest route and spawns hazards directly in your path. The visuals pulse between cool blues and hot reds based on how closely you follow the AI's predicted trajectory, creating a feedback loop where speed and visual intensity reinforce each other.

🧪 Try This!

Experiment with the code by making these changes:

  1. Speed up hazard scaling — Make the AI spawn more hazards for slower runs, and way more for faster runs.
  2. Make the player faster — Increase maxSpeed so the player moves quicker, pushing the AI to generate tougher obstacles.
  3. Reverse the difficulty curve — Make slow segments spawn more hazards than fast ones, inverting the AI's logic.
  4. Boost the visual glitch intensity — Make the background scanlines more aggressive and add more vertical glitch bars at lower confidence.
  5. Make text jitter much more intense — Turn up the text glitch effect so the HUD becomes visibly distorted at high confidence.
  6. Extend the spawn area — Let AI-generated hazards appear earlier in the level by lowering the spawn boundary.
  7. Make saws move faster — Increase the angular speed of saws so they oscillate quicker.
Prefer the full editor? Open it there →

📖 About This Sketch

This sketch creates a platformer that gets smarter every time you play. On your first run, the level is simple with just a few static spikes. But after you complete a run, the PathAnalyzer class records your position and speed at every frame, identifying your "optimal path." On the next run, the AI uses that path to spawn lasers, saws, and spikes right where you felt most confident—and the faster you were going, the more aggressive the hazards become. The Player class handles physics and collision detection, the Hazard class manages three types of obstacles with different behaviors, and a dynamic confidence metric tints the entire screen from cool blue (safe, predictable) to hot red (AI knows your moves).

The code is organized around three core systems: the Player's physics simulation with platform collisions, the Hazard system with type-specific behaviors and difficulty scaling, and the PathAnalyzer class that learns from each run and weaponizes your success. You will learn how to record and analyze motion data, scale difficulty based on performance metrics, use color interpolation to visualize internal state, and combine multiple systems (physics, AI, visuals) into a cohesive interactive experience. The sketch also demonstrates advanced p5.js techniques like custom classes, circle-rectangle collision detection, Perlin noise for glitch aesthetics, and persistent state across game resets.

⚙️ How It Works

  1. When the sketch loads, setup() creates a 16:9 canvas and builds a platformer level with ground segments, elevated platforms, static spike hazards, and a goal object. A PathAnalyzer instance is created to track your motion, and a Player is spawned at the starting position. A color palette is initialized to enable smooth interpolation between cool and hot hues based on game state.
  2. Every frame, the draw loop calls updateGame() which advances the Player physics (gravity, acceleration, collision detection with platforms), records the player's x, y, and horizontal speed into the PathAnalyzer's currentPath array, and updates all hazard timers and positions. The updatePredictionConfidence() function compares the player's actual position and speed to where the AI predicted they should be along the best learned path, computing an aiConfidence value from 0 to 1.
  3. The renderGame() function uses aiConfidence to interpolate between cool and hot colors across the entire visual system: background, platforms, hazards, player chromatic aberration, and UI text. This creates the sensation that the AI is 'seeing' you; the hotter the colors, the more accurately the AI predicted your route.
  4. When you collide with a hazard or fall off the world, handleDeath() is called, which freezes the game and saves your run's data via pathAnalyzer.endRun(). The AI analyzes your speed profile (average and peak velocity) and generates new obstacles for the next run using generateObstacles(), which places lasers and saws along your best path with difficulty scaled to how fast you moved.
  5. On the next run (triggered by pressing Space or R), resetGame() clears the current path, loads the newly generated dynamic hazards, and resets the player to the starting position. The cycle repeats: you push faster, the AI learns a faster route, it spawns harder obstacles aligned to that route, and the visual feedback intensifies.

🎓 Concepts You'll Learn

Physics simulation and velocityCollision detection (AABB and circle-rectangle)Procedural difficulty scalingMachine learning pattern recognitionColor interpolation and visual feedbackPerlin noise for glitch aestheticsGame state management and persistenceClass-based object architecture

📝 Code Breakdown

setup()

setup() runs once at the start and is where you initialize the canvas, load assets, and set up initial game state. The color palette defined here controls the visual 'temperature' feedback throughout the game.

function setup() {
  createCanvas(windowWidth, windowHeight);
  buildStaticLevel();
  pathAnalyzer = new PathAnalyzer(platforms);
  resetGame();

  // Color palette
  bgCool = color(4, 6, 18);
  bgHot = color(120, 10, 40);
  glitchCold = color(0, 255, 200);
  glitchHot = color(255, 40, 120);
  playerCold = color(60, 200, 255);
  playerHot = color(255, 255, 255);
  uiCold = color(220);
  uiHot = color(255, 220, 70);
  laserCold = color(120, 200, 255);
  laserHot = color(255, 80, 80);
  sawCold = color(230);
  sawHot = color(255, 200, 120);

  textFont('monospace');
  textSize(14);
}
Line-by-line explanation (9 lines)

🔧 Subcomponents:

assignment Color palette initialization bgCool = color(4, 6, 18);

Establishes the cold/hot color pairs used throughout the sketch to interpolate visuals based on aiConfidence

createCanvas(windowWidth, windowHeight);
Creates a full-screen canvas that fills the browser window
buildStaticLevel();
Calls the level-building function to populate the platforms and static hazards arrays
pathAnalyzer = new PathAnalyzer(platforms);
Creates the AI object that will track your paths and generate obstacles based on learned routes
resetGame();
Initializes the player, clears the current run's recorded path, and generates the first set of hazards
bgCool = color(4, 6, 18);
Deep dark blue—the background color when AI confidence is zero (you're unpredictable)
bgHot = color(120, 10, 40);
Deep burgundy—the background color when AI confidence is one (you're following the learned path perfectly)
playerCold = color(60, 200, 255);
Cyan color for the player when confidence is low
playerHot = color(255, 255, 255);
White color for the player when confidence is high, creating a glowing effect
textFont('monospace');
Sets the UI text to monospace, reinforcing the digital glitch-art aesthetic
resetGame()

resetGame() is called when the sketch starts and whenever the player dies or resets. It bridges the gap between the AI learning and the gameplay: it requests fresh hazards from the PathAnalyzer based on what was learned, then prepares the player and camera for a new attempt.

function resetGame() {
  player = new Player(80, groundY - 120);
  furthestXThisRun = 0;
  cameraX = 0;

  if (pathAnalyzer) {
    pathAnalyzer.startRun();
  }

  // AI-generated dynamic obstacles based on the best previous path
  dynamicHazards = pathAnalyzer ? pathAnalyzer.generateObstacles() : [];
  hazards = staticHazards.concat(dynamicHazards);

  gameState = 'playing';
}
Line-by-line explanation (7 lines)

🔧 Subcomponents:

assignment Player respawn player = new Player(80, groundY - 120);

Creates a fresh player instance at the starting position for the new run

assignment Hazard list combination hazards = staticHazards.concat(dynamicHazards);

Merges static and AI-generated hazards into a single array for collision checking

player = new Player(80, groundY - 120);
Spawns the player at the left side of the level, elevated slightly above the ground
furthestXThisRun = 0;
Resets the progress tracker so we can measure how far right the player gets this run
cameraX = 0;
Resets the camera to show the starting area
pathAnalyzer.startRun();
Clears the currentPath array so motion recording begins fresh
dynamicHazards = pathAnalyzer ? pathAnalyzer.generateObstacles() : [];
Asks the AI to create a new set of hazards based on the best learned path and speed profile from previous runs
hazards = staticHazards.concat(dynamicHazards);
Combines static spikes (always present) with the newly generated lasers and saws into one collision-checkable list
gameState = 'playing';
Marks the game as active so the physics simulation and collision checks will run

Player.update(platforms)

update() is the heart of platformer physics. It combines input handling, acceleration/friction, gravity, and collision detection in a specific order: horizontal movement first, then vertical. This order matters—if you reversed them, the collision logic would behave differently. The onGround flag is crucial; it's set to false each frame and only restored to true when a collision from above is detected, ensuring the player can only jump when standing on a surface.

🔬 This block accelerates when you press a key and applies friction when you don't. What happens if you change frictionGround from 0.8 to 0.5? What about frictionAir from 0.98 to 0.85? How does each one change the feel of movement?

    if (moveDir !== 0) {
      this.vx += moveDir * accel;
    } else {
      this.vx *= this.onGround ? frictionGround : frictionAir;
    }

🔬 These two lines check for four different keys. What happens if you remove the second line entirely? Try adding a new key like Q for a special move.

    if (keyIsDown(65) || keyIsDown(LEFT_ARROW)) moveDir -= 1;  // A / ←
    if (keyIsDown(68) || keyIsDown(RIGHT_ARROW)) moveDir += 1; // D / →
  update(platforms) {
    const accel = 0.7;
    const maxSpeed = 7;
    const frictionGround = 0.8;
    const frictionAir = 0.98;
    const gravity = 0.7;

    // Horizontal input
    let moveDir = 0;
    if (keyIsDown(65) || keyIsDown(LEFT_ARROW)) moveDir -= 1;  // A / ←
    if (keyIsDown(68) || keyIsDown(RIGHT_ARROW)) moveDir += 1; // D / →

    if (moveDir !== 0) {
      this.vx += moveDir * accel;
    } else {
      this.vx *= this.onGround ? frictionGround : frictionAir;
    }
    this.vx = constrain(this.vx, -maxSpeed, maxSpeed);

    // Gravity
    this.vy += gravity;
    this.vy = constrain(this.vy, -20, 18);

    // Reset ground state; will be set again if we land
    this.onGround = false;

    // Horizontal move + collisions
    let newX = this.x + this.vx;
    for (let p of platforms) {
      if (rectsOverlap(newX, this.y, this.w, this.h, p.x, p.y, p.w, p.h)) {
        if (this.vx > 0) {
          newX = p.x - this.w;
        } else if (this.vx < 0) {
          newX = p.x + p.w;
        }
        this.vx = 0;
      }
    }
    this.x = newX;

    // Vertical move + collisions
    let newY = this.y + this.vy;
    for (let p of platforms) {
      if (rectsOverlap(this.x, newY, this.w, this.h, p.x, p.y, p.w, p.h)) {
        if (this.vy > 0) {
          // Land on top
          newY = p.y - this.h;
          this.onGround = true;
        } else if (this.vy < 0) {
          // Hit head on bottom
          newY = p.y + p.h;
        }
        this.vy = 0;
      }
    }
    this.y = newY;
  }
Line-by-line explanation (25 lines)

🔧 Subcomponents:

conditional Horizontal input and acceleration if (moveDir !== 0) { this.vx += moveDir * accel; } else { this.vx *= this.onGround ? frictionGround : frictionAir; }

Applies acceleration when keys are held, or applies friction (different on ground vs. in air) when no input is given

for-loop Horizontal collision detection for (let p of platforms) { if (rectsOverlap(newX, this.y, this.w, this.h, p.x, p.y, p.w, p.h)) { if (this.vx > 0) { newX = p.x - this.w; } else if (this.vx < 0) { newX = p.x + p.w; } this.vx = 0; } }

Checks every platform to see if the player's new horizontal position would overlap; if so, slides them flush against the edge and zeros velocity

for-loop Vertical collision detection and ground detection for (let p of platforms) { if (rectsOverlap(this.x, newY, this.w, this.h, p.x, p.y, p.w, p.h)) { if (this.vy > 0) { // Land on top newY = p.y - this.h; this.onGround = true; } else if (this.vy < 0) { // Hit head on bottom newY = p.y + p.h; } this.vy = 0; } }

Detects landing on platforms from above or head-bumping from below, sets onGround flag, and stops vertical velocity

const accel = 0.7;
How much horizontal velocity increases per frame when a key is held—higher values make acceleration snappier
const maxSpeed = 7;
The cap on horizontal velocity; player can't move faster than 7 pixels/frame even with sustained input
const frictionGround = 0.8;
On the ground, velocity is multiplied by 0.8 each frame (loses 20% speed), making the player stop quickly when keys are released
const frictionAir = 0.98;
In the air, velocity is multiplied by 0.98 each frame (loses only 2% speed), allowing mid-air movement control
const gravity = 0.7;
Downward acceleration applied every frame; higher values make falling faster
let moveDir = 0;
Accumulates directional input: -1 for left, +1 for right, 0 for no input
if (keyIsDown(65) || keyIsDown(LEFT_ARROW)) moveDir -= 1;
Checks if A or left arrow is currently held and decreases moveDir
if (keyIsDown(68) || keyIsDown(RIGHT_ARROW)) moveDir += 1;
Checks if D or right arrow is currently held and increases moveDir
if (moveDir !== 0) { this.vx += moveDir * accel; } else { this.vx *= this.onGround ? frictionGround : frictionAir; }
If a direction key is pressed, add acceleration in that direction; otherwise apply friction based on whether the player is on ground or in air
this.vx = constrain(this.vx, -maxSpeed, maxSpeed);
Clamps horizontal velocity so it never exceeds -7 or +7, preventing unbounded speed
this.vy += gravity;
Increases downward velocity each frame, simulating gravitational pull
this.vy = constrain(this.vy, -20, 18);
Clamps vertical velocity to prevent the player from falling or being pushed upward too fast
this.onGround = false;
Assume the player is in the air; this flag is set back to true only if a collision is detected below
let newX = this.x + this.vx;
Calculate where the player would move horizontally this frame
for (let p of platforms) { if (rectsOverlap(newX, this.y, this.w, this.h, p.x, p.y, p.w, p.h)) {
Loop through all platforms and check if the player's new horizontal position would overlap any platform
if (this.vx > 0) { newX = p.x - this.w;
If moving right and hitting a platform, slide the player's right edge flush against the platform's left edge
} else if (this.vx < 0) { newX = p.x + p.w;
If moving left and hitting a platform, slide the player's left edge flush against the platform's right edge
this.vx = 0;
Stop horizontal velocity to prevent tunneling through the platform
this.x = newX;
Commit the new horizontal position (either moved by velocity or collided/slid)
let newY = this.y + this.vy;
Calculate where the player would move vertically this frame
for (let p of platforms) { if (rectsOverlap(this.x, newY, this.w, this.h, p.x, p.y, p.w, p.h)) {
Loop through all platforms and check if the player's new vertical position would overlap any platform
if (this.vy > 0) { // Land on top newY = p.y - this.h; this.onGround = true;
If moving down and hitting a platform, snap the player's bottom edge to the platform's top and mark them as grounded
} else if (this.vy < 0) { // Hit head on bottom newY = p.y + p.h;
If moving up and hitting a platform's bottom, snap the player's top to the platform's bottom
this.vy = 0;
Stop vertical velocity to prevent tunneling
this.y = newY;
Commit the new vertical position

Player.jump()

jump() enforces the platforming golden rule: you can only jump when standing on ground. The negative velocity value is inverted because p5.js's y-axis points down, so negative velocities move upward. This function is called from keyPressed() when the player presses Space, W, or the up arrow.

  jump() {
    const jumpVel = -14;
    if (this.onGround) {
      this.vy = jumpVel;
      this.onGround = false;
    }
  }
Line-by-line explanation (4 lines)
const jumpVel = -14;
The upward velocity imparted by a jump; negative because y increases downward in p5.js
if (this.onGround) {
Only allow jumping if the player is standing on a platform (prevents infinite mid-air jumping)
this.vy = jumpVel;
Set the vertical velocity to -14, propelling the player upward
this.onGround = false;
Immediately mark the player as airborne so they can't jump again until landing

Player.draw()

draw() uses the global aiConfidence variable to create visual feedback. Every visual property—color, shadow intensity, jitter, scanline count—scales with confidence, creating the sensation that the AI is 'seeing' you. When confidence is high, the player becomes a glowing white entity with strong chromatic shadows and dense scanlines. This is a powerful example of how a single global variable can choreograph an entire visual effect.

🔬 These two lines create the chromatic aberration effect. What happens if you swap the offsets so the magenta is offset to the upper-left and cyan to the lower-right? Try removing one of them entirely to see what the effect looks like with only one color shadow.

    // Cyan shadow
    fill(auraCyan);
    rect(this.x - jitter, this.y - jitter * 0.5, this.w, this.h, 8);
    // Magenta shadow
    fill(auraMagenta);
    rect(this.x + jitter, this.y + jitter * 0.3, this.w, this.h, 8);
  draw() {
    // Glitchy chromatic aura scales with AI confidence
    const baseCol = lerpColor(playerCold, playerHot, aiConfidence);
    const auraCyan = color(0, 255, 255, 80 + aiConfidence * 120);
    const auraMagenta = color(255, 0, 150, 70 + aiConfidence * 110);
    const jitter = 1.5 + aiConfidence * 4;

    noStroke();
    // Cyan shadow
    fill(auraCyan);
    rect(this.x - jitter, this.y - jitter * 0.5, this.w, this.h, 8);
    // Magenta shadow
    fill(auraMagenta);
    rect(this.x + jitter, this.y + jitter * 0.3, this.w, this.h, 8);

    // Main body
    fill(baseCol);
    rect(this.x, this.y, this.w, this.h, 6);

    // Internal glitch scanlines
    const lineCount = 3 + floor(aiConfidence * 4);
    for (let i = 0; i < lineCount; i++) {
      const ly = this.y + (this.h * (i + 1)) / (lineCount + 1);
      stroke(0, 0, 0, 80 + 80 * aiConfidence);
      strokeWeight(1);
      line(this.x + 3, ly, this.x + this.w - 3, ly);
    }

    // Simple face
    noStroke();
    fill(0);
    const eyeY = this.y + this.h * 0.3;
    circle(this.x + this.w * 0.3, eyeY, 4);
    circle(this.x + this.w * 0.7, eyeY, 4);
  }
Line-by-line explanation (15 lines)

🔧 Subcomponents:

assignment Temperature-based color interpolation const baseCol = lerpColor(playerCold, playerHot, aiConfidence);

Blends the player's color from cool blue to hot white based on how well the AI predicts the player's position

assignment Chromatic aberration shadows const auraCyan = color(0, 255, 255, 80 + aiConfidence * 120); const auraMagenta = color(255, 0, 150, 70 + aiConfidence * 110);

Creates glitchy cyan and magenta offset shadows that increase in opacity as confidence rises, simulating VHS chromatic aberration

for-loop Dynamic scanlines for (let i = 0; i < lineCount; i++) { const ly = this.y + (this.h * (i + 1)) / (lineCount + 1); stroke(0, 0, 0, 80 + 80 * aiConfidence); strokeWeight(1); line(this.x + 3, ly, this.x + this.w - 3, ly); }

Draws horizontal scanlines across the player body; more lines and higher opacity when AI confidence increases

const baseCol = lerpColor(playerCold, playerHot, aiConfidence);
Uses linear interpolation to blend between playerCold (cyan, confidence 0) and playerHot (white, confidence 1) based on current aiConfidence
const auraCyan = color(0, 255, 255, 80 + aiConfidence * 120);
Creates a cyan color whose alpha (transparency) increases as confidence rises: from 80 (mostly transparent) to 200 (very visible)
const auraMagenta = color(255, 0, 150, 70 + aiConfidence * 110);
Creates a magenta color whose alpha increases as confidence rises: from 70 to 180
const jitter = 1.5 + aiConfidence * 4;
The offset distance for chromatic shadows; scales from 1.5 pixels (no confidence) to 5.5 pixels (full confidence)
noStroke();
Disables outline drawing for the upcoming rectangles
fill(auraCyan); rect(this.x - jitter, this.y - jitter * 0.5, this.w, this.h, 8);
Draws a cyan rectangle offset to the upper-left with rounded corners; creates a glitchy shadow effect
fill(auraMagenta); rect(this.x + jitter, this.y + jitter * 0.3, this.w, this.h, 8);
Draws a magenta rectangle offset to the lower-right; increases the chromatic aberration illusion
fill(baseCol); rect(this.x, this.y, this.w, this.h, 6);
Draws the main player body in the interpolated color at the actual position
const lineCount = 3 + floor(aiConfidence * 4);
The number of horizontal scanlines drawn across the player; ranges from 3 (no confidence) to 7 (full confidence)
for (let i = 0; i < lineCount; i++) {
Loop through the calculated number of scanlines
const ly = this.y + (this.h * (i + 1)) / (lineCount + 1);
Calculates the y-position of each scanline, evenly distributing them across the player's height
stroke(0, 0, 0, 80 + 80 * aiConfidence);
Sets the line color to black with alpha ranging from 80 (faint) to 160 (visible) based on confidence
line(this.x + 3, ly, this.x + this.w - 3, ly);
Draws a horizontal line inset 3 pixels from the left and right edges
const eyeY = this.y + this.h * 0.3;
Positions the eyes 30% down from the top of the player body
circle(this.x + this.w * 0.3, eyeY, 4); circle(this.x + this.w * 0.7, eyeY, 4);
Draws two small black circles at 30% and 70% across the player width, creating a simple face

Hazard.update()

update() is called every frame for each hazard and controls their motion or animation state. Lasers use a simple timer that cycles through a period, determining when they pulse. Saws use a sine wave, which creates smooth oscillation. Spikes have no update logic because they are static. Understanding how these motion models work will help you create other animated obstacles.

🔬 The laser timer cycles using modulo (%), while the saw uses sine for smooth motion. What would happen if you changed the saw line to use a simple counter like the laser, counting from baseY to baseY + amplitude? Try it: `this.y = this.baseY + (this.phase % this.amplitude);`

    if (this.type === 'laser') {
      this.timer = (this.timer + 1) % this.period;
    } else if (this.type === 'saw') {
      this.phase += this.angularSpeed;
      this.y = this.baseY + Math.sin(this.phase) * this.amplitude;
  update() {
    if (this.type === 'laser') {
      this.timer = (this.timer + 1) % this.period;
    } else if (this.type === 'saw') {
      this.phase += this.angularSpeed;
      this.y = this.baseY + Math.sin(this.phase) * this.amplitude;
    }
  }
Line-by-line explanation (5 lines)

🔧 Subcomponents:

conditional Laser on/off cycle this.timer = (this.timer + 1) % this.period;

Advances the laser's timer each frame, cycling it from 0 to period-1; used to determine when the laser is active

conditional Saw oscillation this.phase += this.angularSpeed; this.y = this.baseY + Math.sin(this.phase) * this.amplitude;

Advances the saw's phase (angle in a sine wave) and uses the sine value to move the saw up and down smoothly

if (this.type === 'laser') {
Check if this hazard is a laser-type
this.timer = (this.timer + 1) % this.period;
Increment the timer and wrap it back to 0 when it reaches the period value, creating a repeating cycle
} else if (this.type === 'saw') {
Check if this hazard is a saw-type
this.phase += this.angularSpeed;
Increase the phase (a value in radians representing position in the sine wave) by the angular speed each frame
this.y = this.baseY + Math.sin(this.phase) * this.amplitude;
Calculate the new y-position: the sine of the phase oscillates between -1 and 1, scaled by amplitude, offset from baseY

Hazard.draw()

draw() renders each hazard type with distinct visual styles. Lasers use Perlin noise for organic flickering, saws use concentric circles to suggest rotation, and spikes use triangle-based glow effects. All three types interpolate their colors based on aiConfidence, making the entire hazard layer respond to how well the AI is predicting your path.

  draw() {
    noStroke();
    if (this.type === 'laser') {
      const active = this.isActive();
      const base = lerpColor(laserCold, laserHot, aiConfidence);
      const n = noise(this.x * 0.03, frameCount * 0.12);
      let alpha = active ? 200 + n * 55 : 40 + n * 40;
      alpha = constrain(alpha, 40, 255);

      fill(red(base), green(base), blue(base), alpha);
      rect(this.x, this.y, this.w, this.h, 4);

      if (active) {
        // bright inner core
        const inner = color(255, 255, 255, 130 + aiConfidence * 80);
        fill(inner);
        rect(this.x + 4, this.y + 4, this.w - 8, this.h - 8, 3);
      }
    } else if (this.type === 'saw') {
      // Glitchy saw blade
      const base = lerpColor(sawCold, sawHot, aiConfidence);
      const shadowCol = color(0, 0, 0, 120);
      const jitter = 1 + aiConfidence * 2;

      // Shadow
      fill(shadowCol);
      circle(this.x + jitter, this.y + jitter, this.radius * 2.1);

      // Blade
      stroke(40, 40, 40, 200);
      strokeWeight(1.5);
      fill(base);
      circle(this.x, this.y, this.radius * 2);

      // Center
      noStroke();
      fill(15, 15, 20, 230);
      circle(this.x, this.y, this.radius * 0.7);
    } else if (this.type === 'spike') {
      // Neon spikes
      const spikeCol = lerpColor(color(230, 80, 80), color(255, 240, 120), aiConfidence);
      const glowCol = color(255, 0, 120, 80 + aiConfidence * 120);

      // Glow
      fill(glowCol);
      triangle(
        this.x - 4, this.y + this.h + 4,
        this.x + this.w * 0.5, this.y - 4,
        this.x + this.w + 4, this.y + this.h + 4
      );

      // Core
      fill(spikeCol);
      triangle(
        this.x, this.y + this.h,
        this.x + this.w * 0.5, this.y,
        this.x + this.w, this.y + this.h
      );
    }
  }
Line-by-line explanation (19 lines)

🔧 Subcomponents:

conditional Laser rendering fill(red(base), green(base), blue(base), alpha); rect(this.x, this.y, this.w, this.h, 4); if (active) { const inner = color(255, 255, 255, 130 + aiConfidence * 80); fill(inner); rect(this.x + 4, this.y + 4, this.w - 8, this.h - 8, 3); }

Draws the laser as a colored rectangle with a brightening effect when active, plus a white inner core to simulate glowing energy

conditional Saw rendering fill(shadowCol); circle(this.x + jitter, this.y + jitter, this.radius * 2.1); stroke(40, 40, 40, 200); strokeWeight(1.5); fill(base); circle(this.x, this.y, this.radius * 2); noStroke(); fill(15, 15, 20, 230); circle(this.x, this.y, this.radius * 0.7);

Draws three concentric circles: a shadow, an outer blade, and a dark center hub

conditional Spike rendering fill(glowCol); triangle( this.x - 4, this.y + this.h + 4, this.x + this.w * 0.5, this.y - 4, this.x + this.w + 4, this.y + this.h + 4 ); fill(spikeCol); triangle( this.x, this.y + this.h, this.x + this.w * 0.5, this.y, this.x + this.w, this.y + this.h );

Draws two overlapping triangles: a larger glowing outline and a smaller core, creating a neon spike effect

noStroke();
Disable stroke for all following shapes in the draw method
const active = this.isActive();
Check whether the laser is in its 'on' phase based on the timer
const base = lerpColor(laserCold, laserHot, aiConfidence);
Interpolate the laser color from laserCold (blue) to laserHot (red) based on AI confidence
const n = noise(this.x * 0.03, frameCount * 0.12);
Use Perlin noise to generate a pseudo-random flickering value based on laser position and frame count
let alpha = active ? 200 + n * 55 : 40 + n * 40;
When active, alpha is brighter (200-255); when inactive, alpha is dimmer (40-80), creating a pulsing effect
alpha = constrain(alpha, 40, 255);
Ensure alpha stays within valid bounds
fill(red(base), green(base), blue(base), alpha);
Decompose the interpolated color and apply the calculated alpha
rect(this.x, this.y, this.w, this.h, 4);
Draw the laser as a rounded rectangle
const inner = color(255, 255, 255, 130 + aiConfidence * 80);
Create a white inner core whose brightness increases with confidence (from 130 to 210 alpha)
rect(this.x + 4, this.y + 4, this.w - 8, this.h - 8, 3);
Draw the inner core inset 4 pixels from the edges
const base = lerpColor(sawCold, sawHot, aiConfidence);
Interpolate the saw color from sawCold (light gray) to sawHot (orange) based on confidence
const shadowCol = color(0, 0, 0, 120);
Define a semi-transparent black color for the shadow
const jitter = 1 + aiConfidence * 2;
Offset distance for the shadow; grows from 1 to 3 pixels as confidence increases
fill(shadowCol); circle(this.x + jitter, this.y + jitter, this.radius * 2.1);
Draw a black shadow circle offset and slightly larger than the blade
stroke(40, 40, 40, 200); strokeWeight(1.5); fill(base); circle(this.x, this.y, this.radius * 2);
Draw the main saw blade circle with a dark outline and interpolated fill color
noStroke(); fill(15, 15, 20, 230); circle(this.x, this.y, this.radius * 0.7);
Draw a dark center hub to complete the saw appearance
const spikeCol = lerpColor(color(230, 80, 80), color(255, 240, 120), aiConfidence);
Interpolate spike color from red-orange (low confidence) to bright yellow (high confidence)
const glowCol = color(255, 0, 120, 80 + aiConfidence * 120);
Define the spike glow as magenta with alpha increasing from 80 to 200 as confidence rises
triangle(...);
Draw two triangles (glow and core) to create the neon spike effect

PathAnalyzer.record(x, y, speed)

record() is called every frame during gameplay and stores a snapshot of the player's position and speed. By the end of a run, currentPath contains hundreds of waypoints that describe the player's exact route. This data is later analyzed to identify the optimal path and inform AI difficulty scaling.

  // Record x/y plus instantaneous horizontal speed
  record(x, y, speed) {
    this.currentPath.push({ x, y, speed });
  }
Line-by-line explanation (1 lines)
this.currentPath.push({ x, y, speed });
Appends an object containing the player's x, y, and horizontal speed to the currentPath array

PathAnalyzer.endRun(maxDistance)

endRun() is called when the player dies or wins, and it decides whether this run was good enough to use as the AI's learning template. Only runs that beat the previous distance record are saved, ensuring the AI always learns from your best performance. The speed metrics (average and peak) drive the difficulty scaling in generateObstacles().

  endRun(maxDistance) {
    // Keep the run that got furthest to the right
    if (maxDistance > this.bestDistance && this.currentPath.length > 20) {
      this.bestDistance = maxDistance;

      // Deep copy best path, including speed
      this.bestPath = this.currentPath.map(p => ({
        x: p.x,
        y: p.y,
        speed: p.speed
      }));

      // Compute speed metrics for difficulty scaling
      let totalSpeed = 0;
      let maxSpeed = 0;
      for (let p of this.currentPath) {
        const s = p.speed || 0;
        totalSpeed += s;
        if (s > maxSpeed) maxSpeed = s;
      }
      this.bestAvgSpeed = totalSpeed / this.currentPath.length;
      this.bestMaxSpeed = maxSpeed;
    }
  }
Line-by-line explanation (7 lines)

🔧 Subcomponents:

assignment Deep copy of best path this.bestPath = this.currentPath.map(p => ({ x: p.x, y: p.y, speed: p.speed }));

Creates a new array with copies of each waypoint, preserving the path even after currentPath is cleared for the next run

for-loop Speed statistics calculation let totalSpeed = 0; let maxSpeed = 0; for (let p of this.currentPath) { const s = p.speed || 0; totalSpeed += s; if (s > maxSpeed) maxSpeed = s; }

Iterates through all waypoints, accumulating total and peak speeds to compute difficulty metrics

if (maxDistance > this.bestDistance && this.currentPath.length > 20) {
Only save the run if it progressed further right than the previous best AND has enough data points (avoids saving trivial runs)
this.bestDistance = maxDistance;
Update the record of the furthest distance reached
this.bestPath = this.currentPath.map(p => ({
Create a new array by mapping over currentPath; each element becomes a new object (deep copy)
let totalSpeed = 0; let maxSpeed = 0;
Initialize accumulators for computing average and peak speed
for (let p of this.currentPath) { const s = p.speed || 0; totalSpeed += s; if (s > maxSpeed) maxSpeed = s; }
Loop through all waypoints, summing speeds and tracking the maximum
this.bestAvgSpeed = totalSpeed / this.currentPath.length;
Calculate average speed across the entire run
this.bestMaxSpeed = maxSpeed;
Store the peak speed reached during this run

PathAnalyzer.generateObstacles()

generateObstacles() is the core of the adaptive difficulty system. It reads your best-run path and speed profile, then strategically places hazards along that route. The faster you were in a segment, the harder the hazard spawned there. This creates the illusion that the AI is 'hunting' you—it literally places threats where you felt confident. The function also ensures hazards don't cluster and avoids the start area, keeping the game fair.

🔬 This logic chooses hazard type based on speed: fast = lasers, slow = saws, medium = alternating. What happens if you remove the middle condition so ALL fast segments get lasers AND all slow segments get lasers? Try changing the thresholds to make lasers spawn in more regions.

      // Type selection: fast segments favor lasers, slower ones favor saws
      let type;
      if (localNorm > 0.6) {
        type = 'laser';
      } else if (localNorm > 0.3) {
        type = created % 2 === 0 ? 'laser' : 'saw';
      } else {
        type = 'saw';
      }
  generateObstacles() {
    const hazards = [];
    if (!this.bestPath || this.bestPath.length < 60) return hazards;

    const path = this.bestPath;

    // Global difficulty: faster average speed → more hazards
    const avgSpeed = this.bestAvgSpeed || 0;    // player maxSpeed ≈ 7
    const speedNorm = constrain(avgSpeed / 7, 0, 1); // 0..1

    // Between 3 (slow/ cautious run) and 10 (very fast) hazards
    const desired = floor(3 + speedNorm * 7);

    const step = max(20, floor(path.length / (desired + 2)));
    let created = 0;

    for (let i = step; i < path.length - step && created < desired; i += step) {
      const p = path[i];
      const localSpeed = p.speed != null ? p.speed : avgSpeed;
      const localNorm = constrain(localSpeed / 7, 0, 1); // 0..1

      // Don't make the spawn area unfair
      if (p.x < 450) continue;
      if (!this.isGoodHazardSpot(p)) continue;

      // Faster local speed → higher chance to spawn something mean
      const spawnChance = 0.35 + localNorm * 0.5; // 0.35..0.85
      if (random() > spawnChance) continue;

      // Avoid overlapping newly added hazards
      let tooClose = false;
      for (let h of hazards) {
        if (Math.abs(h.centerX() - p.x) < 120) {
          tooClose = true;
          break;
        }
      }
      if (tooClose) continue;

      // Type selection: fast segments favor lasers, slower ones favor saws
      let type;
      if (localNorm > 0.6) {
        type = 'laser';
      } else if (localNorm > 0.3) {
        type = created % 2 === 0 ? 'laser' : 'saw';
      } else {
        type = 'saw';
      }

      if (type === 'laser') {
        // Faster segments → quicker cycles + tighter "on" windows
        const basePeriod = 70 - localNorm * 30; // 70..40 frames
        const baseOn = 24 - localNorm * 10;     // 24..14 frames

        const opts = {
          period: floor(basePeriod),
          onDuration: floor(baseOn),
          initialTimer: floor(random(basePeriod)) // desync from others
        };
        hazards.push(new Hazard('laser', p.x, p.y, opts));
      } else if (type === 'saw') {
        // Faster segments → bigger swing + faster motion
        const amp = 30 + localNorm * 35;        // 30..65 px
        const angSpeed = 0.06 + localNorm * 0.07; // 0.06..0.13 rad/frame

        const opts = {
          amplitude: amp,
          angularSpeed: angSpeed
        };
        hazards.push(new Hazard('saw', p.x, p.y, opts));
      }

      created++;
    }

    return hazards;
  }
Line-by-line explanation (25 lines)

🔧 Subcomponents:

calculation Global difficulty scaling const avgSpeed = this.bestAvgSpeed || 0; const speedNorm = constrain(avgSpeed / 7, 0, 1); const desired = floor(3 + speedNorm * 7);

Converts average run speed into a normalized 0-1 value, then uses it to determine how many hazards to spawn (3-10)

for-loop Path sampling and hazard placement for (let i = step; i < path.length - step && created < desired; i += step) {

Iterates through the path at regular intervals, stopping at each sample point to consider spawning a hazard

conditional Probabilistic hazard spawning const spawnChance = 0.35 + localNorm * 0.5; if (random() > spawnChance) continue;

Uses local speed to determine likelihood of placing a hazard; faster segments have higher chance

conditional Hazard type selection let type; if (localNorm > 0.6) { type = 'laser'; } else if (localNorm > 0.3) { type = created % 2 === 0 ? 'laser' : 'saw'; } else { type = 'saw'; }

Chooses hazard type based on local speed: fast segments prefer lasers, slow segments prefer saws, medium segments alternate

assignment Laser configuration scaling const basePeriod = 70 - localNorm * 30; const baseOn = 24 - localNorm * 10; const opts = { period: floor(basePeriod), onDuration: floor(baseOn), initialTimer: floor(random(basePeriod)) };

Faster segments get shorter laser periods (faster blinking) and shorter on-windows (less time to pass), making the challenge harder

assignment Saw configuration scaling const amp = 30 + localNorm * 35; const angSpeed = 0.06 + localNorm * 0.07; const opts = { amplitude: amp, angularSpeed: angSpeed };

Faster segments get bigger, quicker-moving saws, making them harder to navigate

const hazards = [];
Initialize an empty array to collect newly generated hazards
if (!this.bestPath || this.bestPath.length < 60) return hazards;
If there's no learned path yet or it's too short, return empty list; can't generate meaningful obstacles without enough data
const avgSpeed = this.bestAvgSpeed || 0;
Get the average speed from the best run; default to 0 if no run yet
const speedNorm = constrain(avgSpeed / 7, 0, 1);
Normalize the speed to 0-1 by dividing by max player speed (7) and clamping; 0 = very slow, 1 = very fast
const desired = floor(3 + speedNorm * 7);
Scale to desired hazard count: slow run (speedNorm≈0) → ~3 hazards; fast run (speedNorm≈1) → ~10 hazards
const step = max(20, floor(path.length / (desired + 2)));
Calculate the spacing between sample points; larger paths with more desired hazards get closer sampling
let created = 0;
Counter to track how many hazards have been created so far
for (let i = step; i < path.length - step && created < desired; i += step) {
Loop through the path at intervals of 'step', avoiding the very start and end, until we've created enough hazards
const p = path[i];
Get the waypoint at the current sample position
const localSpeed = p.speed != null ? p.speed : avgSpeed;
Use the recorded speed at this waypoint if available; fall back to average speed otherwise
const localNorm = constrain(localSpeed / 7, 0, 1);
Normalize the local speed to 0-1
if (p.x < 450) continue;
Skip the spawn area (starting area); keep early game fair
if (!this.isGoodHazardSpot(p)) continue;
Skip waypoints that aren't suitable for hazards (inside platforms, too close to ground, etc.)
const spawnChance = 0.35 + localNorm * 0.5;
Compute spawn probability: at speed norm 0, 35% chance; at speed norm 1, 85% chance
if (random() > spawnChance) continue;
Roll a random value; if it exceeds spawnChance, skip this waypoint (don't spawn)
let tooClose = false; for (let h of hazards) { if (Math.abs(h.centerX() - p.x) < 120) { tooClose = true; break; } }
Check if any previously placed hazard is within 120 pixels horizontally; if so, mark as too close to avoid clustering
if (tooClose) continue;
Skip this waypoint if a hazard is already nearby
let type; if (localNorm > 0.6) { type = 'laser'; } else if (localNorm > 0.3) { type = created % 2 === 0 ? 'laser' : 'saw'; } else { type = 'saw'; }
Choose hazard type: fast segments get lasers, slow get saws, medium alternate based on count
const basePeriod = 70 - localNorm * 30; const baseOn = 24 - localNorm * 10;
At low local speed, laser period is 70 frames (slow pulse); at high speed, period is 40 frames (fast pulse)
const opts = { period: floor(basePeriod), onDuration: floor(baseOn), initialTimer: floor(random(basePeriod)) };
Bundle the laser parameters and randomize the starting phase so multiple lasers don't pulse in sync
hazards.push(new Hazard('laser', p.x, p.y, opts));
Create the laser hazard at the sampled position with the computed options
const amp = 30 + localNorm * 35; const angSpeed = 0.06 + localNorm * 0.07;
At low speed, saw swings 30 pixels with angular speed 0.06; at high speed, 65 pixels with 0.13 rad/frame
const opts = { amplitude: amp, angularSpeed: angSpeed }; hazards.push(new Hazard('saw', p.x, p.y, opts));
Create the saw hazard with the computed motion parameters
created++;
Increment the hazard counter
return hazards;
Return the newly generated hazard array to be used in the next game run

updatePredictionConfidence()

updatePredictionConfidence() is the bridge between the AI's learned path and the visual feedback. Every frame, it compares where you are and how fast you're moving to where the AI expected you to be. The closer you follow the expected route at the expected speed, the higher the confidence. This confidence value drives the entire visual system—from background color to player chromatic aberration to hazard hues. It's the quantified feedback that makes the player *feel* that the AI is watching and responding.

🔬 The AI weights position error (75%) and speed error (25%). What happens if you flip it to 0.25 and 0.75, making speed the dominant factor? Try equal weights: 0.5 each. How does it change what the visuals react to?

  const combinedError = normDist * 0.75 + normSpeedDiff * 0.25;
  const targetConf = constrain(1 - combinedError, 0, 1);
function updatePredictionConfidence() {
  predictedX = null;
  predictedY = null;

  if (!pathAnalyzer || !pathAnalyzer.bestPath || pathAnalyzer.bestPath.length < 30) {
    // Ease confidence down if no learned path yet
    aiConfidence = lerp(aiConfidence, 0, 0.05);
    return;
  }

  const path = pathAnalyzer.bestPath;
  const maxX = pathAnalyzer.bestDistance || path[path.length - 1].x;
  if (maxX <= 0) {
    aiConfidence = lerp(aiConfidence, 0, 0.05);
    return;
  }

  // Approximate position along best path by horizontal progress
  const progress = constrain(player.centerX() / maxX, 0, 1);
  const idxF = progress * (path.length - 1);
  const idx0 = floor(idxF);
  const idx1 = min(path.length - 1, idx0 + 1);
  const t = idxF - idx0;

  const p0 = path[idx0];
  const p1 = path[idx1];

  const interpX = lerp(p0.x, p1.x, t);
  const interpY = lerp(p0.y, p1.y, t);
  const interpSpeed = lerp(p0.speed || 0, p1.speed || 0, t);

  // Predict where you "should" be in a short time if you follow best path
  const lookAheadFrames = 12;
  const futureIdx = min(path.length - 1, idx0 + lookAheadFrames);
  const futureP = path[futureIdx];
  predictedX = futureP.x;
  predictedY = futureP.y;

  // Measure how close you actually are to the learned route right now
  const actualX = player.centerX();
  const actualY = player.centerY();
  const actualSpeed = abs(player.vx);

  const distPixels = dist(actualX, actualY, interpX, interpY);
  const normDist = constrain(distPixels / 200, 0, 1);        // 0 = perfect
  const speedDiff = abs(actualSpeed - interpSpeed);
  const normSpeedDiff = constrain(speedDiff / 7, 0, 1);      // 0 = perfect

  const combinedError = normDist * 0.75 + normSpeedDiff * 0.25;
  const targetConf = constrain(1 - combinedError, 0, 1);

  // Smooth so colors "ease" instead of snapping
  aiConfidence = lerp(aiConfidence, targetConf, 0.2);
}
Line-by-line explanation (16 lines)

🔧 Subcomponents:

calculation Path position interpolation const progress = constrain(player.centerX() / maxX, 0, 1); const idxF = progress * (path.length - 1); const idx0 = floor(idxF); const idx1 = min(path.length - 1, idx0 + 1); const t = idxF - idx0; const interpX = lerp(p0.x, p1.x, t); const interpY = lerp(p0.y, p1.y, t);

Maps the player's horizontal progress to a position along the learned path, interpolating between waypoints for a smooth estimate

calculation Confidence error metric const distPixels = dist(actualX, actualY, interpX, interpY); const normDist = constrain(distPixels / 200, 0, 1); const speedDiff = abs(actualSpeed - interpSpeed); const normSpeedDiff = constrain(speedDiff / 7, 0, 1); const combinedError = normDist * 0.75 + normSpeedDiff * 0.25; const targetConf = constrain(1 - combinedError, 0, 1);

Measures how far the player is from the predicted position (75% weight) and speed (25% weight); converts error into a confidence score

predictedX = null; predictedY = null;
Clear the previous prediction; will be recalculated if conditions are met
if (!pathAnalyzer || !pathAnalyzer.bestPath || pathAnalyzer.bestPath.length < 30) {
If no learned path exists or it's too short to be meaningful, can't make predictions
aiConfidence = lerp(aiConfidence, 0, 0.05);
Gradually fade confidence toward 0 at 5% per frame, creating a smooth decay when there's no path
const maxX = pathAnalyzer.bestDistance || path[path.length - 1].x;
Get the furthest x-position reached on the best run; defines the domain for progress mapping
const progress = constrain(player.centerX() / maxX, 0, 1);
Compute the player's progress as a fraction of the best run's distance (0 = start, 1 = furthest point)
const idxF = progress * (path.length - 1);
Convert progress to a floating-point index into the path array
const idx0 = floor(idxF); const idx1 = min(path.length - 1, idx0 + 1); const t = idxF - idx0;
Identify the two waypoints surrounding the floating-point index and compute the interpolation parameter
const interpX = lerp(p0.x, p1.x, t); const interpY = lerp(p0.y, p1.y, t); const interpSpeed = lerp(p0.speed || 0, p1.speed || 0, t);
Linearly interpolate between the two waypoints to get the expected position and speed
const lookAheadFrames = 12; const futureIdx = min(path.length - 1, idx0 + lookAheadFrames); const futureP = path[futureIdx]; predictedX = futureP.x; predictedY = futureP.y;
Calculate where the player 'should' be 12 frames ahead along the best path; used to draw the crosshair on screen
const actualX = player.centerX(); const actualY = player.centerY(); const actualSpeed = abs(player.vx);
Capture the player's current center position and horizontal speed magnitude
const distPixels = dist(actualX, actualY, interpX, interpY);
Calculate the Euclidean distance between actual and predicted position
const normDist = constrain(distPixels / 200, 0, 1);
Normalize the distance: 0 = perfect alignment, 1 = more than 200 pixels off
const speedDiff = abs(actualSpeed - interpSpeed); const normSpeedDiff = constrain(speedDiff / 7, 0, 1);
Measure speed difference: 0 = perfect speed match, 1 = more than 7 pixels/frame off
const combinedError = normDist * 0.75 + normSpeedDiff * 0.25;
Weight position error at 75% and speed error at 25%; position matters more for the AI's confidence
const targetConf = constrain(1 - combinedError, 0, 1);
Invert the error: zero error → confidence 1, high error → confidence 0
aiConfidence = lerp(aiConfidence, targetConf, 0.2);
Smoothly interpolate from current confidence to target at 20% per frame, preventing jarring color snaps

updateGame()

updateGame() is the main game loop orchestrator. It updates physics, records the path, checks collisions, handles camera movement, and detects win/lose conditions. It's called every frame when the game state is 'playing'. The order of operations matters: physics first, then camera, then recording, then collision checks, so that your recorded position is your actual position at frame's end.

function updateGame() {
  player.update(platforms);

  // Keep player within world bounds
  if (player.x < 0) {
    player.x = 0;
    player.vx = 0;
  }
  if (player.x + player.w > worldWidth) {
    player.x = worldWidth - player.w;
    player.vx = 0;
  }

  // Camera follows player
  cameraX = player.x - width * 0.4;
  cameraX = constrain(cameraX, 0, max(0, worldWidth - width));

  // Update hazards
  for (let h of hazards) {
    h.update();
  }

  // Record path for this run, including speed
  const speedSample = abs(player.vx);
  pathAnalyzer.record(player.centerX(), player.centerY(), speedSample);
  if (player.x > furthestXThisRun) {
    furthestXThisRun = player.x;
  }

  // Update AI's prediction confidence metric
  updatePredictionConfidence();

  // Hazard collisions
  for (let h of hazards) {
    if (h.collidesWithPlayer(player)) {
      handleDeath('hazard');
      return;
    }
  }

  // Fall off the world
  if (player.y > height + 400) {
    handleDeath('fall');
    return;
  }

  // Goal reached
  if (goal && rectsOverlap(player.x, player.y, player.w, player.h,
                           goal.x, goal.y, goal.w, goal.h)) {
    handleVictory();
    return;
  }
}
Line-by-line explanation (13 lines)

🔧 Subcomponents:

conditional World boundary clamping if (player.x < 0) { player.x = 0; player.vx = 0; }

Prevents the player from moving off the left edge of the world

assignment Camera position tracking cameraX = player.x - width * 0.4; cameraX = constrain(cameraX, 0, max(0, worldWidth - width));

Positions the camera so the player is at 40% of the screen width, and ensures the camera doesn't scroll past world boundaries

for-loop Hazard updates for (let h of hazards) { h.update(); }

Advances the timer or position for each hazard (lasers pulse, saws swing)

for-loop Hazard collision detection for (let h of hazards) { if (h.collidesWithPlayer(player)) { handleDeath('hazard'); return; } }

Tests whether the player overlaps any hazard; if so, ends the run

player.update(platforms);
Apply gravity, friction, input, and collisions to advance the player's physics
if (player.x < 0) { player.x = 0; player.vx = 0; }
If the player drifts off the left edge, snap them back and stop horizontal velocity
if (player.x + player.w > worldWidth) { player.x = worldWidth - player.w; player.vx = 0; }
If the player drifts off the right edge, snap them back and stop horizontal velocity
cameraX = player.x - width * 0.4;
Position the camera so the player appears at 40% across the screen (left-biased for level exploration)
cameraX = constrain(cameraX, 0, max(0, worldWidth - width));
Clamp the camera so it never scrolls past the world edges
for (let h of hazards) { h.update(); }
Call update on every hazard; lasers increment their timer, saws update their phase
const speedSample = abs(player.vx);
Capture the player's current horizontal speed magnitude
pathAnalyzer.record(player.centerX(), player.centerY(), speedSample);
Record this frame's position and speed into the current run's path data
if (player.x > furthestXThisRun) { furthestXThisRun = player.x; }
Track the furthest x-position reached this run; used to decide if this run should be saved
updatePredictionConfidence();
Calculate how well the player is following the learned path and update the visual confidence metric
for (let h of hazards) { if (h.collidesWithPlayer(player)) { handleDeath('hazard'); return; } }
Check every hazard for collision with the player; if one hits, trigger death and exit early
if (player.y > height + 400) { handleDeath('fall'); return; }
If the player falls far below the screen, trigger death (safety net for falling off platforms)
if (goal && rectsOverlap(player.x, player.y, player.w, player.h, goal.x, goal.y, goal.w, goal.h)) { handleVictory(); return; }
Check if the player's rectangle overlaps the goal; if so, trigger victory and exit

renderGame()

renderGame() is the visual orchestration layer. It uses push/pop and translate to create a scrolling camera effect, applies the confidence-driven color interpolations across all elements, and layers multiple glitch effects. The prediction crosshair is a key visual feedback: it shows the player exactly where the AI thinks they'll be, creating a feedback loop where you can adjust your movement to sync with or evade the AI's expectations.

function renderGame() {
  // Background reacts to AI confidence
  const bgCol = lerpColor(bgCool, bgHot, aiConfidence);
  background(bgCol);

  drawBackgroundGlitch();

  push();
  translate(-cameraX, 0);

  // Visualize the AI's "optimal path" for clarity
  pathAnalyzer.drawGhostPath();

  // Platforms
  noStroke();
  for (let p of platforms) {
    // Slight neon tint based on AI confidence
    const platBase = color(40, 40, 55);
    const platHot = color(90, 50, 120);
    fill(lerpColor(platBase, platHot, aiConfidence * 0.6));
    rect(p.x, p.y, p.w, p.h);
  }

  // Goal
  if (goal) {
    const baseCol = color(40, 200, 120);
    const hotCol = color(255, 240, 120);
    const pillarCol = lerpColor(baseCol, hotCol, aiConfidence * 0.8);

    // base pillar
    fill(pillarCol);
    rect(goal.x, goal.y, goal.w, goal.h, 10);
    // pole
    fill(0, 160, 80);
    rect(goal.x + goal.w * 0.15, goal.y + 10, goal.w * 0.15, goal.h - 20);
    // flag
    fill(255, 200, 80);
    triangle(
      goal.x + goal.w * 0.3, goal.y + 20,
      goal.x + goal.w * 0.3, goal.y + 60,
      goal.x + goal.w * 0.9, goal.y + 40
    );
  }

  // Hazards (static + AI-generated)
  for (let h of hazards) {
    h.draw();
  }

  // AI predicted future position crosshair
  if (predictedX != null && predictedY != null && aiConfidence > 0.05) {
    const crossSize = 18 + aiConfidence * 10;
    const glow = lerpColor(glitchCold, glitchHot, aiConfidence);
    noFill();
    stroke(red(glow), green(glow), blue(glow), 140 + aiConfidence * 80);
    strokeWeight(1.5);
    line(predictedX - crossSize, predictedY, predictedX + crossSize, predictedY);
    line(predictedX, predictedY - crossSize, predictedX, predictedY + crossSize);
  }

  // Player
  player.draw();

  pop();

  drawForegroundGlitch();

  drawHUD();
}
Line-by-line explanation (20 lines)

🔧 Subcomponents:

assignment Reactive background const bgCol = lerpColor(bgCool, bgHot, aiConfidence); background(bgCol);

Interpolates the background color from cool blue (safe, unpredictable) to hot burgundy (AI confident)

assignment Camera viewport transformation push(); translate(-cameraX, 0);

Applies a coordinate system shift so the world scrolls to follow the player

conditional Prediction indicator if (predictedX != null && predictedY != null && aiConfidence > 0.05) { const crossSize = 18 + aiConfidence * 10; const glow = lerpColor(glitchCold, glitchHot, aiConfidence); noFill(); stroke(red(glow), green(glow), blue(glow), 140 + aiConfidence * 80); strokeWeight(1.5); line(predictedX - crossSize, predictedY, predictedX + crossSize, predictedY); line(predictedX, predictedY - crossSize, predictedX, predictedY + crossSize); }

Draws a crosshair at the AI's predicted future position when confidence is above threshold, showing where the AI thinks you'll be

const bgCol = lerpColor(bgCool, bgHot, aiConfidence);
Interpolate background color based on AI confidence (0..1)
background(bgCol);
Clear the canvas with the interpolated color
drawBackgroundGlitch();
Overlay animated glitch scanlines and bars that react to confidence
push(); translate(-cameraX, 0);
Save the current drawing state and shift the coordinate system left by cameraX (scrolling effect)
pathAnalyzer.drawGhostPath();
Render the learned path as a semi-transparent line for visual feedback (debug aid and aesthetic)
noStroke(); for (let p of platforms) { const platBase = color(40, 40, 55); const platHot = color(90, 50, 120); fill(lerpColor(platBase, platHot, aiConfidence * 0.6)); rect(p.x, p.y, p.w, p.h); }
Draw all platforms with a color that interpolates from gray-blue (base) to purple (hot) at 60% of confidence intensity
if (goal) {
Check if a goal exists before drawing it
const baseCol = color(40, 200, 120); const hotCol = color(255, 240, 120); const pillarCol = lerpColor(baseCol, hotCol, aiConfidence * 0.8);
Interpolate goal color from green (base) to yellow (hot) at 80% confidence intensity
fill(pillarCol); rect(goal.x, goal.y, goal.w, goal.h, 10);
Draw the main goal pillar with interpolated color and rounded corners
fill(0, 160, 80); rect(goal.x + goal.w * 0.15, goal.y + 10, goal.w * 0.15, goal.h - 20);
Draw a green pole in the center of the pillar
fill(255, 200, 80); triangle(...);
Draw a yellow triangular flag at the top
for (let h of hazards) { h.draw(); }
Render all hazards (static spikes, AI-generated lasers and saws)
if (predictedX != null && predictedY != null && aiConfidence > 0.05) {
If the AI has made a prediction and confidence is high enough, draw the prediction indicator
const crossSize = 18 + aiConfidence * 10;
Scale the crosshair size from 18 pixels (low confidence) to 28 pixels (high confidence)
const glow = lerpColor(glitchCold, glitchHot, aiConfidence);
Choose the crosshair color based on confidence (cyan to magenta)
stroke(red(glow), green(glow), blue(glow), 140 + aiConfidence * 80); strokeWeight(1.5); line(predictedX - crossSize, predictedY, predictedX + crossSize, predictedY); line(predictedX, predictedY - crossSize, predictedX, predictedY + crossSize);
Draw a crosshair (+ symbol) at the predicted position with interpolated color and alpha
// Player player.draw();
Render the player at their current position
pop();
Restore the drawing state, canceling the camera translation
drawForegroundGlitch();
Overlay additional glitch effects on top of the world
drawHUD();
Render the UI text and progress bar

draw()

draw() is the p5.js main loop, called 60 times per second. It separates game logic (update) from rendering (render), allowing paused states where the visuals still render but the simulation doesn't advance. This is a clean architecture pattern used in most game engines.

function draw() {
  if (gameState === 'playing') {
    updateGame();
  }
  renderGame();
}
Line-by-line explanation (3 lines)
if (gameState === 'playing') {
Only update game logic when actively playing; skip updates when dead or in victory state
updateGame();
Run the game simulation: physics, collision detection, path recording, AI prediction
renderGame();
Render the current state to the screen, regardless of game state (so HUD is always visible)

keyPressed()

keyPressed() is called by p5.js whenever a key is pressed. This sketch uses it for two actions: jump (spacebar/W/up) and reset (R). The input also handles state transitions: pressing jump after death triggers resetGame, creating a fluid flow between game states without needing separate screens.

function keyPressed() {
  // Jump
  if (key === ' ' || key === 'W' || key === 'w' || keyCode === UP_ARROW) {
    if (gameState === 'playing') {
      player.jump();
    } else if (gameState === 'dead' || gameState === 'victory') {
      resetGame();
    }
  }

  // Reset
  if (key === 'R' || key === 'r') {
    resetGame();
  }
}
Line-by-line explanation (3 lines)

🔧 Subcomponents:

conditional Spacebar/jump key input if (key === ' ' || key === 'W' || key === 'w' || keyCode === UP_ARROW) { if (gameState === 'playing') { player.jump(); } else if (gameState === 'dead' || gameState === 'victory') { resetGame(); } }

Handles space, W, or up arrow: jumps if playing, resets if dead/victorious

conditional Reset key input if (key === 'R' || key === 'r') { resetGame(); }

Pressing R always resets the game

if (key === ' ' || key === 'W' || key === 'w' || keyCode === UP_ARROW) {
Check if space, W (uppercase or lowercase), or up arrow was pressed
if (gameState === 'playing') { player.jump(); } else if (gameState === 'dead' || gameState === 'victory') { resetGame(); }
If playing, execute a jump; if dead or victorious, reset the game (allowing quick replay)
if (key === 'R' || key === 'r') { resetGame(); }
R always resets, providing an explicit reset button independent of game state

drawBackgroundGlitch()

drawBackgroundGlitch() creates the bottom-layer aesthetic glitch effects. Scanlines flicker using Perlin noise, creating organic CRT monitor artifacts. Vertical bars are purely random and spawn more frequently as the AI becomes confident. The additive blend mode makes the effects glow rather than darken, which is key to the neon look. This function is called before the camera translation, so the glitch effects stay fixed to the screen while the world scrolls behind them.

🔬 This loop draws white scanlines. What happens if you change the `step` from 3 to 1 or 6? What if you change the noise parameters to 0.05 or 0.01? Try changing `stroke(255, alpha)` to `stroke(255, 0, 255, alpha)` for magenta lines.

  // Horizontal scanlines
  const step = 3;
  strokeWeight(1);
  for (let y = 0; y < height; y += step) {
    const n = noise(y * 0.02, frameCount * 0.015);
    const alpha = 8 + n * 35 * (0.3 + aiConfidence);
    stroke(255, alpha);
    line(0, y, width, y);
  }
function drawBackgroundGlitch() {
  push();
  blendMode(ADD);

  // Horizontal scanlines
  const step = 3;
  strokeWeight(1);
  for (let y = 0; y < height; y += step) {
    const n = noise(y * 0.02, frameCount * 0.015);
    const alpha = 8 + n * 35 * (0.3 + aiConfidence);
    stroke(255, alpha);
    line(0, y, width, y);
  }

  // Vertical glitch bars
  const bars = floor(1 + aiConfidence * 6);
  noStroke();
  const baseCol = lerpColor(glitchCold, glitchHot, aiConfidence);
  for (let i = 0; i < bars; i++) {
    const bx = random(width);
    const bh = random(height * 0.15, height * 0.5);
    const by = random(-height * 0.1, height);
    const bw = random(2, 6 + aiConfidence * 4);
    fill(red(baseCol), green(baseCol), blue(baseCol), 35 + aiConfidence * 120);
    rect(bx, by, bw, bh);
  }

  pop();
}
Line-by-line explanation (12 lines)

🔧 Subcomponents:

for-loop Animated scanlines for (let y = 0; y < height; y += step) { const n = noise(y * 0.02, frameCount * 0.015); const alpha = 8 + n * 35 * (0.3 + aiConfidence); stroke(255, alpha); line(0, y, width, y); }

Draws horizontal white lines across the screen with Perlin-noise-driven alpha, creating a flickering CRT scanline effect

for-loop Random vertical glitch bars const bars = floor(1 + aiConfidence * 6); for (let i = 0; i < bars; i++) { const bx = random(width); const bh = random(height * 0.15, height * 0.5); const by = random(-height * 0.1, height); const bw = random(2, 6 + aiConfidence * 4); fill(red(baseCol), green(baseCol), blue(baseCol), 35 + aiConfidence * 120); rect(bx, by, bw, bh); }

Renders 1-7 random vertical colored bars that scale in width and opacity with confidence, creating VHS/digital glitch artifacts

push();
Save the current drawing state
blendMode(ADD);
Use additive blending, making lines stack brightness instead of replacing (creates glow effect)
const step = 3;
Spacing between horizontal scanlines; every 3 pixels
for (let y = 0; y < height; y += step) {
Loop from top to bottom of screen in 3-pixel steps
const n = noise(y * 0.02, frameCount * 0.015);
Use Perlin noise with y and frameCount as seeds to create organic flickering that varies by position and frame
const alpha = 8 + n * 35 * (0.3 + aiConfidence);
Alpha ranges from 8 (base, no jitter) to 8 + 35 * (0.3 + aiConfidence); stronger when confidence is high
stroke(255, alpha); line(0, y, width, y);
Draw a horizontal white line across the screen at this y position with the calculated alpha
const bars = floor(1 + aiConfidence * 6);
Number of vertical glitch bars: 1 at low confidence, up to 7 at high confidence
for (let i = 0; i < bars; i++) {
Loop to generate each glitch bar
const bx = random(width); const bh = random(height * 0.15, height * 0.5); const by = random(-height * 0.1, height); const bw = random(2, 6 + aiConfidence * 4);
Randomize position (x, y), height, and width; bar width scales from 2-6 pixels base, up to 2-10 at high confidence
fill(red(baseCol), green(baseCol), blue(baseCol), 35 + aiConfidence * 120); rect(bx, by, bw, bh);
Draw a rectangle with the interpolated color; alpha ranges from 35 (subtle) to 155 (visible)
pop();
Restore the previous drawing state, disabling additive blending

drawForegroundGlitch()

drawForegroundGlitch() is a top-layer effect that only activates when the AI is confident (aiConfidence > 0.3), creating dramatic visual feedback. The intensity curve ensures that the effect is subtle when confidence is borderline and explosive when the AI 'knows' your path. These flashes are the most eye-catching confirmation that the AI is tracking you.

function drawForegroundGlitch() {
  if (aiConfidence < 0.3) return;

  const intensity = (aiConfidence - 0.3) / 0.7; // 0..1
  push();
  blendMode(ADD);
  noStroke();

  const flashes = floor(1 + intensity * 4);
  for (let i = 0; i < flashes; i++) {
    const w = random(width * 0.08, width * 0.35);
    const h = random(5, 12);
    const x = random(-20, width);
    const y = random(height);
    const c = lerpColor(glitchCold, glitchHot, random());
    fill(red(c), green(c), blue(c), 35 + intensity * 140);
    rect(x, y, w, h);
  }

  pop();
}
Line-by-line explanation (12 lines)

🔧 Subcomponents:

assignment Intensity mapping const intensity = (aiConfidence - 0.3) / 0.7;

Converts aiConfidence from 0-1 range to intensity from 0-1, but only activates above 0.3

for-loop Random colored flash bars const flashes = floor(1 + intensity * 4); for (let i = 0; i < flashes; i++) { const w = random(width * 0.08, width * 0.35); const h = random(5, 12); const x = random(-20, width); const y = random(height); const c = lerpColor(glitchCold, glitchHot, random()); fill(red(c), green(c), blue(c), 35 + intensity * 140); rect(x, y, w, h); }

Draws 1-5 random horizontal bars with colors interpolated across the cold-hot palette, only when confidence is high

if (aiConfidence < 0.3) return;
Early exit: foreground glitch only appears when the AI is moderately confident; prevents visual noise when unpredictable
const intensity = (aiConfidence - 0.3) / 0.7;
Remap aiConfidence from 0.3-1.0 range into 0-1 for easier interpolation
push(); blendMode(ADD);
Save state and use additive blending for glowing overlays
noStroke();
Disable stroke for rectangles
const flashes = floor(1 + intensity * 4);
Number of flashes: 1 at low intensity, up to 5 at high intensity
for (let i = 0; i < flashes; i++) {
Generate each flash
const w = random(width * 0.08, width * 0.35);
Flash width: 8-35% of screen width
const h = random(5, 12);
Flash height: 5-12 pixels (thin horizontal bars)
const x = random(-20, width); const y = random(height);
Random position across the screen; x slightly off-screen for edge flashes
const c = lerpColor(glitchCold, glitchHot, random());
Interpolate a random color from the cold-hot palette
fill(red(c), green(c), blue(c), 35 + intensity * 140); rect(x, y, w, h);
Draw the flash with an alpha that scales from 35 (subtle) to 175 (bright)
pop();
Restore the drawing state

drawHUD()

drawHUD() renders all UI overlays: controls, contextual messages, and progress bar. The HUD is drawn last (in the draw loop) and doesn't use the camera translation, so it stays fixed to the screen. The text jitter at high confidence provides another layer of feedback that the AI is 'seeing' you, complementing the visual glitch effects and color shifts. The progress bar gives a clear spatial goal.

function drawHUD() {
  const uiCol = lerpColor(uiCold, uiHot, aiConfidence);
  fill(uiCol);
  textAlign(LEFT, TOP);
  textSize(14);

  // Slight jitter in text when AI confidence is high (subtle glitch)
  const jitterMag = aiConfidence > 0.7 ? 1.5 * (aiConfidence - 0.7) / 0.3 : 0;
  const jx = random(-jitterMag, jitterMag);
  const jy = random(-jitterMag, jitterMag);

  text("A/D or ←/→ move    W/↑/Space jump    R reset", 16 + jx, 16 + jy);

  let msg = "";
  if (gameState === 'dead') {
    msg =
      "You died. The level just learned from that run.\n" +
      "The faster you push, the nastier it gets.\n" +
      "Press Space or R for a new, more hostile layout.";
  } else if (gameState === 'victory') {
    msg =
      "You reached the goal! Your speed-run line is now the AI's blueprint.\n" +
      "The faster you went, the harder it will try to trip you up next run.\n" +
      "Press Space or R to see how it weaponizes your route.";
  } else {
    msg =
      "The AI tracks your path and how fast you take it.\n" +
      "When its predictions glow hot, expect frame-perfect traps.";
  }
  text(msg, 16 + jx, 40 + jy);

  // Progress bar towards goal
  if (goal) {
    const barW = 260;
    const barH = 10;
    const x = 16;
    const y = height - 26;

    noFill();
    stroke(180);
    rect(x, y, barW, barH, 4);

    const t = constrain(player.x / goal.x, 0, 1);
    noStroke();
    const barCol = lerpColor(color(80, 220, 150), color(255, 100, 100), aiConfidence);
    fill(barCol);
    rect(x + 1, y + 1, (barW - 2) * t, barH - 2, 3);
  }
}
Line-by-line explanation (14 lines)

🔧 Subcomponents:

assignment UI color interpolation const uiCol = lerpColor(uiCold, uiHot, aiConfidence);

Interpolates the UI text color from pale gray to bright yellow based on AI confidence

assignment Confidence-driven text glitch const jitterMag = aiConfidence > 0.7 ? 1.5 * (aiConfidence - 0.7) / 0.3 : 0; const jx = random(-jitterMag, jitterMag); const jy = random(-jitterMag, jitterMag);

Adds random pixel offset to text when confidence is above 0.7, creating a glitchy effect that intensifies as confidence rises

conditional Progress bar rendering if (goal) { const t = constrain(player.x / goal.x, 0, 1); noStroke(); const barCol = lerpColor(color(80, 220, 150), color(255, 100, 100), aiConfidence); fill(barCol); rect(x + 1, y + 1, (barW - 2) * t, barH - 2, 3); }

Draws a progress bar from green (start) to red (end), filled proportionally to how far the player has progressed; color responds to confidence

const uiCol = lerpColor(uiCold, uiHot, aiConfidence);
Blend UI color from pale (uiCold) to golden (uiHot) based on confidence
fill(uiCol);
Set text color to the interpolated UI color
textAlign(LEFT, TOP); textSize(14);
Align text to the top-left and set size to 14 pixels
const jitterMag = aiConfidence > 0.7 ? 1.5 * (aiConfidence - 0.7) / 0.3 : 0;
Calculate jitter magnitude: only applies above 0.7 confidence, scaling from 0 to 1.5 pixels
const jx = random(-jitterMag, jitterMag); const jy = random(-jitterMag, jitterMag);
Generate random x and y offsets within the jitter magnitude
text("A/D or ←/→ move W/↑/Space jump R reset", 16 + jx, 16 + jy);
Draw controls text at the top-left (offset by jitter)
if (gameState === 'dead') { msg = "You died. The level just learned from that run.\n..."; } else if (gameState === 'victory') { msg = "You reached the goal! Your speed-run line is now the AI's blueprint.\n..."; } else { msg = "The AI tracks your path and how fast you take it.\n..."; }
Choose contextual message text based on game state
text(msg, 16 + jx, 40 + jy);
Draw the message text below the controls (also offset by jitter)
if (goal) {
Only draw progress bar if a goal exists
const barW = 260; const barH = 10; const x = 16; const y = height - 26;
Define progress bar dimensions and position: 260 pixels wide, 10 pixels tall, at bottom-left
noFill(); stroke(180); rect(x, y, barW, barH, 4);
Draw the background outline of the progress bar in gray
const t = constrain(player.x / goal.x, 0, 1);
Calculate progress as a fraction: player's x position divided by goal's x position, clamped to 0-1
const barCol = lerpColor(color(80, 220, 150), color(255, 100, 100), aiConfidence);
Interpolate bar color from green (safe/start) to red (danger/AI confident)
rect(x + 1, y + 1, (barW - 2) * t, barH - 2, 3);
Draw the filled portion of the bar, scaled by progress `t`

📦 Key Variables

player object (Player instance)

The main player character; stores position, velocity, dimensions, and handles physics and drawing

let player = new Player(80, groundY - 120);
platforms array of objects

Array of rectangular platform objects, each with x, y, w, h properties; used for collision detection

platforms.push({ x: 0, y: groundY, w: 600, h: 40 });
staticHazards array of Hazard objects

Array of hazards that don't change between runs; e.g., spikes at known locations

staticHazards.push(new Hazard('spike', 580, groundY - 26));
dynamicHazards array of Hazard objects

Array of AI-generated hazards spawned based on the best learned path; regenerated each run

dynamicHazards = pathAnalyzer.generateObstacles();
hazards array of Hazard objects

Merged array of static and dynamic hazards; used for rendering and collision checking

hazards = staticHazards.concat(dynamicHazards);
pathAnalyzer object (PathAnalyzer instance)

The AI system that records the current run's path, learns the best route, and generates obstacles

pathAnalyzer = new PathAnalyzer(platforms);
worldWidth number

Total horizontal size of the game world in pixels; 3800

let worldWidth = 3800;
groundY number

The y-position of the main ground level; height - 80

let groundY; // Set in buildStaticLevel()
goal object {x, y, w, h}

The goal object's position and dimensions; collision with it triggers victory

goal = { x: worldWidth - 140, y: groundY - 140, w: 60, h: 120 };
cameraX number

Horizontal offset for the camera; used to scroll the world to follow the player

let cameraX = 0;
gameState string

Current game state: 'playing', 'dead', or 'victory'; controls update and input logic

let gameState = 'playing';
furthestXThisRun number

Tracks the furthest x-position reached in the current run; used to decide if run should be saved

let furthestXThisRun = 0;
aiConfidence number (0 to 1)

Floating-point value representing how well the AI is predicting the player's route; drives all visual feedback colors and effects

let aiConfidence = 0;
predictedX number or null

The AI's predicted x-position for where the player should be; drawn as a crosshair on screen

let predictedX = null;
predictedY number or null

The AI's predicted y-position for where the player should be

let predictedY = null;
bgCool, bgHot, glitchCold, glitchHot, playerCold, playerHot, uiCold, uiHot, laserCold, laserHot, sawCold, sawHot color objects (p5.Color)

Color palette pairs used for interpolation; each pair defines a 'safe' (cool) and 'threatened' (hot) color for a visual element

bgCool = color(4, 6, 18); bgHot = color(120, 10, 40);

🔧 Potential Improvements (7)

Here are some ways this code could be enhanced:

BUG PathAnalyzer.isPointInsidePlatform()

The function checks if a point is inside a platform with > and < instead of >= and <=, which misses boundary cases and could allow hazards to spawn exactly on platform edges.

💡 Change the comparisons to >= and <=: `return (p.x >= plat.x && p.x <= plat.x + plat.w && ...)`

PERFORMANCE drawBackgroundGlitch() and drawForegroundGlitch()

These functions use nested loops and random() calls every frame, generating slightly different glitch patterns each render. While aesthetically pleasing, this can create visual chatter. More importantly, the random bar positions mean glitch bars can appear/disappear abruptly.

💡 Cache glitch bar positions across multiple frames, updating them only every N frames (e.g., every 6 frames). Use a seeded random function or Perlin noise to generate positions deterministically so they feel intentional rather than chaotic.

FEATURE Player.draw()

The player sprite is a simple rounded rectangle with eyes. At high speeds or glitchy visuals, it can be hard to track.

💡 Add a motion trail effect: render ghosted copies of the player at 5-10 frames behind, with decreasing opacity. This would make motion more readable and look cool.

STYLE generateObstacles() hazard type selection

The type selection logic (lines 280-290) uses nested if-else and modulo arithmetic, making it slightly hard to read.

💡 Extract into a helper function: `function chooseHazardType(localNorm, created) { ... }` to clarify the intent.

BUG updatePredictionConfidence()

If the bestPath is shorter than the player's current progress, the futureIdx could exceed the path length, but it's clamped with min(). However, if idx0 + lookAheadFrames is way out of bounds, predictedX/Y could be stale or misleading.

💡 Add a check: if `idx0 + lookAheadFrames >= path.length`, either disable the prediction crosshair or return early from the function.

FEATURE Hazard.draw()

All hazard types use the same Perlin noise for flickering, which can feel repetitive.

💡 Vary the noise seed or scale per hazard type. For example, lasers could use `noise(this.x * 0.05, ...)` and saws use `noise(this.x * 0.02, ...)` to create distinct flicker patterns.

STYLE Global variable declarations

Many global variables related to colors are declared but not assigned until setup(). This is correct for p5.js, but could be clearer with a comment.

💡 Add a comment block: `// Color palette (initialized in setup)` above the color variable declarations to make the pattern explicit.

🔄 Code Flow

Code flow showing setup, resetgame, playerupdate, playerjump, playerdraw, hazardupdate, hazarddraw, pathanalyzerrecord, pathanalyzerendrun, pathanalyzergenerateobstacles, updatepredictionconfidence, updategame, rendergame, draw, keypressed, drawbackgroundglitch, drawforegroundglitch, drawhud

💡 Click on function names in the diagram to jump to their code

graph TD start[Start] --> setup[setup] setup --> draw[draw loop] draw --> playerupdate[playerupdate] draw --> playerdraw[playerdraw] draw --> hazardupdate[hazardupdate] draw --> hazarddraw[hazarddraw] draw --> pathanalyzerrecord[pathanalyzerrecord] draw --> updatepredictionconfidence[updatepredictionconfidence] draw --> rendergame[rendergame] draw --> drawhud[drawhud] setup --> palette-init[palette-init] click setup href "#fn-setup" click palette-init href "#sub-palette-init" playerupdate --> input-processing[input-processing] playerupdate --> horizontal-collision[horizontal-collision] playerupdate --> vertical-collision[vertical-collision] playerupdate --> color-interpolation[color-interpolation] playerupdate --> chromatic-aura[chromatic-aura] playerupdate --> scanline-loop[scanline-loop] click playerupdate href "#fn-playerupdate" click input-processing href "#sub-input-processing" click horizontal-collision href "#sub-horizontal-collision" click vertical-collision href "#sub-vertical-collision" click color-interpolation href "#sub-color-interpolation" click chromatic-aura href "#sub-chromatic-aura" click scanline-loop href "#sub-scanline-loop" playerdraw --> jump-reset-input[jump-reset-input] playerdraw --> predicted-crosshair[predicted-crosshair] click playerdraw href "#fn-playerdraw" click jump-reset-input href "#sub-jump-reset-input" click predicted-crosshair href "#sub-predicted-crosshair" hazardupdate --> hazard-loop[hazard-loop] hazardupdate --> laser-update[laser-update] hazardupdate --> saw-update[saw-update] click hazardupdate href "#fn-hazardupdate" click hazard-loop href "#sub-hazard-loop" click laser-update href "#sub-laser-update" click saw-update href "#sub-saw-update" hazarddraw --> laser-draw[laser-draw] hazarddraw --> saw-draw[saw-draw] hazarddraw --> spike-draw[spike-draw] click hazarddraw href "#fn-hazarddraw" click laser-draw href "#sub-laser-draw" click saw-draw href "#sub-saw-draw" click spike-draw href "#sub-spike-draw" pathanalyzerrecord --> path-copy[path-copy] click pathanalyzerrecord href "#fn-pathanalyzerrecord" click path-copy href "#sub-path-copy" updatepredictionconfidence --> error-calculation[error-calculation] click updatepredictionconfidence href "#fn-updatepredictionconfidence" click error-calculation href "#sub-error-calculation" rendergame --> camera-translate[camera-translate] rendergame --> background-color[background-color] rendergame --> flash-loop[flash-loop] rendergame --> glitch-bar-loop[glitch-bar-loop] rendergame --> intensity-scaling[intensity-scaling] rendergame --> scanline-loop[scanline-loop] click rendergame href "#fn-rendergame" click camera-translate href "#sub-camera-translate" click background-color href "#sub-background-color" click flash-loop href "#sub-flash-loop" click glitch-bar-loop href "#sub-glitch-bar-loop" click intensity-scaling href "#sub-intensity-scaling" click scanline-loop href "#sub-scanline-loop" drawhud --> ui-color[ui-color] drawhud --> progress-bar[progress-bar] drawhud --> text-jitter[text-jitter] click drawhud href "#fn-drawhud" click ui-color href "#sub-ui-color" click progress-bar href "#sub-progress-bar" click text-jitter href "#sub-text-jitter"

❓ Frequently Asked Questions

What kind of visual experience does the 'run run run' p5.js sketch offer?

The sketch features a high-contrast glitch-art aesthetic that dynamically pulses and distorts based on the player's proximity to the AI's predicted path.

How can players interact with the 'run run run' platformer sketch?

Users can control the player character using the A/D or arrow keys to move and W/↑/Space to jump, with the option to reset the game using the R key.

What creative coding concepts are showcased in the 'run run run' sketch?

The sketch demonstrates adaptive AI behavior by analyzing player movements to spawn hazards and create increasingly challenging gameplay.

Preview

run run run - p5.js creative coding sketch preview
Sketch Preview
Code flow diagram showing the structure of run run run - Code flow showing setup, resetgame, playerupdate, playerjump, playerdraw, hazardupdate, hazarddraw, pathanalyzerrecord, pathanalyzerendrun, pathanalyzergenerateobstacles, updatepredictionconfidence, updategame, rendergame, draw, keypressed, drawbackgroundglitch, drawforegroundglitch, drawhud
Code Flow Diagram
