Shadow maze 2.6

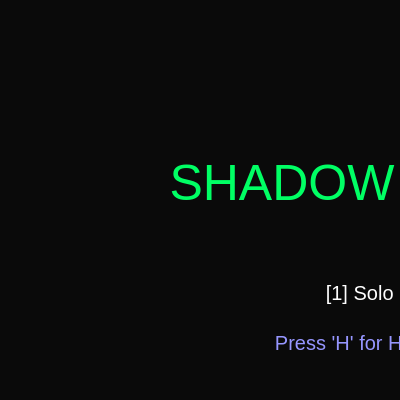
Shadow Maze 2.6 is a stealth maze game where players navigate through fog-shrouded levels while avoiding enemies and collecting coins. The game features single-player and two-player cooperative modes, a progressive difficulty system with an in-game shop for purchasing upgrades, and a light-radius mechanic that reveals only the immediate area around each player, creating tension and exploration.

🧪 Try This!

Experiment with the code by making these changes:

  1. Make the enemies glow — Add a glowing circle before drawing the enemy rectangles to make them stand out more in the fog
  2. Speed up time pressure — Reduce the starting time limit to make levels more challenging
  3. Increase coin rewards — Earn more money per coin collected to reach shop upgrades faster
  4. Add stamina to shop — Create a fourth shop upgrade to restore stamina at the SHOP screen
  5. Make coins bigger — Increase the coin size to make them easier to find in the fog
Prefer the full editor? Open it there →

📖 About This Sketch

This sketch creates a complete stealth maze game where you navigate a dark level illuminated only by a light radius around your character. The core mechanic is the fog effect created with beginContour() and endContour(), which carves circular reveal areas around each player. You collect coins scattered throughout the level, avoid enemies that chase you using simple distance calculations, and reach the goal to advance. The game teaches collision detection, game state machines, enemy AI pathfinding, and the power of masking techniques.

The code is organized into a menu system (MENU, HOWTO, SHOP states), a main game loop (PLAYING state), and end-game screens (WINNER, GAMEOVER). By studying it, you'll learn how to structure a multi-screen game, implement a stamina/sprint mechanic, manage player trails, handle upgrades that modify game variables, and use p5.js shapes and fill() to create visual feedback. The enemy movement algorithm is a great introduction to simple AI that chases the nearest player.

⚙️ How It Works

  1. When the sketch loads, setup() creates an 800×600 canvas and calls resetGame() to initialize the player objects, enemies, walls, coins, and timer. The gameState starts as 'MENU'.
  2. The draw() loop runs 60 times per second and branches on the current gameState: if MENU, it draws the title and mode selection; if HOWTO, it displays controls; if PLAYING, it updates game logic and renders the maze, fog, and UI.
  3. During PLAYING mode, updateGame() handles player input (arrow keys or WASD), moves enemies toward the nearest player, and checks for collisions with coins, walls, and the goal.
  4. The fog effect is the visual heart of the game: drawFog() fills the entire canvas with black, then cuts out two circular 'windows' using beginContour/endContour—one for each player if in two-player mode—so only the area within lightRadius is visible.
  5. When a player collects all coins and reaches the goal, the game advances to the SHOP screen where you can spend wallet money on upgrades (more lives, bigger light radius, increased speed), then returns to PLAYING at the next level.
  6. If an enemy touches a player or the timer runs out, die() decreases lives and resets the level; if lives reach zero, gameState becomes GAMEOVER. At level 10, you reach WINNER and escape entirely.

🎓 Concepts You'll Learn

Game state machineCollision detectionFog of war / masking with beginContourEnemy AI pathfindingParticle effects and trailsStamina and sprint mechanicsProgressive difficultyUI and HUD design

📝 Code Breakdown

preload()

preload() runs before setup() and is used to load external resources like fonts, images, and sounds that your sketch needs immediately.

function preload() {
  robotoFont = loadFont('https://unpkg.com/@fontsource/roboto@latest/files/roboto-latin-400-normal.woff');
}
Line-by-line explanation (1 lines)
robotoFont = loadFont('https://unpkg.com/@fontsource/roboto@latest/files/roboto-latin-400-normal.woff');
Loads a Google Font (Roboto) before setup() runs so text rendering uses it—preload() is called first, guaranteeing the font is ready

setup()

setup() runs once at the start and initializes the canvas, font, color mode, and creates the decorative particles that float in the background of all screens.

function setup() {
  createCanvas(800, 600);
  textFont(robotoFont);
  colorMode(HSB, 360, 100, 100, 100);
  noStroke();
  
  // Create floating particles for subtle background animation
  for (let i = 0; i < 25; i++) {
    particles.push({
      x: random(width),
      y: random(height),
      size: random(4, 10),
      speed: random(0.2, 0.8),
      hue: random(360)
    });
  }
}
Line-by-line explanation (11 lines)

🔧 Subcomponents:

for-loop Particle initialization for (let i = 0; i < 25; i++) { particles.push({ ... }); }

Creates 25 floating particle objects with random positions, sizes, and colors to populate the background

createCanvas(800, 600);
Creates a fixed 800×600 pixel canvas where the game renders
textFont(robotoFont);
Sets the text rendering to use the Roboto font loaded in preload()
colorMode(HSB, 360, 100, 100, 100);
Switches color mode from RGB to HSB (Hue, Saturation, Brightness), making it easier to control colors by hue values 0–360
noStroke();
Disables outlines on all shapes drawn afterward, keeping the aesthetic clean
for (let i = 0; i < 25; i++) {
Loops 25 times to create particles
particles.push({
Adds a new particle object to the particles array
x: random(width),
Assigns a random x position anywhere across the canvas width
y: random(height),
Assigns a random y position anywhere across the canvas height
size: random(4, 10),
Gives each particle a random diameter between 4 and 10 pixels
speed: random(0.2, 0.8),
Each particle moves upward at a random speed between 0.2 and 0.8 pixels per frame
hue: random(360)
Assigns a random hue value (0–360) so each particle has a different base color

draw()

This is the main instruction screen draw() that runs on the MENU state of the game. It handles particle animation, auto-advancing panels with fade effects, and drawing responsive UI elements.

🔬 This loop moves particles upward and wraps them around. What happens if you change p.y -= p.speed to p.y -= p.speed * 2? How does doubling the speed change the visual effect?

  for (let p of particles) {
    p.y -= p.speed;
    if (p.y < -20) {
      p.y = height + 20;
      p.x = random(width);
    }
function draw() {
  // Dark gradient background
  background(240, 25, 10);
  
  // Animate floating particles
  for (let p of particles) {
    p.y -= p.speed;
    if (p.y < -20) {
      p.y = height + 20;
      p.x = random(width);
    }
    p.hue = (p.hue + 0.3) % 360;
    fill(p.hue, 50, 70, 15);
    circle(p.x, p.y, p.size);
  }
  
  // Auto-advance steps
  stepTimer++;
  if (stepTimer >= stepDuration) {
    stepTimer = 0;
    step = (step + 1) % instructions.length;
  }
  
  let current = instructions[step];
  let progress = stepTimer / stepDuration;
  
  // Smooth fade in/out
  let alpha = progress < 0.15 ? map(progress, 0, 0.15, 0, 100) :
              progress > 0.85 ? map(progress, 0.85, 1, 100, 0) : 100;
  
  let centerY = height / 2;
  
  // Animated step number with gentle pulse
  let pulse = 1 + sin(frameCount * 0.08) * 0.08;
  let iconSize = 50 * pulse;
  
  // Draw circular badge with step number
  fill(280, 60, 90, alpha * 0.9);
  circle(width / 2, centerY - 50, iconSize);
  
  // Step number inside circle
  fill(0, 0, 100, alpha);
  textSize(24 * pulse);
  textAlign(CENTER, CENTER);
  text(step + 1, width / 2, centerY - 50);
  
  // Title - responsive size
  textSize(min(26, width / 15));
  fill(280, 70, 100, alpha);
  text(current.title, width / 2, centerY + 15);
  
  // Description - responsive size
  textSize(min(16, width / 24));
  fill(0, 0, 75, alpha * 0.85);
  text(current.desc, width / 2, centerY + 50);
  
  // Progress indicator dots
  let dotSpacing = 14;
  let dotsWidth = (instructions.length - 1) * dotSpacing;
  let dotsX = (width - dotsWidth) / 2;
  
  for (let i = 0; i < instructions.length; i++) {
    let isActive = i === step;
    fill(isActive ? color(280, 70, 100) : color(0, 0, 30));
    circle(dotsX + i * dotSpacing, height - 35, isActive ? 7 : 4);
  }
  
  // Swipe hint
  textSize(11);
  fill(0, 0, 45, 50);
  text("Tap to skip · Swipe panels to navigate", width / 2, height - 60);
}
Line-by-line explanation (31 lines)

🔧 Subcomponents:

for-loop Particle movement and rendering for (let p of particles) { p.y -= p.speed; ... circle(p.x, p.y, p.size); }

Updates each particle's position and color every frame, creating floating animation

conditional Auto-advance instruction steps if (stepTimer >= stepDuration) { stepTimer = 0; step = (step + 1) % instructions.length; }

Automatically moves to the next instruction panel after stepDuration frames have passed

conditional Smooth fade in/out alpha let alpha = progress < 0.15 ? map(progress, 0, 0.15, 0, 100) : progress > 0.85 ? map(progress, 0.85, 1, 100, 0) : 100;

Creates a fade-in during the first 15% of each panel's duration and fade-out in the last 15%

for-loop Draw progress indicator dots for (let i = 0; i < instructions.length; i++) { let isActive = i === step; ... circle(dotsX + i * dotSpacing, height - 35, isActive ? 7 : 4); }

Draws small circles at the bottom to show which instruction panel is currently active

background(240, 25, 10);
Sets the background to a very dark purplish color (H=240, S=25%, B=10% in HSB mode)
for (let p of particles) {
Loops through each particle object in the particles array
p.y -= p.speed;
Moves the particle upward by subtracting its speed from its y position
if (p.y < -20) {
When a particle moves completely off the top of the screen
p.y = height + 20;
Teleport it to the bottom (just below the visible canvas)
p.x = random(width);
Give it a new random x position so it reappears at a different horizontal location
p.hue = (p.hue + 0.3) % 360;
Shift the particle's hue slightly each frame, cycling through the color spectrum; % 360 wraps it back to 0 when it exceeds 360
fill(p.hue, 50, 70, 15);
Set the fill color using the particle's current hue with low saturation and brightness, and very transparent alpha (15)
circle(p.x, p.y, p.size);
Draw the particle as a small transparent circle at its current position
stepTimer++;
Increment the timer tracking how long the current instruction panel has been visible
if (stepTimer >= stepDuration) {
When the timer reaches stepDuration frames, it's time to move to the next panel
stepTimer = 0;
Reset the timer to 0 for the new panel
step = (step + 1) % instructions.length;
Advance to the next instruction index; % instructions.length wraps back to 0 when reaching the end
let current = instructions[step];
Get the current instruction object so we can access its title and description
let progress = stepTimer / stepDuration;
Calculate what fraction of the current panel's duration has elapsed (0 to 1)
let alpha = progress < 0.15 ? map(progress, 0, 0.15, 0, 100) : progress > 0.85 ? map(progress, 0.85, 1, 100, 0) : 100;
Create a fade effect: fade in during the first 15%, fade out during the last 15%, and stay fully visible in between
let pulse = 1 + sin(frameCount * 0.08) * 0.08;
Use a sine wave tied to frameCount to create a gentle pulsing effect that oscillates between 0.92 and 1.08
let iconSize = 50 * pulse;
Apply the pulse to the step number circle, making it subtly grow and shrink
fill(280, 60, 90, alpha * 0.9);
Set the circle's color to a purple hue (280) and apply the alpha fade, slightly dimmer than the text
circle(width / 2, centerY - 50, iconSize);
Draw the pulsing circular badge centered horizontally and 50 pixels above the vertical center
text(step + 1, width / 2, centerY - 50);
Display the step number (1-indexed, so step + 1) inside the circle at the same position
textSize(min(26, width / 15));
Set title text size responsively: use 26 as the default but scale down if canvas is very narrow
text(current.title, width / 2, centerY + 15);
Draw the instruction panel's title text centered horizontally and 15 pixels below the vertical center
textSize(min(16, width / 24));
Set description text size to be smaller, also responsive to canvas width
text(current.desc, width / 2, centerY + 50);
Draw the instruction panel's description text centered and 50 pixels below the vertical center
let dotSpacing = 14;
Space between progress indicator dots, in pixels
let dotsWidth = (instructions.length - 1) * dotSpacing;
Calculate the total width needed for all the dots so we can center them
let dotsX = (width - dotsWidth) / 2;
Calculate the x position where the first dot should be drawn so all dots are centered
let isActive = i === step;
Check if this dot corresponds to the current instruction panel
fill(isActive ? color(280, 70, 100) : color(0, 0, 30));
Color active dots bright purple, inactive dots dark gray
circle(dotsX + i * dotSpacing, height - 35, isActive ? 7 : 4);
Draw the progress dot at the correct position; active dots are larger (diameter 7) than inactive ones (diameter 4)

mousePressed()

This function is called whenever the mouse is clicked. It skips to the next instruction panel and resets the auto-advance timer.

function mousePressed() {
  step = (step + 1) % instructions.length;
  stepTimer = 0;
}
Line-by-line explanation (2 lines)
step = (step + 1) % instructions.length;
Advance to the next instruction panel, wrapping back to 0 at the end
stepTimer = 0;
Reset the timer so the new panel gets its full duration before auto-advancing again

windowResized()

This function is called automatically by p5.js whenever the user resizes their browser window. It ensures the canvas stays full-screen.

function windowResized() {
  resizeCanvas(windowWidth, windowHeight);
}
Line-by-line explanation (1 lines)
resizeCanvas(windowWidth, windowHeight);
Automatically adjusts the canvas size whenever the browser window is resized, keeping the sketch responsive

resetGame()

resetGame() is called when starting a new level or restarting after dying. It reinitializes all player and enemy objects, walls, coins, and the timer, ensuring a fresh start.

🔬 This spawns enemies and scales their speed by level. What happens if you change the condition from level >= 5 to level >= 2? When would the second enemy appear?

  enemies = [];
  enemySpeed = 2 + (level * 0.3);
  enemies.push({ x: 700, y: 300, size: 30 }); 
  if (level >= 5) enemies.push({ x: 700, y: 500, size: 30 });
function resetGame() {
  winTriggered = false; 
  p1 = { x: 50, y: 50, size: 30, color: [255, 0, 0], stamina: 100, trail: [], speed: 4 };
  p2 = { x: 50, y: 520, size: 30, color: [0, 150, 255], stamina: 100, trail: [], speed: 4 };
  goal = { x: 720, y: 50, size: 40 };
  
  enemies = [];
  enemySpeed = 2 + (level * 0.3);
  enemies.push({ x: 700, y: 300, size: 30 }); 
  if (level >= 5) enemies.push({ x: 700, y: 500, size: 30 });  

  timer = 35 - level; 
  generateLevel(level);
}
Line-by-line explanation (10 lines)

🔧 Subcomponents:

calculation Initialize player objects p1 = { x: 50, y: 50, size: 30, color: [255, 0, 0], stamina: 100, trail: [], speed: 4 };

Creates the player 1 object with starting position, color, stamina, and speed

conditional Spawn second enemy at higher levels if (level >= 5) enemies.push({ x: 700, y: 500, size: 30 });

Adds a second enemy when level 5 or higher is reached, increasing difficulty

winTriggered = false;
Resets the win flag so the win condition can trigger again on this level
p1 = { x: 50, y: 50, size: 30, color: [255, 0, 0], stamina: 100, trail: [], speed: 4 };
Creates player 1 (red) starting at top-left (50, 50) with full stamina and an empty trail array
p2 = { x: 50, y: 520, size: 30, color: [0, 150, 255], stamina: 100, trail: [], speed: 4 };
Creates player 2 (blue) starting at bottom-left (50, 520), ready for two-player mode
goal = { x: 720, y: 50, size: 40 };
Places the goal (exit) at top-right, visible only after all coins are collected
enemies = [];
Clears the enemies array so no old enemies carry over to the new level
enemySpeed = 2 + (level * 0.3);
Sets enemy speed to increase with level: level 1 = speed 2.3, level 5 = speed 3.5, creating progressive difficulty
enemies.push({ x: 700, y: 300, size: 30 });
Spawns the first enemy at the right side of the screen, middle height
if (level >= 5) enemies.push({ x: 700, y: 500, size: 30 });
At level 5 and above, spawns a second enemy at a different y position to make the game harder
timer = 35 - level;
Sets the time limit, decreasing as levels increase: level 1 = 34 sec, level 5 = 30 sec, level 10 = 25 sec
generateLevel(level);
Calls generateLevel() to randomly place walls and coins for the current level

generateLevel(lv)

generateLevel() procedurally creates obstacles and collectibles for each level. More walls spawn at higher levels, scaling difficulty automatically.

🔬 This loop creates lv + 3 walls. What if you change it to lv * 2 to make it scale faster? How many walls would appear on level 5?

  for(let i=0; i < lv + 3; i++) {
    walls.push({ x: random(150, 600), y: random(100, 500), w: 40, h: 40 });
  }
function generateLevel(lv) {
  walls = []; coins = [];
  for(let i=0; i < lv + 3; i++) {
    walls.push({ x: random(150, 600), y: random(100, 500), w: 40, h: 40 });
  }
  for(let i=0; i < 3; i++) {
    coins.push({ x: random(100, 700), y: random(100, 500), active: true });
  }
}
Line-by-line explanation (5 lines)

🔧 Subcomponents:

for-loop Randomly place walls for(let i=0; i < lv + 3; i++) { walls.push({ x: random(150, 600), y: random(100, 500), w: 40, h: 40 }); }

Creates lv + 3 obstacles, ensuring more walls appear as the level number increases

for-loop Randomly place coins for(let i=0; i < 3; i++) { coins.push({ x: random(100, 700), y: random(100, 500), active: true }); }

Always spawns exactly 3 coins that the player must collect before the goal becomes accessible

walls = []; coins = [];
Clear old walls and coins from the previous level
for(let i=0; i < lv + 3; i++) {
Loop lv + 3 times, so level 1 creates 4 walls, level 5 creates 8 walls, etc.
walls.push({ x: random(150, 600), y: random(100, 500), w: 40, h: 40 });
Add a new wall object at a random position between x=150–600 and y=100–500, all 40×40 pixels
for(let i=0; i < 3; i++) {
Always create exactly 3 coins
coins.push({ x: random(100, 700), y: random(100, 500), active: true });
Add a new coin at a random position; active: true means it hasn't been collected yet

updateGame()

updateGame() is the core game loop function called every frame during PLAYING state. It orchestrates player input, enemy movement, and collision detection.

function updateGame() {
  handlePlayerMovement(p1, UP_ARROW, DOWN_ARROW, LEFT_ARROW, RIGHT_ARROW, 16); 
  if (playerMode === 2) handlePlayerMovement(p2, 87, 83, 65, 68, 81); 
  moveEnemies();
  checkCollisions();
  if (frameCount % 60 === 0 && timer > 0) timer--;
  if (timer <= 0) die();
}
Line-by-line explanation (6 lines)

🔧 Subcomponents:

calculation Handle P1 input handlePlayerMovement(p1, UP_ARROW, DOWN_ARROW, LEFT_ARROW, RIGHT_ARROW, 16);

Processes arrow key input for player 1, with SHIFT (keyCode 16) as sprint

conditional Handle P2 input (two-player only) if (playerMode === 2) handlePlayerMovement(p2, 87, 83, 65, 68, 81);

Processes WASD input for player 2 only if two-player mode is active

conditional Decrease time every second if (frameCount % 60 === 0 && timer > 0) timer--;

Reduces the timer by 1 every 60 frames (approximately 1 second at 60 FPS)

handlePlayerMovement(p1, UP_ARROW, DOWN_ARROW, LEFT_ARROW, RIGHT_ARROW, 16);
Call handlePlayerMovement for player 1 with arrow keys and SHIFT (keyCode 16) as the sprint key
if (playerMode === 2) handlePlayerMovement(p2, 87, 83, 65, 68, 81);
Only in two-player mode, call handlePlayerMovement for player 2 using WASD (keyCodes 87=W, 83=S, 65=A, 68=D) and Q (keyCode 81) as sprint
moveEnemies();
Update enemy positions so they chase toward the nearest player
checkCollisions();
Test whether players have hit coins, walls, enemies, or the goal
if (frameCount % 60 === 0 && timer > 0) timer--;
Every 60 frames (1 second), decrement the timer by 1; stop when it reaches 0
if (timer <= 0) die();
When time runs out, lose a life

handlePlayerMovement(p, up, down, left, right, sprintKey)

handlePlayerMovement() is called for each player every frame and handles all movement logic: input detection, sprint mechanics, stamina, collision detection, boundary clamping, and trail recording. This is one of the most complex functions in the game.

🔬 These four lines handle directional input and calculate the next position. What happens if you allow diagonal movement by removing the 'if' statements and always applying speed? Or add a modifier like speed * 0.5 to some directions?

  let nextX = p.x, nextY = p.y;
  if (keyIsDown(left)) nextX -= speed;
  if (keyIsDown(right)) nextX += speed;
  if (keyIsDown(up)) nextY -= speed;
  if (keyIsDown(down)) nextY += speed;
function handlePlayerMovement(p, up, down, left, right, sprintKey) {
  let speed = (keyIsDown(sprintKey) && p.stamina > 0) ? p.speed + 3 : p.speed;
  if (speed > p.speed) p.stamina -= 2;
  else if (p.stamina < 100) p.stamina += 0.5;

  let nextX = p.x, nextY = p.y;
  if (keyIsDown(left)) nextX -= speed;
  if (keyIsDown(right)) nextX += speed;
  if (keyIsDown(up)) nextY -= speed;
  if (keyIsDown(down)) nextY += speed;

  let hitWall = false;
  for (let w of walls) {
    if (nextX < w.x + w.w && nextX + p.size > w.x && nextY < w.y + w.h && nextY + p.size > w.y) hitWall = true;
  }
  if (!hitWall) {
    p.x = constrain(nextX, 0, width - p.size);
    p.y = constrain(nextY, 0, height - p.size);
  }
  
  p.trail.push({x: p.x, y: p.y});
  if (p.trail.length > 5) p.trail.shift();
}
Line-by-line explanation (16 lines)

🔧 Subcomponents:

conditional Check if sprinting let speed = (keyIsDown(sprintKey) && p.stamina > 0) ? p.speed + 3 : p.speed;

Apply a +3 speed boost if the sprint key is held and stamina is available

for-loop Test for wall collisions for (let w of walls) { if (nextX < w.x + w.w && nextX + p.size > w.x && nextY < w.y + w.h && nextY + p.size > w.y) hitWall = true; }

Uses AABB (axis-aligned bounding box) collision to prevent the player from moving into walls

calculation Record and trim trail p.trail.push({x: p.x, y: p.y}); if (p.trail.length > 5) p.trail.shift();

Keeps a history of the last 5 positions so a fading trail can be drawn behind the player

let speed = (keyIsDown(sprintKey) && p.stamina > 0) ? p.speed + 3 : p.speed;
If sprint key is pressed AND stamina > 0, use speed + 3; otherwise use normal speed
if (speed > p.speed) p.stamina -= 2;
If currently sprinting, drain stamina by 2 per frame
else if (p.stamina < 100) p.stamina += 0.5;
If not sprinting and stamina isn't full, regenerate 0.5 stamina per frame
let nextX = p.x, nextY = p.y;
Start with the player's current position as the default next position
if (keyIsDown(left)) nextX -= speed;
If left key is held, move left by subtracting speed from nextX
if (keyIsDown(right)) nextX += speed;
If right key is held, move right by adding speed to nextX
if (keyIsDown(up)) nextY -= speed;
If up key is held, move up by subtracting speed from nextY
if (keyIsDown(down)) nextY += speed;
If down key is held, move down by adding speed to nextY
let hitWall = false;
Flag to track whether the next position collides with any wall
for (let w of walls) {
Loop through all walls to check for collisions
if (nextX < w.x + w.w && nextX + p.size > w.x && nextY < w.y + w.h && nextY + p.size > w.y) hitWall = true;
AABB collision test: checks if the player's bounding box overlaps with the wall's bounding box
if (!hitWall) {
Only update position if no wall collision occurred
p.x = constrain(nextX, 0, width - p.size);
Update x position and clamp it between 0 and width - p.size to keep the player on-screen
p.y = constrain(nextY, 0, height - p.size);
Update y position and clamp it between 0 and height - p.size to keep the player on-screen
p.trail.push({x: p.x, y: p.y});
Add the current position to the trail array to create a history of movement
if (p.trail.length > 5) p.trail.shift();
If the trail exceeds 5 positions, remove the oldest one so the trail doesn't grow infinitely

moveEnemies()

moveEnemies() implements simple AI pathfinding: each enemy chases the closest player by comparing x and y positions independently. It's basic but effective for a stealth game.

🔬 These four lines make the enemy chase the target in both x and y directions. What happens if you remove one of them, say the y-direction lines? The enemy would only chase horizontally!

    if (e.x < target.x) e.x += enemySpeed;
    if (e.x > target.x) e.x -= enemySpeed;
    if (e.y < target.y) e.y += enemySpeed;
    if (e.y > target.y) e.y -= enemySpeed;
function moveEnemies() {
  for (let e of enemies) {
    let target = p1;
    if (playerMode === 2) {
      let d1 = dist(e.x, e.y, p1.x, p1.y);
      let d2 = dist(e.x, e.y, p2.x, p2.y);
      target = (d1 < d2) ? p1 : p2;
    }
    if (e.x < target.x) e.x += enemySpeed;
    if (e.x > target.x) e.x -= enemySpeed;
    if (e.y < target.y) e.y += enemySpeed;
    if (e.y > target.y) e.y -= enemySpeed;
  }
}
Line-by-line explanation (10 lines)

🔧 Subcomponents:

conditional Choose nearest player as target let d1 = dist(e.x, e.y, p1.x, p1.y); let d2 = dist(e.x, e.y, p2.x, p2.y); target = (d1 < d2) ? p1 : p2;

In two-player mode, enemies chase whichever player is closer

calculation Move toward target if (e.x < target.x) e.x += enemySpeed; if (e.x > target.x) e.x -= enemySpeed; if (e.y < target.y) e.y += enemySpeed; if (e.y > target.y) e.y -= enemySpeed;

Moves the enemy one step at a time toward the target's x and y coordinates

for (let e of enemies) {
Loop through each enemy in the enemies array
let target = p1;
Default target is player 1
if (playerMode === 2) {
If two-player mode is active, determine which player is closer
let d1 = dist(e.x, e.y, p1.x, p1.y);
Calculate the distance from the enemy to player 1
let d2 = dist(e.x, e.y, p2.x, p2.y);
Calculate the distance from the enemy to player 2
target = (d1 < d2) ? p1 : p2;
Use the ternary operator: if d1 < d2, target player 1; otherwise target player 2
if (e.x < target.x) e.x += enemySpeed;
If the enemy is to the left of the target, move right by adding enemySpeed
if (e.x > target.x) e.x -= enemySpeed;
If the enemy is to the right of the target, move left by subtracting enemySpeed
if (e.y < target.y) e.y += enemySpeed;
If the enemy is above the target, move down by adding enemySpeed
if (e.y > target.y) e.y -= enemySpeed;
If the enemy is below the target, move up by subtracting enemySpeed

drawFog()

drawFog() is the visual centerpiece of the game: it uses beginContour() and endContour() to create 'holes' in a black shape, revealing circular light zones around each player. This is the fog-of-war mechanic.

🔬 This loop creates a circle by generating 18 vertices (360 / 20). What happens if you change i += 20 to i += 10? You'd get 36 vertices and a smoother circle. Try it!

  for (let i = 0; i <= 360; i += 20) {
    vertex(p1.x + 15 + cos(radians(i)) * lightRadius, p1.y + 15 + sin(radians(i)) * lightRadius);
  }
function drawFog() {
  fill(0, 240); 
  noStroke();
  beginShape();
  vertex(0,0); vertex(width,0); vertex(width,height); vertex(0,height);
  
  beginContour();
  for (let i = 0; i <= 360; i += 20) {
    vertex(p1.x + 15 + cos(radians(i)) * lightRadius, p1.y + 15 + sin(radians(i)) * lightRadius);
  }
  endContour();

  if (playerMode === 2) {
    beginContour();
    for (let i = 0; i <= 360; i += 20) {
      vertex(p2.x + 15 + cos(radians(i)) * lightRadius, p2.y + 15 + sin(radians(i)) * lightRadius);
    }
    endContour();
  }
  endShape(CLOSE);
}
Line-by-line explanation (14 lines)

🔧 Subcomponents:

calculation Define outer fog boundary vertex(0,0); vertex(width,0); vertex(width,height); vertex(0,height);

Creates the outer rectangle of the full fog shape (the entire canvas)

for-loop Cut circle for player 1's light for (let i = 0; i <= 360; i += 20) { vertex(p1.x + 15 + cos(radians(i)) * lightRadius, p1.y + 15 + sin(radians(i)) * lightRadius); }

Generates vertices around a circle centered at player 1, creating a 'hole' in the fog

for-loop Cut circle for player 2's light for (let i = 0; i <= 360; i += 20) { vertex(p2.x + 15 + cos(radians(i)) * lightRadius, p2.y + 15 + sin(radians(i)) * lightRadius); }

In two-player mode, cuts a second light circle at player 2's position

fill(0, 240);
Set the fog color to black with very high alpha (240 out of 255), making it nearly opaque
noStroke();
Turn off outlines so the fog has clean edges
beginShape();
Start defining a custom shape
vertex(0,0); vertex(width,0); vertex(width,height); vertex(0,height);
Define the four corners of the canvas as the outer boundary of the fog
beginContour();
Begin defining a contour (a hole) within the outer shape
for (let i = 0; i <= 360; i += 20) {
Loop from 0 to 360 degrees in 20-degree steps to create a circle with 18 vertices
vertex(p1.x + 15 + cos(radians(i)) * lightRadius, p1.y + 15 + sin(radians(i)) * lightRadius);
For each angle i, calculate a point on a circle centered at (p1.x + 15, p1.y + 15) with radius lightRadius using cos and sin
endContour();
Finish defining the first light hole
if (playerMode === 2) {
Only in two-player mode, create a second light hole
beginContour();
Start defining the second contour
for (let i = 0; i <= 360; i += 20) {
Generate the same circular arc for player 2
vertex(p2.x + 15 + cos(radians(i)) * lightRadius, p2.y + 15 + sin(radians(i)) * lightRadius);
Calculate circle vertices centered at player 2's position with the same light radius
endContour();
Finish the second light hole
endShape(CLOSE);
Complete the entire shape, filling it and rendering the fog with two circular holes

checkCollisions()

checkCollisions() handles all proximity-based interactions: enemy contact, coin pickup, and the win condition. It uses dist() to measure distances and early-exit to prevent repeated win triggers.

🔬 This loop checks if each player touches a coin and deactivates it. What happens if you change wallet += 10 to wallet += 50? You'd get more money per coin!

  for (let c of coins) {
    if (c.active && (dist(p1.x+15, p1.y+15, c.x, c.y) < 25 || (playerMode === 2 && dist(p2.x+15, p2.y+15, c.x, c.y) < 25))) {
      c.active = false; wallet += 10;
    }
  }
function checkCollisions() {
  if (winTriggered) return;
  for (let e of enemies) {
    if (dist(p1.x, p1.y, e.x, e.y) < 30 || (playerMode === 2 && dist(p2.x, p2.y, e.x, e.y) < 30)) die();
  }
  for (let c of coins) {
    if (c.active && (dist(p1.x+15, p1.y+15, c.x, c.y) < 25 || (playerMode === 2 && dist(p2.x+15, p2.y+15, c.x, c.y) < 25))) {
      c.active = false; wallet += 10;
    }
  }
  if (coins.filter(c => c.active).length === 0 && (dist(p1.x, p1.y, goal.x, goal.y) < 40 || (playerMode === 2 && dist(p2.x, p2.y, goal.x, goal.y) < 40))) {
    winTriggered = true;
    if (level >= 10) gameState = "WINNER"; 
    else { level++; gameState = "SHOP"; } 
  }
}
Line-by-line explanation (10 lines)

🔧 Subcomponents:

conditional Skip if win already triggered if (winTriggered) return;

Prevents collision checks from firing multiple times if the win condition is already met

for-loop Check enemy collisions for (let e of enemies) { if (dist(p1.x, p1.y, e.x, e.y) < 30 || (playerMode === 2 && dist(p2.x, p2.y, e.x, e.y) < 30)) die(); }

If any enemy is within 30 pixels of a player, the player dies

for-loop Check coin pickups for (let c of coins) { if (c.active && (dist(p1.x+15, p1.y+15, c.x, c.y) < 25 || (playerMode === 2 && dist(p2.x+15, p2.y+15, c.x, c.y) < 25))) { c.active = false; wallet += 10; } }

If a player touches an active coin within 25 pixels, deactivate it and add $10 to wallet

conditional Check win condition if (coins.filter(c => c.active).length === 0 && (dist(p1.x, p1.y, goal.x, goal.y) < 40 || (playerMode === 2 && dist(p2.x, p2.y, goal.x, goal.y) < 40))) { winTriggered = true; ... }

When all coins are collected and a player reaches the goal, trigger win state and advance level or finish game

if (winTriggered) return;
If the win condition has already been met, exit immediately to prevent running collision checks again
for (let e of enemies) {
Loop through all enemies
if (dist(p1.x, p1.y, e.x, e.y) < 30 || (playerMode === 2 && dist(p2.x, p2.y, e.x, e.y) < 30)) die();
If player 1 is within 30 pixels of an enemy, or (in two-player) player 2 is within 30 pixels of an enemy, call die()
for (let c of coins) {
Loop through all coins
if (c.active && (dist(p1.x+15, p1.y+15, c.x, c.y) < 25 || (playerMode === 2 && dist(p2.x+15, p2.y+15, c.x, c.y) < 25))) {
If the coin is active (not yet collected) AND a player's center (offset by +15) is within 25 pixels of the coin
c.active = false; wallet += 10;
Mark the coin as inactive and add $10 to the player's wallet
if (coins.filter(c => c.active).length === 0 && (dist(p1.x, p1.y, goal.x, goal.y) < 40 || (playerMode === 2 && dist(p2.x, p2.y, goal.x, goal.y) < 40))) {
If all coins have been collected (filter returns empty array) AND a player is within 40 pixels of the goal, the win condition is met
winTriggered = true;
Set the win flag to prevent this condition from triggering again
if (level >= 10) gameState = "WINNER";
If level 10 has been reached, move to the WINNER screen
else { level++; gameState = "SHOP"; }
Otherwise, increment the level and move to the SHOP screen to let the player buy upgrades before the next level

die()

die() handles death logic: it decrements lives and either resets the level (if lives remain) or ends the game.

function die() {
  lives--;
  if (lives <= 0) gameState = "GAMEOVER";
  else resetGame();
}
Line-by-line explanation (3 lines)
lives--;
Decrement the lives counter by 1
if (lives <= 0) gameState = "GAMEOVER";
If no lives remain, switch to the GAMEOVER state
else resetGame();
Otherwise, reset the current level and let the player try again

drawGameObjects()

drawGameObjects() renders every visual element in the game: player trails, walls, coins, the goal, and enemies. It uses loops to draw multiple objects efficiently.

function drawGameObjects() {
  for (let i = 0; i < p1.trail.length; i++) {
    fill(255, 0, 0, i * 40); rect(p1.trail[i].x, p1.trail[i].y, 30, 30);
  }
  if (playerMode === 2) {
    for (let i = 0; i < p2.trail.length; i++) {
      fill(0, 150, 255, i * 40); rect(p2.trail[i].x, p2.trail[i].y, 30, 30);
    }
  }
  fill(60); for (let w of walls) rect(w.x, w.y, w.w, w.h);
  fill(255, 204, 0); for (let c of coins) if (c.active) circle(c.x, c.y, 15);
  if (coins.filter(c => c.active).length === 0) { fill(0, 255, 100); rect(goal.x, goal.y, goal.size, goal.size); }
  fill(p1.color); rect(p1.x, p1.y, p1.size, p1.size);
  if (playerMode === 2) { fill(p2.color); rect(p2.x, p2.y, p2.size, p2.size); }
  for (let e of enemies) { fill(0, 255, 0); rect(e.x, e.y, e.size, e.size); }
}
Line-by-line explanation (10 lines)

🔧 Subcomponents:

for-loop Draw player 1 trail for (let i = 0; i < p1.trail.length; i++) { fill(255, 0, 0, i * 40); rect(p1.trail[i].x, p1.trail[i].y, 30, 30); }

Draws each position in the trail with increasing alpha, creating a fading trail effect

for-loop Draw all walls for (let w of walls) rect(w.x, w.y, w.w, w.h);

Renders gray obstacle rectangles

for-loop Draw active coins for (let c of coins) if (c.active) circle(c.x, c.y, 15);

Draws golden circles for coins that haven't been collected

conditional Show goal when coins are collected if (coins.filter(c => c.active).length === 0) { fill(0, 255, 100); rect(goal.x, goal.y, goal.size, goal.size); }

Displays the exit goal only after all coins have been picked up

for (let i = 0; i < p1.trail.length; i++) {
Loop through each position in player 1's trail
fill(255, 0, 0, i * 40); rect(p1.trail[i].x, p1.trail[i].y, 30, 30);
Draw a red square at each trail position with increasing opacity (i * 40), so older trail positions are fainter
if (playerMode === 2) {
Only in two-player mode, draw player 2's trail
for (let i = 0; i < p2.trail.length; i++) { fill(0, 150, 255, i * 40); rect(p2.trail[i].x, p2.trail[i].y, 30, 30); }
Draw player 2's trail in blue with the same fading effect
fill(60); for (let w of walls) rect(w.x, w.y, w.w, w.h);
Set fill to dark gray and draw all walls as rectangles
fill(255, 204, 0); for (let c of coins) if (c.active) circle(c.x, c.y, 15);
Set fill to gold and draw all active coins as circles with diameter 15
if (coins.filter(c => c.active).length === 0) { fill(0, 255, 100); rect(goal.x, goal.y, goal.size, goal.size); }
Use filter() to check if all coins have been collected; if yes, display the goal (exit) in bright green
fill(p1.color); rect(p1.x, p1.y, p1.size, p1.size);
Draw player 1 using the color stored in p1.color
if (playerMode === 2) { fill(p2.color); rect(p2.x, p2.y, p2.size, p2.size); }
In two-player mode, draw player 2 in blue
for (let e of enemies) { fill(0, 255, 0); rect(e.x, e.y, e.size, e.size); }
Draw all enemies as bright green squares

drawUI()

drawUI() renders the on-screen heads-up display showing lives, level, wallet, and timer.

function drawUI() {
  fill(255); textSize(18); textAlign(LEFT);
  text("❤️ Lives: " + lives + " | Level: " + level, 20, 30);
  text("$: " + wallet + " | Time: " + floor(timer), 20, 55);
}
Line-by-line explanation (3 lines)
fill(255); textSize(18); textAlign(LEFT);
Set text color to white, size 18, and left-aligned
text("❤️ Lives: " + lives + " | Level: " + level, 20, 30);
Display the current number of lives and the current level at position (20, 30)
text("$: " + wallet + " | Time: " + floor(timer), 20, 55);
Display the player's money and the remaining time at position (20, 55); floor(timer) rounds down to show whole seconds

drawMenu()

drawMenu() renders the main menu screen where players select single-player or two-player mode.

function drawMenu() {
  textAlign(CENTER);
  fill(0, 255, 100); textSize(50); text("SHADOW MAZE 2.6", width/2, 200);
  fill(255); textSize(20); text("[1] Solo | [2] Duo", width/2, 300);
  fill(150, 150, 255); text("Press 'H' for HOW TO PLAY", width/2, 350);
  fill(0, 255, 100); text("Press ENTER to Start", width/2, 450);
}
Line-by-line explanation (5 lines)
textAlign(CENTER);
Center-align all text
fill(0, 255, 100); textSize(50); text("SHADOW MAZE 2.6", width/2, 200);
Draw the game title in large green text centered at (width/2, 200)
fill(255); textSize(20); text("[1] Solo | [2] Duo", width/2, 300);
Display mode selection instructions in white text centered at (width/2, 300)
fill(150, 150, 255); text("Press 'H' for HOW TO PLAY", width/2, 350);
Show how-to hint in light blue text centered at (width/2, 350)
fill(0, 255, 100); text("Press ENTER to Start", width/2, 450);
Display start instructions in green text centered at (width/2, 450)

drawHowTo()

drawHowTo() displays the rules and controls for the game.

function drawHowTo() {
  textAlign(CENTER); fill(255); textSize(30); text("HOW TO PLAY", width/2, 100);
  textSize(18); text("P1: ARROW KEYS | P2: WASD", width/2, 180);
  text("SHIFT / Q: SPRINT (USES STAMINA)", width/2, 220);
  fill(255, 204, 0); text("COLLECT ALL COINS TO UNLOCK THE EXIT", width/2, 280);
  fill(200); text("PRESS 'BACKSPACE' TO RETURN", width/2, 500);
}
Line-by-line explanation (5 lines)
textAlign(CENTER); fill(255); textSize(30); text("HOW TO PLAY", width/2, 100);
Display the heading in large white text
textSize(18); text("P1: ARROW KEYS | P2: WASD", width/2, 180);
Show control scheme for both players
text("SHIFT / Q: SPRINT (USES STAMINA)", width/2, 220);
Explain the sprint mechanic
fill(255, 204, 0); text("COLLECT ALL COINS TO UNLOCK THE EXIT", width/2, 280);
Highlight the main objective in gold text
fill(200); text("PRESS 'BACKSPACE' TO RETURN", width/2, 500);
Show how to return to the menu in gray text

drawShop()

drawShop() renders the upgrade shop where players spend collected coins on enhancements.

function drawShop() {
  textAlign(CENTER); fill(0, 255, 100); textSize(40); text("SHADOW SHOP", width/2, 100);
  fill(255, 204, 0); textSize(25); text("Your Balance: $" + wallet, width/2, 150);
  fill(255); textSize(20);
  text("[1] Buy Life ($50) | [2] Bigger Flashlight ($30) | [3] Speed ($100)", width/2, 300);
  fill(0, 255, 100); text("PRESS 'ENTER' TO START LEVEL " + level, width/2, 500);
}
Line-by-line explanation (5 lines)
textAlign(CENTER); fill(0, 255, 100); textSize(40); text("SHADOW SHOP", width/2, 100);
Display the shop title in large green text
fill(255, 204, 0); textSize(25); text("Your Balance: $" + wallet, width/2, 150);
Show the player's current wallet balance in gold
fill(255); textSize(20);
Set text to white for the upgrade options
text("[1] Buy Life ($50) | [2] Bigger Flashlight ($30) | [3] Speed ($100)", width/2, 300);
List the three available upgrades with their costs
fill(0, 255, 100); text("PRESS 'ENTER' TO START LEVEL " + level, width/2, 500);
Display the instruction to continue to the next level in green

drawWinScreen()

drawWinScreen() displays the victory screen after completing all 10 levels.

function drawWinScreen() {
  background(0, 50, 0); textAlign(CENTER);
  fill(0, 255, 100); textSize(50); text("YOU ESCAPED!", width/2, 200);
  fill(255); textSize(20); text("Total Loot: $" + wallet, width/2, 300);
  text("Press ENTER for Menu", width/2, 400);
}
Line-by-line explanation (4 lines)
background(0, 50, 0);
Set background to a dark green color to celebrate the win
fill(0, 255, 100); textSize(50); text("YOU ESCAPED!", width/2, 200);
Display the victory message in large green text
fill(255); textSize(20); text("Total Loot: $" + wallet, width/2, 300);
Show the total money earned in white
text("Press ENTER for Menu", width/2, 400);
Prompt player to return to menu

drawGameOver()

drawGameOver() displays the failure screen when the player runs out of lives.

function drawGameOver() {
  background(50, 0, 0); fill(255, 0, 0); textSize(50); textAlign(CENTER); text("GAME OVER", width/2, height/2);
  fill(255); textSize(20); text("Press ENTER to try again", width/2, height/2 + 60);
}
Line-by-line explanation (3 lines)
background(50, 0, 0);
Set background to dark red to indicate failure
fill(255, 0, 0); textSize(50); textAlign(CENTER); text("GAME OVER", width/2, height/2);
Display the game-over message in large red text centered on the canvas
fill(255); textSize(20); text("Press ENTER to try again", width/2, height/2 + 60);
Show how to restart in white text below the message

keyPressed()

keyPressed() is called whenever the player presses a key. It branches on the current gameState and triggers appropriate actions: mode selection, navigation, shop purchases, and game resets.

🔬 These three conditionals handle shop purchases. What if you added a fourth upgrade? For example, you could buy stamina with: if (key === '4' && wallet >= 40) { wallet -= 40; p1.stamina = 150; p2.stamina = 150; }

    if (key === '1' && wallet >= 50) { wallet -= 50; lives++; }
    if (key === '2' && wallet >= 30) { wallet -= 30; lightRadius += 40; }
    if (key === '3' && wallet >= 100) { wallet -= 100; p1.speed += 1; p2.speed += 1; }
function keyPressed() {
  if (gameState === "MENU") {
    if (key === '1') playerMode = 1;
    if (key === '2') playerMode = 2;
    if (key === 'h' || key === 'H') gameState = "HOWTO";
    if (keyCode === ENTER) { resetGame(); gameState = "PLAYING"; }
  } else if (gameState === "HOWTO") {
    if (keyCode === BACKSPACE) gameState = "MENU";
  } else if (gameState === "SHOP") {
    if (key === '1' && wallet >= 50) { wallet -= 50; lives++; }
    if (key === '2' && wallet >= 30) { wallet -= 30; lightRadius += 40; }
    if (key === '3' && wallet >= 100) { wallet -= 100; p1.speed += 1; p2.speed += 1; }
    if (keyCode === ENTER) { resetGame(); gameState = "PLAYING"; }
  } else if (gameState === "WINNER" || gameState === "GAMEOVER") {
    if (keyCode === ENTER) { level = 1; lives = 3; wallet = 0; resetGame(); gameState = "MENU"; }
  }
}
Line-by-line explanation (14 lines)

🔧 Subcomponents:

conditional Handle how-to screen input else if (gameState === "HOWTO") { if (keyCode === BACKSPACE) gameState = "MENU"; }

Allows player to return to menu from help screen

conditional Handle shop upgrades and start level else if (gameState === "SHOP") { ... }

Processes upgrade purchases and transitions to next level

conditional Handle end-game screens else if (gameState === "WINNER" || gameState === "GAMEOVER") { ... }

Resets game and returns to menu after winning or losing

if (gameState === "MENU") {
If currently on the menu
if (key === '1') playerMode = 1;
Pressing '1' selects single-player mode
if (key === '2') playerMode = 2;
Pressing '2' selects two-player mode
if (key === 'h' || key === 'H') gameState = "HOWTO";
Pressing 'H' (any case) opens the controls/rules screen
if (keyCode === ENTER) { resetGame(); gameState = "PLAYING"; }
Pressing ENTER initializes the game and transitions to PLAYING state
} else if (gameState === "HOWTO") {
If currently viewing the how-to screen
if (keyCode === BACKSPACE) gameState = "MENU";
Pressing BACKSPACE returns to the menu
} else if (gameState === "SHOP") {
If currently in the upgrade shop
if (key === '1' && wallet >= 50) { wallet -= 50; lives++; }
Pressing '1' buys a life for $50 if player has enough money
if (key === '2' && wallet >= 30) { wallet -= 30; lightRadius += 40; }
Pressing '2' upgrades light radius (flashlight) for $30, increasing it by 40 pixels
if (key === '3' && wallet >= 100) { wallet -= 100; p1.speed += 1; p2.speed += 1; }
Pressing '3' increases both players' speed by 1 for $100
if (keyCode === ENTER) { resetGame(); gameState = "PLAYING"; }
Pressing ENTER starts the next level
} else if (gameState === "WINNER" || gameState === "GAMEOVER") {
If on either end-game screen (win or loss)
if (keyCode === ENTER) { level = 1; lives = 3; wallet = 0; resetGame(); gameState = "MENU"; }
Pressing ENTER resets all game variables and returns to the menu for a fresh game

📦 Key Variables

robotoFont p5.Font

Stores the loaded Roboto font for consistent text rendering across all screens

let robotoFont;
particles array

Array of floating particle objects that drift upward in the background for visual ambiance

let particles = [];
step number

Tracks the current instruction panel index (0–9) for the welcome screen

let step = 0;
stepTimer number

Counts frames since the current instruction panel appeared; resets when exceeding stepDuration

let stepTimer = 0;
stepDuration number

Number of frames each instruction panel stays visible before auto-advancing (225 frames ≈ 3.75 seconds)

let stepDuration = 225;
instructions array

Array of 10 instruction objects, each with title and description for the welcome carousel

let instructions = [{title: "...", desc: "..."}, ...];
p1 object

Player 1 object containing position (x, y), size, color, stamina, trail, and speed

let p1 = {x: 50, y: 50, size: 30, color: [255, 0, 0], stamina: 100, trail: [], speed: 4};
p2 object

Player 2 object (blue), only used in two-player mode; similar structure to p1

let p2 = {x: 50, y: 520, size: 30, color: [0, 150, 255], stamina: 100, trail: [], speed: 4};
enemies array

Array of enemy objects, each with x, y, and size; count increases at higher levels

let enemies = [];
goal object

The exit/win zone at position (x, y) with a size; becomes visible only after all coins are collected

let goal = {x: 720, y: 50, size: 40};
walls array

Array of obstacle rectangles with x, y, width, and height; randomly generated each level

let walls = [];
coins array

Array of coin objects at position (x, y) with active status; must collect all 3 to unlock the goal

let coins = [];
level number

Current level number (1–10); determines number of walls, enemy count, enemy speed, and time limit

let level = 1;
lives number

Remaining lives; game ends when lives reach 0

let lives = 3;
wallet number

Total money earned from collecting coins; spent in the shop on upgrades

let wallet = 0;
timer number

Remaining time in seconds for the current level; player dies if timer reaches 0

let timer = 30;
enemySpeed number

Speed at which enemies chase the player; increases with level difficulty

let enemySpeed = 2;
lightRadius number

Radius in pixels of the circular light zone around each player; increased by the flashlight upgrade

let lightRadius = 160;
gameState string

Current game screen: 'MENU', 'HOWTO', 'PLAYING', 'SHOP', 'WINNER', or 'GAMEOVER'

let gameState = 'MENU';
playerMode number

Game mode: 1 for single-player, 2 for two-player cooperative

let playerMode = 1;
winTriggered boolean

Flag to prevent the win condition from firing multiple times in a single level

let winTriggered = false;

🔧 Potential Improvements (8)

Here are some ways this code could be enhanced:

BUG drawFog() contour generation

Circles are approximated with only 18 vertices (0–360 in 20° steps), creating visible polygon edges instead of smooth circles

💡 Change the loop to `for (let i = 0; i <= 360; i += 5)` for 72 vertices, creating much smoother light circles

BUG checkCollisions() enemy distance formula

Enemy collision and player position centers don't align; player is 30×30 but uses top-left corner for distance, while coins use center +15

💡 Use `dist(p1.x + 15, p1.y + 15, e.x + 15, e.y + 15)` for consistency, checking center-to-center distances

PERFORMANCE checkCollisions() coin filtering

The line `coins.filter(c => c.active).length === 0` creates a new filtered array every frame just to count coins

💡 Use a simple counter instead: `let activeCoins = 0; for (let c of coins) if (c.active) activeCoins++; if (activeCoins === 0 && ...)`

PERFORMANCE draw() particle animation

Particles update and render every frame even when gameState is not MENU, wasting CPU

💡 Move particle updates inside the `if (gameState === 'MENU')` block so particles only animate on the welcome screen

STYLE drawGameObjects()

Trail colors are hardcoded as [255, 0, 0] and [0, 150, 255]; if player colors change, trails don't match

💡 Use p1.color and p2.color instead: `fill(p1.color[0], p1.color[1], p1.color[2], i * 40)`

FEATURE gameState management

Game lacks a pause feature during PLAYING; no way to pause and resume mid-level

💡 Add a new gameState 'PAUSED' and check for it in draw(); toggle pause with 'P' key in keyPressed()

BUG resetGame() timer calculation

Timer can become 0 or negative on very high levels (e.g., level 15 would give -5 seconds), causing instant death

💡 Use `timer = max(10, 35 - level);` to ensure minimum time of 10 seconds regardless of level

STYLE generateLevel()

Coins and walls always spawn in the same y-range (100–500), leaving top and bottom areas empty

💡 Use the full range: `y: random(30, height - 30)` to distribute obstacles throughout the canvas

🔄 Code Flow

Code flow showing preload, setup, draw, mousePressed, windowResized, resetGame, generateLevel, updateGame, handlePlayerMovement, moveEnemies, drawFog, checkCollisions, die, drawGameObjects, drawUI, drawMenu, drawHowTo, drawShop, drawWinScreen, drawGameOver, keyPressed

💡 Click on function names in the diagram to jump to their code

graph TD start[Start] --> setup[setup] setup --> draw[draw loop] draw --> particle-creation-loop[Particle Creation Loop] draw --> particle-animation-loop[Particle Animation Loop] draw --> step-advancement[Step Advancement] draw --> fade-calculation[Fade Calculation] draw --> progress-dots-loop[Progress Dots Loop] click setup href "#fn-setup" click draw href "#fn-draw" click particle-creation-loop href "#sub-particle-creation-loop" click particle-animation-loop href "#sub-particle-animation-loop" click step-advancement href "#sub-step-advancement" click fade-calculation href "#sub-fade-calculation" click progress-dots-loop href "#sub-progress-dots-loop" draw --> mousePressed[mousePressed] draw --> windowResized[windowResized] click mousePressed href "#fn-mousePressed" click windowResized href "#fn-windowResized" resetGame --> player-initialization[Player Initialization] resetGame --> enemy-spawning[Enemy Spawning] resetGame --> wall-generation-loop[Wall Generation Loop] resetGame --> coin-generation-loop[Coin Generation Loop] click resetGame href "#fn-resetGame" click player-initialization href "#sub-player-initialization" click enemy-spawning href "#sub-enemy-spawning" click wall-generation-loop href "#sub-wall-generation-loop" click coin-generation-loop href "#sub-coin-generation-loop" updateGame --> handlePlayerMovement[Handle Player Movement] updateGame --> moveEnemies[Move Enemies] updateGame --> checkCollisions[Check Collisions] click updateGame href "#fn-updateGame" click handlePlayerMovement href "#fn-handlePlayerMovement" click moveEnemies href "#fn-moveEnemies" click checkCollisions href "#fn-checkCollisions" handlePlayerMovement --> player1-movement[Player 1 Movement] handlePlayerMovement --> player2-movement[Player 2 Movement] handlePlayerMovement --> timer-decrement[Timer Decrement] handlePlayerMovement --> sprint-check[Sprint Check] handlePlayerMovement --> wall-collision-check[Wall Collision Check] handlePlayerMovement --> trail-management[Trail Management] click player1-movement href "#sub-player1-movement" click player2-movement href "#sub-player2-movement" click timer-decrement href "#sub-timer-decrement" click sprint-check href "#sub-sprint-check" click wall-collision-check href "#sub-wall-collision-check" click trail-management href "#sub-trail-management" moveEnemies --> target-selection[Target Selection] moveEnemies --> chase-movement[Chase Movement] click target-selection href "#sub-target-selection" click chase-movement href "#sub-chase-movement" drawFog --> outer-shape[Outer Shape] drawFog --> p1-light-circle[P1 Light Circle] drawFog --> p2-light-circle[P2 Light Circle] click drawFog href "#fn-drawFog" click outer-shape href "#sub-outer-shape" click p1-light-circle href "#sub-p1-light-circle" click p2-light-circle href "#sub-p2-light-circle" checkCollisions --> early-exit[Early Exit] checkCollisions --> enemy-collision-loop[Enemy Collision Loop] checkCollisions --> coin-collection-loop[Coin Collection Loop] checkCollisions --> goal-check[Goal Check] click early-exit href "#sub-early-exit" click enemy-collision-loop href "#sub-enemy-collision-loop" click coin-collection-loop href "#sub-coin-collection-loop" click goal-check href "#sub-goal-check" die --> drawGameOver[Draw Game Over] click die href "#fn-die" click drawGameOver href "#fn-drawGameOver" drawGameObjects --> p1-trail-loop[P1 Trail Loop] drawGameObjects --> wall-loop[Wall Loop] drawGameObjects --> coin-loop[Coin Loop] drawGameObjects --> goal-conditional[Goal Conditional] click drawGameObjects href "#fn-drawGameObjects" click p1-trail-loop href "#sub-p1-trail-loop" click wall-loop href "#sub-wall-loop" click coin-loop href "#sub-coin-loop" click goal-conditional href "#sub-goal-conditional" drawUI --> menu-input[Menu Input] drawUI --> howto-input[How-to Input] drawUI --> shop-input[Shop Input] drawUI --> endgame-input[Endgame Input] click drawUI href "#fn-drawUI" click menu-input href "#sub-menu-input" click howto-input href "#sub-howto-input" click shop-input href "#sub-shop-input" click endgame-input href "#sub-endgame-input" draw --> drawMenu[Draw Menu] draw --> drawHowTo[Draw How To] draw --> drawShop[Draw Shop] draw --> drawWinScreen[Draw Win Screen] click drawMenu href "#fn-drawMenu" click drawHowTo href "#fn-drawHowTo" click drawShop href "#fn-drawShop" click drawWinScreen href "#fn-drawWinScreen"

❓ Frequently Asked Questions

What visual elements are present in the Shadow Maze 2.6 sketch?

The sketch features a dark gradient background with floating particles that animate upwards, changing hue as they move.

How can users interact with the Shadow Maze 2.6 sketch?

Users can swipe between panels to explore different features, including an AI chat for code creation and modification.

What creative coding techniques does the Shadow Maze 2.6 sketch demonstrate?

This sketch showcases particle animation and dynamic background effects, illustrating concepts of randomness and color manipulation in p5.js.

Preview

Shadow maze 2.6 - p5.js creative coding sketch preview
Sketch Preview
Code flow diagram showing the structure of Shadow maze 2.6 - Code flow showing preload, setup, draw, mousePressed, windowResized, resetGame, generateLevel, updateGame, handlePlayerMovement, moveEnemies, drawFog, checkCollisions, die, drawGameObjects, drawUI, drawMenu, drawHowTo, drawShop, drawWinScreen, drawGameOver, keyPressed
Code Flow Diagram