Sketch 2026-02-07 15:33

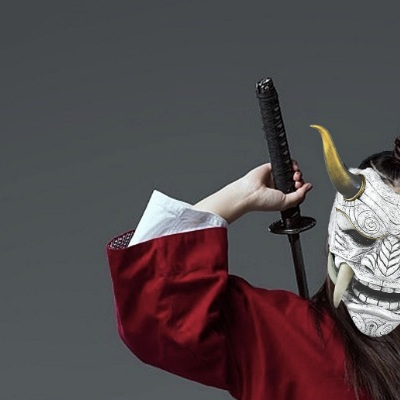
This sketch creates an interactive audio-reactive image distortion effect that displays an image with bulges and pinches controlled by microphone input and time-based oscillations. The distortion effect follows your mouse cursor and responds to sound levels, creating a mesmerizing, morphing visual.

🧪 Try This!

Experiment with the code by making these changes:

  1. Make the distortion follow your voice only—no time wobble — Remove the time-based oscillation so the effect only responds to sounds you make, not continuous waves
  2. Make the distortion much stronger — Increase the audio distortion range so even quiet sounds create noticeable bulges
  3. Speed up the wobbling oscillation — Increase the frequency of the time-based oscillation so the image wobbles faster
  4. Invert the distortion—pinch when loud, bulge when quiet — Swap the audio mapping so high volume pinches inward instead of bulging outward
Prefer the full editor? Open it there →

📖 About This Sketch

This sketch transforms a static image into a living, breathing surface that responds to sound and motion. When you speak or make noise near your microphone, the image bulges and pinches in a circular area centered on your mouse cursor—louder sounds create stronger distortions. The effect uses three core p5.js techniques: pixel-level image manipulation with loadPixels() and updatePixels(), real-time audio analysis with p5.sound's Amplitude class, and polar-to-Cartesian coordinate transformations to create smooth, radial distortions.

The code is organized into five functions: preload() loads the image before anything runs, setup() initializes the canvas and audio input, mousePressed() activates the microphone (required by browser security), draw() runs 60 times per second and performs the pixel distortion, and windowResized() keeps the canvas full-screen. By studying this sketch you will learn how to access and manipulate individual pixel data, read audio input from a user's microphone, and use math (sine waves, polar coordinates) to create complex visual effects.

⚙️ How It Works

  1. When the sketch loads, preload() fetches the image file and setup() creates a full-window canvas, initializes the microphone and amplitude analyzer, and sets pixelDensity(1) to ensure pixels map correctly on high-resolution displays
  2. The first time you click the canvas, mousePressed() starts the microphone (browsers require user interaction before accessing audio)
  3. Every frame, draw() loads the pixel data from both the canvas and the original image into memory using loadPixels()
  4. The sketch reads the current microphone volume with amplitude.getLevel() and combines it with a time-based sine wave oscillation to create a morphFactor—the strength and direction of the distortion
  5. For each pixel on the canvas, the code calculates its distance from the mouse cursor; if it's within the morphing radius, the pixel gets displaced radially using a sine-wave displacement that creates a smooth bulge or pinch effect
  6. The displaced pixel position is converted back from polar coordinates (distance and angle) to Cartesian coordinates (x and y), then clamped to stay within the image bounds
  7. The color from the distorted location in the original image is copied to the current canvas pixel, and updatePixels() applies all changes to create the final distorted frame

🎓 Concepts You'll Learn

Pixel manipulationAudio input and amplitude analysisPolar coordinates and transformationsTime-based animation with sine wavesMouse interactionImage processingCoordinate systems

📝 Code Breakdown

preload()

preload() is a special p5.js function that runs before setup(). Use it to load images, sounds, or other assets that must be ready before your sketch runs. If you don't use preload(), the image might not finish loading in time, causing errors.

function preload() {
  // Load the image file
  // Make sure the filename matches exactly 'paul-on-tractor-pencil-pixels.jpg'
  img = loadImage('paul-on-tractor-pencil-pixels.jpg');
}
Line-by-line explanation (1 lines)
img = loadImage('paul-on-tractor-pencil-pixels.jpg');
Loads the image file before setup() runs; p5.js calls preload() automatically to ensure all assets are ready before the sketch starts

setup()

setup() runs once when the sketch starts. It is where you initialize your canvas, load settings, and create objects like the microphone that will be used in draw().

function setup() {
  // Create a canvas that fills the window
  createCanvas(windowWidth, windowHeight);
  // Important for pixel manipulation: ensure pixelDensity is 1
  // This makes sure 1 p5 pixel corresponds to 1 screen pixel,
  // preventing issues on high-DPI (Retina) displays.
  pixelDensity(1);
  // Optional: Set noSmooth() for a sharper, pixel-art look, especially for this image
  noSmooth();

  // Initialize audio input
  mic = new p5.AudioIn();
  // Initialize amplitude analysis
  amplitude = new p5.Amplitude();
  amplitude.setInput(mic); // Set the microphone as the input for amplitude analysis
}
Line-by-line explanation (6 lines)

🔧 Subcomponents:

initialization Canvas creation and pixel density createCanvas(windowWidth, windowHeight); pixelDensity(1);

Creates a canvas that fills the entire browser window and ensures pixels map correctly on high-resolution screens

initialization Microphone and amplitude setup mic = new p5.AudioIn(); amplitude = new p5.Amplitude(); amplitude.setInput(mic);

Creates microphone and amplitude analyzer objects, then connects them so the amplitude analyzer reads sound from the microphone

createCanvas(windowWidth, windowHeight);
Creates a canvas that matches your browser window's size; windowWidth and windowHeight update automatically if you resize
pixelDensity(1);
Sets pixel density to 1 so each p5.js pixel equals exactly one screen pixel—essential for pixel manipulation to work correctly on Retina/high-DPI displays
noSmooth();
Disables anti-aliasing to create a sharper, crisper look—especially good for pixel-art style images
mic = new p5.AudioIn();
Creates a new microphone input object that will capture sound from your device
amplitude = new p5.Amplitude();
Creates an amplitude analyzer that measures the volume (loudness) of audio
amplitude.setInput(mic);
Tells the amplitude analyzer to read sound from the microphone instead of the default audio output

mousePressed()

Modern browsers require user interaction (a click or key press) before accessing the microphone for privacy and security reasons. mousePressed() is automatically called when you click the canvas, making it the perfect place to start audio input. The console.log() helps you debug—open the browser console (F12) to see the message.

function mousePressed() {
  // Start the microphone if it's not already started
  if (mic && !mic.started) {
    mic.start();
    console.log("Microphone started. You can now speak to interact with the sketch.");
  }
}
Line-by-line explanation (3 lines)

🔧 Subcomponents:

conditional Microphone existence and status check if (mic && !mic.started) {

Ensures the microphone object exists and hasn't already been started before attempting to start it

if (mic && !mic.started) {
Checks two things: 'mic' is not null/undefined AND 'mic.started' is false—this prevents trying to start the microphone twice
mic.start();
Activates the microphone to begin capturing audio from your device
console.log("Microphone started. You can now speak to interact with the sketch.");
Prints a message to the browser console to confirm the microphone is running

draw()

draw() is the heart of this sketch. It runs 60 times per second and processes every pixel on the canvas. The two nested loops (for x, for y) are the key to pixel-level manipulation: each iteration handles one pixel. The big idea is converting from Cartesian coordinates (x, y) to polar coordinates (distance, angle), applying distortion, and converting back—this creates the smooth bulging effect.

function draw() {
  // Clear the canvas with a background color
  background(220);

  // Load the pixels of the canvas for direct manipulation
  // This is more efficient than using get() and set() repeatedly.
  loadPixels();

  // Load the pixels of the image
  // This ensures we have access to the original image data.
  img.loadPixels();

  // --- AUDIO AND TIME REACTIVITY ---

  // Get the current overall amplitude (volume) level from the microphone
  // The level ranges from 0.0 (silent) to 1.0 (loudest)
  let level = amplitude.getLevel();

  // Create a time-based oscillation using sin() function and frameCount
  // frameCount counts the number of frames since the sketch started
  // 0.05 controls the speed of the oscillation
  let timeFactor = sin(frameCount * 0.05);

  // Define the center of the morphing effect
  // It follows the mouse pointer for interactivity.
  let morphCenterX = mouseX;
  let morphCenterY = mouseY;

  // Define the radius of the morphing effect
  // The mouse's X-position controls the base radius, allowing you to make the effect larger or smaller.
  let baseRadius = map(mouseX, 0, width, 50, 300); // Base radius from 50 to 300 pixels
  let morphRadius = baseRadius;

  // Define the strength of the morphing effect (bulge/pinch)
  // Audio level controls the main intensity of the bulge/pinch effect.
  // timeFactor adds a subtle, continuous oscillation on top of the audio reactivity.
  let audioMorphFactor = map(level, 0, 1, -0.7, 0.7); // Stronger audio influence for noticeable effect
  let timeMorphFactor = map(timeFactor, -1, 1, -0.1, 0.1); // Subtle time oscillation for continuous movement
  let morphFactor = audioMorphFactor + timeMorphFactor;

  // --- END REACTIVITY ---

  // Loop through every pixel on the canvas
  for (let y = 0; y < height; y++) {
    for (let x = 0; x < width; x++) {
      // Calculate the index for the current pixel in the canvas's pixels array
      // Each pixel has 4 values (R, G, B, A)
      let canvasIndex = (x + y * width) * 4;

      // Calculate the distance and angle of the current pixel from the morph center
      let dx = x - morphCenterX;
      let dy = y - morphCenterY;
      let dist = sqrt(dx * dx + dy * dy);

      // Check if the current pixel is within the morphing radius
      if (dist < morphRadius) {
        // Normalize the distance (0 to 1 within the radius)
        let normalizedDist = dist / morphRadius;

        // Calculate a displacement value using a sine wave
        // This creates a smooth bulge/pinch effect that is strongest at the center
        // and fades out towards the edge of the morphRadius.
        let displacement = sin(normalizedDist * PI) * morphFactor * morphRadius;

        // Calculate the new distance from the morph center after displacement
        let newDist = dist + displacement;

        // Calculate the angle of the pixel relative to the morph center
        let angle = atan2(dy, dx);

        // Convert the new polar coordinates back to Cartesian coordinates
        let newX = morphCenterX + newDist * cos(angle);
        let newY = morphCenterY + newDist * sin(angle);

        // Constrain the new coordinates to be within the bounds of the original image
        // This prevents trying to access pixels outside the image, which would cause errors.
        newX = constrain(newX, 0, img.width - 1);
        newY = constrain(newY, 0, img.height - 1);

        // Calculate the index for the pixel at the new coordinates in the image's pixels array
        // We use floor() because pixel coordinates must be integers.
        let imgIndex = (floor(newX) + floor(newY) * img.width) * 4;

        // Copy the color from the original image at the new coordinates to the current canvas pixel
        pixels[canvasIndex] = img.pixels[imgIndex];       // Red
        pixels[canvasIndex + 1] = img.pixels[imgIndex + 1]; // Green
        pixels[canvasIndex + 2] = img.pixels[imgIndex + 2]; // Blue
        pixels[canvasIndex + 3] = img.pixels[imgIndex + 3]; // Alpha
      } else {
        // If the pixel is outside the morphing radius, just copy the original image pixel
        // Check if the canvas pixel (x, y) is within the bounds of the image
        if (x < img.width && y < img.height) {
          let imgIndex = (x + y * img.width) * 4;
          pixels[canvasIndex] = img.pixels[imgIndex];
          pixels[canvasIndex + 1] = img.pixels[imgIndex + 1];
          pixels[canvasIndex + 2] = img.pixels[imgIndex + 2];
          pixels[canvasIndex + 3] = img.pixels[imgIndex + 3];
        } else {
          // If the canvas pixel is outside the image bounds (e.g., if canvas is larger than image),
          // fill it with the background color.
          pixels[canvasIndex] = 220;
          pixels[canvasIndex + 1] = 220;
          pixels[canvasIndex + 2] = 220;
          pixels[canvasIndex + 3] = 255;
        }
      }
    }
  }

  // Apply all the pixel changes to the canvas
  updatePixels();
}
Line-by-line explanation (34 lines)

🔧 Subcomponents:

initialization Load pixel data loadPixels(); img.loadPixels();

Prepares the canvas and image pixel data for direct manipulation

calculation Audio and time reactivity let level = amplitude.getLevel(); let timeFactor = sin(frameCount * 0.05);

Reads microphone volume and creates a continuous oscillation to control distortion strength

calculation Define distortion parameters let morphCenterX = mouseX; let morphCenterY = mouseY; let baseRadius = map(mouseX, 0, width, 50, 300);

Sets the center of the distortion effect (mouse position) and radius (controlled by mouse X)

calculation Calculate distortion strength let audioMorphFactor = map(level, 0, 1, -0.7, 0.7); let timeMorphFactor = map(timeFactor, -1, 1, -0.1, 0.1); let morphFactor = audioMorphFactor + timeMorphFactor;

Combines audio input and time oscillation to determine how much to bulge or pinch

for-loop Main pixel processing loop for (let y = 0; y < height; y++) { for (let x = 0; x < width; x++) {

Iterates through every pixel on the canvas (x, y coordinates)

conditional Check if pixel is in morphing radius if (dist < morphRadius) {

Determines whether this pixel should be distorted or copied as-is

calculation Calculate radial displacement let displacement = sin(normalizedDist * PI) * morphFactor * morphRadius;

Uses a sine wave to create a smooth bulge or pinch that is strongest at center and fades at edges

calculation Convert polar to Cartesian coordinates let angle = atan2(dy, dx); let newX = morphCenterX + newDist * cos(angle); let newY = morphCenterY + newDist * sin(angle);

Converts from distance-and-angle back to x-and-y coordinates after displacement

calculation Copy distorted pixel color pixels[canvasIndex] = img.pixels[imgIndex]; pixels[canvasIndex + 1] = img.pixels[imgIndex + 1]; pixels[canvasIndex + 2] = img.pixels[imgIndex + 2]; pixels[canvasIndex + 3] = img.pixels[imgIndex + 3];

Copies the red, green, blue, and alpha values from the original image to the canvas pixel

background(220);
Clears the canvas with a light gray color each frame—without this, the previous frame would stay and create trails
loadPixels();
Loads the canvas's pixel data into memory as an array so you can read and modify individual pixels
img.loadPixels();
Loads the original image's pixel data into memory so you can read from it
let level = amplitude.getLevel();
Reads the current microphone volume as a number between 0 (silent) and 1 (loudest)
let timeFactor = sin(frameCount * 0.05);
Creates a value between -1 and 1 that oscillates smoothly over time; sin() + frameCount creates continuous waves
let morphCenterX = mouseX;
Sets the center of the distortion circle to follow your mouse's X position
let morphCenterY = mouseY;
Sets the center of the distortion circle to follow your mouse's Y position
let baseRadius = map(mouseX, 0, width, 50, 300);
Converts mouse X position (0 to width) into a radius (50 to 300 pixels)—move left for small effect, right for large
let audioMorphFactor = map(level, 0, 1, -0.7, 0.7);
Converts audio level (0 to 1) into a distortion strength (-0.7 to 0.7); louder sound = stronger bulge or pinch
let timeMorphFactor = map(timeFactor, -1, 1, -0.1, 0.1);
Converts time oscillation (-1 to 1) into a subtle distortion (-0.1 to 0.1); adds gentle wobbling on top of audio
let morphFactor = audioMorphFactor + timeMorphFactor;
Combines audio and time effects to create the final distortion strength
for (let y = 0; y < height; y++) {
Outer loop: iterate through every row of pixels (y coordinate)
for (let x = 0; x < width; x++) {
Inner loop: for each row, iterate through every column (x coordinate)—together these loops process every pixel
let canvasIndex = (x + y * width) * 4;
Converts a 2D pixel position (x, y) into a 1D index in the pixels array (multiply by 4 because each pixel has 4 values: R, G, B, A)
let dx = x - morphCenterX;
Calculates horizontal distance from this pixel to the morph center
let dy = y - morphCenterY;
Calculates vertical distance from this pixel to the morph center
let dist = sqrt(dx * dx + dy * dy);
Calculates total distance from pixel to morph center using the Pythagorean theorem
if (dist < morphRadius) {
Checks if this pixel is inside the circle of distortion—if true, it will be displaced; if false, it's copied unchanged
let normalizedDist = dist / morphRadius;
Converts distance (0 to morphRadius) into a normalized value (0 to 1)—used for smooth wave math
let displacement = sin(normalizedDist * PI) * morphFactor * morphRadius;
Creates a smooth wave-shaped displacement: sin() peaks at the center (0.5) and falls to 0 at edges; morphFactor controls strength
let newDist = dist + displacement;
Adds the displacement to the original distance—positive values push outward (bulge), negative values pull inward (pinch)
let angle = atan2(dy, dx);
Calculates the angle (direction) from morph center to this pixel, in radians
let newX = morphCenterX + newDist * cos(angle);
Converts the new distance and angle back to a Cartesian X coordinate
let newY = morphCenterY + newDist * sin(angle);
Converts the new distance and angle back to a Cartesian Y coordinate
newX = constrain(newX, 0, img.width - 1);
Clamps the X coordinate to stay between 0 and the image width, preventing out-of-bounds errors
newY = constrain(newY, 0, img.height - 1);
Clamps the Y coordinate to stay between 0 and the image height, preventing out-of-bounds errors
let imgIndex = (floor(newX) + floor(newY) * img.width) * 4;
Converts the new (x, y) position into a pixel index in the image's pixels array; floor() rounds down to nearest integer
pixels[canvasIndex] = img.pixels[imgIndex];
Copies the red value from the original image's distorted location to the canvas pixel
pixels[canvasIndex + 1] = img.pixels[imgIndex + 1];
Copies the green value
pixels[canvasIndex + 2] = img.pixels[imgIndex + 2];
Copies the blue value
pixels[canvasIndex + 3] = img.pixels[imgIndex + 3];
Copies the alpha (transparency) value
if (x < img.width && y < img.height) {
For pixels outside the distortion radius, check if they're within the original image bounds before copying
pixels[canvasIndex] = 220;
If the pixel is outside the image bounds, fill it with background gray (220)
updatePixels();
Applies all pixel changes made in the loop to the canvas, displaying the distorted image

windowResized()

windowResized() is automatically called by p5.js whenever the browser window is resized. Without this function, the canvas would stay the original size. The second pixelDensity(1) is important because resizing can sometimes reset this setting.

function windowResized() {
  resizeCanvas(windowWidth, windowHeight);
  // Re-apply pixelDensity(1) after resizing
  pixelDensity(1);
}
Line-by-line explanation (2 lines)
resizeCanvas(windowWidth, windowHeight);
Resizes the canvas to match the browser window's new size when you drag the window edge
pixelDensity(1);
Re-applies pixelDensity(1) after resizing to ensure pixel mapping stays correct on high-DPI displays

📦 Key Variables

img p5.Image

Holds the image loaded in preload(); used throughout draw() to read and distort pixel data

let img;
mic p5.AudioIn

Stores the microphone input object; created in setup() and started in mousePressed()

let mic;
amplitude p5.Amplitude

Analyzes the microphone's audio level; provides getLevel() which returns volume as a number 0-1

let amplitude;
level number

Stores the current microphone volume (0 = silent, 1 = loudest); read each frame and used to control distortion strength

let level = amplitude.getLevel();
timeFactor number

Oscillates between -1 and 1 over time using a sine wave; creates continuous wobbling independent of audio

let timeFactor = sin(frameCount * 0.05);
morphCenterX number

The X coordinate of the distortion circle's center; follows mouseX

let morphCenterX = mouseX;
morphCenterY number

The Y coordinate of the distortion circle's center; follows mouseY

let morphCenterY = mouseY;
baseRadius number

The radius of the distortion circle in pixels; mapped from mouseX so left side = small, right side = large

let baseRadius = map(mouseX, 0, width, 50, 300);
morphRadius number

The radius used for distortion calculations; equals baseRadius (could be extended to vary over time)

let morphRadius = baseRadius;
audioMorphFactor number

Controls distortion strength based on microphone volume; ranges -0.7 to 0.7 (negative = pinch, positive = bulge)

let audioMorphFactor = map(level, 0, 1, -0.7, 0.7);
timeMorphFactor number

Adds a subtle time-based oscillation to the distortion; ranges -0.1 to 0.1

let timeMorphFactor = map(timeFactor, -1, 1, -0.1, 0.1);
morphFactor number

The final distortion strength, combining audio and time effects; used to displace pixels

let morphFactor = audioMorphFactor + timeMorphFactor;

🔧 Potential Improvements (4)

Here are some ways this code could be enhanced:

PERFORMANCE draw() pixel loops

The nested for-loops process every pixel every frame, even far outside the morphing radius—on large canvases this is expensive

💡 Optimize by only processing pixels within a bounding box around morphRadius: start x from max(0, morphCenterX - morphRadius) and y from max(0, morphCenterY - morphRadius), and stop when you exceed morphCenterX + morphRadius and morphCenterY + morphRadius

BUG draw() pixel indexing

If the canvas is larger than the image, pixels outside the image are filled with gray, but this doesn't account for cases where the image has transparency or should be tiled

💡 Add an option to either clear those pixels to transparent (pixel[canvasIndex + 3] = 0) or tile the image by using modulo: newX % img.width

STYLE setup() and draw()

The code uses magic numbers (50, 300 for radius; 0.05 for oscillation speed; -0.7, 0.7 for audio mapping) scattered throughout, making it hard to tweak

💡 Define these as constants at the top of the file (e.g., const MIN_RADIUS = 50; const MAX_RADIUS = 300; const OSCILLATION_SPEED = 0.05) so they're easy to find and adjust

FEATURE mousePressed()

Users don't know to click the canvas to start the microphone—there's no visual feedback

💡 Add text() to display 'Click to enable microphone' on the canvas before it's activated, or use keyPressed() as an alternative trigger

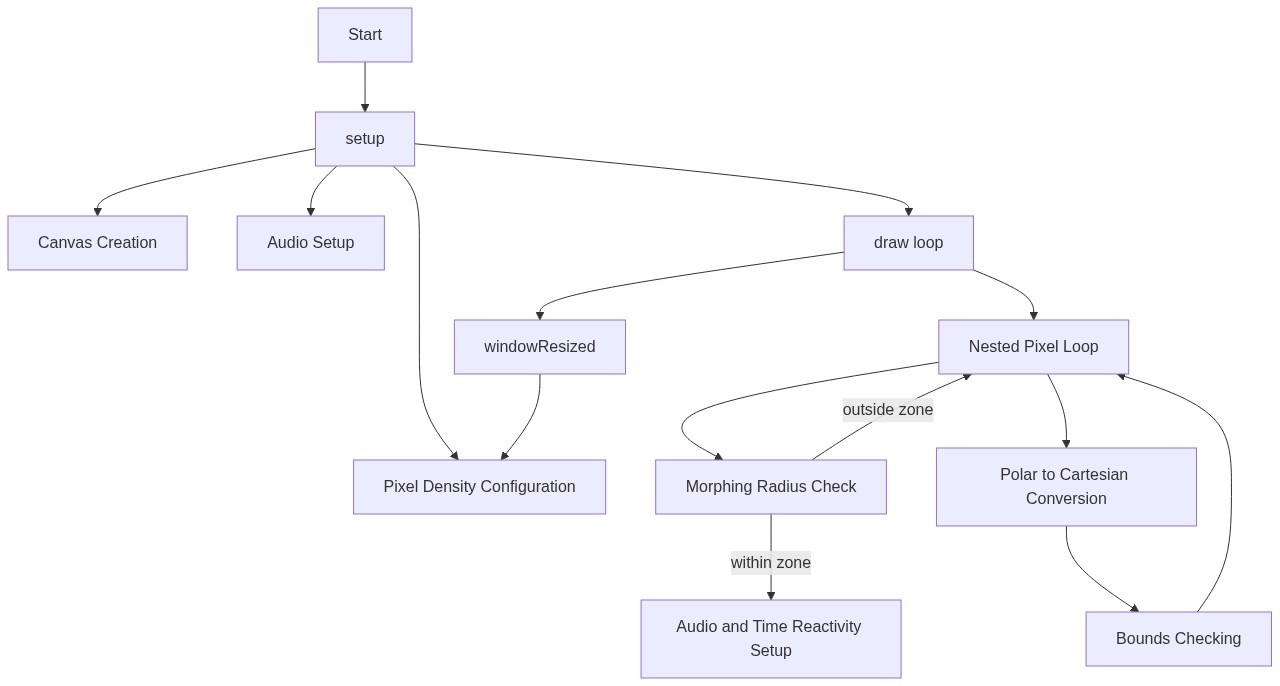
🔄 Code Flow

Code flow showing preload, setup, mousepressed, draw, windowresized

💡 Click on function names in the diagram to jump to their code

graph TD start[Start] --> setup[setup] setup --> canvas-setup[Canvas Setup] setup --> audio-initialization[Audio Initialization] audio-initialization --> mic-check[Microphone Check] mic-check -->|Exists| draw[draw loop] mic-check -->|Doesn't Exist| audio-initialization draw --> pixel-loading[Pixel Loading] pixel-loading --> audio-analysis[Audio Analysis] audio-analysis --> morph-parameters[Morph Parameters] morph-parameters --> morph-factor[Morph Factor] morph-factor --> pixel-loop[Pixel Loop] pixel-loop --> distance-check[Distance Check] distance-check -->|In Radius| displacement-calculation[Displacement Calculation] distance-check -->|Out of Radius| pixel-copy[Pixel Copy] displacement-calculation --> polar-to-cartesian[Polar to Cartesian] polar-to-cartesian --> pixel-copy pixel-copy --> pixel-loop draw --> windowresized[windowResized] windowresized --> setup click setup href "#fn-setup" click draw href "#fn-draw" click canvas-setup href "#sub-canvas-setup" click audio-initialization href "#sub-audio-initialization" click mic-check href "#sub-mic-check" click pixel-loading href "#sub-pixel-loading" click audio-analysis href "#sub-audio-analysis" click morph-parameters href "#sub-morph-parameters" click morph-factor href "#sub-morph-factor" click pixel-loop href "#sub-pixel-loop" click distance-check href "#sub-distance-check" click displacement-calculation href "#sub-displacement-calculation" click polar-to-cartesian href "#sub-polar-to-cartesian" click pixel-copy href "#sub-pixel-copy"

❓ Frequently Asked Questions

What visual experience does the p5.js sketch 'Sketch 2026-02-07 15:33' create?

This sketch generates a dynamic visual display that reacts to audio input, manipulating an image based on the microphone's amplitude levels.

How can users interact with the 'Sketch 2026-02-07 15:33'?

Users can interact with the sketch by clicking the mouse to start the microphone, allowing their voice to influence the visual output.

What creative coding concept is showcased in this p5.js sketch?

The sketch demonstrates the use of real-time audio analysis to create responsive visuals, combining audio input with pixel manipulation.

Preview

Sketch 2026-02-07 15:33 - p5.js creative coding sketch preview
Sketch Preview
Code flow diagram showing the structure of Sketch 2026-02-07 15:33 - Code flow showing preload, setup, mousepressed, draw, windowresized
Code Flow Diagram