Sketch 2026-03-05 16:01

This is a space shooter game where the player controls a blue spaceship to dodge falling red enemies and shoot them down with yellow bullets. The game features explosion particle effects, procedural sound synthesis for laser and explosion audio, and tracks score and lives across three difficulty tiers.

🧪 Try This!

Experiment with the code by making these changes:

  1. Make enemies faster — Increase the enemy spawn rate and speed to ramp up difficulty instantly
  2. Change the spaceship color — Paint the player's spaceship a different color by adjusting the RGB values in the draw() method
  3. Give the player more lives — Starting with more lives makes the game more forgiving and fun for casual players
  4. Award more points per kill — Increase score rewards to make high-score hunting more satisfying
  5. Create bigger explosions — Spawn more particles per explosion for more dramatic visual feedback
  6. Slow down player movement — Reduce the player's speed to make positioning more deliberate and tactical
Prefer the full editor? Open it there →

📖 About This Sketch

This sketch creates a complete space shooter game where the player commands a blue triangle spaceship to eliminate red rectangular enemies that fall from the top of the screen. The game combines several advanced p5.js techniques: procedural sound synthesis using p5.sound's Oscillator and Noise objects, particle systems for explosion effects, collision detection between bullets and enemies, and a game state machine that transitions between START, PLAYING, and GAME_OVER screens. The visual feedback is instant and satisfying—enemies explode into orange particles with synchronized sound, making every successful shot feel impactful.

The code is organized around four custom classes (Player, Bullet, Enemy, Particle) that encapsulate the behavior of game objects, plus five core helper functions (updateGame, drawGame, checkCollision, spawnExplosion, restartGame) that orchestrate the game loop. By studying it, you will learn how to structure a complex interactive sketch using object-oriented programming, manage multiple arrays of game objects, implement a frame-rate-independent shooting system using millisecond timers, and synthesize audio procedurally to match gameplay events.

⚙️ How It Works

  1. When the sketch loads, setup() creates a responsive canvas, initializes a Player object at the bottom center, and configures two synthesized sounds: a high-frequency sine wave for laser shots and a noise burst for explosions. The p5.sound library requires userStartAudio() to enable Web Audio in the browser.
  2. On every frame, draw() checks the game_state variable and either displays the start screen, runs the active game, or shows the game over screen. The game loop alternates between updateGame() and drawGame().
  3. updateGame() moves the player based on arrow keys or WASD, spawns bullets on spacebar or mouse click using a 150-millisecond cooldown timer, and updates the position of all bullets and enemies.
  4. Collision detection runs continuously: bullets that hit enemies trigger spawnExplosion() (which creates 20 orange particles), increment the score by 10, and play the explosion sound via the p5.sound Noise object. Enemies that escape the bottom of the screen or collide with the player both cost one life.
  5. Particles update their position with velocity and fade away via an alpha decay. When lives reach zero, the game transitions to GAME_OVER state, which displays the final score and waits for the player to press spacebar to restart.
  6. The keyPressed() and mousePressed() functions provide input handling for starting and restarting the game, while updateGame() polls keyIsDown() every frame to enable smooth continuous movement and rapid-fire shooting.

🎓 Concepts You'll Learn

Game state machineCollision detectionParticle systemsProcedural sound synthesisClass-based object architectureArray managementEvent-driven input handlingResponsive canvas sizing

📝 Code Breakdown

setup()

setup() runs once when the sketch starts. Use it to initialize your canvas, create objects, and configure any libraries like p5.sound. Note that userStartAudio() is critical for modern Web Audio—without it, your sound synthesis will fail silently.

function setup() {
  // Create a canvas that fills the available space
  createCanvas(windowWidth, windowHeight);
  // Tip: Use windowWidth/windowHeight for responsive canvas

  // Initialize player spaceship
  player = new Player();

  // Setup sound synthesis for laser and explosion
  // Laser sound: high-frequency sine wave with quick attack/decay
  laserSound = new p5.Oscillator('sine');
  laserSound.amp(0); // Start silent
  laserSound.freq(880); // High pitch
  laserSound.start();

  // Explosion sound: noise burst with quick attack/decay
  explosionSound = new p5.Noise();
  explosionSound.amp(0); // Start silent
  explosionSound.start();

  // CRITICAL: Enable audio context on user gesture
  // This is required by modern browsers for Web Audio API
  userStartAudio();

  // Set text properties for UI
  textAlign(CENTER, CENTER);
  textSize(32);
  fill(255);
}
Line-by-line explanation (9 lines)

🔧 Subcomponents:

calculation Responsive Canvas createCanvas(windowWidth, windowHeight);

Creates a canvas that fills the browser window and adapts when resized

calculation Laser Sound Setup laserSound = new p5.Oscillator('sine');

Initializes a high-pitched sine wave oscillator that will play when the player shoots

calculation Explosion Sound Setup explosionSound = new p5.Noise();

Initializes a noise generator that creates the explosion burst sound

calculation Audio Context Initialization userStartAudio();

Enables Web Audio API in the browser—required by modern browsers before any sound can play

createCanvas(windowWidth, windowHeight);
Creates a responsive canvas that fills the entire browser window using dynamic width and height values
player = new Player();
Instantiates the Player object, which initializes the spaceship's position, size, and movement speed
laserSound = new p5.Oscillator('sine');
Creates a sine wave oscillator from the p5.sound library for the laser shooting sound
laserSound.freq(880);
Sets the oscillator frequency to 880 Hz, a high pitch that sounds like a laser
laserSound.start();
Starts the oscillator (it begins playing but stays silent until its amplitude is increased)
explosionSound = new p5.Noise();
Creates a noise generator from p5.sound that produces white noise for explosion effects
explosionSound.start();
Starts the noise generator (stays silent until amplitude is increased)
userStartAudio();
Enables the Web Audio API context—modern browsers require user interaction before sound can play, and this function handles that requirement
textAlign(CENTER, CENTER);
Centers all text both horizontally and vertically from the (x, y) position you give to text()

draw()

draw() runs 60 times per second and is the main game loop. The game_state variable acts as a state machine—a simple way to control which 'mode' the game is in. This pattern (checking game_state and calling different functions) is foundational for all interactive projects.

🔬 This is the state machine that controls what appears on screen. What happens if you rearrange the order of these conditions? What if you change 'PLAYING' to 'PLAY' in just the first condition here (but nowhere else)?

  if (game_state === 'START') {
    drawStartScreen();
  } else if (game_state === 'PLAYING') {
    updateGame();
    drawGame();
  } else if (game_state === 'GAME_OVER') {
    drawGameOverScreen();
  }
function draw() {
  background(10, 10, 30); // Dark space background

  if (game_state === 'START') {
    drawStartScreen();
  } else if (game_state === 'PLAYING') {
    updateGame();
    drawGame();
  } else if (game_state === 'GAME_OVER') {
    drawGameOverScreen();
  }

  drawUI(); // Always draw score and lives
}
Line-by-line explanation (7 lines)

🔧 Subcomponents:

switch-case Game State Machine if (game_state === 'START') { ... } else if (game_state === 'PLAYING') { ... } else if (game_state === 'GAME_OVER') { ... }

Routes the game loop to different functions based on which screen the player is on (START, PLAYING, or GAME_OVER)

background(10, 10, 30); // Dark space background
Clears the canvas to a very dark blue-black color every frame, creating the space theme and removing previous frame visuals
if (game_state === 'START') {
Checks if the game is on the start screen; if true, draws the start message instead of playing
drawStartScreen();
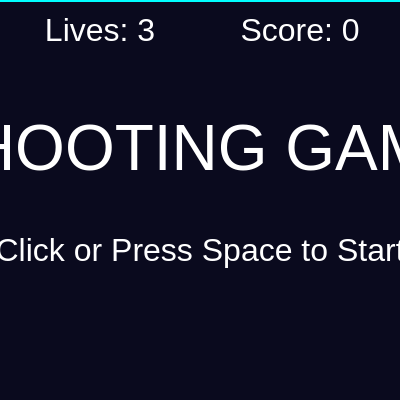
Calls the function that displays 'SHOOTING GAME' and instructions on the start screen
} else if (game_state === 'PLAYING') {
Checks if the game is actively being played; if true, updates and draws the game
updateGame(); drawGame();
updateGame() handles all movement, collision detection, and game logic; drawGame() then renders all objects at their new positions
} else if (game_state === 'GAME_OVER') {
Checks if the player has lost all lives; if true, displays the game over screen with final score
drawUI();
Always draws the score and lives counter, regardless of game state—this stays visible on all screens

updateGame()

updateGame() is the heart of the game logic. It handles input, moves objects, detects collisions, spawns new enemies, and updates particles—all 60 times per second. Notice how it uses backward-looping for-loops when removing items from arrays: this prevents the loop from skipping elements when you splice(). Also notice the timer pattern: millis() - lastBulletTime > bulletDelay. This is a frame-rate-independent way to throttle repeated actions.

🔬 This loop moves each bullet and removes it if it goes off-screen. What happens if you change the condition from i >= 0 to i < bullets.length and start the loop at let i = 0 instead? (Loop forwards instead of backwards.) Why might removing items this way cause problems?

  // Update and draw bullets
  for (let i = bullets.length - 1; i >= 0; i--) {
    bullets[i].update();
    if (bullets[i].isOffScreen()) {
      bullets.splice(i, 1); // Remove bullets that go off-screen
    }

🔬 This code runs every time a bullet hits an enemy. What would happen if you removed the spawnExplosion() line? What if you changed spawnExplosion(enemies[j].x, enemies[j].y) to spawnExplosion(player.x, player.y)?

        score += 10; // Increase score
          spawnExplosion(enemies[j].x, enemies[j].y); // Create explosion particles
          enemies.splice(j, 1); // Remove enemy
function updateGame() {
  player.update(); // Move player

  // Handle player shooting
  if ((keyIsDown(32) || mouseIsPressed) && millis() - lastBulletTime > bulletDelay) { // Spacebar or mouse click
    player.shoot();
    lastBulletTime = millis(); // Reset bullet timer
  }

  // Update and draw bullets
  for (let i = bullets.length - 1; i >= 0; i--) {
    bullets[i].update();
    if (bullets[i].isOffScreen()) {
      bullets.splice(i, 1); // Remove bullets that go off-screen
    } else {
      // Check for bullet-enemy collisions
      for (let j = enemies.length - 1; j >= 0; j--) {
        if (checkCollision(bullets[i], enemies[j])) {
          score += 10; // Increase score
          spawnExplosion(enemies[j].x, enemies[j].y); // Create explosion particles
          enemies.splice(j, 1); // Remove enemy
          bullets.splice(i, 1); // Remove bullet
          explosionSynth.amp(0.8, 0.05); // Play explosion sound
          explosionSynth.amp(0, 0.2); // Decay explosion sound
          break; // Bullet can only hit one enemy
        }
      }
    }
  }

  // Spawn new enemies
  if (millis() - lastEnemySpawnTime > enemySpawnDelay) {
    enemies.push(new Enemy());
    lastEnemySpawnTime = millis();
  }

  // Update and draw enemies
  for (let i = enemies.length - 1; i >= 0; i--) {
    enemies[i].update();
    if (enemies[i].isOffScreen()) {
      enemies.splice(i, 1); // Remove enemies that go off-screen
      lives--; // Lose a life if enemy escapes
    } else {
      // Check for player-enemy collisions
      if (checkCollision(player, enemies[i])) {
        lives--; // Player loses a life
        spawnExplosion(player.x, player.y); // Explosion at player location
        explosionSynth.amp(0.8, 0.05); // Play explosion sound
        explosionSynth.amp(0, 0.2); // Decay explosion sound
        player.resetPosition(); // Reset player position after hit
        enemies.splice(i, 1); // Remove enemy
      }
    }
  }

  // Update and draw particles (explosions)
  for (let i = particles.length - 1; i >= 0; i--) {
    particles[i].update();
    if (particles[i].isFinished()) {
      particles.splice(i, 1); // Remove finished particles
    }
  }

  // Check for game over
  if (lives <= 0) {
    game_state = 'GAME_OVER';
  }
}
Line-by-line explanation (34 lines)

🔧 Subcomponents:

conditional Shooting Input Handler if ((keyIsDown(32) || mouseIsPressed) && millis() - lastBulletTime > bulletDelay) {

Checks if the player pressed spacebar or mouse AND enough time has passed since the last bullet, preventing spam-firing

for-loop Bullet Update and Collision Loop for (let i = bullets.length - 1; i >= 0; i--) {

Moves each bullet and checks if it hit an enemy or left the screen; loops backwards to safely remove bullets from the array

nested-loop Bullet-Enemy Collision Detection for (let j = enemies.length - 1; j >= 0; j--) {

Checks every bullet against every enemy to detect hits

conditional Enemy Spawn Timer if (millis() - lastEnemySpawnTime > enemySpawnDelay) {

Spawns a new enemy when enough time has passed since the last spawn

for-loop Enemy Update and Collision Loop for (let i = enemies.length - 1; i >= 0; i--) {

Moves each enemy and checks if it hit the player or escaped off-screen

for-loop Particle Update Loop for (let i = particles.length - 1; i >= 0; i--) {

Updates particle position and fades out finished particles

conditional Game Over Condition if (lives <= 0) {

Transitions to GAME_OVER state when the player loses all three lives

player.update(); // Move player
Calls the player's update method, which processes keyboard input and moves the spaceship
if ((keyIsDown(32) || mouseIsPressed) && millis() - lastBulletTime > bulletDelay) {
Checks two conditions: (1) spacebar OR mouse button is held, AND (2) at least bulletDelay milliseconds have passed since the last shot
player.shoot();
Creates a new bullet at the player's position and plays the laser sound
lastBulletTime = millis(); // Reset bullet timer
Records the current time so the bulletDelay timer will count down again before the next bullet is allowed
for (let i = bullets.length - 1; i >= 0; i--) {
Loops through all bullets backwards—this is crucial because we'll be removing bullets from the array, and going backwards prevents skipping elements
bullets[i].update();
Calls each bullet's update method to move it up the screen
if (bullets[i].isOffScreen()) {
Checks if the bullet has traveled off the top of the canvas
bullets.splice(i, 1); // Remove bullets that go off-screen
Deletes the bullet from the array using splice(), which removes 1 element at index i
for (let j = enemies.length - 1; j >= 0; j--) {
Nested loop: for each bullet, checks against every enemy to see if they occupy the same space
if (checkCollision(bullets[i], enemies[j])) {
Uses the checkCollision helper function to detect if this bullet and enemy are touching
score += 10; // Increase score
Awards 10 points to the player for destroying an enemy
spawnExplosion(enemies[j].x, enemies[j].y); // Create explosion particles
Creates 20 orange particles at the enemy's location to visually represent the explosion
enemies.splice(j, 1); // Remove enemy
Removes the destroyed enemy from the enemies array
bullets.splice(i, 1); // Remove bullet
Removes the bullet from the bullets array since it hit something and is spent
explosionSynth.amp(0.8, 0.05); // Play explosion sound
Immediately increases the noise generator's amplitude to 0.8 over 0.05 seconds (attack), creating a burst sound
explosionSynth.amp(0, 0.2); // Decay explosion sound
Decreases the amplitude to 0 over 0.2 seconds (decay), making the explosion sound fade away naturally
break; // Bullet can only hit one enemy
Exits the inner enemy loop early—a bullet stops checking enemies after hitting one, so it can't hit multiple enemies
if (millis() - lastEnemySpawnTime > enemySpawnDelay) {
Checks if enough time has passed since the last enemy was spawned
enemies.push(new Enemy());
Creates a new Enemy object and adds it to the enemies array—the constructor automatically spawns it at a random x position and off-screen at the top
lastEnemySpawnTime = millis();
Resets the spawn timer so the next enemy won't spawn until enemySpawnDelay milliseconds pass
for (let i = enemies.length - 1; i >= 0; i--) {
Loops through all enemies backwards, just like the bullet loop
enemies[i].update();
Moves the enemy down the screen
if (enemies[i].isOffScreen()) {
Checks if the enemy has fallen past the bottom of the canvas
enemies.splice(i, 1); // Remove enemies that go off-screen lives--; // Lose a life if enemy escapes
Removes the escaped enemy and decrements lives by 1—the player loses a life if they fail to shoot an enemy before it reaches the bottom
if (checkCollision(player, enemies[i])) {
Checks if the player's spaceship is touching an enemy
lives--; // Player loses a life
Decrements lives—the player loses a life on direct collision with an enemy
spawnExplosion(player.x, player.y); // Explosion at player location
Creates particles at the player's position to show a collision explosion
player.resetPosition(); // Reset player position after hit
Moves the player back to the starting position so they can continue playing
enemies.splice(i, 1); // Remove enemy
Deletes the enemy that just hit the player
for (let i = particles.length - 1; i >= 0; i--) {
Loops through all particles and updates them
particles[i].update();
Moves each particle and decreases its alpha (opacity) so it fades away
if (particles[i].isFinished()) {
Checks if a particle's alpha has reached 0 and the animation is complete
particles.splice(i, 1); // Remove finished particles
Deletes the particle from the array so it stops being drawn and updated
if (lives <= 0) { game_state = 'GAME_OVER'; }
Checks if the player has run out of lives and transitions to the GAME_OVER state, which will display the game over screen on the next draw() call

drawGame()

drawGame() is simple: it just calls the draw() method on every game object. Notice that it uses forEach() instead of a for-loop—this is because we're not removing items during the loop, so a simpler syntax works. Always separate update (movement/logic) from draw (rendering) in your code; this makes it easier to understand and debug.

function drawGame() {
  player.draw();
  bullets.forEach(bullet => bullet.draw());
  enemies.forEach(enemy => enemy.draw());
  particles.forEach(particle => particle.draw());
}
Line-by-line explanation (4 lines)

🔧 Subcomponents:

for-loop forEach with Arrow Functions bullets.forEach(bullet => bullet.draw());

Iterates through all bullets and calls draw() on each one—a cleaner alternative to a for-loop when you're not modifying the array

player.draw();
Draws the player's spaceship at its current position
bullets.forEach(bullet => bullet.draw());
Uses forEach() to call draw() on every bullet—forEach is cleaner than a for-loop when you're not removing items
enemies.forEach(enemy => enemy.draw());
Draws all enemies on the screen
particles.forEach(particle => particle.draw());
Draws all explosion particles, which fade as they animate

drawUI()

drawUI() displays the score and lives overlay. Template literals (using backticks and ${}) let you embed JavaScript variables directly into strings. This function is called every frame in draw(), so it always shows the current values.

function drawUI() {
  fill(255); // White text
  noStroke();

  // Score
  text(`Score: ${score}`, width - 100, 30);

  // Lives
  text(`Lives: ${lives}`, 100, 30);
}
Line-by-line explanation (4 lines)
fill(255); // White text
Sets the text color to white (255, 255, 255 in RGB)
noStroke();
Removes any outline from text
text(`Score: ${score}`, width - 100, 30);
Displays the current score using a template literal (`backticks`) to insert the score value; positioned near the top-right of the screen
text(`Lives: ${lives}`, 100, 30);
Displays the remaining lives near the top-left of the screen

drawStartScreen()

This function displays the start screen when game_state === 'START'. It's called from draw() before any gameplay begins. Customize the text and positions to match your game's theme.

function drawStartScreen() {
  fill(255);
  noStroke();
  textSize(64);
  text("SHOOTING GAME", width / 2, height / 2 - 50);
  textSize(32);
  text("Click or Press Space to Start", width / 2, height / 2 + 50);
}
Line-by-line explanation (5 lines)
fill(255);
Sets text color to white
textSize(64);
Makes the title text large (64 pixels)
text("SHOOTING GAME", width / 2, height / 2 - 50);
Displays the title centered horizontally and slightly above the screen center
textSize(32);
Reduces text size to 32 pixels for the instructions
text("Click or Press Space to Start", width / 2, height / 2 + 50);
Displays instructions centered on the screen

drawGameOverScreen()

This function displays when the player runs out of lives. Notice how it uses fill() multiple times to change colors for different text elements. The final score is embedded using a template literal.

function drawGameOverScreen() {
  fill(255, 0, 0); // Red text
  noStroke();
  textSize(64);
  text("GAME OVER!", width / 2, height / 2 - 100);
  fill(255);
  textSize(32);
  text(`Final Score: ${score}`, width / 2, height / 2);
  text("Press Space to Restart", width / 2, height / 2 + 100);
}
Line-by-line explanation (7 lines)
fill(255, 0, 0); // Red text
Sets text color to red for the GAME OVER message
textSize(64);
Makes the GAME OVER text large and prominent
text("GAME OVER!", width / 2, height / 2 - 100);
Displays the game over message centered near the top of the screen
fill(255);
Switches text color back to white for the score and restart instructions
textSize(32);
Reduces text size for secondary information
text(`Final Score: ${score}`, width / 2, height / 2);
Displays the player's final score in the center of the screen
text("Press Space to Restart", width / 2, height / 2 + 100);
Displays restart instructions near the bottom

Player class

The Player class encapsulates all the data and behavior related to the player's spaceship. The constructor method runs once when the Player is created (in setup()). The update() method runs every frame and polls the keyboard. The draw() method renders the spaceship shape. The shoot() method creates bullets and plays sound. Notice how the spaceship is drawn using a triangle and rectangle—this is a simple geometric approach that's easy to customize.

🔬 These two if-statements handle left and right movement. What happens if you change -= to += in the first one (so left makes the player go right)? What if you change keyIsDown(65) to keyIsDown(90) to use 'Z' instead of 'A'?

    if (keyIsDown(LEFT_ARROW) || keyIsDown(65)) { // Left Arrow or 'A'
      this.x -= this.speed;
    }
    if (keyIsDown(RIGHT_ARROW) || keyIsDown(68)) { // Right Arrow or 'D'
      this.x += this.speed;
    }
class Player {
  constructor() {
    this.size = 50;
    this.speed = 5;
    this.resetPosition();
  }

  resetPosition() {
    this.x = width / 2;
    this.y = height - this.size * 2;
  }

  update() {
    // Move with arrow keys or WASD
    if (keyIsDown(LEFT_ARROW) || keyIsDown(65)) { // Left Arrow or 'A'
      this.x -= this.speed;
    }
    if (keyIsDown(RIGHT_ARROW) || keyIsDown(68)) { // Right Arrow or 'D'
      this.x += this.speed;
    }
    if (keyIsDown(UP_ARROW) || keyIsDown(87)) { // Up Arrow or 'W'
      this.y -= this.speed;
    }
    if (keyIsDown(DOWN_ARROW) || keyIsDown(83)) { // Down Arrow or 'S'
      this.y += this.speed;
    }

    // Keep player within canvas bounds
    this.x = constrain(this.x, this.size / 2, width - this.size / 2);
    this.y = constrain(this.y, this.size / 2, height - this.size / 2);
  }

  draw() {
    fill(0, 200, 255); // Blue spaceship
    noStroke();
    // Simple spaceship shape (triangle with a rectangle base)
    triangle(this.x, this.y - this.size / 2,
             this.x - this.size / 2, this.y + this.size / 2,
             this.x + this.size / 2, this.y + this.size / 2);
    rectMode(CENTER);
    rect(this.x, this.y + this.size / 4, this.size * 0.8, this.size * 0.5);
    rectMode(CORNER);
  }

  shoot() {
    bullets.push(new Bullet(this.x, this.y - this.size / 2));
    laserSound.amp(0.5, 0.05); // Play laser sound
    laserSound.amp(0, 0.1); // Decay laser sound
  }
}
Line-by-line explanation (23 lines)

🔧 Subcomponents:

calculation Player Constructor constructor() { this.size = 50; this.speed = 5; this.resetPosition(); }

Initializes the player's size, speed, and position when a new Player is created

conditional Movement Input Handling if (keyIsDown(LEFT_ARROW) || keyIsDown(65))

Checks if the player pressed left arrow or 'A' key and moves the spaceship left

calculation Boundary Constraint this.x = constrain(this.x, this.size / 2, width - this.size / 2);

Limits the player's position so the spaceship never goes outside the canvas

calculation Spaceship Drawing triangle(...); rect(...);

Draws a blue triangle (nose) and rectangle (body) to create the spaceship shape

class Player {
Defines a class called Player, which is a blueprint for creating player objects
constructor() { this.size = 50; this.speed = 5; this.resetPosition(); }
The constructor method runs when a new Player is created; it sets size and speed properties and calls resetPosition()
resetPosition() {
A method that moves the player to the center-bottom of the screen, used on startup and after collisions
this.x = width / 2;
Sets the player's x position to the horizontal center of the canvas
this.y = height - this.size * 2;
Places the player near the bottom of the screen (height minus twice the spaceship size for padding)
if (keyIsDown(LEFT_ARROW) || keyIsDown(65)) {
Checks if the left arrow key OR the 'A' key (ASCII 65) is currently pressed
this.x -= this.speed;
Moves the player left by subtracting the speed value from the x position
if (keyIsDown(RIGHT_ARROW) || keyIsDown(68)) {
Checks for right arrow or 'D' key (ASCII 68)
this.x += this.speed;
Moves the player right by adding the speed value to x
if (keyIsDown(UP_ARROW) || keyIsDown(87)) {
Checks for up arrow or 'W' key (ASCII 87)
this.y -= this.speed;
Moves the player up by subtracting speed from y (remember: y=0 is at the top in p5.js)
if (keyIsDown(DOWN_ARROW) || keyIsDown(83)) {
Checks for down arrow or 'S' key (ASCII 83)
this.y += this.speed;
Moves the player down by adding speed to y
this.x = constrain(this.x, this.size / 2, width - this.size / 2);
Uses p5.js's constrain() function to limit x between the left and right edges, preventing the spaceship from going off-screen
this.y = constrain(this.y, this.size / 2, height - this.size / 2);
Constrains y similarly to keep the spaceship within the top and bottom of the canvas
fill(0, 200, 255); // Blue spaceship
Sets the fill color to cyan blue (0 red, 200 green, 255 blue in RGB)
triangle(this.x, this.y - this.size / 2, this.x - this.size / 2, this.y + this.size / 2, this.x + this.size / 2, this.y + this.size / 2);
Draws a triangle with three vertices: one at the top (the nose), and two at the bottom left and right (the wings)
rectMode(CENTER);
Changes rect drawing mode so that coordinates refer to the rectangle's center instead of its top-left corner
rect(this.x, this.y + this.size / 4, this.size * 0.8, this.size * 0.5);
Draws a rectangle below the triangle to form the spaceship's body
rectMode(CORNER);
Resets rect mode back to the default (CORNER) so future rectangles aren't affected
bullets.push(new Bullet(this.x, this.y - this.size / 2));
Creates a new Bullet at the player's position (starting from the top of the spaceship) and adds it to the bullets array
laserSound.amp(0.5, 0.05); // Play laser sound
Immediately increases the laser sound's amplitude to 0.5 over 0.05 seconds, creating an attack phase
laserSound.amp(0, 0.1); // Decay laser sound
Decreases the amplitude back to 0 over 0.1 seconds, creating a decay that makes the laser sound short and punchy

Bullet class

The Bullet class is one of the simplest in the sketch. Each bullet moves straight up at a constant speed, and isOffScreen() returns true when the bullet has traveled off the top of the canvas. In updateGame(), finished bullets are removed from the array to save memory.

class Bullet {
  constructor(x, y) {
    this.x = x;
    this.y = y;
    this.size = 10;
    this.speed = 10;
  }

  update() {
    this.y -= this.speed;
  }

  draw() {
    fill(255, 255, 0); // Yellow bullet
    noStroke();
    ellipse(this.x, this.y, this.size, this.size);
  }

  isOffScreen() {
    return this.y < -this.size;
  }
}
Line-by-line explanation (7 lines)
constructor(x, y) {
The constructor receives x and y coordinates from where the bullet is fired
this.x = x; this.y = y;
Stores the bullet's starting position (usually from the player's position)
this.size = 10; this.speed = 10;
Sets the bullet's diameter and movement speed per frame
this.y -= this.speed;
Moves the bullet upward by subtracting speed from y each frame
fill(255, 255, 0); // Yellow bullet
Sets the bullet's color to yellow (255 red, 255 green, 0 blue)
ellipse(this.x, this.y, this.size, this.size);
Draws a circle (ellipse with equal width and height) at the bullet's current position
return this.y < -this.size;
Returns true if the bullet has gone off the top of the canvas (y is less than negative its size), allowing updateGame() to remove it

Enemy class

The Enemy class spawns off-screen at the top and falls downward at a randomized speed. Each enemy has a unique speed (set in the constructor), which makes the game feel less predictable. The draw() method uses three rectangles—one main body and two smaller wings—to create a distinctive enemy silhouette.

class Enemy {
  constructor() {
    this.size = 40;
    this.x = random(this.size / 2, width - this.size / 2);
    this.y = -this.size; // Start off-screen at the top
    this.speed = random(2, 5); // Random speed
  }

  update() {
    this.y += this.speed;
  }

  draw() {
    fill(255, 0, 0); // Red enemy
    noStroke();
    // Simple enemy shape (rectangle with small wings)
    rectMode(CENTER);
    rect(this.x, this.y, this.size, this.size);
    rect(this.x - this.size * 0.7, this.y, this.size * 0.4, this.size * 0.2);
    rect(this.x + this.size * 0.7, this.y, this.size * 0.4, this.size * 0.2);
    rectMode(CORNER);
  }

  isOffScreen() {
    return this.y > height + this.size;
  }
}
Line-by-line explanation (9 lines)
this.x = random(this.size / 2, width - this.size / 2);
Picks a random x position across the width of the canvas, ensuring the enemy stays within bounds
this.y = -this.size; // Start off-screen at the top
Positions the enemy above the top of the canvas so it scrolls in smoothly
this.speed = random(2, 5); // Random speed
Gives each enemy a random speed between 2 and 5 pixels per frame, adding variety to the difficulty
this.y += this.speed;
Moves the enemy downward each frame
fill(255, 0, 0); // Red enemy
Sets the enemy's color to red
rect(this.x, this.y, this.size, this.size);
Draws the main body of the enemy as a square
rect(this.x - this.size * 0.7, this.y, this.size * 0.4, this.size * 0.2);
Draws a left wing (a small rectangle to the left of the body)
rect(this.x + this.size * 0.7, this.y, this.size * 0.4, this.size * 0.2);
Draws a right wing (a small rectangle to the right of the body)
return this.y > height + this.size;
Returns true if the enemy has fallen past the bottom of the canvas, so updateGame() can remove it and deduct a life

Particle class

The Particle class creates the explosion effect. Each particle moves with independent velocity and fades away based on a random decay rate. Notice how the alpha value is included in the fill() call—this fourth argument makes the color transparent. This is the particle system pattern: create many small objects that move and fade, making complex effects from simple building blocks.

class Particle {
  constructor(x, y) {
    this.x = x;
    this.y = y;
    this.size = random(5, 15);
    this.vx = random(-2, 2);
    this.vy = random(-2, 2);
    this.alpha = 255;
    this.decayRate = random(3, 8);
  }

  update() {
    this.x += this.vx;
    this.y += this.vy;
    this.alpha -= this.decayRate;
  }

  draw() {
    noStroke();
    fill(255, 100, 0, this.alpha); // Orange-red fading particles
    ellipse(this.x, this.y, this.size, this.size);
  }

  isFinished() {
    return this.alpha <= 0;
  }
}
Line-by-line explanation (10 lines)
this.size = random(5, 15);
Gives each particle a random diameter between 5 and 15 pixels
this.vx = random(-2, 2);
Sets a random horizontal velocity for the particle, allowing it to scatter left, right, or stay centered
this.vy = random(-2, 2);
Sets a random vertical velocity so particles spray upward and downward
this.alpha = 255;
Starts the particle fully opaque (alpha 255); it will fade as decayRate decreases it
this.decayRate = random(3, 8);
Each particle fades at a different speed—some last longer than others, adding visual variety
this.x += this.vx; this.y += this.vy;
Moves the particle in its velocity direction each frame
this.alpha -= this.decayRate;
Decreases the alpha value each frame, making the particle gradually transparent
fill(255, 100, 0, this.alpha); // Orange-red fading particles
Fills particles with orange-red color (255 red, 100 green, 0 blue) and the current alpha, so they fade as alpha decreases
ellipse(this.x, this.y, this.size, this.size);
Draws the particle as a circle
return this.alpha <= 0;
Returns true when the particle is fully transparent, allowing updateGame() to remove it from the particles array

checkCollision()

checkCollision() uses a simple radius-based collision test: two objects collide if the distance between their centers is less than the sum of their radii. This works well for circular objects and is computationally cheap. For pixel-perfect collision detection, you'd need more complex algorithms, but this works great for game feel.

function checkCollision(obj1, obj2) {
  // Simple circle-circle collision check
  let d = dist(obj1.x, obj1.y, obj2.x, obj2.y);
  return d < (obj1.size / 2 + obj2.size / 2);
}
Line-by-line explanation (2 lines)
let d = dist(obj1.x, obj1.y, obj2.x, obj2.y);
Uses p5.js's dist() function to calculate the distance between the centers of two objects
return d < (obj1.size / 2 + obj2.size / 2);
Compares the distance to the sum of the two objects' radii; if distance is less, they overlap and collide

spawnExplosion()

spawnExplosion() is a helper function that quickly creates multiple Particle objects at a single location. This pattern (creating many instances in a loop) is how particle systems work. By changing the loop count, you can make explosions feel more or less dramatic.

function spawnExplosion(x, y) {
  for (let i = 0; i < 20; i++) {
    particles.push(new Particle(x, y));
  }
}
Line-by-line explanation (2 lines)

🔧 Subcomponents:

for-loop Particle Creation Loop for (let i = 0; i < 20; i++) {

Creates 20 particles at the explosion location

for (let i = 0; i < 20; i++) {
Loops 20 times, creating one particle each iteration
particles.push(new Particle(x, y));
Creates a new Particle at the explosion location (x, y) and adds it to the particles array

restartGame()

restartGame() is called when the player presses spacebar on the START or GAME_OVER screens. It resets all game variables and state, effectively starting a fresh game. Notice how it clears the arrays by assigning empty arrays—this removes all references to old objects, allowing the garbage collector to clean them up.

function restartGame() {
  score = 0;
  lives = 3;
  bullets = [];
  enemies = [];
  particles = [];
  player.resetPosition();
  game_state = 'PLAYING';
}
Line-by-line explanation (5 lines)
score = 0;
Resets the score to 0
lives = 3;
Restores the player to 3 lives
bullets = []; enemies = []; particles = [];
Clears all active game objects by creating empty arrays, removing any bullets, enemies, or particles from the previous game
player.resetPosition();
Moves the player's spaceship back to the center-bottom of the screen
game_state = 'PLAYING';
Changes the game state from START or GAME_OVER to PLAYING, so draw() will run updateGame() and drawGame() instead of showing menu screens

keyPressed()

keyPressed() is a p5.js event handler that runs once every time a key is pressed. Notice that shooting is NOT handled here—instead, shooting uses keyIsDown() in updateGame() for continuous fire. The difference: keyPressed() fires once per key press, while keyIsDown() is continuous, making it perfect for rapid-fire games.

function keyPressed() {
  if (keyCode === 32) { // Spacebar
    if (game_state === 'START' || game_state === 'GAME_OVER') {
      restartGame();
    }
    // Shooting is handled in draw() for continuous fire
  }
}
Line-by-line explanation (3 lines)
if (keyCode === 32) { // Spacebar
Checks if the pressed key is spacebar (keyCode 32)
if (game_state === 'START' || game_state === 'GAME_OVER') {
Only acts on spacebar if the game is on a menu screen (not during active gameplay)
restartGame();
Calls restartGame() to start or resume a new game

mousePressed()

mousePressed() runs once every time the mouse is clicked. Here it allows the player to start the game by clicking in addition to pressing spacebar. Like keyPressed(), shooting is handled separately in updateGame() using mouseIsPressed, which is checked every frame for continuous fire.

function mousePressed() {
  if (game_state === 'START' || game_state === 'GAME_OVER') {
    restartGame();
  }
  // Shooting is handled in draw() for continuous fire
}
Line-by-line explanation (2 lines)
if (game_state === 'START' || game_state === 'GAME_OVER') {
Checks if the game is on a menu screen
restartGame();
Starts a new game when the player clicks on a menu screen

windowResized()

windowResized() is a p5.js event handler called whenever the browser window changes size. By calling resizeCanvas() here, the game stays responsive and fills the available space. This is why the sketch originally used createCanvas(windowWidth, windowHeight) in setup().

function windowResized() {
  resizeCanvas(windowWidth, windowHeight);
  // Called when preview panel is resized
}
Line-by-line explanation (1 lines)
resizeCanvas(windowWidth, windowHeight);
Resizes the canvas to match the new window dimensions whenever the browser window is resized

📦 Key Variables

player object

Stores the Player instance that represents the blue spaceship the player controls

let player; // Initialized in setup() as: player = new Player();
bullets array

Stores all active Bullet objects currently on screen; bullets are added when the player shoots and removed when they go off-screen or hit enemies

let bullets = [];
enemies array

Stores all active Enemy objects falling from the top; enemies are added periodically and removed when destroyed or when they escape the bottom

let enemies = [];
particles array

Stores all active Particle objects from explosions; particles are created in spawnExplosion() and removed when they finish fading

let particles = [];
score number

Tracks the player's current score, incremented by 10 for each enemy destroyed

let score = 0;
lives number

Tracks how many lives the player has remaining; starts at 3 and decreases when enemies escape or hit the player; game ends when lives reach 0

let lives = 3;
game_state string

Stores the current state of the game ('START', 'PLAYING', or 'GAME_OVER'), controlling which screen is displayed

let game_state = 'START';
laserSound object (p5.Oscillator)

A sine wave oscillator from p5.sound that produces the laser shooting sound when amplitude is ramped up and down

let laserSound; // Initialized in setup()
explosionSound object (p5.Noise)

A noise generator from p5.sound that produces the explosion sound when amplitude is ramped up and down

let explosionSound; // Initialized in setup()
lastBulletTime number

Stores the timestamp (in milliseconds) of the last time a bullet was fired, used to enforce bulletDelay between shots

let lastBulletTime = 0;
bulletDelay number

The minimum milliseconds that must pass between bullet shots (150ms by default), preventing rapid spam-firing

const bulletDelay = 150;
lastEnemySpawnTime number

Stores the timestamp of the last enemy spawn, used to enforce enemySpawnDelay between spawns

let lastEnemySpawnTime = 0;
enemySpawnDelay number

The minimum milliseconds between enemy spawns (1000ms by default), controlling the difficulty pace

const enemySpawnDelay = 1000;

🔧 Potential Improvements (6)

Here are some ways this code could be enhanced:

BUG draw() and updateGame()

References 'explosionSynth' which doesn't exist—the variable is declared as 'explosionSound'

💡 Change all instances of 'explosionSynth.amp()' to 'explosionSound.amp()' (lines that play the explosion sound in updateGame())

PERFORMANCE updateGame() bullet-enemy collision loop

The nested loop checking every bullet against every enemy is O(n²) and will slow down if there are many bullets and enemies

💡 Use spatial partitioning (divide the canvas into a grid) or a quadtree to only check nearby objects, or implement bullet pooling to reuse objects instead of creating new ones

STYLE updateGame() particle update

Particle update loop manually splices from the array, but drawGame() uses forEach which doesn't remove them—inconsistent patterns

💡 Use consistent patterns: either manually splice in both places or use filter() to remove finished particles: particles = particles.filter(p => !p.isFinished())

FEATURE Game overall

Difficulty is static—enemies spawn at a constant rate regardless of score or time elapsed

💡 Add progressive difficulty: increase enemySpawnDelay and enemy speed based on elapsed time or score, making the game harder as the player gets better

FEATURE Player and Enemy classes

Collision detection treats all objects as circles, but the spaceship is drawn as a triangle and enemies as rectangles with wings—visual and collision shapes don't match

💡 Either use bounding circles for all objects (easier) or implement polygon collision detection (harder but more accurate)

STYLE All sound playback

Amplitude ramping for sound happens in two separate calls (attack and decay), which is verbose and could be wrapped in a helper function

💡 Create a function playSoundEffect(synth, attackAmp, attackTime, decayTime) to avoid repeating amp() calls throughout updateGame()

🔄 Code Flow

Code flow showing setup, draw, updategame, drawgame, drawui, drawstartscreen, drawgameoverscreen, player, bullet, enemy, particle, checkcollision, spawnexplosion, restartgame, keypressed, mousepressed, windowresized

💡 Click on function names in the diagram to jump to their code

graph TD start[Start] --> setup[setup] setup --> canvas-creation[canvas-creation] setup --> audio-context[audio-context] setup --> laser-synth[laser-synth] setup --> explosion-synth[explosion-synth] setup --> draw[draw loop] click setup href "#fn-setup" click canvas-creation href "#sub-canvas-creation" click audio-context href "#sub-audio-context" click laser-synth href "#sub-laser-synth" click explosion-synth href "#sub-explosion-synth" draw --> state-machine[state-machine] state-machine -->|START| drawstartscreen[drawstartscreen] state-machine -->|PLAYING| updategame[updategame] state-machine -->|GAME_OVER| drawgameoverscreen[drawgameoverscreen] click state-machine href "#sub-state-machine" click drawstartscreen href "#fn-drawstartscreen" click updategame href "#fn-updategame" click drawgameoverscreen href "#fn-drawgameoverscreen" updategame --> player-input[player-input] player-input -->|shoot| bullet-update-loop[bullet-update-loop] bullet-update-loop --> bullet-enemy-collision[bullet-enemy-collision] bullet-update-loop --> enemy-update-loop[enemy-update-loop] enemy-update-loop --> game-over-check[game-over-check] click player-input href "#sub-player-input" click bullet-update-loop href "#sub-bullet-update-loop" click bullet-enemy-collision href "#sub-bullet-enemy-collision" click enemy-update-loop href "#sub-enemy-update-loop" click game-over-check href "#sub-game-over-check" draw --> drawgame[drawgame] drawgame --> forEach-arrows[forEach-arrows] click drawgame href "#fn-drawgame" click forEach-arrows href "#sub-forEach-arrows" draw --> drawui[drawui] click drawui href "#fn-drawui" drawstartscreen -->|display| drawstartscreen drawgameoverscreen -->|display| drawgameoverscreen restartgame -->|reset| restartgame click restartgame href "#fn-restartgame" windowresized -->|resize| windowresized click windowresized href "#fn-windowresized" player --> player-constructor[player-constructor] player-constructor --> movement-conditionals[movement-conditionals] movement-conditionals --> boundary-constrain[boundary-constrain] boundary-constrain --> spaceship-draw[spaceship-draw] click player href "#fn-player" click player-constructor href "#sub-player-constructor" click movement-conditionals href "#sub-movement-conditionals" click boundary-constrain href "#sub-boundary-constrain" click spaceship-draw href "#sub-spaceship-draw" bullet --> bullet-update-loop bullet -->|offscreen| bullet-update-loop click bullet href "#fn-bullet" enemy --> enemy-spawn[enemy-spawn] enemy --> enemy-update-loop click enemy href "#fn-enemy" particle --> particle-update-loop[particle-update-loop] particle --> particle-loop[particle-loop] click particle href "#fn-particle" click particle-update-loop href "#sub-particle-update-loop" click particle-loop href "#sub-particle-loop" spawnexplosion -->|create| spawnexplosion click spawnexplosion href "#fn-spawnexplosion"

❓ Frequently Asked Questions

What visual elements does the p5.js sketch create?

The sketch creates a dynamic space-themed game where players control a spaceship, shoot bullets at enemies, and experience visual effects for explosions.

How can users interact with the sketch during gameplay?

Users can interact by controlling the spaceship, shooting bullets at enemies, and navigating through the game states such as START, PLAYING, and GAME OVER.

What creative coding concepts are demonstrated in this p5.js sketch?

The sketch demonstrates object-oriented programming with classes for game entities, sound synthesis for audio effects, and responsive canvas design for varying screen sizes.

Preview

Sketch 2026-03-05 16:01 - p5.js creative coding sketch preview
Sketch Preview
Code flow diagram showing the structure of Sketch 2026-03-05 16:01 - Code flow showing setup, draw, updategame, drawgame, drawui, drawstartscreen, drawgameoverscreen, player, bullet, enemy, particle, checkcollision, spawnexplosion, restartgame, keypressed, mousepressed, windowresized
Code Flow Diagram
