Sketch 2026-03-05 16:07

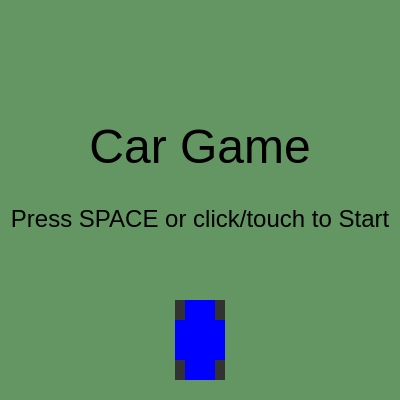
This sketch creates a playable car racing game where you control a blue car to dodge red obstacle vehicles on a three-lane road. The game features keyboard and touch controls, collision detection, score tracking, and three game states (menu, playing, game over).

🧪 Try This!

Experiment with the code by making these changes:

  1. Change the player car color — The player's car is blue. Modify the color constant to make it green, yellow, or any RGB color you choose.
  2. Make obstacles spawn more frequently — Obstacles spawn every 100 frames. Reduce this to 50 for a much harder, busier road.
  3. Increase score increment speed — The score climbs once every 60 frames. Change it to 30 so the player gains points twice as fast.
  4. Make the player car much faster — Increase the maximum speed from 10 to 20, letting the player go much faster and changing the overall game pace.
  5. Remove friction for instant acceleration feel — The car naturally slows when you release the pedals. Remove friction to make the car feel 'floating' without passive deceleration.
  6. Make the road wider — Increase ROAD_WIDTH from 400 to 600 pixels, giving the player more room to maneuver and making the game easier.
Prefer the full editor? Open it there →

📖 About This Sketch

This sketch is a complete, playable racing game where you steer a blue car down a three-lane road to avoid red obstacles while your score climbs. What makes it visually engaging is the animated road surface with dashed lane markers that scroll in sync with your speed, combined with realistic car graphics complete with wheels. Under the hood, it uses the Car class to manage both the player and obstacles, collision detection using axis-aligned bounding boxes (AABB), and a state machine pattern that switches between menu, playing, and game-over screens.

The code is organized around three core ideas: a Car class that handles both player and obstacle behavior, a game loop that spawns obstacles at timed intervals and detects collisions, and three rendering functions for each game state. By studying it you will learn how to structure a complete interactive game, manage multiple entities using arrays and classes, control game flow with state variables, and build responsive touch controls alongside keyboard input.

⚙️ How It Works

  1. When the sketch loads, setup() creates a canvas that fills the window and calls resetGame() to initialize the player car at the bottom center of the screen, empty obstacle array, and score to zero. The game starts in 'menu' state.
  2. On the menu screen, drawMenu() displays the title and instructions while showing the player car. Pressing SPACE or clicking/touching transitions to 'playing' state.
  3. During gameplay, drawRoad() renders a gray road surface with white shoulders and scrolling yellow dashed lane markers. The road scroll position tracks the player's speed, creating the illusion of motion.
  4. Every frame, updateGame() reads keyboard and touch input (arrow keys, WASD, or left/right screen halves) and updates the player car's speed with acceleration and friction, then applies steering to move the car left/right within the road boundaries.
  5. Obstacles spawn at random lanes above the screen every 100 frames, provided there is enough vertical gap between them. Each obstacle moves downward at a speed based on the player's current speed, creating dynamic difficulty.
  6. The game checks collision between the player car and every obstacle using AABB collision detection. If a collision occurs, the game transitions to 'gameOver' state. Otherwise, the score increments every 60 frames, rewarding the player for survival.
  7. On game over, drawGameOver() displays the final score and waits for another SPACE press or click to restart.

🎓 Concepts You'll Learn

Object-oriented programming (classes)Game state managementCollision detection (AABB)Keyboard and touch input handlingArray management and spawningResponsive canvas sizing

📝 Code Breakdown

setup()

setup() runs once when the sketch starts. It is the perfect place to initialize your canvas and call helper functions that set up initial game state.

function setup() {
  createCanvas(windowWidth, windowHeight);
  resetGame();
}
Line-by-line explanation (2 lines)
createCanvas(windowWidth, windowHeight);
Creates a canvas that matches the full browser window size, making the game fill the entire screen.
resetGame();
Calls the resetGame() function to initialize all game variables and create the player car, preparing the game for its first run.

draw()

draw() is the main animation loop, called 60 times per second. A state machine like this—using a variable to control which code runs—is the foundation of game architecture.

🔬 This if-else chain controls what appears on screen by checking gameState. What happens if you swap the order so drawGameOver() is checked first? Does the logic still work correctly, or do you notice a problem?

  if (gameState === 'menu') {
    drawMenu();
  } else if (gameState === 'playing') {
    drawRoad();
    updateGame();
    displayGame();
  } else if (gameState === 'gameOver') {
    drawGameOver();
  }
function draw() {
  background(100, 150, 100); // Green background (grass)

  if (gameState === 'menu') {
    drawMenu();
  } else if (gameState === 'playing') {
    drawRoad();
    updateGame();
    displayGame();
  } else if (gameState === 'gameOver') {
    drawGameOver();
  }
}
Line-by-line explanation (4 lines)

🔧 Subcomponents:

conditional Game State Router if (gameState === 'menu') { ... } else if (gameState === 'playing') { ... } else if (gameState === 'gameOver') { ... }

Routes the draw function to the correct game screen based on the current game state

background(100, 150, 100);
Fills the entire canvas with a green color every frame to represent grass surrounding the road.
if (gameState === 'menu') {
Checks if the game is in menu state and draws the menu screen if true.
} else if (gameState === 'playing') {
If the game is in playing state, draw the road, update all game logic, and display game objects.
} else if (gameState === 'gameOver') {
If the game is in game-over state, draw the game-over screen with the final score.

Car class

The Car class is the heart of this game. By bundling position, speed, and behavior into a single class, you can create many cars (player and obstacles) without duplicating code. The isPlayer flag is a simple pattern for varying behavior—one class, multiple uses.

🔬 These lines slow the car down when you release the pedals. What happens if you remove the friction code entirely (delete or comment out these 3 lines)? How does the car handle?

      // Apply friction if no acceleration/braking
        if (this.speed > 0) this.speed -= PLAYER_FRICTION;
        if (this.speed < 0) this.speed += PLAYER_FRICTION;

🔬 Steering multiplies PLAYER_STEERING_SPEED by abs(this.speed), so faster cars turn more. What if you remove the * abs(this.speed) multiplication? Try: this.x -= PLAYER_STEERING_SPEED; Does the car feel snappier or slower to turn?

      // Steering (left/right)
      if (keyIsDown(LEFT_ARROW) || keyIsDown(65)) { // LEFT_ARROW or 'A' key
        this.x -= PLAYER_STEERING_SPEED * abs(this.speed);
      } else if (keyIsDown(RIGHT_ARROW) || keyIsDown(68)) { // RIGHT_ARROW or 'D' key
        this.x += PLAYER_STEERING_SPEED * abs(this.speed);
      }
class Car {
  constructor(x, y, isPlayer = true) {
    this.x = x;
    this.y = y;
    this.speed = 0;
    this.isPlayer = isPlayer;
    this.color = isPlayer ? color(0, 0, 255) : color(255, 0, 0); // Blue for player, Red for obstacles
    this.lane = 1; // 0: left, 1: center, 2: right
  }

  update() {
    if (this.isPlayer) {
      // Handle player input
      if (keyIsDown(UP_ARROW) || keyIsDown(87)) { // UP_ARROW or 'W' key
        this.speed += PLAYER_ACCELERATION;
      } else if (keyIsDown(DOWN_ARROW) || keyIsDown(83)) { // DOWN_ARROW or 'S' key
        this.speed -= PLAYER_BRAKING;
      } else {
        // Apply friction if no acceleration/braking
        if (this.speed > 0) this.speed -= PLAYER_FRICTION;
        if (this.speed < 0) this.speed += PLAYER_FRICTION;
      }

      // Clamp speed
      this.speed = constrain(this.speed, -PLAYER_MAX_SPEED / 2, PLAYER_MAX_SPEED);

      // Steering (left/right)
      if (keyIsDown(LEFT_ARROW) || keyIsDown(65)) { // LEFT_ARROW or 'A' key
        this.x -= PLAYER_STEERING_SPEED * abs(this.speed);
      } else if (keyIsDown(RIGHT_ARROW) || keyIsDown(68)) { // RIGHT_ARROW or 'D' key
        this.x += PLAYER_STEERING_SPEED * abs(this.speed);
      }

      // Mouse/Touch steering (left half of screen steers left, right half steers right)
      if (mouseIsPressed || touches.length > 0) { // Check touches.length for touch input
        let touchX = mouseIsPressed ? mouseX : touches[0].x;
        if (touchX < width / 2) {
          this.x -= PLAYER_STEERING_SPEED * abs(this.speed);
        } else {
          this.x += PLAYER_STEERING_SPEED * abs(this.speed);
        }
      }

      // Keep player car within road boundaries
      let roadLeft = width / 2 - ROAD_WIDTH / 2;
      let roadRight = width / 2 + ROAD_WIDTH / 2;
      this.x = constrain(this.x, roadLeft + CAR_WIDTH / 2, roadRight - CAR_WIDTH / 2);

    } else {
      // Obstacles just move down
      this.y += this.speed;
    }
  }

  display() {
    push();
    rectMode(CENTER);
    fill(this.color);
    noStroke();
    rect(this.x, this.y, CAR_WIDTH, CAR_HEIGHT);

    // Draw simple wheels
    fill(50);
    rect(this.x - CAR_WIDTH / 2 + 5, this.y - CAR_HEIGHT / 2 + 10, 10, 20); // Front left
    rect(this.x + CAR_WIDTH / 2 - 5, this.y - CAR_HEIGHT / 2 + 10, 10, 20); // Front right
    rect(this.x - CAR_WIDTH / 2 + 5, this.y + CAR_HEIGHT / 2 - 10, 10, 20); // Back left
    rect(this.x + CAR_WIDTH / 2 - 5, this.y + CAR_HEIGHT / 2 - 10, 10, 20); // Back right

    pop();
  }

  // Simple AABB collision detection
  checkCollision(otherCar) {
    let dX = abs(this.x - otherCar.x);
    let dY = abs(this.y - otherCar.y);

    return (dX < (CAR_WIDTH / 2 + CAR_WIDTH / 2) && dY < (CAR_HEIGHT / 2 + CAR_HEIGHT / 2));
  }
}
Line-by-line explanation (20 lines)

🔧 Subcomponents:

constructor Constructor constructor(x, y, isPlayer = true) { ... }

Initializes a new Car with position, speed, color, and whether it is the player or an obstacle

conditional Player Speed Control if (keyIsDown(UP_ARROW) || keyIsDown(87)) { this.speed += PLAYER_ACCELERATION; }

Increases the car's speed when the player presses the up arrow or W key

conditional Keyboard Steering if (keyIsDown(LEFT_ARROW) || keyIsDown(65)) { ... }

Moves the car left or right in response to arrow keys or WASD input

conditional Touch/Mouse Steering if (mouseIsPressed || touches.length > 0) { ... }

Steers the car based on whether the player clicks/touches the left or right half of the screen

calculation Road Boundary Constraint this.x = constrain(this.x, roadLeft + CAR_WIDTH / 2, roadRight - CAR_WIDTH / 2);

Prevents the player car from driving outside the road boundaries

constructor(x, y, isPlayer = true) {
Creates a new Car at position (x, y). The isPlayer parameter defaults to true, letting you specify if this is the player or an obstacle.
this.x = x;
Stores the car's horizontal position on the canvas.
this.y = y;
Stores the car's vertical position on the canvas.
this.speed = 0;
Initializes the car with no movement; speed will be updated in the update() method.
this.color = isPlayer ? color(0, 0, 255) : color(255, 0, 0);
Sets the car's color to blue (0, 0, 255) if it is the player, or red (255, 0, 0) if it is an obstacle.
if (keyIsDown(UP_ARROW) || keyIsDown(87)) {
Checks if the player is pressing the up arrow or W key. keyIsDown() returns true if the key is held down that frame.
this.speed += PLAYER_ACCELERATION;
Increases the car's speed by a small amount (PLAYER_ACCELERATION = 0.2) each frame the key is held.
this.speed = constrain(this.speed, -PLAYER_MAX_SPEED / 2, PLAYER_MAX_SPEED);
Clamps the speed between a minimum (negative for reverse) and maximum (PLAYER_MAX_SPEED = 10) so it cannot accelerate infinitely.
if (keyIsDown(LEFT_ARROW) || keyIsDown(65)) {
Checks if the left arrow or A key is pressed. The car only steers if it is moving (abs(this.speed) > 0).
this.x -= PLAYER_STEERING_SPEED * abs(this.speed);
Moves the car left by a distance that scales with its speed—faster cars turn sharper, slower cars turn gently.
if (mouseIsPressed || touches.length > 0) {
Checks if the player is clicking the mouse or touching the screen. touches.length > 0 detects multi-touch mobile input.
let touchX = mouseIsPressed ? mouseX : touches[0].x;
Gets the horizontal position of the mouse or the first touch point; uses mouseX if the mouse is pressed, otherwise uses the touch x-coordinate.
let roadLeft = width / 2 - ROAD_WIDTH / 2;
Calculates the left edge of the road by subtracting half the road width from the canvas center.
this.x = constrain(this.x, roadLeft + CAR_WIDTH / 2, roadRight - CAR_WIDTH / 2);
Clamps the car's x position so that its center stays within the road, preventing it from driving off the shoulders.
} else {
If this car is not the player (an obstacle), it does not respond to input.
this.y += this.speed;
Obstacles simply move down the screen each frame by adding their speed to their y position.
rect(this.x, this.y, CAR_WIDTH, CAR_HEIGHT);
Draws a rectangle centered at the car's position with a width of 50 and height of 80 pixels.
rect(this.x - CAR_WIDTH / 2 + 5, this.y - CAR_HEIGHT / 2 + 10, 10, 20);
Draws a small rectangle (10x20) to represent the car's front-left wheel at an offset from the car's center.
let dX = abs(this.x - otherCar.x);
Calculates the horizontal distance between this car and another car by taking the absolute difference of their x coordinates.
return (dX < (CAR_WIDTH / 2 + CAR_WIDTH / 2) && dY < (CAR_HEIGHT / 2 + CAR_HEIGHT / 2));
Returns true if both the horizontal and vertical distances are less than the combined half-widths and half-heights—meaning the cars overlap and collide.

drawMenu()

drawMenu() is called every frame while gameState === 'menu'. It uses textAlign(CENTER, CENTER) to position text elegantly and calls playerCar.display() to show a preview of the vehicle before the game starts.

function drawMenu() {
  fill(0);
  textSize(48);
  textAlign(CENTER, CENTER);
  text("Car Game", width / 2, height / 2 - 50);
  textSize(24);
  text("Press SPACE or click/touch to Start", width / 2, height / 2 + 20);

  // Display the player car on the menu screen
  playerCar.display();
}
Line-by-line explanation (6 lines)
fill(0);
Sets the text color to black (0 in grayscale mode, or RGB 0,0,0 in RGB mode).
textSize(48);
Sets the font size for the next text() call to 48 pixels, making the title large and prominent.
textAlign(CENTER, CENTER);
Centers text both horizontally and vertically around the coordinates you provide to text().
text("Car Game", width / 2, height / 2 - 50);
Draws the title 'Car Game' centered horizontally and 50 pixels above the vertical center of the canvas.
textSize(24);
Reduces the font size to 24 pixels for the instruction text below the title.
playerCar.display();
Calls the player car's display() method to draw the blue car on the menu screen, showing the player what their vehicle looks like.

drawGameOver()

drawGameOver() displays the final game state after a collision. String concatenation (+ score) is a simple way to mix text and numbers for dynamic UI.

function drawGameOver() {
  fill(0);
  textSize(48);
  textAlign(CENTER, CENTER);
  text("GAME OVER", width / 2, height / 2 - 50);
  textSize(32);
  text("Score: " + score, width / 2, height / 2);
  textSize(24);
  text("Press SPACE or click/touch to Restart", width / 2, height / 2 + 50);
}
Line-by-line explanation (5 lines)
fill(0);
Sets the text color to black.
textSize(48);
Sets the font size to 48 pixels for the 'GAME OVER' heading.
text("GAME OVER", width / 2, height / 2 - 50);
Draws 'GAME OVER' centered at the top of the screen.
text("Score: " + score, width / 2, height / 2);
Concatenates the string 'Score: ' with the numerical score variable and displays it in the center of the screen.
text("Press SPACE or click/touch to Restart", width / 2, height / 2 + 50);
Instructs the player how to restart the game, displayed below the score.

updateGame()

updateGame() is the heart of the game loop. It updates all actors (player and obstacles), handles collision detection, manages spawning, and tracks score. By isolating update logic in a separate function, the code stays organized and easy to debug.

🔬 This increments score by 1 every 60 frames. What happens if you change score++ to score += 5? The player will gain points 5 times faster for the same survival time. Try it!

  // Increment score
  if (frameCount - lastScoreIncrementFrame > SCORE_INCREMENT_INTERVAL) {
    score++;
    lastScoreIncrementFrame = frameCount;
  }
function updateGame() {
  // Update player car
  playerCar.update();

  // Scroll road based on player speed
  roadScrollY += playerCar.speed;
  if (roadScrollY > LANE_WIDTH) roadScrollY = 0; // Reset scroll for continuous effect
  if (roadScrollY < 0) roadScrollY = LANE_WIDTH;

  // Update obstacles
  for (let i = obstacles.length - 1; i >= 0; i--) {
    obstacles[i].update();

    // Check for collision with player car
    if (playerCar.checkCollision(obstacles[i])) {
      gameState = 'gameOver';
    }

    // Remove obstacles that go off-screen
    if (obstacles[i].y > height + CAR_HEIGHT / 2) {
      obstacles.splice(i, 1);
    }
  }

  // Generate new obstacles
  if (frameCount - lastObstacleSpawnFrame > OBSTACLE_SPAWN_INTERVAL) {
    if (obstacles.length === 0 || obstacles[obstacles.length - 1].y < height - OBSTACLE_MIN_GAP) {
      generateObstacle();
      lastObstacleSpawnFrame = frameCount;
    }
  }

  // Increment score
  if (frameCount - lastScoreIncrementFrame > SCORE_INCREMENT_INTERVAL) {
    score++;
    lastScoreIncrementFrame = frameCount;
  }
}
Line-by-line explanation (13 lines)

🔧 Subcomponents:

calculation Road Scroll Update roadScrollY += playerCar.speed;

Updates the road's visual scroll position based on the player's current speed

conditional Scroll Position Wrapping if (roadScrollY > LANE_WIDTH) roadScrollY = 0;

Resets the scroll position when it exceeds one lane width to create a continuous looping effect

for-loop Obstacle Update Loop for (let i = obstacles.length - 1; i >= 0; i--) { ... }

Iterates through all obstacles, updates them, checks collisions, and removes off-screen obstacles

conditional Collision Detection if (playerCar.checkCollision(obstacles[i])) { gameState = 'gameOver'; }

Ends the game if the player car touches any obstacle

conditional Obstacle Spawning if (frameCount - lastObstacleSpawnFrame > OBSTACLE_SPAWN_INTERVAL) { ... }

Spawns a new obstacle at a timed interval, with a minimum gap check

conditional Score Increment if (frameCount - lastScoreIncrementFrame > SCORE_INCREMENT_INTERVAL) { ... }

Increases the score every 60 frames, rewarding the player for survival

playerCar.update();
Calls the player car's update() method to process keyboard/touch input and update its position and speed.
roadScrollY += playerCar.speed;
Adds the player's speed to roadScrollY so the road visually scrolls at the same pace the player is moving.
if (roadScrollY > LANE_WIDTH) roadScrollY = 0;
When the scroll position exceeds one lane width, it resets to 0, creating the illusion of an infinitely scrolling road.
for (let i = obstacles.length - 1; i >= 0; i--) {
Loops backward through the obstacles array (from last to first) so you can safely remove items during iteration without skipping elements.
obstacles[i].update();
Calls update() on each obstacle, which moves it down the screen and updates its position.
if (playerCar.checkCollision(obstacles[i])) {
Calls the player car's checkCollision() method to test if this obstacle overlaps with the player.
gameState = 'gameOver';
If a collision is detected, immediately transitions the game to 'gameOver' state, ending the current game.
if (obstacles[i].y > height + CAR_HEIGHT / 2) {
Checks if the obstacle has moved below the bottom of the screen, allowing it to be safely removed.
obstacles.splice(i, 1);
Removes the obstacle from the array using splice(), which prevents memory from accumulating as obstacles spawn and leave the screen.
if (frameCount - lastObstacleSpawnFrame > OBSTACLE_SPAWN_INTERVAL) {
Checks if enough frames have passed since the last obstacle spawned. frameCount is p5's built-in frame counter, incrementing by 1 every frame.
if (obstacles.length === 0 || obstacles[obstacles.length - 1].y < height - OBSTACLE_MIN_GAP) {
Spawns a new obstacle only if the screen is empty or if the last obstacle is far enough down the screen, ensuring minimum vertical spacing.
lastObstacleSpawnFrame = frameCount;
Records the current frameCount as the spawn time, so the next spawn waits at least OBSTACLE_SPAWN_INTERVAL frames.
score++;
Increments the score by 1 point every SCORE_INCREMENT_INTERVAL frames, rewarding the player for surviving longer.

displayGame()

displayGame() separates rendering logic from game logic. It runs after updateGame() to draw all game objects and UI. By keeping display code separate, you can change how things look without affecting how they behave.

function displayGame() {
  playerCar.display();

  // Display obstacles
  for (let obstacle of obstacles) {
    obstacle.display();
  }

  // Display score
  fill(0);
  textSize(24);
  textAlign(LEFT, TOP);
  text("Score: " + score, 10, 10);
}
Line-by-line explanation (5 lines)

🔧 Subcomponents:

for-loop Obstacle Display Loop for (let obstacle of obstacles) { obstacle.display(); }

Draws each obstacle on the screen using the for...of loop syntax

playerCar.display();
Calls the player car's display() method to draw the blue car on the canvas.
for (let obstacle of obstacles) {
Uses a for...of loop to iterate through each obstacle in the obstacles array. This is simpler syntax than a traditional for loop.
obstacle.display();
Calls each obstacle's display() method to draw it on the screen.
fill(0);
Sets the text color to black for the score display.
text("Score: " + score, 10, 10);
Displays 'Score: ' followed by the current score at coordinates (10, 10), which is the top-left corner of the canvas.

drawRoad()

drawRoad() uses a simple but elegant animation technique: the dashed yellow lines stay fixed on screen, but their yPos is adjusted by roadScrollY each frame. This creates the illusion of the road scrolling forward without actually moving the road geometry.

🔬 The + roadScrollY is what animates the lanes. What happens if you remove it (delete + roadScrollY from the yPos line)? Do the lane marks still move, or do they stay frozen?

  let numDashes = height / LANE_WIDTH;
  for (let i = 0; i < numDashes; i++) {
    let yPos = (i * LANE_WIDTH + roadScrollY) % height;
    line(width / 2 - LANE_WIDTH / 2, yPos, width / 2 - LANE_WIDTH / 2, yPos + LANE_WIDTH / 2);
    line(width / 2 + LANE_WIDTH / 2, yPos, width / 2 + LANE_WIDTH / 2, yPos + LANE_WIDTH / 2);
function drawRoad() {
  rectMode(CORNER);
  noStroke();

  // Draw road surface (gray)
  fill(80);
  rect(width / 2 - ROAD_WIDTH / 2, 0, ROAD_WIDTH, height);

  // Draw road shoulders (white)
  fill(255);
  rect(width / 2 - ROAD_WIDTH / 2 - 10, 0, 10, height); // Left shoulder
  rect(width / 2 + ROAD_WIDTH / 2, 0, 10, height); // Right shoulder

  // Draw lane lines (dashed yellow)
  stroke(255, 255, 0);
  strokeWeight(5);
  let numDashes = height / LANE_WIDTH;
  for (let i = 0; i < numDashes; i++) {
    let yPos = (i * LANE_WIDTH + roadScrollY) % height;
    line(width / 2 - LANE_WIDTH / 2, yPos, width / 2 - LANE_WIDTH / 2, yPos + LANE_WIDTH / 2);
    line(width / 2 + LANE_WIDTH / 2, yPos, width / 2 + LANE_WIDTH / 2, yPos + LANE_WIDTH / 2);
  }
  noStroke();
}
Line-by-line explanation (10 lines)

🔧 Subcomponents:

calculation Road Surface rect(width / 2 - ROAD_WIDTH / 2, 0, ROAD_WIDTH, height);

Draws the main gray road surface centered on the canvas

for-loop Lane Line Animation for (let i = 0; i < numDashes; i++) { ... }

Draws scrolling yellow dashed lines to separate lanes, using roadScrollY for smooth animation

rectMode(CORNER);
Sets rectangle drawing mode to CORNER, meaning the first two arguments to rect() are the top-left corner, not the center.
fill(80);
Sets the fill color to dark gray (80 in grayscale, approximately RGB 80,80,80), representing the road surface.
rect(width / 2 - ROAD_WIDTH / 2, 0, ROAD_WIDTH, height);
Draws a rectangle centered horizontally that spans the full height of the canvas, creating the road surface.
fill(255);
Sets the fill color to white (255) for the road shoulders/edges.
rect(width / 2 - ROAD_WIDTH / 2 - 10, 0, 10, height);
Draws a 10-pixel white strip to the left of the road, representing the left shoulder or curb.
stroke(255, 255, 0);
Sets the line color to yellow (255, 255, 0 in RGB) for the lane markers.
strokeWeight(5);
Sets the thickness of lines to 5 pixels, making the lane markers clearly visible.
let numDashes = height / LANE_WIDTH;
Calculates how many lane marks fit vertically on the screen by dividing screen height by lane width.
let yPos = (i * LANE_WIDTH + roadScrollY) % height;
Calculates the vertical position of each lane mark, adding roadScrollY to animate it, and using modulo (%) to wrap it back to the top when it goes off the bottom.
line(width / 2 - LANE_WIDTH / 2, yPos, width / 2 - LANE_WIDTH / 2, yPos + LANE_WIDTH / 2);
Draws a vertical line segment at the left lane boundary from yPos to yPos + LANE_WIDTH/2, creating the appearance of dashed lines.

generateObstacle()

generateObstacle() is called at timed intervals to keep the road populated. By scaling obstacle speed to the player's speed, the difficulty scales naturally—fast players get faster obstacles. The minimum speed check ensures obstacles never freeze.

🔬 Currently obstacles move slower than the player (0.8-0.9x speed). What happens if you change 0.9 to 1.1? Obstacles will be faster than the player—try it and see if the game becomes too hard!

  let obstacleSpeed = random(playerCar.speed * OBSTACLE_SPEED_MULTIPLIER, playerCar.speed * 0.9);
  if (obstacleSpeed < 5) obstacleSpeed = 5; // Ensure obstacles have a minimum speed
function generateObstacle() {
  let lane = floor(random(3)); // 0, 1, or 2
  let xPos = width / 2 - ROAD_WIDTH / 2 + (lane + 0.5) * LANE_WIDTH;
  let yPos = -CAR_HEIGHT / 2; // Spawn above the screen

  let obstacleSpeed = random(playerCar.speed * OBSTACLE_SPEED_MULTIPLIER, playerCar.speed * 0.9);
  if (obstacleSpeed < 5) obstacleSpeed = 5; // Ensure obstacles have a minimum speed

  obstacles.push(new Car(xPos, yPos, false));
  obstacles[obstacles.length - 1].speed = obstacleSpeed;
}
Line-by-line explanation (7 lines)

🔧 Subcomponents:

calculation Random Lane Selection let lane = floor(random(3));

Randomly picks a lane (0, 1, or 2) for the new obstacle

calculation Position Calculation let xPos = width / 2 - ROAD_WIDTH / 2 + (lane + 0.5) * LANE_WIDTH;

Calculates the x position based on the selected lane, centering the obstacle within that lane

calculation Speed Randomization let obstacleSpeed = random(playerCar.speed * OBSTACLE_SPEED_MULTIPLIER, playerCar.speed * 0.9);

Gives obstacles a speed that varies but is scaled to the player's speed for dynamic difficulty

let lane = floor(random(3));
Generates a random number between 0 and 3, then floors it to get 0, 1, or 2. This randomly selects one of the three lanes.
let xPos = width / 2 - ROAD_WIDTH / 2 + (lane + 0.5) * LANE_WIDTH;
Calculates the x position of the new obstacle. The formula finds the left edge of the road, adds the lane position, and uses (lane + 0.5) to center the obstacle within its lane.
let yPos = -CAR_HEIGHT / 2;
Spawns the obstacle above the screen (negative y value), so it enters from the top and moves downward.
let obstacleSpeed = random(playerCar.speed * OBSTACLE_SPEED_MULTIPLIER, playerCar.speed * 0.9);
Assigns the obstacle a random speed between 80% and 90% of the player's current speed. This makes obstacles vary in speed and scale difficulty with the player's acceleration.
if (obstacleSpeed < 5) obstacleSpeed = 5;
Ensures that obstacles always move at least 5 pixels per frame, preventing them from appearing stationary if the player is moving very slowly.
obstacles.push(new Car(xPos, yPos, false));
Creates a new Car object at (xPos, yPos) with isPlayer = false (making it red), and adds it to the obstacles array.
obstacles[obstacles.length - 1].speed = obstacleSpeed;
Accesses the last obstacle added to the array and sets its speed to the calculated obstacleSpeed value.

resetGame()

resetGame() is a helper function that bundles all the initialization logic in one place. By calling it from both setup() and the game-over state, you avoid code duplication and make it easy to add new variables that need resetting.

function resetGame() {
  playerCar = new Car(width / 2, height - CAR_HEIGHT / 2 - 20, true);
  obstacles = [];
  roadScrollY = 0;
  score = 0;
  lastObstacleSpawnFrame = 0;
  lastScoreIncrementFrame = 0;
}
Line-by-line explanation (6 lines)
playerCar = new Car(width / 2, height - CAR_HEIGHT / 2 - 20, true);
Creates a new player Car at the center horizontally and near the bottom of the screen vertically.
obstacles = [];
Resets the obstacles array to an empty array, removing all active obstacles from the previous game.
roadScrollY = 0;
Resets the road scroll position to 0, so the lane markings start fresh.
score = 0;
Resets the score to 0.
lastObstacleSpawnFrame = 0;
Resets the frame counter for obstacle spawning so obstacles can begin spawning immediately.
lastScoreIncrementFrame = 0;
Resets the frame counter for score increments so scoring can begin immediately.

keyPressed()

keyPressed() is a built-in p5.js function that fires once per key press (not per frame). It is perfect for one-time state transitions. The keyCode variable tells you which key was pressed; 32 is SPACE.

function keyPressed() {
  if (gameState === 'menu' && keyCode === 32) { // SPACE key
    gameState = 'playing';
  } else if (gameState === 'gameOver' && keyCode === 32) { // SPACE key
    resetGame();
    gameState = 'playing';
  }
}
Line-by-line explanation (4 lines)

🔧 Subcomponents:

conditional Game Over Restart } else if (gameState === 'gameOver' && keyCode === 32) {

Restarts the game when the player presses SPACE on the game-over screen

if (gameState === 'menu' && keyCode === 32) {
Checks if the game is in menu state AND the pressed key is SPACE (keyCode 32). Both conditions must be true.
gameState = 'playing';
Changes the game state to 'playing', transitioning from the menu screen to active gameplay.
} else if (gameState === 'gameOver' && keyCode === 32) {
Checks if the game is in game-over state and the pressed key is SPACE.
resetGame();
Calls resetGame() to reinitialize all game variables, clearing the previous game's state.

mousePressed()

mousePressed() fires once per mouse click. Here it provides touch/click support for starting or restarting the game, complementing the keyboard input for mobile players.

function mousePressed() {
  if (gameState === 'menu' || gameState === 'gameOver') {
    resetGame();
    gameState = 'playing';
  }
}
Line-by-line explanation (3 lines)
if (gameState === 'menu' || gameState === 'gameOver') {
Checks if the game is in either the menu state OR the game-over state. If either is true, the block executes.
resetGame();
Resets all game variables and creates a fresh game.
gameState = 'playing';
Transitions to the playing state, starting the game.

windowResized()

windowResized() is a built-in p5.js function that fires whenever the browser window is resized. Without it, the canvas would not adapt and the game would break on mobile or desktop resizing. The final two lines ensure the player car stays centered and visible.

function windowResized() {
  resizeCanvas(windowWidth, windowHeight);
  // Re-position player car if needed on resize
  playerCar.x = width / 2;
  playerCar.y = height - CAR_HEIGHT / 2 - 20;
}
Line-by-line explanation (3 lines)
resizeCanvas(windowWidth, windowHeight);
Resizes the p5.js canvas to match the current browser window dimensions when the window is resized.
playerCar.x = width / 2;
Recenters the player car horizontally to match the new canvas width.
playerCar.y = height - CAR_HEIGHT / 2 - 20;
Repositions the player car vertically near the bottom of the new canvas height.

📦 Key Variables

ROAD_WIDTH number

The width of the playable road area in pixels. Controls the total horizontal space available.

const ROAD_WIDTH = 400;
LANE_WIDTH number

The width of each individual lane, calculated as ROAD_WIDTH / 3. Used for positioning cars and drawing lane markers.

const LANE_WIDTH = ROAD_WIDTH / 3;
CAR_WIDTH number

The width of a car in pixels. Used for drawing and collision detection.

const CAR_WIDTH = 50;
CAR_HEIGHT number

The height of a car in pixels. Used for drawing and collision detection.

const CAR_HEIGHT = 80;
PLAYER_MAX_SPEED number

The maximum forward speed the player car can accelerate to. Limits gameplay difficulty.

const PLAYER_MAX_SPEED = 10;
PLAYER_ACCELERATION number

How much the player car's speed increases per frame when accelerating. Controls responsiveness.

const PLAYER_ACCELERATION = 0.2;
PLAYER_BRAKING number

How much the player car's speed decreases per frame when braking.

const PLAYER_BRAKING = 0.4;
PLAYER_FRICTION number

How much the player car slows down passively each frame when no pedals are pressed.

const PLAYER_FRICTION = 0.1;
PLAYER_STEERING_SPEED number

How many pixels the car moves left or right per frame when steering, scaled by speed.

const PLAYER_STEERING_SPEED = 0.1;
OBSTACLE_SPEED_MULTIPLIER number

A factor (0.8) that scales obstacle speed to the player's speed, ensuring they are slightly slower by default.

const OBSTACLE_SPEED_MULTIPLIER = 0.8;
OBSTACLE_SPAWN_INTERVAL number

The minimum number of frames between obstacle spawns. Smaller values increase difficulty.

const OBSTACLE_SPAWN_INTERVAL = 100;
OBSTACLE_MIN_GAP number

The minimum vertical distance (in pixels) between obstacles to prevent them from stacking.

const OBSTACLE_MIN_GAP = 200;
SCORE_INCREMENT_INTERVAL number

The number of frames between each score increment. Controls how fast the player's score increases.

const SCORE_INCREMENT_INTERVAL = 60;
playerCar object

An instance of the Car class representing the player-controlled blue car.

let playerCar = new Car(200, 300, true);
obstacles array

An array of Car objects representing all active red obstacle cars on the road.

let obstacles = [];
roadScrollY number

Tracks the vertical scroll position of the road's lane markings, enabling smooth animation.

let roadScrollY = 0;
score number

The player's current score, incremented every SCORE_INCREMENT_INTERVAL frames.

let score = 0;
gameState string

A string that tracks the current game state: 'menu', 'playing', or 'gameOver'.

let gameState = 'menu';
lastObstacleSpawnFrame number

Records the frameCount when the last obstacle was spawned, used to throttle spawning rate.

let lastObstacleSpawnFrame = 0;
lastScoreIncrementFrame number

Records the frameCount when the score was last incremented, used to throttle score updates.

let lastScoreIncrementFrame = 0;

🔧 Potential Improvements (6)

Here are some ways this code could be enhanced:

BUG Car.checkCollision()

AABB collision detection is approximate and can miss collisions at extreme angles or when cars pass through each other at high speeds in a single frame.

💡 Implement continuous collision detection (CCD) or sweep testing to check collision along the path of movement, not just at the current position.

PERFORMANCE updateGame() obstacle loop

Obstacles are checked against the player and screen boundaries every frame, even when far off-screen. This grows less efficient as the obstacle count increases.

💡 Cache the player car's bounding box at the start of updateGame() and skip off-screen collision checks by checking Y position first before calling checkCollision().

STYLE Car class methods

The update() method is very long (50+ lines) and mixes input handling, physics, and boundary checking. This violates the single responsibility principle.

💡 Extract input handling into a separate handleInput() method and boundary checking into a clampToRoad() method to improve readability and maintainability.

FEATURE generateObstacle()

Obstacle difficulty does not increase over time. The game stays at the same difficulty regardless of how long the player survives.

💡 Make obstacle spawn interval and speed scale with score: const interval = OBSTACLE_SPAWN_INTERVAL - (score / 100); This creates escalating difficulty.

BUG drawRoad() lane animation

When roadScrollY wraps around, there can be a single frame of visual discontinuity where lane marks jump.

💡 Use a smoother modulo operation or adjust the wrap-around logic to ensure seamless scrolling: roadScrollY = roadScrollY % (LANE_WIDTH * 2).

STYLE Global constants

The many magic numbers at the top make the code harder to tune. Some related constants are spread far apart.

💡 Group related constants (e.g., all PLAYER_* together, all OBSTACLE_* together) and add descriptive comments explaining the relationship between dependent constants.

🔄 Code Flow

Code flow showing setup, draw, car, drawmenu, drawgameover, updateGame, displaygame, drawroad, generateobstacle, resetgame, keypressed, mousepressed, windowresized

💡 Click on function names in the diagram to jump to their code

graph TD start[Start] --> setup[setup] setup --> draw[draw loop] draw --> gamestate[gamestate-conditional] gamestate -->|menu| drawmenu[drawmenu] gamestate -->|game| updateGame[updateGame] gamestate -->|gameover| drawgameover[drawgameover] click setup href "#fn-setup" click draw href "#fn-draw" click drawmenu href "#fn-drawmenu" click drawgameover href "#fn-drawgameover" click updateGame href "#fn-updateGame" drawmenu --> playerCarDisplay[playerCar.display()] updateGame --> player-acceleration[player-acceleration] updateGame --> steering-keyboard[steering-keyboard] updateGame --> steering-touch[steering-touch] updateGame --> boundary-constraint[boundary-constraint] updateGame --> road-scroll[road-scroll] updateGame --> scroll-wrap[scroll-wrap] updateGame --> obstacle-loop[obstacle-loop] updateGame --> collision-check[collision-check] updateGame --> obstacle-spawn[obstacle-spawn] updateGame --> score-increment[score-increment] click player-acceleration href "#sub-player-acceleration" click steering-keyboard href "#sub-steering-keyboard" click steering-touch href "#sub-steering-touch" click boundary-constraint href "#sub-boundary-constraint" click road-scroll href "#sub-road-scroll" click scroll-wrap href "#sub-scroll-wrap" click obstacle-loop href "#sub-obstacle-loop" click collision-check href "#sub-collision-check" click obstacle-spawn href "#sub-obstacle-spawn" click score-increment href "#sub-score-increment" obstacle-loop --> obstacle-display-loop[obstacle-display-loop] obstacle-loop -->|check| collision-check obstacle-loop -->|update| speed-randomization[speed-randomization] obstacle-loop -->|spawn| lane-selection[lane-selection] obstacle-loop -->|position| position-calculation[position-calculation] click obstacle-display-loop href "#sub-obstacle-display-loop" click speed-randomization href "#sub-speed-randomization" click lane-selection href "#sub-lane-selection" click position-calculation href "#sub-position-calculation" drawgameover --> gameover-restart[gameover-restart] gameover-restart --> resetgame[resetgame] click gameover-restart href "#sub-gameover-restart" click resetgame href "#fn-resetgame" resetgame --> setup

❓ Frequently Asked Questions

What visual elements are present in the Sketch 2026-03-05 16:07?

The sketch features a top-down view of a road where players control a blue car navigating through red obstacles, creating a dynamic and colorful driving game environment.

How can users interact with the Sketch 2026-03-05 16:07?

Users can accelerate, brake, and steer the player car using the UP and DOWN arrow keys or the 'W' and 'S' keys on their keyboard.

What creative coding concepts does the Sketch 2026-03-05 16:07 demonstrate?

This sketch showcases object-oriented programming through the Car class, as well as game mechanics like obstacle spawning and score tracking in a real-time interactive environment.

Preview

Sketch 2026-03-05 16:07 - p5.js creative coding sketch preview
Sketch Preview
Code flow diagram showing the structure of Sketch 2026-03-05 16:07 - Code flow showing setup, draw, car, drawmenu, drawgameover, updateGame, displaygame, drawroad, generateobstacle, resetgame, keypressed, mousepressed, windowresized
Code Flow Diagram