
Sketch 2026-04-21 19:20

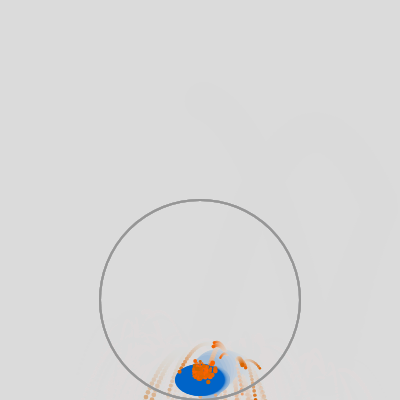
This sketch creates an interactive bouncing balloon that falls under gravity, squishes on impact, bounces around the canvas and inside a circular pit, and pops when clicked. It features particle effects on bounces, fading motion trails, a sound effect, and an optional colorful crowd of onlookers that appears when you press 'y'.

🧪 Try This!

Experiment with the code by making these changes:

  1. Make gravity stronger — The ball will accelerate downward faster and bounce higher, creating a springier effect
  2. Change the balloon color — Instantly change the balloon from blue to a different color
  3. Make bounces less damped — The balloon will keep more energy after each bounce and bounce higher and farther
  4. Make the pit bigger — A larger circular pit will trap the balloon more easily
  5. Add more particles to bounces — Each bounce will emit more colorful particles, creating a more explosive effect
  6. See motion trails clearly — The semi-transparent background is nearly opaque now, so you'll see clearer motion trails as the balloon moves
Prefer the full editor? Open it there →

📖 About This Sketch

This sketch creates a bright blue balloon that bounces realistically across the screen under the pull of gravity. When it hits any surface—the canvas edges, the ground, or the walls of a circular pit—it squishes, emits orange particle bursts, and plays a sine wave sound effect. Click the balloon to pop it in a red expanding burst, and press 'y' to summon a crowd of colorful spectators. The code teaches you gravity, collision detection, vector math for bouncing off curves, particle systems, and the p5.sound library.

The sketch is organized into a physics engine in draw() that updates the ball's position and handles three types of collisions (flat edges and the curved pit wall), a Particle class for the burst effects, helper functions for sound and particles, and event handlers for mouse clicks and keyboard input. By reading this code, you will learn how professional physics simulations handle different collision types, how to create visual feedback with particles, and how to structure interactive sketches with multiple systems working together.

⚙️ How It Works

  1. When the sketch loads, setup() creates a responsive canvas, initializes the balloon at the top center with random velocity, positions a circular pit near the bottom, and starts a sine wave oscillator that will play bounce sounds.
  2. Every frame, draw() clears the background with a semi-transparent gray to create fading motion trails, then applies gravity to the ball's vertical velocity while updating its position.
  3. The physics engine checks for collisions: bouncing off the left/right canvas edges (reversing and dampening horizontal velocity), bouncing off the top edge, and bouncing off the bottom ground or the curved pit walls (using vector reflection for realistic physics).
  4. When the ball bounces, playBounceSound() triggers a brief fade-in and fade-out of the oscillator, and emitParticles() creates 5-15 orange circles that fade and fall with lighter gravity, creating a burst effect.
  5. A squishTimer makes the ball ellipse compress vertically and expand horizontally on impact using a cosine curve, returning to normal shape over 15 frames.
  6. Clicking the balloon sets balloonPopped to true, triggering a red expanding stroke that fades over 30 frames before the balloon resets; pressing 'y' generates a crowd of gray circles at the bottom of the screen using the generateCrowd() function.

🎓 Concepts You'll Learn

Gravity and physics simulationCollision detection and responseVector reflection for curved surfacesParticle systemsAnimation easing with trigonometric functionsp5.sound oscillatorsClass-based object designEvent handling (mouse, keyboard, window resize)

📝 Code Breakdown

setup()

setup() runs once when the sketch starts. It's where you initialize the canvas, variables, and audio. The responsive canvas (windowWidth, windowHeight) is tied to the windowResized() function, which updates canvas size and ball position if the window changes.

function setup() {
  createCanvas(windowWidth, windowHeight);
  // Tip: Use windowWidth/windowHeight for responsive canvas

  // Initialize ball properties
  ballRadius = 20; // Set ball radius to 20 pixels
  ballX = width / 2; // Start ball in the middle of the canvas horizontally
  ballY = height / 4; // Start ball near the top of the canvas vertically

  // Give the ball an initial random velocity
  ballVX = random(-5, 5); // Random x-velocity between -5 and 5
  ballVY = random(-2, 2); // Random y-velocity between -2 and 2

  // Calculate pit position. Its bottom edge should be at the canvas bottom.
  pitX = width / 2;
  pitY = height - pitRadius; // Center Y is pitRadius above the bottom

  // Start the audio context (important for any sound)
  userStartAudio();

  // Setup the sound oscillator
  ballSound = new p5.Oscillator();
  ballSound.setType('sine'); // A simple sine wave
  ballSound.freq(220);       // A low frequency (A3)
  ballSound.amp(0);          // Start with 0 volume
  ballSound.start();         // Start the oscillator, but it won't make sound yet
}
Line-by-line explanation (14 lines)

🔧 Subcomponents:

calculation Responsive Canvas Setup createCanvas(windowWidth, windowHeight);

Creates a canvas that fills the entire browser window and responds to resizing

calculation Ball Position and Velocity Setup ballX = width / 2; ballY = height / 4; ballVX = random(-5, 5); ballVY = random(-2, 2);

Positions the ball at the top-center and gives it a random starting velocity so each run is different

calculation Pit Position pitX = width / 2; pitY = height - pitRadius;

Centers the pit horizontally and positions its center so it touches the bottom of the canvas

calculation Audio Oscillator Initialization ballSound = new p5.Oscillator(); ballSound.setType('sine'); ballSound.freq(220); ballSound.amp(0); ballSound.start();

Creates a silent sine wave oscillator that will play bounce sounds without making noise until triggered

createCanvas(windowWidth, windowHeight);
Creates a canvas the size of the entire browser window. windowWidth and windowHeight update when the window resizes.
ballRadius = 20;
Sets the balloon's radius to 20 pixels. This is used for drawing and collision detection.
ballX = width / 2;
Places the ball horizontally at the center of the canvas (width / 2).
ballY = height / 4;
Places the ball vertically at 1/4 down from the top (height / 4), so it has room to fall.
ballVX = random(-5, 5);
Gives the ball a random initial horizontal velocity between -5 and 5 pixels per frame, making each run unique.
ballVY = random(-2, 2);
Gives the ball a random initial vertical velocity between -2 and 2 pixels per frame.
pitX = width / 2;
Centers the pit horizontally on the canvas.
pitY = height - pitRadius;
Positions the pit's center so its curved edge touches the bottom of the canvas (the center is one radius above the bottom).
userStartAudio();
Wakes up the browser's audio context. This is required before using p5.sound in many browsers due to autoplay policies.
ballSound = new p5.Oscillator();
Creates a new oscillator object that will generate sound waves.
ballSound.setType('sine');
Sets the oscillator to produce a smooth sine wave (as opposed to square, triangle, or sawtooth waves).
ballSound.freq(220);
Sets the frequency to 220 Hz, which is the musical note A3 (a low-pitched A).
ballSound.amp(0);
Sets the volume to 0, so the oscillator won't make sound yet even though it's running.
ballSound.start();
Starts the oscillator. It will remain silent until we change its amplitude in playBounceSound().
draw()

draw() is the heartbeat of the sketch, running 60 times per second. It handles all physics (gravity, velocity, collision detection), applies visual effects (squish, burst, particles), and renders everything. The pit collision code is particularly interesting because it uses vector math to reflect the ball off a curved surface instead of a flat one—this is how games handle circular obstacles.

🔬 This code flips horizontal velocity and dampens it to 95% on every wall bounce. What happens if you change 0.95 to 0.8, or to 1.0? (0.8 loses more energy, 1.0 loses none.)

    // 3. Handle bouncing off the vertical edges (left/right)
    if (ballX - ballRadius <= 0 || ballX + ballRadius >= width) {
      ballVX *= -1; // Reverse the x-velocity
      ballVX *= 0.95; // Simulate energy loss
    }

🔬 This single line adds gravity (0.5) to vertical velocity each frame, accelerating the ball downward. What happens if you change it to += gravity * 2? How about += gravity * 0.1?

    // 2. Apply gravity to the ball's y-velocity
    ballVY += gravity;
function draw() {
  background(220, 50); // Clear the canvas with a light gray background each frame, but allow previous frames to fade

  // --- Draw the Pit ---
  noFill();
  stroke(150); // Gray outline for the pit
  strokeWeight(2);
  ellipse(pitX, pitY, pitRadius * 2);

  // --- NEW: Draw the Crowd ---
  noStroke();
  for (let i = 0; i < crowd.length; i++) {
    fill(crowd[i].color);
    ellipse(crowd[i].x, crowd[i].y, crowd[i].size);
  }

  if (!balloonPopped) {
    // If the balloon is not popped, update its physics and draw it

    // 1. Update ball's position based on its velocity
    ballX += ballVX;
    ballY += ballVY;

    // 2. Apply gravity to the ball's y-velocity
    ballVY += gravity;

    // 3. Handle bouncing off the vertical edges (left/right)
    if (ballX - ballRadius <= 0 || ballX + ballRadius >= width) {
      ballVX *= -1; // Reverse the x-velocity
      ballVX *= 0.95; // Simulate energy loss
    }

    // 4. Handle bouncing off the canvas top edge
    if (ballY - ballRadius <= 0) {
      ballVY *= -1; // Reverse the y-velocity
      ballVY *= 0.9; // Simulate energy loss
      ballY = ballRadius; // Prevent sticking to the top
    }

    // 5. Handle bouncing off the canvas bottom edge OR the pit curve
    if (ballY + ballRadius >= height) {
      // Ball has hit the canvas bottom line
      ballY = height - ballRadius; // Place it on the ground
      ballVY *= -1; // Reverse vertical velocity
      ballVY *= 0.9; // Energy loss

      // Play sound, trigger particles, and start squish effect
      playBounceSound();
      emitParticles(ballX, ballY); // Emit particles at bounce location
      squishTimer = SQUISH_DURATION; // Start squish timer

      // Check if the ball is now horizontally inside the pit's range
      if (abs(ballX - pitX) < pitRadius) {
        inPit = true; // Ball is now considered to be "in the pit"
      }
    }

    // 6. If the ball is inside the pit, handle collision with its curved boundary
    if (inPit) {
      let d = dist(ballX, ballY, pitX, pitY);
      if (d + ballRadius >= pitRadius) {
        // Collision with the pit's curved boundary!
        // Position correction: Move the ball out of the pit
        let angle = atan2(ballY - pitY, ballX - pitX);
        ballX = pitX + cos(angle) * (pitRadius - ballRadius);
        ballY = pitY + sin(angle) * (pitRadius - ballRadius);

        // Velocity reflection (more accurate for curved surfaces)
        let normalVec = createVector(ballX - pitX, ballY - pitY);
        normalVec.normalize();
        let velVec = createVector(ballVX, ballVY);
        let dot = velVec.dot(normalVec);
        let reflectedVel = velVec.sub(normalVec.mult(2 * dot));

        ballVX = reflectedVel.x * 0.9; // Apply energy loss
        ballVY = reflectedVel.y * 0.9; // Apply energy loss

        // Play sound, trigger particles, and start squish effect (for pit bounce)
        playBounceSound();
        emitParticles(ballX, ballY); // Emit particles at bounce location
        squishTimer = SQUISH_DURATION; // Start squish timer
      }

      // Safety check: If the ball somehow escapes the pit, reset inPit
      if (ballY > height + ballRadius || abs(ballX - pitX) > pitRadius + ballRadius * 2) {
        inPit = false;
      }
    }

    // Calculate squish factor
    let currentSquish = 1; // Default to no squish
    if (squishTimer > 0) {
      currentSquish = map(cos(map(squishTimer, SQUISH_DURATION, 0, 0, PI)), -1, 1, 1.2, 0.8);
      squishTimer--;
    }

    // 7. Draw the ball with squish effect
    noStroke(); // Don't draw an outline for the ball
    fill(0, 100, 200); // Set ball color to a shade of blue
    ellipse(ballX, ballY, ballRadius * 2 / currentSquish, ballRadius * 2 * currentSquish);
  } else {
    // If the balloon is popped, draw the burst effect

    if (burstTimer > 0) {
      // Draw an expanding, fading circle as a burst effect
      noFill();
      stroke(255, 0, 0, map(burstTimer, BURST_DURATION, 0, 200, 0)); // Red, fading stroke
      strokeWeight(map(burstTimer, BURST_DURATION, 0, 1, 10)); // Expanding stroke
      ellipse(ballX, ballY, ballRadius * 2 + map(burstTimer, BURST_DURATION, 0, 0, ballRadius * 3)); // Expanding size
      burstTimer--;
    } else {
      // After burst effect, reset the balloon
      balloonPopped = false;
      // Re-initialize ball properties to make it reappear
      ballRadius = 20;
      ballX = width / 2;
      ballY = height / 4;
      ballVX = random(-5, 5);
      ballVY = random(-2, 2);
      inPit = false; // Ensure inPit is reset too
    }
  }

  // Update and display particles
  for (let i = particles.length - 1; i >= 0; i--) {
    particles[i].update();
    particles[i].show();
    if (particles[i].isDead()) {
      particles.splice(i, 1); // Remove dead particles
    }
  }
}
Line-by-line explanation (41 lines)

🔧 Subcomponents:

calculation Fading Motion Trail background(220, 50);

Semi-transparent gray background (alpha 50) creates fading trails by drawing over previous frames without fully clearing them

calculation Pit Visualization ellipse(pitX, pitY, pitRadius * 2);

Draws the circular pit boundary as a gray outline

for-loop Draw Crowd Members for (let i = 0; i < crowd.length; i++) { fill(crowd[i].color); ellipse(crowd[i].x, crowd[i].y, crowd[i].size); }

Loops through all crowd members and draws each as a colored circle

calculation Position Update ballX += ballVX; ballY += ballVY;

Updates the ball's x and y position by adding velocity each frame, creating motion

calculation Gravity Application ballVY += gravity;

Adds gravity (0.5 pixels/frame²) to vertical velocity, making the ball accelerate downward

conditional Horizontal Edge Bounce if (ballX - ballRadius <= 0 || ballX + ballRadius >= width) { ballVX *= -1; ballVX *= 0.95; }

Reverses horizontal velocity when the ball hits left or right edges and dampens energy to 95%

conditional Top Edge Bounce if (ballY - ballRadius <= 0) { ballVY *= -1; ballVY *= 0.9; ballY = ballRadius; }

Bounces the ball off the top edge and prevents it from sticking

conditional Ground Bounce and Pit Entry if (ballY + ballRadius >= height) { ballY = height - ballRadius; ballVY *= -1; ballVY *= 0.9; playBounceSound(); emitParticles(ballX, ballY); squishTimer = SQUISH_DURATION; if (abs(ballX - pitX) < pitRadius) { inPit = true; } }

Bounces the ball off the ground, triggers sound and particles, and checks if the ball entered the pit

conditional Pit Curved Boundary Collision if (inPit) { let d = dist(ballX, ballY, pitX, pitY); if (d + ballRadius >= pitRadius) { ... } }

Detects collision with the pit's curved wall and bounces the ball using vector reflection

calculation Squish Effect Animation let currentSquish = 1; if (squishTimer > 0) { currentSquish = map(cos(map(squishTimer, SQUISH_DURATION, 0, 0, PI)), -1, 1, 1.2, 0.8); squishTimer--; }

Creates a bouncy compression effect using cosine easing, squishing the ball vertically while expanding it horizontally

calculation Ball Rendering ellipse(ballX, ballY, ballRadius * 2 / currentSquish, ballRadius * 2 * currentSquish);

Draws the blue balloon with the squish effect applied: narrower in one direction, wider in the other

conditional Burst Animation if (burstTimer > 0) { noFill(); stroke(255, 0, 0, map(burstTimer, BURST_DURATION, 0, 200, 0)); strokeWeight(map(burstTimer, BURST_DURATION, 0, 1, 10)); ellipse(ballX, ballY, ballRadius * 2 + map(burstTimer, BURST_DURATION, 0, 0, ballRadius * 3)); burstTimer--; }

When popped, animates an expanding red circle that fades over 30 frames

calculation Balloon Reset balloonPopped = false; ballRadius = 20; ballX = width / 2; ballY = height / 4; ballVX = random(-5, 5); ballVY = random(-2, 2); inPit = false;

After the burst effect finishes, resets the balloon to its initial state for another round

for-loop Update and Display Particles for (let i = particles.length - 1; i >= 0; i--) { particles[i].update(); particles[i].show(); if (particles[i].isDead()) { particles.splice(i, 1); } }

Loops backwards through particles, updates their physics, draws them, and removes dead ones to free memory

background(220, 50);
Draws a semi-transparent light gray background (RGB 220, 220, 220 with alpha 50 out of 255). The transparency allows previous frames to fade, creating motion trails.
noFill();
Tells p5.js not to fill shapes with color—only draw their outlines.
stroke(150);
Sets the outline color to a medium gray for the pit's edge.
strokeWeight(2);
Makes the outline 2 pixels thick.
ellipse(pitX, pitY, pitRadius * 2);
Draws a circle at the pit's center. The third argument is the diameter (2 × radius), so this creates the pit boundary.
for (let i = 0; i < crowd.length; i++) {
Loops through every member of the crowd array, from index 0 to length-1.
fill(crowd[i].color);
Sets the fill color for this crowd member's circle.
ballX += ballVX;
Adds the horizontal velocity to the ball's x position. This is how the ball moves sideways.
ballY += ballVY;
Adds the vertical velocity to the ball's y position. This moves the ball up or down.
ballVY += gravity;
Increases downward velocity by the gravity value (0.5). This acceleration makes the ball fall faster and faster.
if (ballX - ballRadius <= 0 || ballX + ballRadius >= width) {
Checks if the ball has crossed the left edge (ballX - ballRadius <= 0) OR the right edge (ballX + ballRadius >= width).
ballVX *= -1;
Flips the sign of horizontal velocity, making the ball bounce back in the opposite direction.
ballVX *= 0.95;
Multiplies velocity by 0.95, so each bounce loses 5% of its speed (energy loss due to friction).
if (ballY - ballRadius <= 0) {
Checks if the ball's top edge has reached or passed the top of the canvas.
ballY = ballRadius;
Clamps the ball's position so it doesn't get stuck to the top. Sets it exactly at the surface.
if (ballY + ballRadius >= height) {
Checks if the ball's bottom edge has reached or passed the bottom of the canvas.
ballY = height - ballRadius;
Places the ball exactly on the ground to prevent it from sinking through the canvas bottom.
if (abs(ballX - pitX) < pitRadius) {
Checks if the ball is horizontally within the pit's width (distance from ball to pit center is less than pit radius). If true, the ball is now considered inside the pit.
let d = dist(ballX, ballY, pitX, pitY);
Calculates the distance from the ball's center to the pit's center using the dist() function.
if (d + ballRadius >= pitRadius) {
Checks if the ball has hit the pit's curved boundary. The ball collides when its distance to pit center plus its radius is greater than or equal to the pit radius.
let angle = atan2(ballY - pitY, ballX - pitX);
Calculates the angle from the pit center to the ball using atan2(). This gives the direction of the collision normal.
ballX = pitX + cos(angle) * (pitRadius - ballRadius);
Repositions the ball so it sits exactly on the pit's curve boundary (using cosine to get the x-component of the direction).
ballY = pitY + sin(angle) * (pitRadius - ballRadius);
Repositions the ball's y coordinate on the pit boundary (using sine to get the y-component of the direction).
let normalVec = createVector(ballX - pitX, ballY - pitY);
Creates a vector pointing from the pit center to the ball. This is the surface normal (perpendicular to the curve).
normalVec.normalize();
Scales the normal vector to length 1. This is required for the reflection calculation to work correctly.
let velVec = createVector(ballVX, ballVY);
Converts the ball's velocity (ballVX, ballVY) into a p5.Vector object so we can use vector math operations.
let dot = velVec.dot(normalVec);
Calculates the dot product: how much of the ball's velocity is pointing toward or away from the surface. Used to calculate the reflection.
let reflectedVel = velVec.sub(normalVec.mult(2 * dot));
The standard physics formula for reflecting a velocity off a surface. Subtracts twice the dot product times the normal from the original velocity.
ballVX = reflectedVel.x * 0.9;
Applies the reflected velocity and dampens it to 90% to simulate energy loss on bounce.
ballVY = reflectedVel.y * 0.9;
Same damping for the vertical component.
if (ballY > height + ballRadius || abs(ballX - pitX) > pitRadius + ballRadius * 2) {
Safety check: if the ball somehow escapes the pit (too far below or too far horizontally), reset inPit to false.
let currentSquish = map(cos(map(squishTimer, SQUISH_DURATION, 0, 0, PI)), -1, 1, 1.2, 0.8);
Complex easing calculation: maps squishTimer to a cosine curve, then maps that to a squish factor between 0.8 and 1.2. Creates a bouncy compression effect.
squishTimer--;
Decrements the squish timer each frame, counting down until the effect is complete.
ellipse(ballX, ballY, ballRadius * 2 / currentSquish, ballRadius * 2 * currentSquish);
Draws the ball with squish applied. The third argument (width) is divided by squish (makes it narrower), and the fourth argument (height) is multiplied by squish (makes it taller), creating a bouncy deformation.
stroke(255, 0, 0, map(burstTimer, BURST_DURATION, 0, 200, 0));
Sets the stroke color to red and makes the alpha fade from 200 to 0 as the burst timer counts down from BURST_DURATION to 0.
strokeWeight(map(burstTimer, BURST_DURATION, 0, 1, 10));
Makes the stroke weight expand from 1 pixel to 10 pixels as the burst plays, creating an expanding ring effect.
ellipse(ballX, ballY, ballRadius * 2 + map(burstTimer, BURST_DURATION, 0, 0, ballRadius * 3));
Draws the burst circle, growing from the balloon's size to 3 times larger as the timer counts down.
for (let i = particles.length - 1; i >= 0; i--) {
Loops backwards through the particles array (from last to first). Backwards iteration is important when removing items from an array.
particles[i].update();
Calls the update() method on particle i, which updates its position and applies gravity to it.
particles[i].show();
Calls the show() method on particle i, which draws it on the canvas.
if (particles[i].isDead()) { particles.splice(i, 1); }
If the particle has faded out completely (isDead() returns true), removes it from the array using splice(), freeing memory.

playBounceSound()

This function uses p5.sound's amp() method with time ramping. Calling amp() twice in sequence creates a smooth envelope (the shape of the sound over time). This is better than hard on/off sounds, which sound artificial. The 0.05 and 0.2 timing values were chosen to create a short 'plink' sound, but you can adjust them to change the character of the bounce.

🔬 This function creates a quick 'plink' sound by fading in then fading out. What happens if you swap the two numbers in the first line: change amp(0.5, 0.05) to amp(0.5, 0.5)? How does a slower fade-in change the bounce sound's character?

function playBounceSound() {
  ballSound.amp(0.5, 0.05); // Fade in to 0.5 volume over 0.05 seconds
  ballSound.amp(0, 0.2);   // Fade out to 0 volume over 0.2 seconds
}
function playBounceSound() {
  ballSound.amp(0.5, 0.05); // Fade in to 0.5 volume over 0.05 seconds
  ballSound.amp(0, 0.2);   // Fade out to 0 volume over 0.2 seconds
}
Line-by-line explanation (2 lines)

🔧 Subcomponents:

calculation Sound Fade In ballSound.amp(0.5, 0.05);

Quickly fades the oscillator's volume from current level to 0.5 over 50 milliseconds

calculation Sound Fade Out ballSound.amp(0, 0.2);

Fades the volume back to 0 over 200 milliseconds, so the sound disappears smoothly

ballSound.amp(0.5, 0.05);
Sets the oscillator's amplitude (volume) to 0.5, ramping up over 0.05 seconds (50 milliseconds). This creates a quick fade-in of the bounce sound.
ballSound.amp(0, 0.2);
Sets the amplitude to 0, ramping down over 0.2 seconds (200 milliseconds). This fades the sound out so it doesn't abruptly cut off.

emitParticles(x, y)

This function demonstrates the particle system pattern: spawn many small objects at once with random properties, then let the draw loop update and draw them each frame until they're gone. By randomizing count, velocity, and size in the Particle constructor, the effect looks organic and different every time.

🔬 These two lines control particle direction: vx spreads them sideways, vy shoots them upward (negative = up). What if you change vy to random(-1, 1) or random(-8, -4)? How does this change the visual effect of the burst?

    // Random velocity, slightly upwards and outwards
    let vx = random(-2, 2);
    let vy = random(-4, -1);
function emitParticles(x, y) {
  let numParticles = random(5, 15); // Emit 5 to 15 particles
  for (let i = 0; i < numParticles; i++) {
    // Random velocity, slightly upwards and outwards
    let vx = random(-2, 2);
    let vy = random(-4, -1);
    particles.push(new Particle(x, y, vx, vy));
  }
}
Line-by-line explanation (5 lines)

🔧 Subcomponents:

calculation Random Particle Count let numParticles = random(5, 15);

Chooses a random number of particles between 5 and 15 to emit, so bounces don't look identical

for-loop Particle Emission Loop for (let i = 0; i < numParticles; i++) { let vx = random(-2, 2); let vy = random(-4, -1); particles.push(new Particle(x, y, vx, vy)); }

Loops numParticles times, creating a new Particle with random velocity and adding it to the particles array

let numParticles = random(5, 15);
Picks a random integer between 5 and 15. This ensures each bounce emits a different number of particles, making the effect look less repetitive.
for (let i = 0; i < numParticles; i++) {
Loops from i = 0 to i = numParticles - 1. Each iteration creates one particle.
let vx = random(-2, 2);
Gives each particle a random horizontal velocity between -2 and 2 pixels per frame, so they spread outward in all directions.
let vy = random(-4, -1);
Gives each particle an upward velocity (negative y) between -4 and -1. The negative values make them shoot upward, not downward.
particles.push(new Particle(x, y, vx, vy));
Creates a new Particle object at position (x, y) with velocity (vx, vy), and adds it to the particles array so it will be updated and drawn in draw().

class Particle

The Particle class is a great example of ES6 object-oriented programming in p5.js. Each particle is an independent object with its own position, velocity, and appearance. By storing particles in an array and calling update() and show() on each one every frame, you create the illusion of many separate objects interacting. This pattern is used in almost every game and animation system.

🔬 This update method moves the particle, applies lighter gravity, and fades it. What happens if you change gravity * 0.5 to gravity * 1.0 (or gravity * 0)? How does particle gravity affect the burst effect's look?

  update() {
    this.x += this.vx;
    this.y += this.vy;
    this.vy += gravity * 0.5; // Apply a lighter gravity to particles
    this.alpha -= random(5, 10); // Fade out over time
  }
class Particle {
  constructor(x, y, vx, vy) {
    this.x = x;
    this.y = y;
    this.vx = vx;
    this.vy = vy;
    this.alpha = 255; // Start fully opaque
    this.size = random(2, 5); // Random size
    this.color = color(random(200, 255), 100, 0); // Orange/red color
  }

  update() {
    this.x += this.vx;
    this.y += this.vy;
    this.vy += gravity * 0.5; // Apply a lighter gravity to particles
    this.alpha -= random(5, 10); // Fade out over time
  }

  show() {
    noStroke();
    fill(this.color, this.alpha);
    ellipse(this.x, this.y, this.size);
  }

  isDead() {
    return this.alpha <= 0;
  }
}
Line-by-line explanation (13 lines)

🔧 Subcomponents:

calculation Particle Initialization constructor(x, y, vx, vy) { this.x = x; this.y = y; this.vx = vx; this.vy = vy; this.alpha = 255; this.size = random(2, 5); this.color = color(random(200, 255), 100, 0); }

Sets up a particle with position, velocity, random size, and a random shade of orange/red color

calculation Update Particle Physics update() { this.x += this.vx; this.y += this.vy; this.vy += gravity * 0.5; this.alpha -= random(5, 10); }

Each frame: moves the particle, applies lighter gravity, and fades its color by reducing alpha

calculation Draw Particle show() { noStroke(); fill(this.color, this.alpha); ellipse(this.x, this.y, this.size); }

Draws the particle as a circle with its current color and alpha transparency

calculation Check If Particle Has Faded isDead() { return this.alpha <= 0; }

Returns true when alpha has faded below 0, signaling that this particle should be removed from the array

constructor(x, y, vx, vy) {
The constructor is called when you create a new Particle with new Particle(x, y, vx, vy). It initializes all the particle's properties.
this.x = x;
Stores the starting x position in this.x. 'this' means 'this particle object'.
this.alpha = 255;
Sets the opacity to 255 (fully opaque). Alpha ranges from 0 (invisible) to 255 (fully visible).
this.size = random(2, 5);
Randomly picks a diameter between 2 and 5 pixels, so particles don't all look identical.
this.color = color(random(200, 255), 100, 0);
Creates an orange/red color by randomly choosing the red component (200–255), keeping green at 100, and blue at 0. RGB values create the color.
update() {
A method (function inside a class) called once per frame to update the particle's position, velocity, and appearance.
this.x += this.vx;
Adds horizontal velocity to x, moving the particle sideways.
this.vy += gravity * 0.5;
Applies gravity to the particle, but at only 50% strength (gravity * 0.5), making particles fall slower than the main ball so they're more visible.
this.alpha -= random(5, 10);
Decreases alpha by a random amount between 5 and 10 each frame. This creates the fading effect, with randomness making it look more natural.
show() {
A method called once per frame to draw this particle on the canvas.
fill(this.color, this.alpha);
Sets the fill color to this particle's color with its current alpha. As alpha decreases, the particle becomes transparent.
isDead() {
A method that checks whether the particle has faded completely.
return this.alpha <= 0;
Returns true if alpha is at or below 0 (invisible), so the draw loop knows to delete this particle and free memory.

generateCrowd()

This function demonstrates procedural generation: creating many objects with random properties in a loop. Instead of using a class (like Particle), it uses simple object literals with { x: x, y: y, ... }, which is faster for read-only objects. The crowd is stateless—it doesn't move or change, it just sits in the background looking on.

🔬 This loop creates 100 gray circles at random positions in the bottom 20% of the screen. What happens if you change random(150, 200) to random(0, 255) to add color variation? Or change size from random(5, 15) to random(15, 30)?

  for (let i = 0; i < NUM_CROWD_MEMBERS; i++) {
    let x = random(width);
    let y = random(height * 0.8, height); // Appear at the bottom 20% of the screen
    let size = random(5, 15);
    let color = random(150, 200); // Shades of gray for simplicity
    crowd.push({ x: x, y: y, size: size, color: color });
  }
function generateCrowd() {
  crowd = []; // Clear existing crowd if any
  for (let i = 0; i < NUM_CROWD_MEMBERS; i++) {
    let x = random(width);
    let y = random(height * 0.8, height); // Appear at the bottom 20% of the screen
    let size = random(5, 15);
    let color = random(150, 200); // Shades of gray for simplicity
    crowd.push({ x: x, y: y, size: size, color: color });
  }
  console.log('Crowd generated!');
}
Line-by-line explanation (8 lines)

🔧 Subcomponents:

calculation Clear Crowd Array crowd = [];

Empties the crowd array so a new crowd can be generated without duplicates

for-loop Generate Crowd Members for (let i = 0; i < NUM_CROWD_MEMBERS; i++) { let x = random(width); let y = random(height * 0.8, height); let size = random(5, 15); let color = random(150, 200); crowd.push({ x: x, y: y, size: size, color: color }); }

Loops 100 times, creating a random crowd member each iteration and adding it to the array

calculation Debug Message console.log('Crowd generated!');

Prints a message to the browser console for debugging

crowd = [];
Clears the crowd array by assigning it an empty array. This prevents duplicates if generateCrowd() is called multiple times.
for (let i = 0; i < NUM_CROWD_MEMBERS; i++) {
Loops NUM_CROWD_MEMBERS times (100 times). Each iteration creates one crowd member.
let x = random(width);
Picks a random x position anywhere from 0 to the canvas width, spreading crowd members horizontally.
let y = random(height * 0.8, height);
Picks a random y position in the bottom 20% of the canvas (between 80% of height and 100% of height), so the crowd appears at the bottom like spectators.
let size = random(5, 15);
Gives each crowd member a random diameter between 5 and 15 pixels, creating visual variety.
let color = random(150, 200);
Picks a random shade of gray (RGB values all the same: 150–200), so the crowd is a mix of light and medium grays.
crowd.push({ x: x, y: y, size: size, color: color });
Creates a simple object with properties x, y, size, color and adds it to the crowd array. This is a shorthand object literal instead of using a class.
console.log('Crowd generated!');
Prints 'Crowd generated!' to the browser's console. This is useful for debugging—open the browser's developer tools (F12) to see it.

mousePressed()

mousePressed() is one of p5.js's event handlers—functions that run automatically in response to user input. Other event handlers include mouseMoved(), keyPressed(), touchStarted(), and more. Hit detection using dist() is the foundation of interactive games and sketches.

🔬 This code checks if your click is inside the balloon. What happens if you change d < ballRadius to d < ballRadius * 2? How does this change the clickable area?

    let d = dist(mouseX, mouseY, ballX, ballY);
    if (d < ballRadius) {
function mousePressed() {
  if (!balloonPopped) {
    // Check if the mouse click is within the ball's area
    let d = dist(mouseX, mouseY, ballX, ballY);
    if (d < ballRadius) {
      balloonPopped = true;   // Set popped state to true
      burstTimer = BURST_DURATION; // Start the burst timer
      console.log('Balloon popped!');
      // Optional: Add a sound effect for popping here if you include p5.sound
    }
  }
}
Line-by-line explanation (7 lines)

🔧 Subcomponents:

conditional Check If Not Already Popped if (!balloonPopped) {

Only allow popping if the balloon is currently inflated (not already popped)

calculation Distance to Click let d = dist(mouseX, mouseY, ballX, ballY);

Calculates how far the click was from the balloon's center

conditional Collision Detection if (d < ballRadius) {

Checks if the click was inside the balloon's radius (a hit)

calculation Pop the Balloon balloonPopped = true; burstTimer = BURST_DURATION; console.log('Balloon popped!');

Sets the popped flag and starts the burst animation timer

function mousePressed() {
This p5.js built-in function is called automatically whenever the mouse button is pressed on the canvas.
if (!balloonPopped) {
The ! means 'not', so this checks if the balloon is NOT already popped. If it's already popped, nothing happens.
let d = dist(mouseX, mouseY, ballX, ballY);
Calculates the distance from the click position (mouseX, mouseY) to the ball's center (ballX, ballY) using the dist() function.
if (d < ballRadius) {
Checks if the distance is less than the ball's radius, meaning the click was inside the ball. This is called hit detection or collision detection.
balloonPopped = true;
Sets the balloonPopped flag to true, which tells draw() to stop updating ball physics and start drawing the burst animation.
burstTimer = BURST_DURATION;
Sets the burst timer to 30 (the value of BURST_DURATION), starting the countdown for the burst animation.
console.log('Balloon popped!');
Prints a debug message to the browser console. Open the developer tools to see it.

keyPressed()

keyPressed() is p5.js's keyboard event handler. The global variable 'key' stores the character that was just pressed. For special keys like spacebar or arrow keys, use keyCode instead. This sketch uses keyPressed() for a simple on-off trigger, but you could also use keyIsPressed to detect if a key is being held down.

function keyPressed() {
  if (key === 'y' || key === 'Y') { // Check if the pressed key is 'y' or 'Y'
    generateCrowd();
  }
}
Line-by-line explanation (3 lines)

🔧 Subcomponents:

conditional Check for Y Key if (key === 'y' || key === 'Y') {

Tests if the user pressed the lowercase 'y' OR uppercase 'Y'

calculation Generate Crowd generateCrowd();

Calls the generateCrowd() function to spawn a new crowd of spectators

function keyPressed() {
This p5.js built-in function is called automatically every time a key is pressed.
if (key === 'y' || key === 'Y') {
Checks if the key pressed equals 'y' (lowercase) OR equals 'Y' (uppercase). The === operator tests for exact equality.
generateCrowd();
Calls the generateCrowd() function, which creates 100 new gray circles at the bottom of the canvas.

windowResized()

windowResized() is crucial for responsive sketches. Without it, your canvas would be stuck at its initial size even if the window resizes. This sketch uses it not just to resize the canvas, but to keep the ball and pit centered and properly positioned relative to the new dimensions. The safety check for the pit ensures physics don't break during a resize.

function windowResized() {
  resizeCanvas(windowWidth, windowHeight);
  // This function is called when the preview panel is resized,
  // making your canvas responsive to different window sizes.
  // We also need to re-initialize the ball's position to keep it centered
  ballX = width / 2;
  // Re-calculate pit position based on new canvas size
  pitX = width / 2;
  pitY = height - pitRadius;
  // If ball was in pit, re-adjust its position if it's now outside due to resize
  if (inPit) {
    let d = dist(ballX, ballY, pitX, pitY);
    if (d + ballRadius >= pitRadius) {
      let angle = atan2(ballY - pitY, ballX - pitX);
      ballX = pitX + cos(angle) * (pitRadius - ballRadius);
      ballY = pitY + sin(angle) * (pitRadius - ballRadius);
    }
  }
  // Note: We don't reset ballY or velocities to allow continuous bouncing
}
Line-by-line explanation (10 lines)

🔧 Subcomponents:

calculation Resize Canvas resizeCanvas(windowWidth, windowHeight);

Resizes the p5.js canvas to match the new window dimensions

calculation Recenter Ball Horizontally ballX = width / 2;

Keeps the ball centered horizontally after a resize

calculation Recalculate Pit Position pitX = width / 2; pitY = height - pitRadius;

Re-positions the pit to stay centered and anchored to the bottom after resize

conditional Pit Safety Check if (inPit) { let d = dist(ballX, ballY, pitX, pitY); if (d + ballRadius >= pitRadius) { ... } }

If the ball was in the pit, checks whether it's still properly positioned after resize and adjusts if needed

function windowResized() {
This p5.js built-in function is called automatically whenever the browser window is resized.
resizeCanvas(windowWidth, windowHeight);
Updates the canvas size to match the new window dimensions. Without this, the canvas would stay its original size.
ballX = width / 2;
Recalculates the ball's x position as the center of the new canvas width, keeping it centered.
pitX = width / 2;
Recalculates the pit's x position to stay centered on the new canvas.
pitY = height - pitRadius;
Recalculates the pit's y position so it stays anchored to the bottom of the new canvas.
if (inPit) {
Checks if the ball is currently inside the pit. If it is, we need to verify it's still valid after the resize.
let d = dist(ballX, ballY, pitX, pitY);
Recalculates the distance from ball to pit center using the new positions.
if (d + ballRadius >= pitRadius) {
Checks if the ball has moved outside the pit boundary due to the resize.
let angle = atan2(ballY - pitY, ballX - pitX);
If the ball is outside, recalculates the angle to reposition it correctly on the pit's boundary.
ballX = pitX + cos(angle) * (pitRadius - ballRadius);
Snaps the ball back to the pit's boundary using the recalculated angle.

📦 Key Variables

ballX number

Stores the ball's horizontal position on the canvas (x-coordinate)

let ballX;
ballY number

Stores the ball's vertical position on the canvas (y-coordinate)

let ballY;
ballVX number

Stores the ball's horizontal velocity (how many pixels it moves left/right per frame)

let ballVX;
ballVY number

Stores the ball's vertical velocity (how many pixels it moves up/down per frame)

let ballVY;
ballRadius number

Stores the ball's radius in pixels (half its diameter). Used for drawing and collision detection

let ballRadius;
gravity number

The constant acceleration applied to ballVY each frame, pulling the ball downward (0.5 pixels/frame²)

let gravity = 0.5;
balloonPopped boolean

A flag that tracks whether the balloon has been popped (true) or is still inflated (false)

let balloonPopped = false;
burstTimer number

Countdown timer for the burst animation after the balloon pops, counts down from BURST_DURATION to 0

let burstTimer = 0;
BURST_DURATION number

Constant defining how many frames the burst animation lasts (30 frames)

const BURST_DURATION = 30;
pitX number

The horizontal position (x-coordinate) of the circular pit's center

let pitX;
pitY number

The vertical position (y-coordinate) of the circular pit's center

let pitY;
pitRadius number

The radius of the circular pit in pixels. Controls the pit's size

let pitRadius = 100;
inPit boolean

A flag indicating whether the ball is currently inside the pit (true) or outside it (false)

let inPit = false;
ballSound p5.Oscillator

A sine wave oscillator from p5.sound that plays the bounce sound effect

let ballSound;
particles array

An array that holds all active Particle objects. Particles are added on bounce and removed when they fade

let particles = [];
squishTimer number

Countdown timer for the ball's squish/deformation effect on impact, counts down from SQUISH_DURATION to 0

let squishTimer = 0;
SQUISH_DURATION number

Constant defining how many frames the squish animation lasts (15 frames)

const SQUISH_DURATION = 15;
crowd array

An array of objects representing crowd members (gray circles at the bottom). Populated by generateCrowd()

let crowd = [];
NUM_CROWD_MEMBERS number

Constant defining how many crowd members to generate when generateCrowd() is called (100)

const NUM_CROWD_MEMBERS = 100;

🔧 Potential Improvements (5)

Here are some ways this code could be enhanced:

BUG draw() - pit collision check

The pit collision code in draw() is duplicated (appears twice: after top bounce and in the inPit block), leading to unnecessary calculations and harder maintenance.

💡 Extract the pit collision logic into a separate function like handlePitCollision() and call it from both places, or refactor the ground bounce to check pit entry only once.

PERFORMANCE draw() - particle loop

Particles are looped backwards correctly (for removal safety), but looping backwards through every particle every frame is fine. However, if you have hundreds of particles, consider spatial partitioning or object pooling for better performance.

💡 For this sketch, performance is fine. But in larger projects, pre-allocate a pool of particles and reuse them instead of creating new ones constantly.

STYLE setup()

The pit position is calculated in setup() but recalculated in windowResized(), creating duplicate logic that must be kept in sync if you change the formula.

💡 Extract pit position calculation into a helper function like calculatePitPosition() and call it from both setup() and windowResized().

FEATURE mousePressed()

The balloon resets to the same position (width / 2, height / 4) every time, making gameplay predictable after multiple pops.

💡 Add randomization to the reset position: ballX = random(ballRadius, width - ballRadius); and ballY = random(height / 4, height / 2); This keeps the player engaged by varying where the balloon reappears.

BUG draw() - squish effect

The squish calculation uses a complex nested map() call that's hard to understand and could overflow if SQUISH_DURATION is changed to 0.

💡 Simplify the squish calculation by computing the cosine progression more clearly: let t = (SQUISH_DURATION - squishTimer) / SQUISH_DURATION; let squish = cos(t * PI) * 0.2 + 1.0; This is more readable and safer.

🔄 Code Flow

Code flow showing setup, draw, playbouncessound, emitparticles, particle, generatecrowd, mousepressed, keypressed, windowresized

💡 Click on function names in the diagram to jump to their code

graph TD start[Start] --> setup[setup] setup --> canvas-creation[Canvas Creation] setup --> ball-initialization[Ball Initialization] setup --> pit-calculation[Pit Calculation] setup --> sound-setup[Sound Setup] setup --> windowresized[windowResized] setup --> draw[draw loop] click setup href "#fn-setup" click canvas-creation href "#sub-canvas-creation" click ball-initialization href "#sub-ball-initialization" click pit-calculation href "#sub-pit-calculation" click sound-setup href "#sub-sound-setup" click windowresized href "#fn-windowresized" draw --> motion-trail[Motion Trail] draw --> position-update[Position Update] draw --> gravity-apply[Gravity Apply] draw --> edge-bounce-horizontal[Edge Bounce Horizontal] draw --> edge-bounce-top[Edge Bounce Top] draw --> ground-bounce[Ground Bounce] draw --> pit-collision[Pit Collision] draw --> ball-drawing[Ball Drawing] draw --> burst-effect[Burst Effect] draw --> particle-loop[Particle Loop] draw --> crowd-loop[Crowd Loop] click draw href "#fn-draw" click motion-trail href "#sub-motion-trail" click position-update href "#sub-position-update" click gravity-apply href "#sub-gravity-apply" click edge-bounce-horizontal href "#sub-edge-bounce-horizontal" click edge-bounce-top href "#sub-edge-bounce-top" click ground-bounce href "#sub-ground-bounce" click pit-collision href "#sub-pit-collision" click ball-drawing href "#sub-ball-drawing" click burst-effect href "#sub-burst-effect" click particle-loop href "#sub-particle-loop" click crowd-loop href "#sub-crowd-loop" crowd-loop --> crowd-clear[Crowd Clear] crowd-loop --> crowd-loop-gen[Crowd Loop Generation] click crowd-clear href "#sub-crowd-clear" click crowd-loop-gen href "#sub-crowd-loop" particle-loop --> emission-loop[Emission Loop] emission-loop --> particle-count[Particle Count] emission-loop --> constructor[Constructor] click emission-loop href "#sub-emission-loop" click particle-count href "#sub-particle-count" click constructor href "#sub-constructor" particle-loop --> update-method[Update Method] particle-loop --> show-method[Show Method] particle-loop --> isdead-method[Is Dead Method] click update-method href "#sub-update-method" click show-method href "#sub-show-method" click isdead-method href "#sub-isdead-method" burst-effect --> reset-balloon[Reset Balloon] click reset-balloon href "#sub-reset-balloon" ground-bounce --> playbouncessound[Play Bounce Sound] ground-bounce --> emitparticles[Emit Particles] click playbouncessound href "#fn-playbouncessound" click emitparticles href "#fn-emitparticles" mousepressed[mousePressed] --> distance-calc[Distance Calculation] mousepressed --> pop-check[Pop Check] mousepressed --> hit-detection[Hit Detection] mousepressed --> pop-action[Pop Action] click mousepressed href "#fn-mousepressed" click distance-calc href "#sub-distance-calc" click pop-check href "#sub-pop-check" click hit-detection href "#sub-hit-detection" click pop-action href "#sub-pop-action" keypressed[keyPressed] --> key-check[Key Check] key-check --> call-function[Call Function] click keypressed href "#fn-keypressed" click key-check href "#sub-key-check" click call-function href "#sub-call-function" windowresized --> resize-canvas[Resize Canvas] windowresized --> recenter-ball[Recenter Ball] windowresized --> recalc-pit[Recalculate Pit] windowresized --> pit-safety-check[Pit Safety Check] click resize-canvas href "#sub-resize-canvas" click recenter-ball href "#sub-recenter-ball" click recalc-pit href "#sub-recalc-pit" click pit-safety-check href "#sub-pit-safety-check"

❓ Frequently Asked Questions

What visual effects can I expect from the Sketch 2026-04-21 19:20?

This sketch features a bright balloon that bounces and squishes across the screen, leaving fading motion trails, and interacts with a circular pit, all while colorful onlookers cheer.

How can I interact with the balloon in this creative coding sketch?

You can influence the balloon's movement by aiming it toward the pit, watching it react with playful physics and sound effects.

What creative coding concepts are demonstrated in this p5.js sketch?

The sketch showcases physics simulations, animation techniques like squishing and bursting, and sound integration to enhance user experience.

Preview

Sketch 2026-04-21 19:20 - p5.js creative coding sketch preview
Sketch Preview
Code flow diagram showing the structure of Sketch 2026-04-21 19:20 - Code flow showing setup, draw, playbouncessound, emitparticles, particle, generatecrowd, mousepressed, keypressed, windowresized
Code Flow Diagram