Sketch 2026-05-15 16:34

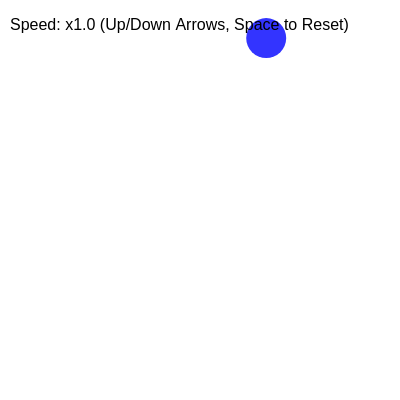
This sketch creates an animated bouncing ball that changes color based on its horizontal position and plays a sound effect whenever it hits a wall. The ball's speed can be controlled with arrow keys, and the spacebar resets it to a random starting state.

🧪 Try This!

Experiment with the code by making these changes:

  1. Make the ball bigger — Changing ballRadius makes the ball's diameter larger—it will still bounce accurately because collisions use the radius too
  2. Change the bounce sound frequency — Lower frequencies sound deeper, higher frequencies sound like chirps—try a different note
  3. Create longer motion trails — Lower the alpha value (last parameter) of the background fill to make trails fade slower and linger longer
  4. Make the ball lose speed on each bounce — Change the bounce reversal from *= -1 to *= -0.85 so the ball gradually slows down (like a real bouncing ball losing energy)
  5. Use a sine wave sound instead of triangle — Triangle waves sound like 'pings', sine waves sound smoother and more musical
Prefer the full editor? Open it there →

📖 About This Sketch

This sketch animates a colorful ball bouncing around the canvas while playing a ping sound on each collision. What makes it interesting is how three p5.js techniques work together: the ball's hue shifts continuously based on its horizontal position using the map() function, the speed multiplier system lets you slow down or speed up the motion with arrow keys, and p5.sound's oscillator generates a brief triangle-wave sound whenever the ball hits a wall. This is a great next step after your first bouncing ball because it adds color, interaction, and audio.

The code is organized into setup() which initializes the canvas and sound, draw() which updates the ball's position and handles collisions sixty times per second, and three helper functions: keyPressed() to handle arrow keys and spacebar, drawBackgroundGradient() (defined but not called in the final version), and windowResized() to maintain responsiveness. By studying it, you will learn how to use HSB color mode, trigger sounds on events, constrain numeric values, and respond to keyboard input.

⚙️ How It Works

  1. When the sketch loads, setup() creates a full-window canvas, initializes the ball at the center with random base speeds between 3 and 7 pixels per frame, and creates a silent triangle-wave oscillator ready to play sounds.
  2. Every frame, draw() applies a semi-transparent white rectangle over the canvas to fade previous ball positions into a motion trail effect, then updates the ball's position by adding its speed multiplied by the current speed multiplier.
  3. Two collision checks compare the ball's radius-adjusted position to the canvas edges—if it crosses a boundary, the corresponding base speed reverses direction and a collision flag is set.
  4. When a collision happens, the oscillator jumps to volume 0.5 then fades out over 0.3 seconds, creating a brief 'ping' sound synchronized to the bounce.
  5. The ball's hue is calculated by mapping its X position across the width to a hue range of 0–360, so it shifts from red through the spectrum as it moves horizontally.
  6. Text displays the current speed multiplier, and pressing Up Arrow increases it, Down Arrow decreases it, and Spacebar resets everything to a new random start.

🎓 Concepts You'll Learn

Collision detection with radiusHSB color mode and dynamic hue mappingSpeed multiplier systemProcedural sound synthesis with oscillatorsKeyboard input handlingMotion trails and transparencyResponsive canvas sizing

📝 Code Breakdown

preload()

preload() is optional and only needed when loading external assets. In this sketch, all assets (sound and graphics) are created in code, so preload() stays empty.

function preload() {
  // No external assets to load in preload()
}
Line-by-line explanation (1 lines)
function preload() {
preload() runs once before setup() and is typically used to load images, sounds, and fonts from files—in this sketch it's empty because we generate sound procedurally instead

setup()

setup() runs once when the sketch first loads. Use it to initialize your canvas, set up colors modes, create objects, and prepare anything that won't change frame-to-frame. In this sketch, setup() also creates and starts the sound oscillator.

🔬 These two lines give the ball a random starting speed. What happens if you change random(3, 7) to random(8, 12)—will the ball move faster or slower on each reset?

  baseBallSpeedX = random(3, 7);
  baseBallSpeedY = random(3, 7);
function setup() {
  createCanvas(windowWidth, windowHeight);
  // Tip: Use windowWidth/windowHeight for responsive canvas

  // Set color mode to HSB for easier hue manipulation
  // HSB values are typically 0-360 for Hue, 0-100 for Saturation and Brightness
  colorMode(HSB, 360, 100, 100);

  // Initialize the ball's position in the center of the canvas
  ballX = width / 2;
  ballY = height / 2;

  // Initialize the base speeds
  baseBallSpeedX = random(3, 7);
  baseBallSpeedY = random(3, 7);

  // Initialize the bounce sound oscillator
  bounceOsc = new p5.Oscillator();
  bounceOsc.setType('triangle'); // A triangle wave sounds a bit like a ping
  bounceOsc.freq(440); // Standard A4 note
  bounceOsc.amp(0); // Start with zero amplitude (silent)
  bounceOsc.start();

  // userStartAudio() is required to start audio playback in most modern browsers
  // It must be called on a user gesture (like a mouse click or key press),
  // or in setup() if the sketch is initiated by a user gesture.
  userStartAudio();
}
Line-by-line explanation (12 lines)

🔧 Subcomponents:

calculation Responsive canvas setup createCanvas(windowWidth, windowHeight);

Creates a canvas that fills the entire browser window

calculation HSB color mode initialization colorMode(HSB, 360, 100, 100);

Switches from RGB to HSB (Hue, Saturation, Brightness) so hue values map 0-360, and saturation/brightness map 0-100

calculation Ball starting position ballX = width / 2; ballY = height / 2;

Places the ball in the center of the canvas

calculation Sound oscillator initialization bounceOsc = new p5.Oscillator(); bounceOsc.setType('triangle'); bounceOsc.freq(440); bounceOsc.amp(0); bounceOsc.start();

Creates a silent triangle-wave oscillator at concert-pitch A4 (440 Hz) that will be triggered on collision

createCanvas(windowWidth, windowHeight);
Creates a canvas that fills the entire window—using windowWidth and windowHeight instead of fixed numbers makes the sketch responsive to window resizing
colorMode(HSB, 360, 100, 100);
Switches color mode from RGB to HSB (Hue-Saturation-Brightness), where hue ranges 0-360 degrees and saturation/brightness each range 0-100—this makes it easy to create a rainbow effect by varying hue alone
ballX = width / 2;
Sets the ball's starting horizontal position to the center of the canvas
ballY = height / 2;
Sets the ball's starting vertical position to the center of the canvas
baseBallSpeedX = random(3, 7);
Assigns a random horizontal speed between 3 and 7 pixels per frame—every time you reload or press spacebar, this changes
baseBallSpeedY = random(3, 7);
Assigns a random vertical speed between 3 and 7 pixels per frame—ensures no two sessions feel identical
bounceOsc = new p5.Oscillator();
Creates a new sound oscillator object that will generate the bounce tone
bounceOsc.setType('triangle');
Sets the oscillator to output a triangle wave, which sounds like a 'ping' rather than a pure sine wave or harsh square wave
bounceOsc.freq(440);
Sets the frequency to 440 Hz, which is the musical note A4—a pleasant mid-range tone
bounceOsc.amp(0);
Sets the oscillator's amplitude to 0, making it silent until a collision triggers a sound
bounceOsc.start();
Starts the oscillator running in the background (silently at amp 0)—it will now respond to amplitude changes from collisions
userStartAudio();
In modern browsers, audio playback must be started by a user gesture—this call allows audio to play from setup() without requiring a click

draw()

draw() runs continuously (default 60 frames per second) and is where all animation and drawing happen. In this sketch, draw() handles four key tasks: fading the background for trails, updating the ball's position and speed, checking collisions and playing sounds, and rendering the ball and text. The semi-transparent background rect instead of background() is the secret to the motion trail effect.

🔬 This code bounces the ball off left and right walls. What if you change *= -1 to *= -0.8 so the ball loses a little speed on each bounce? Will it eventually stop?

  if (ballX + ballRadius >= width || ballX - ballRadius <= 0) {
    baseBallSpeedX *= -1; // Reverse the base X speed
    collidedX = true;
  }

🔬 The first line maps the X position to a hue 0-360, creating a rainbow. What happens if you swap the numbers and use map(ballX, 0, width, 360, 0) so hue counts backwards?

  let ballHue = map(ballX, 0, width, 0, 360);
  fill(ballHue, 80, 100); // Dynamic hue, high saturation, full brightness
function draw() {
  // Draw the animated background gradient
  // Instead of completely clearing the background, we draw a semi-transparent rectangle
  // over it. This creates a fading trail effect.
  // The alpha value (last parameter) controls the transparency. Lower values mean longer trails.
  fill(0, 0, 100, 10); // White color (0 hue, 0 saturation, 100 brightness) with 10% opacity
  noStroke();
  rect(0, 0, width, height); // Draw a rectangle over the entire canvas

  // Calculate the current ball speed based on the multiplier
  ballSpeedX = baseBallSpeedX * speedMultiplier;
  ballSpeedY = baseBallSpeedY * speedMultiplier;

  // 1. Update the ball's position based on its speed
  ballX += ballSpeedX;
  ballY += ballSpeedY;

  // 2. Check for collisions with canvas edges and reverse speed
  // A flag to ensure sound is played only once per collision direction
  let collidedX = false;
  let collidedY = false;

  // If the ball hits the right edge or left edge
  if (ballX + ballRadius >= width || ballX - ballRadius <= 0) {
    baseBallSpeedX *= -1; // Reverse the base X speed
    collidedX = true;
  }

  // If the ball hits the bottom edge or top edge
  if (ballY + ballRadius >= height || ballY - ballRadius <= 0) {
    baseBallSpeedY *= -1; // Reverse the base Y speed
    collidedY = true;
  }

  // Play the sound if a collision occurred in either direction
  if (collidedX || collidedY) {
    // Quickly set amplitude to 0.5 (volume), then fade out over 0.3 seconds
    bounceOsc.amp(0.5, 0.05); // Turn on quickly
    bounceOsc.amp(0, 0.3);   // Fade out
  }

  // 3. Draw the ball
  // Map the ball's horizontal position to a hue value (0 to 360)
  let ballHue = map(ballX, 0, width, 0, 360);
  fill(ballHue, 80, 100); // Dynamic hue, high saturation, full brightness
  noStroke();
  ellipse(ballX, ballY, ballRadius * 2); // Draw an ellipse for the ball

  // Display current speed multiplier
  fill(0); // Black color for text
  textSize(16);
  noStroke();
  text(`Speed: x${speedMultiplier.toFixed(1)} (Up/Down Arrows, Space to Reset)`, 10, 30);
}

Line-by-line explanation (23 lines)

🔧 Subcomponents:

calculation Motion trail background fill(0, 0, 100, 10); // White color (0 hue, 0 saturation, 100 brightness) with 10% opacity noStroke(); rect(0, 0, width, height); // Draw a rectangle over the entire canvas

Instead of clearing the canvas entirely, this semi-transparent rectangle fades old frames, creating a ghosting trail effect behind the moving ball

calculation Speed multiplier application ballSpeedX = baseBallSpeedX * speedMultiplier; ballSpeedY = baseBallSpeedY * speedMultiplier;

Multiplies the base speeds by the current speed multiplier so arrow keys control overall speed without changing the direction ratios

calculation Ball position update ballX += ballSpeedX; ballY += ballSpeedY;

Moves the ball each frame by adding its current velocity to its position

conditional Left and right edge collision if (ballX + ballRadius >= width || ballX - ballRadius <= 0) { baseBallSpeedX *= -1; // Reverse the base X speed collidedX = true; }

Checks if the ball's edge has crossed the canvas width boundaries and reverses horizontal direction if so, setting the collision flag

conditional Top and bottom edge collision if (ballY + ballRadius >= height || ballY - ballRadius <= 0) { baseBallSpeedY *= -1; // Reverse the base Y speed collidedY = true; }

Checks if the ball's edge has crossed the canvas height boundaries and reverses vertical direction if so, setting the collision flag

conditional Collision sound playback if (collidedX || collidedY) { // Quickly set amplitude to 0.5 (volume), then fade out over 0.3 seconds bounceOsc.amp(0.5, 0.05); // Turn on quickly bounceOsc.amp(0, 0.3); // Fade out }

Plays a brief sound when a collision happens by jumping the oscillator's volume to 0.5 then fading it back to silence

calculation Dynamic color mapping let ballHue = map(ballX, 0, width, 0, 360);

Maps the ball's X position across the canvas width to a hue value 0-360, creating a rainbow effect as the ball moves left and right

calculation Ball rendering fill(ballHue, 80, 100); // Dynamic hue, high saturation, full brightness noStroke(); ellipse(ballX, ballY, ballRadius * 2); // Draw an ellipse for the ball

Draws the ball as a colorful circle at its current position using the dynamically calculated hue

calculation Speed display and instructions fill(0); // Black color for text textSize(16); noStroke(); text(`Speed: x${speedMultiplier.toFixed(1)} (Up/Down Arrows, Space to Reset)`, 10, 30);

Displays the current speed multiplier and instructions in the top-left corner so the user knows what the arrow keys do

fill(0, 0, 100, 10); // White color (0 hue, 0 saturation, 100 brightness) with 10% opacity
Sets the fill color to near-white with 10% opacity (the 4th parameter is alpha). In HSB mode, 0 hue with 0 saturation is grayscale white
rect(0, 0, width, height); // Draw a rectangle over the entire canvas
Draws a semi-transparent rectangle covering the entire canvas—this gradually fades the previous frame instead of completely erasing it, creating motion trails
ballSpeedX = baseBallSpeedX * speedMultiplier;
Multiplies the base X speed by the current speed multiplier—when you press Up arrow and speedMultiplier increases, this value grows, speeding up the ball
ballSpeedY = baseBallSpeedY * speedMultiplier;
Multiplies the base Y speed by the current speed multiplier—same logic as X to keep both axes synchronized
ballX += ballSpeedX;
Updates the ball's X position by adding its current speed—if ballSpeedX is 4, the ball moves 4 pixels to the right each frame
ballY += ballSpeedY;
Updates the ball's Y position by adding its current speed—same principle for vertical motion
let collidedX = false;
Declares a flag variable that tracks whether a horizontal collision happened this frame—it stays false unless the ball hits a vertical wall
let collidedY = false;
Declares a flag variable for vertical collisions—stays false unless the ball hits a horizontal wall
if (ballX + ballRadius >= width || ballX - ballRadius <= 0) {
Checks if the ball's right edge (ballX + ballRadius) has gone past the right canvas edge (width) OR its left edge (ballX - ballRadius) has gone past 0—the radius is included to detect collision accurately
baseBallSpeedX *= -1; // Reverse the base X speed
Multiplies the base speed by -1 to reverse direction—if the ball was moving right at +5 pixels/frame, it now moves left at -5 pixels/frame
collidedX = true;
Sets the flag to true so the sound-playing code below knows a collision happened
if (ballY + ballRadius >= height || ballY - ballRadius <= 0) {
Checks if the ball's bottom edge has passed the canvas bottom (height) OR its top edge has passed 0
baseBallSpeedY *= -1; // Reverse the base Y speed
Reverses the vertical direction by multiplying by -1
collidedY = true;
Sets the flag so the sound plays for vertical collisions too
if (collidedX || collidedY) {
Checks if either flag is true (meaning a collision happened in any direction this frame)
bounceOsc.amp(0.5, 0.05); // Turn on quickly
Sets the oscillator's amplitude to 0.5 (loudness) over 0.05 seconds—the quick ramp creates a percussive 'ping' sound
bounceOsc.amp(0, 0.3); // Fade out
Fades the amplitude from 0.5 back down to 0 over 0.3 seconds—this creates a quick burst followed by silence rather than an abrupt cutoff
let ballHue = map(ballX, 0, width, 0, 360);
Uses map() to convert the ball's X position (ranging 0 to width) into a hue value (ranging 0 to 360), so left side is red, middle is green, right side is blue
fill(ballHue, 80, 100); // Dynamic hue, high saturation, full brightness
Sets the fill color in HSB mode: the hue varies based on position, saturation is high (80) for vivid color, brightness is full (100) for brightness
ellipse(ballX, ballY, ballRadius * 2); // Draw an ellipse for the ball
Draws a circle (ellipse with equal width and height) centered at ballX, ballY with diameter ballRadius * 2
fill(0); // Black color for text
Switches fill to 0 (in HSB mode, this is black) so text displays in black
textSize(16);
Sets the font size to 16 pixels
text(`Speed: x${speedMultiplier.toFixed(1)} (Up/Down Arrows, Space to Reset)`, 10, 30);
Displays text at position (10, 30) showing the current speed multiplier with 1 decimal place and instructions for keyboard controls

drawBackgroundGradient()

This function creates an animated gradient background by drawing 1-pixel-tall rectangles across the canvas, each with a different hue. The gradient rotates smoothly through the color wheel because startHue changes every frame. Note that this function is defined but never called in the sketch—it was likely used during development and commented out to keep focus on the bouncing ball. You could call it in draw() before drawing the ball to see the animated background effect.

🔬 The gradient shifts at frameCount * 0.5 degrees per frame, and spans 60 degrees (the difference between startHue and endHue). What happens if you change 60 to 180 so the gradient spans half the color wheel instead?

  let startHue = (frameCount * 0.5) % 360; // Shift hue slowly
  let endHue = (startHue + 60) % 360;     // 60-degree offset from start hue
function drawBackgroundGradient() {
  noStroke(); // No border for the gradient rectangles

  let startHue = (frameCount * 0.5) % 360; // Shift hue slowly
  let endHue = (startHue + 60) % 360;     // 60-degree offset from start hue

  for (let i = 0; i <= height; i++) {
    let interHue = map(i, 0, height, startHue, endHue);
    fill(interHue, 30, 95); // Low saturation, high brightness for a subtle background
    rect(0, i, width, 1);   // Draw a rectangle across the canvas
  }
}
Line-by-line explanation (6 lines)

🔧 Subcomponents:

calculation Animated hue calculation let startHue = (frameCount * 0.5) % 360; // Shift hue slowly let endHue = (startHue + 60) % 360; // 60-degree offset from start hue

Computes two hues that shift smoothly over time and are 60 degrees apart, creating an animated gradient

for-loop Per-row gradient rendering for (let i = 0; i <= height; i++) { let interHue = map(i, 0, height, startHue, endHue); fill(interHue, 30, 95); // Low saturation, high brightness for a subtle background rect(0, i, width, 1); // Draw a rectangle across the canvas }

Draws one thin horizontal line for each pixel row, with hues interpolated between startHue and endHue, creating a smooth vertical gradient

let startHue = (frameCount * 0.5) % 360; // Shift hue slowly
Calculates a starting hue that shifts by 0.5 degrees every frame (frameCount increases by 1 each frame). The % 360 wraps it back to 0 after reaching 360, creating a continuous loop through the color wheel
let endHue = (startHue + 60) % 360; // 60-degree offset from start hue
Creates an end hue 60 degrees offset from the start hue, so the gradient always spans a 60-degree hue range that rotates smoothly
for (let i = 0; i <= height; i++) {
Loops through every pixel row from 0 to the canvas height
let interHue = map(i, 0, height, startHue, endHue);
Maps each row number (i) to a hue value between startHue and endHue, so the top row is startHue and the bottom row is endHue
fill(interHue, 30, 95); // Low saturation, high brightness for a subtle background
Sets the fill color with the interpolated hue, low saturation (30) so colors are muted, and high brightness (95) so the background is light
rect(0, i, width, 1); // Draw a rectangle across the canvas
Draws a 1-pixel-tall rectangle from the left edge to the right edge at row i—together all rows create a smooth vertical gradient

keyPressed()

keyPressed() is a p5.js function that runs once whenever any key is pressed—it's perfect for handling user input. In this sketch, it implements three features: Up/Down arrows control speed, and spacebar resets. Notice that keyCode (numeric) is used for arrow keys while key (character) is used for spacebar—different keys are reported different ways.

🔬 This block increases speed by speedIncrement and keeps it in range with constrain(). What if you change += speedIncrement to *= 1.1 so each key press multiplies speed by 10% instead of adding a fixed amount? Will the speed control feel different?

  if (keyCode === UP_ARROW) {
    speedMultiplier += speedIncrement;
    // Constrain the speed multiplier to stay within the defined range
    speedMultiplier = constrain(speedMultiplier, minSpeedMultiplier, maxSpeedMultiplier);
  }
function keyPressed() {
  if (keyCode === UP_ARROW) {
    speedMultiplier += speedIncrement;
    // Constrain the speed multiplier to stay within the defined range
    speedMultiplier = constrain(speedMultiplier, minSpeedMultiplier, maxSpeedMultiplier);
  } else if (keyCode === DOWN_ARROW) {
    speedMultiplier -= speedIncrement;
    // Constrain the speed multiplier to stay within the defined range
    speedMultiplier = constrain(speedMultiplier, minSpeedMultiplier, maxSpeedMultiplier);
  } else if (key === ' ') { // Check for spacebar
    speedMultiplier = 1.0; // Reset speed to normal
    // Generate new random base speeds for a fresh start
    baseBallSpeedX = random(3, 7);
    baseBallSpeedY = random(3, 7);
    // Re-center the ball as well
    ballX = width / 2;
    ballY = height / 2;
  }
}
Line-by-line explanation (11 lines)

🔧 Subcomponents:

conditional Up arrow speed increase if (keyCode === UP_ARROW) { speedMultiplier += speedIncrement; // Constrain the speed multiplier to stay within the defined range speedMultiplier = constrain(speedMultiplier, minSpeedMultiplier, maxSpeedMultiplier); }

Increases the speed multiplier by speedIncrement when Up arrow is pressed, then clamps it between min and max values

conditional Down arrow speed decrease } else if (keyCode === DOWN_ARROW) { speedMultiplier -= speedIncrement; // Constrain the speed multiplier to stay within the defined range speedMultiplier = constrain(speedMultiplier, minSpeedMultiplier, maxSpeedMultiplier); }

Decreases the speed multiplier by speedIncrement when Down arrow is pressed, then clamps it between min and max values

conditional Spacebar reset } else if (key === ' ') { // Check for spacebar speedMultiplier = 1.0; // Reset speed to normal // Generate new random base speeds for a fresh start baseBallSpeedX = random(3, 7); baseBallSpeedY = random(3, 7); // Re-center the ball as well ballX = width / 2; ballY = height / 2; }

Resets the ball to its initial state: normal speed, new random direction, and center position

if (keyCode === UP_ARROW) {
Checks if the key pressed was the Up arrow—keyCode is a special variable in p5.js that holds the numeric code of the last key pressed
speedMultiplier += speedIncrement;
Increases the speed multiplier by speedIncrement (default 0.1), making the ball move faster
speedMultiplier = constrain(speedMultiplier, minSpeedMultiplier, maxSpeedMultiplier);
constrain() clamps the value between a minimum and maximum—without this, the speed could become infinite if you held Down. It keeps speedMultiplier between 0.2 and 3.0
} else if (keyCode === DOWN_ARROW) {
Checks if the key pressed was the Down arrow—else if means this only runs if the previous condition (Up arrow) was false
speedMultiplier -= speedIncrement;
Decreases the speed multiplier, making the ball move slower
} else if (key === ' ') { // Check for spacebar
Checks if the key pressed was a spacebar—note this uses key (the actual character) instead of keyCode because spacebar is easier to detect as a space character
speedMultiplier = 1.0; // Reset speed to normal
Sets the speed multiplier back to 1.0, restoring normal speed
baseBallSpeedX = random(3, 7);
Generates new random X speed between 3 and 7 pixels per frame
baseBallSpeedY = random(3, 7);
Generates new random Y speed between 3 and 7 pixels per frame
ballX = width / 2;
Re-centers the ball horizontally
ballY = height / 2;
Re-centers the ball vertically

windowResized()

windowResized() is called automatically by p5.js whenever the browser window is resized. In this sketch, it ensures the canvas expands or shrinks with the window, and re-centers the ball so it doesn't disappear. This is how the sketch stays responsive—without it, the canvas would stay a fixed size.

function windowResized() {
  resizeCanvas(windowWidth, windowHeight);
  // Called when preview panel is resized
  // Re-center the ball if the canvas size changes significantly
  ballX = width / 2;
  ballY = height / 2;
}
Line-by-line explanation (3 lines)

🔧 Subcomponents:

calculation Canvas resizing resizeCanvas(windowWidth, windowHeight);

Resizes the canvas to match the current window dimensions when the window is resized

calculation Ball repositioning on resize ballX = width / 2; ballY = height / 2;

Re-centers the ball after resize so it doesn't end up off-screen or in a weird position

resizeCanvas(windowWidth, windowHeight);
p5.js automatically calls windowResized() whenever the window is resized—resizeCanvas() updates the canvas size to match
ballX = width / 2;
Re-centers the ball horizontally after the canvas size changes
ballY = height / 2;
Re-centers the ball vertically after the canvas size changes

📦 Key Variables

ballX number

Stores the ball's horizontal position on the canvas in pixels

let ballX = 200;
ballY number

Stores the ball's vertical position on the canvas in pixels

let ballY = 200;
baseBallSpeedX number

Stores the initial random horizontal velocity (pixels per frame) that gets reversed on wall bounces

let baseBallSpeedX = 5;
baseBallSpeedY number

Stores the initial random vertical velocity (pixels per frame) that gets reversed on wall bounces

let baseBallSpeedY = 3;
ballSpeedX number

Stores the current horizontal velocity (base speed × multiplier) that actually moves the ball each frame

let ballSpeedX = 5;
ballSpeedY number

Stores the current vertical velocity (base speed × multiplier) that actually moves the ball each frame

let ballSpeedY = 3;
ballRadius number

Radius of the ball in pixels—used both to draw it and to detect collisions with accurate edge boundaries

let ballRadius = 20;
speedMultiplier number

A value (0.2–3.0) that scales the base speeds up or down in response to arrow key presses

let speedMultiplier = 1.0;
minSpeedMultiplier number

The slowest the ball can be set to go when using arrow keys

let minSpeedMultiplier = 0.2;
maxSpeedMultiplier number

The fastest the ball can be set to go when using arrow keys

let maxSpeedMultiplier = 3.0;
speedIncrement number

How much the speed multiplier changes with each Up or Down arrow key press

let speedIncrement = 0.1;
bounceOsc object

A p5.sound oscillator object that generates the triangle-wave 'ping' sound when the ball hits a wall

let bounceOsc = new p5.Oscillator();

🔧 Potential Improvements (4)

Here are some ways this code could be enhanced:

BUG draw() collision detection

Ball can visually overlap the canvas edge if speed is very high (>30 pixels/frame) before the next collision check

💡 Clamp the ball position to stay within bounds: ballX = constrain(ballX, ballRadius, width - ballRadius); ballY = constrain(ballY, ballRadius, height - ballRadius);

FEATURE keyPressed()

Only one key per frame can be detected, so holding Up and Down simultaneously doesn't toggle features

💡 Use keyIsDown(UP_ARROW) in draw() to check if keys are currently held down, allowing multi-key input

PERFORMANCE draw()

The text() call happens every frame, but it displays the same value for multiple frames—textSize() and fill() are also set redundantly

💡 Move text color and size setup outside draw() or into a separate function called once, not every frame

STYLE setup() and draw()

The oscillator is created in setup() but never explicitly stopped—if the sketch reloads, background oscillators may accumulate in the browser's audio context

💡 Add bounceOsc.stop(); at the end of setup() before creating a new one, or implement cleanup logic in a window.beforeunload handler

🔄 Code Flow

Code flow showing preload, setup, draw, drawbackgroundgradient, keypressed, windowresized

💡 Click on function names in the diagram to jump to their code

graph TD start[Start] --> setup[setup] setup --> canvas-creation[Canvas Creation] setup --> color-mode-setup[Color Mode Setup] setup --> ball-position-init[Ball Position Init] setup --> oscillator-creation[Oscillator Creation] setup --> draw[draw loop] click setup href "#fn-setup" click canvas-creation href "#sub-canvas-creation" click color-mode-setup href "#sub-color-mode-setup" click ball-position-init href "#sub-ball-position-init" click oscillator-creation href "#sub-oscillator-creation" draw --> trail-effect[Trail Effect] draw --> speed-calculation[Speed Calculation] draw --> position-update[Position Update] draw --> horizontal-collision[Horizontal Collision] draw --> vertical-collision[Vertical Collision] draw --> sound-trigger[Sound Trigger] draw --> hue-mapping[Hue Mapping] draw --> ball-drawing[Ball Drawing] draw --> text-display[Text Display] click draw href "#fn-draw" click trail-effect href "#sub-trail-effect" click speed-calculation href "#sub-speed-calculation" click position-update href "#sub-position-update" click horizontal-collision href "#sub-horizontal-collision" click vertical-collision href "#sub-vertical-collision" click sound-trigger href "#sub-sound-trigger" click hue-mapping href "#sub-hue-mapping" click ball-drawing href "#sub-ball-drawing" click text-display href "#sub-text-display" keypressed[keyPressed] --> up-arrow-handler[Up Arrow Handler] keypressed --> down-arrow-handler[Down Arrow Handler] keypressed --> spacebar-reset[Spacebar Reset] click keypressed href "#fn-keypressed" click up-arrow-handler href "#sub-up-arrow-handler" click down-arrow-handler href "#sub-down-arrow-handler" click spacebar-reset href "#sub-spacebar-reset" windowresized[windowResized] --> canvas-resize[Canvas Resize] windowresized --> ball-reposition[Ball Reposition] click windowresized href "#fn-windowresized" click canvas-resize href "#sub-canvas-resize" click ball-reposition href "#sub-ball-reposition"

❓ Frequently Asked Questions

What visual effects does the p5.js sketch create?

The sketch generates a dynamic canvas with a ball that bounces around, utilizing HSB color mode for vibrant color manipulation.

How can users interact with the sketch?

Users can control the ball's speed by pressing keys, allowing for an interactive experience as they adjust the speed multiplier.

What creative coding techniques are showcased in this sketch?

This sketch demonstrates procedural sound generation using an oscillator and incorporates responsive design principles for the canvas size.

Preview

Sketch 2026-05-15 16:34 - p5.js creative coding sketch preview
Sketch Preview
Code flow diagram showing the structure of Sketch 2026-05-15 16:34 - Code flow showing preload, setup, draw, drawbackgroundgradient, keypressed, windowresized
Code Flow Diagram