Sketch 2026-05-15 22:54 by cbun

This sketch creates a cozy nighttime scene with a crackling fire pit in front of a house under a starry sky. The fire flickers realistically using Perlin noise, sparks drift upward, and generative ambient music plays a breathing G-Major 7th chord when the user taps to start.

🧪 Try This!

Experiment with the code by making these changes:

  1. Make the fire flicker faster — Increase the Perlin noise advance rate so the fire height and width change rapidly, creating an erratic, intense blaze
  2. Double the spark rate — More sparks will emit from the fire, creating a denser shower of embers that rise and fade
  3. Make the fire twice as tall — The flame height range increases, so the fire grows much higher on the canvas
  4. Change the window light color to blue — The house windows glow cool blue instead of warm yellow, like interior electric lights instead of candlelight
  5. Slow down the audio breathing — The ambient chord swells and fades much more slowly, creating a deeper meditative rhythm
  6. Increase starfield density — More stars fill the night sky, creating a richer, more crowded celestial backdrop
Prefer the full editor? Open it there →

📖 About This Sketch

This sketch creates a calming nighttime scene: a cozy house silhouette, a roaring fire pit surrounded by stones, and a starry sky overhead. The fire flickers naturally using Perlin noise, embers drift upward with wind-like swirling, and when you tap the canvas, generative ambient music begins breathing in and out. It demonstrates layered drawing (depth sorting with z-order), performance optimization through pre-calculated geometry, Perlin noise for organic animation, the p5.sound library for procedural audio, and shadow effects for atmospheric depth.

The code is organized into setup and scene initialization, a main draw loop that layers nine different visual elements from sky to sparks, specialized functions for each major scene component (house, fire, stones, logs), and dedicated audio functions that create breathing ambient music tied to the frame rate. By studying this sketch you will learn how to compose complex scenes by layering simple shapes, how to fake 3D depth using 2D sorting, how to use noise for natural-looking variation, and how to generate atmospheric sound that evolves over time.

⚙️ How It Works

  1. When the page loads, setup() creates a full-window canvas and initScene() pre-calculates the positions of 200 stars and 16 fire pit stones arranged in a circle—this happens once at the start to avoid expensive calculations during animation.
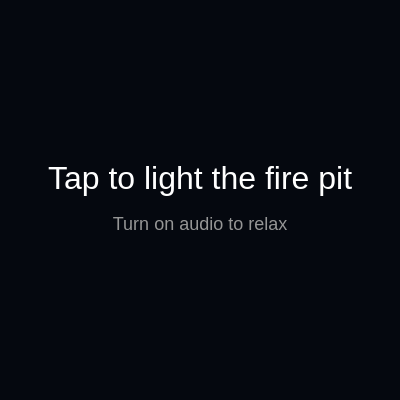
  2. The user sees a start screen with text 'Tap to light the fire pit'. When they click or tap, mousePressed() or touchStarted() triggers startExperience(), which enables audio and creates four sine wave oscillators tuned to D3, G3, B3, and F#4 (a deep G-Major 7th chord).
  3. Every frame, draw() advances noiseOffset by 0.04, generating two Perlin noise values (flicker1 and flicker2) that vary smoothly between 0 and 1—these drive the fire's height, width, and glow intensity, creating organic flickering.
  4. The scene is drawn in nine layered steps: background sky with moon and twinkling stars, the silhouetted house with glowing windows, the patio ground with firelight glow, back-facing stones of the fire pit, wooden logs, the multi-layered fire (outer red, middle orange, inner yellow, white core), front-facing stones, and finally sparks that drift upward.
  5. handleSparks() creates new sparks at 40% probability each frame near the fire base, updates their positions with a wind sway effect using sine(frameCount), and removes them when their alpha life value reaches zero.
  6. updateAudioBreathe() modulates the amplitude of all four oscillators in and out with different sine curves offset by 1, 2, and 3 frames—creating the illusion that the ambient chord is breathing slowly and peacefully.

🎓 Concepts You'll Learn

Perlin noiseLayered drawing and depth sortingParticle systemsGenerative ambient soundProcedural animationCanvas layeringPerformance optimization

📝 Code Breakdown

setup()

setup() runs exactly once when the sketch starts. It is where you initialize the canvas size and call setup-time helper functions. By pre-computing expensive geometry here, we avoid recalculating it 60 times per second in the draw loop.

function setup() {
  createCanvas(windowWidth, windowHeight);
  noStroke();
  initScene();
}
Line-by-line explanation (3 lines)
createCanvas(windowWidth, windowHeight);
Creates a canvas that fills the entire browser window, making the scene immersive and full-screen
noStroke();
Disables outlines on all shapes by default—the scene uses solid fills for a smoother, less technical appearance
initScene();
Calls the initScene function to pre-compute the positions of all stars and fire pit stones once, before animation begins

initScene()

initScene() pre-calculates all static geometry once at startup and whenever the window resizes. By storing star and stone positions in arrays ahead of time, draw() avoids expensive calculations 60 times per second. The stone depth-sorting (isFront flag and sort) is the key to faking 3D depth: objects that are lower on the screen (higher y-value) draw last, so they appear in front.

function initScene() {
  stars = [];
  stones = [];
  
  // 1. Generate Stars
  for (let i = 0; i < 200; i++) {
    stars.push({
      x: random(width),
      y: random(height * 0.6), // Stars only in the sky
      size: random(1, 3),
      twinkleOffset: random(100)
    });
  }

  // 2. Generate Fire Pit Stones
  let pitWidth = min(width * 0.4, 300);
  let pitHeight = pitWidth * 0.35;
  
  // Create a ring of stones
  for (let a = 0; a < TWO_PI; a += PI / 8) {
    // Add some randomness to the perfect circle
    let rOffset = random(0.8, 1.2);
    stones.push({
      x: cos(a) * (pitWidth / 2) * rOffset,
      y: sin(a) * (pitHeight / 2) * rOffset,
      sizeX: random(40, 65),
      sizeY: random(25, 40),
      color: random(60, 100),
      isFront: sin(a) > 0 // Determines if it draws in front of or behind the fire
    });
  }
  
  // Sort stones by Y axis so they overlap correctly (fake depth)
  stones.sort((a, b) => a.y - b.y);
}
Line-by-line explanation (16 lines)

🔧 Subcomponents:

for-loop Star generation loop for (let i = 0; i < 200; i++) {

Creates 200 star objects with random positions in the upper 60% of the canvas, each with a unique twinkle timing offset

for-loop Stone ring generation loop for (let a = 0; a < TWO_PI; a += PI / 8) {

Distributes 16 stones in a circular arrangement around the fire pit center, adding random size variation to break geometric perfection

calculation Depth sorting by Y-axis stones.sort((a, b) => a.y - b.y);

Sorts stones from top to bottom so they draw in the correct visual order, creating the illusion of depth and 3D space

stars = [];
Clears the stars array to empty before refilling it, ensuring old stars don't duplicate if initScene() is called again
stones = [];
Clears the stones array to prepare for a fresh generation of fire pit stones
for (let i = 0; i < 200; i++) {
Loops 200 times to create 200 individual star objects
x: random(width),
Picks a random horizontal position anywhere across the canvas width for this star
y: random(height * 0.6),
Places the star in only the upper 60% of the canvas, keeping stars out of the ground and house areas
size: random(1, 3),
Gives each star a random size between 1 and 3 pixels to create visual variety
twinkleOffset: random(100)
Assigns each star a unique offset value used later in drawSky() to offset their twinkling animation timing
let pitWidth = min(width * 0.4, 300);
Calculates the fire pit's width as 40% of the canvas width, but caps it at 300 pixels so it doesn't get absurdly large on huge screens
let pitHeight = pitWidth * 0.35;
Makes the pit height proportional to its width (35% of width) so it looks like a proper ellipse rather than a flat line
for (let a = 0; a < TWO_PI; a += PI / 8) {
Loops from 0 to 2π (a full circle) in steps of π/8, creating exactly 16 evenly-spaced angles around the circle
let rOffset = random(0.8, 1.2);
Generates a random scale factor between 0.8 and 1.2 that will be multiplied into the stone's distance from center, making the circle slightly irregular and natural-looking
x: cos(a) * (pitWidth / 2) * rOffset,
Converts the angle 'a' into an x-coordinate on a circle using cosine, scaled by the pit width and the random offset
y: sin(a) * (pitHeight / 2) * rOffset,
Converts the angle 'a' into a y-coordinate on an ellipse using sine, creating the vertical spread of the stone ring
color: random(60, 100),
Assigns each stone a random gray value between 60 and 100, so some appear darker and some lighter
isFront: sin(a) > 0
Uses trigonometry to determine depth: if sin(a) is positive (bottom half of circle), the stone draws in front; if negative (top half), it draws behind the fire
stones.sort((a, b) => a.y - b.y);
Sorts all stones by their y-coordinate from smallest (top) to largest (bottom), so stones draw in correct visual order to create depth

draw()

The draw() function is the heartbeat of the animation, running 60 times per second. Its structure shows the key insight of this sketch: layering. By drawing elements in a careful order (sky first, then house, patio, back stones, fire, front stones, sparks last), we create the illusion of a complete 3D scene using only 2D shapes. The Perlin noise values (flicker1 and flicker2) drive organic animation: they vary smoothly frame-to-frame, never jumping erratically.

🔬 These four lines draw back stones, logs, fire, and front stones in a specific order to create depth. What happens if you swap the order of the back and front stone calls—which one draws on top now?

  // --- 4. Back of the Fire Pit ---
  drawStones(cx, fireY, false); // Draw stones behind the fire
  
  // --- 5. Logs ---
  drawLogs(cx, fireY);

  // --- 6. The Fire ---
  drawFire(cx, fireY - 15, flicker1, flicker2);

  // --- 7. Front of the Fire Pit ---
  drawStones(cx, fireY, true); // Draw stones in front of the fire
function draw() {
  if (!started) {
    drawStartScreen();
    return;
  }

  // Scene Coordinates
  let cx = width / 2;
  let groundY = height * 0.65;
  let fireY = height * 0.85; // Move fire pit lower on screen

  // Smooth Perlin noise for flickering
  noiseOffset += 0.04;
  let flicker1 = noise(noiseOffset);
  let flicker2 = noise(noiseOffset + 100);

  updateAudioBreathe();

  // --- 1. Background (Sky & Stars) ---
  background(8, 12, 22);
  drawSky();

  // --- 2. The House (Midground) ---
  drawHouse(cx, groundY, flicker1);

  // --- 3. The Ground / Patio ---
  drawPatio(groundY, fireY, flicker1);

  // --- 4. Back of the Fire Pit ---
  drawStones(cx, fireY, false); // Draw stones behind the fire
  
  // --- 5. Logs ---
  drawLogs(cx, fireY);

  // --- 6. The Fire ---
  drawFire(cx, fireY - 15, flicker1, flicker2);

  // --- 7. Front of the Fire Pit ---
  drawStones(cx, fireY, true); // Draw stones in front of the fire

  // --- 8. Sparks ---
  let flameW = map(flicker1, 0, 1, 60, 80);
  handleSparks(cx, fireY - 40, flameW);
}
Line-by-line explanation (20 lines)

🔧 Subcomponents:

conditional Start screen guard if (!started) {

Shows the tap-to-start screen until the user interacts with the page

calculation Perlin noise flickering values noiseOffset += 0.04; let flicker1 = noise(noiseOffset); let flicker2 = noise(noiseOffset + 100);

Generates two smooth, slowly-changing random values between 0 and 1 that drive the fire's natural-looking flicker

sequence Nine-layer scene composition background(8, 12, 22); drawSky(); drawHouse(cx, groundY, flicker1); drawPatio(groundY, fireY, flicker1); drawStones(cx, fireY, false); drawLogs(cx, fireY); drawFire(cx, fireY - 15, flicker1, flicker2); drawStones(cx, fireY, true); handleSparks(cx, fireY - 40, flameW);

Layers nine visual elements in depth order: sky, house, patio, back stones, logs, fire, front stones, sparks—creating the illusion of a complete 3D scene

if (!started) {
Checks if the scene has started (if the user has tapped/clicked yet)
drawStartScreen();
Shows the start screen with instructions to tap
return;
Exits the draw function early, skipping the rest of the scene rendering until the user starts the experience
let cx = width / 2;
Stores the horizontal center of the canvas so all scene elements can reference it
let groundY = height * 0.65;
Places the ground 65% down the screen, creating a composition with more sky above than ground below
let fireY = height * 0.85;
Positions the fire pit near the bottom of the screen for visual stability and to leave room for sparks to rise
noiseOffset += 0.04;
Slowly advances through the Perlin noise function by 0.04 each frame, creating smooth organic variation
let flicker1 = noise(noiseOffset);
Samples the Perlin noise at the current offset, returning a smooth random value between 0 and 1 that controls fire height and intensity
let flicker2 = noise(noiseOffset + 100);
Samples the Perlin noise at a different offset (100 units away) to get an independent flickering value that varies differently from flicker1, creating more complex movement
updateAudioBreathe();
Updates the audio oscillator amplitudes to create the breathing ambient music effect
background(8, 12, 22);
Fills the entire canvas with a very dark blue color, clearing the previous frame and establishing the night sky
drawSky();
Draws the moon, moon glow, and all 200 twinkling stars
drawHouse(cx, groundY, flicker1);
Draws the silhouetted house with glowing windows and door, passing the firelight flicker so the house glows in sync with the fire
drawPatio(groundY, fireY, flicker1);
Draws the ground and patio with firelight glow that gets brighter and dimmer with the fire's flicker
drawStones(cx, fireY, false);
Draws all back-facing stones (upper half of the ring) behind the fire so they appear distant
drawLogs(cx, fireY);
Draws three wooden logs crossing the fire pit
drawFire(cx, fireY - 15, flicker1, flicker2);
Draws the layered flames (red outer, orange middle, yellow inner, white core) with shadows, using both flicker values for complex movement
drawStones(cx, fireY, true);
Draws all front-facing stones (lower half of the ring) in front of the fire so they appear close to the viewer
let flameW = map(flicker1, 0, 1, 60, 80);
Converts the flicker1 value (0-1) to a flame width (60-80 pixels) so sparks originate from the widest part of the fire
handleSparks(cx, fireY - 40, flameW);
Creates new sparks, updates existing ones, and draws them all

drawSky()

drawSky() demonstrates two important animation techniques: layered opacity for atmospheric depth (the moon glow halos get fainter with lower alpha values), and per-object offset animation (each star's twinkleOffset makes it twinkle independently). The sine wave oscillation creates a smooth, natural-looking variation—the star doesn't blink on and off, it gently fades in and out.

🔬 This loop uses sin(frameCount * 0.03 + s.twinkleOffset) to make stars twinkle. What happens if you change 0.03 to 0.1? The stars twinkle faster or slower?

  for (let s of stars) {
    let alpha = map(sin(frameCount * 0.03 + s.twinkleOffset), -1, 1, 20, 255);
    fill(255, 255, 255, alpha);
    ellipse(s.x, s.y, s.size, s.size);
  }
function drawSky() {
  // Moon
  fill(240, 245, 255, 200);
  ellipse(width * 0.15, height * 0.15, 80, 80);
  // Moon glow
  fill(240, 245, 255, 20);
  ellipse(width * 0.15, height * 0.15, 120, 120);
  ellipse(width * 0.15, height * 0.15, 200, 200);

  // Twinkling stars
  for (let s of stars) {
    let alpha = map(sin(frameCount * 0.03 + s.twinkleOffset), -1, 1, 20, 255);
    fill(255, 255, 255, alpha);
    ellipse(s.x, s.y, s.size, s.size);
  }
}
Line-by-line explanation (8 lines)

🔧 Subcomponents:

calculation Moon and glow rendering ellipse(width * 0.15, height * 0.15, 80, 80); // Moon glow fill(240, 245, 255, 20); ellipse(width * 0.15, height * 0.15, 120, 120); ellipse(width * 0.15, height * 0.15, 200, 200);

Draws a bright moon and two larger, fading glow halos around it to create a soft atmospheric effect

for-loop Star twinkling animation for (let s of stars) { let alpha = map(sin(frameCount * 0.03 + s.twinkleOffset), -1, 1, 20, 255);

Loops through every star and animates its brightness using a sine wave, offset by each star's unique twinkleOffset so they don't all brighten at once

fill(240, 245, 255, 200);
Sets the fill color to nearly white with high opacity (200) for a bright moon
ellipse(width * 0.15, height * 0.15, 80, 80);
Draws an 80-pixel diameter moon positioned at 15% from the left and 15% from the top—a classic upper-left placement
fill(240, 245, 255, 20);
Lowers the opacity dramatically to 20 for a subtle, transparent glow
ellipse(width * 0.15, height * 0.15, 120, 120); ellipse(width * 0.15, height * 0.15, 200, 200);
Draws two concentric halos around the moon at 120 and 200 pixels diameter, each very faint, creating an atmospheric soft-focus effect
for (let s of stars) {
Loops through every star object stored in the stars array
let alpha = map(sin(frameCount * 0.03 + s.twinkleOffset), -1, 1, 20, 255);
Calculates a brightness value: sin(frameCount * 0.03 + s.twinkleOffset) oscillates between -1 and 1 as frames pass, and map() converts that to an alpha between 20 (dim) and 255 (bright). The s.twinkleOffset ensures each star reaches peak brightness at a different frame
fill(255, 255, 255, alpha);
Sets the fill to white with the calculated alpha, so this star appears at the computed brightness
ellipse(s.x, s.y, s.size, s.size);
Draws a circular star at its pre-computed x and y position, using its pre-computed size

drawHouse()

drawHouse() showcases the power of compositing: a dark silhouette (house body and roof), an animated transparent overlay (firelight glow that flickers), and warm details (glowing windows, door frame) combine to create a cozy nighttime scene. The glowAlpha that maps flicker to opacity is key—it ties the visual state of the house to the fire's animation without needing to redraw the geometry.

function drawHouse(cx, groundY, flicker) {
  let houseW = min(width * 0.8, 700);
  let houseH = 250;
  let houseX = cx - houseW / 2;
  let houseY = groundY - houseH;

  // House Base Shadow (dark silhouette)
  fill(12, 15, 20);
  rect(houseX, houseY, houseW, houseH);
  
  // Roof
  fill(8, 10, 15);
  triangle(houseX - 40, houseY, cx, houseY - 150, houseX + houseW + 40, houseY);

  // Firelight reflection on the house facade
  let glowAlpha = map(flicker, 0, 1, 0, 40);
  fill(255, 140, 50, glowAlpha);
  rect(houseX, houseY, houseW, houseH);

  // Warm glowing windows
  let winW = 60;
  let winH = 90;
  fill(255, 200, 100);
  // Left window
  rect(houseX + houseW * 0.2, houseY + houseH * 0.4, winW, winH, 5);
  // Right window
  rect(houseX + houseW * 0.8 - winW, houseY + houseH * 0.4, winW, winH, 5);
  
  // Window frames
  fill(20, 15, 10);
  rect(houseX + houseW * 0.2 + winW/2 - 2, houseY + houseH * 0.4, 4, winH);
  rect(houseX + houseW * 0.2, houseY + houseH * 0.4 + winH/2 - 2, winW, 4);
  
  rect(houseX + houseW * 0.8 - winW + winW/2 - 2, houseY + houseH * 0.4, 4, winH);
  rect(houseX + houseW * 0.8 - winW, houseY + houseH * 0.4 + winH/2 - 2, winW, 4);

  // Door
  fill(25, 20, 15);
  rect(cx - 35, groundY - 120, 70, 120);
}
Line-by-line explanation (18 lines)

🔧 Subcomponents:

calculation Firelight reflection let glowAlpha = map(flicker, 0, 1, 0, 40); fill(255, 140, 50, glowAlpha); rect(houseX, houseY, houseW, houseH);

Maps the flickering fire value to an alpha that creates an orange glow on the house that brightens and dims in sync with the fire

sequence Window panes and frames // Left window rect(houseX + houseW * 0.2, houseY + houseH * 0.4, winW, winH, 5); // Right window rect(houseX + houseW * 0.8 - winW, houseY + houseH * 0.4, winW, winH, 5); // Window frames

Draws four window panes (two windows with vertical and horizontal dividers) to add detail and warmth to the house facade

let houseW = min(width * 0.8, 700);
Calculates the house width as 80% of the canvas, but never larger than 700 pixels so it stays proportional on huge screens
let houseH = 250;
Sets the house height to a fixed 250 pixels
let houseX = cx - houseW / 2;
Centers the house horizontally by subtracting half its width from the canvas center
let houseY = groundY - houseH;
Positions the house so its bottom edge sits at groundY
fill(12, 15, 20);
Sets the fill to a very dark blue-gray for the silhouetted house body
rect(houseX, houseY, houseW, houseH);
Draws the main house rectangle as a dark silhouette
fill(8, 10, 15);
Sets the fill to an even darker color for the roof
triangle(houseX - 40, houseY, cx, houseY - 150, houseX + houseW + 40, houseY);
Draws a triangle roof with the apex at the center 150 pixels above the house top, and base points extending 40 pixels beyond the house sides
let glowAlpha = map(flicker, 0, 1, 0, 40);
Converts the flicker value (0-1) to an alpha (0-40) so when the fire is dim (flicker near 0), the house glow is nearly invisible, and when the fire is bright (flicker near 1), the glow is at 40 alpha
fill(255, 140, 50, glowAlpha);
Sets the fill to a warm orange with the calculated alpha, simulating firelight illuminating the house facade
rect(houseX, houseY, houseW, houseH);
Draws the same rectangle again with the orange glow fill on top of the dark silhouette
fill(255, 200, 100);
Sets the fill to warm yellow-orange for glowing window panes
rect(houseX + houseW * 0.2, houseY + houseH * 0.4, winW, winH, 5);
Draws the left window at 20% along the house width, 40% down its height, with 5-pixel corner rounding
rect(houseX + houseW * 0.8 - winW, houseY + houseH * 0.4, winW, winH, 5);
Draws the right window at 80% along the house width (minus its own width to center it there), with the same vertical position
fill(20, 15, 10);
Sets the fill to very dark brown for window frames and the door
rect(houseX + houseW * 0.2 + winW/2 - 2, houseY + houseH * 0.4, 4, winH);
Draws a thin vertical divider line (4 pixels wide) down the center of the left window
rect(houseX + houseW * 0.2, houseY + houseH * 0.4 + winH/2 - 2, winW, 4);
Draws a thin horizontal divider line (4 pixels tall) across the middle of the left window, creating a 4-pane effect
rect(cx - 35, groundY - 120, 70, 120);
Draws a centered dark door that is 70 pixels wide and 120 pixels tall

drawPatio()

drawPatio() demonstrates atmospheric lighting: the firelight casts a glow that animates with the fire's flicker. By drawing two concentric ellipses with different alphas, we create the illusion of light radiating outward and fading with distance—a simple but effective way to tie the patio's appearance to the fire's animation.

function drawPatio(groundY, fireY, flicker) {
  // Deep dark grass/yard
  fill(10, 12, 18);
  rect(0, groundY, width, height - groundY);

  // Patio base
  fill(25, 25, 30);
  ellipse(width / 2, fireY, min(width * 0.9, 700), 250);

  // Cast light on the patio from the fire
  let patioGlow = map(flicker, 0, 1, 10, 30);
  fill(255, 120, 30, patioGlow);
  ellipse(width / 2, fireY, min(width * 0.8, 600), 200);
  fill(255, 150, 50, patioGlow + 10);
  ellipse(width / 2, fireY, min(width * 0.5, 400), 120);
}
Line-by-line explanation (9 lines)

🔧 Subcomponents:

calculation Ground and patio base fill(10, 12, 18); rect(0, groundY, width, height - groundY); // Patio base fill(25, 25, 30); ellipse(width / 2, fireY, min(width * 0.9, 700), 250);

Establishes two layers of ground: deep dark yard below, and a lighter patio ellipse centered on the fire

calculation Flickering firelight glow on patio let patioGlow = map(flicker, 0, 1, 10, 30); fill(255, 120, 30, patioGlow); ellipse(width / 2, fireY, min(width * 0.8, 600), 200); fill(255, 150, 50, patioGlow + 10); ellipse(width / 2, fireY, min(width * 0.5, 400), 120);

Draws two concentric orange-red ellipses with alpha tied to the fire's flicker, creating the visual effect of light radiating from the fire pit outward and dimming with distance

fill(10, 12, 18);
Sets the fill to deep dark blue-black for the yard beyond the firelight
rect(0, groundY, width, height - groundY);
Fills the entire lower portion of the screen from groundY down to the bottom with dark color, representing unlit grass
fill(25, 25, 30);
Sets the fill to a medium-dark gray for the patio ground
ellipse(width / 2, fireY, min(width * 0.9, 700), 250);
Draws an ellipse representing the patio, centered at the fire pit, scaled to 90% of canvas width (capped at 700) and 250 pixels tall
let patioGlow = map(flicker, 0, 1, 10, 30);
Converts the flicker value (0-1) to a glow alpha (10-30) so the firelight grows brighter and dimmer
fill(255, 120, 30, patioGlow);
Sets the fill to a warm orange with the mapped alpha for the outermost firelight circle
ellipse(width / 2, fireY, min(width * 0.8, 600), 200);
Draws a large orange glow ellipse representing light spreading from the fire
fill(255, 150, 50, patioGlow + 10);
Sets the fill to a slightly lighter orange with alpha boosted by 10, creating a brighter inner ring of firelight
ellipse(width / 2, fireY, min(width * 0.5, 400), 120);
Draws a smaller, brighter inner glow ellipse, creating a concentrated light effect around the fire

drawStones()

drawStones() is called twice per frame: once with drawFrontStones = false to draw distant stones behind the fire, and once with true to draw close stones in front. The isFront flag (set during initScene() based on trigonometry) controls which stones draw at which depth. Front stones also get a warm color shift to simulate firelight hitting them more directly—a subtle detail that makes the lighting feel physically plausible.

function drawStones(cx, cy, drawFrontStones) {
  for (let s of stones) {
    // Only draw the stones assigned to this layer (front or back)
    if (s.isFront === drawFrontStones) {
      fill(s.color, s.color * 0.95, s.color * 0.9);
      stroke(s.color * 0.6);
      strokeWeight(2);
      
      // If it's a front stone, add a slight warm tint from the fire
      if (s.isFront) {
        fill(s.color + 30, s.color * 0.95 + 15, s.color * 0.9);
      }

      ellipse(cx + s.x, cy + s.y, s.sizeX, s.sizeY);
    }
  }
  noStroke();
}
Line-by-line explanation (9 lines)

🔧 Subcomponents:

conditional Front/back layer filter if (s.isFront === drawFrontStones) {

Ensures only stones marked for this layer (front or back) draw, enabling two separate calls to create proper depth

conditional Front stone firelight warming if (s.isFront) { fill(s.color + 30, s.color * 0.95 + 15, s.color * 0.9); }

Adds orange warmth to front stones by boosting red and green channels, simulating firelight reflection

for (let s of stones) {
Loops through all stone objects in the stones array
if (s.isFront === drawFrontStones) {
Only processes stones that match the layer being drawn (if drawFrontStones is true, only draw stones with isFront true)
fill(s.color, s.color * 0.95, s.color * 0.9);
Sets the fill to a slightly desaturated gray using the stone's color value for red, a slightly darker value for green, and an even darker for blue
stroke(s.color * 0.6);
Sets the stroke color to a darker gray (60% of the stone's base color)
strokeWeight(2);
Sets the outline thickness to 2 pixels for definition
if (s.isFront) {
Checks if this is a front-facing stone to apply warm firelight coloring
fill(s.color + 30, s.color * 0.95 + 15, s.color * 0.9);
Shifts the color warmer by adding 30 to red and 15 to green, simulating orange firelight illuminating the stone
ellipse(cx + s.x, cy + s.y, s.sizeX, s.sizeY);
Draws an ellipse for the stone at the fire pit center (cx, cy) plus the stone's offset position, with the stone's pre-computed size
noStroke();
Turns off stroking for all subsequent shapes to clean up the drawing context

drawLogs()

drawLogs() is simple but effective: three thick brown lines with rounded caps create the illusion of wooden logs. The crisscross arrangement looks natural and unplanned. Note that this function is called after back stones and before the fire, so the fire draws on top—but before front stones, so stones can appear in front of the logs if needed.

function drawLogs(cx, cy) {
  stroke(30, 15, 10);
  strokeCap(ROUND);
  strokeWeight(20);
  // Log 1
  line(cx - 60, cy - 10, cx + 50, cy + 15);
  // Log 2
  line(cx + 60, cy - 20, cx - 40, cy + 25);
  // Log 3
  line(cx, cy - 30, cx + 10, cy + 30);
  noStroke();
}
Line-by-line explanation (7 lines)
stroke(30, 15, 10);
Sets the stroke color to dark brown for the wood appearance
strokeCap(ROUND);
Makes the line ends rounded instead of sharp, giving them a more realistic log appearance
strokeWeight(20);
Sets the stroke width to 20 pixels, making the logs visually substantial
line(cx - 60, cy - 10, cx + 50, cy + 15);
Draws the first log from upper-left to lower-right, crossing through the fire pit center
line(cx + 60, cy - 20, cx - 40, cy + 25);
Draws the second log from upper-right to lower-left, crisscrossing the first log
line(cx, cy - 30, cx + 10, cy + 30);
Draws a third log nearly vertically, for a more realistic three-log arrangement
noStroke();
Disables stroking for subsequent shapes to avoid unintended outlines

drawFire()

drawFire() is the visual heart of the sketch. It uses four nested teardrop shapes with progressively smaller size, brighter color (red → orange → yellow → white), and smaller shadow blur to create a convincing multi-layer flame. The flicker1 and flicker2 values drive the width and height variations independently, creating complex, organic movement. The shadow blur (drawingContext.shadowBlur) creates a glowing effect without expensive gradients—a performance optimization that still looks beautiful.

🔬 The outer flame doesn't sway, but the middle flame uses map(flicker2,0,1,-10,10) to move left and right. What if you add the same offset to the outer flame too? Will it look more or less realistic?

  // Outer Flame (Red/Orange)
  fill(220, 60, 10, 210);
  drawTeardrop(cx, fireY - flameH * 0.4, flameW * 1.5, flameH * 1.1);

  // Middle Flame (Orange)
  drawingContext.shadowBlur = 20;
  drawingContext.shadowColor = color(255, 150, 0);
  fill(255, 140, 0, 230);
  drawTeardrop(cx + map(flicker2,0,1,-10,10), fireY - flameH * 0.35, flameW * 1.1, flameH * 0.85);
function drawFire(cx, fireY, flicker1, flicker2) {
  let flameW = map(flicker1, 0, 1, 70, 90);
  let flameH = map(flicker2, 0, 1, 160, 220);

  // Ambient Glow (Performance friendly standard ellipses instead of gradients)
  let ambientAlpha = map(flicker1, 0, 1, 15, 30);
  fill(255, 100, 0, ambientAlpha);
  ellipse(cx, fireY - 50, 300, 300);
  fill(255, 150, 0, ambientAlpha);
  ellipse(cx, fireY - 50, 150, 150);

  // Setup performance-friendly localized glowing shadow
  drawingContext.shadowBlur = map(flicker1, 0, 1, 40, 80);
  drawingContext.shadowColor = color(255, 100, 0);

  // Outer Flame (Red/Orange)
  fill(220, 60, 10, 210);
  drawTeardrop(cx, fireY - flameH * 0.4, flameW * 1.5, flameH * 1.1);

  // Middle Flame (Orange)
  drawingContext.shadowBlur = 20;
  drawingContext.shadowColor = color(255, 150, 0);
  fill(255, 140, 0, 230);
  drawTeardrop(cx + map(flicker2,0,1,-10,10), fireY - flameH * 0.35, flameW * 1.1, flameH * 0.85);

  // Inner Flame (Yellow)
  drawingContext.shadowBlur = 10;
  drawingContext.shadowColor = color(255, 255, 0);
  fill(255, 220, 40, 240);
  drawTeardrop(cx, fireY - flameH * 0.3, flameW * 0.7, flameH * 0.6);

  // Core (White-hot)
  drawingContext.shadowBlur = 5;
  drawingContext.shadowColor = color(255, 255, 255);
  fill(255, 255, 220);
  drawTeardrop(cx, fireY - flameH * 0.2, flameW * 0.4, flameH * 0.3);

  drawingContext.shadowBlur = 0; // Reset
}

Line-by-line explanation (22 lines)

🔧 Subcomponents:

calculation Flickering flame dimensions let flameW = map(flicker1, 0, 1, 70, 90); let flameH = map(flicker2, 0, 1, 160, 220);

Converts the two noise-based flicker values into width and height ranges so the fire grows and shrinks organically

sequence Four-layer flame rendering // Outer Flame (Red/Orange) fill(220, 60, 10, 210); drawTeardrop(cx, fireY - flameH * 0.4, flameW * 1.5, flameH * 1.1); // Middle Flame (Orange) // ... drawTeardrop ... // Inner Flame (Yellow) // ... drawTeardrop ... // Core (White-hot) // ... drawTeardrop ...

Draws four concentric teardrop shapes from dark red outside to white-hot core, each with different size and shadow blur, creating a convincing multi-layer flame

let flameW = map(flicker1, 0, 1, 70, 90);
Converts the first noise value (0-1) to a flame width ranging from 70 to 90 pixels
let flameH = map(flicker2, 0, 1, 160, 220);
Converts the second noise value (0-1) to a flame height ranging from 160 to 220 pixels, varying independently for complex movement
let ambientAlpha = map(flicker1, 0, 1, 15, 30);
Maps the flicker to an alpha for the ambient glow halo
ellipse(cx, fireY - 50, 300, 300);
Draws a large orange glow ellipse 50 pixels above the fire base
ellipse(cx, fireY - 50, 150, 150);
Draws a brighter orange inner glow
drawingContext.shadowBlur = map(flicker1, 0, 1, 40, 80);
Sets the canvas shadow blur (glow effect) to vary with the fire's flicker, ranging from 40 to 80 pixels
drawingContext.shadowColor = color(255, 100, 0);
Sets the shadow color to orange for a warm glow
fill(220, 60, 10, 210);
Sets the fill to dark red-orange for the outer flame layer
drawTeardrop(cx, fireY - flameH * 0.4, flameW * 1.5, flameH * 1.1);
Draws the outer red teardrop at 40% of the flame height, 1.5× the width, and 1.1× the height for a large outer layer
drawingContext.shadowBlur = 20;
Reduces the shadow blur to 20 pixels for the middle flame layer
drawingContext.shadowColor = color(255, 150, 0);
Changes the shadow color to brighter orange
fill(255, 140, 0, 230);
Sets the fill to orange for the middle flame layer
drawTeardrop(cx + map(flicker2,0,1,-10,10), fireY - flameH * 0.35, flameW * 1.1, flameH * 0.85);
Draws the middle teardrop slightly offset left-right using flicker2 (±10 pixels offset), creating swaying motion
drawingContext.shadowBlur = 10;
Further reduces shadow blur for the inner yellow layer
drawingContext.shadowColor = color(255, 255, 0);
Changes shadow color to yellow
fill(255, 220, 40, 240);
Sets the fill to bright yellow for the inner flame
drawTeardrop(cx, fireY - flameH * 0.3, flameW * 0.7, flameH * 0.6);
Draws a smaller yellow teardrop at 30% flame height, 70% width, 60% height
drawingContext.shadowBlur = 5;
Minimizes shadow blur for the bright white-hot core
drawingContext.shadowColor = color(255, 255, 255);
Sets shadow color to white for the brightest core
fill(255, 255, 220);
Sets the fill to nearly white with a slight yellow tint
drawTeardrop(cx, fireY - flameH * 0.2, flameW * 0.4, flameH * 0.3);
Draws the smallest white-hot teardrop at 20% height, 40% width, 30% height—the brightest, most concentrated core
drawingContext.shadowBlur = 0;
Resets shadow blur to 0 to prevent shadows from affecting subsequent shapes

drawTeardrop()

drawTeardrop() creates a flame-like teardrop shape using beginShape(), vertex(), and bezierVertex(). The teardrop has a sharp point at the top (y - h/2) and a rounded bottom (y + h/2). The Bezier control points (x ± w/2, y - h/4) and (x ± w/2, y + h/2) curve the sides smoothly, creating a natural-looking flame silhouette. By varying w and h, the same function can create different flame layers at different scales.

function drawTeardrop(x, y, w, h) {
  beginShape();
  vertex(x, y - h / 2); // Top tip
  bezierVertex(x + w / 2, y - h / 4, x + w / 2, y + h / 2, x, y + h / 2);
  bezierVertex(x - w / 2, y - h / 4, x - w / 2, y + h / 2, x, y + h / 2);
  endShape(CLOSE);
}
Line-by-line explanation (5 lines)
beginShape();
Starts defining a custom shape using vertices and curves
vertex(x, y - h / 2);
Places the first vertex at the top of the teardrop, centered horizontally and h/2 pixels above the center y
bezierVertex(x + w / 2, y - h / 4, x + w / 2, y + h / 2, x, y + h / 2);
Draws a smooth Bezier curve from the top vertex down the right side to the bottom center, using control points at (x+w/2, y-h/4) and (x+w/2, y+h/2)
bezierVertex(x - w / 2, y - h / 4, x - w / 2, y + h / 2, x, y + h / 2);
Mirrors the first curve down the left side with control points at (x-w/2, y-h/4) and (x-w/2, y+h/2), meeting at the same bottom point
endShape(CLOSE);
Closes the shape by connecting the last point back to the first, and finishes defining the custom shape

handleSparks()

handleSparks() implements a complete particle system in a compact function. Each frame, it probabilistically spawns new sparks with upward velocity, updates all active sparks by applying physics (position += velocity) and a wind effect (sine wave sway), draws them, and removes dead ones. The backward loop (i--) is critical: when you remove items from an array during iteration, you must go backward or you'll skip items. This is a pattern used in almost every particle system.

🔬 The line s.x += s.vx + sin(frameCount * 0.05 + s.y) * 1.5 creates the wind sway. What happens if you change 0.05 to 0.2 or remove the + sin(...) * 1.5 entirely? Will sparks sway more, less, or drift straight up?

    s.x += s.vx + sin(frameCount * 0.05 + s.y) * 1.5; // Swirling wind effect
    s.y += s.vy;
    s.life -= 4;
function handleSparks(baseX, baseY, widthRange) {
  // More sparks for a big fire!
  if (random() < 0.4) {
    sparks.push({
      x: baseX + random(-widthRange, widthRange),
      y: baseY + random(0, 30),
      vx: random(-1, 1),
      vy: random(-2, -5),
      life: 255,
      size: random(2, 5)
    });
  }

  for (let i = sparks.length - 1; i >= 0; i--) {
    let s = sparks[i];
    s.x += s.vx + sin(frameCount * 0.05 + s.y) * 1.5; // Swirling wind effect
    s.y += s.vy;
    s.life -= 4; 

    fill(255, 200, 50, s.life);
    ellipse(s.x, s.y, s.size, s.size);

    if (s.life <= 0) sparks.splice(i, 1);
  }
}
Line-by-line explanation (16 lines)

🔧 Subcomponents:

conditional Spark creation probability if (random() < 0.4) {

Creates a new spark 40% of the time each frame—high frequency creates dense emission from the fire

for-loop Spark update and render loop for (let i = sparks.length - 1; i >= 0; i--) {

Loops through all active sparks, updates their positions with wind sway, fades their life, and removes dead sparks

calculation Wind swaying effect s.x += s.vx + sin(frameCount * 0.05 + s.y) * 1.5;

Adds a sine wave horizontal displacement based on time and the spark's y position, creating a swirling wind effect

if (random() < 0.4) {
40% chance each frame: a random number 0-1 has a 40% chance of being less than 0.4
sparks.push({
Creates a new spark object and adds it to the sparks array
x: baseX + random(-widthRange, widthRange),
Places the spark horizontally within ±widthRange of the fire center, so it originates from the flame base
y: baseY + random(0, 30),
Places the spark slightly above the fire base, with up to 30 pixels of random vertical offset
vx: random(-1, 1),
Gives the spark a horizontal velocity between -1 and +1 pixels per frame for initial sideways drift
vy: random(-2, -5),
Gives the spark an upward velocity (negative y) between -2 and -5 pixels per frame so sparks always rise
life: 255,
Initializes the spark's life to 255 (full opacity in alpha)
size: random(2, 5)
Gives each spark a random size between 2 and 5 pixels
for (let i = sparks.length - 1; i >= 0; i--) {
Loops backward through the sparks array (from last to first) so we can safely remove items during iteration
let s = sparks[i];
Gets a reference to the current spark object
s.x += s.vx + sin(frameCount * 0.05 + s.y) * 1.5;
Updates x position by adding the spark's velocity AND a sine wave based on time and height, creating the impression of wind swirling the sparks left and right as they rise
s.y += s.vy;
Updates y position by adding the spark's vertical velocity, moving it upward each frame
s.life -= 4;
Decreases the spark's life by 4 each frame, so it fades out over time
fill(255, 200, 50, s.life);
Sets the fill to warm yellow-orange with the spark's current life as the alpha (fading as life decreases)
ellipse(s.x, s.y, s.size, s.size);
Draws a circular spark at its current position
if (s.life <= 0) sparks.splice(i, 1);
Checks if the spark is dead (life ≤ 0) and removes it from the array using splice()

drawStartScreen()

drawStartScreen() provides a simple, inviting interface that tells the user what to do. It only displays until the user interacts with the page. Using two different font sizes and opacities (white title, gray subtitle) creates visual hierarchy. The setup is performance-friendly since it's just text, and once the user taps, it never runs again.

function drawStartScreen() {
  background(5, 8, 15);
  fill(255);
  textAlign(CENTER, CENTER);
  textSize(32);
  text("Tap to light the fire pit", width / 2, height / 2 - 20);
  textSize(18);
  fill(150);
  text("Turn on audio to relax", width / 2, height / 2 + 25);
}
Line-by-line explanation (8 lines)
background(5, 8, 15);
Fills the canvas with a very dark blue, slightly less bright than the main scene background
fill(255);
Sets the fill color to white for the main instruction text
textAlign(CENTER, CENTER);
Centers text both horizontally and vertically around its x,y position
textSize(32);
Sets the font size to 32 pixels for the main instruction
text("Tap to light the fire pit", width / 2, height / 2 - 20);
Draws the main instruction text centered at the canvas midpoint, offset 20 pixels up
textSize(18);
Reduces font size to 18 pixels for the secondary instruction
fill(150);
Lightens the fill to medium gray for the secondary text
text("Turn on audio to relax", width / 2, height / 2 + 25);
Draws the audio instruction text centered, offset 25 pixels down

mousePressed()

mousePressed() is a p5.js built-in event handler that fires whenever the user clicks on the canvas. It simply delegates to startExperience() to keep code organized.

function mousePressed() {
  startExperience();
}
Line-by-line explanation (1 lines)
startExperience();
Calls the startExperience() function, which initializes the scene and audio

touchStarted()

touchStarted() is a p5.js handler for touch events on mobile and tablet devices. By returning false, we prevent the browser from interpreting the tap as a scroll or pan, keeping focus on the sketch.

function touchStarted() {
  startExperience();
  return false;
}
Line-by-line explanation (2 lines)
startExperience();
Calls the startExperience() function to initialize the scene and audio
return false;
Returns false to prevent the browser's default touch behavior (like scrolling), so the tap is consumed by the sketch only

startExperience()

startExperience() is the initialization gate. It only runs once thanks to the if (!started) guard. It enables the started flag so draw() switches scenes, initializes the audio context (required by web browsers), and creates four oscillators tuned to a G-Major 7th chord—a deep, consonant, relaxing harmony. The amplitudes start at 0 and are controlled by updateAudioBreathe(), which dynamically modulates them to create the breathing effect.

function startExperience() {
  if (!started) {
    started = true;
    userStartAudio();

    // Deepened the G-Major 7th chord for a larger, outdoor ambient feel
    osc1 = new p5.Oscillator('sine'); osc1.freq(146.83); // D3 (Lower)
    osc2 = new p5.Oscillator('sine'); osc2.freq(196.00); // G3
    osc3 = new p5.Oscillator('sine'); osc3.freq(246.94); // B3
    osc4 = new p5.Oscillator('sine'); osc4.freq(369.99); // F#4
    
    osc1.start(); osc2.start(); osc3.start(); osc4.start();
    osc1.amp(0); osc2.amp(0); osc3.amp(0); osc4.amp(0);
  }
}
Line-by-line explanation (10 lines)

🔧 Subcomponents:

sequence Audio oscillator creation and startup osc1 = new p5.Oscillator('sine'); osc1.freq(146.83); // ... osc2, osc3, osc4 ... osc1.start(); osc2.start(); osc3.start(); osc4.start(); osc1.amp(0); osc2.amp(0); osc3.amp(0); osc4.amp(0);

Creates four sine wave oscillators tuned to a deep G-Major 7th chord and starts them all, then sets their amplitudes to 0 so they're silent until updateAudioBreathe() fades them in

if (!started) {
Checks if the experience has NOT started yet—this function only runs once
started = true;
Sets the global started flag to true, triggering draw() to switch from the start screen to the main scene
userStartAudio();
Calls a p5.sound function that initializes the audio context and unlocks audio playback on the browser (required for most modern browsers)
osc1 = new p5.Oscillator('sine');
Creates the first oscillator with a sine wave shape
osc1.freq(146.83);
Sets oscillator 1 to D3 at 146.83 Hz (musical note)
osc2 = new p5.Oscillator('sine'); osc2.freq(196.00);
Creates and tunes oscillator 2 to G3 at 196 Hz
osc3 = new p5.Oscillator('sine'); osc3.freq(246.94);
Creates and tunes oscillator 3 to B3 at 246.94 Hz
osc4 = new p5.Oscillator('sine'); osc4.freq(369.99);
Creates and tunes oscillator 4 to F#4 at 369.99 Hz
osc1.start(); osc2.start(); osc3.start(); osc4.start();
Starts all four oscillators so they begin generating sound
osc1.amp(0); osc2.amp(0); osc3.amp(0); osc4.amp(0);
Sets all oscillator amplitudes to 0 so no sound is heard initially—updateAudioBreathe() will fade them in

updateAudioBreathe()

updateAudioBreathe() creates the ambient music's signature breathing effect by modulating oscillator amplitudes with offset sine waves. Each oscillator's amplitude range is slightly different and offset in phase (+0, +1, +2, +3), so they swell and fade at slightly different times. This creates a slow, meditative harmonic breathing that feels organic and relaxing. The 0.1-second ramp time in amp() smooths the amplitude changes, preventing clicks or pops in the audio.

function updateAudioBreathe() {
  if (started && osc1) {
    let slowTime = frameCount * 0.008; // Slightly slower breathing
    osc1.amp(map(sin(slowTime), -1, 1, 0.03, 0.12), 0.1);
    osc2.amp(map(sin(slowTime + 1), -1, 1, 0.02, 0.09), 0.1);
    osc3.amp(map(sin(slowTime + 2), -1, 1, 0.01, 0.07), 0.1);
    osc4.amp(map(sin(slowTime + 3), -1, 1, 0.00, 0.06), 0.1);
  }
}
Line-by-line explanation (6 lines)

🔧 Subcomponents:

calculation Sine wave amplitude modulation osc1.amp(map(sin(slowTime), -1, 1, 0.03, 0.12), 0.1); osc2.amp(map(sin(slowTime + 1), -1, 1, 0.02, 0.09), 0.1); osc3.amp(map(sin(slowTime + 2), -1, 1, 0.01, 0.07), 0.1); osc4.amp(map(sin(slowTime + 3), -1, 1, 0.00, 0.06), 0.1);

Maps a sine wave (oscillating -1 to 1) to each oscillator's amplitude range, offset by different amounts so they breathe in and out at slightly different times

if (started && osc1) {
Only runs if the experience has started and the oscillators exist
let slowTime = frameCount * 0.008;
Creates a slowly-advancing time value: frameCount increments every frame, multiplied by 0.008 so it advances very gradually
osc1.amp(map(sin(slowTime), -1, 1, 0.03, 0.12), 0.1);
Oscillator 1 amplitude: sin(slowTime) oscillates -1 to 1, mapped to amplitude 0.03–0.12, with a 0.1-second ramp time for smoothing
osc2.amp(map(sin(slowTime + 1), -1, 1, 0.02, 0.09), 0.1);
Oscillator 2 amplitude: offset by +1 in the sine phase so it peaks at a slightly different time than osc1, creating the breathing effect
osc3.amp(map(sin(slowTime + 2), -1, 1, 0.01, 0.07), 0.1);
Oscillator 3 amplitude: offset by +2, peaking even later, with a smaller amplitude range (0.01–0.07)
osc4.amp(map(sin(slowTime + 3), -1, 1, 0.00, 0.06), 0.1);
Oscillator 4 amplitude: offset by +3, with the smallest amplitude range (0–0.06), providing a subtle high-frequency shimmer

windowResized()

windowResized() is a p5.js handler that fires whenever the browser window is resized. By calling initScene(), we ensure that the scene's geometry re-adapts to the new canvas dimensions, keeping everything properly centered and proportional on screens of any size.

function windowResized() {
  resizeCanvas(windowWidth, windowHeight);
  initScene(); // Recompute static geometry layout based on new size
}
Line-by-line explanation (2 lines)
resizeCanvas(windowWidth, windowHeight);
Resizes the canvas to match the current browser window dimensions
initScene();
Recalculates the positions of all stars and stones so they scale and redistribute based on the new canvas size

📦 Key Variables

noiseOffset number

Tracks the position in the Perlin noise function used for fire flickering animation. Increments by 0.04 each frame to create smooth, continuous variation.

let noiseOffset = 0;
sparks array

Stores all active spark particles. Each spark is an object with position (x, y), velocity (vx, vy), life (alpha), and size. New sparks are added and dead ones removed every frame.

let sparks = [];
stars array

Stores all 200 star objects generated during initScene(). Each star has x, y, size, and twinkleOffset properties that are pre-computed for performance.

let stars = [];
stones array

Stores all fire pit stones generated in a circle during initScene(). Each stone has position (x, y), size (sizeX, sizeY), color, and an isFront flag for depth sorting.

let stones = [];
started boolean

Tracks whether the user has clicked/tapped to start the experience. When false, the start screen displays; when true, the main scene and audio play.

let started = false;
osc1, osc2, osc3, osc4 p5.Oscillator

Four sine wave oscillators that generate the ambient music chord. Created when startExperience() is called, and their amplitudes are modulated by updateAudioBreathe() to create the breathing effect.

let osc1, osc2, osc3, osc4;

🔧 Potential Improvements (5)

Here are some ways this code could be enhanced:

PERFORMANCE initScene()

Stones are sorted by Y every time the window resizes, even if the sort order hasn't changed much. For large stone counts, this is wasteful.

💡 Consider caching the sort order and only re-sorting if canvas dimensions change significantly, or use a different depth-ordering strategy.

FEATURE updateAudioBreathe()

The audio always breathes at the same speed (0.008) and amplitude ranges are hard-coded. Users can't adjust the meditation pace.

💡 Expose the slowTime multiplier as a tunable variable or add keyboard controls (e.g., arrow keys) to slow or speed the breathing in real-time.

STYLE drawFire()

The flame color values (220, 60, 10), (255, 140, 0), etc. are scattered throughout the function. They're hard to tweak holistically.

💡 Define flame colors as constants at the top of the sketch (e.g., const FLAME_OUTER = color(220, 60, 10)) for easier visual tuning.

BUG handleSparks()

Sparks can stray far off-canvas if the wind sway amplitude (1.5 in sin(...) * 1.5) is large or the canvas is tiny, wasting memory on invisible particles.

💡 Add a boundary check: if a spark drifts beyond the canvas by more than a margin, remove it early to keep the particle count bounded.

FEATURE draw()

The scene composition is fixed (sky, house, patio, back stones, logs, fire, front stones, sparks). There's no dynamic day/night cycle or weather changes.

💡 Add a slow time-of-night variable that shifts background color and fire intensity over a 5-10 minute cycle for a slowly-evolving ambiance.

🔄 Code Flow

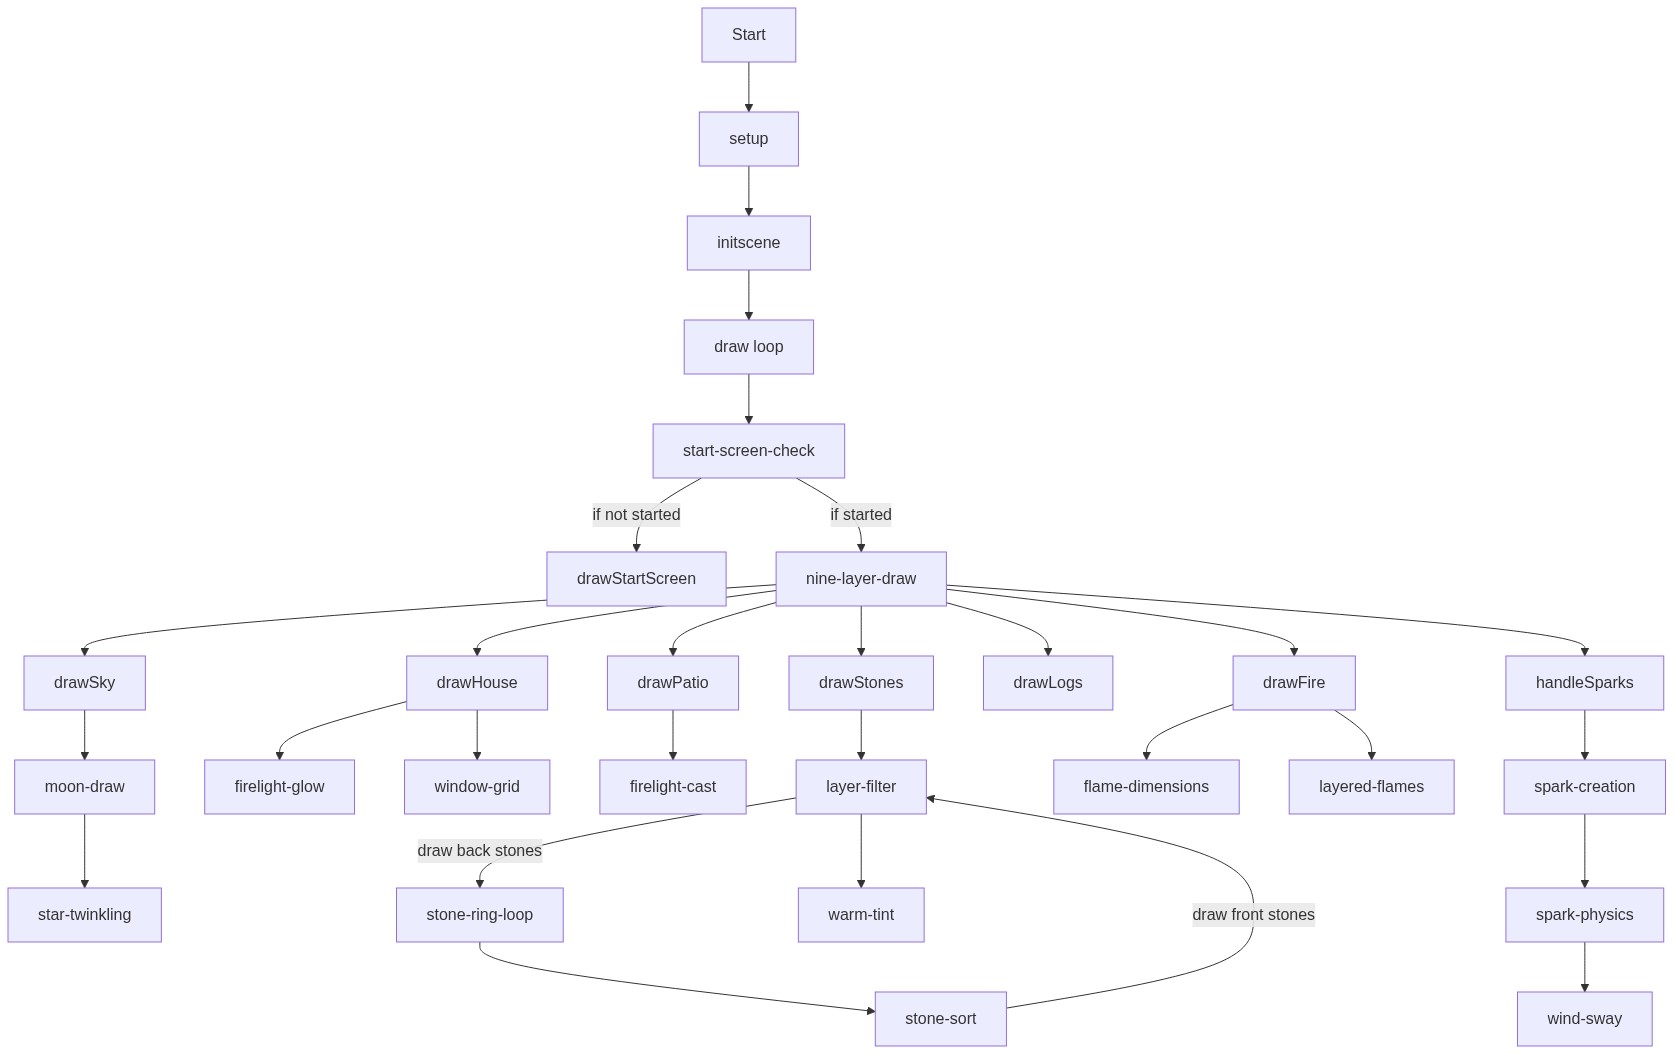
Code flow showing setup, initscene, draw, drawsky, drawhouse, drawpatio, drawstones, drawlogs, drawfire, drawteardrop, handlesparks, drawstartscreen, mousepressed, touchstarted, startexperience, updateaudiobreathe, windowresized

💡 Click on function names in the diagram to jump to their code

graph TD start[Start] --> setup[setup] setup --> initscene[initscene] initscene --> draw[draw loop] draw --> start-screen-check[start-screen-check] start-screen-check -->|if not started| drawstartscreen[drawStartScreen] start-screen-check -->|if started| nine-layer-draw[nine-layer-draw] nine-layer-draw --> drawsky[drawSky] drawsky --> moon-draw[moon-draw] moon-draw --> star-twinkling[star-twinkling] nine-layer-draw --> drawhouse[drawHouse] drawhouse --> firelight-glow[firelight-glow] drawhouse --> window-grid[window-grid] nine-layer-draw --> drawpatio[drawPatio] drawpatio --> firelight-cast[firelight-cast] nine-layer-draw --> drawstones[drawStones] drawstones --> layer-filter[layer-filter] layer-filter -->|draw back stones| stone-ring-loop[stone-ring-loop] stone-ring-loop --> stone-sort[stone-sort] stone-sort -->|draw front stones| layer-filter layer-filter --> warm-tint[warm-tint] nine-layer-draw --> drawlogs[drawLogs] nine-layer-draw --> drawfire[drawFire] drawfire --> flame-dimensions[flame-dimensions] drawfire --> layered-flames[layered-flames] nine-layer-draw --> handlesparks[handleSparks] handlesparks --> spark-creation[spark-creation] spark-creation --> spark-physics[spark-physics] spark-physics --> wind-sway[wind-sway] click setup href "#fn-setup" click initscene href "#fn-initscene" click draw href "#fn-draw" click start-screen-check href "#sub-start-screen-check" click drawstartscreen href "#fn-drawStartScreen" click nine-layer-draw href "#sub-nine-layer-draw" click drawsky href "#fn-drawSky" click moon-draw href "#sub-moon-draw" click star-twinkling href "#sub-star-twinkling" click drawhouse href "#fn-drawHouse" click firelight-glow href "#sub-firelight-glow" click window-grid href "#sub-window-grid" click drawpatio href "#fn-drawPatio" click firelight-cast href "#sub-firelight-cast" click drawstones href "#fn-drawStones" click layer-filter href "#sub-layer-filter" click stone-ring-loop href "#sub-stone-ring-loop" click stone-sort href "#sub-stone-sort" click warm-tint href "#sub-warm-tint" click drawlogs href "#fn-drawLogs" click drawfire href "#fn-drawFire" click flame-dimensions href "#sub-flame-dimensions" click layered-flames href "#sub-layered-flames" click handlesparks href "#fn-handleSparks" click spark-creation href "#sub-spark-creation" click spark-physics href "#sub-spark-physics" click wind-sway href "#sub-wind-sway"

❓ Frequently Asked Questions

What visual elements are featured in the p5.js sketch titled 'Sketch 2026-05-15 22:54'?

The sketch creates a serene nighttime scene with twinkling stars, a cozy house, and a fire pit surrounded by stones, all set against a dark sky.

Is there any interactive functionality for users in this creative coding sketch?

While the sketch primarily illustrates a static visual experience, it features a start screen that users can engage with to initiate the animation.

What creative coding techniques are showcased in this p5.js sketch?

The sketch demonstrates the use of Perlin noise for flickering effects, as well as pre-calculated static geometry to enhance performance.

Preview

Sketch 2026-05-15 22:54 by cbun - p5.js creative coding sketch preview
Sketch Preview
Code flow diagram showing the structure of Sketch 2026-05-15 22:54 by cbun - Code flow showing setup, initscene, draw, drawsky, drawhouse, drawpatio, drawstones, drawlogs, drawfire, drawteardrop, handlesparks, drawstartscreen, mousepressed, touchstarted, startexperience, updateaudiobreathe, windowresized
Code Flow Diagram