
SmileFaceCatchGPT5high

This is a colorful arcade-style catching game where players move a smiley face at the bottom of the screen to catch falling happy faces while avoiding angry red ones. The game features dynamic difficulty that increases with score, smooth animations with wiggling and spinning smilies, and cheerful sound effects powered by p5.sound synthesizers.

🧪 Try This!

Experiment with the code by making these changes:

  1. Make the game harder immediately — Lower the base spawn interval so smilies appear much more frequently from the start
  2. Flip the game—catch angry faces instead — Swap which type awards points and which penalizes—now catching red faces increases score
  3. Increase the ratio of angry faces — Spawn more angry red faces and fewer happy yellow ones to make the game much harder
  4. Make the player smiley enormous — Increase the player's radius so they take up more of the screen and are easier to catch with
  5. Triple the movement responsiveness — Increase the lerp factor so the player snaps instantly to your mouse instead of drifting smoothly
  6. Start with more lives — Change the starting life count so the game is more forgiving for beginners
Prefer the full editor? Open it there →

📖 About This Sketch

Smiley Catch is a fast-paced arcade game built entirely with p5.js. Players control a sunglasses-wearing smiley face at the bottom of the canvas and move it left and right to catch happy yellow faces—each catch increases the score. Angry red faces fall too, and catching them or missing happy faces costs a life. The game builds tension through three core p5.js techniques: collision detection using dist(), game state management with strings, and smooth animation using the draw loop with velocity, sine waves for wiggling, and rotating sprites.

The code is organized into clear functional sections: a setup that initializes the canvas and sound synthesizers, a main draw loop that delegates to title/playing/gameover states, player movement using lerp for smooth following, a spawning system that increases difficulty over time, and collision detection that checks distance between falling smilies and the player. By studying it, you will learn how to build a complete interactive game from scratch, manage multiple game objects in an array, play synthetic sounds on demand, and create a polished user experience across desktop and mobile devices.

⚙️ How It Works

  1. When the sketch loads, setup() creates a full-window canvas in HSB color mode (which makes animated backgrounds easier), initializes two p5.MonoSynth objects for sound, and creates the player smiley at the bottom center.
  2. The draw loop runs 60 times per second and checks the gameState variable. On the title screen, it shows instructions. When playing, it updates game logic and draws all active objects. When the game ends, it freezes the game and overlays a 'Game Over' panel.
  3. While playing, updateGame() continuously calls updatePlayerPosition() which tracks the mouse or first touch point and smoothly slides the player toward it using lerp, keeping them within canvas bounds.
  4. maybeSpawnSmiley() creates new falling smilies at random intervals that shrink as the score climbs—making the game harder. Each smiley is an object with position, speed, size, type (good or bad), color, and animation properties like wiggle amount and rotation speed.
  5. updateSmilies() runs the physics loop: each frame it moves every smiley down by its speed, adds side-to-side wiggle using a sine wave, spins it, and checks two collision conditions. If the smiley touches the player (distance < sum of radii), the player gains a point or loses a life depending on type and a sound plays. If the smiley falls below the bottom without being caught, the player loses a life.
  6. The background constantly animates with a vertical stripe pattern whose hue drifts, giving a dynamic, cheerful atmosphere. Score and lives are displayed in the HUD using tiny smiley icons to show remaining lives.

🎓 Concepts You'll Learn

Game state managementCollision detectionArray iteration and spliceSmooth animation with lerpProcedural spawn controlHSB color modeSound synthesis with p5.soundTouch and mouse input handlingDynamic difficulty scaling

📝 Code Breakdown

setup()

setup() runs once when the sketch starts. It prepares your canvas size, colors, fonts, and any global objects that need initialization before the game begins. By using windowWidth and windowHeight, the game adapts to any device size.

function setup() {
  createCanvas(windowWidth, windowHeight);
  colorMode(HSB, 360, 100, 100);
  textFont('sans-serif');
  textAlign(CENTER, CENTER);

  createPlayer();

  // Simple synths from p5.sound:
  // https://p5js.org/reference/#/p5.MonoSynth
  goodSynth = new p5.MonoSynth();
  badSynth = new p5.MonoSynth();
}
Line-by-line explanation (7 lines)
createCanvas(windowWidth, windowHeight);
Creates a canvas that fills the entire browser window, making the game responsive to screen size
colorMode(HSB, 360, 100, 100);
Switches p5.js to HSB (Hue, Saturation, Brightness) color mode instead of RGB—this makes it easy to animate color gradually by changing just the hue number
textFont('sans-serif');
Sets the font for all text drawn by text() to a clean sans-serif typeface
textAlign(CENTER, CENTER);
Makes all text anchor at its center point instead of the default top-left, so coordinates are more intuitive
createPlayer();
Calls a helper function that initializes the player object with starting position and size
goodSynth = new p5.MonoSynth();
Creates a monophonic synthesizer (single note at a time) for happy catch sounds from the p5.sound library
badSynth = new p5.MonoSynth();
Creates a second synthesizer for unhappy sounds (missed happy faces or caught angry faces)
draw()

draw() runs 60 times per second and is the heartbeat of your animation. The if-else chain routes different behavior based on gameState—a common pattern for managing multiple screens (title, gameplay, game over) in interactive sketches.

🔬 This if-else chain decides what to draw and update each frame based on gameState. What happens if you reorder it so the title draws AFTER the gameover screen? Which screen wins if two conditions are true?

  if (gameState === 'title') {
    drawTitleScreen();
  } else if (gameState === 'playing') {
    updateGame();
    drawGame();
  } else if (gameState === 'gameover') {
    drawGame();      // show frozen game state
    drawGameOver();  // overlay "game over" panel
  }
function draw() {
  drawBackground();

  if (gameState === 'title') {
    drawTitleScreen();
  } else if (gameState === 'playing') {
    updateGame();
    drawGame();
  } else if (gameState === 'gameover') {
    drawGame();      // show frozen game state
    drawGameOver();  // overlay "game over" panel
  }
}
Line-by-line explanation (6 lines)

🔧 Subcomponents:

switch-case Game state routing if (gameState === 'title') { ... } else if (gameState === 'playing') { ... }

Routes execution to the correct screen and update logic based on the current game state

drawBackground();
Draws the animated gradient background every frame—this must happen first so it sits behind all game objects
if (gameState === 'title') {
Checks if we are on the title screen by comparing the gameState string to 'title'
} else if (gameState === 'playing') {
If the game is actively playing, we call both update (game logic) and draw (rendering)
updateGame();
Updates all game logic: player position, spawning, smiley physics, and collision detection
drawGame();
Renders all game objects: falling smilies, the player, and the HUD (score and lives display)
} else if (gameState === 'gameover') {
When the game ends, we draw the frozen final game state and overlay the game-over panel on top

createPlayer()

This function creates the player object with three properties: x and y position, and r for radius. It's called once in setup() and again when restarting the game. Using an object is cleaner than three separate variables.

function createPlayer() {
  player = {
    x: width / 2,
    y: height - 80,
    r: 45
  };
}
Line-by-line explanation (4 lines)
player = {
Creates a JavaScript object to store all the player's properties in one place
x: width / 2,
Sets the player's starting x position to the horizontal center of the canvas
y: height - 80,
Places the player 80 pixels above the bottom of the canvas, giving space for the UI text
r: 45
Sets the player's radius to 45 pixels—this is used for drawing the smiley and for collision detection

updateGame()

updateGame() is the orchestrator of all game logic, called every frame while playing. It delegates to specialized functions that each handle one piece of the game (player, spawning, smilies). This organization keeps the code readable as complexity grows.

function updateGame() {
  animateBackground();

  updatePlayerPosition();
  maybeSpawnSmiley();
  updateSmilies();
  checkGameOver();
}
Line-by-line explanation (5 lines)
animateBackground();
Updates background animation state (currently a placeholder, but the hue drifts in drawBackground)
updatePlayerPosition();
Reads mouse/touch input and smoothly moves the player toward that position
maybeSpawnSmiley();
Decides if enough frames have passed to create a new falling smiley, spawning one if needed
updateSmilies();
Updates physics for all falling smilies: movement, rotation, collision detection, and removal when caught or missed
checkGameOver();
Tests if lives have reached zero and transitions the game state to 'gameover' if so

drawGame()

drawGame() renders all three visual layers: falling smilies (using translate and rotate to position them), the player, and the HUD. The loop demonstrates how to use push/pop to isolate transformations—essential for drawing multiple moving objects independently.

🔬 This loop draws every smiley by moving to its position and rotating. What happens if you remove the rotate() line? Will smilies still fall and be catchable?

  for (let i = 0; i < smilies.length; i++) {
    const s = smilies[i];
    push();
    translate(s.x, s.y);
    rotate(s.rotation);
    drawSmileyAtOrigin(s.r, s.type, s.hue);
    pop();
  }
function drawGame() {
  // Draw falling smilies
  for (let i = 0; i < smilies.length; i++) {
    const s = smilies[i];
    push();
    translate(s.x, s.y);
    rotate(s.rotation);
    drawSmileyAtOrigin(s.r, s.type, s.hue);
    pop();
  }

  // Draw player
  drawPlayer();

  // UI
  drawHUD();
}
Line-by-line explanation (9 lines)

🔧 Subcomponents:

for-loop Draw all falling smilies for (let i = 0; i < smilies.length; i++) {

Iterates through every smiley in the smilies array and renders it with its current position and rotation

for (let i = 0; i < smilies.length; i++) {
Loops through every smiley object stored in the global smilies array
const s = smilies[i];
Creates a shorthand 's' for the current smiley to keep code readable
push();
Saves the current transformation matrix (position, rotation, scale) so changes don't affect other drawings
translate(s.x, s.y);
Moves the drawing origin to the smiley's x, y position on the canvas
rotate(s.rotation);
Rotates the coordinate system by the smiley's current rotation angle, making it spin
drawSmileyAtOrigin(s.r, s.type, s.hue);
Draws the smiley face at the current origin (now the smiley's position), rotated, with its size, type, and color
pop();
Restores the previous transformation matrix so the next smiley starts with a clean slate
drawPlayer();
Renders the player smiley with sunglasses at the bottom of the screen
drawHUD();
Renders the score, lives count, and tiny smiley life indicators in the top corners

updatePlayerPosition()

updatePlayerPosition() reads input and moves the player. The key insight is lerp—it creates smooth, eased motion instead of instant snaps. By clamping with constrain, we prevent the player from getting stuck at screen edges. The touch-first logic ensures mobile players have a good experience.

🔬 This code prefers touch over mouse. What happens if you swap the logic so mouse has priority instead? Try switching the if and else blocks.

  if (touches.length > 0) {
    targetX = touches[0].x;
  } else {
    targetX = mouseX;
  }
function updatePlayerPosition() {
  let targetX;

  // Touch input has priority if present
  if (touches.length > 0) {
    targetX = touches[0].x;
  } else {
    targetX = mouseX;
  }

  if (!isFinite(targetX) || targetX === 0) {
    targetX = width / 2;
  }

  targetX = constrain(targetX, player.r, width - player.r);

  // Smooth movement
  player.x = lerp(player.x, targetX, 0.2);
  player.y = height - player.r - 20;
}
Line-by-line explanation (10 lines)

🔧 Subcomponents:

conditional Touch vs mouse input if (touches.length > 0) {

Prioritizes touch input over mouse if the user is on a mobile device with active touches

conditional Input sanity check if (!isFinite(targetX) || targetX === 0) {

Resets to center if input is invalid, preventing NaN or zero from breaking player movement

calculation Keep player on canvas targetX = constrain(targetX, player.r, width - player.r);

Clamps targetX so the player never slides half-off the screen edges

let targetX;
Declares a variable to store where the player should be moving toward
if (touches.length > 0) {
Checks if there are any active touch points on the screen (mobile/tablet input)
targetX = touches[0].x;
If touching, use the x position of the first finger (touches[0])
} else {
If no touch, fall back to mouse input
targetX = mouseX;
Use the current mouse x position as the target
if (!isFinite(targetX) || targetX === 0) {
Checks if targetX is invalid (NaN, Infinity) or exactly zero (sometimes happens on startup)
targetX = width / 2;
If input is bad, reset to center to prevent glitchy movement
targetX = constrain(targetX, player.r, width - player.r);
Clamps targetX between player.r (left edge) and width - player.r (right edge), preventing off-screen positions
player.x = lerp(player.x, targetX, 0.2);
Smoothly interpolates from current position toward target using lerp with factor 0.2 (20% of the way each frame)
player.y = height - player.r - 20;
Keeps the player locked at a fixed y position near the bottom (20 pixels above the edge)

drawPlayer()

drawPlayer() demonstrates how to layer shapes using push/pop. By translating to the player's position once and drawing everything relative to the origin, all coordinates become simple and symmetric. The sunglasses use proportional sizing so they always fit the player's radius.

🔬 These lines scale the sunglasses size to match player.r. What happens if you double the multipliers (0.9 becomes 1.8, 0.45 becomes 0.9)? Will the sunglasses grow or shrink?

  const w = player.r * 0.9;
  const h = player.r * 0.45;
  rect(-player.r * 0.4, -player.r * 0.3, w, h, h * 0.2);
  rect(player.r * 0.4, -player.r * 0.3, w, h, h * 0.2);
function drawPlayer() {
  push();
  translate(player.x, player.y);

  // Base smiley
  drawSmileyAtOrigin(player.r, 'good', 50);

  // Sunglasses (to make the player look cool)
  noStroke();
  fill(0, 0, 10, 230);
  rectMode(CENTER);
  const w = player.r * 0.9;
  const h = player.r * 0.45;
  rect(-player.r * 0.4, -player.r * 0.3, w, h, h * 0.2);
  rect(player.r * 0.4, -player.r * 0.3, w, h, h * 0.2);
  rect(0, -player.r * 0.3, player.r * 0.4, h * 0.3, h * 0.15);

  pop();
}
Line-by-line explanation (12 lines)

🔧 Subcomponents:

calculation Draw base smiley face drawSmileyAtOrigin(player.r, 'good', 50);

Renders the yellow smiley face at the origin using the player's radius

calculation Draw sunglasses frames rect(-player.r * 0.4, -player.r * 0.3, w, h, h * 0.2);

Draws the two lens rectangles scaled to fit the player's size

push();
Saves the current transformation state so transformations below don't affect other drawings
translate(player.x, player.y);
Moves the drawing origin to the player's position on the canvas
drawSmileyAtOrigin(player.r, 'good', 50);
Draws a yellow happy smiley face at the origin with the player's radius
noStroke();
Disables outlines for the next shapes (the sunglasses)
fill(0, 0, 10, 230);
Sets fill color to nearly black (HSB: hue 0, saturation 0, brightness 10) with alpha 230 for semi-transparency
rectMode(CENTER);
Makes rectangles draw from their center instead of top-left, so positioning is easier
const w = player.r * 0.9;
Calculates the width of each sunglasses lens to be 90% of the player's radius
const h = player.r * 0.45;
Calculates the height of each lens to be 45% of the player's radius (wider than tall)
rect(-player.r * 0.4, -player.r * 0.3, w, h, h * 0.2);
Draws the left sunglasses lens, offset 40% of radius to the left and 30% up, with rounded corners
rect(player.r * 0.4, -player.r * 0.3, w, h, h * 0.2);
Draws the right lens mirrored on the opposite side
rect(0, -player.r * 0.3, player.r * 0.4, h * 0.3, h * 0.15);
Draws the bridge connecting the two lenses in the center
pop();
Restores the previous transformation state

maybeSpawnSmiley()

maybeSpawnSmiley() implements dynamic difficulty—a key game design concept. By scaling spawn rate to score, the game gets harder as you succeed, keeping it challenging. The max() function ensures difficulty never becomes impossible by clamping the minimum interval.

🔬 This code spawns smilies slower at the start and faster as you gain points. What happens if you change the '/ 10' to '/ 5'? Will you reach higher levels faster or slower?

  const level = floor(score / 10);
  spawnInterval = max(15, 60 - level * 5);

  if (frameCount - lastSpawnFrame > spawnInterval) {
function maybeSpawnSmiley() {
  const level = floor(score / 10);
  spawnInterval = max(15, 60 - level * 5);

  if (frameCount - lastSpawnFrame > spawnInterval) {
    spawnSmiley();
    lastSpawnFrame = frameCount;
  }
}
Line-by-line explanation (5 lines)

🔧 Subcomponents:

calculation Dynamic difficulty calculation const level = floor(score / 10); spawnInterval = max(15, 60 - level * 5);

Increases spawn rate as score increases, making the game progressively harder

conditional Time-based spawn trigger if (frameCount - lastSpawnFrame > spawnInterval) {

Decides whether enough frames have elapsed since the last spawn to create a new smiley

const level = floor(score / 10);
Calculates the current level by dividing score by 10 and rounding down—level goes up every 10 points
spawnInterval = max(15, 60 - level * 5);
Decreases spawn interval by 5 frames per level, but never below 15 frames—making smilies appear faster as difficulty increases
if (frameCount - lastSpawnFrame > spawnInterval) {
Checks if enough frames have passed since the last spawn (frameCount is the total frames since start, lastSpawnFrame is when we last spawned)
spawnSmiley();
If the interval has elapsed, create a new smiley
lastSpawnFrame = frameCount;
Record this frame number so we can measure the next interval from here

spawnSmiley()

spawnSmiley() creates a complete smiley object with position, size, type, speed, and animation properties. By randomizing most values (type, size, speed, wiggle, rotation), each smiley feels unique even though they use the same drawing code. This is called procedural generation.

🔬 map() converts score into a speed value. If you change the 2 and 8 to 1 and 15, what will happen to how fast smilies fall at different scores?

  const speedBase = map(score, 0, 100, 2, 8, true);
  const speed = random(speedBase * 0.7, speedBase * 1.3);
function spawnSmiley() {
  const type = random() < 0.8 ? 'good' : 'bad'; // 80% happy, 20% angry
  const r = random(25, 55);
  const x = random(r, width - r);
  const y = -r;

  const speedBase = map(score, 0, 100, 2, 8, true);
  const speed = random(speedBase * 0.7, speedBase * 1.3);

  const hue = (type === 'good') ? random(40, 60) : random(0, 10);

  smilies.push({
    x,
    y,
    r,
    speed,
    type,
    hue,
    wiggleOffset: random(TWO_PI),
    wiggleAmount: random(0.8, 2.5),
    rotation: random(TWO_PI),
    rotationSpeed: random(-0.05, 0.05)
  });
}
Line-by-line explanation (11 lines)

🔧 Subcomponents:

conditional Random type selection const type = random() < 0.8 ? 'good' : 'bad';

Randomly assigns type as 'good' (happy, 80% chance) or 'bad' (angry, 20% chance)

calculation Speed based on score const speedBase = map(score, 0, 100, 2, 8, true); const speed = random(speedBase * 0.7, speedBase * 1.3);

Maps current score to a base falling speed, then randomizes within ±30% for variety

conditional Hue by type const hue = (type === 'good') ? random(40, 60) : random(0, 10);

Happy faces get yellow-green hues (40-60), angry faces get red hues (0-10)

const type = random() < 0.8 ? 'good' : 'bad';
Generates a random number 0-1; if less than 0.8, type is 'good' (happy face), else 'bad' (angry face)
const r = random(25, 55);
Randomly sizes the smiley between 25 and 55 pixel radius, giving visual variety
const x = random(r, width - r);
Places the smiley randomly across the width, but inset by its radius so it doesn't spawn half-off-screen
const y = -r;
Starts the smiley just above the top of the canvas (negative y), so it falls down into view
const speedBase = map(score, 0, 100, 2, 8, true);
Maps score 0-100 to fall speed 2-8 pixels per frame, with clamping so higher scores always get higher speed
const speed = random(speedBase * 0.7, speedBase * 1.3);
Randomizes the actual speed within ±30% of the base, so not all smilies fall at identical speed
const hue = (type === 'good') ? random(40, 60) : random(0, 10);
Happy faces get a yellowish hue (40-60), angry faces get a reddish hue (0-10) in HSB mode
wiggleOffset: random(TWO_PI),
Randomizes the starting phase of the sine wave wiggle so smilies don't all sway in sync
wiggleAmount: random(0.8, 2.5),
Randomizes how much each smiley sways left-right during fall
rotation: random(TWO_PI),
Starts each smiley at a random rotation angle (0-360 degrees)
rotationSpeed: random(-0.05, 0.05)
Randomly spins each smiley clockwise or counterclockwise at a gentle speed

updateSmilies()

updateSmilies() is the heart of game physics and collision detection. The backward loop is a common pattern when removing items from arrays during iteration. The sine-wave wiggle demonstrates how to use frameCount and trigonometry for organic, repetitive motion. The collision and miss checks implement the core game rules.

🔬 These three lines animate falling, swaying, and spinning. What happens if you change += to = for the rotation line? Will smilies keep spinning or snap to a fixed angle?

    // Fall and wiggle
    s.y += s.speed;
    s.x += sin(frameCount * 0.05 + s.wiggleOffset) * s.wiggleAmount;
    s.rotation += s.rotationSpeed;

🔬 This collision check uses dist() to measure distance. What happens if you change < to > so only smilies FAR AWAY from the player are considered 'caught'?

    const d = dist(s.x, s.y, player.x, player.y);
    if (d < s.r + player.r) {
function updateSmilies() {
  for (let i = smilies.length - 1; i >= 0; i--) {
    const s = smilies[i];

    // Fall and wiggle
    s.y += s.speed;
    s.x += sin(frameCount * 0.05 + s.wiggleOffset) * s.wiggleAmount;
    s.rotation += s.rotationSpeed;

    // Catch check
    const d = dist(s.x, s.y, player.x, player.y);
    if (d < s.r + player.r) {
      if (s.type === 'good') {
        score++;
        playGoodSound();
      } else {
        lives--;
        playBadSound();
      }
      smilies.splice(i, 1);
      continue;
    }

    // Missed (falls past bottom)
    if (s.y - s.r > height) {
      if (s.type === 'good') {
        lives--;
        playBadSound();
      }
      smilies.splice(i, 1);
    }
  }
}
Line-by-line explanation (19 lines)

🔧 Subcomponents:

for-loop Reverse iteration for safe removal for (let i = smilies.length - 1; i >= 0; i--) {

Loops backward through the array so removing items with splice() doesn't skip any elements

calculation Fall and wiggle physics s.y += s.speed; s.x += sin(frameCount * 0.05 + s.wiggleOffset) * s.wiggleAmount;

Moves smiley down by speed, and adds a sine-wave wiggle for side-to-side motion

conditional Catch collision check const d = dist(s.x, s.y, player.x, player.y); if (d < s.r + player.r) {

Calculates distance between smiley and player, removes smiley and updates score/lives if they overlap

conditional Missed smiley check if (s.y - s.r > height) {

Detects when a smiley falls below the bottom of the canvas and applies penalty for missed good faces

for (let i = smilies.length - 1; i >= 0; i--) {
Loops backward from the last smiley to the first—this is crucial because splice() removes elements and would skip items if we looped forward
const s = smilies[i];
Shorthand for the current smiley to keep code readable
s.y += s.speed;
Moves the smiley down by its speed value each frame, making it fall
s.x += sin(frameCount * 0.05 + s.wiggleOffset) * s.wiggleAmount;
Adds a sine wave oscillation to x position—creates smooth left-right swaying as the smiley falls, with unique phase per smiley
s.rotation += s.rotationSpeed;
Rotates the smiley each frame by its rotation speed, making it spin
const d = dist(s.x, s.y, player.x, player.y);
Calculates the distance between the smiley's center and the player's center using p5.js dist()
if (d < s.r + player.r) {
Checks if distance is less than the sum of their radii—if so, they are touching (collision)
if (s.type === 'good') {
If caught smiley is happy, increase score
score++;
Increment score by 1
playGoodSound();
Play a cheerful synth sound to reward the catch
} else {
If caught smiley is angry instead...
lives--;
Lose a life for catching a bad face
playBadSound();
Play a sad synth sound for the penalty
smilies.splice(i, 1);
Remove the caught smiley from the array (splice removes 1 element at index i)
continue;
Skip the rest of the loop for this smiley since it's been removed and processed
if (s.y - s.r > height) {
Checks if the smiley has fallen below the bottom (top of smiley y - radius is past canvas bottom)
if (s.type === 'good') {
If a happy smiley was missed...
lives--;
Lose a life for missing a good face
playBadSound();
Play sad sound for the missed opportunity

drawSmileyAtOrigin()

drawSmileyAtOrigin() demonstrates proportional scaling—all sizes and positions are calculated as percentages of radius r, so the smiley looks good at any size. The type parameter switches the mouth between smile and frown using if-else. This function is the foundation for both falling smilies and the player character.

🔬 The arc() function draws part of an ellipse—good faces use 0 to PI (top half), angry ones use PI to TWO_PI (bottom half). What happens if both used 0 to PI? Will angry faces smile?

  if (type === 'good') {
    // Smile
    arc(0, r * 0.1, r * 1.3, r * 0.9, 0, PI);
  } else {
    // Frown
    arc(0, r * 0.9, r * 1.3, r * 0.9, PI, TWO_PI);
  }
function drawSmileyAtOrigin(r, type, hue) {
  // Face
  stroke(0, 0, 20);
  strokeWeight(r * 0.08);
  fill(hue, 80, 100);
  circle(0, 0, r * 2);

  // Eyes
  noStroke();
  fill(0, 0, 20);
  const eyeOffsetX = r * 0.45;
  const eyeOffsetY = -r * 0.3;
  const eyeSize = r * 0.35;
  circle(-eyeOffsetX, eyeOffsetY, eyeSize);
  circle(eyeOffsetX, eyeOffsetY, eyeSize);

  // Eye highlights
  fill(60, 0, 100);
  const highlightSize = r * 0.15;
  circle(-eyeOffsetX + r * 0.1, eyeOffsetY - r * 0.1, highlightSize);
  circle(eyeOffsetX + r * 0.1, eyeOffsetY - r * 0.1, highlightSize);

  // Mouth
  noFill();
  stroke(0, 0, 20);
  strokeWeight(r * 0.12);
  if (type === 'good') {
    // Smile
    arc(0, r * 0.1, r * 1.3, r * 0.9, 0, PI);
  } else {
    // Frown
    arc(0, r * 0.9, r * 1.3, r * 0.9, PI, TWO_PI);
  }
}
Line-by-line explanation (19 lines)

🔧 Subcomponents:

calculation Draw face outline circle(0, 0, r * 2);

Draws the main circle face at the origin with diameter = 2*r

calculation Draw both eyes circle(-eyeOffsetX, eyeOffsetY, eyeSize); circle(eyeOffsetX, eyeOffsetY, eyeSize);

Draws two symmetric eye circles using proportional offsets

conditional Smile or frown if (type === 'good') { arc(0, r * 0.1, r * 1.3, r * 0.9, 0, PI); } else { arc(0, r * 0.9, r * 1.3, r * 0.9, PI, TWO_PI); }

Draws a smile arc for happy faces or a frown arc for angry faces

stroke(0, 0, 20);
Sets outline color to near-black (HSB: 0 hue, 0 saturation, 20 brightness) for all stroked shapes
strokeWeight(r * 0.08);
Sets outline thickness to 8% of the smiley's radius, so bigger smilies have thicker outlines
fill(hue, 80, 100);
Sets fill color using the hue parameter passed in (yellow for good, red for bad), with 80% saturation and 100% brightness (vivid)
circle(0, 0, r * 2);
Draws the main face circle at the origin (0, 0) with diameter r*2 (radius r)
noStroke();
Removes outlines for the next shapes (eyes and highlights)
fill(0, 0, 20);
Changes fill to dark for the eye pupils
const eyeOffsetX = r * 0.45;
Positions eyes horizontally 45% of radius left and right from center
const eyeOffsetY = -r * 0.3;
Positions eyes vertically 30% of radius above center (negative = up)
const eyeSize = r * 0.35;
Sets eye diameter to 35% of smiley radius
circle(-eyeOffsetX, eyeOffsetY, eyeSize);
Draws left eye at negative offset position
circle(eyeOffsetX, eyeOffsetY, eyeSize);
Draws right eye at positive offset position (mirrored)
fill(60, 0, 100);
Changes fill to white (HSB: 60 hue, 0 saturation, 100 brightness) for eye highlights
const highlightSize = r * 0.15;
Sets highlight diameter to 15% of smiley radius (small dots)
circle(-eyeOffsetX + r * 0.1, eyeOffsetY - r * 0.1, highlightSize);
Draws left eye highlight slightly right and up from the pupil center
circle(eyeOffsetX + r * 0.1, eyeOffsetY - r * 0.1, highlightSize);
Draws right eye highlight, mirrored
if (type === 'good') {
Checks if this is a happy smiley
arc(0, r * 0.1, r * 1.3, r * 0.9, 0, PI);
Draws a smile arc (top half of an ellipse) centered slightly below origin, with width 1.3x radius and height 0.9x radius
} else {
Otherwise (angry smiley)...
arc(0, r * 0.9, r * 1.3, r * 0.9, PI, TWO_PI);
Draws a frown arc (bottom half of an ellipse) centered lower on the face

drawHUD()

drawHUD() demonstrates text rendering and alignment. Instead of just showing a number for lives, it draws tiny smiley icons—a visual, game-themed way to display remaining health. The loop shows how to position multiple elements horizontally with calculated spacing.

function drawHUD() {
  // Score & lives
  textAlign(LEFT, TOP);
  textSize(26);
  fill(0, 0, 0, 220);
  noStroke();
  text('Score: ' + score, 20, 16);

  textAlign(RIGHT, TOP);
  text('Lives: ' + lives, width - 20, 16);

  // Tiny smileys to show remaining lives
  const lifeR = 14;
  for (let i = 0; i < lives; i++) {
    const x = width - 30 - i * (lifeR * 2 + 8);
    const y = 55;
    push();
    translate(x, y);
    drawSmileyAtOrigin(lifeR, 'good', 50);
    pop();
  }
}
Line-by-line explanation (12 lines)

🔧 Subcomponents:

calculation Draw score text text('Score: ' + score, 20, 16);

Renders the score value at top-left with text concatenation

for-loop Draw life indicator smilies for (let i = 0; i < lives; i++) {

Loops through remaining lives and draws a tiny smiley icon for each

textAlign(LEFT, TOP);
Aligns text from its top-left corner, so coordinates place the corner of the text box
textSize(26);
Sets text size to 26 pixels
fill(0, 0, 0, 220);
Sets text color to near-black with alpha 220 (slightly transparent)
noStroke();
Disables outlines for text
text('Score: ' + score, 20, 16);
Draws 'Score: ' concatenated with the score number at x=20, y=16
textAlign(RIGHT, TOP);
Changes alignment to top-right corner for the lives text
text('Lives: ' + lives, width - 20, 16);
Draws 'Lives: ' text at top-right (width - 20 pushes it from the right edge)
const lifeR = 14;
Sets the radius of tiny life indicator smileys to 14 pixels
for (let i = 0; i < lives; i++) {
Loops once per remaining life (0 to lives-1)
const x = width - 30 - i * (lifeR * 2 + 8);
Calculates x position for each life icon, spacing them 30 pixels from right edge, with gap between icons
const y = 55;
Places all life icons at the same y position below the text
push(); translate(x, y); drawSmileyAtOrigin(lifeR, 'good', 50); pop();
Moves to the life icon position, draws a tiny happy smiley, and restores the transformation

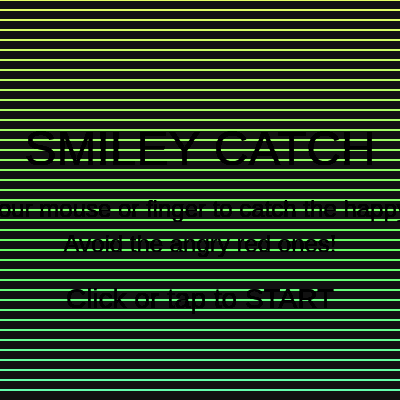
drawTitleScreen()

drawTitleScreen() creates a welcoming first screen that explains the game. It demonstrates responsive text sizing (using min() to adapt to any device) and layered text alignment. This is a standard pattern for game menus in p5.js.

function drawTitleScreen() {
  fill(0, 0, 0, 180);
  textAlign(CENTER, CENTER);

  const bigSize = min(width, height) * 0.12;
  textSize(bigSize);
  text('SMILEY CATCH', width / 2, height / 2 - bigSize);

  textSize(24);
  text('Move your mouse or finger to catch the happy faces.', width / 2, height / 2 + 10);
  text('Avoid the angry red ones!', width / 2, height / 2 + 45);

  textSize(28);
  text('Click or tap to START', width / 2, height * 0.75);
}
Line-by-line explanation (10 lines)
fill(0, 0, 0, 180);
Sets text color to dark (near-black) with alpha 180 (semi-transparent) for readability
textAlign(CENTER, CENTER);
Aligns all text to center from this point forward, both horizontally and vertically
const bigSize = min(width, height) * 0.12;
Calculates title text size as 12% of the smaller canvas dimension, making it responsive to screen size
textSize(bigSize);
Sets text size to the calculated big size
text('SMILEY CATCH', width / 2, height / 2 - bigSize);
Draws the game title centered horizontally and positioned above the canvas center
textSize(24);
Reduces text size for instructions
text('Move your mouse or finger to catch the happy faces.', width / 2, height / 2 + 10);
Draws the first instruction line slightly below center
text('Avoid the angry red ones!', width / 2, height / 2 + 45);
Draws the second instruction line below the first
textSize(28);
Increases text size for the call-to-action
text('Click or tap to START', width / 2, height * 0.75);
Draws the start prompt near the bottom of the screen

drawGameOver()

drawGameOver() overlays a modal dialog box (dark rounded rectangle with text) on top of the frozen game. The responsive sizing ensures the panel looks good on phones and desktops. This is a common UI pattern in interactive sketches.

function drawGameOver() {
  rectMode(CENTER);
  noStroke();
  fill(0, 0, 0, 200);
  const panelW = min(width * 0.7, 600);
  const panelH = 220;
  rect(width / 2, height / 2, panelW, panelH, 20);

  fill(60, 0, 100);
  textAlign(CENTER, CENTER);

  textSize(48);
  text('Game Over!', width / 2, height / 2 - 50);

  textSize(26);
  text('Final score: ' + score, width / 2, height / 2 + 0);

  textSize(22);
  text('Click or tap to play again', width / 2, height / 2 + 50);
}
Line-by-line explanation (14 lines)

🔧 Subcomponents:

calculation Draw semi-transparent panel rect(width / 2, height / 2, panelW, panelH, 20);

Draws a centered dark rounded rectangle to serve as background for the game-over text

rectMode(CENTER);
Makes rectangles draw from their center point instead of top-left
noStroke();
Removes outlines from shapes
fill(0, 0, 0, 200);
Sets fill to semi-transparent dark (alpha 200) for the background panel
const panelW = min(width * 0.7, 600);
Sets panel width to 70% of canvas width, but capped at 600 pixels maximum (prevents stretching on very wide screens)
const panelH = 220;
Sets panel height to a fixed 220 pixels
rect(width / 2, height / 2, panelW, panelH, 20);
Draws the dark panel centered at canvas center with 20-pixel rounded corners
fill(60, 0, 100);
Changes fill to white (HSB: 60 hue gives yellow-white, 0 saturation, 100 brightness) for text
textAlign(CENTER, CENTER);
Centers all text both horizontally and vertically
textSize(48);
Large text size for the game-over headline
text('Game Over!', width / 2, height / 2 - 50);
Draws 'Game Over!' text above the panel center
textSize(26);
Medium text size for the final score
text('Final score: ' + score, width / 2, height / 2 + 0);
Displays the final score number centered in the panel
textSize(22);
Slightly smaller text for the restart prompt
text('Click or tap to play again', width / 2, height / 2 + 50);
Prompts the player to restart below the score

drawBackground()

drawBackground() creates a continuously shifting gradient by layering colored lines. The hue rotation (bgHue += 0.1) makes colors cycle smoothly. The stripe height (y += 10) controls resolution—smaller steps create smoother gradients but are slower. This is a simple but effective background animation technique.

🔬 This loop draws horizontal stripes with gradually changing hue. The y * 0.2 creates the gradient slope. What happens if you change y * 0.2 to y * 0.5? Will the hue gradient shift faster or slower?

  for (let y = 0; y < height; y += 10) {
    const h = (bgHue + y * 0.2) % 360;
    stroke(h, 60, 100);
    line(0, y, width, y);
  }
function drawBackground() {
  // Simple animated vertical gradient using lines
  bgHue = (bgHue + 0.1) % 360;

  for (let y = 0; y < height; y += 10) {
    const h = (bgHue + y * 0.2) % 360;
    stroke(h, 60, 100);
    line(0, y, width, y);
  }

  noStroke();
}
Line-by-line explanation (6 lines)

🔧 Subcomponents:

calculation Animate hue rotation bgHue = (bgHue + 0.1) % 360;

Smoothly rotates the background hue through the color spectrum

for-loop Draw horizontal stripes for (let y = 0; y < height; y += 10) {

Draws many thin horizontal lines at different hues to create a vertical gradient effect

bgHue = (bgHue + 0.1) % 360;
Increments bgHue by 0.1 each frame, wrapping back to 0 when it exceeds 360 (using modulo %) to cycle smoothly through colors
for (let y = 0; y < height; y += 10) {
Loops from the top of the canvas to the bottom in 10-pixel steps
const h = (bgHue + y * 0.2) % 360;
Calculates the hue for this stripe by adding y * 0.2 to the base hue, creating a gradient from top to bottom
stroke(h, 60, 100);
Sets the line color to the calculated hue with 60% saturation and 100% brightness (vivid colors)
line(0, y, width, y);
Draws a horizontal line across the full width at the current y position
noStroke();
Disables strokes after drawing to prevent outline artifacts on subsequent shapes

animateBackground()

animateBackground() is empty by design, keeping updateGame() organized. The actual background update happens in drawBackground(). This is a common organizational pattern—separate update logic from rendering logic even if one is currently unused.

function animateBackground() {
  // Slight hue drift handled in drawBackground()
}
Line-by-line explanation (1 lines)
// Slight hue drift handled in drawBackground()
This function is a placeholder—the actual background animation (hue drifting) is already implemented in drawBackground(). It exists here for code organization.

playGoodSound()

playGoodSound() demonstrates p5.sound's MonoSynth object, which generates synthetic tones. C6 is a high, cheerful note perfect for positive feedback. The duration (0.1) is short and punchy. Learning to pair sounds with game events makes interactions feel more rewarding.

function playGoodSound() {
  // Bright, short beep
  if (goodSynth) {
    const now = 0;
    goodSynth.play('C6', 0.4, now, 0.1);
  }
}
Line-by-line explanation (3 lines)
if (goodSynth) {
Checks if goodSynth was successfully created (defensive check in case sound initialization failed)
const now = 0;
Sets the start time to 0 (immediate playback)
goodSynth.play('C6', 0.4, now, 0.1);
Plays note C6 (a high, bright note) at volume 0.4, starting immediately, for duration 0.1 seconds

playBadSound()

playBadSound() contrasts with playGoodSound()—it uses a much lower note (G2 vs C6) and lasts twice as long (0.2 vs 0.1). This audio design choice makes negative events feel different from positive ones. Low, longer tones are universally perceived as sad or wrong.

function playBadSound() {
  // Lower, slightly longer "oops" beep
  if (badSynth) {
    const now = 0;
    badSynth.play('G2', 0.5, now, 0.2);
  }
}
Line-by-line explanation (3 lines)
if (badSynth) {
Checks if badSynth was successfully created
const now = 0;
Sets start time to 0 (immediate)
badSynth.play('G2', 0.5, now, 0.2);
Plays note G2 (a low, sad note) at volume 0.5, starting immediately, for duration 0.2 seconds (twice as long as good sound)

startGame()

startGame() transitions from title/gameover screen to active gameplay. It resets all game variables and calls userStartAudio() to satisfy browser audio policies—a necessary but often-overlooked detail. This function is called by mouse/touch events, not automatically.

function startGame() {
  // Required for browser audio policies:
  // https://p5js.org/reference/#/p5/userStartAudio
  userStartAudio();

  score = 0;
  lives = 3;
  smilies = [];
  createPlayer();
  lastSpawnFrame = frameCount;
  gameState = 'playing';
}
Line-by-line explanation (7 lines)
userStartAudio();
Initializes the Web Audio API context—modern browsers require user interaction before playing sounds, and this unlocks that capability
score = 0;
Resets the score to 0 for a fresh game
lives = 3;
Resets lives to 3
smilies = [];
Clears the smilies array, removing any falling faces from the previous game
createPlayer();
Reinitializes the player object at the starting position
lastSpawnFrame = frameCount;
Records the current frame as the spawn time baseline so the first smiley spawns at the correct interval
gameState = 'playing';
Sets game state to 'playing', which tells draw() to start the game loop

checkGameOver()

checkGameOver() is a simple state gate that transitions the game from playing to gameover when lives run out. The check for gameState === 'playing' prevents accidentally re-setting it if called multiple times. This function is called every frame while playing.

function checkGameOver() {
  if (lives <= 0 && gameState === 'playing') {
    gameState = 'gameover';
  }
}
Line-by-line explanation (2 lines)
if (lives <= 0 && gameState === 'playing') {
Checks if lives have reached zero or below, AND the game is currently in 'playing' state (prevents re-triggering)
gameState = 'gameover';
Transitions to the gameover state, which tells draw() to stop updating and show the game-over screen instead

mousePressed()

mousePressed() is a p5.js event handler that runs whenever the user clicks. It provides a simple way to transition from menu screens to gameplay. Because it checks gameState, clicks during active gameplay are safely ignored.

function mousePressed() {
  if (gameState === 'title' || gameState === 'gameover') {
    startGame();
  }
}
Line-by-line explanation (2 lines)
if (gameState === 'title' || gameState === 'gameover') {
Checks if the current screen is title or gameover
startGame();
If on either screen, start a new game when the mouse is clicked

touchStarted()

touchStarted() is p5.js's touch equivalent of mousePressed. By delegating to mousePressed(), we reuse the same code for both inputs. Returning false prevents default browser behavior (page scrolling), which would interrupt gameplay on mobile.

function touchStarted() {
  mousePressed();
  // Prevent page scroll on mobile
  return false;
}
Line-by-line explanation (2 lines)
mousePressed();
Calls the same logic as mouse clicks so touch events work identically
return false;
Prevents the browser from scrolling the page when the user touches the canvas—essential for mobile game feel

touchMoved()

touchMoved() prevents unwanted page scrolling during gameplay. It's called continuously while the user has a finger on the screen and is moving it. Returning false disables the browser's default scroll behavior.

function touchMoved() {
  // Prevent scrolling while dragging
  return false;
}
Line-by-line explanation (1 lines)
return false;
Blocks the browser's default touch-drag scrolling so the game stays in view while the player moves their finger

windowResized()

windowResized() is a p5.js event handler that runs whenever the browser window is resized. It ensures the canvas scales responsively and the player repositions correctly so the game remains playable at any window size. This is essential for modern web games that work on phones and desktops.

function windowResized() {
  resizeCanvas(windowWidth, windowHeight);
  // Keep player near the bottom
  if (player) {
    player.y = height - player.r - 20;
    player.x = constrain(player.x, player.r, width - player.r);
  }
}
Line-by-line explanation (4 lines)
resizeCanvas(windowWidth, windowHeight);
Resizes the p5.js canvas to match the new window size when the browser window is resized
if (player) {
Checks if the player object exists (it might not during very early initialization)
player.y = height - player.r - 20;
Re-calculates the player's y position to keep it at the same relative distance from the bottom in the new canvas size
player.x = constrain(player.x, player.r, width - player.r);
Clamps the player's x position so it stays within bounds in the resized canvas (prevents it from being off-screen on either side)

📦 Key Variables

smilies array

Stores all currently falling smiley objects (each with position, speed, type, color, and animation properties)

let smilies = [];
player object

Stores the player-controlled smiley with properties x, y (position) and r (radius)

let player;
score number

Tracks the current game score (incremented each time a happy face is caught)

let score = 0;
lives number

Tracks remaining lives (decremented when missing happy faces or catching angry faces, game ends when it reaches 0)

let lives = 3;
gameState string

Tracks the current game screen: 'title', 'playing', or 'gameover'—controls which draw function runs each frame

let gameState = 'title';
lastSpawnFrame number

Records the frame number when the last smiley was spawned, used to calculate spawn intervals

let lastSpawnFrame = 0;
spawnInterval number

Number of frames between smiley spawns, decreases as score increases to raise difficulty

let spawnInterval = 60;
goodSynth object (p5.MonoSynth)

Synthesizer for playing cheerful sounds when happy faces are caught

let goodSynth;
badSynth object (p5.MonoSynth)

Synthesizer for playing sad sounds when missing happy faces or catching angry faces

let badSynth;
bgHue number

Current hue value (0-360) for the animated background gradient, incremented each frame to cycle through colors

let bgHue = 50;

🔧 Potential Improvements (6)

Here are some ways this code could be enhanced:

BUG updateSmilies() collision detection

The collision detection uses distance (dist) but smilies can be caught when they're slightly off-screen or overlapping with cursor slightly—may feel imprecise or unpredictable

💡 Add a tolerance factor or adjust the collision radius dynamically based on smiley size for more consistent hitboxes

PERFORMANCE drawBackground()

Drawing hundreds of horizontal lines every frame (height / 10) is inefficient, especially on large high-resolution displays

💡 Use createGraphics() to pre-render the gradient pattern once and cache it, only updating the hue offset with a shader or by redrawing less frequently

STYLE Global variables

Many global variables (smilies, player, score, lives, gameState, etc.) could be organized into a single game object for better code organization

💡 Refactor into let game = { smilies: [], score: 0, lives: 3, state: 'title', ... } to reduce global namespace pollution and improve readability

FEATURE spawnSmiley() and game mechanics

Game difficulty is only controlled by spawn rate—smilies get faster but all fall straight (after wiggle). Lacks varied challenges

💡 Add difficulty tiers with new smiley behaviors: obstacle smilies that don't give/lose points, bouncing smilies, or split smilies that spawn two smaller ones when caught

BUG updatePlayerPosition()

On startup or if mouseX is never updated, targetX could remain at 0 (uninitialized), which triggers the fallback to center—but this check may not catch all edge cases

💡 Initialize mouseX fallback on startup or use a more robust check: constrain input to ensure it's always within valid screen bounds before using

STYLE Sound functions (playGoodSound, playBadSound)

Notes are hardcoded ('C6', 'G2') and durations are magic numbers (0.1, 0.2) with no context

💡 Create sound configuration constants at the top: const GOOD_NOTE = 'C6', GOOD_DURATION = 0.1, BAD_NOTE = 'G2', etc. for easier tuning

🔄 Code Flow

Code flow showing setup, draw, createplayer, updategame, drawgame, updateplayerposition, drawplayer, maybespawnsmiley, spawnsmiley, updatesmilies, drawsmileyatorigin, drawhud, drawtitlescreen, drawgameover, drawbackground, animatebackground, playgoodsound, playbadsound, startgame, checkgameover, mousepressed, touchstarted, touchmoved, windowresized

💡 Click on function names in the diagram to jump to their code

graph TD start[Start] --> setup[setup] setup --> draw[draw loop] draw --> state-switch[state-switch] draw --> updategame[updategame] draw --> drawgame[drawgame] draw --> drawhud[drawhud] draw --> drawbackground[drawbackground] click setup href "#fn-setup" click draw href "#fn-draw" click state-switch href "#sub-state-switch" click updategame href "#fn-updategame" click drawgame href "#fn-drawgame" click drawhud href "#fn-drawhud" click drawbackground href "#fn-drawbackground" updategame --> updateplayerposition[updateplayerposition] updategame --> maybespawnsmiley[maybespawnsmiley] updategame --> updatesmilies[updatesmilies] click updateplayerposition href "#fn-updateplayerposition" click maybespawnsmiley href "#fn-maybespawnsmiley" click updatesmilies href "#fn-updatesmilies" drawgame --> smilies-loop[smilies-loop] drawgame --> drawplayer[drawplayer] click smilies-loop href "#sub-smilies-loop" click drawplayer href "#fn-drawplayer" updatesmilies --> reverse-loop[reverse-loop] updatesmilies --> physics-update[physics-update] updatesmilies --> collision-detection[collision-detection] updatesmilies --> miss-detection[miss-detection] click reverse-loop href "#sub-reverse-loop" click physics-update href "#sub-physics-update" click collision-detection href "#sub-collision-detection" click miss-detection href "#sub-miss-detection" drawplayer --> face-circle[face-circle] drawplayer --> eyes-loop[eyes-loop] drawplayer --> mouth-conditional[mouth-conditional] drawplayer --> sunglasses-loop[sunglasses-loop] click face-circle href "#sub-face-circle" click eyes-loop href "#sub-eyes-loop" click mouth-conditional href "#sub-mouth-conditional" click sunglasses-loop href "#sub-sunglasses-loop" maybespawnsmiley --> difficulty-scaling[difficulty-scaling] maybespawnsmiley --> spawn-check[spawn-check] click difficulty-scaling href "#sub-difficulty-scaling" click spawn-check href "#sub-spawn-check" spawn-check --> type-assignment[type-assignment] spawn-check --> speed-scaling[speed-scaling] spawn-check --> color-assignment[color-assignment] click type-assignment href "#sub-type-assignment" click speed-scaling href "#sub-speed-scaling" click color-assignment href "#sub-color-assignment" drawhud --> score-display[score-display] drawhud --> life-icons-loop[life-icons-loop] click score-display href "#sub-score-display" click life-icons-loop href "#sub-life-icons-loop" drawbackground --> hue-drift[hue-drift] drawbackground --> gradient-loop[gradient-loop] click hue-drift href "#sub-hue-drift" click gradient-loop href "#sub-gradient-loop"

Preview

SmileFaceCatchGPT5high - p5.js creative coding sketch preview
Sketch Preview
Code flow diagram showing the structure of SmileFaceCatchGPT5high - Code flow showing setup, draw, createplayer, updategame, drawgame, updateplayerposition, drawplayer, maybespawnsmiley, spawnsmiley, updatesmilies, drawsmileyatorigin, drawhud, drawtitlescreen, drawgameover, drawbackground, animatebackground, playgoodsound, playbadsound, startgame, checkgameover, mousepressed, touchstarted, touchmoved, windowresized
Code Flow Diagram