
Snake Game Attempt - xelsed.ai

This sketch creates a neon-glowing snake game controlled entirely by mouse movement instead of arrow keys. The snake's head smoothly chases the cursor while body segments trail behind with a springy lag effect, and everything is rendered with a glowing green neon aesthetic using canvas shadow effects.

🧪 Try This!

Experiment with the code by making these changes:

  1. Make the snake move faster to the cursor — Increasing SPEED_LERP_AMOUNT makes the head catch up to the mouse much more quickly, giving the game a snappier feel.
  2. Recolor the snake to hot pink — Changing the fill color in drawSnake() instantly recolors both the head and body of the snake.
  3. Turn off the glow effect entirely — Setting shadowBlur to 0 removes the neon halo, letting you compare the flat look against the glowing version.
  4. Start with a much longer snake — Increasing INITIAL_LENGTH makes the game harder immediately by starting with a longer body to avoid colliding with.
Prefer the full editor? Open it there →

📖 About This Sketch

This sketch reimagines the classic Snake game with fluid, mouse-driven movement instead of grid-based arrow key controls. Instead of teleporting between grid cells, the snake's head smoothly glides toward the mouse cursor using p5.Vector.lerp(), and each body segment chases the one in front of it with its own lerp, creating an elastic, rope-like trailing motion. The whole thing is drenched in a retro neon glow created by tapping directly into the HTML5 canvas's shadowBlur and shadowColor properties, and the snake's body is drawn as rotated rectangles connecting each segment rather than a chain of separate circles.

The code is organized around a p5.Vector array called snake, where each vector is one segment's position, plus a handful of small single-purpose functions: one to move the snake, one to check food collisions, one to check self-collisions, one to check wall collisions, and separate drawing functions for the snake, the food, and the glow effect. Studying this sketch teaches you how to use vector interpolation (lerp) for smooth follow-the-leader movement, how to rotate a shape to point along a direction using heading() and rotate(), and how push()/pop() lets you apply a special effect (the glow) to only some elements on screen.

⚙️ How It Works

  1. When the sketch loads, setup() creates a full-window canvas and calls resetGame(), which builds a snake of 5 segments in the center of the screen and places the first piece of food at a random valid spot.
  2. Every frame, draw() clears the background, then calls updateSnake() to move the head toward the current mouse position and pulls each body segment toward the segment in front of it, creating a smooth, lagging chain reaction of motion.
  3. After moving, draw() runs three collision checks in sequence: checkFoodCollision() grows the snake and generates new food if the head touches it, checkSelfCollision() ends the game if the head gets too close to its own body (skipping the first few segments so sharp turns don't falsely trigger it), and checkWallCollision() ends the game if the head leaves the canvas.
  4. The snake and food are drawn inside a push()/pop() block where applyGlow() sets the canvas's shadowBlur and shadowColor, so only those shapes get the neon glow while the score text drawn afterward stays sharp.
  5. The body is rendered by looping through the segments and, for each pair, translating and rotating the drawing origin using the angle between them (dir.heading()) so a rectangle can be stretched to visually connect the two points.
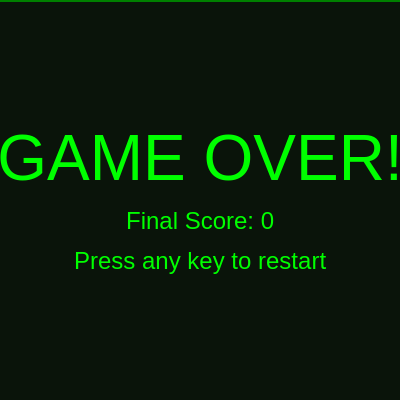
  6. If the game ends, draw() shows the Game Over screen instead of updating anything, and pressing any key calls resetGame() to start over; resizing the browser window also triggers a full reset via windowResized().

🎓 Concepts You'll Learn

p5.Vector and lerp() interpolationArray of vectors as a data structureTrigonometric heading/rotation for connecting shapesCanvas 2D context shadow effects for glowpush()/pop() isolated drawing stateCollision detection with distance checks

📝 Code Breakdown

setup()

setup() runs exactly once when the sketch starts. It's the right place to create the canvas and call any one-time initialization function like resetGame().

function setup() {
  createCanvas(windowWidth, windowHeight);
  resetGame(); // Initialize the game
}
Line-by-line explanation (2 lines)
createCanvas(windowWidth, windowHeight);
Creates a canvas that fills the entire browser window, using p5's built-in windowWidth and windowHeight variables.
resetGame(); // Initialize the game
Calls the resetGame function to set up the snake's starting position, score, and first food item before drawing begins.
resetGame()

resetGame() is a reusable initialization function - calling it both from setup() and from keyPressed()/windowResized() avoids duplicating setup logic, a common and useful pattern.

🔬 This loop lays the initial body out horizontally using headPos.x - i * SEGMENT_SIZE. What happens if you change headPos.y to also shift with i, like headPos.y + i * 5, so the snake starts diagonally?

  for (let i = 1; i < INITIAL_LENGTH; i++) {
    snake.push(createVector(headPos.x - i * SEGMENT_SIZE, headPos.y));
  }
function resetGame() {
  snake = [];
  score = 0;
  isGameOver = false;

  // Initialize snake segments at the center of the canvas
  let headPos = createVector(width / 2, height / 2);
  snake.push(headPos); // Head segment
  // Add initial body segments slightly behind the head
  for (let i = 1; i < INITIAL_LENGTH; i++) {
    snake.push(createVector(headPos.x - i * SEGMENT_SIZE, headPos.y));
  }

  generateFood(); // Place the first food item
}
Line-by-line explanation (8 lines)

🔧 Subcomponents:

for-loop Build Initial Body Segments for (let i = 1; i < INITIAL_LENGTH; i++) { snake.push(createVector(headPos.x - i * SEGMENT_SIZE, headPos.y)); }

Adds body segments to the left of the head, spaced SEGMENT_SIZE apart, so the snake starts as a straight horizontal line.

snake = [];
Empties the snake array so a fresh set of segments can be added, useful both at game start and on restart.
score = 0;
Resets the score counter back to zero.
isGameOver = false;
Clears the game over flag so draw() resumes normal gameplay instead of showing the game over screen.
let headPos = createVector(width / 2, height / 2);
Creates a p5.Vector at the exact center of the canvas to be the snake's starting head position.
snake.push(headPos); // Head segment
Adds the head vector as the first element (index 0) of the snake array.
for (let i = 1; i < INITIAL_LENGTH; i++) {
Loops to add the remaining body segments, starting at index 1 since the head already occupies index 0.
snake.push(createVector(headPos.x - i * SEGMENT_SIZE, headPos.y));
Places each new segment further to the left of the head, spaced one SEGMENT_SIZE apart, so the initial snake looks like a straight line.
generateFood(); // Place the first food item
Calls generateFood() to pick a random valid spot for the first piece of food.

generateFood()

This function demonstrates 'rejection sampling' - a common technique where you generate random values and keep retrying until one satisfies your constraints, with a safety limit to avoid infinite loops.

🔬 This line rejects food positions too close to the snake. What happens visually if you make the threshold much larger, like SEGMENT_SIZE * 5 + FOOD_SIZE, forcing food to spawn far from the snake every time?

      if (p5.Vector.dist(newFoodPos, snake[i]) < SEGMENT_SIZE + FOOD_SIZE) {
        validPos = false;
        break; // If overlap, try a new position
      }
function generateFood() {
  let validPos = false;
  let newFoodPos;
  let attempts = 0;
  const MAX_ATTEMPTS = 100; // Max attempts to find a valid food position

  // Loop to ensure food doesn't spawn on top of the snake
  while (!validPos && attempts < MAX_ATTEMPTS) {
    newFoodPos = createVector(
      random(FOOD_SIZE / 2, width - FOOD_SIZE / 2),
      random(FOOD_SIZE / 2, height - FOOD_SIZE / 2)
    );

    validPos = true;
    for (let i = 0; i < snake.length; i++) {
      // Check if new food position overlaps with any snake segment
      if (p5.Vector.dist(newFoodPos, snake[i]) < SEGMENT_SIZE + FOOD_SIZE) {
        validPos = false;
        break; // If overlap, try a new position
      }
    }
    attempts++;
  }

  // Fallback: if a valid position isn't found after max attempts, place it anyway
  if (!validPos) {
    console.warn("Could not find a valid food position after max attempts. Placing anyway.");
    newFoodPos = createVector(random(FOOD_SIZE / 2, width - FOOD_SIZE / 2), random(FOOD_SIZE / 2, height - FOOD_SIZE / 2));
  }

  food = newFoodPos;
}
Line-by-line explanation (11 lines)

🔧 Subcomponents:

while-loop Retry Until Valid Position Found while (!validPos && attempts < MAX_ATTEMPTS) { ... }

Keeps trying random positions for the food until one is found that doesn't overlap the snake, or gives up after 100 tries.

for-loop Check Overlap With Every Segment for (let i = 0; i < snake.length; i++) { if (p5.Vector.dist(newFoodPos, snake[i]) < SEGMENT_SIZE + FOOD_SIZE) { validPos = false; break; } }

Compares the candidate food position against every snake segment to make sure food doesn't spawn on top of the snake.

let validPos = false;
Tracks whether the current candidate food position is acceptable; starts false so the loop runs at least once.
const MAX_ATTEMPTS = 100; // Max attempts to find a valid food position
Caps how many times the loop will retry, preventing an infinite loop if the snake fills most of the screen.
while (!validPos && attempts < MAX_ATTEMPTS) {
Keeps generating new random positions as long as a valid spot hasn't been found and the attempt limit hasn't been reached.
newFoodPos = createVector( random(FOOD_SIZE / 2, width - FOOD_SIZE / 2), random(FOOD_SIZE / 2, height - FOOD_SIZE / 2) );
Picks a random x and y within the canvas, inset by half the food's size so it never spawns partly off-screen.
validPos = true;
Optimistically assumes this new position is valid before checking it against the snake.
for (let i = 0; i < snake.length; i++) {
Loops through every current snake segment to check for overlap with the candidate food position.
if (p5.Vector.dist(newFoodPos, snake[i]) < SEGMENT_SIZE + FOOD_SIZE) {
Uses p5.Vector.dist() to measure the distance between the food and this segment; if they're too close, it counts as an overlap.
validPos = false; break; // If overlap, try a new position
Marks the position invalid and immediately stops checking further segments since one overlap is enough to reject it.
attempts++;
Increments the attempt counter each time through the while loop so the search eventually gives up if needed.
if (!validPos) { console.warn("Could not find a valid food position after max attempts. Placing anyway."); newFoodPos = createVector(random(FOOD_SIZE / 2, width - FOOD_SIZE / 2), random(FOOD_SIZE / 2, height - FOOD_SIZE / 2)); }
A safety fallback: if 100 attempts all failed, just place the food somewhere random anyway rather than leaving it undefined.
food = newFoodPos;
Commits the chosen position to the global food variable, which drawFood() and checkFoodCollision() will use.

draw()

draw() is p5.js's animation loop, running ~60 times per second. Structuring it as a short list of function calls (updateSnake, checkFoodCollision, etc.) rather than one giant block makes the game logic much easier to read and debug.

🔬 The glow only applies inside this push()/pop() block. What happens if you move displayScore() to be called BEFORE pop(), so it's inside the glow block too?

  push();
  applyGlow();

  drawFood();
  drawSnake();

  pop(); // Reset drawing context to remove glow for subsequent elements (like score)
function draw() {
  background(10, 20, 10); // Dark green background

  // If game is over, display game over screen and exit draw loop
  if (isGameOver) {
    displayGameOver();
    return;
  }

  // Game logic
  updateSnake();
  checkFoodCollision();
  checkSelfCollision();
  checkWallCollision();

  // Apply glow effect for all drawn elements in this push/pop block
  push();
  applyGlow();

  drawFood();
  drawSnake();

  pop(); // Reset drawing context to remove glow for subsequent elements (like score)

  displayScore();
}
Line-by-line explanation (12 lines)

🔧 Subcomponents:

conditional Game Over Early Return if (isGameOver) { displayGameOver(); return; }

Stops the rest of draw() from running once the game has ended, freezing the scene and showing the game over text instead.

background(10, 20, 10); // Dark green background
Repaints the entire canvas with a near-black green color every frame, erasing the previous frame's drawing so nothing smears.
if (isGameOver) { displayGameOver(); return; }
If the game has ended, this shows the game over screen and exits draw() early with return, skipping all the movement and collision code below.
updateSnake();
Moves the head toward the mouse and updates each body segment's position.
checkFoodCollision();
Checks whether the head has reached the food; if so, grows the snake and respawns food.
checkSelfCollision();
Checks whether the head has bumped into the snake's own body, ending the game if so.
checkWallCollision();
Checks whether the head has left the canvas boundaries, ending the game if so.
push();
Saves the current drawing style settings so changes made next (like the glow) can be undone later with pop().
applyGlow();
Turns on the neon shadow/glow effect that will apply to every shape drawn until pop() is called.
drawFood();
Draws the food circle, which will appear with the glow effect active.
drawSnake();
Draws the snake's head and body, also affected by the glow.
pop(); // Reset drawing context to remove glow for subsequent elements (like score)
Restores the drawing settings from before push(), turning off the glow so it doesn't affect anything drawn afterward.
displayScore();
Draws the score text without the glow effect, since it's called after pop().

updateSnake()

p5.Vector.lerp(target, amount) is a powerful shortcut for smooth, spring-like motion: instead of jumping straight to a target, an object moves a percentage of the remaining distance each frame, naturally slowing as it gets close.

🔬 This loop runs backward from the tail to segment 1. What happens if you change it to run forward instead (for (let i = 1; i < snake.length; i++))? Predict the visual difference before trying it.

  for (let i = snake.length - 1; i > 0; i--) {
    snake[i].lerp(snake[i - 1], BODY_LERP_AMOUNT); // Smoothly interpolates body segments
  }
function updateSnake() {
  // Move head towards the mouse cursor
  let targetHeadPos = createVector(mouseX, mouseY);
  snake[0].lerp(targetHeadPos, SPEED_LERP_AMOUNT); // Smoothly interpolates head position

  // Move body segments to follow the previous segment
  for (let i = snake.length - 1; i > 0; i--) {
    snake[i].lerp(snake[i - 1], BODY_LERP_AMOUNT); // Smoothly interpolates body segments
  }
}
Line-by-line explanation (4 lines)

🔧 Subcomponents:

for-loop Body Segments Follow Chain for (let i = snake.length - 1; i > 0; i--) { snake[i].lerp(snake[i - 1], BODY_LERP_AMOUNT); }

Loops backward through the snake so each segment smoothly moves toward the position of the segment directly ahead of it, creating a chain-follow effect.

let targetHeadPos = createVector(mouseX, mouseY);
Creates a vector representing where the mouse currently is - this is the destination the head will chase.
snake[0].lerp(targetHeadPos, SPEED_LERP_AMOUNT); // Smoothly interpolates head position
lerp() moves the head vector a fraction of the way toward the mouse each frame (controlled by SPEED_LERP_AMOUNT), producing smooth acceleration and deceleration instead of instant snapping.
for (let i = snake.length - 1; i > 0; i--) {
Loops from the tail end of the snake backward to segment 1 (not 0, since the head is already updated).
snake[i].lerp(snake[i - 1], BODY_LERP_AMOUNT); // Smoothly interpolates body segments
Each segment smoothly moves toward the position the segment in front of it currently occupies, so motion ripples down the body like a wave.

checkFoodCollision()

Growing the snake by copying the last segment's position (rather than inserting a brand new far-away point) means the new segment appears right where the tail already is and smoothly stretches out as it starts lerping - avoiding a visual jump.

function checkFoodCollision() {
  // Calculate distance between head and food
  if (p5.Vector.dist(snake[0], food) < SEGMENT_SIZE / 2 + FOOD_SIZE / 2) {
    score++; // Increase score
    // Grow snake by adding a new segment at the end, copying the last segment's position
    snake.push(snake[snake.length - 1].copy());
    generateFood(); // Generate new food
  }
}
Line-by-line explanation (4 lines)

🔧 Subcomponents:

conditional Head Touches Food if (p5.Vector.dist(snake[0], food) < SEGMENT_SIZE / 2 + FOOD_SIZE / 2) { ... }

Detects whether the snake's head is close enough to the food to count as 'eating' it.

if (p5.Vector.dist(snake[0], food) < SEGMENT_SIZE / 2 + FOOD_SIZE / 2) {
Measures the straight-line distance between the head (snake[0]) and the food; if it's less than the sum of their radii, they're overlapping.
score++; // Increase score
Adds one point to the score whenever food is eaten.
snake.push(snake[snake.length - 1].copy());
Grows the snake by duplicating the position of its current last segment and adding it to the end of the array - the new segment then quickly lerps into its proper trailing spot next frame.
generateFood(); // Generate new food
Calls generateFood() to place a new piece of food somewhere valid on the canvas.

checkSelfCollision()

This function shows a subtle but important game design fix: because the smooth lerp movement means segments are always somewhat close together, a naive collision check against ALL segments would end the game instantly. Skipping the first few segments avoids that false positive.

🔬 The loop starts at i = 3 to give the head a 'buffer' against nearby segments. What happens if you start it at i = 1 instead - does the snake instantly game-over even without touching anything?

  for (let i = 3; i < snake.length; i++) {
    if (p5.Vector.dist(snake[0], snake[i]) < COLLISION_THRESHOLD) {
      isGameOver = true; // Set game over flag
      return;
    }
  }
function checkSelfCollision() {
  // Start checking from the 4th segment (index 3) to prevent immediate game over
  // This gives the snake a small "buffer" for sharp turns due to the lerping movement.
  for (let i = 3; i < snake.length; i++) {
    if (p5.Vector.dist(snake[0], snake[i]) < COLLISION_THRESHOLD) {
      isGameOver = true; // Set game over flag
      return;
    }
  }
}
Line-by-line explanation (4 lines)

🔧 Subcomponents:

for-loop Check Head Against Body Segments for (let i = 3; i < snake.length; i++) { if (p5.Vector.dist(snake[0], snake[i]) < COLLISION_THRESHOLD) { isGameOver = true; return; } }

Compares the head's position to every body segment beyond the first few, ending the game if the head gets too close to its own tail.

for (let i = 3; i < snake.length; i++) {
Starts checking from index 3 rather than 1, skipping the segments closest to the head - since the lerping movement naturally keeps nearby segments close together, checking them would cause false game-overs.
if (p5.Vector.dist(snake[0], snake[i]) < COLLISION_THRESHOLD) {
Measures the distance from the head to this body segment and compares it against the collision threshold.
isGameOver = true; // Set game over flag
Sets the global game over flag to true, which draw() checks at the start of every frame to switch to the game over screen.
return;
Immediately exits the function once a collision is found, since there's no need to keep checking further segments.

checkWallCollision()

This is a straightforward boundary check pattern used in almost every game: comparing a position's x and y against 0, width, and height to detect when something leaves the visible play area.

function checkWallCollision() {
  let head = snake[0];
  if (head.x < 0 || head.x > width || head.y < 0 || head.y > height) {
    isGameOver = true;
  }
}
Line-by-line explanation (3 lines)

🔧 Subcomponents:

conditional Head Outside Canvas Bounds if (head.x < 0 || head.x > width || head.y < 0 || head.y > height) { isGameOver = true; }

Checks whether the head's x or y coordinate has gone past any of the four canvas edges.

let head = snake[0];
Grabs a shorthand reference to the head vector for readability.
if (head.x < 0 || head.x > width || head.y < 0 || head.y > height) {
Checks all four boundaries at once: left, right, top, and bottom edges of the canvas.
isGameOver = true;
Ends the game if any part of that condition is true.

drawSnake()

translate()+rotate()+push()/pop() is the classic p5.js pattern for drawing a shape at an angle: move the origin to where you want to draw, rotate the coordinate system, draw normally, then pop() to undo the transformation before the next shape.

🔬 The rectangle's height here is SEGMENT_SIZE * 0.9, making the body slightly thinner than the head circles. What happens if you make it much thinner, like SEGMENT_SIZE * 0.3, so the body looks like a thin string?

    rect(0, 0, dir.mag() + SEGMENT_SIZE * 0.5, SEGMENT_SIZE * 0.9);
function drawSnake() {
  noStroke();
  fill(0, 255, 0); // Neon green color

  // Draw snake head as a circle
  circle(snake[0].x, snake[0].y, SEGMENT_SIZE);

  // Draw snake body as rectangles connecting the segments
  for (let i = 1; i < snake.length; i++) {
    let current = snake[i];
    let prev = snake[i - 1];

    // Calculate direction from current segment to previous segment
    let dir = p5.Vector.sub(prev, current);
    let angle = dir.heading(); // Get the angle of this direction

    push();
    translate(current.x, current.y); // Move origin to the current segment
    rotate(angle); // Rotate to align with the direction

    rectMode(CENTER);
    // Draw a rectangle that stretches between the current and previous segments
    // Length is the distance between them plus a small overlap for smoothness
    // Width is slightly less than SEGMENT_SIZE to make the circles more prominent
    rect(0, 0, dir.mag() + SEGMENT_SIZE * 0.5, SEGMENT_SIZE * 0.9);

    pop();
  }
}
Line-by-line explanation (8 lines)

🔧 Subcomponents:

for-loop Draw Connecting Rectangles for (let i = 1; i < snake.length; i++) { ... }

Loops through each pair of adjacent segments and draws a rotated rectangle stretching between them, so the body looks like one continuous shape rather than disconnected dots.

circle(snake[0].x, snake[0].y, SEGMENT_SIZE);
Draws the head as a plain circle at its position with a diameter of SEGMENT_SIZE.
for (let i = 1; i < snake.length; i++) {
Loops through every body segment starting at index 1, since index 0 (the head) was already drawn separately.
let dir = p5.Vector.sub(prev, current);
Calculates a vector pointing from the current segment to the previous one, representing the direction the connecting rectangle should stretch toward.
let angle = dir.heading(); // Get the angle of this direction
heading() converts that direction vector into an angle in radians, which is used to rotate the rectangle so it lines up correctly.
translate(current.x, current.y); // Move origin to the current segment
Shifts the drawing origin (0,0) to the current segment's position so all following drawing commands are relative to it.
rotate(angle); // Rotate to align with the direction
Rotates the coordinate system by the calculated angle, so drawing a shape along the x-axis will actually point toward the previous segment.
rect(0, 0, dir.mag() + SEGMENT_SIZE * 0.5, SEGMENT_SIZE * 0.9);
Draws a rectangle centered at the (now translated and rotated) origin. Its length equals the distance to the previous segment (dir.mag()) plus a little extra overlap, and its width is slightly smaller than SEGMENT_SIZE, so the shape visually bridges the gap between the two segment positions.
pop();
Restores the translate/rotate transformations back to normal so the next segment's drawing starts from the untouched coordinate system.

drawFood()

Keeping drawFood() as its own tiny function makes it trivial to change the food's appearance without touching any game logic - a good example of separating drawing code from game state code.

function drawFood() {
  noStroke();
  fill(0, 255, 0); // Neon green color
  circle(food.x, food.y, FOOD_SIZE);
}
Line-by-line explanation (3 lines)
noStroke();
Removes the outline so the food is drawn as a solid, borderless circle.
fill(0, 255, 0); // Neon green color
Sets the fill color to bright green, matching the snake's neon theme.
circle(food.x, food.y, FOOD_SIZE);
Draws a circle at the food's position with a diameter of FOOD_SIZE.

applyGlow()

p5.js lets you drop down to the raw Canvas 2D API via drawingContext whenever p5's own functions don't expose a feature you need - here it's used to unlock the shadowBlur/shadowColor glow effect that p5 doesn't have a built-in function for.

function applyGlow() {
  // `drawingContext` is the raw HTML canvas 2D rendering context
  drawingContext.shadowBlur = GLOW_STRENGTH;
  drawingContext.shadowColor = color(0, 255, 0); // Neon green glow color
}
Line-by-line explanation (2 lines)
drawingContext.shadowBlur = GLOW_STRENGTH;
drawingContext exposes the underlying HTML5 Canvas 2D API directly; setting shadowBlur makes every shape drawn afterward cast a soft blurred shadow of this many pixels.
drawingContext.shadowColor = color(0, 255, 0); // Neon green glow color
Sets the color of that shadow to bright green, which combined with the blur creates the neon glow look around the snake and food.

displayScore()

textAlign() controls which point on the text string the x/y coordinates refer to - TOP/LEFT is ideal for HUD elements pinned to a screen corner.

function displayScore() {
  fill(0, 255, 0); // Neon green text color
  noStroke();
  textSize(32);
  textAlign(LEFT, TOP);
  text(`Score: ${score}`, 20, 20);
}
Line-by-line explanation (3 lines)
textSize(32);
Sets the font size for the score text to 32 pixels.
textAlign(LEFT, TOP);
Aligns the text so its position is measured from its top-left corner, making it easy to place in a screen corner.
text(`Score: ${score}`, 20, 20);
Draws the current score as a string 20 pixels from the left and top edges, using a template literal to embed the score variable directly in the text.

displayGameOver()

This function only ever runs when isGameOver is true, showing how a boolean flag can completely switch what draw() renders - a simple form of game state management.

function displayGameOver() {
  fill(0, 255, 0); // Neon green text color
  noStroke();
  textSize(64);
  textAlign(CENTER, CENTER);
  text("GAME OVER!", width / 2, height / 2 - 40);
  textSize(24);
  text(`Final Score: ${score}`, width / 2, height / 2 + 20);
  text("Press any key to restart", width / 2, height / 2 + 60);
}
Line-by-line explanation (5 lines)
textAlign(CENTER, CENTER);
Aligns text so the given x/y coordinate is the center of the text, making it easy to center messages on screen.
text("GAME OVER!", width / 2, height / 2 - 40);
Draws the main game over message centered horizontally and slightly above the vertical middle of the canvas.
textSize(24);
Switches to a smaller font size for the secondary lines of text.
text(`Final Score: ${score}`, width / 2, height / 2 + 20);
Shows the player's final score below the main heading.
text("Press any key to restart", width / 2, height / 2 + 60);
Shows instructions for how to play again, further down the screen.

keyPressed()

keyPressed() is a p5.js event function that's automatically called once whenever any key is pressed, without needing to check for it manually inside draw().

function keyPressed() {
  if (isGameOver) {
    resetGame(); // Restart the game if it's over
  }
}
Line-by-line explanation (2 lines)

🔧 Subcomponents:

conditional Restart On Any Key If Game Over if (isGameOver) { resetGame(); }

Only restarts the game with a key press if it's actually over, so keys don't do anything mid-game.

if (isGameOver) {
Checks whether the game has ended before allowing a restart.
resetGame(); // Restart the game if it's over
Calls resetGame() to reinitialize everything and start playing again.

windowResized()

windowResized() is another automatic p5.js event function, called whenever the browser window changes size - useful for keeping full-window sketches responsive.

function windowResized() {
  resizeCanvas(windowWidth, windowHeight);
  resetGame();
}
Line-by-line explanation (2 lines)
resizeCanvas(windowWidth, windowHeight);
Resizes the existing canvas to match the browser window's new dimensions whenever the user resizes their window.
resetGame();
Restarts the game after resizing, since the old snake and food positions may no longer make sense on the new canvas size.

📦 Key Variables

snake array

An array of p5.Vector objects, one per segment, where index 0 is the head and later indices trail behind it.

let snake = [];
food object

A single p5.Vector storing the current position of the food the snake is trying to eat.

let food;
score number

Tracks how many pieces of food the player has eaten so far.

let score = 0;
isGameOver boolean

Flags whether the game has ended, controlling whether draw() runs normal gameplay or shows the game over screen.

let isGameOver = false;
SEGMENT_SIZE number

Constant controlling the diameter/thickness of the snake's head and body segments.

const SEGMENT_SIZE = 20;
FOOD_SIZE number

Constant controlling the diameter of the food dot.

const FOOD_SIZE = 25;
INITIAL_LENGTH number

Constant controlling how many segments the snake starts with.

const INITIAL_LENGTH = 5;
SPEED_LERP_AMOUNT number

Constant (0-1) controlling how quickly the head chases the mouse cursor each frame.

const SPEED_LERP_AMOUNT = 0.08;
BODY_LERP_AMOUNT number

Constant (0-1) controlling how quickly each body segment follows the segment ahead of it.

const BODY_LERP_AMOUNT = 0.15;
GLOW_STRENGTH number

Constant controlling how many pixels the neon shadow blur extends around drawn shapes.

const GLOW_STRENGTH = 20;
COLLISION_THRESHOLD number

Constant distance below which the head is considered to have collided with a body segment, derived from SEGMENT_SIZE.

const COLLISION_THRESHOLD = SEGMENT_SIZE * 0.8;

🔧 Potential Improvements (4)

Here are some ways this code could be enhanced:

BUG checkFoodCollision()

The distance check uses SEGMENT_SIZE / 2 + FOOD_SIZE / 2, but generateFood() rejects positions within SEGMENT_SIZE + FOOD_SIZE of any segment - a much larger radius. This means food can never actually be reachable near the tail segments right after growth, though it works fine in practice since the head moves freely.

💡 Keep the collision radius and the food-spawn exclusion radius consistent, or document why they intentionally differ, to avoid confusion when tuning SEGMENT_SIZE or FOOD_SIZE.

PERFORMANCE generateFood()

As the snake grows very long, the nested while+for loop checks every segment against every random guess up to 100 times, which becomes increasingly expensive and can still fail to find a spot on a nearly-full screen.

💡 For long snakes, consider building a grid of free cells once (a spatial lookup) rather than repeatedly guessing random points and checking full-array distances.

STYLE checkSelfCollision()

The magic number 3 (starting index for the collision check) is a hardcoded workaround for the lerp buffer effect, and isn't tied to any named constant explaining why 3 specifically was chosen.

💡 Extract it into a named constant like const SELF_COLLISION_SKIP_SEGMENTS = 3 with a comment explaining it's tuned to the current BODY_LERP_AMOUNT, so future tuning is easier to reason about.

FEATURE draw() / general game flow

There's no pause state, difficulty progression, or sound feedback when eating food or dying, which limits replay value.

💡 Consider adding a simple sound effect on food-eating and game-over using p5.sound, and gradually increasing SPEED_LERP_AMOUNT as the score rises for a difficulty curve.

🔄 Code Flow

Code flow showing setup, resetgame, generatefood, draw, updatesnake, checkfoodcollision, checkselfcollision, checkwallcollision, drawsnake, drawfood, applyglow, displayscore, displaygameover, keypressed, windowresized

💡 Click on function names in the diagram to jump to their code

graph TD start[Start] --> setup[setup] setup --> resetgame[resetGame] resetgame --> draw[draw loop] draw --> gameover-check[Game Over Early Return] gameover-check -->|if not game over| updatesnake[updateSnake] updatesnake --> body-follow-loop[Body Segments Follow Chain] body-follow-loop --> checkfoodcollision[checkFoodCollision] checkfoodcollision --> food-hit-check[Head Touches Food] food-hit-check -->|if food hit| generatefood[generateFood] draw --> checkselfcollision[checkSelfCollision] checkselfcollision --> self-hit-loop[Check Head Against Body Segments] draw --> checkwallcollision[checkWallCollision] checkwallcollision --> wall-bounds-check[Head Outside Canvas Bounds] draw --> drawsnake[drawSnake] draw --> drawfood[drawFood] draw --> displayscore[displayScore] draw --> displaygameover[displayGameOver] draw --> applyglow[applyGlow] draw --> body-segment-loop[Draw Connecting Rectangles] body-init-loop[Build Initial Body Segments] --> resetgame food-search-loop[Retry Until Valid Position Found] --> generatefood overlap-check-loop[Check Overlap With Every Segment] --> food-search-loop restart-check[Restart On Any Key If Game Over] --> keypressed[keyPressed] click setup href "#fn-setup" click resetgame href "#fn-resetgame" click draw href "#fn-draw" click updatesnake href "#fn-updatesnake" click checkfoodcollision href "#fn-checkfoodcollision" click checkselfcollision href "#fn-checkselfcollision" click checkwallcollision href "#fn-checkwallcollision" click drawsnake href "#fn-drawsnake" click drawfood href "#fn-drawfood" click applyglow href "#fn-applyglow" click displayscore href "#fn-displayscore" click displaygameover href "#fn-displaygameover" click keypressed href "#fn-keypressed" click body-init-loop href "#sub-body-init-loop" click food-search-loop href "#sub-food-search-loop" click overlap-check-loop href "#sub-overlap-check-loop" click gameover-check href "#sub-gameover-check" click body-follow-loop href "#sub-body-follow-loop" click food-hit-check href "#sub-food-hit-check" click self-hit-loop href "#sub-self-hit-loop" click wall-bounds-check href "#sub-wall-bounds-check" click body-segment-loop href "#sub-body-segment-loop" click restart-check href "#sub-restart-check"

❓ Frequently Asked Questions

What visual experience does the Snake Game Attempt - XeLseDai provide?

This sketch creates a dynamic visual experience featuring a growing snake that moves towards the mouse cursor, with a glowing food item that the snake tries to consume.

How can users interact with the Snake Game Attempt - XeLseDai?

Users can control the movement of the snake by moving their mouse, which directs the snake's head towards the cursor.

What creative coding concepts are demonstrated in the Snake Game Attempt - XeLseDai?

The sketch showcases concepts such as vector manipulation for movement, collision detection, and procedural generation of food placement.

Preview

Snake Game Attempt - xelsed.ai - p5.js creative coding sketch preview
Sketch Preview
Code flow diagram showing the structure of Snake Game Attempt - xelsed.ai - Code flow showing setup, resetgame, generatefood, draw, updatesnake, checkfoodcollision, checkselfcollision, checkwallcollision, drawsnake, drawfood, applyglow, displayscore, displaygameover, keypressed, windowresized
Code Flow Diagram