
Sketch 2026-03-01 22:19

This is a classic arcade-style space shooter where the player controls a ship at the bottom of the screen to destroy enemies falling from above. The game features progressive difficulty, collision detection, a lives system, and score tracking, with the game ending when all lives are lost.

🧪 Try This!

Experiment with the code by making these changes:

  1. Change the ship color — Editing the fill() color values instantly recolors the ship—try (0, 255, 0) for green or (255, 200, 0) for gold.
  2. Make the ship move faster — Higher speed values let the ship cross the screen quicker—try 12 or 15 for fast reflexes, or 3 for slow careful aim.
  3. Double the points per kill — Instead of earning 1 point per kill, earn 10—watch your score climb faster and feel more rewarded.
  4. Make enemies bigger targets — Change the random enemy width range from (30, 50) to (60, 100) so enemies are much larger and easier to hit.
  5. Bullets travel way faster — Increase bullet speed from 10 to 20 so they zip across the screen almost instantly.
  6. Start the game on easier difficulty — Change the initial spawn interval from 60 to 100 frames so enemies appear less frequently at the start.
Prefer the full editor? Open it there →

📖 About This Sketch

This sketch creates a fully playable space shooter game with a player-controlled ship, falling enemies, bullets, and increasing difficulty. The visual appeal comes from the arcade aesthetic: cyan player ship with a green nose cone, red enemies, and yellow bullets set against a dark starfield background. It demonstrates several essential p5.js techniques: the draw loop for continuous animation, collision detection using axis-aligned bounding boxes, game state management to switch between screens, and array manipulation to spawn and remove objects dynamically.

The code is organized into clear sections: game logic functions that update player position, handle shooting, spawn and move enemies, and check collisions; drawing functions that render the game world and UI screens; and input handlers that respond to keyboard controls. By studying this sketch, you will learn how to build an interactive game from the ground up, manage arrays of objects (bullets and enemies), detect collisions between rectangles, and implement a game state machine that transitions between start, playing, and game-over screens.

⚙️ How It Works

  1. When the sketch loads, setup() creates a full-screen canvas and initializes a player ship object with position, size, and movement speed. The game starts in the 'start' state, showing a title screen with instructions.
  2. Pressing ENTER transitions to the 'playing' state, where the draw loop runs updateGame() every frame. This function calls several sub-routines: handlePlayerMovement() reads keyboard input and moves the ship left or right (constrained to the canvas), handleShooting() is a placeholder since shooting happens in keyPressed(), and spawnEnemies() creates new red enemy rectangles at the top of the screen at gradually decreasing intervals to increase difficulty.
  3. updateBullets() moves all bullets upward each frame and removes them when they leave the top of the screen. updateEnemies() moves all enemies downward and removes them when they leave the bottom—but if an enemy reaches the bottom, the player loses a life.
  4. checkCollisions() tests every bullet against every enemy using a rectOverlap() helper function that compares axis-aligned bounding boxes. When a bullet and enemy overlap, both are removed and the score increases. The function also tests the player against every enemy; a collision removes the enemy, costs a life, and may trigger game over.
  5. drawGame() renders the player ship (a cyan rectangle with a green triangle nose), all bullets (yellow rectangles), all enemies (red rectangles), and the score/lives UI in the top corners. drawStartScreen() and drawGameOverScreen() display the appropriate overlay text.
  6. Pressing R after game over calls resetGame(true), clearing all objects, resetting lives and score, and restarting the game loop.

🎓 Concepts You'll Learn

Game state machineCollision detection (AABB)Array iteration and removalObject propertiesProgressive difficultyUser input handlingCoordinate geometry

📝 Code Breakdown

setup()

setup() runs once when the sketch loads. It is the perfect place to initialize the canvas size and create the data structures (objects, arrays) that your game will use throughout its lifetime.

function setup() {
  createCanvas(windowWidth, windowHeight);

  player = {
    x: width / 2,
    y: height - 80,
    w: 50,
    h: 30,
    speed: 7
  };

  resetGame(false); // set initial values but stay on start screen
}
Line-by-line explanation (8 lines)

🔧 Subcomponents:

object-creation Player Object Initialization player = { x: width / 2, y: height - 80, w: 50, h: 30, speed: 7 };

Creates the player ship as a plain JavaScript object with position (x, y), dimensions (w, h), and movement speed

createCanvas(windowWidth, windowHeight);
Creates a canvas that fills the entire browser window, making the game responsive to window size
player = {
Begins declaring the player as an object (not a class) with several properties that define its state
x: width / 2,
Sets the player's horizontal starting position to the center of the canvas
y: height - 80,
Sets the player's vertical position 80 pixels from the bottom, giving a border area
w: 50,
Defines the player ship's width as 50 pixels—this is used in collision detection and drawing
h: 30,
Defines the player ship's height as 30 pixels
speed: 7
Sets how many pixels the player moves left or right per frame when a key is held down
resetGame(false);
Calls resetGame() with false to initialize game variables but keep the game in 'start' state rather than immediately playing

resetGame(startImmediately)

resetGame() is a helper function that consolidates all the initialization logic in one place. Calling it from both setup() and keyPressed() keeps the code DRY (Don't Repeat Yourself) and makes it easy to add new variables to reset—just add one line here instead of two places.

function resetGame(startImmediately = true) {
  bullets = [];
  enemies = [];
  score = 0;
  lives = 3;
  enemySpawnInterval = 60;
  lastEnemySpawnFrame = frameCount;
  player.x = width / 2;
  player.y = height - 80;

  if (startImmediately) {
    gameState = 'playing';
  }
}
Line-by-line explanation (10 lines)

🔧 Subcomponents:

calculation Clear Game Arrays bullets = []; enemies = [];

Empties the bullets and enemies arrays so the new game starts with no objects on screen

calculation Reset UI Values score = 0; lives = 3;

Resets the score to 0 and gives the player 3 lives to start fresh

conditional Conditional Game Start if (startImmediately) { gameState = 'playing'; }

If startImmediately is true, immediately transition to 'playing'; otherwise stay on 'start' screen

bullets = [];
Clears all bullets from the screen by creating a new empty array—this removes visual clutter when restarting
enemies = [];
Clears all enemies, giving the player a fresh start with no threats on the screen
score = 0;
Resets the score counter to zero for a new game
lives = 3;
Gives the player three lives—the standard starting lives for arcade games
enemySpawnInterval = 60;
Resets the enemy spawn interval to 60 frames, which is the starting difficulty before any scaling happens
lastEnemySpawnFrame = frameCount;
Records the current frame number so spawn timing starts fresh from this moment
player.x = width / 2;
Moves the player ship back to the horizontal center of the canvas
player.y = height - 80;
Moves the player ship back to its starting vertical position near the bottom
if (startImmediately) {
Tests whether the calling code wants to start playing immediately (true when restarting from game over) or just reset values (false on initial setup)
gameState = 'playing';
If startImmediately is true, changes the game state from 'start' to 'playing', which will trigger the game loop in draw()

draw()

draw() is called 60 times per second and is the heart of p5.js sketches. Notice it doesn't call updateGame() when the state is 'start' or 'gameOver'—this is how we pause the game. This if-else structure is called a state machine and is one of the most powerful patterns in game programming.

🔬 This is a state machine: one block runs depending on which state we're in. Notice that 'gameOver' calls drawGame() before drawGameOverScreen(). What would happen if you removed the drawGame() call so only the overlay shows?

  if (gameState === 'start') {
    drawStartScreen();
  } else if (gameState === 'playing') {
    updateGame();
    drawGame();
  } else if (gameState === 'gameOver') {
    drawGame();
    drawGameOverScreen();
  }
function draw() {
  background(10);

  if (gameState === 'start') {
    drawStartScreen();
  } else if (gameState === 'playing') {
    updateGame();
    drawGame();
  } else if (gameState === 'gameOver') {
    drawGame();
    drawGameOverScreen();
  }
}
Line-by-line explanation (9 lines)

🔧 Subcomponents:

conditional Start State Branch if (gameState === 'start') { drawStartScreen(); }

When the game hasn't started, display the title and instructions screen

conditional Playing State Branch } else if (gameState === 'playing') { updateGame(); drawGame(); }

During active gameplay, update all game logic then render the current state

conditional Game Over State Branch } else if (gameState === 'gameOver') { drawGame(); drawGameOverScreen(); }

After game over, show the final game state with a game-over overlay on top

background(10);
Draws a very dark background (almost black) at the start of every frame, erasing the previous frame and creating a clean slate for new drawings
if (gameState === 'start') {
Tests whether the current game state is 'start', which happens before the player presses ENTER
drawStartScreen();
If the state is 'start', call the function that renders the title, instructions, and start prompt
} else if (gameState === 'playing') {
Tests whether the state is 'playing', which happens after ENTER is pressed and before all lives are lost
updateGame();
Calls the main game update function, which handles movement, spawning, bullets, enemies, and collision checks
drawGame();
Calls the function that renders the player, bullets, enemies, and UI (score and lives) to the screen
} else if (gameState === 'gameOver') {
Tests whether the state is 'gameOver', which happens when lives reach zero
drawGame();
Still draws the final game state so the player can see where they lost
drawGameOverScreen();
Draws a semi-transparent overlay with the final score and restart instructions on top of the game view

updateGame()

updateGame() is an orchestrator function—it calls several smaller functions in a specific order. This structure makes the code readable: you can see at a glance what happens each frame. If you need to add a new feature (like power-ups), you would add a new update function and call it here.

function updateGame() {
  handlePlayerMovement();
  handleShooting();
  spawnEnemies();
  updateBullets();
  updateEnemies();
  checkCollisions();
}
Line-by-line explanation (6 lines)
handlePlayerMovement();
Calls the function that reads keyboard input and moves the player ship left or right
handleShooting();
A placeholder function (it just has a comment); actual shooting is handled in keyPressed()
spawnEnemies();
Creates new enemies at the top of the screen at decreasing intervals to progressively increase difficulty
updateBullets();
Moves all bullets upward and removes bullets that have left the screen
updateEnemies();
Moves all enemies downward and removes enemies that reach the bottom (costing a life)
checkCollisions();
Tests every bullet against every enemy and the player against every enemy, handling hits and game-over conditions

handlePlayerMovement()

keyIsDown() is different from keyPressed()—keyIsDown() returns true while a key is held, allowing smooth continuous movement. keyPressed() fires once per key press, which is why shooting (a single-action event) uses keyPressed() instead.

🔬 These two blocks let you move left or right. What would happen if you added a third block to move up with the UP_ARROW? (Hint: subtract from player.y to go up, add to player.y to go down.)

  if (keyIsDown(LEFT_ARROW) || keyIsDown(65)) { // LEFT or 'A'
    player.x -= player.speed;
  }
  if (keyIsDown(RIGHT_ARROW) || keyIsDown(68)) { // RIGHT or 'D'
    player.x += player.speed;
  }
function handlePlayerMovement() {
  if (keyIsDown(LEFT_ARROW) || keyIsDown(65)) { // LEFT or 'A'
    player.x -= player.speed;
  }
  if (keyIsDown(RIGHT_ARROW) || keyIsDown(68)) { // RIGHT or 'D'
    player.x += player.speed;
  }
  player.x = constrain(player.x, player.w / 2, width - player.w / 2);
}
Line-by-line explanation (5 lines)

🔧 Subcomponents:

conditional Left Movement Check if (keyIsDown(LEFT_ARROW) || keyIsDown(65)) { // LEFT or 'A' player.x -= player.speed; }

Moves the player left if either the LEFT_ARROW or A key is held down

conditional Right Movement Check if (keyIsDown(RIGHT_ARROW) || keyIsDown(68)) { // RIGHT or 'D' player.x += player.speed; }

Moves the player right if either the RIGHT_ARROW or D key is held down

calculation Edge Boundary Clamp player.x = constrain(player.x, player.w / 2, width - player.w / 2);

Prevents the player from moving off the left or right edge of the canvas

if (keyIsDown(LEFT_ARROW) || keyIsDown(65)) {
Tests whether the LEFT_ARROW key OR the A key (keyCode 65) is currently held down; if either is true, the block executes
player.x -= player.speed;
Subtracts player.speed from the x position, moving the ship left by 7 pixels (the default speed value)
if (keyIsDown(RIGHT_ARROW) || keyIsDown(68)) {
Tests whether the RIGHT_ARROW key OR the D key (keyCode 68) is currently held down
player.x += player.speed;
Adds player.speed to the x position, moving the ship right by 7 pixels
player.x = constrain(player.x, player.w / 2, width - player.w / 2);
Uses p5.js's constrain() function to clamp player.x within bounds: the minimum is player.w/2 (half the ship's width from the left edge) and the maximum is width - player.w/2 (half the ship's width from the right edge), preventing the ship from leaving the screen

handleShooting()

This function exists as a placeholder for organization. Shooting is deliberately handled in keyPressed() rather than updateGame() because we want one bullet per spacebar press, not continuous fire while holding the key. If you wanted to add continuous fire later, this is where you would implement it.

function handleShooting() {
  // Shooting is handled in keyPressed() (one shot per press)
}
Line-by-line explanation (1 lines)
// Shooting is handled in keyPressed() (one shot per press)
This function is intentionally empty because shooting happens in keyPressed() instead—a single bullet spawns per spacebar press rather than continuously

spawnEnemies()

spawnEnemies() is where progressive difficulty lives. By gradually decreasing enemySpawnInterval, the game naturally gets harder without any special event triggering it. This is a classic arcade game design pattern—players feel the pressure slowly increasing, which keeps engagement high.

🔬 This is the enemy creation code. The y is always -30 (above the screen). What if you started enemies further above or below? Try changing -30 to a different number—what visual effect does it create?

  if (frameCount - lastEnemySpawnFrame > enemySpawnInterval) {
    const enemyWidth = random(30, 50);
    enemies.push({
      x: random(enemyWidth / 2, width - enemyWidth / 2),
      y: -30,
      w: enemyWidth,
      h: 30,
      speed: random(2, 5)
    });
function spawnEnemies() {
  if (frameCount - lastEnemySpawnFrame > enemySpawnInterval) {
    const enemyWidth = random(30, 50);
    enemies.push({
      x: random(enemyWidth / 2, width - enemyWidth / 2),
      y: -30,
      w: enemyWidth,
      h: 30,
      speed: random(2, 5)
    });
    lastEnemySpawnFrame = frameCount;

    // Gradually make game harder: faster spawns
    if (enemySpawnInterval > 25) {
      enemySpawnInterval -= 0.2;
    }
  }
}
Line-by-line explanation (11 lines)

🔧 Subcomponents:

conditional Spawn Timing Check if (frameCount - lastEnemySpawnFrame > enemySpawnInterval) {

Tests whether enough frames have passed since the last spawn; if so, create a new enemy

calculation Enemy Object Creation const enemyWidth = random(30, 50); enemies.push({ x: random(enemyWidth / 2, width - enemyWidth / 2), y: -30, w: enemyWidth, h: 30, speed: random(2, 5) });

Creates a new enemy with randomized width, position, and speed, and adds it to the enemies array

conditional Difficulty Scaling if (enemySpawnInterval > 25) { enemySpawnInterval -= 0.2; }

Gradually decreases spawn intervals to make enemies appear more frequently as the game progresses, capping out at 25 frames minimum

if (frameCount - lastEnemySpawnFrame > enemySpawnInterval) {
Checks whether the time since the last spawn (current frameCount minus lastEnemySpawnFrame) is greater than the spawn interval; this creates a timer-based spawn system
const enemyWidth = random(30, 50);
Generates a random width between 30 and 50 pixels for this enemy, making enemies slightly different sizes for visual variety
enemies.push({
Adds a new enemy object to the enemies array
x: random(enemyWidth / 2, width - enemyWidth / 2),
Sets the enemy's x position to a random location across the canvas width, adjusted so the enemy doesn't spawn halfway off-screen
y: -30,
Starts the enemy at y = -30, above the visible canvas, so it appears to fall from the top
w: enemyWidth,
The enemy's width is the random value generated above
h: 30,
All enemies have a fixed height of 30 pixels
speed: random(2, 5)
Each enemy gets a random falling speed between 2 and 5 pixels per frame
lastEnemySpawnFrame = frameCount;
Records the current frame number so the next spawn timer can measure from this moment
if (enemySpawnInterval > 25) {
Tests whether the spawn interval is still above the minimum threshold of 25 frames
enemySpawnInterval -= 0.2;
Decreases the spawn interval by 0.2, making enemies spawn slightly more frequently each time one spawns, ramping up difficulty over time

updateBullets()

Notice the loop counts backwards (from length - 1 down to 0) instead of forward. This is essential whenever you're removing items from an array during iteration. If you looped forward and removed index 2, everything after it would shift down, and you'd accidentally skip the new element at index 2.

🔬 Bullets move upward by subtracting b.speed from b.y. What if you changed it to b.y -= b.speed * 2? How much faster would bullets travel? Try it and observe.

  for (let i = bullets.length - 1; i >= 0; i--) {
    let b = bullets[i];
    b.y -= b.speed;
function updateBullets() {
  for (let i = bullets.length - 1; i >= 0; i--) {
    let b = bullets[i];
    b.y -= b.speed;
    if (b.y + b.h / 2 < 0) {
      bullets.splice(i, 1);
    }
  }
}
Line-by-line explanation (5 lines)

🔧 Subcomponents:

for-loop Bullet Update Loop for (let i = bullets.length - 1; i >= 0; i--) {

Iterates through all bullets backwards so that removing one doesn't skip any items

calculation Bullet Movement b.y -= b.speed;

Moves each bullet upward by subtracting its speed from its y position

conditional Off-Screen Removal if (b.y + b.h / 2 < 0) { bullets.splice(i, 1); }

Removes bullets that have left the top of the canvas to prevent memory waste

for (let i = bullets.length - 1; i >= 0; i--) {
Loops through the bullets array backwards (from the last element down to 0); this is crucial because removing an item from an array while looping forward would skip elements
let b = bullets[i];
Stores a reference to the current bullet in variable b for easier reading in the following lines
b.y -= b.speed;
Subtracts the bullet's speed from its y position, moving it upward 10 pixels per frame (the default speed)
if (b.y + b.h / 2 < 0) {
Tests whether the bullet's center (y + h/2) has gone above the top of the canvas (less than 0); if so, the bullet is off-screen and should be removed
bullets.splice(i, 1);
Removes the bullet from the array by splicing out 1 element at index i, preventing off-screen bullets from accumulating in memory

updateEnemies()

updateEnemies() demonstrates defensive loss conditions. Games need challenges, and one of the best challenges is the pressure of limited resources (lives). Every escaped enemy creates tension—players feel the stakes rising.

🔬 When an enemy escapes the bottom, you lose a life. What if you changed it so you lose 2 lives per escaped enemy? Or what if enemies didn't cost lives at all? Try changing lives-- to lives -= 2.

    // Enemy reached bottom: lose a life
    if (e.y - e.h / 2 > height) {
      enemies.splice(i, 1);
      lives--;
function updateEnemies() {
  for (let i = enemies.length - 1; i >= 0; i--) {
    let e = enemies[i];
    e.y += e.speed;

    // Enemy reached bottom: lose a life
    if (e.y - e.h / 2 > height) {
      enemies.splice(i, 1);
      lives--;
      if (lives <= 0) {
        gameState = 'gameOver';
      }
    }
  }
}
Line-by-line explanation (8 lines)

🔧 Subcomponents:

for-loop Enemy Update Loop for (let i = enemies.length - 1; i >= 0; i--) {

Iterates through all enemies backwards to safely remove them

calculation Enemy Downward Movement e.y += e.speed;

Moves each enemy downward by adding its speed to its y position

conditional Enemy Escape Check if (e.y - e.h / 2 > height) { enemies.splice(i, 1); lives--; if (lives <= 0) { gameState = 'gameOver'; } }

Removes enemies that reach the bottom and costs the player a life; triggers game over if lives reach zero

for (let i = enemies.length - 1; i >= 0; i--) {
Loops through enemies backwards for safe removal
let e = enemies[i];
Stores a reference to the current enemy
e.y += e.speed;
Adds the enemy's speed to its y position, moving it downward toward the player
if (e.y - e.h / 2 > height) {
Tests whether the enemy's center has passed below the bottom of the canvas (greater than height)
enemies.splice(i, 1);
Removes the enemy from the array since it has escaped the bottom
lives--;
Decrements the lives counter by 1, penalizing the player for letting an enemy escape
if (lives <= 0) {
Tests whether lives have reached zero or below
gameState = 'gameOver';
Changes the game state to 'gameOver', which will trigger the game-over screen in draw()

checkCollisions()

Collision detection is the heartbeat of interactive games. This code uses a simple nested-loop approach: O(n²) complexity means it gets slow with many objects, but for small arrays it's fine and very readable. The bullet-vs-enemy and player-vs-enemy checks use the same rectOverlap() function, demonstrating code reuse.

🔬 This nested loop tests every bullet against every enemy. It's thorough but can be slow with many objects. The break statement exits the inner loop early when a hit is found. What do you think would happen if you removed the break statement and let a bullet hit multiple enemies?

  for (let i = bullets.length - 1; i >= 0; i--) {
    let b = bullets[i];
    for (let j = enemies.length - 1; j >= 0; j--) {
      let e = enemies[j];
      if (rectOverlap(b, e)) {
function checkCollisions() {
  // Bullet vs Enemy
  for (let i = bullets.length - 1; i >= 0; i--) {
    let b = bullets[i];
    for (let j = enemies.length - 1; j >= 0; j--) {
      let e = enemies[j];
      if (rectOverlap(b, e)) {
        // Remove both and increase score
        bullets.splice(i, 1);
        enemies.splice(j, 1);
        score++;

        // Slightly increase difficulty as score increases
        break; // break enemy loop for this bullet
      }
    }
  }

  // Player vs Enemy
  for (let i = enemies.length - 1; i >= 0; i--) {
    let e = enemies[i];
    if (rectOverlap(player, e)) {
      enemies.splice(i, 1);
      lives--;
      if (lives <= 0) {
        gameState = 'gameOver';
      }
    }
  }
}
Line-by-line explanation (18 lines)

🔧 Subcomponents:

for-loop Bullet-Enemy Collision Loop for (let i = bullets.length - 1; i >= 0; i--) { let b = bullets[i]; for (let j = enemies.length - 1; j >= 0; j--) {

Nested loop that checks every bullet against every enemy for collisions

conditional Bullet-Enemy Collision Response if (rectOverlap(b, e)) { bullets.splice(i, 1); enemies.splice(j, 1); score++; break;

When a bullet hits an enemy, removes both and awards a point

for-loop Player-Enemy Collision Loop for (let i = enemies.length - 1; i >= 0; i--) {

Checks every enemy against the player for collisions

conditional Player-Enemy Collision Response if (rectOverlap(player, e)) { enemies.splice(i, 1); lives--; if (lives <= 0) { gameState = 'gameOver'; } }

When an enemy hits the player, remove the enemy and cost a life

// Bullet vs Enemy
Comment marking the start of the bullet-enemy collision detection section
for (let i = bullets.length - 1; i >= 0; i--) {
Outer loop iterating through all bullets backwards
let b = bullets[i];
Stores the current bullet in variable b
for (let j = enemies.length - 1; j >= 0; j--) {
Inner loop iterating through all enemies backwards for each bullet, creating an O(n²) collision check
let e = enemies[j];
Stores the current enemy in variable e
if (rectOverlap(b, e)) {
Calls the rectOverlap() helper to test whether the bullet and enemy rectangles overlap
bullets.splice(i, 1);
Removes the bullet that hit
enemies.splice(j, 1);
Removes the enemy that was hit
score++;
Increments the score by 1 for the kill
break;
Breaks out of the inner (enemy) loop since this bullet has already hit and been removed, so no need to check more enemies
// Player vs Enemy
Comment marking the start of the player-enemy collision detection section
for (let i = enemies.length - 1; i >= 0; i--) {
Loops through all enemies backwards
let e = enemies[i];
Stores the current enemy
if (rectOverlap(player, e)) {
Tests whether the player rectangle overlaps with the enemy rectangle
enemies.splice(i, 1);
Removes the enemy that hit the player
lives--;
Costs the player one life
if (lives <= 0) {
Tests whether the player is out of lives
gameState = 'gameOver';
Transitions to the game-over state if lives are depleted

rectOverlap(a, b)

rectOverlap() uses the Axis-Aligned Bounding Box (AABB) collision algorithm, the most common collision test in games. It works by checking whether the rectangles are separated on any axis (left, right, top, bottom). If they're not separated on all axes, they must be overlapping. This is fast, simple, and works perfectly for rectangular objects.

function rectOverlap(a, b) {
  return !(
    a.x + a.w / 2 < b.x - b.w / 2 ||
    a.x - a.w / 2 > b.x + b.w / 2 ||
    a.y + a.h / 2 < b.y - b.h / 2 ||
    a.y - a.h / 2 > b.y + b.h / 2
  );
}
Line-by-line explanation (7 lines)

🔧 Subcomponents:

conditional Axis-Aligned Bounding Box Test return !( a.x + a.w / 2 < b.x - b.w / 2 || a.x - a.w / 2 > b.x + b.w / 2 || a.y + a.h / 2 < b.y - b.h / 2 || a.y - a.h / 2 > b.y + b.h / 2 );

Tests if two axis-aligned rectangles overlap by checking four edge conditions; returns true if they overlap, false otherwise

function rectOverlap(a, b) {
Defines a collision detection function that takes two rectangle objects (a and b) as parameters
return !(
Returns the negation (!) of the condition below; the function returns true if the boxes DO overlap
a.x + a.w / 2 < b.x - b.w / 2 ||
Tests if a's right edge is to the left of b's left edge (meaning they don't touch on the x-axis); the || means OR, so if ANY condition is true, they don't overlap
a.x - a.w / 2 > b.x + b.w / 2 ||
Tests if a's left edge is to the right of b's right edge
a.y + a.h / 2 < b.y - b.h / 2 ||
Tests if a's bottom edge is above b's top edge
a.y - a.h / 2 > b.y + b.h / 2
Tests if a's top edge is below b's bottom edge; if this is true, they don't overlap vertically
);
Closes the negation; if any of the four conditions are true (boxes don't touch), the whole thing is true, and ! makes it false—meaning no overlap

drawGame()

drawGame() is pure rendering—it doesn't change any game state, just displays the current state visually. Notice the separation of concerns: updateGame() changes values, drawGame() displays them. This makes code easier to understand and modify.

🔬 This triangle is the ship's nose pointing upward. The -10 controls how far the tip sticks out. What if you changed -10 to -20? Or to -5? How does it change the ship's appearance?

  // Player "nose" (triangle) to make it look like a ship
  fill(0, 255, 150);
  triangle(
    player.x, player.y - player.h / 2 - 10,
    player.x - player.w / 4, player.y,
    player.x + player.w / 4, player.y
  );
function drawGame() {
  // Player
  rectMode(CENTER);
  noStroke();
  fill(0, 200, 255);
  rect(player.x, player.y, player.w, player.h);

  // Player "nose" (triangle) to make it look like a ship
  fill(0, 255, 150);
  triangle(
    player.x, player.y - player.h / 2 - 10,
    player.x - player.w / 4, player.y,
    player.x + player.w / 4, player.y
  );

  // Bullets
  fill(255, 255, 0);
  for (let b of bullets) {
    rect(b.x, b.y, b.w, b.h);
  }

  // Enemies
  fill(255, 80, 80);
  for (let e of enemies) {
    rect(e.x, e.y, e.w, e.h);
  }

  // UI: Score and Lives
  fill(255);
  textSize(20);
  textAlign(LEFT, TOP);
  text('Score: ' + score, 15, 10);

  textAlign(RIGHT, TOP);
  text('Lives: ' + lives, width - 15, 10);
}
Line-by-line explanation (21 lines)

🔧 Subcomponents:

calculation Player Ship Drawing rectMode(CENTER); noStroke(); fill(0, 200, 255); rect(player.x, player.y, player.w, player.h); fill(0, 255, 150); triangle( player.x, player.y - player.h / 2 - 10, player.x - player.w / 4, player.y, player.x + player.w / 4, player.y );

Draws the player ship as a cyan rectangle with a green triangle nose pointing upward

for-loop Bullets Drawing Loop fill(255, 255, 0); for (let b of bullets) { rect(b.x, b.y, b.w, b.h); }

Draws all active bullets as small yellow rectangles

for-loop Enemies Drawing Loop fill(255, 80, 80); for (let e of enemies) { rect(e.x, e.y, e.w, e.h); }

Draws all active enemies as red rectangles

calculation Score and Lives UI fill(255); textSize(20); textAlign(LEFT, TOP); text('Score: ' + score, 15, 10); textAlign(RIGHT, TOP); text('Lives: ' + lives, width - 15, 10);

Displays the current score on the top-left and lives on the top-right of the screen

rectMode(CENTER);
Sets rect() to draw from the center point (x, y) rather than from the top-left corner, matching how we store player.x and player.y
noStroke();
Disables outlines on shapes so only fill colors show
fill(0, 200, 255);
Sets fill color to cyan (red=0, green=200, blue=255 in RGB)
rect(player.x, player.y, player.w, player.h);
Draws the player ship as a 50×30 pixel rectangle at its current position
fill(0, 255, 150);
Changes fill color to a bright green-cyan
triangle(
Begins drawing a triangle to act as the ship's nose cone
player.x, player.y - player.h / 2 - 10,
First point: the tip of the nose, positioned above the ship
player.x - player.w / 4, player.y,
Second point: bottom-left corner of the nose
player.x + player.w / 4, player.y
Third point: bottom-right corner of the nose
fill(255, 255, 0);
Changes fill to yellow for bullets
for (let b of bullets) {
Uses a for-of loop to iterate through each bullet in the bullets array
rect(b.x, b.y, b.w, b.h);
Draws a yellow rectangle for each bullet at its current position
fill(255, 80, 80);
Changes fill to red for enemies
for (let e of enemies) {
Iterates through each enemy in the enemies array
rect(e.x, e.y, e.w, e.h);
Draws a red rectangle for each enemy
fill(255);
Changes fill to white for text
textSize(20);
Sets text size to 20 pixels
textAlign(LEFT, TOP);
Aligns text to the left edge and top of the specified position
text('Score: ' + score, 15, 10);
Draws the score text 15 pixels from the left and 10 pixels from the top
textAlign(RIGHT, TOP);
Aligns text to the right edge (so it doesn't go off-screen on small windows)
text('Lives: ' + lives, width - 15, 10);
Draws the lives text 15 pixels from the right edge and 10 pixels from the top

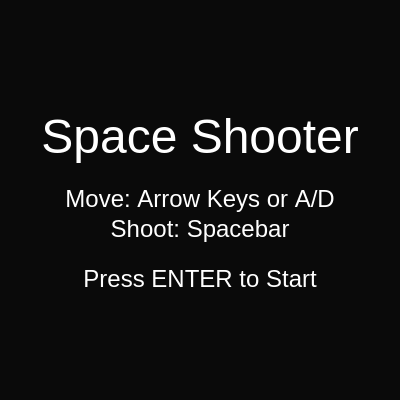
drawStartScreen()

drawStartScreen() is called only when gameState === 'start'. It provides a clear visual before gameplay begins, showing the player what controls are available. The spacing (using height / 2 + offsets) makes the layout flexible across different window sizes.

function drawStartScreen() {
  background(10);
  fill(255);
  textAlign(CENTER, CENTER);

  textSize(48);
  text('Space Shooter', width / 2, height / 2 - 60);

  textSize(24);
  text('Move: Arrow Keys or A/D', width / 2, height / 2);
  text('Shoot: Spacebar', width / 2, height / 2 + 30);
  text('Press ENTER to Start', width / 2, height / 2 + 80);
}
Line-by-line explanation (9 lines)
background(10);
Clears the screen with the same dark color as the game background for visual consistency
fill(255);
Sets fill color to white for all text
textAlign(CENTER, CENTER);
Centers all text both horizontally and vertically around the specified coordinates
textSize(48);
Sets text size to 48 pixels for the title
text('Space Shooter', width / 2, height / 2 - 60);
Draws the title centered horizontally and positioned 60 pixels above the middle of the screen
textSize(24);
Reduces text size to 24 pixels for instructions
text('Move: Arrow Keys or A/D', width / 2, height / 2);
Displays movement instructions centered horizontally at the screen's vertical middle
text('Shoot: Spacebar', width / 2, height / 2 + 30);
Displays shooting instructions 30 pixels below center
text('Press ENTER to Start', width / 2, height / 2 + 80);
Displays the start prompt 80 pixels below center, giving a clear call-to-action

drawGameOverScreen()

drawGameOverScreen() overlays information on top of the final game state (drawn by drawGame()). The semi-transparent black rectangle (alpha=170) dims everything beneath while keeping it slightly visible, a common UI pattern that keeps context while drawing focus to the overlay.

function drawGameOverScreen() {
  fill(0, 0, 0, 170);
  rectMode(CORNER);
  noStroke();
  rect(0, 0, width, height);

  fill(255);
  textAlign(CENTER, CENTER);
  textSize(48);
  text('Game Over', width / 2, height / 2 - 60);

  textSize(28);
  text('Final Score: ' + score, width / 2, height / 2);

  textSize(22);
  text('Press R to Restart', width / 2, height / 2 + 50);
}
Line-by-line explanation (12 lines)

🔧 Subcomponents:

calculation Semi-Transparent Overlay fill(0, 0, 0, 170); rectMode(CORNER); noStroke(); rect(0, 0, width, height);

Draws a semi-transparent black rectangle over the entire canvas, dimming the background game state

calculation Game Over Text Display fill(255); textAlign(CENTER, CENTER); textSize(48); text('Game Over', width / 2, height / 2 - 60); textSize(28); text('Final Score: ' + score, width / 2, height / 2); textSize(22); text('Press R to Restart', width / 2, height / 2 + 50);

Displays the game-over message, final score, and restart instructions in white text

fill(0, 0, 0, 170);
Sets fill to black with alpha=170 (semi-transparent, out of 255); this creates a darkening overlay effect
rectMode(CORNER);
Switches to drawing rectangles from the top-left corner (instead of CENTER, which is used for the game objects)
noStroke();
Disables shape outlines
rect(0, 0, width, height);
Draws a rectangle covering the entire canvas from (0,0) to (width, height), creating the overlay
fill(255);
Changes fill to white for text
textAlign(CENTER, CENTER);
Centers all text
textSize(48);
Sets large text size for the 'Game Over' title
text('Game Over', width / 2, height / 2 - 60);
Displays the game-over message centered and slightly above the middle
textSize(28);
Reduces size for the score display
text('Final Score: ' + score, width / 2, height / 2);
Displays the final score in the center of the screen
textSize(22);
Reduces size again for the restart prompt
text('Press R to Restart', width / 2, height / 2 + 50);
Displays the restart instruction below the score

keyPressed()

keyPressed() is p5.js's event handler for keyboard input. It fires once per key press (not per frame), making it perfect for discrete actions. The code structure shows how state is used to gate actions: you can only shoot when gameState === 'playing', preventing accidental shots during menus.

🔬 This creates a bullet at player.x and player.y. What if you wanted to spawn TWO bullets side-by-side? You could add another bullets.push() call with slightly different x values. Try adding a second push with x: player.x - 10.

    bullets.push({
      x: player.x,
      y: player.y - player.h / 2 - 10,
      w: 6,
      h: 16,
      speed: 10
    });
function keyPressed() {
  if (gameState === 'start' && keyCode === ENTER) {
    resetGame(true);
  }

  if (gameState === 'gameOver' && (key === 'r' || key === 'R')) {
    resetGame(true);
  }

  // Shooting
  if (gameState === 'playing' && key === ' ') {
    bullets.push({
      x: player.x,
      y: player.y - player.h / 2 - 10,
      w: 6,
      h: 16,
      speed: 10
    });
  }
}
Line-by-line explanation (11 lines)

🔧 Subcomponents:

conditional Start Game Trigger if (gameState === 'start' && keyCode === ENTER) { resetGame(true); }

When on the start screen and ENTER is pressed, begin the game

conditional Restart Game Trigger if (gameState === 'gameOver' && (key === 'r' || key === 'R')) { resetGame(true); }

When on the game-over screen and R is pressed, restart the game

conditional Bullet Creation if (gameState === 'playing' && key === ' ') { bullets.push({ x: player.x, y: player.y - player.h / 2 - 10, w: 6, h: 16, speed: 10 }); }

When playing and spacebar is pressed, create a new bullet at the ship's nose position

function keyPressed() {
Called once per key press (unlike keyIsDown which is continuous); this is ideal for one-time events like shooting or menu selection
if (gameState === 'start' && keyCode === ENTER) {
Tests whether the game is on the start screen AND the key pressed was ENTER (keyCode 13)
resetGame(true);
Resets the game state and immediately starts playing
if (gameState === 'gameOver' && (key === 'r' || key === 'R')) {
Tests whether the game is over AND the key pressed was either lowercase 'r' or uppercase 'R'
if (gameState === 'playing' && key === ' ') {
Tests whether the game is actively playing AND the spacebar (key code for space) was pressed
bullets.push({
Adds a new bullet object to the bullets array
x: player.x,
Bullet starts at the player's horizontal position
y: player.y - player.h / 2 - 10,
Bullet starts slightly above the ship's nose (at the tip of the triangle), so it appears to fire from the front
w: 6,
Bullet width is 6 pixels
h: 16,
Bullet height is 16 pixels (tall and narrow)
speed: 10
Bullet moves upward at 10 pixels per frame

windowResized()

windowResized() is called automatically by p5.js whenever the window is resized. Without this function, the canvas would stay its original size. This function keeps the game responsive and playable on any screen size.

function windowResized() {
  resizeCanvas(windowWidth, windowHeight);
  // Keep player near bottom center when resized
  player.x = width / 2;
  player.y = height - 80;
}
Line-by-line explanation (4 lines)
function windowResized() {
Special p5.js event handler that fires whenever the browser window is resized
resizeCanvas(windowWidth, windowHeight);
Resizes the canvas to match the new window dimensions, keeping the game full-screen
player.x = width / 2;
Recenterss the player horizontally based on the new canvas width
player.y = height - 80;
Repositions the player vertically based on the new canvas height, keeping it 80 pixels from the bottom

📦 Key Variables

player object

Stores the player ship's state: x and y position, width and height dimensions, and movement speed

let player = { x: 200, y: 350, w: 50, h: 30, speed: 7 };
bullets array

Array of bullet objects; each bullet has x, y, w, h, and speed properties. Bullets are added when firing and removed when off-screen or hitting an enemy

let bullets = [];
enemies array

Array of enemy objects; each enemy has x, y, w, h, and speed properties. Enemies spawn at the top and are removed when hit or escape the bottom

let enemies = [];
score number

Tracks the total number of enemies destroyed; increments by 1 each time a bullet hits an enemy

let score = 0;
lives number

Counts remaining player lives; starts at 3 and decreases when an enemy escapes or hits the player; game ends when lives reach 0

let lives = 3;
gameState string

Tracks the current game mode: 'start' (title screen), 'playing' (active gameplay), or 'gameOver' (game-over screen). Controls which branch of draw() executes each frame

let gameState = 'start';
enemySpawnInterval number

Number of frames between enemy spawns; starts at 60 and decreases by 0.2 each spawn, making enemies appear more frequently and increasing difficulty

let enemySpawnInterval = 60;
lastEnemySpawnFrame number

Records the frameCount when the last enemy was spawned; used to calculate when the next enemy should spawn based on enemySpawnInterval

let lastEnemySpawnFrame = 0;

🔧 Potential Improvements (6)

Here are some ways this code could be enhanced:

BUG updateEnemies()

Collision boundary check uses e.y - e.h / 2 > height, which triggers when the enemy's center passes the bottom. For tight gameplay, this might feel imprecise—enemies could escape slightly before triggering.

💡 Use e.y > height to remove enemies as soon as ANY part of them leaves the screen, creating a more forgiving collision boundary.

PERFORMANCE checkCollisions()

The nested loop tests every bullet against every enemy (O(n²) complexity). With many objects, this becomes slow.

💡 For large-scale games, use spatial partitioning (grid-based collision) or broad-phase culling to reduce comparisons. For this sketch, the current approach is fine.

STYLE player object

The player is a plain JavaScript object, while the sketch would benefit from consistency if scaled up. Using a class would make code more organized.

💡 Convert to a Player class: class Player { constructor(x, y) { this.x = x; ... } move() { ... } } for better structure and reusability.

FEATURE global state

The game lacks sound effects and visual feedback (like screen shake or particle explosions on kills), making hits feel less impactful.

💡 Add p5.sound library for shooting/hit sounds, or create simple visual effects like brief color flashes when enemies are hit.

BUG keyPressed() shooting

Players can hold spacebar and shoot multiple bullets in quick succession if the keyPressed event fires multiple times (depending on OS key-repeat settings).

💡 Add a cooldown variable (e.g., lastShotFrame) and only allow shooting if frameCount - lastShotFrame > 5, preventing rapid-fire abuse.

STYLE spawnEnemies()

Magic numbers (30, 50, 2, 5, 0.2, 25) are scattered throughout the function, making it hard to tune difficulty.

💡 Extract these to named constants at the top of the file: const ENEMY_MIN_WIDTH = 30, ENEMY_MAX_WIDTH = 50, etc., for easier tweaking.

🔄 Code Flow

Code flow showing setup, resetgame, draw, updategame, handleplayermovement, handleshooting, spawnenemies, updatebullets, updateenemies, checkcollisions, rectoverlap, drawgame, drawstartscreen, drawgameoverscreen, keypressed, windowresized

💡 Click on function names in the diagram to jump to their code

graph TD start[Start] --> setup[setup] setup --> resetgame[resetGame] resetgame --> playerinit[player-init] resetgame --> resetarrays[reset-arrays] resetgame --> resetui[reset-ui] setup --> draw[draw loop] draw --> stateconditional[state-conditional] stateconditional -->|startImmediately true| stateplaying[state-playing] stateconditional -->|startImmediately false| statestart[state-start] statestart --> drawstartscreen[drawStartScreen] stateplaying --> updategame[updateGame] updategame --> handleplayermovement[handlePlayerMovement] handleplayermovement --> leftmovement[left-movement] handleplayermovement --> rightmovement[right-movement] leftmovement --> boundaryconstraint[boundary-constraint] rightmovement --> boundaryconstraint updategame --> handleshooting[handleShooting] updategame --> spawnenemies[spawnEnemies] spawnenemies --> spawncheck[spawn-check] spawncheck -->|enough frames| enemycreation[enemy-creation] enemycreation --> difficultyscale[difficulty-scale] updategame --> updatebullets[updateBullets] updatebullets --> bulletloop[bullet-loop] bulletloop --> bulletmovement[bullet-movement] bulletmovement --> offscreenremoval[offscreen-removal] updategame --> updateenemies[updateEnemies] updateenemies --> enemyloop[enemy-loop] enemyloop --> enemymovement[enemy-movement] enemymovement --> escapecheck[escape-check] updategame --> checkcollisions[checkCollisions] checkcollisions --> bulletenemyloop[bullet-enemy-loop] bulletenemyloop --> bulletenemyhit[bullet-enemy-hit] checkcollisions --> playerenemyloop[player-enemy-loop] playerenemyloop --> playerenemyhit[player-enemy-hit] draw --> drawgame[drawGame] drawgame --> playerdraw[player-draw] drawgame --> bulletsdraw[bullets-draw] drawgame --> enemiesdraw[enemies-draw] drawgame --> uidraw[ui-draw] draw -->|gameState === 'start'| drawstartscreen draw -->|gameState === 'gameOver'| drawgameoverscreen[drawGameOverScreen] drawgameoverscreen --> overlay[overlay] overlay --> gameovertext[gameover-text] keypressed[keyPressed] -->|gameState === 'playing'| shoottrigger[shoot-trigger] keypressed -->|gameState === 'start'| starttrigger[start-trigger] keypressed -->|gameState === 'gameOver'| restarttrigger[restart-trigger] windowresized[windowResized] --> setup click setup href "#fn-setup" click resetgame href "#fn-resetgame" click draw href "#fn-draw" click stateconditional href "#sub-state-conditional" click statestart href "#sub-state-start" click stateplaying href "#sub-state-playing" click updategame href "#fn-updategame" click handleplayermovement href "#fn-handleplayermovement" click handleshooting href "#fn-handleshooting" click spawnenemies href "#fn-spawnenemies" click updatebullets href "#fn-updatebullets" click updateenemies href "#fn-updateenemies" click checkcollisions href "#fn-checkcollisions" click drawgame href "#fn-drawgame" click drawstartscreen href "#fn-drawstartscreen" click drawgameoverscreen href "#fn-drawgameoverscreen" click bulletloop href "#sub-bullet-loop" click bulletmovement href "#sub-bullet-movement" click offscreenremoval href "#sub-offscreen-removal" click enemyloop href "#sub-enemy-loop" click enemymovement href "#sub-enemy-movement" click escapecheck href "#sub-escape-check" click bulletenemyloop href "#sub-bullet-enemy-loop" click bulletenemyhit href "#sub-bullet-enemy-hit" click playerenemyloop href "#sub-player-enemy-loop" click playerenemyhit href "#sub-player-enemy-hit" click playerdraw href "#sub-player-draw" click bulletsdraw href "#sub-bullets-draw" click enemiesdraw href "#sub-enemies-draw" click uidraw href "#sub-ui-draw" click overlay href "#sub-overlay" click gameovertext href "#sub-gameover-text" click starttrigger href "#sub-start-trigger" click restarttrigger href "#sub-restart-trigger" click shoottrigger href "#sub-shoot-trigger" click windowresized href "#fn-windowresized"

❓ Frequently Asked Questions

What visual elements does the p5.js Sketch 2026-03-01 22:19 showcase?

The sketch creates a simple space shooter game featuring a player-controlled spaceship, various enemy ships, and dynamic backgrounds as the player navigates and shoots.

How can users engage with the space shooter game in this p5.js sketch?

Users can interact by using the left/right arrow keys or 'A'/'D' to move the player, pressing the spacebar to shoot, and hitting enter to start the game or 'R' to restart after a game over.

What creative coding concepts are demonstrated in this p5.js sketch?

The sketch demonstrates concepts such as game state management, collision detection, and real-time interaction through keyboard events, all fundamental to creating interactive games.

Preview

Sketch 2026-03-01 22:19 - p5.js creative coding sketch preview
Sketch Preview
Code flow diagram showing the structure of Sketch 2026-03-01 22:19 - Code flow showing setup, resetgame, draw, updategame, handleplayermovement, handleshooting, spawnenemies, updatebullets, updateenemies, checkcollisions, rectoverlap, drawgame, drawstartscreen, drawgameoverscreen, keypressed, windowresized
Code Flow Diagram