
Subject gus: breached through the facility

This is a stealth-horror escape game where you play as a red circle named Gus navigating a glowing maze while avoiding a blue enemy guard with a rotating field of view. Navigate through 20x20 grid of walls and corridors, time your movements to avoid detection, and reach the green exit tile—all with atmospheric sound design and subtle glitch effects.

🧪 Try This!

Experiment with the code by making these changes:

  1. Make Gus faster — Lower PLAYER_MOVE_DURATION so Gus dashes between tiles in 100ms instead of 200ms—you'll zip through the maze.
  2. Make the guard faster — Lower ENEMY_MOVE_DURATION to match the player's speed (or faster) to increase difficulty dramatically.
  3. Expand the guard's vision — Increase FOV_RANGE to 250 so the guard can see much farther—the red cone will extend far across the map.
  4. Narrow the guard's vision — Reduce FOV_ANGLE to 45 degrees so the guard has tunnel vision—much easier to sneak around.
  5. Change Gus's color — Make Gus green or blue instead of red by changing the fill in Player.draw().
  6. Make the guard invisible
Prefer the full editor? Open it there →

📖 About This Sketch

This sketch creates an immersive stealth-horror experience: you guide Gus (a red circle) through a maze-like facility while avoiding an enemy guard (blue square) that patrols with a visible, rotating field of view cone. The game combines several essential p5.js techniques: grid-based tile navigation with smooth lerped movement, line-of-sight detection using Bresenham raycasting, field-of-view angle checks, and layered sound design using p5.sound oscillators and noise generators. The visual atmosphere is heightened by a camera that follows the player, subtle glitch effects, and a carefully designed color palette—all working together to create tension and immersion.

The code is organized into a game state machine (menu, playing, game over, win), two actor classes (Player and Enemy) that handle their own movement and drawing, and a suite of helper functions for rendering the map, checking line of sight, and managing input. By studying this sketch, you will learn how to structure a complete interactive game, implement smooth tile-based movement with interpolation, detect when an AI character can 'see' the player using raycasting, manage game state transitions, and layer multiple sound cues to reinforce gameplay tension.

⚙️ How It Works

  1. When the sketch loads, setup() creates a canvas sized to fit the map, initializes a player at grid position (1,1), creates an enemy that patrols along a predefined path, and sets up p5.sound objects—ambient noise for the facility hum, a sine wave for detection alerts, and pink noise with an envelope for footsteps.
  2. The main draw loop switches between game states: MENU shows title and instructions, PLAYING updates both actors and checks for detection/win conditions, GAME_OVER displays a red alert, and WIN shows the escape message. In the PLAYING state, the camera follows the player by translating the canvas, and subtle glitches are applied to the translated scene.
  3. Player movement is grid-based but animated smoothly: when you press arrow keys or WASD, the move() function checks if the destination is walkable (not a wall) and starts a timed interpolation. Over 200 milliseconds, the player's pixel position lerps from the current tile center to the target tile center, creating fluid motion. The player's direction (determined by movement direction) controls which way an eye indicator points.
  4. The enemy patrols continuously along a fixed path, updating its grid position every 500 milliseconds with smooth lerp interpolation, and rotates its direction to face the next waypoint. Its field of view is a 90-degree cone extending 150 pixels from its current position.
  5. Detection happens via checkLineOfSight(): it first checks if the player is within FOV range, then verifies the player is inside the 90-degree cone of the enemy's current facing direction, and finally performs a Bresenham-style grid traversal to ensure no walls block the line of sight. If all three checks pass, the game state switches to GAME_OVER, the detection sound fades in, and the ambient sound fades out.
  6. If the player reaches grid position (18, 18)—the exit tile marked in green on the map—the game switches to WIN state and victory sounds play. Players can restart by pressing any key or tapping the screen, which calls resetGame() and returns to PLAYING state.

🎓 Concepts You'll Learn

Grid-based movement and tile navigationLerp interpolation for smooth animationGame state machinesField of view and line of sight detectionBresenham raycasting algorithmp5.sound oscillators and envelopesCamera following and canvas translationCollision detection with tile maps

📝 Code Breakdown

preload()

preload() runs once before setup(), ensuring that external assets (fonts, images, audio) are fully loaded before the game starts. This is critical when using p5.sound because Web Audio APIs require asynchronous initialization. The sound objects here use p5.sound's disconnect() and connect() methods to chain filters, demonstrating how to build a signal processing pipeline for atmospheric audio.

function preload() {
  // Load glitchy sci-fi font from Fontsource CDN
  gameFont = loadFont('https://cdn.jsdelivr.net/fontsource/fonts/vt323@latest/latin-400-normal.woff');

  // Using p5.Noise for ambient facility hum
  ambientSound = new p5.Noise('white');
  ambientSound.amp(0); // Start muted, fade in on user gesture
  ambientSound.pan(0);
  ambientSound.start(); // Noise starts playing continuously
  ambientSound.disconnect(); // Disconnect from master output to apply filter
  ambientSound.connect(new p5.Filter('lowpass', 200, 1)); // Filter for a deeper, muffled hum

  // Using p5.Oscillator for detection alert sound
  detectionSound = new p5.Oscillator('sine');
  detectionSound.freq(440);
  detectionSound.amp(0); // Start muted
  detectionSound.start();
  detectionSound.disconnect();
  detectionSound.connect(new p5.Filter('highpass', 1000, 1)); // Filter for a sharper alert

  // Using p5.Noise for footsteps sound (a brief static burst)
  footstepsNoise = new p5.Noise('pink');
  footstepsNoise.amp(0); // Start muted, envelope will control amplitude
  footstepsNoise.start();
  footstepsNoise.disconnect();
  footstepsNoise.connect(new p5.Filter('lowpass', 500, 1)); // Filter for a softer thump

  footstepsEnv = new p5.Env();
  // Attack time, attack level, decay time, decay level, release time, release level
  // Short attack, quick decay, no sustain, quick release for a "thump"
  // Adjusted ADSR to align with PLAYER_MOVE_DURATION for a brief footstep sound
  footstepsEnv.setADSR(0.01, PLAYER_MOVE_DURATION / 1000 * 0.5, 0, 0.05, PLAYER_MOVE_DURATION / 1000 * 0.5);
  footstepsEnv.setRange(0.1, 0); // Max amplitude 0.1, Min amplitude 0
}
Line-by-line explanation (13 lines)

🔧 Subcomponents:

function-call Font Loading gameFont = loadFont('https://cdn.jsdelivr.net/fontsource/fonts/vt323@latest/latin-400-normal.woff');

Loads a VT323 retro sci-fi font from a CDN to give the UI a hacker/dystopian aesthetic

object-instantiation Ambient Sound Setup ambientSound = new p5.Noise('white');

Creates a white noise generator that will serve as the facility's background hum when filtered

object-instantiation Detection Sound Setup detectionSound = new p5.Oscillator('sine');

Creates a sine wave oscillator that plays an alert tone when the player is caught

object-instantiation Footsteps Sound Setup footstepsNoise = new p5.Noise('pink');

Creates pink noise that will be shaped into a footstep thump sound via an envelope

method-call Envelope Configuration footstepsEnv.setADSR(0.01, PLAYER_MOVE_DURATION / 1000 * 0.5, 0, 0.05, PLAYER_MOVE_DURATION / 1000 * 0.5);

Configures attack, decay, sustain, and release times to shape the noise into a brief, punchy footstep sound synchronized with player movement duration

gameFont = loadFont('https://cdn.jsdelivr.net/fontsource/fonts/vt323@latest/latin-400-normal.woff');
Loads a custom retro font (VT323) from a CDN before the sketch runs. This font gives the game a sci-fi hacker aesthetic.
ambientSound = new p5.Noise('white');
Creates a white noise generator—random sound at all frequencies. This will be filtered to create a facility hum.
ambientSound.amp(0);
Sets the noise volume to 0 (silent). It will be faded in later when the player starts the game via a user gesture.
ambientSound.start();
Starts the noise generator playing continuously in the background. It stays silent until its amp is increased.
ambientSound.disconnect();
Removes the noise from the master audio output, allowing us to apply filters before it reaches the speaker.
ambientSound.connect(new p5.Filter('lowpass', 200, 1));
Pipes the noise through a low-pass filter that removes high frequencies, creating a deep, muffled facility hum effect.
detectionSound = new p5.Oscillator('sine');
Creates a sine wave oscillator—a pure, smooth tone used for the detection alert sound.
detectionSound.freq(440);
Sets the oscillator frequency to 440 Hz (the musical note A4), a clear, piercing tone for an alarm.
detectionSound.disconnect();
Removes the oscillator from master output so we can apply filtering for a more ominous alert sound.
detectionSound.connect(new p5.Filter('highpass', 1000, 1));
Pipes the oscillator through a high-pass filter that removes low frequencies, creating a sharper, more electronic alert tone.
footstepsNoise = new p5.Noise('pink');
Creates pink noise (noise with more emphasis on lower frequencies). This sounds more like footsteps than white noise.
footstepsEnv.setADSR(0.01, PLAYER_MOVE_DURATION / 1000 * 0.5, 0, 0.05, PLAYER_MOVE_DURATION / 1000 * 0.5);
Configures the envelope's ADSR (Attack, Decay, Sustain, Release) timings. Attack is nearly instant (0.01s), decay and release align with movement duration to create a quick thump synchronized with player movement.
footstepsEnv.setRange(0.1, 0);
Sets the envelope's amplitude range: 0.1 at peak (max), 0 at quiet (min). This ensures the footstep sound is audible but not overwhelming.
setup()

setup() runs once before the first draw frame, preparing the canvas, text styling, audio system, and game objects. Notice that it uses min() to ensure the canvas doesn't exceed the window size—this is a responsive design pattern that works well for web sketches. The userStartAudio() call is critical for p5.sound; without it, the Web Audio API won't initialize and your sounds won't play.

function setup() {
  // Create canvas, ensuring it fits the window or map dimensions
  createCanvas(min(windowWidth, MAP_COLS * TILE_SIZE), min(windowHeight, MAP_ROWS * TILE_SIZE));
  textFont(gameFont);
  textSize(TILE_SIZE * 0.7);
  textAlign(CENTER, CENTER);

  // Web Audio requires a user gesture to start. userStartAudio() handles this.
  userStartAudio();

  // Initialize player and enemy objects
  player = new Player(1, 1); // Gus starts at grid (1,1)
  enemy = new Enemy([ // Enemy patrol path
    {x: 5, y: 5}, {x: 5, y: 1}, {x: 10, y: 1}, {x: 10, y: 5},
    {x: 15, y: 5}, {x: 15, y: 1}, {x: 18, y: 1}, {x: 18, y: 10},
    {x: 15, y: 10}, {x: 15, y: 18}, {x: 10, y: 18}, {x: 10, y: 10},
    {x: 5, y: 10}, {x: 5, y: 18}, {x: 1, y: 18}, {x: 1, y: 10}
  ]);

  // Connect footstepsEnv to footstepsNoise's amplitude for control
  footstepsEnv.setInput(footstepsNoise);
}
Line-by-line explanation (8 lines)

🔧 Subcomponents:

function-call Canvas Sizing createCanvas(min(windowWidth, MAP_COLS * TILE_SIZE), min(windowHeight, MAP_ROWS * TILE_SIZE));

Creates a canvas that is at most the window size or the map size (whichever is smaller), ensuring responsive design

function-calls Text Configuration textFont(gameFont); textSize(TILE_SIZE * 0.7); textAlign(CENTER, CENTER);

Sets up text rendering with the loaded font, a size proportional to grid tiles, and center alignment for UI text

function-call Web Audio Initialization userStartAudio();

Initializes the Web Audio API, which requires a user gesture (click/tap) before sounds can play—this must happen in setup or after user input

object-instantiation Player Instantiation player = new Player(1, 1);

Creates the player (Gus) at grid position (1, 1) in the top-left corridor of the map

object-instantiation Enemy Instantiation enemy = new Enemy([...]);

Creates the enemy guard with a 16-point patrol path that covers much of the facility

method-call Audio Signal Connection footstepsEnv.setInput(footstepsNoise);

Connects the envelope to the pink noise so that triggering the envelope controls the footstep sound's amplitude

createCanvas(min(windowWidth, MAP_COLS * TILE_SIZE), min(windowHeight, MAP_ROWS * TILE_SIZE));
Creates a canvas sized to fit the map grid within the window. If the window is smaller than the map, the canvas shrinks; if larger, it stays at map size.
textFont(gameFont);
Tells p5.js to use the VT323 font (loaded in preload) for all text drawn after this line.
textSize(TILE_SIZE * 0.7);
Sets the default text size to 70% of a grid tile size, making it proportional to the game layout and readable on different canvas sizes.
textAlign(CENTER, CENTER);
Centers all text horizontally and vertically around the coordinates you pass to text()—useful for centered UI.
userStartAudio();
Initializes the Web Audio API. In modern browsers, audio must be explicitly started after user interaction (a click or tap).
player = new Player(1, 1);
Creates a new Player instance at grid position (1, 1). The Player constructor calculates its pixel position as (1*40+20, 1*40+20) = (60, 60).
enemy = new Enemy([...]);
Creates an Enemy that will patrol along the 16 waypoints defined in the array. The enemy starts at the first waypoint (5, 5).
footstepsEnv.setInput(footstepsNoise);
Connects the envelope object to the footstepsNoise so that when the envelope is triggered (in player.move), it modulates the noise's amplitude to produce a footstep thump.

draw()

draw() is the main game loop that runs 60 times per second. It's responsible for clearing the canvas each frame and dispatching to the appropriate rendering function based on game state. This state-machine pattern makes it easy to switch between menu, gameplay, and end screens without messy if-else chains. By separating each screen into its own function (drawMenu, drawPlaying, etc.), the code stays organized and easy to debug.

🔬 The switch statement branches to different functions based on gameState. What happens if you comment out the drawMenu() call and replace it with drawPlaying()? The menu will now show the game scene instead of the title.

  switch (gameState) {
    case GAME_STATE.MENU:
      drawMenu();
      break;
function draw() {
  background(20); // Dark background for horror tone

  // Draw based on current game state
  switch (gameState) {
    case GAME_STATE.MENU:
      drawMenu();
      break;
    case GAME_STATE.PLAYING:
      drawPlaying();
      break;
    case GAME_STATE.GAME_OVER:
      drawGameOver();
      break;
    case GAME_STATE.WIN:
      drawWin();
      break;
  }
}
Line-by-line explanation (6 lines)

🔧 Subcomponents:

function-call Background Clearing background(20);

Clears the entire canvas with a dark grey color, preparing it for the current frame's drawing

switch-case Game State Routing switch (gameState) { ... }

Routes execution to different draw functions based on the current game state, implementing a state machine

background(20);
Fills the entire canvas with a dark grey (RGB: 20, 20, 20), clearing all previous drawings and creating a horror atmosphere.
switch (gameState) {
Checks the value of the global gameState variable and branches to the appropriate drawing function.
case GAME_STATE.MENU:
If gameState equals GAME_STATE.MENU (0), call drawMenu() to show the title screen.
case GAME_STATE.PLAYING:
If gameState equals GAME_STATE.PLAYING (1), call drawPlaying() to render the active game with player, enemy, and map.
case GAME_STATE.GAME_OVER:
If gameState equals GAME_STATE.GAME_OVER (2), call drawGameOver() to display the detection alert screen.
case GAME_STATE.WIN:
If gameState equals GAME_STATE.WIN (3), call drawWin() to display the escape victory screen.

drawMap()

drawMap() uses nested loops to iterate over every tile in the 20x20 grid, then draws a colored rectangle for each tile based on its type. This is a classic tilemap rendering pattern used in countless games. The subtle grid lines provide visual feedback about tile boundaries, helping players understand the grid-based movement system. Notice that walls are slightly lighter than the floor—this is a minimalist design choice that suggests walls without being obvious.

function drawMap() {
  for (let r = 0; r < MAP_ROWS; r++) {
    for (let c = 0; c < MAP_COLS; c++) {
      let x = c * TILE_SIZE;
      let y = r * TILE_SIZE;

      noStroke();
      if (MAP[r][c] === 1) {
        fill(40); // Dark grey for walls
      } else if (MAP[r][c] === 2) {
        fill(50, 200, 50); // Green for the exit
      } else {
        fill(20); // Very dark grey for the floor
      }
      rect(x, y, TILE_SIZE, TILE_SIZE);

      // Draw subtle grid lines for definition
      stroke(30);
      strokeWeight(0.5);
      line(x, y, x + TILE_SIZE, y);
      line(x, y, x, y + TILE_SIZE);
    }
  }
}
Line-by-line explanation (12 lines)

🔧 Subcomponents:

for-loop Row Iteration for (let r = 0; r < MAP_ROWS; r++) {

Loops through each row of the MAP array (0 to 19)

for-loop Column Iteration for (let c = 0; c < MAP_COLS; c++) {

Loops through each column in the current row (0 to 19), visiting all 400 tiles

conditional Tile Type Rendering if (MAP[r][c] === 1) { fill(40); } else if (MAP[r][c] === 2) { fill(50, 200, 50); } else { fill(20); }

Colors each tile based on its type: walls (1) are dark grey, the exit (2) is green, and floors (0) are very dark

function-calls Grid Line Drawing stroke(30); strokeWeight(0.5); line(x, y, x + TILE_SIZE, y); line(x, y, x, y + TILE_SIZE);

Draws subtle grid lines around each tile for visual definition and clarity

for (let r = 0; r < MAP_ROWS; r++) {
Starts a loop over rows. r iterates from 0 to 19 (MAP_ROWS = 20), visiting each row of the map.
for (let c = 0; c < MAP_COLS; c++) {
Nested loop over columns. c iterates from 0 to 19 (MAP_COLS = 20) for each row, visiting every cell in the grid.
let x = c * TILE_SIZE;
Calculates the pixel x coordinate of the tile's top-left corner by multiplying column number by tile size (40).
let y = r * TILE_SIZE;
Calculates the pixel y coordinate of the tile's top-left corner by multiplying row number by tile size (40).
if (MAP[r][c] === 1) { fill(40); }
If the tile value is 1 (a wall), set the fill color to dark grey (40).
else if (MAP[r][c] === 2) { fill(50, 200, 50); }
If the tile value is 2 (the exit), set the fill color to bright green (RGB: 50, 200, 50).
else { fill(20); }
If the tile value is 0 (floor), set the fill color to very dark grey (20) to match the background.
rect(x, y, TILE_SIZE, TILE_SIZE);
Draws a 40x40 pixel square at position (x, y) with the fill color determined above.
stroke(30);
Sets the color of drawn lines to a slightly lighter grey (30) to outline the grid.
strokeWeight(0.5);
Sets the thickness of grid lines to 0.5 pixels—thin enough to be subtle but visible.
line(x, y, x + TILE_SIZE, y);
Draws the top edge of the tile, from top-left (x, y) to top-right (x + 40, y).
line(x, y, x, y + TILE_SIZE);
Draws the left edge of the tile, from top-left (x, y) to bottom-left (x, y + 40).

drawMenu()

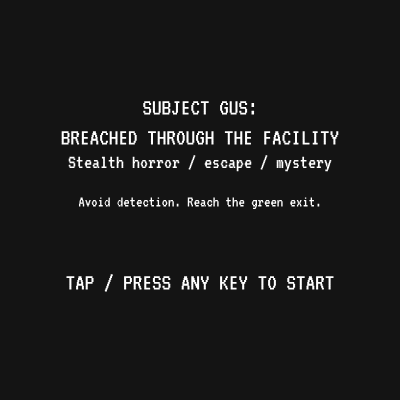
drawMenu() is called every frame while gameState === GAME_STATE.MENU. It displays the title screen with layered text at different sizes and positions. By varying textSize() between calls to text(), you create a visual hierarchy that guides the player's eye. The y-positions are calculated as offsets from the screen center (height / 2), making the layout responsive to different canvas sizes.

function drawMenu() {
  fill(255);
  text("SUBJECT GUS:\nBREACHED THROUGH THE FACILITY", width / 2, height / 2 - TILE_SIZE * 2);
  textSize(TILE_SIZE * 0.5);
  text("Stealth horror / escape / mystery", width / 2, height / 2 - TILE_SIZE);
  textSize(TILE_SIZE * 0.4);
  text("Avoid detection. Reach the green exit.", width / 2, height / 2);
  textSize(TILE_SIZE * 0.6);
  text("TAP / PRESS ANY KEY TO START", width / 2, height / 2 + TILE_SIZE * 2);
}
Line-by-line explanation (8 lines)

🔧 Subcomponents:

function-calls Title Display fill(255); text("SUBJECT GUS:\nBREACHED THROUGH THE FACILITY", width / 2, height / 2 - TILE_SIZE * 2);

Displays the game title in white text, centered horizontally and positioned near the top of the screen

function-calls Subtitle Display textSize(TILE_SIZE * 0.5); text("Stealth horror / escape / mystery", width / 2, height / 2 - TILE_SIZE);

Shows the game's genre and theme in a smaller font size

function-calls Instruction Display textSize(TILE_SIZE * 0.4); text("Avoid detection. Reach the green exit.", width / 2, height / 2);

Displays key gameplay mechanics in an even smaller font

function-calls Call-to-Action textSize(TILE_SIZE * 0.6); text("TAP / PRESS ANY KEY TO START", width / 2, height / 2 + TILE_SIZE * 2);

Instructs the player how to begin the game, positioned near the bottom

fill(255);
Sets the text color to white (RGB: 255, 255, 255) for high contrast against the dark background.
text("SUBJECT GUS:\nBREACHED THROUGH THE FACILITY", width / 2, height / 2 - TILE_SIZE * 2);
Draws the title text. '\n' creates a line break. The text is centered at (width/2) and positioned near the top (height/2 - 80).
textSize(TILE_SIZE * 0.5);
Changes text size to 20 pixels (40 * 0.5) for the subtitle, smaller than the title.
text("Stealth horror / escape / mystery", width / 2, height / 2 - TILE_SIZE);
Displays a genre description, centered and positioned just below the title.
textSize(TILE_SIZE * 0.4);
Changes text size to 16 pixels for the instructions, even smaller.
text("Avoid detection. Reach the green exit.", width / 2, height / 2);
Shows the core gameplay objective, centered at the middle of the screen.
textSize(TILE_SIZE * 0.6);
Changes text size to 24 pixels for the call-to-action, making it prominent.
text("TAP / PRESS ANY KEY TO START", width / 2, height / 2 + TILE_SIZE * 2);
Displays the start instruction near the bottom, inviting the player to begin.

drawPlaying()

drawPlaying() is the active gameplay rendering function. It demonstrates three key techniques: (1) camera following using translate(), which moves the world so the player stays centered, (2) state transition checks that end the game when the player is detected or escapes, and (3) layered drawing with push/pop, ensuring UI elements stay fixed while the game world moves. The push() and pop() calls are essential—without them, the camera translation would affect the HUD text drawn at the end.

🔬 This block ends the game if the enemy sees you. What happens if you comment out the gameState line? The detection sound will still play, but the game won't end—you can keep playing even after being detected!

  // Check for detection
  if (enemy.checkLineOfSight(player)) {
    gameState = GAME_STATE.GAME_OVER;
    detectionSound.amp(0.5, 0.1); // Play detection sound
    ambientSound.amp(0.02, 0.5); // Lower ambient sound
  }
function drawPlaying() {
  // Save the current transformation matrix
  push();

  // Translate the canvas to center the player
  // The player's current pixel position is (player.x, player.y)
  // We want to translate the canvas so that player.x ends up at width/2
  // and player.y ends up at height/2.
  // So, the translation amount is (width/2 - player.x, height/2 - player.y)
  translate(width / 2 - player.x, height / 2 - player.y);

  // Apply subtle glitch effect to the translated scene
  applyGlitchEffect();

  drawMap();
  player.update(); // Update player's position
  enemy.update(); // Update enemy's patrol

  // Check for detection
  if (enemy.checkLineOfSight(player)) {
    gameState = GAME_STATE.GAME_OVER;
    detectionSound.amp(0.5, 0.1); // Play detection sound
    ambientSound.amp(0.02, 0.5); // Lower ambient sound
  }

  // Check if player reached the exit tile
  if (player.gridX === 18 && player.gridY === 18) { // Exit is hardcoded at (18, 18)
    gameState = GAME_STATE.WIN;
    ambientSound.amp(0.02, 0.5);
  }

  player.draw(); // Draw Gus
  enemy.draw(); // Draw the Guard robot

  // Restore the previous transformation matrix
  pop();

  // Display status (placeholder for story elements)
  // This text should remain fixed on the screen, not scroll with the player.
  textSize(TILE_SIZE * 0.4);
  fill(200);
  noStroke();
  text("Sector 1: Containment Wing", width / 2, TILE_SIZE / 2);
}
Line-by-line explanation (16 lines)

🔧 Subcomponents:

function-calls Camera Setup push(); translate(width / 2 - player.x, height / 2 - player.y); applyGlitchEffect();

Saves the current transformation, centers the camera on the player, and applies a glitch effect to create cinematic unease

function-calls Update Game State drawMap(); player.update(); enemy.update();

Renders the map and updates both the player and enemy positions for this frame

conditional Line of Sight Detection if (enemy.checkLineOfSight(player)) { gameState = GAME_STATE.GAME_OVER; ... }

Checks if the enemy can see the player; if so, immediately switches to game over and plays the detection sound

conditional Exit Reached Check if (player.gridX === 18 && player.gridY === 18) { gameState = GAME_STATE.WIN; ... }

Checks if the player has reached the exit tile at (18, 18); if so, triggers the win state

function-call Camera Cleanup pop();

Restores the transformation matrix so UI elements drawn after this don't move with the camera

function-calls Fixed UI Display text("Sector 1: Containment Wing", width / 2, TILE_SIZE / 2);

Displays a HUD element (sector name) that stays fixed on screen because it's drawn after pop()

push();
Saves the current transformation matrix (no translations/rotations yet). Everything until pop() will be inside this saved state.
translate(width / 2 - player.x, height / 2 - player.y);
Moves the entire canvas so the player appears at the center of the screen. If player.x = 100 and width = 400, we translate by 200 - 100 = 100 pixels to the right.
applyGlitchEffect();
Randomly applies a subtle glitch (small offset or scale) to the translated scene, reinforcing the sci-fi horror atmosphere.
drawMap();
Draws the entire 20x20 tile map. All coordinates are relative to the translated canvas, so it appears centered around the player.
player.update();
Updates the player's position based on elapsed time if they are currently moving between tiles (interpolation).
enemy.update();
Updates the enemy's position along its patrol path using the same interpolation logic.
if (enemy.checkLineOfSight(player)) {
Calls the enemy's line-of-sight check. If it returns true, the player is visible and has been caught.
gameState = GAME_STATE.GAME_OVER;
Switches the game state to GAME_OVER, which will trigger the game over screen next frame.
detectionSound.amp(0.5, 0.1);
Fades the detection sound to amplitude 0.5 over 0.1 seconds, creating an instant alarm effect.
ambientSound.amp(0.02, 0.5);
Fades the ambient hum down to a quieter level over 0.5 seconds, shifting the audio mood to panic.
if (player.gridX === 18 && player.gridY === 18) {
Checks if the player's grid position matches the exit tile at column 18, row 18.
gameState = GAME_STATE.WIN;
Switches to the WIN state, triggering the victory screen next frame.
player.draw();
Draws the player (Gus) at their current pixel position within the translated canvas.
enemy.draw();
Draws the enemy guard and its field-of-view cone within the translated canvas.
pop();
Restores the transformation matrix to the state before push(). All subsequent drawing is no longer translated by the camera.
text("Sector 1: Containment Wing", width / 2, TILE_SIZE / 2);
Draws UI text that stays fixed on the screen (not moving with the camera) because it's drawn after pop().

drawGameOver()

drawGameOver() displays when the player is caught. It uses red text and large sizes to create a sense of failure and urgency. The detectionSound fadeout is important—it prevents the alarm from playing forever on the game over screen. Notice that this function is called every frame while gameState === GAME_STATE.GAME_OVER, so the fadeout command runs repeatedly, but p5.sound's amp() method is smart enough to apply the fade only once per state transition.

function drawGameOver() {
  fill(255, 0, 0);
  textSize(TILE_SIZE * 1.5);
  text("BREACH DETECTED!", width / 2, height / 2 - TILE_SIZE * 1.5);
  textSize(TILE_SIZE);
  text("GAME OVER", width / 2, height / 2);
  textSize(TILE_SIZE * 0.6);
  text("TAP / PRESS ANY KEY TO RESTART", width / 2, height / 2 + TILE_SIZE * 2);

  // Fade detection sound out
  detectionSound.amp(0, 0.5);
}
Line-by-line explanation (8 lines)

🔧 Subcomponents:

function-calls Detection Alert fill(255, 0, 0); textSize(TILE_SIZE * 1.5); text("BREACH DETECTED!", width / 2, height / 2 - TILE_SIZE * 1.5);

Displays the main alert in red, large text to convey immediate danger and failure

function-calls Game Over Message text("GAME OVER", width / 2, height / 2);

Shows the standard game over message centered on screen

function-calls Restart Instruction text("TAP / PRESS ANY KEY TO RESTART", width / 2, height / 2 + TILE_SIZE * 2);

Tells the player how to restart the game

method-call Detection Sound Fadeout detectionSound.amp(0, 0.5);

Gradually fades the alarm sound to silence over 0.5 seconds for a less jarring transition

fill(255, 0, 0);
Sets text color to bright red (RGB: 255, 0, 0) to signify danger and failure.
textSize(TILE_SIZE * 1.5);
Sets text size to 60 pixels (40 * 1.5) for the main alert—large and impossible to miss.
text("BREACH DETECTED!", width / 2, height / 2 - TILE_SIZE * 1.5);
Draws the alert message in red, large, and centered near the top of the screen.
textSize(TILE_SIZE);
Reduces text size to 40 pixels for the standard game over message.
text("GAME OVER", width / 2, height / 2);
Displays 'GAME OVER' centered on the screen at medium size.
textSize(TILE_SIZE * 0.6);
Reduces text size to 24 pixels for the restart prompt.
text("TAP / PRESS ANY KEY TO RESTART", width / 2, height / 2 + TILE_SIZE * 2);
Displays the restart instruction near the bottom, inviting another attempt.
detectionSound.amp(0, 0.5);
Fades the alarm sound to silence (amplitude 0) over 0.5 seconds. This prevents the alarm from playing indefinitely.

drawWin()

drawWin() mirrors drawGameOver() but uses green text and victory messages. Both functions create a clear visual and emotional contrast—red for failure, green for success. This is a simple but effective use of color to communicate game state to the player. Unlike drawGameOver(), this function doesn't fade any sounds; the ambient hum will continue softly, leaving the player with a sense of calm after escape.

function drawWin() {
  fill(50, 200, 50);
  textSize(TILE_SIZE * 1.5);
  text("FACILITY ESCAPED!", width / 2, height / 2 - TILE_SIZE * 1.5);
  textSize(TILE_SIZE);
  text("YOU WIN!", width / 2, height / 2);
  textSize(TILE_SIZE * 0.6);
  text("TAP / PRESS ANY KEY TO RESTART", width / 2, height / 2 + TILE_SIZE * 2);
}
Line-by-line explanation (7 lines)

🔧 Subcomponents:

function-calls Escape Message fill(50, 200, 50); textSize(TILE_SIZE * 1.5); text("FACILITY ESCAPED!", width / 2, height / 2 - TILE_SIZE * 1.5);

Displays the main victory message in green, large text to signify success

function-calls Win Message text("YOU WIN!", width / 2, height / 2);

Shows the standard victory message centered on screen

function-calls Restart Instruction text("TAP / PRESS ANY KEY TO RESTART", width / 2, height / 2 + TILE_SIZE * 2);

Tells the player how to play again

fill(50, 200, 50);
Sets text color to green (RGB: 50, 200, 50) to signify success and safety.
textSize(TILE_SIZE * 1.5);
Sets text size to 60 pixels for the main victory message—large and celebratory.
text("FACILITY ESCAPED!", width / 2, height / 2 - TILE_SIZE * 1.5);
Draws the escape message in green, large, and centered near the top of the screen.
textSize(TILE_SIZE);
Reduces text size to 40 pixels for the standard win message.
text("YOU WIN!", width / 2, height / 2);
Displays 'YOU WIN!' centered on the screen in green.
textSize(TILE_SIZE * 0.6);
Reduces text size to 24 pixels for the restart prompt.
text("TAP / PRESS ANY KEY TO RESTART", width / 2, height / 2 + TILE_SIZE * 2);
Displays the restart instruction near the bottom.

applyGlitchEffect()

applyGlitchEffect() adds a subtle visual distortion to the game world, reinforcing the sci-fi horror atmosphere by suggesting a 'corrupted' facility or malfunctioning AI. It's called once per frame in drawPlaying(), after the camera translation, so the glitches affect only the game world, not the UI. The probability-based approach (0.5% per frame) means glitches are rare and jarring, perfect for creating tension without being distracting. This is a classic technique in indie horror games.

function applyGlitchEffect() {
  if (random() < GLITCH_EFFECT_CHANCE) {
    let offset = random(-5, 5); // Random translation
    let scaleFactor = random(0.98, 1.02); // Random scaling
    translate(offset, offset);
    scale(scaleFactor);
  }
}
Line-by-line explanation (5 lines)

🔧 Subcomponents:

conditional Glitch Probability Check if (random() < GLITCH_EFFECT_CHANCE) {

Uses a random number to determine if a glitch should occur this frame based on GLITCH_EFFECT_CHANCE (0.005)

calculation Offset Calculation let offset = random(-5, 5);

Generates a random pixel offset between -5 and 5 to slightly displace the scene

calculation Scale Factor Calculation let scaleFactor = random(0.98, 1.02);

Generates a random scale factor between 0.98 and 1.02 to slightly zoom the scene

function-calls Glitch Application translate(offset, offset); scale(scaleFactor);

Applies the random offset and scale to the current transformation, creating a subtle glitch artifact

if (random() < GLITCH_EFFECT_CHANCE) {
Generates a random number between 0 and 1. If it's less than GLITCH_EFFECT_CHANCE (0.005), the glitch activates. This means roughly 0.5% of frames will glitch.
let offset = random(-5, 5);
Creates a random pixel offset between -5 and +5 to slightly shift the entire scene left, right, up, or down.
let scaleFactor = random(0.98, 1.02);
Creates a random scale factor between 0.98 (2% smaller) and 1.02 (2% larger), creating a subtle zoom effect.
translate(offset, offset);
Applies the random offset to both x and y coordinates, shifting the scene by the same amount in both directions (diagonal glitch).
scale(scaleFactor);
Scales the entire scene by the random factor, making everything slightly larger or smaller.

resetGame()

resetGame() is called when the player presses a key or taps while on the menu or game over/win screens. It reinitializes all game objects and state variables, returning the game to its initial condition. This is essential for replayability. Notice that it uses new Player() and new Enemy() to create fresh instances—this is cleaner than manually resetting properties because the constructors handle all initialization logic in one place.

function resetGame() {
  player = new Player(1, 1); // Reset player to start
  enemy = new Enemy([ // Reset enemy patrol
    {x: 5, y: 5}, {x: 5, y: 1}, {x: 10, y: 1}, {x: 10, y: 5},
    {x: 15, y: 5}, {x: 15, y: 1}, {x: 18, y: 1}, {x: 18, y: 10},
    {x: 15, y: 10}, {x: 15, y: 18}, {x: 10, y: 18}, {x: 10, y: 10},
    {x: 5, y: 10}, {x: 5, y: 18}, {x: 1, y: 18}, {x: 1, y: 10}
  ]);
  gameState = GAME_STATE.PLAYING; // Set state to playing
  ambientSound.amp(0.05, 1); // Fade ambient sound back in
  detectionSound.amp(0); // Mute detection sound
  footstepsNoise.amp(0); // Mute footsteps noise (envelope will play it)
}
Line-by-line explanation (6 lines)

🔧 Subcomponents:

object-instantiation Player Reset player = new Player(1, 1);

Creates a fresh player instance at the starting position (1, 1)

object-instantiation Enemy Reset enemy = new Enemy([...]);

Creates a fresh enemy instance with the same patrol path, starting from the first waypoint

variable-assignment Game State Reset gameState = GAME_STATE.PLAYING;

Sets the game state back to PLAYING so the gameplay loop resumes

method-calls Audio Reset ambientSound.amp(0.05, 1); detectionSound.amp(0); footstepsNoise.amp(0);

Resets all sounds to their starting states: ambient hum fades in, alarms and footsteps are muted

player = new Player(1, 1);
Creates a brand new player object at grid position (1, 1). The old player object is discarded.
enemy = new Enemy([...]);
Creates a brand new enemy object with the same 16-waypoint patrol path. The old enemy object is discarded.
gameState = GAME_STATE.PLAYING;
Sets gameState to PLAYING (value 1), which tells the main draw loop to call drawPlaying() next frame.
ambientSound.amp(0.05, 1);
Fades the ambient hum to 0.05 amplitude over 1 second, creating a slow atmospheric fade-in at game start.
detectionSound.amp(0);
Immediately mutes the detection alarm by setting its amplitude to 0 (no fade time).
footstepsNoise.amp(0);
Immediately mutes the footsteps noise. The envelope will control when it plays during movement.

keyPressed()

keyPressed() is a p5.js event handler that fires whenever a key is pressed. By returning false, you tell the browser not to perform its default action (like scrolling or refreshing). This is crucial for games that use arrow keys, which would otherwise scroll the page. The actual logic is delegated to handleInput() for cleaner code organization.

function keyPressed() {
  handleInput(keyCode);
  return false; // Prevent default browser behavior (e.g., scrolling with arrow keys)
}
Line-by-line explanation (3 lines)

🔧 Subcomponents:

function-call Input Delegation handleInput(keyCode);

Passes the key code to a centralized input handler that processes movement and state transitions

return-statement Browser Default Prevention return false;

Prevents the browser's default behavior (like arrow key scrolling) so the game can use those keys for movement

function keyPressed() {
p5.js calls this function automatically whenever the user presses a key. keyCode is the numeric code of the pressed key.
handleInput(keyCode);
Calls the handleInput() function with the numeric key code, allowing centralized processing of all keyboard input.
return false;
Returns false to prevent the browser from processing the key event, stopping arrow keys from scrolling the page.

handleInput()

handleInput() is a centralized input processor that handles both game state transitions (starting/restarting) and player movement. It enforces a movement guard that prevents input while the player is interpolating, which prevents the player from queuing moves. The switch statement maps multiple keys to the same action (e.g., both LEFT_ARROW and 65 for left movement), giving the player flexibility in controls. This is a common pattern in game development called 'input buffering' or 'input handling'.

🔬 The switch statement has four cases: LEFT_ARROW/A, RIGHT_ARROW/D, UP_ARROW/W, DOWN_ARROW/S. What happens if you comment out the case LEFT_ARROW and case 65 lines? The left arrow and A keys will no longer work for moving left.

  // Handle arrow keys or WASD for movement
  switch (code) {
    case LEFT_ARROW:
    case 65: // A key
      player.move(-1, 0);
      break;
function handleInput(code) {
  // Restart game if in menu/game over/win state
  if (gameState === GAME_STATE.MENU || gameState === GAME_STATE.GAME_OVER || gameState === GAME_STATE.WIN) {
    if (ambientSound) { // Removed isLoaded() check
      ambientSound.amp(0.05, 1); // Ensure ambient sound starts on user gesture
    }
    resetGame(); // Reset game and set state to playing
    return;
  }

  if (player.moving) return; // Cannot move if already interpolating

  // Handle arrow keys or WASD for movement
  switch (code) {
    case LEFT_ARROW:
    case 65: // A key
      player.move(-1, 0);
      break;
    case RIGHT_ARROW:
    case 68: // D key
      player.move(1, 0);
      break;
    case UP_ARROW:
    case 87: // W key
      player.move(0, -1);
      break;
    case DOWN_ARROW:
    case 83: // S key
      player.move(0, 1);
      break;
  }
}
Line-by-line explanation (10 lines)

🔧 Subcomponents:

conditional State Transition Handler if (gameState === GAME_STATE.MENU || gameState === GAME_STATE.GAME_OVER || gameState === GAME_STATE.WIN) { resetGame(); return; }

If the game is not in PLAYING state, start/restart the game when any key is pressed

conditional Movement Guard if (player.moving) return;

Prevents new movement input while the player is already interpolating between tiles

switch-case Movement Direction Routing switch (code) { case LEFT_ARROW: case 65: ... }

Maps arrow keys and WASD to four movement directions

if (gameState === GAME_STATE.MENU || gameState === GAME_STATE.GAME_OVER || gameState === GAME_STATE.WIN) {
Checks if the game is in a non-playing state (menu, game over, or win).
if (ambientSound) { ambientSound.amp(0.05, 1); }
Ensures the ambient sound is audible when the player starts the game. This is a safety check for Web Audio compatibility.
resetGame();
Reinitializes the game, resetting player and enemy positions and changing gameState to PLAYING.
return;
Exits the function early so no movement processing happens during state transitions.
if (player.moving) return;
If the player is already moving between tiles, ignore the key press. This prevents queuing multiple moves.
switch (code) {
Checks the key code and routes to the appropriate movement direction.
case LEFT_ARROW:
If the left arrow key (p5.js constant LEFT_ARROW) was pressed...
case 65: // A key
...or the A key (ASCII code 65) was pressed, execute the following movement command.
player.move(-1, 0);
Moves the player left by 1 grid tile (dx = -1, dy = 0).
break;
Exits the switch case so the next case isn't executed.

touchStarted()

touchStarted() is p5.js's touch event handler, making the game playable on mobile and tablet devices. It mirrors the keyboard input logic but branches between state transitions and gameplay input. The touches[] array holds all active touch points; touches[0] is the first (or primary) touch. By returning false, you prevent the browser's default touch behaviors, which is critical for full-screen game experiences.

function touchStarted() {
  // Start/Restart game on any touch
  if (gameState === GAME_STATE.MENU || gameState === GAME_STATE.GAME_OVER || gameState === GAME_STATE.WIN) {
    if (ambientSound) { // Removed isLoaded() check
      ambientSound.amp(0.05, 1); // Ensure ambient sound starts on user gesture
    }
    resetGame(); // Reset game and set state to playing
  } else if (gameState === GAME_STATE.PLAYING) {
    let touchX = touches[0].x;
    let touchY = touches[0].y;
    handleTouchInput(touchX, touchY);
  }
  return false; // Prevent default browser behavior (e.g., scrolling/zooming)
}
Line-by-line explanation (9 lines)

🔧 Subcomponents:

conditional State Restart Handler if (gameState === GAME_STATE.MENU || gameState === GAME_STATE.GAME_OVER || gameState === GAME_STATE.WIN) { resetGame(); }

Restarts the game if the player touches during a non-playing state

conditional Gameplay Input Handler else if (gameState === GAME_STATE.PLAYING) { handleTouchInput(touchX, touchY); }

Processes touch input for movement during active gameplay

variable-assignment Touch Coordinate Extraction let touchX = touches[0].x; let touchY = touches[0].y;

Gets the x and y screen coordinates of the first touch point

function touchStarted() {
p5.js calls this function whenever the user touches the screen (on mobile/tablet).
if (gameState === GAME_STATE.MENU || gameState === GAME_STATE.GAME_OVER || gameState === GAME_STATE.WIN) {
Checks if the game is not currently playing (menu, game over, or win screens).
if (ambientSound) { ambientSound.amp(0.05, 1); }
Ensures ambient sound is ready when the player starts gameplay. Web Audio requires a user gesture.
resetGame();
Reinitializes the game to return to playing state.
} else if (gameState === GAME_STATE.PLAYING) {
If the game is already playing, process the touch as a movement input.
let touchX = touches[0].x;
Gets the x coordinate of the first touch point. touches[0] is the first finger that touched the screen.
let touchY = touches[0].y;
Gets the y coordinate of the first touch point.
handleTouchInput(touchX, touchY);
Calls a function to process the touch coordinates and determine movement direction.
return false;
Prevents the browser from performing default touch behavior (like scrolling or zooming).

handleTouchInput()

handleTouchInput() converts raw touch coordinates into grid-based movement commands. It uses a dead zone (a touch buffer around the player) to prevent accidental movements, and prioritizes the axis with the larger displacement to make touch controls feel intuitive. This is a common pattern in mobile games where you want responsive, forgiving controls. The ternary operator (? :) is shorthand for if-else, making the code concise and readable.

function handleTouchInput(touchX, touchY) {
  if (player.moving) return; // Cannot move if already interpolating

  // Determine direction based on touch relative to player
  let dx = touchX - player.x;
  let dy = touchY - player.y;

  // Define a dead zone around the player to prevent accidental movement
  const DEAD_ZONE = TILE_SIZE / 2;

  if (abs(dx) > DEAD_ZONE || abs(dy) > DEAD_ZONE) {
    // Prioritize movement along the axis with the greater touch displacement
    if (abs(dx) > abs(dy)) {
      player.move(dx > 0 ? 1 : -1, 0); // Move horizontally
    } else {
      player.move(0, dy > 0 ? 1 : -1); // Move vertically
    }
  }
}
Line-by-line explanation (9 lines)

🔧 Subcomponents:

conditional Movement Guard if (player.moving) return;

Prevents new touches from queuing multiple moves while interpolating

calculation Relative Vector Calculation let dx = touchX - player.x; let dy = touchY - player.y;

Calculates the direction from the player to the touch point

conditional Dead Zone Filtering if (abs(dx) > DEAD_ZONE || abs(dy) > DEAD_ZONE) {

Ignores touches near the player to prevent accidental movements

conditional Axis Priority Selection if (abs(dx) > abs(dy)) { player.move(dx > 0 ? 1 : -1, 0); } else { player.move(0, dy > 0 ? 1 : -1); }

Moves along the axis with the greater displacement, making touch input feel responsive

if (player.moving) return;
If the player is already moving between tiles, ignore this touch. This prevents accidental double-moves.
let dx = touchX - player.x;
Calculates the horizontal distance from the player's current position to where the user touched. Positive means touch is to the right.
let dy = touchY - player.y;
Calculates the vertical distance. Positive means touch is below the player.
const DEAD_ZONE = TILE_SIZE / 2;
Defines a 20-pixel radius around the player where touches are ignored, preventing accidental moves from touches too close to the player.
if (abs(dx) > DEAD_ZONE || abs(dy) > DEAD_ZONE) {
Only process the touch if it's outside the dead zone—at least 20 pixels away on x or y axis.
if (abs(dx) > abs(dy)) {
Checks which displacement is larger. If horizontal distance is greater, treat it as horizontal movement.
player.move(dx > 0 ? 1 : -1, 0);
Moves right (1) if dx is positive, left (-1) if negative. The ? : is a ternary operator for concise conditional assignment.
} else {
If vertical distance is greater than horizontal, move vertically instead.
player.move(0, dy > 0 ? 1 : -1);
Moves down (1) if dy is positive, up (-1) if negative.

Player.move()

Player.move() is the core movement logic. It validates the destination tile, updates the logical grid position, and initiates a smooth lerp animation. The key insight is that gridX/gridY are the logical position (which tile), while x/y are the pixel position (where to draw). By separating these, the code can perform tile-based collision detection while animating smooth pixel-level movement. The footsteps envelope is triggered here, synchronizing audio with player action.

move(dx, dy) {
  if (this.moving) return; // Cannot move if already interpolating

  let nextGridX = this.gridX + dx;
  let nextGridY = this.gridY + dy;

  // Check if the next tile is within bounds and not a wall
  if (nextGridX >= 0 && nextGridX < MAP_COLS &&
    nextGridY >= 0 && nextGridY < MAP_ROWS &&
    MAP[nextGridY][nextGridX] !== 1) {
    // Update grid position and start smooth movement
    this.gridX = nextGridX;
    this.gridY = nextGridY;
    this.startX = this.x;
    this.startY = this.y;
    this.targetX = nextGridX * TILE_SIZE + TILE_SIZE / 2;
    this.targetY = nextGridY * TILE_SIZE + TILE_SIZE / 2;
    this.moving = true;
    this.moveStartTime = millis(); // Record start time for lerp

    // Play footsteps sound using the envelope
    if (footstepsNoise) { // Check if footstepsNoise object exists
      footstepsEnv.play(); // Trigger the envelope to shape the footstepsNoise amplitude
    }
  }
}
Line-by-line explanation (12 lines)

🔧 Subcomponents:

conditional Collision Detection if (nextGridX >= 0 && nextGridX < MAP_COLS && nextGridY >= 0 && nextGridY < MAP_ROWS && MAP[nextGridY][nextGridX] !== 1)

Ensures the destination tile is within map bounds and is not a wall (value 1)

variable-assignments Grid Position Update this.gridX = nextGridX; this.gridY = nextGridY;

Updates the logical grid position to the destination tile

variable-assignments Interpolation Setup this.startX = this.x; this.startY = this.y; this.targetX = nextGridX * TILE_SIZE + TILE_SIZE / 2; this.targetY = nextGridY * TILE_SIZE + TILE_SIZE / 2;

Records current pixel position as start and calculates target pixel position for smooth animation

variable-assignment Movement Flag this.moving = true; this.moveStartTime = millis();

Sets the moving flag and records the timestamp to drive the interpolation in update()

function-call Footstep Sound if (footstepsNoise) { footstepsEnv.play(); }

Plays a footstep sound by triggering the envelope to modulate the pink noise

if (this.moving) return;
If the player is already moving, exit immediately. This prevents starting another move before the current one finishes.
let nextGridX = this.gridX + dx;
Calculates the destination column by adding the movement delta (dx) to the current column.
let nextGridY = this.gridY + dy;
Calculates the destination row by adding the movement delta (dy) to the current row.
if (nextGridX >= 0 && nextGridX < MAP_COLS && ...) {
Checks four conditions: nextGridX is not negative, not past right edge, nextGridY is not negative, not past bottom edge.
MAP[nextGridY][nextGridX] !== 1
Checks that the destination tile is not a wall (value 1). Walls block movement, but floor (0) and exit (2) tiles allow it.
this.gridX = nextGridX;
Updates the player's grid column to the destination.
this.gridY = nextGridY;
Updates the player's grid row to the destination.
this.startX = this.x;
Records the current pixel x position as the starting point for the lerp animation.
this.targetX = nextGridX * TILE_SIZE + TILE_SIZE / 2;
Calculates the target pixel x position: column * 40 + 20 (center of the tile).
this.moving = true;
Sets the moving flag to true, signaling that this player is now in motion and shouldn't accept new input.
this.moveStartTime = millis();
Records the current time in milliseconds, used to calculate interpolation progress in update().
if (footstepsNoise) { footstepsEnv.play(); }
Triggers the footstep envelope, which modulates the pink noise to produce a brief thump sound synchronized with movement.

Player.update()

Player.update() animates the player's pixel position using lerp (linear interpolation). Each frame, it calculates t (0 to 1) based on elapsed time, then uses t to smoothly transition the player from start to target position. When t reaches 1, the movement is complete and the flag resets. This is the core animation pattern used in nearly all game engines. The direction logic uses the start/target comparison to determine which way the player faced—a simple but clever way to track movement direction without storing it separately.

update() {
  if (this.moving) {
    let elapsed = millis() - this.moveStartTime;
    let t = min(1, elapsed / PLAYER_MOVE_DURATION); // Interpolation factor (0 to 1)

    // Lerp (linear interpolate) between start and target positions
    this.x = lerp(this.startX, this.targetX, t);
    this.y = lerp(this.startY, this.targetY, t);

    // Determine direction for eye indicator
    if (this.targetX > this.startX) this.direction = 0; // right
    else if (this.targetX < this.startX) this.direction = 2; // left
    else if (this.targetY > this.startY) this.direction = 1; // down
    else if (this.targetY < this.startY) this.direction = 3; // up

    // If movement is complete, snap to target and stop moving
    if (t >= 1) {
      this.x = this.targetX;
      this.y = this.targetY;
      this.moving = false;
    }
  }
}
Line-by-line explanation (12 lines)

🔧 Subcomponents:

calculation Elapsed Time Calculation let elapsed = millis() - this.moveStartTime; let t = min(1, elapsed / PLAYER_MOVE_DURATION);

Calculates how far through the movement animation we are (0.0 to 1.0)

function-calls Lerp Animation this.x = lerp(this.startX, this.targetX, t); this.y = lerp(this.startY, this.targetY, t);

Smoothly interpolates pixel position from start to target based on elapsed time

conditional Direction Determination if (this.targetX > this.startX) this.direction = 0; ...

Sets the direction indicator based on which axis the player moved along

conditional Movement Completion if (t >= 1) { this.x = this.targetX; this.y = this.targetY; this.moving = false; }

Snaps the player to the exact target position and stops the movement when animation completes

if (this.moving) {
Only perform update if the player is currently moving (moving flag is true).
let elapsed = millis() - this.moveStartTime;
Calculates how many milliseconds have passed since the move started by subtracting the start time from the current time.
let t = min(1, elapsed / PLAYER_MOVE_DURATION);
Calculates interpolation factor t (0 to 1). Divides elapsed time by total movement duration. min(1, ...) caps it at 1 to prevent overshooting.
this.x = lerp(this.startX, this.targetX, t);
Lerp (linear interpolate) between start and target x positions. When t=0, x=startX; when t=1, x=targetX; when t=0.5, x is halfway.
this.y = lerp(this.startY, this.targetY, t);
Same as above for the y position.
if (this.targetX > this.startX) this.direction = 0;
If the target x is greater than start x, the player moved right, so set direction to 0 (right).
else if (this.targetX < this.startX) this.direction = 2;
If the target x is less, the player moved left, so direction is 2 (left).
else if (this.targetY > this.startY) this.direction = 1;
If x didn't change but target y is greater, the player moved down, so direction is 1 (down).
else if (this.targetY < this.startY) this.direction = 3;
If target y is less, the player moved up, so direction is 3 (up).
if (t >= 1) {
When interpolation is complete (t reaches 1), finalize the movement.
this.x = this.targetX;
Snap to exact target position to avoid floating-point rounding errors.
this.moving = false;
Set moving to false so the player can accept new input on the next frame.

Player.draw()

Player.draw() renders the player as a simple two-circle design: a larger body circle and a smaller eye circle. The eye acts as a direction indicator, showing which way the player just moved. This is a minimalist but effective character design that communicates state visually. The switch statement is a clean way to handle direction-based positioning, and by using offsets rather than absolute coordinates, the eye position scales with the body size.

draw() {
  noStroke();
  fill(255, 0, 0); // Gus is red
  circle(this.x, this.y, this.size);

  // Draw eye/direction indicator
  let eyeX = this.x;
  let eyeY = this.y;
  let eyeOffset = this.size / 4;
  switch (this.direction) {
    case 0: eyeX += eyeOffset; break; // right
    case 1: eyeY += eyeOffset; break; // down
    case 2: eyeX -= eyeOffset; break; // left
    case 3: eyeY -= eyeOffset; break; // up
  }
  fill(0);
  circle(eyeX, eyeY, this.size / 4);
}
Line-by-line explanation (13 lines)

🔧 Subcomponents:

function-calls Body Drawing noStroke(); fill(255, 0, 0); circle(this.x, this.y, this.size);

Draws Gus as a red circle (diameter = this.size = 24 pixels)

calculation Eye Position Calculation let eyeOffset = this.size / 4; switch (this.direction) { ... }

Calculates eye position offset based on the player's facing direction

function-call Eye Drawing fill(0); circle(eyeX, eyeY, this.size / 4);

Draws a black circle (diameter = 6 pixels) at the calculated eye position

noStroke();
Disables the outline so circles are filled without borders.
fill(255, 0, 0);
Sets the fill color to red (RGB: 255, 0, 0) for Gus's body.
circle(this.x, this.y, this.size);
Draws a red circle at the player's current pixel position (this.x, this.y) with diameter this.size (24 pixels).
let eyeX = this.x;
Initializes the eye x position to the body's x position.
let eyeY = this.y;
Initializes the eye y position to the body's y position.
let eyeOffset = this.size / 4;
Calculates the eye offset distance as 1/4 of the body size (6 pixels), the distance from center to eye.
switch (this.direction) {
Checks the direction value (0-3) to determine which way to offset the eye.
case 0: eyeX += eyeOffset; break;
If direction is 0 (right), move the eye right by offsetting eyeX.
case 1: eyeY += eyeOffset; break;
If direction is 1 (down), move the eye down by offsetting eyeY.
case 2: eyeX -= eyeOffset; break;
If direction is 2 (left), move the eye left by subtracting from eyeX.
case 3: eyeY -= eyeOffset; break;
If direction is 3 (up), move the eye up by subtracting from eyeY.
fill(0);
Sets the fill color to black (RGB: 0, 0, 0) for the eye.
circle(eyeX, eyeY, this.size / 4);
Draws a small black circle (diameter 6 pixels) at the calculated eye position.

Enemy.update()

Enemy.update() is nearly identical to Player.update(), but it advances along a fixed patrol path instead of waiting for input. The key difference is the patrol path logic at the top: when the enemy reaches a waypoint, it automatically advances to the next one using modulo arithmetic for looping. The lerp animation uses ENEMY_MOVE_DURATION (500ms vs. the player's 200ms), making the enemy move slower and giving the player an advantage. This predictable, slower patrol is essential for the game's stealth mechanics—players need time to react.

update() {
  if (!this.moving) {
    // Move to the next point in the patrol path
    this.currentPathIndex = (this.currentPathIndex + 1) % this.path.length;
    let nextTile = this.path[this.currentPathIndex];
    this.gridX = nextTile.x;
    this.gridY = nextTile.y;
    this.startX = this.x;
    this.startY = this.y;
    this.targetX = nextTile.x * TILE_SIZE + TILE_SIZE / 2;
    this.targetY = nextTile.y * TILE_SIZE + TILE_SIZE / 2;
    this.moving = true;
    this.moveStartTime = millis();
  }

  let elapsed = millis() - this.moveStartTime;
  let t = min(1, elapsed / ENEMY_MOVE_DURATION); // Use ENEMY_MOVE_DURATION here

  this.x = lerp(this.startX, this.targetX, t);
  this.y = lerp(this.startY, this.targetY, t);

  // Determine direction for FOV cone
  if (this.targetX > this.startX) this.direction = 0; // right
  else if (this.targetX < this.startX) this.direction = 2; // left
  else if (this.targetY > this.startY) this.direction = 1; // down
  else if (this.targetY < this.startY) this.direction = 3; // up

  if (t >= 1) {
    this.x = this.targetX;
    this.y = this.targetY;
    this.moving = false;
  }
}
Line-by-line explanation (13 lines)

🔧 Subcomponents:

conditional Path Advancement if (!this.moving) { this.currentPathIndex = (this.currentPathIndex + 1) % this.path.length; ... }

When the enemy reaches a waypoint, advance to the next waypoint in the patrol path using modulo to loop

calculation-and-update Smooth Movement Interpolation let t = min(1, elapsed / ENEMY_MOVE_DURATION); this.x = lerp(...); this.y = lerp(...);

Animates the enemy's position from current waypoint to the next using lerp, identical to player movement but with a different duration

conditional Direction Determination if (this.targetX > this.startX) this.direction = 0; ...

Sets the enemy's facing direction based on the direction of movement to its next waypoint

if (!this.moving) {
If the enemy is not currently moving (has reached a waypoint), start moving to the next waypoint.
this.currentPathIndex = (this.currentPathIndex + 1) % this.path.length;
Advances to the next waypoint in the path. The modulo operator (%) wraps back to 0 when reaching the end, creating a continuous loop.
let nextTile = this.path[this.currentPathIndex];
Gets the next waypoint object from the path array using the updated index.
this.gridX = nextTile.x; this.gridY = nextTile.y;
Updates the logical grid position to the next waypoint.
this.startX = this.x; this.startY = this.y;
Records the current pixel position as the start point for the next lerp animation.
this.targetX = nextTile.x * TILE_SIZE + TILE_SIZE / 2;
Calculates the target pixel x position: waypoint column * 40 + 20.
this.moving = true; this.moveStartTime = millis();
Starts the movement by setting the moving flag and recording the start time.
let elapsed = millis() - this.moveStartTime;
Calculates how much time has passed since movement started.
let t = min(1, elapsed / ENEMY_MOVE_DURATION);
Calculates interpolation factor t using ENEMY_MOVE_DURATION (500ms), making the enemy move slower than the player.
this.x = lerp(this.startX, this.targetX, t);
Lerps the enemy's pixel x position from start to target based on elapsed time.
this.y = lerp(this.startY, this.targetY, t);
Lerps the enemy's pixel y position.
if (this.targetX > this.startX) this.direction = 0;
If moving right, set direction to 0 so the FOV cone points right.
if (t >= 1) { this.x = this.targetX; this.y = this.targetY; this.moving = false; }
When animation completes, snap to exact target and reset the moving flag.

Enemy.checkLineOfSight()

checkLineOfSight() is the most complex function in the sketch, implementing three-stage visibility detection: (1) quick distance check for early exit, (2) angle check to ensure the player is in the FOV cone, (3) Bresenham raycasting to verify walls don't block the line of sight. The Bresenham algorithm is a classic computer graphics technique for drawing lines on a pixel grid; here it's repurposed to walk from enemy to player, checking each grid tile for walls. This creates convincing AI perception that respects the maze geometry.

checkLineOfSight(player) {
  let ex = floor(this.gridX);
  let ey = floor(this.gridY);
  let px = floor(player.gridX);
  let py = floor(player.gridY);

  // 1. Check distance first for performance
  let distSq = (player.x - this.x)**2 + (player.y - this.y)**2;
  if (distSq > ENEMY_FOV_RANGE**2) {
    return false; // Player is too far away
  }
  
  // 2. Check if player is within the enemy's field of view angle
  let angleToPlayer = atan2(player.y - this.y, player.x - this.x);
  let fovAngleRad = radians(ENEMY_FOV_ANGLE);
  let currentDirAngle;

  switch (this.direction) {
    case 0: currentDirAngle = 0; break; // right
    case 1: currentDirAngle = HALF_PI; break; // down
    case 2: currentDirAngle = PI; break; // left
    case 3: currentDirAngle = -HALF_PI; break; // up
  }

  // Normalize angle difference to be between -PI and PI
  let angleDiff = angleToPlayer - currentDirAngle;
  angleDiff = (angleDiff + PI) % TWO_PI - PI;

  if (abs(angleDiff) > fovAngleRad / 2) {
    return false; // Player is outside the FOV cone
  }

  // 3. Grid traversal for obstruction check (Bresenham-like algorithm)
  // This checks if any wall tiles are between the enemy and player
  let dx = abs(px - ex);
  let dy = abs(py - ey);
  let stepX = (ex < px) ? 1 : -1;
  let stepY = (ey < py) ? 1 : -1;
  let err = dx - dy;

  let currentX = ex;
  let currentY = ey;

  while (currentX !== px || currentY !== py) {
    // Check if the current cell is a wall, but skip the enemy's own cell
    if (MAP[currentY][currentX] === 1 && (currentX !== ex || currentY !== ey)) {
      return false; // Obstructed by a wall
    }

    let e2 = 2 * err;
    if (e2 > -dy) {
      err -= dy;
      currentX += stepX;
    }
    if (e2 < dx) {
      err += dx;
      currentY += stepY;
    }
  }

  return true; // Player is visible
}
Line-by-line explanation (20 lines)

🔧 Subcomponents:

calculation Grid Coordinate Conversion let ex = floor(this.gridX); let ey = floor(this.gridY); let px = floor(player.gridX); let py = floor(player.gridY);

Converts floating-point grid positions to integer grid coordinates for the Bresenham check

conditional Distance Range Check let distSq = (player.x - this.x)**2 + (player.y - this.y)**2; if (distSq > ENEMY_FOV_RANGE**2) { return false; }

Early exit if the player is too far away, using squared distance to avoid expensive sqrt() calls

conditional Field of View Angle Check let angleToPlayer = atan2(...); ... if (abs(angleDiff) > fovAngleRad / 2) { return false; }

Checks if the player is within the 90-degree cone of the enemy's current facing direction

while-loop Bresenham Line-of-Sight Raycasting while (currentX !== px || currentY !== py) { ... }

Traverses a line from enemy to player, checking each grid tile for walls to determine if the line of sight is obstructed

let ex = floor(this.gridX); let ey = floor(this.gridY);
Converts the enemy's grid position to integers using floor(), ensuring consistent grid-based raycasting.
let px = floor(player.gridX); let py = floor(player.gridY);
Converts the player's grid position to integers.
let distSq = (player.x - this.x)**2 + (player.y - this.y)**2;
Calculates squared distance between enemy and player using pixel positions. Squared distance avoids the expensive sqrt() operation.
if (distSq > ENEMY_FOV_RANGE**2) { return false; }
If squared distance exceeds squared FOV range (150² = 22500), the player is too far and definitely not visible.
let angleToPlayer = atan2(player.y - this.y, player.x - this.x);
Calculates the angle from enemy to player using atan2(). Returns radians in range [-PI, PI].
let fovAngleRad = radians(ENEMY_FOV_ANGLE);
Converts the FOV angle (90 degrees) to radians (π/2) for angle comparison.
switch (this.direction) { case 0: currentDirAngle = 0; ... }
Maps the direction value (0-3) to an angle in radians: 0=right, π/2=down, π=left, -π/2=up.
let angleDiff = angleToPlayer - currentDirAngle;
Calculates the difference between the angle to the player and the enemy's facing direction.
angleDiff = (angleDiff + PI) % TWO_PI - PI;
Normalizes angle difference to [-π, π] range. This ensures we compare the shortest angular difference.
if (abs(angleDiff) > fovAngleRad / 2) { return false; }
If the absolute angle difference exceeds half the FOV angle (45 degrees for a 90-degree FOV), the player is outside the cone.
let dx = abs(px - ex); let dy = abs(py - ey);
Calculates the absolute differences in x and y grid coordinates, needed for Bresenham's algorithm.
let stepX = (ex < px) ? 1 : -1; let stepY = (ey < py) ? 1 : -1;
Determines the direction to step: +1 if moving positive, -1 if moving negative. Ternary operators for conciseness.
let err = dx - dy;
Initializes the Bresenham error term, used to track when to step along each axis.
let currentX = ex; let currentY = ey;
Starts the line-of-sight ray at the enemy's position.
while (currentX !== px || currentY !== py) {
Loops until reaching the player's grid cell, checking each tile along the way.
if (MAP[currentY][currentX] === 1 && (currentX !== ex || currentY !== ey)) {
Checks if the current tile is a wall (value 1), but skips the enemy's own starting cell. If a wall is found, line of sight is blocked.
let e2 = 2 * err;
Calculates a doubled error term for the next step decision.
if (e2 > -dy) { err -= dy; currentX += stepX; }
If error favors horizontal movement, step along the x axis and adjust the error term.
if (e2 < dx) { err += dx; currentY += stepY; }
If error favors vertical movement, step along the y axis and adjust the error term.
return true;
If the loop completes without finding a wall, the player is visible—return true.

Enemy.draw()

Enemy.draw() renders the guard and its field of view. The FOV cone is drawn using a loop that steps around the semicircle in 5-degree increments, connecting each point to create the cone outline. This visual feedback is crucial for teaching the player how the detection mechanic works—seeing the red cone helps them understand their danger zone. The eye indicator (white circle) shows the guard's current facing direction, making its patrol behavior intuitive.

draw() {
  noStroke();
  fill(0, 0, 255); // Enemy is blue
  rectMode(CENTER);
  rect(this.x, this.y, this.size, this.size);
  rectMode(CORNER);

  // Draw FOV cone
  noFill();
  stroke(255, 0, 0, 100); // Red transparent for detection
  strokeWeight(1);
  let fovAngleRad = radians(ENEMY_FOV_ANGLE);
  let currentDirAngle;

  switch (this.direction) {
    case 0: currentDirAngle = 0; break; // right
    case 1: currentDirAngle = HALF_PI; break; // down
    case 2: currentDirAngle = PI; break; // left
    case 3: currentDirAngle = -HALF_PI; break; // up
  }

  // Draw cone from enemy position
  beginShape();
  vertex(this.x, this.y);
  for (let a = -fovAngleRad / 2; a <= fovAngleRad / 2; a += radians(5)) {
    let x = this.x + cos(currentDirAngle + a) * ENEMY_FOV_RANGE;
    let y = this.y + sin(currentDirAngle + a) * ENEMY_FOV_RANGE;
    vertex(x, y);
  }
  vertex(this.x, this.y);
  endShape();

  // Draw eye/direction indicator on the enemy
  let eyeX = this.x;
  let eyeY = this.y;
  let eyeOffset = this.size / 4;
  switch (this.direction) {
    case 0: eyeX += eyeOffset; break; // right
    case 1: eyeY += eyeOffset; break; // down
    case 2: eyeX -= eyeOffset; break; // left
    case 3: eyeY -= eyeOffset; break; // up
  }
  fill(255);
  circle(eyeX, eyeY, this.size / 4);
}
Line-by-line explanation (19 lines)

🔧 Subcomponents:

function-calls Enemy Body Drawing noStroke(); fill(0, 0, 255); rectMode(CENTER); rect(this.x, this.y, this.size, this.size);

Draws the enemy as a blue square (32x32 pixels) centered at its position

shape-drawing FOV Cone Drawing beginShape(); vertex(this.x, this.y); for (let a = -fovAngleRad / 2; a <= fovAngleRad / 2; a += radians(5)) { ... } vertex(this.x, this.y); endShape();

Draws a semi-transparent red cone showing the enemy's field of view

function-calls Eye Direction Indicator fill(255); circle(eyeX, eyeY, this.size / 4);

Draws a white circle indicating the direction the enemy is facing

noStroke();
Disables outlines for the body.
fill(0, 0, 255);
Sets fill color to blue (RGB: 0, 0, 255).
rectMode(CENTER);
Changes rect drawing mode so the rectangle is centered at the given coordinates.
rect(this.x, this.y, this.size, this.size);
Draws a blue square with side length 32 (this.size) centered at the enemy's position.
rectMode(CORNER);
Resets rect mode back to CORNER (top-left) for any other rectangles drawn later.
noFill();
Disables fill for the next shapes (the FOV cone).
stroke(255, 0, 0, 100);
Sets the outline color to red with alpha 100/255 ≈ 39% transparency, making the FOV cone semi-transparent.
strokeWeight(1);
Sets outline thickness to 1 pixel.
let fovAngleRad = radians(ENEMY_FOV_ANGLE);
Converts FOV angle (90 degrees) to radians (π/2) for trigonometric calculations.
switch (this.direction) { case 0: currentDirAngle = 0; ... }
Maps direction (0-3) to angle: 0=0 radians (right), 1=π/2 (down), 2=π (left), 3=-π/2 (up).
beginShape();
Starts defining a custom shape (the FOV cone).
vertex(this.x, this.y);
Adds the first vertex at the enemy's center (the point of the cone).
for (let a = -fovAngleRad / 2; a <= fovAngleRad / 2; a += radians(5)) {
Loops from -45° to +45° (for a 90° FOV) in 5-degree increments, creating the cone's arc.
let x = this.x + cos(currentDirAngle + a) * ENEMY_FOV_RANGE;
Calculates x coordinate of a point on the cone's arc. Uses cos() with the facing angle offset by loop variable a.
let y = this.y + sin(currentDirAngle + a) * ENEMY_FOV_RANGE;
Calculates y coordinate using sin(). Points are 150 pixels (ENEMY_FOV_RANGE) from the enemy.
vertex(x, y);
Adds a vertex at the calculated arc point.
vertex(this.x, this.y);
Closes the shape by adding the center vertex again.
endShape();
Completes the shape definition, drawing the outlined cone.
fill(255); circle(eyeX, eyeY, this.size / 4);
Draws a white eye indicator at the calculated position, showing the enemy's facing direction.

windowResized()

windowResized() ensures the sketch adapts to different window sizes. By using min(), the canvas stays proportional to the map and never exceeds its natural size. This is a best practice for responsive web sketches—it allows the game to work on phones, tablets, and desktops without distortion.

function windowResized() {
  resizeCanvas(min(windowWidth, MAP_COLS * TILE_SIZE), min(windowHeight, MAP_ROWS * TILE_SIZE));
}
Line-by-line explanation (2 lines)

🔧 Subcomponents:

function-call Responsive Canvas Resize resizeCanvas(min(windowWidth, MAP_COLS * TILE_SIZE), min(windowHeight, MAP_ROWS * TILE_SIZE));

Adjusts the canvas size whenever the window is resized, respecting map dimensions

function windowResized() {
p5.js calls this function automatically whenever the window is resized.
resizeCanvas(min(windowWidth, MAP_COLS * TILE_SIZE), min(windowHeight, MAP_ROWS * TILE_SIZE));
Resizes the canvas to fit the window, but caps it at map dimensions (800x800 pixels for a 20x20 grid with 40-pixel tiles).

📦 Key Variables

TILE_SIZE number

The size of each grid cell in pixels (40). Used to convert grid coordinates to pixel positions and scale UI elements.

const TILE_SIZE = 40;
PLAYER_MOVE_DURATION number

Milliseconds for the player to move one tile (200). Controls how fast player movement is animated.

const PLAYER_MOVE_DURATION = 200;
ENEMY_MOVE_DURATION number

Milliseconds for the enemy to move between waypoints (500). Enemies move slower than the player, giving players an advantage.

const ENEMY_MOVE_DURATION = 500;
ENEMY_FOV_ANGLE number

The width of the enemy's field of view in degrees (90). Determines how wide the detection cone is.

const ENEMY_FOV_ANGLE = 90;
ENEMY_FOV_RANGE number

The maximum distance the enemy can see in pixels (150). Sets the length of the detection cone.

const ENEMY_FOV_RANGE = 150;
GLITCH_EFFECT_CHANCE number

Probability of a glitch effect per frame (0.005 = 0.5%). Controls the frequency of visual distortions.

const GLITCH_EFFECT_CHANCE = 0.005;
GAME_STATE object

Enum-like object defining game state constants: MENU, PLAYING, GAME_OVER, WIN. Used to control which screen is displayed.

const GAME_STATE = { MENU: 0, PLAYING: 1, GAME_OVER: 2, WIN: 3 };
gameState number

Current game state (MENU, PLAYING, GAME_OVER, or WIN). Controls the flow of the game.

let gameState = GAME_STATE.MENU;
player object

The Player object representing Gus. Stores position, animation state, and direction.

let player;
enemy object

The Enemy object representing the guard. Stores patrol path, position, and field of view state.

let enemy;
gameFont object

The loaded VT323 font used for all UI text. Loaded in preload() and applied in setup().

let gameFont;
ambientSound object

p5.Noise object that generates the facility's ambient hum. Filtered with a low-pass filter.

let ambientSound;
detectionSound object

p5.Oscillator that generates the alarm tone when the player is detected. Filtered with a high-pass filter.

let detectionSound;
footstepsNoise object

p5.Noise (pink noise) that is modulated by the footstepsEnv to create footstep sounds.

let footstepsNoise;
footstepsEnv object

p5.Env object that shapes the footstepsNoise into brief, punchy footstep sounds synchronized with player movement.

let footstepsEnv;
MAP array

2D array representing the 20x20 tile map. Values: 1=wall, 0=floor, 2=exit. Defines the maze layout and collision geometry.

const MAP = [[1,1,...],[1,0,...],...];
MAP_ROWS number

Number of rows in the MAP (20). Used in loops and boundary checks.

const MAP_ROWS = MAP.length;
MAP_COLS number

Number of columns in the MAP (20). Used in loops and boundary checks.

const MAP_COLS = MAP[0].length;

🔧 Potential Improvements (6)

Here are some ways this code could be enhanced:

PERFORMANCE Enemy.checkLineOfSight()

The Bresenham raycasting loop runs every frame even when the player is far outside the FOV range. The distance check early-exit helps, but it could be optimized further.

💡 Add a bounding box check (e.g., distance from enemy to player in both x and y must be less than FOV_RANGE) before the angle check to skip more cases early. This would reduce unnecessary trigonometry calculations.

FEATURE Game mechanics

The enemy always patrols the same fixed path with no randomness or learning behavior. While this is predictable (good for a stealth game), adding occasional pauses or deviations could make it more challenging.

💡 Add occasional random waypoint delays or probabilistic direction changes to the enemy's patrol. This would keep the player from memorizing the exact patrol timing.

BUG Enemy.checkLineOfSight() Bresenham loop

The Bresenham algorithm's termination condition (currentX !== px || currentY !== py) is correct but could theoretically loop infinitely if the step logic is buggy. Additionally, checking MAP[currentY][currentX] before arriving at the target is correct but the condition skips the enemy's own cell, which is good—but if a wall exactly overlaps the player's tile, the check won't catch it.

💡 Add a safety counter limit to the while loop to prevent infinite loops (e.g., if (count++ > 100) break;). Also consider what happens if the player is on a wall tile (shouldn't happen in this design, but is a potential edge case).

STYLE Player and Enemy classes

Both classes have identical movement and interpolation logic, but it's duplicated rather than refactored into a shared method or utility function. This violates DRY (Don't Repeat Yourself) and makes updates error-prone.

💡 Extract the common animation logic (lerp, direction determination, elapsed time calculation) into a shared helper function or a parent class. This would reduce code duplication and make maintenance easier.

FEATURE Audio

The ambientSound, detectionSound, and footstepsNoise are set up in preload() but the sketch doesn't check if Web Audio failed to initialize (which can happen in older browsers or certain security contexts). Errors are silently ignored.

💡 Add error handling and fallback UI (e.g., a message saying 'Sound disabled') if Web Audio initialization fails. Check if sounds exist before calling methods on them, which is partially done but could be more robust.

FEATURE Mobile controls

The touch input system works but uses a simple dead zone and axis-priority approach. On very small screens or with accidental touches, the player might move unintentionally.

💡 Add a minimum touch distance threshold and consider showing a virtual joystick or directional buttons on mobile to make input more explicit and forgiving.

🔄 Code Flow

Code flow showing preload, setup, draw, drawmap, drawmenu, drawplaying, drawgameover, drawwin, applyglitcheffect, resetgame, keyPressed, handleinput, touchstarted, handletouchinput, player-move, player-update, player-draw, enemy-update, enemy-checklineofSight, enemy-draw, windowresized

💡 Click on function names in the diagram to jump to their code

graph TD start[Start] --> setup[setup] setup --> preload[preload] preload --> canvascreation[Canvas Sizing] preload --> fontload[Font Loading] preload --> ambientsetup[Ambient Sound Setup] preload --> detectionsetup[Detection Sound Setup] preload --> footstepssetup[Footsteps Sound Setup] preload --> envelopesetup[Envelope Configuration] setup --> audioinit[Web Audio Initialization] setup --> playerinit[Player Instantiation] setup --> enemyinit[Enemy Instantiation] setup --> textstyling[Text Configuration] setup --> draw[draw loop] click preload href "#fn-preload" click canvascreation href "#sub-canvas-creation" click fontload href "#sub-font-load" click ambientsetup href "#sub-ambient-setup" click detectionsetup href "#sub-detection-setup" click footstepssetup href "#sub-footsteps-setup" click envelopesetup href "#sub-envelope-setup" click audioinit href "#sub-audio-init" click playerinit href "#sub-player-init" click enemyinit href "#sub-enemy-init" click textstyling href "#sub-text-styling" click setup href "#fn-setup" draw --> stateSwitch[Game State Routing] stateSwitch --> drawmenu[drawMenu] stateSwitch --> drawplaying[drawPlaying] stateSwitch --> drawgameover[drawGameOver] stateSwitch --> drawwin[drawWin] click draw href "#fn-draw" click stateSwitch href "#sub-state-switch" click drawmenu href "#fn-drawmenu" click drawplaying href "#fn-drawplaying" click drawgameover href "#fn-drawgameover" click drawwin href "#fn-drawwin" drawplaying --> backgroundclear[Background Clearing] drawplaying --> cameraTranslation[Camera Setup] drawplaying --> gameupdate[Update Game State] gameupdate --> drawmap[drawMap] drawmap --> rowloop[Row Iteration] rowloop --> columnloop[Column Iteration] columnloop --> tilerendering[Tile Type Rendering] tilerendering --> gridlines[Grid Line Drawing] click drawmap href "#fn-drawmap" click rowloop href "#sub-row-loop" click columnloop href "#sub-column-loop" click tilerendering href "#sub-tile-rendering" click gridlines href "#sub-grid-lines" gameupdate --> detectioncheck[Line of Sight Detection] detectioncheck --> exitcheck[Exit Reached Check] detectioncheck --> detectioncheck[Line of Sight Detection] click detectioncheck href "#sub-detection-check" click exitcheck href "#sub-exit-check" drawplaying --> applyglitcheffect[applyGlitchEffect] applyglitcheffect --> chancecheck[Glitch Probability Check] chancecheck --> offsetcalc[Offset Calculation] chancecheck --> scalecalc[Scale Factor Calculation] scalecalc --> glitchapply[Glitch Application] click applyglitcheffect href "#fn-applyglitcheffect" click chancecheck href "#sub-chance-check" click offsetcalc href "#sub-offset-calc" click scalecalc href "#sub-scale-calc" click glitchapply href "#sub-glitch-apply" drawgameover --> alerttext[Detection Alert] drawgameover --> gameovertext[Game Over Message] drawgameover --> restartprompt[Restart Instruction] restartprompt --> soundfadeout[Detection Sound Fadeout] click alerttext href "#sub-alert-text" click gameovertext href "#sub-gameover-text" click restartprompt href "#sub-restart-prompt" click soundfadeout href "#sub-sound-fadeout" drawwin --> victorytext[Escape Message] drawwin --> youwintext[Win Message] drawwin --> restartprompt2[Restart Instruction] click victorytext href "#sub-victory-text" click youwintext href "#sub-youwin-text" click restartprompt2 href "#sub-restart-prompt2" draw --> keyPressed[keyPressed] keyPressed --> defaultprevent[Browser Default Prevention] defaultprevent --> inputdelegation[Input Delegation] inputdelegation --> stateTransitionCheck[State Transition Handler] stateTransitionCheck --> movementGuard[Movement Guard] movementGuard --> movementSwitch[Movement Direction Routing] click keyPressed href "#fn-keyPressed" click defaultprevent href "#sub-default-prevention" click inputdelegation href "#sub-input-delegation" click stateTransitionCheck href "#sub-state-transition-check" click movementGuard href "#sub-movement-guard" click movementSwitch href "#sub-movement-switch" draw --> touchstarted[touchStarted] touchstarted --> stateRestart[State Restart Handler] touchstarted --> gameplayinput[Gameplay Input Handler] gameplayinput --> touchExtraction[Touch Coordinate Extraction] touchExtraction --> movementGuard2[Movement Guard] movementGuard2 --> relativevector[Relative Vector Calculation] relativevector --> deadzonecheck[Dead Zone Filtering] deadzonecheck --> axispriority[Axis Priority Selection] axispriority --> collisioncheck[Collision Detection] collisioncheck --> gridupdate[Grid Position Update] gridupdate --> lerpsetup[Interpolation Setup] click touchstarted href "#fn-touchstarted" click stateRestart href "#sub-state-restart" click gameplayinput href "#sub-gameplay-input" click touchExtraction href "#sub-touch-extraction" click movementGuard2 href "#sub-movement-guard2" click relativevector href "#sub-relative-vector" click deadzonecheck href "#sub-deadzone-check" click axispriority href "#sub-axis-priority" click collisioncheck href "#sub-collision-check" click gridupdate href "#sub-grid-update" click lerpsetup href "#sub-lerp-setup" player-move --> movementflag[Movement Flag] movementflag --> footstepSound[Footstep Sound] footstepSound --> elapsedcalc[Elapsed Time Calculation] elapsedcalc --> lerpupdate[Lerp Animation] lerpupdate --> directioncheck[Direction Determination] directioncheck --> completioncheck[Movement Completion] completioncheck --> bodydraw[Body Drawing] bodydraw --> eyeoffsetcalc[Eye Position Calculation] eyeoffsetcalc --> eyedraw[Eye Drawing] click player-move href "#fn-player-move" click movementflag href "#sub-movement-flag" click footstepSound href "#sub-footstep-sound" click elapsedcalc href "#sub-elapsed-calc" click lerpupdate href "#sub-lerp-update" click directioncheck href "#sub-direction-check" click completioncheck href "#sub-completion-check" click bodydraw href "#sub-body-draw" click eyeoffsetcalc href "#sub-eye-offset-calc" click eyedraw href "#sub-eye-draw" enemy-update --> pathadvance[Path Advancement] pathadvance --> interpolation[Smooth Movement Interpolation] interpolation --> directionupdate[Direction Determination] click enemy-update href "#fn-enemy-update" click pathadvance href "#sub-path-advance" click interpolation href "#sub-interpolation" click directionupdate href "#sub-direction-update" enemy-checklineofsight --> distancecheck[Distance Range Check] distancecheck --> anglecheck[Field of View Angle Check] anglecheck --> bresenhamraycasting[Bresenham Line-of-Sight Raycasting] click enemy-checklineofsight href "#fn-enemy-checklineofSight" click distancecheck href "#sub-distance-check" click anglecheck href "#sub-angle-check" click bresenhamraycasting href "#sub-bresenham-raycasting" enemy-draw --> bodydrawenemy[Enemy Body Drawing] bodydrawenemy --> fovconedraw[FOV Cone Drawing] fovconedraw --> eyeindicator[Eye Direction Indicator] click enemy-draw href "#fn-enemy-draw" click bodydrawenemy href "#sub-body-draw-enemy" click fovconedraw href "#sub-fov-cone-draw" click eyeindicator href "#sub-eye-indicator" windowresized --> responsiveResize[Responsive Canvas Resize] click windowresized href "#fn-windowresized" click responsiveResize href "#sub-responsive-resize"

❓ Frequently Asked Questions

What visual experience does the p5.js sketch 'Subject gus: breached through the facility' offer?

The sketch presents a glowing, maze-like grid environment where a smooth-moving circle navigates while avoiding an enemy's scanning field of view.

How can players interact with the 'Subject gus' sketch?

Players control the smooth-moving circle, timing their movements to sneak through the maze and dash for the exit without being detected by the enemy.

What creative coding concepts are showcased in this p5.js sketch?

This sketch demonstrates techniques such as game state management, enemy AI behavior, and sound design to enhance the immersive gameplay experience.

Preview

Subject gus: breached through the facility - p5.js creative coding sketch preview
Sketch Preview
Code flow diagram showing the structure of Subject gus: breached through the facility - Code flow showing preload, setup, draw, drawmap, drawmenu, drawplaying, drawgameover, drawwin, applyglitcheffect, resetgame, keyPressed, handleinput, touchstarted, handletouchinput, player-move, player-update, player-draw, enemy-update, enemy-checklineofSight, enemy-draw, windowresized
Code Flow Diagram