Teachable Machine > P5.js > Device (web serial) (Remix) (Remix)

This sketch combines machine learning image classification with real-time device communication, allowing a Teachable Machine model to recognize objects from your webcam and send classification results to physical devices via USB Serial or Bluetooth. It bridges the gap between p5.js, ml5.js, and embedded systems like the micro:bit.

🧪 Try This!

Experiment with the code by making these changes:

  1. Change the send interval to send more frequently — Lower values make the device respond faster to classification changes, but send more data.
  2. Change the webcam preview size — Modify the ratio so the video preview takes up more or less of the canvas.
  3. Add support for a new classification label — If your Teachable Machine is trained on different labels, add a case for them in the switch statement.
  4. Speed up the Bluetooth connection timeout — Reduce the 2-second macOS delay if you're on a faster system (Linux/Windows).
  5. Display incoming serial data prominently — Make the received serial data text larger so you can read feedback from your device more easily.
Prefer the full editor? Open it there →

📖 About This Sketch

This sketch creates an interactive machine learning application that watches your webcam through a Teachable Machine classifier and sends the predictions to hardware devices via Web Serial (USB) or Web Bluetooth connections. It combines three powerful modern web APIs—ml5.js for classification, Web Serial for USB communication, and Web Bluetooth for wireless connectivity—to create a complete IoT pipeline from visual recognition to device control.

The code is organized into three main sections: the setup and draw functions that manage the p5.js canvas and UI, the ml5.js classifier that runs continuous image recognition on the video feed, and dedicated Web Serial and Web Bluetooth functions that handle device communication. By studying this sketch, you'll learn how to load custom ML models, react to classification results, and send data to hardware devices using the browser's hardware APIs.

⚙️ How It Works

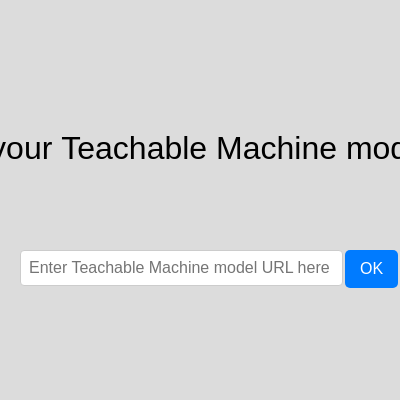
  1. When the sketch loads, setup() creates a full-screen canvas and video capture from your webcam, but doesn't load any model yet. Instead, it displays input fields where you can paste your Teachable Machine model URL.
  2. Once you enter a model URL and click OK, loadModelFromInput() fetches and initializes the ml5.js classifier. When the model is ready, the sketch switches to 'classifier' mode and starts continuous image recognition via classifyVideo().
  3. In the draw loop, the current video frame is displayed on the left side of the canvas, and the top classification result (label and confidence percentage) is shown on the right side.
  4. The gotResult() callback receives new classification predictions many times per second. Each result includes a label (like 'ihminen', 'koira', 'kissa') and a confidence score between 0 and 1.
  5. When a confident classification is detected, a switch statement maps the label to a number (1, 2, or 3). If the label has changed and enough time has passed (1 second by default), that number is sent to any connected USB or Bluetooth device.
  6. Web Serial functions (connectSerial, writeSerial, readSerial) manage USB communication with devices like Arduino, while Web Bluetooth functions (connectBluetooth, writeBluetooth) handle wireless communication with devices like the micro:bit. Both systems reset their send timers when a connection is established to force an immediate transmission.

🎓 Concepts You'll Learn

Machine learning classificationContinuous video processingWeb Serial API for USB communicationWeb Bluetooth API for wireless devicesAsynchronous callbacks and promisesState management and UI switchingCanvas layout and responsive design

📝 Code Breakdown

preload()

In p5.js, preload() runs before setup() and is designed to load assets like images and fonts. This sketch skips model loading here because the model URL is user-provided.

function preload() {
  console.log('preload() started.');
  // We won't load the model here anymore.
  // Model loading will happen when the user enters a URL and clicks OK.
  console.log('preload() finished.');
}
Line-by-line explanation (3 lines)
console.log('preload() started.');
Logs to the browser console that preload() has begun—useful for debugging the startup sequence.
// Model loading will happen when the user enters a URL and clicks OK.
This sketch intentionally does NOT load the model in preload(). Instead, the user provides the model URL at runtime, allowing flexibility to use different models without code changes.
console.log('preload() finished.');
Logs that preload() has completed, confirming setup can proceed.

setup()

setup() is called once when the sketch starts. It initializes the canvas, video stream, and all UI controls. The key insight here is that the model is NOT loaded in setup()—instead, the user provides the URL at runtime, which is more flexible than hardcoding a specific model.

🔬 The code checks if 'serial' exists in navigator before creating the button. What happens if you remove the if-statement and always create the button? Will it still work on browsers that don't support Web Serial?

  // Check if Web Serial API is supported
  if ('serial' in navigator) {
    // Create the "Connect USB device" button
    serialConnectButton = createButton('Connect USB device');
function setup() {
  console.log('setup() started.');
  createCanvas(windowWidth, windowHeight); // Create a responsive canvas
  
  // Create the video capture from the webcam
  video = createCapture(VIDEO, videoReady); // Add a callback for video readiness
  video.hide(); // Hide the HTML video element as we'll draw it on the canvas
  console.log('Video capture object created in setup().');
  // Initialize custom ready flag to false
  video.ready = false;

  // Initial display message asking for model URL
  textSize(32);
  textAlign(CENTER, CENTER);
  fill(0);
  text('Please enter your Teachable Machine model URL below', width / 2, height / 2);

  // --- Model URL Input Setup ---
  modelURLInput = createInput();
  modelURLInput.attribute('placeholder', 'Enter Teachable Machine model URL here');
  modelURLInput.style('font-size', '16px');
  modelURLInput.style('padding', '8px');
  // FIX: videomargin is now defined, so this line will work.
  modelURLInput.style('width', 'calc(100% - 100px - 2 * ' + videoMargin + 'px)'); // Adjust width
  modelURLInput.style('border', '1px solid #ccc');
  modelURLInput.style('border-radius', '4px');

  modelURLLoadButton = createButton('OK');
  modelURLLoadButton.mousePressed(loadModelFromInput);
  modelURLLoadButton.style('font-size', '16px');
  modelURLLoadButton.style('padding', '10px 15px');
  modelURLLoadButton.style('background-color', '#007BFF');
  modelURLLoadButton.style('color', 'white');
  modelURLLoadButton.style('border', 'none');
  modelURLLoadButton.style('border-radius', '5px');
  modelURLLoadButton.style('cursor', 'pointer');

  // --- Web Serial Setup ---
  // Create p5 DOM elements for serial status and received data
  serialStatusP = createP('Web Serial: Not connected.');
  serialStatusP.style('font-size', '18px');
  serialStatusP.style('color', '#333');
  serialStatusP.style('font-family', 'sans-serif'); // Add a standard font for consistency

  receivedSerialDataP = createP('Received: '); // Renamed for clarity
  receivedSerialDataP.style('font-size', '18px');
  receivedSerialDataP.style('color', '#333');
  receivedSerialDataP.style('font-family', 'sans-serif'); // Add a standard font for consistency

  // Check if Web Serial API is supported
  if ('serial' in navigator) {
    // Create the "Connect USB device" button
    serialConnectButton = createButton('Connect USB device'); // <<< MUUTETTU TEKSTI
    serialConnectButton.mousePressed(connectSerial); // Call connectSerial() when button is pressed
    serialConnectButton.style('font-size', '16px');
    serialConnectButton.style('padding', '10px 15px');
    serialConnectButton.style('background-color', '#4CAF50');
    serialConnectButton.style('color', 'white');
    serialConnectButton.style('border', 'none');
    serialConnectButton.style('border-radius', '5px');
    serialConnectButton.style('cursor', 'pointer');

    // Add event listener for port disconnection (e.g., USB cable unplugged)
    navigator.serial.addEventListener('disconnect', portDisconnected);

  } else {
    // Display an error message if Web Serial is not supported
    serialStatusP.html('Web Serial API not supported in this browser. Try Chrome/Edge.');
    serialStatusP.style('color', 'red');
  }

  // --- Web Bluetooth Setup ---
  bluetoothStatusP = createP('Web Bluetooth: Not connected.');
  bluetoothStatusP.style('font-size', '18px');
  bluetoothStatusP.style('color', '#333');
  bluetoothStatusP.style('font-family', 'sans-serif');

  if ('bluetooth' in navigator) {
    console.log('Web Bluetooth API is supported in this browser.');
    bluetoothConnectButton = createButton('Connect Bluetooth Device');
    bluetoothConnectButton.mousePressed(connectBluetooth);
    bluetoothConnectButton.style('font-size', '16px');
    bluetoothConnectButton.style('padding', '10px 15px');
    bluetoothConnectButton.style('background-color', '#6A5ACD'); // A nice purple
    bluetoothConnectButton.style('color', 'white');
    bluetoothConnectButton.style('border', 'none');
    bluetoothConnectButton.style('border-radius', '5px');
    bluetoothConnectButton.style('cursor', 'pointer');
  } else {
    console.warn('Web Bluetooth API is NOT supported in this browser.');
    bluetoothStatusP.html('Web Bluetooth API not supported in this browser. Try Chrome/Edge.');
    bluetoothStatusP.style('color', 'red');
  }

  // Set initial visibility for UI elements
  setClassifierUIVisibility(false); // Hide classifier elements initially

  // Call windowResized once to set initial positions correctly
  windowResized();
  console.log('setup() finished. appState:', appState);
}

Line-by-line explanation (11 lines)

🔧 Subcomponents:

initialization Video Capture Initialization video = createCapture(VIDEO, videoReady);

Creates a video stream from the user's webcam and registers a callback to run when the video is ready

conditional Web Serial API Support Check if ('serial' in navigator) {

Checks if the browser supports the Web Serial API before creating the connect button

conditional Web Bluetooth API Support Check if ('bluetooth' in navigator) {

Checks if the browser supports the Web Bluetooth API before creating the connect button

createCanvas(windowWidth, windowHeight);
Creates a canvas that fills the entire browser window, allowing responsive resizing.
video = createCapture(VIDEO, videoReady);
Starts capturing video from the user's webcam. The videoReady function is called as a callback when the video stream is ready to use.
video.hide();
Hides the HTML video element since we'll draw it on the p5 canvas ourselves using the image() function.
video.ready = false;
Sets a custom flag to track whether the video has actually started playing. p5.js's video object doesn't have a built-in ready property, so we create one.
modelURLInput = createInput();
Creates a text input field where users can paste their Teachable Machine model URL.
modelURLLoadButton = createButton('OK');
Creates a button that triggers loadModelFromInput() when clicked, telling the sketch to fetch and initialize the model.
if ('serial' in navigator) {
Checks whether the Web Serial API exists in the browser. If it does, the Connect USB button is created; if not, an error message is shown.
navigator.serial.addEventListener('disconnect', portDisconnected);
Listens for the event when a USB serial device is unplugged, so the sketch can automatically clean up and reset the UI.
if ('bluetooth' in navigator) {
Checks whether the Web Bluetooth API exists. If it does, the Bluetooth connect button is created; otherwise, an error message is shown.
setClassifierUIVisibility(false);
Hides all the classifier-related UI elements (serial/Bluetooth buttons and status text) because the model hasn't been loaded yet.
windowResized();
Calls the windowResized() function to position all UI elements correctly based on the current canvas size.

videoReady()

videoReady() is a callback that runs once the webcam stream is initialized. It's critical because sometimes the model loads before the video is ready, or vice versa. This function synchronizes the two—classification only starts when BOTH are ready.

function videoReady() {
  console.log('Video capture is ready! (videoReady() callback executed)'); // Critical log
  video.ready = true; // Custom flag to indicate video is ready
  console.log('Video element readyState:', video.elt.readyState); // Check HTML video element state
  console.log('Video dimensions: ', video.width, 'x', video.height); // Log actual video dimensions

  // If model is already loaded and we're in classifier state, start classifying
  if (appState === 'classifier' && classifier && classifier.ready) {
    console.log('Video ready and classifier ready. Starting classification from videoReady().');
    classifyVideo();
  }
}
Line-by-line explanation (5 lines)

🔧 Subcomponents:

state-update Mark Video as Ready video.ready = true;

Sets a custom flag so the draw() function knows the video stream is actually playing and safe to display.

conditional Start Classification if Both Ready if (appState === 'classifier' && classifier && classifier.ready) {

Checks if both the video and the classifier are ready. If so, begins the continuous classification loop immediately.

video.ready = true;
Sets our custom 'ready' flag to true, signaling that the webcam stream is actually running and has pixel data.
console.log('Video element readyState:', video.elt.readyState);
Logs the HTML video element's readyState (a number from 0-4) to confirm the video is truly loaded. This is useful for debugging.
console.log('Video dimensions: ', video.width, 'x', video.height);
Logs the actual pixel dimensions of the webcam stream so you know how large the video source is.
if (appState === 'classifier' && classifier && classifier.ready) {
Checks three conditions: that the app is in 'classifier' mode (model loaded), that classifier exists, and that the model is ready. All three must be true.
classifyVideo();
Starts the continuous classification loop if everything is ready. If the model loaded before the video was ready, this kicks off recognition.

setClassifierUIVisibility()

This helper function manages the two modes of the interface: the 'input' mode where you load a model, and the 'classifier' mode where you run it. It uses CSS display toggling instead of creating/destroying elements, which is more efficient.

/**
 * Hides/shows UI elements belonging to the classifier view.
 * @param {boolean} isVisible - True to show, false to hide.
 */
function setClassifierUIVisibility(isVisible) {
  const displayStyle = isVisible ? 'block' : 'none';
  
  if (serialStatusP) serialStatusP.style('display', displayStyle);
  if (receivedSerialDataP) receivedSerialDataP.style('display', displayStyle);
  if (serialConnectButton) serialConnectButton.style('display', displayStyle);

  if (bluetoothStatusP) bluetoothStatusP.style('display', displayStyle);
  if (bluetoothConnectButton) bluetoothConnectButton.style('display', displayStyle);

  // Input view elements are visible when classifier elements are hidden
  if (modelURLInput) modelURLInput.style('display', isVisible ? 'none' : 'block');
  if (modelURLLoadButton) modelURLLoadButton.style('display', isVisible ? 'none' : 'block');
  console.log('Classifier UI visibility set to:', isVisible);
}
Line-by-line explanation (3 lines)

🔧 Subcomponents:

conditional Set Display Style String const displayStyle = isVisible ? 'block' : 'none';

Converts the boolean parameter into a CSS display value—'block' to show, 'none' to hide.

iteration Toggle Serial Elements if (serialStatusP) serialStatusP.style('display', displayStyle);

Shows or hides the Web Serial status and data elements by toggling their CSS display property.

iteration Toggle Bluetooth Elements if (bluetoothStatusP) bluetoothStatusP.style('display', displayStyle);

Shows or hides the Web Bluetooth status and connect button elements.

iteration Toggle Model Input Elements if (modelURLInput) modelURLInput.style('display', isVisible ? 'none' : 'block');

Hides the model URL input field when the classifier is active (since you can't change the model mid-classification), and shows it when you're not classifying.

const displayStyle = isVisible ? 'block' : 'none';
Creates a CSS display value: 'block' if isVisible is true, 'none' if false. This controls whether elements are visible.
if (serialStatusP) serialStatusP.style('display', displayStyle);
Checks if serialStatusP exists, then sets its display CSS to either 'block' (visible) or 'none' (hidden).
if (modelURLInput) modelURLInput.style('display', isVisible ? 'none' : 'block');
Inverted logic: hides the input field when classifier is visible (isVisible true), and shows it when classifier is hidden. This prevents users from changing the model mid-classification.

loadModelFromInput()

This function bridges the UI and ml5.js. When the user enters a model URL and clicks OK, this function extracts the URL, validates it, and tells ml5.js to load it. The actual ml5.js loading happens asynchronously—the modelLoaded callback is where we handle the result.

🔬 The code trims whitespace from the input and validates it. What happens if you remove the trim() call and someone pastes a URL with trailing spaces? Will the model still load?

  const newModelURL = modelURLInput.value().trim();
  if (newModelURL) {
    modelURL = newModelURL;
    console.log('Attempting to load model from:', modelURL);
function loadModelFromInput() {
  console.log('loadModelFromInput() called.');
  const newModelURL = modelURLInput.value().trim();
  if (newModelURL) {
    modelURL = newModelURL;
    console.log('Attempting to load model from:', modelURL); // Log attempt
    currentClassification.label = 'Loading model...';
    classifier = ml5.imageClassifier(modelURL, modelLoaded); // Re-initialize classifier
    classifier.ready = false; // Reset ready flag
    modelURLInput.attribute('disabled', ''); // Disable input during loading
    modelURLLoadButton.attribute('disabled', ''); // Disable button during loading
  } else {
    alert('Please enter a valid Teachable Machine model URL.');
    console.warn('No model URL entered.');
  }
}
Line-by-line explanation (8 lines)

🔧 Subcomponents:

conditional Validate URL Input if (newModelURL) {

Checks that the user entered a non-empty URL before attempting to load the model.

function-call Initialize ml5 Classifier classifier = ml5.imageClassifier(modelURL, modelLoaded);

Tells ml5.js to fetch and initialize the Teachable Machine model from the URL. When loading is done, it calls the modelLoaded() callback.

state-update Disable UI During Loading modelURLInput.attribute('disabled', '');

Disables the input field and button so the user can't click 'OK' multiple times or change the URL while loading is in progress.

const newModelURL = modelURLInput.value().trim();
Gets the text from the input field and removes leading/trailing whitespace using trim().
if (newModelURL) {
Checks if the URL string is non-empty. If it's empty, the else block shows an alert.
modelURL = newModelURL;
Stores the validated URL in the global modelURL variable so other functions can access it.
currentClassification.label = 'Loading model...';
Updates the display to show a loading message instead of the previous classification result.
classifier = ml5.imageClassifier(modelURL, modelLoaded);
Tells ml5.js to download and initialize the Teachable Machine model. When complete, it will call the modelLoaded callback function.
classifier.ready = false;
Sets the ready flag to false so the draw() function knows the model isn't initialized yet.
modelURLInput.attribute('disabled', '');
Disables the text input field so the user can't type while the model is loading.
modelURLLoadButton.attribute('disabled', '');
Disables the OK button so the user can't click it multiple times while loading is in progress.

modelLoaded()

modelLoaded() is a callback that ml5.js invokes when the model loading is complete (or fails). It handles error checking, synchronizes with the video stream, and switches the entire interface from 'input' mode to 'classifier' mode. The key pattern here is checking multiple readiness flags before starting the classification loop.

// Modified modelLoaded function to handle errors
function modelLoaded(error) {
  console.log('modelLoaded() callback received.');
  if (error) {
    console.error('Error loading model:', error); // Log the error
    currentClassification.label = 'Model loading failed: ' + error.message;
    // Re-enable input and button so user can try again
    modelURLInput.removeAttribute('disabled');
    modelURLLoadButton.removeAttribute('disabled');
    // Keep appState as 'input'
    console.log('Model loading failed, staying in input state.');
    return; // Stop here if loading failed
  }
  console.log('Model Loaded successfully!'); // Confirm model is loaded
  classifier.ready = true; // Set a custom flag to indicate the model is ready
  currentClassification.label = 'Model Loaded. Starting classification...';
  // Check if video is also ready before starting classification
  if (video && video.ready) {
    console.log('Classifier ready and video ready. Starting classification from modelLoaded().');
    classifyVideo(); // Start classifying once the model is loaded AND video is ready
  } else {
    console.warn('Model loaded, but video not yet ready. Will start classification when video is ready.');
  }
  modelURLInput.removeAttribute('disabled'); // Enable input after loading
  modelURLLoadButton.removeAttribute('disabled'); // Enable button after loading
  appState = 'classifier'; // Switch to classifier view
  setClassifierUIVisibility(true); // Show classifier elements
  windowResized(); // Re-position elements for the classifier view
  console.log('modelLoaded() finished. appState:', appState);
}
Line-by-line explanation (10 lines)

🔧 Subcomponents:

conditional Handle Loading Errors if (error) {

Checks if ml5.js encountered an error loading the model (bad URL, network issue, etc.) and handles it gracefully.

conditional Synchronize with Video Readiness if (video && video.ready) {

Only starts classification if BOTH the model and the video stream are ready. If the video isn't ready yet, waits for the videoReady() callback to start it.

state-update Switch to Classifier Mode appState = 'classifier';

Changes the application state from 'input' to 'classifier', which tells the draw() function to display the classification UI instead of the model input form.

if (error) {
If ml5.js passes an error object, the model failed to load. This could be due to an invalid URL, network issues, or CORS problems.
currentClassification.label = 'Model loading failed: ' + error.message;
Displays a user-friendly error message that includes the specific reason for the failure.
modelURLInput.removeAttribute('disabled');
Re-enables the input field so the user can fix their URL and try again.
return;
Exits the function early if there's an error, skipping all the success logic below.
classifier.ready = true;
Sets our custom 'ready' flag to true, signaling that the model is initialized and ready to classify images.
if (video && video.ready) {
Checks both that the video object exists AND that our custom video.ready flag is true. Both conditions must be met to start classifying.
classifyVideo();
Starts the continuous classification loop. From this point forward, classifyVideo() will recursively call itself to classify every frame.
appState = 'classifier';
Changes the global appState variable from 'input' to 'classifier', which tells the draw() function to switch the UI layout.
setClassifierUIVisibility(true);
Shows the Web Serial and Web Bluetooth UI elements, and hides the model URL input form.
windowResized();
Repositions all UI elements for the new 'classifier' layout.

classifyVideo()

classifyVideo() is the core loop of the ML system. It's called recursively through gotResult()—each time a classification finishes, it immediately starts the next one. The readiness checks prevent errors during startup, and the setTimeout retry logic handles edge cases where initialization happens in an unexpected order.

function classifyVideo() {
  // Ensure the video is loaded and the model is ready before attempting to classify
  if (video && video.ready && classifier && classifier.ready) {
    console.log('Classifying video frame.');
    // Classify the current video frame and call gotResult when done
    // Reference: https://learn.ml5js.org/docs/#/reference/image-classifier?id=classify
    classifier.classify(video, gotResult);
  } else {
    // If not ready, try again after a short delay
    // This is important if video or classifier isn't ready simultaneously
    console.warn('classifyVideo() called, but video or classifier not ready. Retrying in 100ms.');
    setTimeout(classifyVideo, 100);
  }
}
Line-by-line explanation (4 lines)

🔧 Subcomponents:

conditional Verify Video and Model Ready if (video && video.ready && classifier && classifier.ready) {

Checks that both the video stream and the ml5 classifier are initialized before attempting classification.

function-call Invoke ml5 Classifier classifier.classify(video, gotResult);

Tells ml5.js to analyze the current video frame and call gotResult() when it finishes.

function-call Retry if Not Ready setTimeout(classifyVideo, 100);

If either video or classifier isn't ready, wait 100 milliseconds and try again. This prevents errors from trying to classify before setup is complete.

if (video && video.ready && classifier && classifier.ready) {
Four separate checks: video exists, video.ready is true, classifier exists, and classifier.ready is true. All four must be true.
classifier.classify(video, gotResult);
Sends the current video frame to the ml5 classifier and tells it to call the gotResult() function when classification is complete.
console.warn('classifyVideo() called, but video or classifier not ready. Retrying in 100ms.');
Logs a warning if the function was called before everything was initialized, which shouldn't normally happen but can occur during startup.
setTimeout(classifyVideo, 100);
Schedules classifyVideo() to run again after 100 milliseconds. This creates a retry loop that waits for initialization to complete.

gotResult()

gotResult() is the callback that fires every time ml5.js finishes classifying a frame. It's the critical handoff point: errors are handled, results are sorted, the top prediction is stored, and the loop continues. The recursive classifyVideo() call at the end creates the continuous classification pipeline.

🔬 This code sorts results and takes the top one. What happens if you take results[1] (the second-best prediction) or results[2] (third-best) instead? Would the displayed label jump around less or more?

  // Sort results by confidence in descending order to get the top prediction
  results.sort((a, b) => b.confidence - a.confidence);
  const topResult = results[0];
function gotResult(error, results) {
  // If there's an error during classification, log it
  if (error) {
    console.error('Error during classification:', error);
    currentClassification.label = 'Error: ' + error.message;
    currentClassification.confidence = 0;
    // Don't stop classifying, try again
    classifyVideo();
    return;
  }

  // If no error, results will be an array of objects
  // Each object has a 'label' and 'confidence'
  // Sort results by confidence in descending order to get the top prediction
  results.sort((a, b) => b.confidence - a.confidence);
  const topResult = results[0];

  // Update the current classification result
  currentClassification.label = topResult.label;
  currentClassification.confidence = topResult.confidence;

  // Keep classifying the video feed recursively
  classifyVideo();
}
Line-by-line explanation (10 lines)

🔧 Subcomponents:

conditional Handle Classification Errors if (error) {

Catches errors that occur during the ml5.js classification process and logs them without crashing.

calculation Sort Results by Confidence results.sort((a, b) => b.confidence - a.confidence);

Sorts the array of classification results in descending order by confidence, so the highest-confidence prediction is at index [0].

state-update Store Top Result currentClassification.label = topResult.label;

Saves the best prediction's label and confidence to the global currentClassification object, where draw() will display it.

function-call Continue Classification Loop classifyVideo();

Calls classifyVideo() again, creating a continuous loop that processes every frame of the video stream.

if (error) {
Checks if ml5.js encountered an error during this classification attempt.
console.error('Error during classification:', error);
Logs the error to the browser console for debugging.
currentClassification.label = 'Error: ' + error.message;
Displays the error message to the user on the canvas so they know something went wrong.
classifyVideo();
Restarts classification immediately after an error, rather than giving up. This makes the system resilient.
return;
Exits the function early so the error doesn't cause further issues.
results.sort((a, b) => b.confidence - a.confidence);
Sorts the results array using a comparison function. For each pair, if b.confidence is higher, it comes first. This puts the best prediction at index [0].
const topResult = results[0];
Gets the first (highest-confidence) result from the sorted array.
currentClassification.label = topResult.label;
Stores the predicted class label (like 'cat', 'dog', 'person') in the global object.
currentClassification.confidence = topResult.confidence;
Stores the confidence score (0 to 1) in the global object. This is displayed as a percentage in draw().
classifyVideo();
Immediately starts classifying the next frame. This recursive pattern creates smooth, continuous predictions.

draw()

draw() is the main rendering loop, called 60 times per second. It's responsible for displaying either the input screen or the classifier screen, drawing the video feed, displaying predictions, and deciding when to send data to connected devices. The draw() function ties together ml5.js classification results, UI layout, and device communication.

function draw() {
  background(220); // Clear the canvas each frame

  if (appState === 'input') {
    // Display input view message
    textSize(32);
    textAlign(CENTER, CENTER);
    fill(0);
    text('Please enter your Teachable Machine model URL below', width / 2, height / 2 - 50); // Slightly above input field
  } else if (appState === 'classifier') {
    if (video && video.ready && classifier && classifier.ready) { // Check video.ready here too
      console.log('Attempting to draw video. Video ready:', video.ready, 'Classifier ready:', classifier.ready); // Critical log
      // Calculate preview size while maintaining aspect ratio
      // Let's make the preview height about half the canvas height, minus margins.
      let previewHeight = height / 2 - 2 * videoMargin;
      let previewWidth = (previewHeight / video.height) * video.width;

      // Ensure previewWidth doesn't exceed available space if canvas is very narrow
      // (e.g., if canvas width is less than previewWidth + videoMargin * 2)
      let availableWidthForVideo = width - 2 * videoMargin;
      if (previewWidth > availableWidthForVideo) {
        previewWidth = availableWidthForVideo;
        previewHeight = (previewWidth / video.width) * video.height;
      }

      // Draw the video feed at the top-left with margin
      image(video, videoMargin, videoMargin, previewWidth, previewHeight);

      // Classification text and background rectangle to the right of the video preview.
      let textRectX = videoMargin + previewWidth + videoMargin;
      let textRectWidth = width - textRectX - videoMargin;
      let textRectHeight = previewHeight; // Make it the same height as the video preview
      let textRectY = videoMargin; // Align with the top of the video

      fill(255, 200); // White with 200 alpha
      noStroke();
      rect(textRectX, textRectY, textRectWidth, textRectHeight);

      // Display the current classification result
      fill(0);
      textSize(24);
      textAlign(LEFT, CENTER);
      // Center text vertically within its rectangle
      let textYOffset = textRectY + textRectHeight / 2;
      text(`Label: ${currentClassification.label}`, textRectX + 10, textYOffset - 20); // Adjust y for two lines
      // Use nf() to format confidence as a percentage with 2 decimal places
      text(`Confidence: ${nf(currentClassification.confidence * 100, 0, 2)}%`, textRectX + 10, textYOffset + 20);

      // --- Determine number to send based on classification ---
      let numberToSend = -1; // Default to -1 for unknown labels
      const currentLabel = currentClassification.label.toLowerCase(); // Use lowercase for comparison
      switch (currentLabel) {
        case 'ihminen':
          numberToSend = 1;
          break;
        case 'koira':
          numberToSend = 2;
          break;
        case 'kissa': // Assuming 'kissa' for number 3 based on common classification tasks
          numberToSend = 3;
          break;
        default:
          numberToSend = -1; // For any other label, or if label is empty/null
          break;
      }

      // --- Send classification data via Web Serial and Web Bluetooth ---
      // Send if classification is valid, label has changed, and interval has passed
      const isValidClassification = numberToSend !== -1;
      const labelChanged = currentLabel !== lastSentLabel.toLowerCase();
      const intervalPassed = millis() - lastClassificationSendTime > classificationSendInterval;

      if (isValidClassification && labelChanged && intervalPassed) {
        // Send via Web Serial
        if (port && writer) {
          const serialDataToSend = numberToSend + '\n'; // Add newline for microcontroller parsing
          writeSerial(serialDataToSend);
        }

        // Send via Web Bluetooth
        if (bluetoothCharacteristic) {
          // Web Bluetooth: Convert number to string and add newline for micro:bit UART
          writeBluetooth(numberToSend);
        }

        // Update last sent info if any data was attempted to be sent via either method
        if (port || bluetoothCharacteristic) {
          lastSentLabel = currentLabel;
          lastClassificationSendTime = millis();
        }
      } else if (!isValidClassification && intervalPassed) {
        // Log if no valid number was mapped and we were supposed to send
        if (port || bluetoothCharacteristic) {
          console.warn(`Unrecognized or default label "${currentLabel}". Not sending data.`);
          // If the label is unknown, we might still want to update the time to prevent
          // continuous warnings, but not update lastSentLabel.
          // For simplicity, we'll just log the warning without updating the timer here
          // unless a valid label was found. This ensures a valid label *will* be sent
          // immediately once detected, even if a few unknown labels passed.
        }
      }
    } else if (!classifier.ready) {
      // Display loading message if the model is not yet ready (should only happen briefly after OK)
      textSize(32);
      textAlign(CENTER, CENTER);
      fill(0);
      text('Loading model...', width / 2, height / 2);
    }
  }
}
Line-by-line explanation (21 lines)

🔧 Subcomponents:

conditional Input Mode Display if (appState === 'input') {

When the user hasn't loaded a model yet, shows instructions for entering a Teachable Machine URL.

function-call Draw Video Preview image(video, videoMargin, videoMargin, previewWidth, previewHeight);

Draws the live webcam feed onto the canvas at the calculated size and position.

calculation Maintain Aspect Ratio let previewWidth = (previewHeight / video.height) * video.width;

Calculates the video preview width by preserving the original video's aspect ratio.

switch-case Map Labels to Numbers switch (currentLabel) {

Converts human-readable class labels (like 'ihminen') into numeric codes (1, 2, 3) for sending to devices.

conditional Determine When to Send Data if (isValidClassification && labelChanged && intervalPassed) {

Sends data only if three conditions are met: valid label, label has changed since last send, and enough time has passed (1 second by default).

function-call Send via Serial and Bluetooth if (port && writer) { writeSerial(serialDataToSend); }

If either USB Serial or Bluetooth is connected, sends the mapped number to that device.

background(220);
Clears the canvas with a light gray color every frame, preventing motion trails and keeping the display fresh.
if (appState === 'input') {
Checks whether the app is waiting for a model URL or actively classifying. The UI is completely different for each mode.
text('Please enter your Teachable Machine model URL below', width / 2, height / 2 - 50);
Displays the instruction text centered on the canvas, slightly above where the input field will be positioned.
let previewHeight = height / 2 - 2 * videoMargin;
Sets the video preview to be about half the canvas height, minus top and bottom margins for spacing.
let previewWidth = (previewHeight / video.height) * video.width;
Calculates the width needed to maintain the webcam's original aspect ratio. If the webcam is 640x480, and previewHeight is 200, previewWidth will be 266 (proportional).
if (previewWidth > availableWidthForVideo) {
Checks if the calculated width exceeds the available horizontal space. If it does, the video is too wide and needs to be scaled down.
image(video, videoMargin, videoMargin, previewWidth, previewHeight);
Draws the video stream onto the canvas at position (videoMargin, videoMargin) with the calculated dimensions. The last two arguments are width and height.
let textRectX = videoMargin + previewWidth + videoMargin;
Positions the classification text box to start right after the video preview ends, with a margin between them.
fill(255, 200); noStroke(); rect(textRectX, textRectY, textRectWidth, textRectHeight);
Draws a semi-transparent white rectangle to the right of the video to serve as a background for the classification text.
text(`Label: ${currentClassification.label}`, textRectX + 10, textYOffset - 20);
Displays the predicted class name (like 'ihminen' or 'koira') in the text box with 10 pixels of padding from the left edge.
text(`Confidence: ${nf(currentClassification.confidence * 100, 0, 2)}%`, textRectX + 10, textYOffset + 20);
Displays the confidence as a percentage (0-100) with exactly 2 decimal places. The nf() function formats the number.
const currentLabel = currentClassification.label.toLowerCase();
Converts the label to lowercase for consistent comparison in the switch statement (handles different capitalization).
switch (currentLabel) {
Checks the label against predefined cases ('ihminen', 'koira', 'kissa') and maps each to a number (1, 2, 3).
const isValidClassification = numberToSend !== -1;
Sets a boolean flag: true if a known label was mapped to a number, false if the label was unknown (numberToSend is -1).
const labelChanged = currentLabel !== lastSentLabel.toLowerCase();
Checks if the current label is different from the label we last sent to the device. If they're the same, we don't send again.
const intervalPassed = millis() - lastClassificationSendTime > classificationSendInterval;
Checks if enough time (1000 ms by default) has passed since the last send. This prevents flooding the device with data.
if (isValidClassification && labelChanged && intervalPassed) {
Sends data only if ALL three conditions are true: label is recognized, label has changed, and interval has passed.
const serialDataToSend = numberToSend + '\n';
Converts the number to a string and adds a newline character so the microcontroller can parse it correctly.
if (port && writer) { writeSerial(serialDataToSend); }
If a USB serial port is connected, sends the data to it via the writeSerial() function.
if (bluetoothCharacteristic) { writeBluetooth(numberToSend); }
If a Bluetooth connection is active, sends the number to it via the writeBluetooth() function.
lastSentLabel = currentLabel; lastClassificationSendTime = millis();
Updates the 'last sent' variables so the code knows not to send the same label immediately again.

windowResized()

windowResized() is called automatically by p5.js whenever the browser window is resized. It recalculates all layout positions and canvas dimensions to maintain a responsive design. Notice how it repositions elements differently for 'input' mode versus 'classifier' mode.

function windowResized() {
  resizeCanvas(windowWidth, windowHeight); // Adjust canvas size on window resize
  console.log('windowResized() called. appState:', appState);

  if (appState === 'input') {
    // When in input state, position input/button centrally below the initial text
    let inputWidth = min(width - 2 * videoMargin, 400); // Max 400px wide, or less if canvas is narrow
    if (modelURLInput) modelURLInput.style('width', `${inputWidth - modelURLLoadButton.width - 20}px`); // Adjust for button width and spacing
    if (modelURLInput) modelURLInput.position(width / 2 - inputWidth / 2, height / 2 + 50); // Below initial text
    if (modelURLLoadButton) modelURLLoadButton.position(width / 2 + inputWidth / 2 - modelURLLoadButton.width, height / 2 + 50); // To the right of input
  } else { // In classifier state, use the standard layout
    // Recalculate video preview size based on new window dimensions
    let previewHeight = height / 2 - 2 * videoMargin;
    let previewWidth = (previewHeight / video.height) * video.width;
    let availableWidthForVideo = width - 2 * videoMargin;
    if (previewWidth > availableWidthForVideo) {
      previewWidth = availableWidthForVideo;
      previewHeight = (previewWidth / video.width) * video.height;
    }

    // Calculate the new starting y-position for the DOM elements below the video
    // It's the bottom of the video (videoMargin + previewHeight) + an additional videoMargin for spacing
    let domElementsStartY = videoMargin + previewHeight + videoMargin;

    // Re-position model URL input and button (now below video, not centered)
    if (modelURLInput) modelURLInput.style('width', 'calc(100% - 100px - 2 * ' + videoMargin + 'px)'); // Reset width
    if (modelURLInput) modelURLInput.position(videoMargin, domElementsStartY);
    if (modelURLLoadButton) modelURLLoadButton.position(videoMargin + modelURLInput.width + 10, domElementsStartY); // 10px spacing

    // Re-position other p5 DOM elements
    // Adjust starting Y for other elements based on the model URL input/button height
    let otherDomElementsStartY = domElementsStartY + 40; // Assuming button height is around 30-35px + 10px spacing
    
    // Serial elements
    if (serialStatusP) serialStatusP.position(videoMargin, otherDomElementsStartY); // Adjusted y
    if (receivedSerialDataP) receivedSerialDataP.position(videoMargin, otherDomElementsStartY + 30); // Adjusted y
    if (serialConnectButton) serialConnectButton.position(videoMargin, otherDomElementsStartY + 70); // Adjusted y

    // Bluetooth elements (below Serial elements)
    let bluetoothDomElementsStartY = otherDomElementsStartY + 110; // 70 + buttonHeight (approx 40)
    if (bluetoothStatusP) bluetoothStatusP.position(videoMargin, bluetoothDomElementsStartY);
    if (bluetoothConnectButton) bluetoothConnectButton.position(videoMargin, bluetoothDomElementsStartY + 30);
  }
}
Line-by-line explanation (7 lines)

🔧 Subcomponents:

function-call Resize Canvas to Window resizeCanvas(windowWidth, windowHeight);

Updates the p5.js canvas dimensions to match the browser window whenever the user resizes it.

conditional Input Mode Layout if (appState === 'input') {

Positions the model URL input field and OK button centrally below the instruction text.

conditional Classifier Mode Layout } else {

Positions the video preview, status text, and connection buttons in a vertical stack below the video.

resizeCanvas(windowWidth, windowHeight);
Updates the canvas to fill the entire window whenever the window size changes (e.g., user resizes browser).
if (appState === 'input') {
Checks which mode the app is in and repositions elements accordingly. Input mode and classifier mode have different layouts.
let inputWidth = min(width - 2 * videoMargin, 400);
Calculates the input field width: it's either the available window width minus margins, or 400px, whichever is smaller.
if (modelURLInput) modelURLInput.position(width / 2 - inputWidth / 2, height / 2 + 50);
Centers the input field horizontally and positions it 50 pixels below the middle of the canvas vertically.
let domElementsStartY = videoMargin + previewHeight + videoMargin;
Calculates the Y position where UI elements should start: right below the video preview with a margin.
if (serialStatusP) serialStatusP.position(videoMargin, otherDomElementsStartY);
Positions the Web Serial status text at the left margin, at the calculated Y position.
let bluetoothDomElementsStartY = otherDomElementsStartY + 110;
Positions Bluetooth elements further down, leaving space for the Serial elements and buttons above.

connectSerial()

connectSerial() is the entry point for USB serial communication. It uses async/await syntax to handle asynchronous operations like opening ports. The key steps are: request a port from the user, open it at the correct baud rate, set up text streams for easy string communication, and start reading data.

/**
 * Connects to a serial port selected by the user.
 */
async function connectSerial() {
  // Tarkistus, ettei yhdistetä turhaan uudestaan
  if (port && port.readable) {
    console.log('Portti on jo auki! Ei tarvitse yhdistää uudestaan.');
    return;
  }

  try {
    console.log('connectSerial() called.');
    port = await navigator.serial.requestPort();
    serialStatusP.html('Web Serial: Connecting...');

    await port.open({ baudRate: 9600 });
    serialStatusP.html('Web Serial: Connected!');
    serialConnectButton.html('Disconnect USB device'); 
    serialConnectButton.mousePressed(disconnectSerial); 

    const textDecoder = new TextDecoderStream();
    const textEncoder = new TextEncoderStream();
    reader = textDecoder.readable.getReader(); 
    writer = textEncoder.writable.getWriter(); 

    port.readable.pipeTo(textDecoder.writable);
    textEncoder.readable.pipeTo(port.writable); 
    console.log('Serial streams piped.');

    // --- LISÄYS: PAKOTETAAN VÄLITÖN LÄHETYS ---
    // Nollataan ajastin ja viimeisin lähetysmuisti.
    // Tämä pakottaa draw()-silmukan lähettämään nykyisen tunnistuksen 
    // heti seuraavalla kierroksella (millisekuntien kuluttua).
    lastSentLabel = ""; 
    lastClassificationSendTime = 0;
    // -------------------------------------------

    readSerial(); 
  } catch (error) {
    console.error('Error connecting to serial port:', error);
    serialStatusP.html('Web Serial: Connection failed. ' + error.message);
  }
}
Line-by-line explanation (16 lines)

🔧 Subcomponents:

conditional Prevent Duplicate Connections if (port && port.readable) {

Checks if a port is already open before attempting to connect again, preventing errors from multiple connections.

function-call Show Port Selection Dialog port = await navigator.serial.requestPort();

Displays the browser's serial port picker, allowing the user to select which USB device to connect to.

function-call Open Port at Baud Rate await port.open({ baudRate: 9600 });

Opens the selected serial port at 9600 baud (a standard speed for Arduino and microcontrollers). Wait for it to complete before continuing.

function-call Create Text Streams const textDecoder = new TextDecoderStream();

Creates a text decoder and encoder so data can be sent and received as strings instead of raw bytes.

function-call Connect Streams to Port port.readable.pipeTo(textDecoder.writable);

Pipes the port's readable stream through the text decoder, so incoming data is automatically converted to strings.

state-update Force Immediate Send lastSentLabel = "";

Clears the last-sent label so the next draw loop will immediately send the current classification to the device.

if (port && port.readable) {
Checks if a port is already open. If it is, the function returns early to avoid trying to open another one.
port = await navigator.serial.requestPort();
Opens a dialog where the user selects which USB serial device to connect to. 'await' pauses execution until the user chooses a device.
serialStatusP.html('Web Serial: Connecting...');
Updates the status text to inform the user that a connection is being established.
await port.open({ baudRate: 9600 });
Opens the serial port at 9600 baud, a standard speed for Arduino. 'await' waits for the port to actually open before continuing.
serialStatusP.html('Web Serial: Connected!');
Updates the status to confirm the connection succeeded.
serialConnectButton.html('Disconnect USB device');
Changes the button text from 'Connect' to 'Disconnect' now that a device is connected.
serialConnectButton.mousePressed(disconnectSerial);
Changes what function the button calls—now clicking it will run disconnectSerial() instead of connectSerial().
const textDecoder = new TextDecoderStream();
Creates a decoder that converts raw bytes from the serial port into text strings.
const textEncoder = new TextEncoderStream();
Creates an encoder that converts text strings into raw bytes before sending them to the serial port.
reader = textDecoder.readable.getReader();
Gets a reader object that will be used to read decoded text from the port in the readSerial() loop.
writer = textEncoder.writable.getWriter();
Gets a writer object that will be used to send encoded text to the port via writeSerial().
port.readable.pipeTo(textDecoder.writable);
Pipes the raw data from the port into the text decoder, so all incoming data is automatically converted to strings.
textEncoder.readable.pipeTo(port.writable);
Pipes encoded text from the encoder to the port's writable stream, so outgoing text is automatically converted to bytes.
lastSentLabel = "";
Clears the 'last sent label' memory, which forces the next classification to be sent immediately (even if it's the same label).
lastClassificationSendTime = 0;
Resets the send timer so the interval check will pass immediately on the next draw() call.
readSerial();
Starts the continuous loop that reads incoming data from the serial port.

disconnectSerial()

disconnectSerial() safely closes the serial connection by cleaning up all streams and the port object. The order matters: cancel reader → close writer → close port. After cleanup, portDisconnected() resets the UI back to showing 'Not connected' and changes the button back to 'Connect'.

/**
 * Disconnects from the currently connected serial port.
 */
async function disconnectSerial() {
  try {
    console.log('disconnectSerial() called.');
    if (reader) await reader.cancel(); // Cancel any pending read operations
    if (writer) await writer.close(); // Close the writer stream
    if (port) await port.close(); // Close the serial port

    portDisconnected(); // Reset variables and UI
    console.log('Serial port successfully disconnected.');
  } catch (error) {
    console.error('Error disconnecting serial port:', error);
    serialStatusP.html('Web Serial: Disconnection failed. ' + error.message);
  }
}
Line-by-line explanation (5 lines)

🔧 Subcomponents:

function-call Cancel Pending Reads if (reader) await reader.cancel();

Stops any ongoing read operation so readSerial() will exit its loop.

function-call Close Write Stream if (writer) await writer.close();

Closes the writer stream so no more data can be sent to the port.

function-call Close Serial Port if (port) await port.close();

Closes the serial port itself, releasing the USB connection.

function-call Reset UI and Variables portDisconnected();

Calls a helper function to clear port variables and update the UI back to 'disconnected' state.

if (reader) await reader.cancel();
If a reader exists, cancels any pending read operation. This stops the readSerial() loop.
if (writer) await writer.close();
Closes the writer stream so no more data can be sent to the port.
if (port) await port.close();
Closes the actual serial port connection, releasing the USB device.
portDisconnected();
Calls a helper function to clear the port variables and reset the UI status/buttons.
console.log('Serial port successfully disconnected.');
Logs a success message to the browser console.

readSerial()

readSerial() is a continuously running loop that waits for data from the serial port. It uses async/await to pause the loop when data isn't available, resuming when something arrives. This is efficient because it doesn't waste CPU cycles polling. The loop only exits when the port is closed or an error is caught.

/**
 * Continuously reads data from the serial port.
 */
async function readSerial() {
  console.log('readSerial() started.');
  while (port && port.readable) {
    try {
      const { value, done } = await reader.read();
      if (done) {
        console.log('Reader closed.');
        break; // Exit loop if reader is closed
      }
      
      // Check if the received value is "1" (and trim whitespace for robustness)
      if (value.trim() === '1') {
        receivedSerialDataP.html('Received: remote device connected');
        // You might want to update serialStatusP too, but currentStatusP is already "Connected!'
      } else {
        receivedSerialDataP.html(`Received: ${value}`); // Display received data
      }
      
      // For more complex data, you might parse 'value' here (e.g., JSON.parse(value))
    } catch (error) {
      console.error('Error reading from serial port:', error);
      serialStatusP.html('Web Serial: Read error. ' + error.message);
      break; // Exit loop on error
    }
  }
  portDisconnected(); // Assume disconnected if loop exits (e.g., due to error or port closure)
  console.log('readSerial() stopped.');
}
Line-by-line explanation (7 lines)

🔧 Subcomponents:

while-loop Continuous Read Loop while (port && port.readable) {

Keeps reading from the port as long as it's open. The loop only exits when the port is closed or an error occurs.

function-call Read Data from Port const { value, done } = await reader.read();

Waits for data from the serial port. The 'done' flag is true when the stream is closed; 'value' contains the string that was received.

conditional Display Received Data if (value.trim() === '1') {

Checks if the received data is '1' (trimming whitespace) and displays a special message if so. Otherwise, displays the raw received data.

while (port && port.readable) {
Loops continuously as long as the port exists and is readable. This loop will only exit when the port is closed or an error breaks it.
const { value, done } = await reader.read();
Waits for the next chunk of data from the serial port. 'value' is the actual data (a string), 'done' is a boolean that's true when the stream ends. 'await' pauses the loop until data arrives.
if (done) {
Checks if the reader stream has been closed (done = true). If so, exit the loop.
if (value.trim() === '1') {
Checks if the received value is exactly '1' after trimming whitespace. If true, displays a special message.
receivedSerialDataP.html('Received: remote device connected');
Displays this message when the device sends '1', interpreting it as a connection confirmation.
receivedSerialDataP.html(`Received: ${value}`);
Displays whatever data was received, substituting the value into the text.
portDisconnected();
If an error occurs or the loop exits, calls portDisconnected() to clean up and reset the UI.

writeSerial()

writeSerial() is simple but critical: it sends a string to the serial port. It's always called from draw() with a number like '1\n' to tell the microcontroller which class was detected. The function checks that the port is actually connected before attempting to write.

/**
 * Writes data to the serial port.
 * @param {string} data - The string data to send.
 */
async function writeSerial(data) {
  if (port && writer) {
    try {
      await writer.write(data);
      console.log('Sent to Serial:', data.trim()); // Log sent data (the number) without the trailing newline
    } catch (error) {
      console.error('Error writing to serial port:', error);
      serialStatusP.html('Web Serial: Write error. ' + error.message);
      portDisconnected(); // Assume disconnected on write error
    }
  } else {
    console.warn('Cannot write: Serial port not connected.');
    serialStatusP.html('Web Serial: Cannot write, not connected.');
  }
}
Line-by-line explanation (4 lines)

🔧 Subcomponents:

conditional Verify Port and Writer Exist if (port && writer) {

Checks that both the port and writer are initialized before attempting to send data.

function-call Send Data String await writer.write(data);

Sends the string data to the serial port. The 'await' waits for the write to complete.

if (port && writer) {
Checks that a port is connected AND a writer has been initialized. If either is missing, the data cannot be sent.
await writer.write(data);
Sends the string data (e.g., '1\n') to the connected serial port. 'await' pauses until the write is complete.
console.log('Sent to Serial:', data.trim());
Logs what was sent to the browser console, trimming the newline for cleaner output.
if (port && writer) {
If the port isn't connected, warns the user and displays an error message.

portDisconnected()

portDisconnected() is a cleanup function called whenever the serial port is no longer available (user disconnected, cable unplugged, or an error occurred). It resets all variables and UI elements to their initial state, making it safe and simple to reconnect later.

/**
 * Resets serial variables and UI when the port disconnects.
 */
function portDisconnected() {
  console.log('Serial port disconnected.');
  port = undefined;
  reader = undefined;
  writer = undefined;
  serialStatusP.html('Web Serial: Disconnected.');
  receivedSerialDataP.html('Received: ');
  if (serialConnectButton) {
    serialConnectButton.html('Connect USB device'); // <<< MUUTETTU TEKSTI
    serialConnectButton.mousePressed(connectSerial); // Change button action back to connect
  }
  // Reset lastSentLabel and timer to allow re-sending on reconnect
  lastSentLabel = ''; 
  lastClassificationSendTime = 0; 
}
Line-by-line explanation (9 lines)

🔧 Subcomponents:

state-update Clear Port Variables port = undefined;

Sets port, reader, and writer to undefined so the system knows no connection exists.

function-call Update UI Elements serialStatusP.html('Web Serial: Disconnected.');

Updates the status text and resets the button to show 'Connect' instead of 'Disconnect'.

state-update Reset Button Function serialConnectButton.mousePressed(connectSerial);

Changes what the button does when clicked—now it will call connectSerial() again instead of disconnectSerial().

port = undefined;
Clears the port variable so the system knows the connection is gone.
reader = undefined;
Clears the reader so no more data can be read from the (now closed) port.
writer = undefined;
Clears the writer so no more data can be sent to the (now closed) port.
serialStatusP.html('Web Serial: Disconnected.');
Updates the status text on the page to show 'Disconnected'.
receivedSerialDataP.html('Received: ');
Clears the 'Received' text so it doesn't show stale data from the previous connection.
serialConnectButton.html('Connect USB device');
Changes the button text back to 'Connect USB device' so the user knows they can reconnect.
serialConnectButton.mousePressed(connectSerial);
Rebinds the button's click handler back to connectSerial() (it was changed to disconnectSerial() when connected).
lastSentLabel = '';
Clears the last-sent label memory, so the next classification will be sent immediately upon reconnection.
lastClassificationSendTime = 0;
Resets the send timer, so the interval check will pass immediately on the next draw() after reconnection.

connectBluetooth()

connectBluetooth() is more complex than connectSerial() because Bluetooth requires connecting to a GATT server, discovering services and characteristics, and optionally setting up bidirectional communication. The two-second delay for macOS is a known workaround to prevent service discovery timeouts on Mac systems.

async function connectBluetooth() {
  console.log('connectBluetooth() called from button press.');
  bluetoothStatusP.html('Web Bluetooth: Requesting device...');
  
  try {
    // 1. Pyydetään laite
    bluetoothDevice = await navigator.bluetooth.requestDevice({
      acceptAllDevices: true, 
      optionalServices: [bluetoothServiceUUID] 
    });
    console.log('Bluetooth device requested:', bluetoothDevice.name);

    bluetoothDevice.addEventListener('gattserverdisconnected', bluetoothDisconnected);

    // 2. Yhdistetään palvelimeen
    bluetoothStatusP.html('Web Bluetooth: Connecting to GATT server...');
    const server = await bluetoothDevice.gatt.connect();
    console.log('Connected to GATT server.');

    // Pieni tauko Macia varten
    await new Promise(resolve => setTimeout(resolve, 2000));

    // 3. Haetaan palvelu ja KIRJOITUS-kanava (Tämä on pakollinen)
    bluetoothStatusP.html('Web Bluetooth: Getting service...');
    bluetoothService = await server.getPrimaryService(bluetoothServiceUUID);
    
    bluetoothStatusP.html('Web Bluetooth: Getting characteristics...');
    bluetoothCharacteristic = await bluetoothService.getCharacteristic(bluetoothCharacteristicUUID);
    console.log('Got Write characteristic (RX).');

    // 4. LISÄYS: Haetaan KUUNTELU-kanava (Tämä on nyt vapaaehtoinen)
    // Jos tämä epäonnistuu, yhteys toimii silti yhteen suuntaan.
    try {
        const bluetoothNotifyCharacteristic = await bluetoothService.getCharacteristic(bluetoothNotifyCharacteristicUUID);
        await bluetoothNotifyCharacteristic.startNotifications();
        bluetoothNotifyCharacteristic.addEventListener('characteristicvaluechanged', handleNotifications);
        console.log('SUCCESS: Notifications started (Echo working).');
    } catch (notifyError) {
        // TÄMÄ ESTÄÄ OHJELMAA KAATUMASTA:
        console.warn('WARNING: Could not start notifications (Echo not working), but Write is OK.', notifyError);
    }

    // 5. Valmis!
    bluetoothStatusP.html(`Web Bluetooth: Connected to ${bluetoothDevice.name}!`);
    bluetoothConnectButton.html('Disconnect Bluetooth Device'); 
    bluetoothConnectButton.mousePressed(disconnectBluetooth); 
    
    // Nollataan ajastimet välitöntä lähetystä varten
    lastSentLabel = ""; 
    lastClassificationSendTime = 0;
    console.log('Bluetooth connection established successfully.');

  } catch (error) {
    console.error('Error connecting to Bluetooth device:', error);
    bluetoothStatusP.html('Web Bluetooth: Connection failed. ' + error.message);
    bluetoothDisconnected(); 
  }
}
Line-by-line explanation (12 lines)

🔧 Subcomponents:

function-call Show Device Picker bluetoothDevice = await navigator.bluetooth.requestDevice({

Opens a browser dialog where the user selects a Bluetooth device to connect to. acceptAllDevices: true shows any device; optionalServices limits scanning to devices with the specified UUID.

function-call Listen for Disconnection bluetoothDevice.addEventListener('gattserverdisconnected', bluetoothDisconnected);

Registers a listener so bluetoothDisconnected() is called automatically if the device disconnects unexpectedly (e.g., out of range).

function-call Connect to GATT Server const server = await bluetoothDevice.gatt.connect();

Establishes a connection to the Bluetooth device's GATT (Generic Attribute Profile) server, which provides access to services and characteristics.

function-call Wait for macOS await new Promise(resolve => setTimeout(resolve, 2000));

Pauses for 2 seconds to allow macOS's Bluetooth stack time to settle. This prevents timeouts on Mac devices.

function-call Get UART Service bluetoothService = await server.getPrimaryService(bluetoothServiceUUID);

Retrieves the micro:bit's UART service, which handles serial-like communication.

function-call Get Write Characteristic bluetoothCharacteristic = await bluetoothService.getCharacteristic(bluetoothCharacteristicUUID);

Retrieves the write characteristic (RX) so data can be sent to the device.

try-catch Optional Notification Setup try { ... } catch (notifyError) { ... }

Attempts to set up notifications (reading echoed data back), but doesn't fail the whole connection if this part doesn't work.

bluetoothDevice = await navigator.bluetooth.requestDevice({
Opens the Bluetooth device picker. 'await' pauses until the user selects a device.
acceptAllDevices: true,
Allows any Bluetooth device to be selected, not just ones matching specific criteria.
optionalServices: [bluetoothServiceUUID]
Tells the browser to allow devices with the micro:bit UART service UUID to be discoverable and connected.
bluetoothDevice.addEventListener('gattserverdisconnected', bluetoothDisconnected);
Registers bluetoothDisconnected() to run automatically if the device disconnects unexpectedly.
const server = await bluetoothDevice.gatt.connect();
Connects to the device's GATT server, which provides access to services and characteristics. 'await' waits for the connection to complete.
await new Promise(resolve => setTimeout(resolve, 2000));
A 2-second delay to give macOS time to settle after GATT connection. Without it, service discovery might timeout on Mac.
bluetoothService = await server.getPrimaryService(bluetoothServiceUUID);
Gets the UART service from the connected device. This service provides the characteristics for serial communication.
bluetoothCharacteristic = await bluetoothService.getCharacteristic(bluetoothCharacteristicUUID);
Gets the write characteristic (RX). This is the pipe through which we'll send numbers to the device.
const bluetoothNotifyCharacteristic = await bluetoothService.getCharacteristic(bluetoothNotifyCharacteristicUUID);
Optionally gets the notify characteristic (TX) so the device can send data back to us. This is wrapped in a try-catch because it's not required.
await bluetoothNotifyCharacteristic.startNotifications();
Enables notifications on the TX characteristic, so we'll be notified whenever the device sends data back.
bluetoothNotifyCharacteristic.addEventListener('characteristicvaluechanged', handleNotifications);
Registers handleNotifications() to run whenever the device sends data back via the TX characteristic.
lastSentLabel = "";
Clears the last-sent label so the next classification will be sent immediately upon connection.

disconnectBluetooth()

disconnectBluetooth() is simpler than connectBluetooth(). It checks the connection exists, disconnects the GATT server, and calls bluetoothDisconnected() to clean up. Unlike serial, Bluetooth disconnection doesn't require canceling reader/writer operations.

/**
 * Disconnects from the currently connected Bluetooth device.
 */
async function disconnectBluetooth() {
  try {
    console.log('disconnectBluetooth() called.');
    if (bluetoothDevice && bluetoothDevice.gatt.connected) {
      bluetoothStatusP.html('Web Bluetooth: Disconnecting...');
      bluetoothDevice.gatt.disconnect();
      console.log('Bluetooth GATT server disconnected.');
    }
    bluetoothDisconnected(); // Reset variables and UI
  } catch (error) {
    console.error('Error disconnecting Bluetooth device:', error);
    bluetoothStatusP.html('Web Bluetooth: Disconnection failed. ' + error.message);
  }
}
Line-by-line explanation (4 lines)

🔧 Subcomponents:

conditional Verify Device and Connection if (bluetoothDevice && bluetoothDevice.gatt.connected) {

Checks that a device is connected before attempting to disconnect. Prevents errors if called when not connected.

function-call Disconnect GATT Server bluetoothDevice.gatt.disconnect();

Closes the GATT connection to the Bluetooth device.

function-call Reset UI and Variables bluetoothDisconnected();

Calls a helper function to clear Bluetooth variables and reset the UI.

if (bluetoothDevice && bluetoothDevice.gatt.connected) {
Checks that a device exists AND is currently connected before attempting to disconnect.
bluetoothStatusP.html('Web Bluetooth: Disconnecting...');
Updates the status to show that a disconnection is in progress.
bluetoothDevice.gatt.disconnect();
Closes the GATT server connection, disconnecting from the device.
bluetoothDisconnected();
Calls the cleanup function to reset variables and update the UI.

writeBluetooth()

writeBluetooth() converts a number into a byte string and sends it to the device. It uses a two-tier approach: first try 'writeValueWithoutResponse' (fast, preferred by micro:bit), then fall back to 'writeValue' (slower but more compatible). Both methods succeed or fail gracefully without forcing a disconnect.

async function writeBluetooth(number) {
  // Jos Bluetooth ei ole yhdistetty, lopetetaan heti
  if (!bluetoothCharacteristic) return;

  const stringToSend = String(number) + '\n';
  const encoder = new TextEncoder();
  const encodedData = encoder.encode(stringToSend);

  try {
    // --- TÄMÄ ON KORJAUS ---
    // Yritetään ENSIN "WriteWithoutResponse" -tapaa.
    // Tämä on se tapa, jota Micro:bitin Nordic UART vaatii.
    // Emme kysele ominaisuuksia (properties), koska Mac saattaa valehdella ne.
    // Yritetään vain suoraan.
    await bluetoothCharacteristic.writeValueWithoutResponse(encodedData);
    
    // Jos päästiin tänne, lähetys onnistui!
    console.log('Sent to Bluetooth:', stringToSend.trim()); // <--- NYT LOKI NÄKYY
    bluetoothStatusP.html('Sent to BT: ' + number);

  } catch (error) {
    // Jos "WithoutResponse" ei toiminut (harvinaista), kokeillaan varatapaa
    console.warn('Primary write failed, trying fallback...', error);
    
    try {
        await bluetoothCharacteristic.writeValue(encodedData);
        console.log('Sent to Bluetooth (Fallback):', stringToSend.trim());
        bluetoothStatusP.html('Sent to BT (FB): ' + number);
    } catch (err2) {
        // Jos molemmat epäonnistuvat
        console.error('Bluetooth Write Error:', err2);
        // Älä katkaise yhteyttä (disconnect), näytä vain virhe
        bluetoothStatusP.html('BT Write Error: ' + err2.message);
    }
  }
}
Line-by-line explanation (11 lines)

🔧 Subcomponents:

conditional Verify Characteristic Exists if (!bluetoothCharacteristic) return;

Early exit if the Bluetooth characteristic isn't initialized. Prevents errors when writing to a non-existent connection.

calculation Convert to String and Encode const stringToSend = String(number) + '\n'; const encodedData = encoder.encode(stringToSend);

Converts the number to a string, adds a newline, and encodes it to bytes that can be sent over Bluetooth.

function-call Write Without Response (Primary) await bluetoothCharacteristic.writeValueWithoutResponse(encodedData);

Sends the data to the device using the micro:bit's preferred method. This is fast because we don't wait for confirmation.

try-catch Write With Response (Fallback) catch (error) { try { await bluetoothCharacteristic.writeValue(encodedData); }

If the primary method fails, tries a slower method that waits for confirmation. This provides redundancy.

if (!bluetoothCharacteristic) return;
If the characteristic isn't set up, exit immediately. This prevents errors when trying to write to a non-existent connection.
const stringToSend = String(number) + '\n';
Converts the number to a string (e.g., 1 becomes '1') and adds a newline so the micro:bit can parse it correctly.
const encoder = new TextEncoder();
Creates a TextEncoder that converts strings to bytes (the binary format required by Bluetooth).
const encodedData = encoder.encode(stringToSend);
Encodes the string as bytes. For example, '1\n' becomes [49, 10] in bytes.
await bluetoothCharacteristic.writeValueWithoutResponse(encodedData);
Sends the encoded data to the device without waiting for confirmation. This is fast and is what the micro:bit UART expects.
console.log('Sent to Bluetooth:', stringToSend.trim());
Logs the sent data to the browser console (trimming the newline for cleaner output).
bluetoothStatusP.html('Sent to BT: ' + number);
Updates the status text to show what was sent, confirming the write succeeded.
catch (error) {
If writeValueWithoutResponse() fails, this error handler attempts a fallback approach.
await bluetoothCharacteristic.writeValue(encodedData);
The fallback method: send data WITH a response, meaning the device confirms receipt. This is slower but works on more devices.
catch (err2) {
If both methods fail, this inner catch handles the final error.
bluetoothStatusP.html('BT Write Error: ' + err2.message);
Displays an error message but does NOT disconnect. This allows you to troubleshoot without losing the connection.

bluetoothDisconnected()

bluetoothDisconnected() mirrors portDisconnected() for Bluetooth. It clears all Bluetooth variables and resets the UI, making reconnection straightforward. It's called both explicitly (when disconnect is clicked) and automatically (when the device disconnects unexpectedly via the 'gattserverdisconnected' event).

/**
 * Resets Bluetooth variables and UI when the device disconnects (or fails to connect).
 */
function bluetoothDisconnected() {
  console.log('Bluetooth device disconnected or connection failed.');
  bluetoothDevice = undefined;
  bluetoothService = undefined;
  bluetoothCharacteristic = undefined;
  bluetoothStatusP.html('Web Bluetooth: Disconnected.');
  if (bluetoothConnectButton) {
    bluetoothConnectButton.html('Connect Bluetooth Device');
    bluetoothConnectButton.mousePressed(connectBluetooth); // Change button action back to connect
  }
  // Reset lastSentLabel and timer to allow re-sending on reconnect
  lastSentLabel = '';
  lastClassificationSendTime = 0;
}
Line-by-line explanation (7 lines)

🔧 Subcomponents:

state-update Clear Bluetooth Variables bluetoothDevice = undefined;

Sets all Bluetooth-related variables to undefined so the system knows no connection exists.

function-call Update UI Status and Button bluetoothStatusP.html('Web Bluetooth: Disconnected.');

Updates the status text and resets the button to show 'Connect' instead of 'Disconnect'.

state-update Allow Immediate Resend lastSentLabel = '';

Clears the last-sent label so the first classification after reconnection will be sent immediately.

bluetoothDevice = undefined;
Clears the device reference so the system knows it's no longer connected.
bluetoothService = undefined;
Clears the service reference.
bluetoothCharacteristic = undefined;
Clears the characteristic reference so writeBluetooth() will return early if called.
bluetoothStatusP.html('Web Bluetooth: Disconnected.');
Updates the status text on the page to show 'Disconnected'.
bluetoothConnectButton.html('Connect Bluetooth Device');
Changes the button text back to 'Connect' so the user knows they can reconnect.
bluetoothConnectButton.mousePressed(connectBluetooth);
Rebinds the button's click handler back to connectBluetooth() (it was changed to disconnectBluetooth() when connected).
lastSentLabel = '';
Clears the last-sent label memory so the next classification will be sent immediately upon reconnection.

handleNotifications()

handleNotifications() is the callback for incoming Bluetooth data. It's invoked whenever the micro:bit sends data back via the TX characteristic. The function is a stub—you can extend it to react to device responses, such as updating variables or triggering visual effects in p5.js.

// Ja tämä uusi funktio koodin loppuun:
function handleNotifications(event) {
  let value = event.target.value;
  let decoder = new TextDecoder('utf-8');
  console.log('MICROBIT VASTASI:', decoder.decode(value));
  // You can add more logic here to handle the received data
  // For example, update a p5.js variable, draw something, etc.
}
Line-by-line explanation (4 lines)

🔧 Subcomponents:

calculation Extract Received Bytes let value = event.target.value;

Gets the byte data from the event that was triggered when the device sent data back.

function-call Decode Bytes to Text let decoder = new TextDecoder('utf-8'); console.log('MICROBIT VASTASI:', decoder.decode(value));

Converts the bytes into a readable UTF-8 string and logs it to the console.

let value = event.target.value;
Gets the byte data (a Uint8Array) from the Bluetooth characteristic value change event.
let decoder = new TextDecoder('utf-8');
Creates a TextDecoder that will convert bytes to UTF-8 strings.
console.log('MICROBIT VASTASI:', decoder.decode(value));
Decodes the bytes to a string and logs it to the browser console. This shows what the micro:bit sent back.
// You can add more logic here to handle the received data
This is a comment suggesting you can extend this function to react to incoming data (update variables, draw things, etc.).

📦 Key Variables

classifier ml5.ImageClassifier

Stores the ml5.js image classifier object that performs the machine learning predictions on video frames.

let classifier;
video p5.Renderer

Stores the p5.js video capture object from the user's webcam.

let video;
modelURL string

Stores the URL of the Teachable Machine model entered by the user.

let modelURL = '';
currentClassification object

Stores the latest classification result with properties 'label' (class name) and 'confidence' (0-1 score).

let currentClassification = { label: 'Please enter model URL', confidence: 0 };
port SerialPort

Stores the Web Serial port connection object for USB communication with Arduino/microcontroller.

let port;
reader ReadableStreamDefaultReader

Reads data from the serial port in the readSerial() loop.

let reader;
writer WritableStreamDefaultWriter

Writes data to the serial port via the writeSerial() function.

let writer;
bluetoothDevice BluetoothDevice

Stores the selected Bluetooth device (like a micro:bit).

let bluetoothDevice;
bluetoothService BluetoothRemoteGATTService

Stores the GATT service (UART service) retrieved from the Bluetooth device.

let bluetoothService;
bluetoothCharacteristic BluetoothRemoteGATTCharacteristic

Stores the UART write characteristic for sending data to the Bluetooth device.

let bluetoothCharacteristic;
appState string

Tracks which mode the app is in: 'input' (waiting for model URL) or 'classifier' (running classification).

let appState = 'input';
classificationSendInterval number

Milliseconds to wait between sending the same classification to devices (prevents data flooding).

let classificationSendInterval = 1000;
lastSentLabel string

Stores the label that was last sent to a device, used to detect when the label changes.

let lastSentLabel = '';
lastClassificationSendTime number

Timestamp (in milliseconds) of when the last classification was sent, used to enforce the send interval.

let lastClassificationSendTime = 0;
videoMargin number

Pixel spacing around the video preview and UI elements on the canvas.

let videoMargin = 20;

🔧 Potential Improvements (6)

Here are some ways this code could be enhanced:

BUG draw() - label mapping

The switch statement uses lowercase 'ihminen', 'koira', 'kissa', but currentLabel is lowercased from the classification. If Teachable Machine outputs labels in a different case, the mapping will fail silently (numberToSend stays -1).

💡 Test your actual Teachable Machine labels carefully. Consider adding a fallback log: 'console.log("Unrecognized label:", currentLabel);' in the default case to debug mismatches.

PERFORMANCE draw()

The aspect ratio calculation and boundary checking for video preview happens every frame in draw(), even though it only changes when the window is resized. This is recalculated 60 times per second unnecessarily.

💡 Move the previewHeight and previewWidth calculations into windowResized() and store them as global variables. Only recalculate when the window actually resizes.

FEATURE draw() - device communication

Currently, only the top classification result is sent to devices. If the confidence is very low (e.g., 0.1), unreliable predictions are still sent.

💡 Add a confidence threshold check before mapping to a number: 'if (topResult.confidence > 0.7) { numberToSend = ... }' to prevent weak predictions from being sent.

STYLE connectBluetooth()

The function contains comments in Finnish ('Pyydetään laite', 'Yhdistetään palvelimeen') mixed with English. This makes the code harder to follow for international developers.

💡 Standardize on a single language (English is recommended for open-source code). Translate comments like 'Pieni tauko Macia varten' to 'Brief delay for macOS'.

BUG readSerial()

The function displays the entire received value directly in the HTML. If the device sends a long string or malformed data, it could break the UI layout.

💡 Truncate long received strings and escape HTML special characters: 'receivedSerialDataP.html(`Received: ${value.substring(0, 50)}...`);'

FEATURE handleNotifications()

The function only logs the received Bluetooth data. There's no way for the sketch to react to device responses (e.g., an acknowledgment or status from the micro:bit).

💡 Create a global variable to store the last received message from the device, then display it or use it to trigger p5.js visual effects in draw().

🔄 Code Flow

Code flow showing preload, setup, videoready, setclassifieruivisibility, loadmodelfrominput, modeloaded, classifyvideo, gotresult, draw, windowresized, connectserial, disconnectserial, readserial, writeserial, portdisconnected, connectbluetooth, disconnectbluetooth, writebluetooth, bluetoothdisconnected, handlenotifications

💡 Click on function names in the diagram to jump to their code

graph TD start[Start] --> setup[setup] setup --> draw[draw loop] draw --> video-setup[video-setup] draw --> serial-element-toggle[serial-element-toggle] draw --> bluetooth-element-toggle[bluetooth-element-toggle] draw --> input-element-toggle[input-element-toggle] draw --> input-state-display[input-state-display] draw --> video-display[video-display] draw --> canvas-resize[canvas-resize] draw --> send-condition-check[send-condition-check] draw --> dual-protocol-send[dual-protocol-send] click setup href "#fn-setup" click draw href "#fn-draw" click video-setup href "#sub-video-setup" click serial-element-toggle href "#sub-serial-element-toggle" click bluetooth-element-toggle href "#sub-bluetooth-element-toggle" click input-element-toggle href "#sub-input-element-toggle" click input-state-display href "#sub-input-state-display" click video-display href "#sub-video-display" click canvas-resize href "#sub-canvas-resize" click send-condition-check href "#sub-send-condition-check" click dual-protocol-send href "#sub-dual-protocol-send" setup --> serial-support-check[serial-support-check] setup --> bluetooth-support-check[bluetooth-support-check] setup --> videoready[videoready] setup --> setclassifieruivisibility[setclassifieruivisibility] setup --> loadmodelfrominput[loadmodelfrominput] click serial-support-check href "#sub-serial-support-check" click bluetooth-support-check href "#sub-bluetooth-support-check" click videoready href "#fn-videoready" click setclassifieruivisibility href "#fn-setclassifieruivisibility" click loadmodelfrominput href "#fn-loadmodelfrominput" loadmodelfrominput --> url-validation[url-validation] url-validation --> model-initialization[model-initialization] model-initialization --> button-disable[button-disable] button-disable --> error-check[error-check] click url-validation href "#sub-url-validation" click model-initialization href "#sub-model-initialization" click button-disable href "#sub-button-disable" click error-check href "#sub-error-check" videoready --> ready-flag-set[ready-flag-set] ready-flag-set --> video-sync-check[video-sync-check] video-sync-check --> classifier-ready-check[classifier-ready-check] classifier-ready-check --> mode-switch[mode-switch] mode-switch --> classifyvideo[classifyvideo] click ready-flag-set href "#sub-ready-flag-set" click video-sync-check href "#sub-video-sync-check" click classifier-ready-check href "#sub-classifier-ready-check" click mode-switch href "#sub-mode-switch" click classifyvideo href "#fn-classifyvideo" classifyvideo --> classification-call[classification-call] classification-call --> retry-logic[retry-logic] retry-logic --> error-handling[error-handling] error-handling --> gotresult[gotresult] click classification-call href "#sub-classification-call" click retry-logic href "#sub-retry-logic" click error-handling href "#sub-error-handling" click gotresult href "#fn-gotresult" gotresult --> sort-results[sort-results] sort-results --> update-display[update-display] update-display --> recursive-call[recursive-call] click sort-results href "#sub-sort-results" click update-display href "#sub-update-display" click recursive-call href "#sub-recursive-call" windowresized[windowresized] --> canvas-resize click windowresized href "#fn-windowresized" connectserial[connectserial] --> port-check[port-check] port-check --> port-request[port-request] port-request --> port-open[port-open] port-open --> stream-setup[stream-setup] stream-setup --> pipe-streams[pipe-streams] click connectserial href "#fn-connectserial" click port-check href "#sub-port-check" click port-request href "#sub-port-request" click port-open href "#sub-port-open" click stream-setup href "#sub-stream-setup" click pipe-streams href "#sub-pipe-streams" readserial[readserial] --> read-loop[read-loop] read-loop --> data-read[data-read] data-read --> display-data[display-data] display-data --> connection-check[connection-check] connection-check --> send-data[send-data] send-data --> variable-reset[variable-reset] variable-reset --> ui-update[ui-update] click readserial href "#fn-readserial" click read-loop href "#sub-read-loop" click data-read href "#sub-data-read" click display-data href "#sub-display-data" click connection-check href "#sub-connection-check" click send-data href "#sub-send-data" click variable-reset href "#sub-variable-reset" click ui-update href "#sub-ui-update" disconnectserial[disconnectserial] --> reader-cancel[reader-cancel] reader-cancel --> writer-close[writer-close] writer-close --> port-close[port-close] port-close --> reset-state[reset-state] click disconnectserial href "#fn-disconnectserial" click reader-cancel href "#sub-reader-cancel" click writer-close href "#sub-writer-close" click port-close href "#sub-port-close" click reset-state href "#sub-reset-state" connectbluetooth[connectbluetooth] --> device-request[device-request] device-request --> gatt-connect[gatt-connect] gatt-connect --> mac-delay[mac-delay] mac-delay --> service-get[service-get] service-get --> characteristic-get[characteristic-get] characteristic-get --> notify-optional[notify-optional] click connectbluetooth href "#fn-connectbluetooth" click device-request href "#sub-device-request" click gatt-connect href "#sub-gatt-connect" click mac-delay href "#sub-mac-delay" click service-get href "#sub-service-get" click characteristic-get href "#sub-characteristic-get" click notify-optional href "#sub-notify-optional" disconnectbluetooth[disconnectbluetooth] --> connection-check[connection-check] connection-check --> gatt-disconnect[gatt-disconnect] gatt-disconnect --> reset-cleanup[reset-cleanup] click disconnectbluetooth href "#fn-disconnectbluetooth" click connection-check href "#sub-connection-check" click gatt-disconnect href "#sub-gatt-disconnect" click reset-cleanup href "#sub-reset-cleanup" writebluetooth[writebluetooth] --> encode-data[encode-data] encode-data --> primary-write[primary-write] primary-write --> fallback-write[fallback-write] click writebluetooth href "#fn-writebluetooth" click encode-data href "#sub-encode-data" click primary-write href "#sub-primary-write" click fallback-write href "#sub-fallback-write" handlenotifications[handlenotifications] --> value-extract[value-extract] value-extract --> decode-text[decode-text] click handlenotifications href "#fn-handlenotifications" click value-extract href "#sub-value-extract" click decode-text href "#sub-decode-text"

❓ Frequently Asked Questions

What visual elements does the Teachable Machine p5.js sketch display?

This sketch utilizes webcam video capture to display real-time image classifications based on a user-provided Teachable Machine model URL.

How can users interact with the Teachable Machine sketch?

Users can input a Teachable Machine model URL, click a button to load the model, and connect to serial or Bluetooth devices for enhanced functionality.

What creative coding technique is showcased in this p5.js sketch?

The sketch demonstrates the integration of machine learning with real-time video processing, allowing for interactive image classification.

Preview

Teachable Machine > P5.js > Device (web serial) (Remix) (Remix) - p5.js creative coding sketch preview
Sketch Preview
Code flow diagram showing the structure of Teachable Machine > P5.js > Device (web serial) (Remix) (Remix) - Code flow showing preload, setup, videoready, setclassifieruivisibility, loadmodelfrominput, modeloaded, classifyvideo, gotresult, draw, windowresized, connectserial, disconnectserial, readserial, writeserial, portdisconnected, connectbluetooth, disconnectbluetooth, writebluetooth, bluetoothdisconnected, handlenotifications
Code Flow Diagram