
test

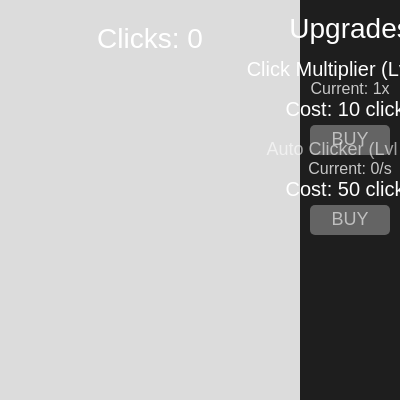
This sketch creates an interactive clicker game where players click on a live webcam feed to earn clicks, which can be spent on upgrades like click multipliers and auto-clickers. The interface features a circular video target in the main game area and a responsive sidebar panel displaying available upgrades with buy buttons.

🧪 Try This!

Experiment with the code by making these changes:

  1. Change the video circle to a square — Replace ellipse with rect in the mask buffer drawing to make the video a square instead of a circle
  2. Make video clicks worth 10x — Multiply the clickMultiplier by 10 to make each video click much more powerful
  3. Double the initial click multiplier cost — Increase the starting cost from 10 to 20 to make the first upgrade harder to afford
  4. Make auto-clicker cheaper but weaker — Reduce auto-clicker starting cost from 50 to 20 and change cost scaling from 2 to 1.5 for a more affordable upgrade path
  5. Change main area to 60% (wider sidebar) — Give the upgrade sidebar more space by shrinking the main game area from 75% to 60% of the canvas
Prefer the full editor? Open it there →

📖 About This Sketch

This sketch builds a full clicker game where your webcam becomes the clickable target. Players click the circular video feed to earn clicks, then spend those clicks on upgrades that increase click multiplier (earning more per click) or purchase auto-clickers (earning clicks automatically). The sketch demonstrates several powerful p5.js techniques: video capture with circular masking, responsive layout calculation, mouse interaction detection, and game state management through upgrade objects.

The code is organized into a setup() function that initializes the webcam and canvas, a draw() function that renders the game every frame with auto-clicker income and UI updates, and several helper functions that handle layout, upgrades, and mouse input. By studying it, you will learn how to integrate webcam video, create circular masks, manage complex game state with objects, detect clicks within circular shapes, and build responsive interfaces that scale with window size.

⚙️ How It Works

  1. When the sketch loads, setup() creates a full-window canvas, captures the webcam video, and calculates layout dimensions that split the screen into a main game area (75%) and a sidebar (25%).
  2. Every frame, draw() clears the background, renders the sidebar, applies the auto-clicker income based on the current auto-clicker level and deltaTime, and displays the circular masked video feed in the center of the main area.
  3. The circular video is created by drawing a white ellipse mask onto a graphics buffer, then applying that mask to the resized video image so only the circular portion is visible.
  4. The click count displays prominently above the video, and the upgrades panel below shows each upgrade's name, level, current effect, cost, and a buy button that turns green when affordable.
  5. When the player clicks the circular video, mouseClicked() checks the distance from click to video center and applies the click multiplier bonus to the click count.
  6. When the player clicks a buy button, the cost is deducted from clicks, the upgrade level increases, the effect doubles (for multiplier) or increases by 1 (for auto-clicker), and the cost multiplies by the costIncreaseFactor for the next purchase.
  7. When the window resizes, windowResized() recalculates all layout dimensions and resizes the mask buffer to match the new circular video size.

🎓 Concepts You'll Learn

Video capture and maskingResponsive layout and window resizingGame state management with objectsMouse interaction and click detectionDistance-based collision detectionGraphics buffersUpgrade systems and progression

📝 Code Breakdown

setup()

setup() runs once when the sketch starts. It initializes the canvas, captures the webcam, and prepares all the variables the game needs. Notice how it calls helper functions (calculateLayoutDimensions, calculateVideoBounds) to keep the code organized and reusable.

function setup() {
  createCanvas(windowWidth, windowHeight);
  // Tip: Use windowWidth/windowHeight for responsive canvas

  // Calculate layout dimensions for sidebar and main area
  calculateLayoutDimensions();

  // Create a capture object to access the webcam
  video = createCapture(VIDEO);
  video.hide(); // Hide the default HTML video element

  // Start the audio context. This is good practice for any media
  userStartAudio();

  // Set up text properties for displaying the click count and upgrade info
  textSize(24);
  textAlign(CENTER, CENTER);
  fill(255);
  noStroke();

  // Calculate the video position and size once in setup
  // and update it in windowResized
  calculateVideoBounds();

  // Create an off-screen graphics buffer for the circular mask
  maskBuffer = createGraphics(videoDiameter, videoDiameter);
}
Line-by-line explanation (9 lines)

🔧 Subcomponents:

function-call Canvas Setup createCanvas(windowWidth, windowHeight);

Creates a full-window canvas that will hold the game area and sidebar

function-call Webcam Capture video = createCapture(VIDEO);

Accesses the user's webcam and stores the live feed in the video variable

function-call Mask Buffer Creation maskBuffer = createGraphics(videoDiameter, videoDiameter);

Creates an invisible off-screen graphics buffer that will hold the circular mask

createCanvas(windowWidth, windowHeight);
Creates a canvas sized to fill the entire browser window, making the game responsive
calculateLayoutDimensions();
Calls a helper function that calculates how much width the sidebar and main area should occupy
video = createCapture(VIDEO);
Requests access to the user's webcam and creates a video object that captures the live feed
video.hide();
Hides the default HTML video element so only the circular masked version appears on the canvas
userStartAudio();
Initializes the audio context for p5.sound; this is best practice when using media
textSize(24);
Sets the default text size to 24 pixels for all text drawn on the canvas
textAlign(CENTER, CENTER);
Centers text both horizontally and vertically around the coordinates where text is drawn
calculateVideoBounds();
Calls a helper function that calculates the position and diameter of the circular video
maskBuffer = createGraphics(videoDiameter, videoDiameter);
Creates an invisible graphics buffer the same size as the circular video to hold the mask
draw()

draw() runs 60 times per second and is where all animation happens. This sketch uses it to clear the screen, add passive income, capture and mask the webcam video, and call helper functions to draw the UI. Notice how deltaTime (the milliseconds since the last frame) is used to make auto-clicker income frame-rate independent—a player's computer running at 30fps or 120fps will earn clicks at the same real-time rate.

🔬 This code draws the circular mask. What happens if you change ellipse to rect? Try it and see what shape your video becomes—rectangle? What if you use triangle or polygon?

  // 3. Draw the circular mask on the maskBuffer
  maskBuffer.clear(); // Clear the mask buffer each frame
  maskBuffer.fill(255); // White for the mask area
  maskBuffer.noStroke();
  maskBuffer.ellipse(maskBuffer.width / 2, maskBuffer.height / 2, videoDiameter, videoDiameter);

🔬 This is the auto-clicker income system. What happens if you multiply autoClickRate by 10? Try it and see how much faster passive clicks accumulate—but don't forget to change it back!

  let autoClickRate = upgrades.find(u => u.id === "autoClicker").effect;
  if (autoClickRate > 0) {
    // Add clicks based on autoClickRate (clicks per second) and deltaTime (milliseconds per frame)
    clickCount += (autoClickRate * deltaTime) / 1000;
  }
function draw() {
  background(220); // Clear the main area background

  // Draw sidebar background (darker color)
  fill(30, 30, 30);
  rect(mainAreaWidth, 0, sidebarWidth, height); // Sidebar rectangle

  // --- Auto Clicker Logic ---
  let autoClickRate = upgrades.find(u => u.id === "autoClicker").effect;
  if (autoClickRate > 0) {
    // Add clicks based on autoClickRate (clicks per second) and deltaTime (milliseconds per frame)
    clickCount += (autoClickRate * deltaTime) / 1000;
  }

  // --- Draw Circular Video Feed ---
  // 1. Get the current video frame
  let videoImage = video.get();

  // 2. Resize the video image to fit the mask buffer
  videoImage.resize(videoDiameter, videoDiameter);

  // 3. Draw the circular mask on the maskBuffer
  maskBuffer.clear(); // Clear the mask buffer each frame
  maskBuffer.fill(255); // White for the mask area
  maskBuffer.noStroke();
  maskBuffer.ellipse(maskBuffer.width / 2, maskBuffer.height / 2, videoDiameter, videoDiameter);

  // 4. Apply the mask to the video image
  videoImage.mask(maskBuffer);

  // 5. Draw the masked video image onto the main canvas
  image(videoImage, videoX, videoY, videoDiameter, videoDiameter);

  // --- Display Click Count ---
  fill(255);
  textSize(28);
  text(`Clicks: ${floor(clickCount)}`, mainAreaWidth / 2, height * 0.1);

  // --- Display Upgrades Panel ---
  drawUpgradesPanel();
}
Line-by-line explanation (17 lines)

🔧 Subcomponents:

conditional Auto-Clicker Income clickCount += (autoClickRate * deltaTime) / 1000;

Adds passive clicks every frame based on the auto-clicker level and time elapsed since last frame

calculation Circular Video Masking Pipeline videoImage.mask(maskBuffer);

Applies the circular mask so only the circle-shaped portion of the video is visible

function-call Click Count Display text(`Clicks: ${floor(clickCount)}`, mainAreaWidth / 2, height * 0.1);

Renders the current click count as integer text in the center-top of the main game area

background(220);
Clears the entire canvas with light gray (RGB 220,220,220) each frame to erase the previous frame
fill(30, 30, 30);
Sets the fill color to dark gray for the sidebar background
rect(mainAreaWidth, 0, sidebarWidth, height);
Draws a dark rectangle from the edge of the main area to the right, spanning full height—this is the sidebar background
let autoClickRate = upgrades.find(u => u.id === "autoClicker").effect;
Searches the upgrades array to find the auto-clicker upgrade and stores its current effect (clicks per second)
if (autoClickRate > 0) {
Only adds passive clicks if the player has purchased at least one auto-clicker level
clickCount += (autoClickRate * deltaTime) / 1000;
Multiplies the clicks-per-second rate by deltaTime (milliseconds since last frame) divided by 1000 to convert to seconds, then adds that to the click count
let videoImage = video.get();
Captures the current frame from the webcam video feed as an image
videoImage.resize(videoDiameter, videoDiameter);
Resizes the video image to match the circular diameter so it fits the mask buffer perfectly
maskBuffer.clear();
Clears the mask buffer to erase the previous frame's mask (necessary because we redraw it each frame)
maskBuffer.fill(255);
Sets the fill color to white on the mask buffer—white areas in a mask determine what is visible
maskBuffer.ellipse(maskBuffer.width / 2, maskBuffer.height / 2, videoDiameter, videoDiameter);
Draws a white circle in the center of the mask buffer—this defines the shape that will be kept from the video
videoImage.mask(maskBuffer);
Applies the circular mask to the video image, making everything outside the circle transparent
image(videoImage, videoX, videoY, videoDiameter, videoDiameter);
Draws the masked circular video onto the canvas at the calculated position and size in the main game area
fill(255);
Sets text color to white for displaying the click count
textSize(28);
Sets text size to 28 pixels for the click count display
text(`Clicks: ${floor(clickCount)}`, mainAreaWidth / 2, height * 0.1);
Displays the click count as an integer in the center of the main area, 10% down from the top
drawUpgradesPanel();
Calls a helper function that renders all the upgrade buttons, levels, and costs in the sidebar

calculateVideoBounds()

This helper function calculates where the circular video should appear so it remains centered no matter what window size the player uses. It's called in setup() and again in windowResized() to recalculate dimensions when the browser is resized. Using math to position elements responsively is a powerful pattern for building games that work on any screen size.

function calculateVideoBounds() {
  // Determine the diameter of the circular video
  videoDiameter = min(mainAreaWidth, height) * 0.6; // 60% of the smaller main area dimension

  // Center the circular video within the main game area
  videoX = (mainAreaWidth - videoDiameter) / 2;
  videoY = (height - videoDiameter) / 2;
}
Line-by-line explanation (3 lines)

🔧 Subcomponents:

calculation Video Diameter Calculation videoDiameter = min(mainAreaWidth, height) * 0.6;

Sizes the video to 60% of the smaller dimension (width or height) so it fits nicely in the main area

calculation Horizontal Centering videoX = (mainAreaWidth - videoDiameter) / 2;

Calculates the left edge position to center the circular video horizontally in the main area

calculation Vertical Centering videoY = (height - videoDiameter) / 2;

Calculates the top edge position to center the circular video vertically on the canvas

videoDiameter = min(mainAreaWidth, height) * 0.6;
Uses the smaller of (main area width or canvas height), then multiplies by 0.6 to create a diameter that uses 60% of available space and avoids stretching
videoX = (mainAreaWidth - videoDiameter) / 2;
Subtracts the video diameter from the main area width, divides by 2 to get equal padding on both sides, positioning the video's left edge
videoY = (height - videoDiameter) / 2;
Subtracts the video diameter from the total canvas height, divides by 2 to get equal top and bottom padding, positioning the video's top edge

calculateLayoutDimensions()

This simple function divides the canvas width into sidebar and main area. It's called in setup() and windowResized() so the layout rescales when the browser window changes size. Responsive design with p5.js is as simple as using percentages and calling recalculation functions when windowResized() fires.

function calculateLayoutDimensions() {
  sidebarWidth = width * 0.25; // 25% of total canvas width for the sidebar
  mainAreaWidth = width - sidebarWidth; // Remaining 75% for the main game area
}
Line-by-line explanation (2 lines)

🔧 Subcomponents:

calculation Sidebar Width sidebarWidth = width * 0.25;

Allocates 25% of the canvas width to the sidebar for upgrades

calculation Main Area Width mainAreaWidth = width - sidebarWidth;

Allocates the remaining 75% of canvas width to the main game area with the clickable video

sidebarWidth = width * 0.25;
Multiplies the total canvas width by 0.25 (25%) to determine how wide the sidebar should be
mainAreaWidth = width - sidebarWidth;
Subtracts the sidebar width from the total canvas width to get the remaining space for the main game area

drawUpgradesPanel()

This helper function renders the entire upgrades sidebar. It loops through the upgrades array and displays each upgrade's name, level, current effect, cost, and a buy button that changes color based on affordability. The ternary operator (? :) is used to format effect text differently depending on the upgrade type. This function is called from draw() every frame so the display always stays current with the game state.

🔬 This loop iterates over all upgrades. What happens if you change upgrades.length to 1? The loop stops early! Try it and see only the first upgrade displayed—this is a way to test code with fewer items.

  for (let i = 0; i < upgrades.length; i++) {
    let upgrade = upgrades[i];
    let currentEffect = upgrade.id === "clickMultiplier" ? `${upgrade.effect}x` : `${upgrade.effect}/s`;
function drawUpgradesPanel() {
  let panelX = mainAreaWidth; // Sidebar starts where the main area ends
  let panelWidth = sidebarWidth;
  // panelY = 0;
  // panelHeight = height; // Sidebar spans the full height

  // Panel title
  fill(255);
  textSize(28);
  text("Upgrades", panelX + panelWidth / 2, 30);

  // Draw each upgrade
  textSize(20);
  let upgradeY = 70; // Starting Y position within the sidebar
  let upgradeSpacing = 80; // Increased spacing for better readability in sidebar

  for (let i = 0; i < upgrades.length; i++) {
    let upgrade = upgrades[i];
    let currentEffect = upgrade.id === "clickMultiplier" ? `${upgrade.effect}x` : `${upgrade.effect}/s`;
    let nextEffect = upgrade.id === "clickMultiplier" ? `${upgrade.effect * 2}x` : `${upgrade.effect + 1}/s`;

    // Upgrade Name and Level
    text(`${upgrade.name} (Lvl ${upgrade.level}/${upgrade.maxLevel})`, panelX + panelWidth / 2, upgradeY + i * upgradeSpacing);

    // Current Effect
    textSize(16);
    fill(200);
    text(`Current: ${currentEffect}`, panelX + panelWidth / 2, upgradeY + i * upgradeSpacing + 20);

    // Cost and Buy Button
    if (upgrade.level < upgrade.maxLevel) {
      textSize(20);
      fill(255);
      text(`Cost: ${floor(upgrade.cost)} clicks`, panelX + panelWidth / 2, upgradeY + i * upgradeSpacing + 40);

      // Draw buy button only if affordable
      let buyButtonX = panelX + panelWidth / 2 - 40; // Center button in sidebar
      let buyButtonY = upgradeY + i * upgradeSpacing + 55; // Adjusted Y for button

      if (clickCount >= upgrade.cost) {
        fill(0, 200, 0); // Green for affordable
        rect(buyButtonX, buyButtonY, 80, 30, 5);
        fill(255);
        textSize(18);
        text("BUY", panelX + panelWidth / 2, buyButtonY + 15); // Centered text on button
      } else {
        fill(100); // Grey for unaffordable
        rect(buyButtonX, buyButtonY, 80, 30, 5);
        fill(255, 150);
        textSize(18);
        text("BUY", panelX + panelWidth / 2, buyButtonY + 15); // Centered text on button
      }
    } else {
      fill(150); // Grey for max level
      textSize(20);
      text("MAX LEVEL", panelX + panelWidth / 2, upgradeY + i * upgradeSpacing + 40);
    }
  }
}
Line-by-line explanation (27 lines)

🔧 Subcomponents:

function-call Panel Title text("Upgrades", panelX + panelWidth / 2, 30);

Displays 'Upgrades' as the heading at the top of the sidebar

for-loop Upgrade Display Loop for (let i = 0; i < upgrades.length; i++) {

Iterates through each upgrade in the upgrades array to display its name, level, cost, and buy button

calculation Effect Display Formatting let currentEffect = upgrade.id === "clickMultiplier" ? `${upgrade.effect}x` : `${upgrade.effect}/s`;

Formats the effect differently for click multiplier (shows as '2x', '4x') vs auto-clicker (shows as '1/s', '2/s')

conditional Button Color Based on Affordability if (clickCount >= upgrade.cost) {

Changes button color to green if the player has enough clicks, or grey if they cannot afford the upgrade

conditional Max Level Display if (upgrade.level < upgrade.maxLevel) {

Shows the buy button only if the upgrade hasn't reached max level; shows 'MAX LEVEL' text otherwise

let panelX = mainAreaWidth;
Sets the left edge of the sidebar to where the main area ends
let panelWidth = sidebarWidth;
Stores the sidebar width for use in positioning text and buttons
fill(255);
Sets the fill color to white for the title text
textSize(28);
Sets text size to 28 pixels for a prominent title
text("Upgrades", panelX + panelWidth / 2, 30);
Displays 'Upgrades' centered horizontally in the sidebar, 30 pixels from the top
textSize(20);
Sets text size to 20 pixels for upgrade names and labels
let upgradeY = 70;
Sets the starting Y position for the first upgrade (below the title)
let upgradeSpacing = 80;
Sets the vertical spacing between each upgrade's display area—80 pixels apart prevents overlap
for (let i = 0; i < upgrades.length; i++) {
Loops through each upgrade in the upgrades array, using i as the index
let upgrade = upgrades[i];
Stores the current upgrade object for easy reference within the loop
let currentEffect = upgrade.id === "clickMultiplier" ? `${upgrade.effect}x` : `${upgrade.effect}/s`;
Uses a ternary operator to format the effect display differently: click multiplier shows as '2x' or '4x', auto-clicker shows as '1/s' or '2/s'
text(`${upgrade.name} (Lvl ${upgrade.level}/${upgrade.maxLevel})`, panelX + panelWidth / 2, upgradeY + i * upgradeSpacing);
Displays the upgrade name and current level in format like 'Click Multiplier (Lvl 2/5)'
text(`Current: ${currentEffect}`, panelX + panelWidth / 2, upgradeY + i * upgradeSpacing + 20);
Displays the current effect in a smaller gray text, 20 pixels below the upgrade name
if (upgrade.level < upgrade.maxLevel) {
Only shows cost and buy button if the upgrade hasn't reached its maximum level
text(`Cost: ${floor(upgrade.cost)} clicks`, panelX + panelWidth / 2, upgradeY + i * upgradeSpacing + 40);
Displays the cost in clicks (rounded down to an integer) to purchase the next level
let buyButtonX = panelX + panelWidth / 2 - 40;
Calculates the left edge of the button, centered by subtracting half the button width (80/2=40)
let buyButtonY = upgradeY + i * upgradeSpacing + 55;
Positions the button 55 pixels below the upgrade name, with spacing accounted for
if (clickCount >= upgrade.cost) {
Checks if the player has enough clicks to afford this upgrade
fill(0, 200, 0);
Sets button color to green (RGB 0, 200, 0) when the upgrade is affordable
rect(buyButtonX, buyButtonY, 80, 30, 5);
Draws an 80x30 pixel button with 5-pixel rounded corners at the calculated position
text("BUY", panelX + panelWidth / 2, buyButtonY + 15);
Displays 'BUY' text centered on the button (the Y offset of 15 is half the button height)
} else {
If the player doesn't have enough clicks, show the unaffordable version
fill(100);
Sets button color to grey (RGB 100, 100, 100) when unaffordable
fill(255, 150);
Sets text color to semi-transparent white (white with reduced alpha) for the disabled button
} else {
If the upgrade has reached max level, show this instead
fill(150);
Sets text color to grey for the max level message
text("MAX LEVEL", panelX + panelWidth / 2, upgradeY + i * upgradeSpacing + 40);
Displays 'MAX LEVEL' where the cost would be, indicating the upgrade is fully purchased

mouseClicked()

mouseClicked() fires once every time the player clicks the mouse. This function handles all game input: detecting clicks on the circular video and awarding clicks with the multiplier bonus, and detecting clicks on buy buttons in the sidebar. Notice how the button position calculations are replicated from drawUpgradesPanel()—this is necessary so hit detection matches the drawn locations. The dist() function is a clever way to detect clicks inside a circle without complex math.

🔬 This detects clicks on the circular video using dist(). What happens if you change < to >? The condition flips—now clicking OUTSIDE the circle counts as a video click! Try it to see how distance-based collision detection works.

  if (dist(mouseX, mouseY, videoX + videoDiameter / 2, videoY + videoDiameter / 2) < videoDiameter / 2) {
    // Increment the click counter, applying click multiplier
    let clickMultiplier = upgrades.find(u => u.id === "clickMultiplier").effect;
    clickCount += clickMultiplier;

🔬 This is the purchase logic. What happens if you change upgrade.effect *= 2 to upgrade.effect += 2? Instead of doubling, each level adds 2 to the multiplier—try it and see how the progression changes from exponential to linear!

            clickCount -= upgrade.cost;
            upgrade.level++;
            // Increase effect based on upgrade type
            if (upgrade.id === "clickMultiplier") {
              upgrade.effect *= 2; // Double multiplier
            } else if (upgrade.id === "autoClicker") {
              upgrade.effect += 1; // Add 1 auto-click per second
            }
function mouseClicked() {
  // Check if the mouse click occurred within the bounds of the circular video
  if (dist(mouseX, mouseY, videoX + videoDiameter / 2, videoY + videoDiameter / 2) < videoDiameter / 2) {
    // Increment the click counter, applying click multiplier
    let clickMultiplier = upgrades.find(u => u.id === "clickMultiplier").effect;
    clickCount += clickMultiplier;
    console.log(`Clicked on video! Total Clicks: ${floor(clickCount)}`); // Optional: for debugging
  } else {
    // Check if click was in the upgrades sidebar
    let panelX = mainAreaWidth;
    let panelWidth = sidebarWidth;

    if (mouseX >= panelX && mouseX <= panelX + panelWidth &&
        mouseY >= 0 && mouseY <= height) { // Clicked anywhere in the sidebar
      // Loop through upgrades to check for buy button clicks
      let upgradeY = 70;
      let upgradeSpacing = 80;

      for (let i = 0; i < upgrades.length; i++) {
        let upgrade = upgrades[i];
        if (upgrade.level < upgrade.maxLevel) {
          // Check if click was on the buy button
          let buyButtonX = panelX + panelWidth / 2 - 40;
          let buyButtonY = upgradeY + i * upgradeSpacing + 55;
          let buyButtonWidth = 80;
          let buyButtonHeight = 30;

          if (clickCount >= upgrade.cost &&
              mouseX >= buyButtonX && mouseX <= buyButtonX + buyButtonWidth &&
              mouseY >= buyButtonY && mouseY <= buyButtonY + buyButtonHeight) {

            clickCount -= upgrade.cost;
            upgrade.level++;
            // Increase effect based on upgrade type
            if (upgrade.id === "clickMultiplier") {
              upgrade.effect *= 2; // Double multiplier
            } else if (upgrade.id === "autoClicker") {
              upgrade.effect += 1; // Add 1 auto-click per second
            }
            // Increase cost for next level
            upgrade.cost *= upgrade.costIncreaseFactor;
            console.log(`Bought ${upgrade.name}! New level: ${upgrade.level}, Clicks left: ${floor(clickCount)}`);
            break; // Exit loop after purchasing one upgrade
          }
        }
      }
    }
  }
}
Line-by-line explanation (25 lines)

🔧 Subcomponents:

conditional Video Click Detection if (dist(mouseX, mouseY, videoX + videoDiameter / 2, videoY + videoDiameter / 2) < videoDiameter / 2) {

Uses distance calculation to check if the click landed inside the circular video

calculation Fetch Click Multiplier let clickMultiplier = upgrades.find(u => u.id === "clickMultiplier").effect;

Searches the upgrades array to find the current click multiplier bonus

conditional Sidebar Click Detection if (mouseX >= panelX && mouseX <= panelX + panelWidth && mouseY >= 0 && mouseY <= height) {

Checks if the click landed anywhere in the sidebar region

for-loop Buy Button Loop for (let i = 0; i < upgrades.length; i++) {

Iterates through upgrades to find which buy button was clicked

conditional Purchase Logic if (clickCount >= upgrade.cost && mouseX >= buyButtonX && mouseX <= buyButtonX + buyButtonWidth && mouseY >= buyButtonY && mouseY <= buyButtonY + buyButtonHeight) {

Verifies the player can afford the upgrade and the click landed on a specific button, then executes the purchase

if (dist(mouseX, mouseY, videoX + videoDiameter / 2, videoY + videoDiameter / 2) < videoDiameter / 2) {
Uses the dist() function to calculate the distance from the click to the center of the circular video, comparing it to the radius (diameter/2) to detect if the click landed inside the circle
let clickMultiplier = upgrades.find(u => u.id === "clickMultiplier").effect;
Searches the upgrades array for the object with id 'clickMultiplier' and stores its current effect value
clickCount += clickMultiplier;
Adds the click multiplier value to the click count (if multiplier is 2, adds 2 clicks per click)
console.log(`Clicked on video! Total Clicks: ${floor(clickCount)}`);
Logs a message to the browser console for debugging—helps verify clicks are being registered
let panelX = mainAreaWidth;
Stores the left edge of the sidebar for comparison with mouseX
let panelWidth = sidebarWidth;
Stores the sidebar width for use in the boundary check
if (mouseX >= panelX && mouseX <= panelX + panelWidth && mouseY >= 0 && mouseY <= height) {
Checks if the click is within the horizontal bounds of the sidebar and vertical bounds of the canvas
let upgradeY = 70;
Replicates the starting Y position from drawUpgradesPanel() to match button positions
let upgradeSpacing = 80;
Replicates the spacing from drawUpgradesPanel() so button positions match their drawn location
for (let i = 0; i < upgrades.length; i++) {
Loops through each upgrade to check if its buy button was clicked
if (upgrade.level < upgrade.maxLevel) {
Only checks buy button if the upgrade hasn't reached max level
let buyButtonX = panelX + panelWidth / 2 - 40;
Replicates the button position calculation from drawUpgradesPanel() to know where the button is drawn
let buyButtonY = upgradeY + i * upgradeSpacing + 55;
Replicates the vertical position calculation to match the drawn button's location
let buyButtonWidth = 80;
Stores the button width for collision checking (must match the rect() call in drawUpgradesPanel)
let buyButtonHeight = 30;
Stores the button height for collision checking (must match the rect() call in drawUpgradesPanel)
if (clickCount >= upgrade.cost && mouseX >= buyButtonX && mouseX <= buyButtonX + buyButtonWidth && mouseY >= buyButtonY && mouseY <= buyButtonY + buyButtonHeight) {
Checks three conditions: (1) player has enough clicks, (2) click is within button's horizontal bounds, (3) click is within button's vertical bounds
clickCount -= upgrade.cost;
Deducts the upgrade cost from the player's click count
upgrade.level++;
Increments the upgrade's level counter
if (upgrade.id === "clickMultiplier") {
Checks if this is a click multiplier upgrade
upgrade.effect *= 2;
Doubles the multiplier effect (1x becomes 2x, 2x becomes 4x, etc.)
} else if (upgrade.id === "autoClicker") {
Checks if this is an auto-clicker upgrade
upgrade.effect += 1;
Adds 1 to the auto-clicker effect (0/s becomes 1/s, 1/s becomes 2/s, etc.)
upgrade.cost *= upgrade.costIncreaseFactor;
Multiplies the cost by the costIncreaseFactor (1.5 for multiplier, 2 for auto-clicker) so the next level costs more
console.log(`Bought ${upgrade.name}! New level: ${upgrade.level}, Clicks left: ${floor(clickCount)}`);
Logs the purchase to the console for debugging
break;
Exits the loop after purchasing one upgrade so only one upgrade can be bought per click

windowResized()

windowResized() is a special p5.js function that automatically fires whenever the browser window is resized. In this sketch, it ensures the entire responsive layout recalculates: the canvas size, the sidebar and main area proportions, the video position and size, and the mask buffer. This is the key to making the game work at any screen size without stretching or breaking.

function windowResized() {
  resizeCanvas(windowWidth, windowHeight);
  // Recalculate layout dimensions for sidebar and main area
  calculateLayoutDimensions();
  // Recalculate video bounds based on new main area width
  calculateVideoBounds();
  // Resize the mask buffer as well to match the new video diameter
  maskBuffer.resizeCanvas(videoDiameter, videoDiameter);
}
Line-by-line explanation (4 lines)

🔧 Subcomponents:

function-call Canvas Resize resizeCanvas(windowWidth, windowHeight);

Resizes the canvas to match the new window dimensions when the browser is resized

function-call Layout Recalculation calculateLayoutDimensions();

Recalculates sidebar and main area widths based on the new canvas width

function-call Video Bounds Recalculation calculateVideoBounds();

Recalculates the circular video position and size to center it in the new main area

function-call Mask Buffer Resize maskBuffer.resizeCanvas(videoDiameter, videoDiameter);

Resizes the graphics buffer used for the circular mask to match the new video diameter

resizeCanvas(windowWidth, windowHeight);
Built-in p5.js function that resizes the canvas to fill the browser window when it changes size
calculateLayoutDimensions();
Calls the helper function to recalculate sidebarWidth and mainAreaWidth with the new canvas width
calculateVideoBounds();
Calls the helper function to recalculate videoDiameter, videoX, and videoY based on the new main area size
maskBuffer.resizeCanvas(videoDiameter, videoDiameter);
Resizes the graphics buffer to match the new video diameter so the mask stays the correct size

📦 Key Variables

video object

Stores the webcam video capture object; used to get frames for display on the circular video feed

let video;
clickCount number

Tracks the total number of clicks the player has earned (can be fractional due to auto-clickers); spent on upgrades

let clickCount = 0;
videoDiameter number

Stores the calculated diameter (in pixels) of the circular video feed; recalculated on window resize

let videoDiameter;
videoX number

Stores the left edge position (x-coordinate) of the circular video on the canvas

let videoX;
videoY number

Stores the top edge position (y-coordinate) of the circular video on the canvas

let videoY;
maskBuffer object

A p5.Graphics object used as an off-screen buffer; holds the circular mask applied to the video

let maskBuffer;
sidebarWidth number

Stores the width (in pixels) allocated to the upgrades sidebar; calculated as 25% of canvas width

let sidebarWidth;
mainAreaWidth number

Stores the width (in pixels) allocated to the main game area; calculated as 75% of canvas width

let mainAreaWidth;
upgrades array

Array of upgrade objects, each containing id, name, cost, effect, level, maxLevel, and costIncreaseFactor; represents the upgrade system

let upgrades = [ { id: "clickMultiplier", name: "Click Multiplier", cost: 10, effect: 1, level: 0, maxLevel: 5, costIncreaseFactor: 1.5 }, ... ];

🔧 Potential Improvements (5)

Here are some ways this code could be enhanced:

BUG mouseClicked() and drawUpgradesPanel()

Button position calculations are duplicated in two places—if you change upgradeY or upgradeSpacing in one function, the other breaks

💡 Extract upgradeY and upgradeSpacing as global variables or helper functions so they're calculated once and shared by both functions. This prevents desynchronization.

PERFORMANCE draw()

video.get() creates a new image object every frame, then resize() and mask() operations are performed on it—this is computationally expensive for 60 FPS

💡 Cache the resized/masked video in a global variable and only recalculate when videoDiameter changes (in windowResized), rather than every frame

FEATURE upgrades array

The nextEffect variable is calculated in drawUpgradesPanel() but never displayed to the player

💡 Add a line like `text('Next: ${nextEffect}', ...)` to show what the next level's effect will be, helping players make informed upgrade decisions

STYLE draw() and drawUpgradesPanel()

Text size and color are changed frequently throughout the code, making it hard to maintain a consistent visual style

💡 Define text properties as constants at the top (titleSize = 28, upgradeSize = 20, etc.) and use them throughout, making global style changes easier

BUG mouseClicked()

If a player clicks on a non-clickable area of the sidebar (e.g., title text), the click does nothing but also doesn't register on the video—the else-if structure prevents fallback behavior

💡 Use a separate if-statement for sidebar clicks instead of else-if, allowing clicks outside both regions to still be checked for the video

🔄 Code Flow

Code flow showing setup, draw, calculatevideobounds, calculatelayoutdimensions, drawupgradespanel, mouseclicked, windowresized

💡 Click on function names in the diagram to jump to their code

graph TD start[Start] --> setup[setup] setup --> canvas-creation[Canvas Setup] setup --> webcam-capture[Webcam Capture] setup --> mask-buffer-creation[Mask Buffer Creation] setup --> calculatevideobounds[Calculate Video Bounds] setup --> calculatelayoutdimensions[Calculate Layout Dimensions] setup --> draw[draw loop] click setup href "#fn-setup" click canvas-creation href "#sub-canvas-creation" click webcam-capture href "#sub-webcam-capture" click mask-buffer-creation href "#sub-mask-buffer-creation" click calculatevideobounds href "#fn-calculatevideobounds" click calculatelayoutdimensions href "#fn-calculatelayoutdimensions" draw --> auto-clicker-logic[Auto-Clicker Income] draw --> video-masking[Circular Video Masking Pipeline] draw --> click-count-display[Click Count Display] draw --> drawupgradespanel[Draw Upgrades Panel] click draw href "#fn-draw" click auto-clicker-logic href "#sub-auto-clicker-logic" click video-masking href "#sub-video-masking" click click-count-display href "#sub-click-count-display" click drawupgradespanel href "#fn-drawupgradespanel" drawupgradespanel --> title-display[Panel Title] drawupgradespanel --> upgrade-loop[Upgrade Display Loop] upgrade-loop --> effect-formatting[Effect Display Formatting] upgrade-loop --> button-affordability-check[Button Color Based on Affordability] upgrade-loop --> max-level-check[Max Level Display] click title-display href "#sub-title-display" click upgrade-loop href "#sub-upgrade-loop" click effect-formatting href "#sub-effect-formatting" click button-affordability-check href "#sub-button-affordability-check" click max-level-check href "#sub-max-level-check" mouseclicked[mouseClicked] --> video-click-detection[Video Click Detection] mouseclicked --> sidebar-click-detection[Sidebar Click Detection] sidebar-click-detection --> button-click-loop[Buy Button Loop] button-click-loop --> purchase-logic[Purchase Logic] click mouseclicked href "#fn-mouseclicked" click video-click-detection href "#sub-video-click-detection" click sidebar-click-detection href "#sub-sidebar-click-detection" click button-click-loop href "#sub-button-click-loop" click purchase-logic href "#sub-purchase-logic" windowresized[windowResized] --> canvas-resize[Canvas Resize] windowresized --> layout-recalc[Layout Recalculation] windowresized --> video-recalc[Video Bounds Recalculation] windowresized --> buffer-resize[Mask Buffer Resize] click windowresized href "#fn-windowresized" click canvas-resize href "#sub-canvas-resize" click layout-recalc href "#sub-layout-recalc" click video-recalc href "#sub-video-recalc" click buffer-resize href "#sub-buffer-resize"

❓ Frequently Asked Questions

What visual elements are featured in the p5.js test sketch?

The sketch captures webcam video and displays it as a circular image overlay on the canvas, creating an engaging visual experience.

How can users interact with the test sketch?

Users can click on the canvas to increase their click count and purchase upgrades that enhance their clicking power or provide automatic clicks.

What creative coding concepts does the test sketch demonstrate?

The sketch showcases interactive programming through webcam capture and an upgrade system, highlighting concepts like state management and responsive design.

Preview

test - p5.js creative coding sketch preview
Sketch Preview
Code flow diagram showing the structure of test - Code flow showing setup, draw, calculatevideobounds, calculatelayoutdimensions, drawupgradespanel, mouseclicked, windowresized
Code Flow Diagram
