
theme of the day

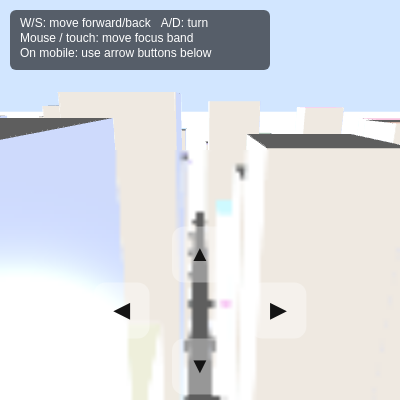
This sketch creates an immersive 3D walkable city rendered in WEBGL with a tilt-shift effect that simulates a miniature diorama. Users navigate using keyboard (W/A/S/D) or on-screen buttons, while the tilt-shift effect blurs everything outside a horizontal band centered on the mouse/touch position, creating cinematic depth-of-field.

🧪 Try This!

Experiment with the code by making these changes:

  1. Make the city denser — Increase cityCols and cityRows to create a much larger, more crowded cityscape—more buildings to explore
  2. Extreme tilt-shift with a narrow band — Shrink the focus band so only a razor-thin slice is sharp—the miniature effect becomes more dramatic and surreal
  3. Change the sky to sunset — Swap the blue sky for warm sunset orange tones—changes the entire mood of the city
  4. Make buildings taller and more varied — Increase the max height multiplier so buildings tower much higher—more dramatic skyline
  5. Stronger blur effect
  6. Boost camera speed for racing through city — Double the base walking speed so you zip through buildings much faster—more exhilarating
Prefer the full editor? Open it there →

📖 About This Sketch

This sketch creates an interactive 3D city you can walk through in first-person perspective. The scene uses WEBGL for fast 3D rendering, procedural building generation for visual variety, and a tilt-shift effect that creates the optical illusion of a tiny model by keeping a horizontal band sharp while blurring everything above and below. The result feels cinematic and miniature-like, even though it's a full-size 3D scene.

The code is organized into several layers: city generation that creates a grid of randomized buildings, a camera system with keyboard/touch movement controls, a dual-buffer rendering pipeline that creates the blur effect without expensive post-processing, and a HUD that displays instructions. By studying it, you will learn how to combine WEBGL rendering, off-screen buffers for effects, camera control, and interactive input handling into a cohesive interactive experience.

⚙️ How It Works

  1. When setup() runs, it creates two off-screen buffers: a WEBGL buffer for the 3D scene and a smaller 2D buffer for blurring. The city is generated as a grid of buildings with random widths, depths, and heights, plus roads running between them.
  2. On every frame, handleMovement() updates the camera position and rotation based on keyboard input (WASD) or on-screen button touches, keeping the camera constrained within the city bounds.
  3. drawCityToBuffer() renders the 3D city into the WEBGL buffer using perspective camera, directional lighting for depth, a ground plane, roads, and all buildings with slightly shinier material for taller structures.
  4. A cheap blur effect is created by copying the full 3D buffer into a smaller 2D buffer (downscaling reduces detail, upscaling blurs it), then displaying this blurred version full-screen.
  5. The tilt-shift magic happens when the sharp original buffer is overlaid on top of the blurred version in a horizontal band centered on the mouse or touch position, creating selective focus that mimics a miniature model.
  6. The HUD displays keyboard instructions and draws four arrow buttons for touch-based movement that activate when tapped, making the sketch work on mobile devices.

🎓 Concepts You'll Learn

WEBGL 3D renderingOff-screen buffers and compositingCamera control and perspectiveProcedural generationDepth-of-field and post-processing effectsTouch and keyboard input handling

📝 Code Breakdown

setup()

setup() runs once when the sketch starts. Here we initialize the canvas, create the off-screen buffers that power the tilt-shift effect, generate the city, and position the camera. The dual-buffer approach is key: one buffer holds the sharp 3D render, the other holds a blurred version, and draw() composites them together.

function setup() {
  createCanvas(windowWidth, windowHeight);
  pixelDensity(1); // keep consistent across devices

  // Off-screen WEBGL buffer for the 3D scene
  cityBuffer = createGraphics(width, height, WEBGL);
  cityBuffer.pixelDensity(1);

  // Smaller buffer for cheap blur (downscale then upscale)
  const blurScale = 4;
  blurBuffer = createGraphics(
    Math.max(1, Math.floor(width / blurScale)),
    Math.max(1, Math.floor(height / blurScale))
  );

  initCity();
  initCamera();
}
Line-by-line explanation (7 lines)

🔧 Subcomponents:

calculation Canvas initialization createCanvas(windowWidth, windowHeight);

Creates a full-window canvas that will display the final composited image

calculation WEBGL buffer creation cityBuffer = createGraphics(width, height, WEBGL);

Creates an off-screen 3D rendering target where the city scene is drawn

calculation Blur buffer creation blurBuffer = createGraphics( Math.max(1, Math.floor(width / blurScale)), Math.max(1, Math.floor(height / blurScale)) );

Creates a downscaled 2D buffer used to create the blur effect via pixelation

createCanvas(windowWidth, windowHeight);
Creates the main canvas at full window size where the final tilt-shift image will be displayed
pixelDensity(1);
Sets pixel density to 1 to keep rendering consistent across devices (prevents extra upscaling on high-DPI screens)
cityBuffer = createGraphics(width, height, WEBGL);
Creates a WEBGL off-screen buffer at full resolution—this is where the 3D city gets rendered before effects are applied
const blurScale = 4;
Defines a downscaling factor—4 means the blur buffer is 1/4 the resolution of the main canvas
blurBuffer = createGraphics( Math.max(1, Math.floor(width / blurScale)), Math.max(1, Math.floor(height / blurScale)) );
Creates a small 2D buffer that will store the downscaled (blurry) version of the city for compositing
initCity();
Calls the function that generates all buildings and lays out the city grid
initCamera();
Calls the function that positions the camera at the starting viewpoint
initCity()

initCity() generates the city layout as a grid of buildings with randomized dimensions. It calculates spacing based on canvas size and city grid dimensions, centers the grid at world origin, and creates each building with random width, depth, height, and soft color. The result is a procedurally-generated city that feels organic despite being grid-based.

🔬 These three lines control building width and depth. What happens if you change the multipliers to * 0.3 and * 1.5 instead? Will buildings become more uniform or more varied?

      const baseSize = citySpacing * 0.6;
      const w = random(baseSize * 0.7, baseSize * 1.3);
      const d = random(baseSize * 0.7, baseSize * 1.3);
function initCity() {
  // Generate a grid of box "buildings" with varied sizes
  buildings = [];

  citySpacing = (min(width, height) / max(cityCols, cityRows)) * 0.7;
  cityStartX = -((cityCols - 1) * citySpacing) / 2;
  cityStartZ = -((cityRows - 1) * citySpacing) / 2;

  for (let i = 0; i < cityCols; i++) {
    for (let j = 0; j < cityRows; j++) {
      const x = cityStartX + i * citySpacing;
      const z = cityStartZ + j * citySpacing;

      const baseSize = citySpacing * 0.6;
      const w = random(baseSize * 0.7, baseSize * 1.3);
      const d = random(baseSize * 0.7, baseSize * 1.3);
      const h = random(citySpacing * 0.9, citySpacing * 3.5);

      // Soft, slightly desaturated building colors
      const col = color(
        random(170, 230),
        random(170, 230),
        random(170, 240)
      );

      buildings.push({ x, z, w, d, h, col });
    }
  }
}
Line-by-line explanation (13 lines)

🔧 Subcomponents:

calculation Grid spacing calculation citySpacing = (min(width, height) / max(cityCols, cityRows)) * 0.7;

Calculates how far apart buildings should be based on canvas size and city dimensions

calculation Grid centering cityStartX = -((cityCols - 1) * citySpacing) / 2; cityStartZ = -((cityRows - 1) * citySpacing) / 2;

Centers the city grid at world origin (0, 0) so it's symmetric around the camera

for-loop Building generation loop for (let i = 0; i < cityCols; i++) { for (let j = 0; j < cityRows; j++) {

Nested loops that iterate through every grid position to create a building at each spot

calculation Randomized building dimensions const w = random(baseSize * 0.7, baseSize * 1.3); const d = random(baseSize * 0.7, baseSize * 1.3); const h = random(citySpacing * 0.9, citySpacing * 3.5);

Creates variety in building sizes—widths and depths vary ±30%, heights range from short to very tall

buildings = [];
Clears the buildings array to start fresh (needed when called from windowResized)
citySpacing = (min(width, height) / max(cityCols, cityRows)) * 0.7;
Calculates spacing between buildings based on canvas size and grid dimensions, scaled down to 70% to leave room between rows
cityStartX = -((cityCols - 1) * citySpacing) / 2;
Calculates the X position of the first column so the entire grid is centered at X = 0
cityStartZ = -((cityRows - 1) * citySpacing) / 2;
Calculates the Z position of the first row so the entire grid is centered at Z = 0
for (let i = 0; i < cityCols; i++) {
Outer loop iterates through each column of the city grid
for (let j = 0; j < cityRows; j++) {
Inner loop iterates through each row—together these create every grid position
const x = cityStartX + i * citySpacing;
Calculates X position for this building by adding column index times spacing to the starting X
const z = cityStartZ + j * citySpacing;
Calculates Z position for this building by adding row index times spacing to the starting Z
const baseSize = citySpacing * 0.6;
Sets a reference size for buildings as 60% of the spacing—this provides a ratio for random variations
const w = random(baseSize * 0.7, baseSize * 1.3);
Randomizes building width between 70% and 130% of base size, creating visual variety
const h = random(citySpacing * 0.9, citySpacing * 3.5);
Randomizes building height from nearly one unit tall to 3.5 units, creating a varied skyline
const col = color( random(170, 230), random(170, 230), random(170, 240) );
Creates a color for the building by randomizing R, G, and B channels in the 170-240 range, producing soft, slightly desaturated tones
buildings.push({ x, z, w, d, h, col });
Stores all building properties as a single object in the buildings array for later rendering

initCamera()

initCamera() sets the starting viewpoint and orientation. It positions the camera eye-level above the ground, centered horizontally, and looking into the city from the front. This is called once at startup and again when the window is resized.

function initCamera() {
  // Start slightly above ground, looking into the city from the front
  camYaw = 0;       // 0 = looking toward -Z
  camY = 140;       // ground is at Y = 200 (Y+ is downward)
  const cityDepth = (cityRows - 1) * citySpacing;
  const frontZ = cityStartZ + cityDepth / 2 + citySpacing * 4;
  camX = 0;
  camZ = frontZ;
}
Line-by-line explanation (6 lines)

🔧 Subcomponents:

calculation Yaw initialization camYaw = 0;

Sets initial camera rotation to 0 radians, looking straight ahead toward -Z axis

calculation Camera height camY = 140;

Sets camera height to 140 units; ground is at 200, so camera is 60 units above ground (eye level)

calculation Starting position const cityDepth = (cityRows - 1) * citySpacing; const frontZ = cityStartZ + cityDepth / 2 + citySpacing * 4; camX = 0; camZ = frontZ;

Positions camera at the front edge of the city, centered horizontally, looking into the cityscape

camYaw = 0;
Sets initial camera rotation to 0 radians; in this sketch, yaw is rotation around the Y axis
camY = 140;
Sets camera Y position to 140; since ground is at Y=200 in WEBGL, this places the camera 60 units above the ground (a comfortable eye-level height)
const cityDepth = (cityRows - 1) * citySpacing;
Calculates the total depth (Z extent) of the city by multiplying the number of rows minus 1 by spacing
const frontZ = cityStartZ + cityDepth / 2 + citySpacing * 4;
Calculates a starting Z position 4 city blocks in front of the city center, so the camera begins looking into the skyline from a distance
camX = 0;
Sets initial camera X position to 0, which is the center of the city horizontally
camZ = frontZ;
Sets initial camera Z position to the calculated front position, placing the viewer in front of the city looking in

handleMovement()

handleMovement() processes keyboard and touch input each frame to update the camera position and rotation. It converts keyboard codes (87=W, 65=A, etc.) into direction vectors, checks for sprint mode (Shift), and constrains the camera to stay within the city bounds. This function is called every frame from draw().

🔬 These lines convert yaw angle into a direction vector. What happens if you swap them or remove the negative sign on the cosine? Walk forward and see if the direction changes.

  const forwardX = Math.sin(camYaw);
  const forwardZ = -Math.cos(camYaw);
function handleMovement() {
  const baseSpeed = 8;
  const rotSpeed = 0.04;

  // Rotate with A/D or left/right on-screen buttons
  if (keyIsDown(65) || touchMove.left) { // A
    camYaw -= rotSpeed;
  }
  if (keyIsDown(68) || touchMove.right) { // D
    camYaw += rotSpeed;
  }

  // Move forward/back with W/S or up/down on-screen buttons
  let speed = baseSpeed;
  if (keyIsDown(SHIFT)) {
    speed *= 1.8;
  }

  const forwardX = Math.sin(camYaw);
  const forwardZ = -Math.cos(camYaw);

  if (keyIsDown(87) || touchMove.forward) { // W
    camX += forwardX * speed;
    camZ += forwardZ * speed;
  }
  if (keyIsDown(83) || touchMove.back) { // S
    camX -= forwardX * speed;
    camZ -= forwardZ * speed;
  }

  // Keep camera roughly within the city area
  if (citySpacing) {
    const margin = citySpacing * 3;
    const minX = cityStartX - margin;
    const maxX = cityStartX + (cityCols - 1) * citySpacing + margin;
    const minZ = cityStartZ - margin;
    const maxZ = cityStartZ + (cityRows - 1) * citySpacing + margin;
    camX = constrain(camX, minX, maxX);
    camZ = constrain(camZ, minZ, maxZ);
  }
}
Line-by-line explanation (19 lines)

🔧 Subcomponents:

conditional Rotation input check if (keyIsDown(65) || touchMove.left) { // A camYaw -= rotSpeed; } if (keyIsDown(68) || touchMove.right) { // D camYaw += rotSpeed; }

Checks for A/D keys or touch button input and rotates camera left or right

conditional Shift key sprint boost if (keyIsDown(SHIFT)) { speed *= 1.8; }

Multiplies movement speed by 1.8 when Shift is held, allowing faster traversal

calculation Forward direction calculation const forwardX = Math.sin(camYaw); const forwardZ = -Math.cos(camYaw);

Converts yaw angle into X and Z components so movement always goes in the direction the camera is facing

conditional Forward/backward movement if (keyIsDown(87) || touchMove.forward) { // W camX += forwardX * speed; camZ += forwardZ * speed; } if (keyIsDown(83) || touchMove.back) { // S camX -= forwardX * speed; camZ -= forwardZ * speed; }

Checks for W/S keys or touch buttons and moves camera in the direction it's facing (or backward)

conditional Camera boundary constraint if (citySpacing) { const margin = citySpacing * 3; const minX = cityStartX - margin; const maxX = cityStartX + (cityCols - 1) * citySpacing + margin; const minZ = cityStartZ - margin; const maxZ = cityStartZ + (cityRows - 1) * citySpacing + margin; camX = constrain(camX, minX, maxX); camZ = constrain(camZ, minZ, maxZ); }

Limits camera movement to a region roughly the size of the city plus a 3-unit margin to prevent getting lost

const baseSpeed = 8;
Sets a constant for normal movement speed—8 pixels per frame
const rotSpeed = 0.04;
Sets a constant for rotation speed—0.04 radians per frame when turning
if (keyIsDown(65) || touchMove.left) { // A
Checks if the A key (65) is pressed OR the left on-screen button is active; if true, rotate left
camYaw -= rotSpeed;
Subtracts from yaw (the rotation angle), turning the camera counterclockwise
if (keyIsDown(68) || touchMove.right) { // D
Checks if the D key (68) is pressed OR the right on-screen button is active; if true, rotate right
camYaw += rotSpeed;
Adds to yaw, turning the camera clockwise
let speed = baseSpeed;
Initializes speed variable with the base speed value
if (keyIsDown(SHIFT)) {
Checks if Shift key is held down
speed *= 1.8;
Multiplies speed by 1.8, enabling sprint mode for faster movement
const forwardX = Math.sin(camYaw);
Converts yaw angle to an X component using sine—this is the horizontal direction the camera faces
const forwardZ = -Math.cos(camYaw);
Converts yaw angle to a Z component using negative cosine—combined with forwardX, this forms a direction vector
if (keyIsDown(87) || touchMove.forward) { // W
Checks if W key (87) is pressed OR forward on-screen button is active
camX += forwardX * speed;
Moves camera forward by adding speed times the forward X direction to current X position
camZ += forwardZ * speed;
Moves camera forward by adding speed times the forward Z direction to current Z position
if (keyIsDown(83) || touchMove.back) { // S
Checks if S key (83) is pressed OR back on-screen button is active
camX -= forwardX * speed;
Moves camera backward by subtracting the forward direction
const margin = citySpacing * 3;
Calculates a margin of 3 city block spacings outside the city boundary
camX = constrain(camX, minX, maxX);
Clamps camera X position between the minimum and maximum boundaries so it stays in/near the city
camZ = constrain(camZ, minZ, maxZ);
Clamps camera Z position between the minimum and maximum boundaries

drawCityToBuffer()

drawCityToBuffer() is the core 3D rendering function. It renders the entire city scene into the off-screen WEBGL buffer at full resolution. It sets up camera, lighting, and perspective, then draws the ground plane, roads, and all buildings. This sharp, full-quality render is later composited with a blurred version to create the tilt-shift effect.

function drawCityToBuffer() {
  const g = cityBuffer;

  g.background(210, 230, 255); // soft sky color
  g.noStroke();

  // --- Camera on the off-screen WEBGL buffer ---
  // Positive Y is *down* in p5 WEBGL, so to look slightly DOWN
  // toward the ground we use centerY > camY.
  const lookDist = citySpacing * 4; // how far ahead we look
  const centerX = camX + Math.sin(camYaw) * lookDist;
  const centerZ = camZ - Math.cos(camYaw) * lookDist;
  const centerY = camY + 20; // look slightly downward

  // See p5.camera reference: https://p5js.org/reference/#/p5/camera
  g.camera(
    camX, camY, camZ,     // eye
    centerX, centerY, centerZ, // center we're looking at
    0, 1, 0               // up vector
  );

  // Perspective with generous near/far so nothing gets clipped
  // See p5.perspective: https://p5js.org/reference/#/p5/perspective
  const fov = PI / 3;
  g.perspective(fov, width / height, 1, 10000);

  // Lighting
  g.ambientLight(80);
  // Warm directional "sunlight" from above-right
  g.directionalLight(255, 245, 230, 0.5, -1, -0.3);
  // Cool fill light from the opposite side
  g.directionalLight(180, 200, 255, -0.3, -0.5, 0.4);

  // Ground plane
  g.push();
  g.translate(0, 200, 0);
  g.rotateX(HALF_PI);
  g.ambientMaterial(220, 230, 220);
  g.plane(4000, 4000);
  g.pop();

  // Roads along Z (horizontal streets)
  const roadHeight = 4;
  const roadThickness = citySpacing * 0.28;
  g.ambientMaterial(60);
  for (let j = 0; j <= cityRows; j++) {
    const z = cityStartZ - citySpacing * 0.5 + j * citySpacing;
    g.push();
    g.translate(0, 200 - roadHeight / 2, z);
    g.box((cityCols + 2) * citySpacing, roadHeight, roadThickness);
    g.pop();
  }

  // Roads along X (vertical streets)
  for (let i = 0; i <= cityCols; i++) {
    const x = cityStartX - citySpacing * 0.5 + i * citySpacing;
    g.push();
    g.translate(x, 200 - roadHeight / 2, 0);
    g.box(roadThickness, roadHeight, (cityRows + 2) * citySpacing);
    g.pop();
  }

  // Draw buildings
  for (let b of buildings) {
    g.push();
    // 200 is "ground" Y; center boxes so bases sit on the ground
    g.translate(b.x, 200 - b.h / 2, b.z);

    // Make taller buildings a bit shinier (glass towers)
    const isTall = b.h > citySpacing * 2.4;
    if (isTall) {
      g.specularMaterial(
        red(b.col) + 20,
        green(b.col) + 20,
        blue(b.col) + 20
      );
      g.shininess(40);
    } else {
      g.ambientMaterial(b.col);
    }

    g.box(b.w, b.h, b.d);

    // Darker roof for contrast
    g.push();
    g.translate(0, -b.h / 2 + 1, 0);
    g.ambientMaterial(
      red(b.col) * 0.7,
      green(b.col) * 0.7,
      blue(b.col) * 0.7
    );
    g.box(b.w * 0.98, 2, b.d * 0.98);
    g.pop();

    g.pop();
  }
}
Line-by-line explanation (30 lines)

🔧 Subcomponents:

calculation Background and fill settings g.background(210, 230, 255); // soft sky color g.noStroke();

Sets background to soft blue sky and disables strokes for all shapes

calculation Camera configuration g.camera( camX, camY, camZ, centerX, centerY, centerZ, 0, 1, 0 );

Sets up the 3D camera with eye position, look-at point, and up vector

calculation Perspective configuration g.perspective(fov, width / height, 1, 10000);

Sets field-of-view, aspect ratio, and near/far clipping planes

calculation Lighting setup g.ambientLight(80); g.directionalLight(255, 245, 230, 0.5, -1, -0.3); g.directionalLight(180, 200, 255, -0.3, -0.5, 0.4);

Adds base ambient light plus warm sunlight and cool fill light for depth

calculation Ground plane rendering g.push(); g.translate(0, 200, 0); g.rotateX(HALF_PI); g.ambientMaterial(220, 230, 220); g.plane(4000, 4000); g.pop();

Draws a large ground plane at Y=200 with a light gray material

for-loop Horizontal roads loop for (let j = 0; j <= cityRows; j++) {

Loops through each row to draw horizontal streets

for-loop Vertical roads loop for (let i = 0; i <= cityCols; i++) {

Loops through each column to draw vertical streets

for-loop Buildings rendering loop for (let b of buildings) {

Iterates through all buildings to render them with appropriate materials

const g = cityBuffer;
Alias the WEBGL buffer as 'g' for shorter code—all drawing now happens to this off-screen buffer
g.background(210, 230, 255);
Clears the WEBGL buffer with a soft light-blue sky color (RGB: 210, 230, 255)
g.noStroke();
Disables outlines on all subsequent shapes so buildings and roads have clean faces
const lookDist = citySpacing * 4;
Sets how far ahead of the camera position the camera looks—4 city blocks in the facing direction
const centerX = camX + Math.sin(camYaw) * lookDist;
Calculates the X coordinate of the look-at point by moving ahead in the yaw direction
const centerZ = camZ - Math.cos(camYaw) * lookDist;
Calculates the Z coordinate of the look-at point to form a complete forward direction vector
const centerY = camY + 20;
Sets look-at Y to 20 units below eye level, making the camera naturally look slightly downward
g.camera( camX, camY, camZ, centerX, centerY, centerZ, 0, 1, 0 );
Sets the camera: eye at (camX, camY, camZ), looking at (centerX, centerY, centerZ), with Y-axis as up
const fov = PI / 3;
Sets field-of-view to PI/3 (60 degrees)—a standard moderate angle that captures enough of the scene
g.perspective(fov, width / height, 1, 10000);
Sets perspective projection with FOV, aspect ratio, near plane at 1 unit, far plane at 10000 units
g.ambientLight(80);
Adds a base ambient light at brightness 80, ensuring all surfaces have some minimum illumination
g.directionalLight(255, 245, 230, 0.5, -1, -0.3);
Adds warm sunlight from above-right (direction vector 0.5, -1, -0.3) with warm color (255, 245, 230)
g.directionalLight(180, 200, 255, -0.3, -0.5, 0.4);
Adds cool fill light from the opposite side to brighten shadows and add dimensionality
g.translate(0, 200, 0);
Moves to Y=200, the ground level—the ground plane will be centered here
g.rotateX(HALF_PI);
Rotates 90 degrees around X axis so the plane faces upward to become the ground
g.ambientMaterial(220, 230, 220);
Sets the ground material to light gray, which responds to lighting
g.plane(4000, 4000);
Draws a 4000x4000 unit plane—large enough to underlay the entire city
const roadThickness = citySpacing * 0.28;
Calculates road thickness as 28% of spacing—narrow enough to feel like streets
g.ambientMaterial(60);
Sets road material to dark gray (60 brightness)
const z = cityStartZ - citySpacing * 0.5 + j * citySpacing;
Calculates Z position for this row's horizontal road
g.box((cityCols + 2) * citySpacing, roadHeight, roadThickness);
Draws a horizontal road: long in X direction, thin in Z and Y directions
const x = cityStartX - citySpacing * 0.5 + i * citySpacing;
Calculates X position for this column's vertical road
g.box(roadThickness, roadHeight, (cityRows + 2) * citySpacing);
Draws a vertical road: long in Z direction, thin in X and Y directions
const isTall = b.h > citySpacing * 2.4;
Determines if this building is considered 'tall' (over 2.4 times the spacing)
g.specularMaterial( red(b.col) + 20, green(b.col) + 20, blue(b.col) + 20 ); g.shininess(40);
For tall buildings, sets a shiny specular material (like glass) by brightening the color and increasing shininess
g.ambientMaterial(b.col);
For short buildings, uses a matte ambient material with the stored building color
g.box(b.w, b.h, b.d);
Draws the main building box with stored width, height, and depth
g.translate(0, -b.h / 2 + 1, 0);
Moves to the top of the building to add a roof
g.ambientMaterial( red(b.col) * 0.7, green(b.col) * 0.7, blue(b.col) * 0.7 );
Darkens the building color to 70% for the roof material
g.box(b.w * 0.98, 2, b.d * 0.98);
Draws a thin roof box slightly smaller than the building base to give a finished look

drawArrowButton()

drawArrowButton() is a helper function that renders a single on-screen control button. It's called four times from drawHUD() to create forward, back, left, and right movement buttons. The 'active' parameter controls the button's opacity—inactive buttons appear faded to indicate they're not being pressed.

function drawArrowButton(btn, label, active) {
  push();
  rectMode(CENTER);
  textAlign(CENTER, CENTER);

  fill(255, active ? 170 : 90);
  noStroke();
  rect(btn.x, btn.y, btn.size, btn.size, 12);

  fill(20);
  textSize(22);
  text(label, btn.x, btn.y + 1);
  pop();
}
Line-by-line explanation (10 lines)

🔧 Subcomponents:

calculation Rect mode configuration rectMode(CENTER); textAlign(CENTER, CENTER);

Sets rectangles to draw from center and text to center-align for consistent button layout

conditional Button color based on state fill(255, active ? 170 : 90);

Uses ternary operator to set button brightness—brighter (170 alpha) when active, dimmer (90) when inactive

calculation Button rectangle drawing rect(btn.x, btn.y, btn.size, btn.size, 12);

Draws a rounded square button at the button's position

calculation Button label text text(label, btn.x, btn.y + 1);

Draws the arrow symbol or label centered on the button

push();
Saves the current drawing state (colors, transforms, modes) so changes don't affect other drawings
rectMode(CENTER);
Sets rect() to draw from the center point instead of top-left, making button positioning easier
textAlign(CENTER, CENTER);
Sets text to align center-horizontally and center-vertically
fill(255, active ? 170 : 90);
Sets fill color to white (255) with alpha 170 if button is active, or alpha 90 if inactive—inactive buttons appear dimmer
noStroke();
Disables stroke on the button rectangle for a clean appearance
rect(btn.x, btn.y, btn.size, btn.size, 12);
Draws a square button centered at (btn.x, btn.y) with rounded corners (12 pixel radius)
fill(20);
Changes fill to dark gray (20 brightness) for the text label
textSize(22);
Sets text size to 22 pixels
text(label, btn.x, btn.y + 1);
Draws the label (arrow symbol like '▲') centered on the button, offset down by 1 pixel
pop();
Restores the saved drawing state so subsequent code isn't affected by this function's settings

drawHUD()

drawHUD() renders the heads-up display, including a semi-transparent instruction panel and four on-screen directional buttons. This is called every frame from draw() and positions buttons at the bottom of the screen for mobile users. The buttons activate when touched and show visual feedback via brightness changes.

function drawHUD() {
  push();

  // Instruction panel
  const pad = 10;
  const boxW = 260;
  const boxH = 60;
  fill(0, 150);
  noStroke();
  rect(pad, pad, boxW, boxH, 6);

  fill(255);
  textSize(12);
  textAlign(LEFT, TOP);
  text(
    "W/S: move forward/back   A/D: turn\n" +
    "Mouse / touch: move focus band\n" +
    "On mobile: use arrow buttons below",
    pad + 10,
    pad + 8
  );

  // On-screen movement buttons (for touch / mouse)
  const size = 56;
  const cx = width / 2;
  const cy = height - size * 1.6;

  uiButtons.forward = { x: cx, y: cy - size, size };
  uiButtons.back = { x: cx, y: cy + size, size };
  uiButtons.left = { x: cx - size * 1.4, y: cy, size };
  uiButtons.right = { x: cx + size * 1.4, y: cy, size };

  drawArrowButton(uiButtons.forward, "▲", touchMove.forward);
  drawArrowButton(uiButtons.back, "▼", touchMove.back);
  drawArrowButton(uiButtons.left, "◀", touchMove.left);
  drawArrowButton(uiButtons.right, "▶", touchMove.right);

  pop();
}
Line-by-line explanation (21 lines)

🔧 Subcomponents:

calculation Instruction panel fill(0, 150); noStroke(); rect(pad, pad, boxW, boxH, 6);

Draws a semi-transparent dark background panel for the instructions

calculation Instruction text text( "W/S: move forward/back A/D: turn\n" + "Mouse / touch: move focus band\n" + "On mobile: use arrow buttons below", pad + 10, pad + 8 );

Displays control instructions to the user

calculation Button position calculation const size = 56; const cx = width / 2; const cy = height - size * 1.6;

Calculates button size and center position for the control layout

calculation Individual button positions uiButtons.forward = { x: cx, y: cy - size, size }; uiButtons.back = { x: cx, y: cy + size, size }; uiButtons.left = { x: cx - size * 1.4, y: cy, size }; uiButtons.right = { x: cx + size * 1.4, y: cy, size };

Stores the position and size of each directional button

calculation Button rendering drawArrowButton(uiButtons.forward, "▲", touchMove.forward); drawArrowButton(uiButtons.back, "▼", touchMove.back); drawArrowButton(uiButtons.left, "◀", touchMove.left); drawArrowButton(uiButtons.right, "▶", touchMove.right);

Calls drawArrowButton() four times to render all directional buttons

push();
Saves drawing state
const pad = 10;
Sets padding of 10 pixels for the instruction panel
const boxW = 260;
Sets instruction box width to 260 pixels
const boxH = 60;
Sets instruction box height to 60 pixels
fill(0, 150);
Sets fill to black (0) with alpha 150, creating a semi-transparent background
rect(pad, pad, boxW, boxH, 6);
Draws the background panel at top-left with 6-pixel rounded corners
fill(255);
Changes fill to white for the text
textSize(12);
Sets text size to 12 pixels
textAlign(LEFT, TOP);
Sets text to align to left and top
const size = 56;
Sets each control button size to 56x56 pixels
const cx = width / 2;
Centers buttons horizontally at canvas midpoint
const cy = height - size * 1.6;
Positions buttons near the bottom of the canvas (1.6 button sizes from the bottom)
uiButtons.forward = { x: cx, y: cy - size, size };
Stores the up arrow button position (one size above center)
uiButtons.back = { x: cx, y: cy + size, size };
Stores the down arrow button position (one size below center)
uiButtons.left = { x: cx - size * 1.4, y: cy, size };
Stores the left arrow button position (1.4 sizes to the left of center)
uiButtons.right = { x: cx + size * 1.4, y: cy, size };
Stores the right arrow button position (1.4 sizes to the right of center)
drawArrowButton(uiButtons.forward, "▲", touchMove.forward);
Draws the up arrow, passing its stored position and current active state
drawArrowButton(uiButtons.back, "▼", touchMove.back);
Draws the down arrow
drawArrowButton(uiButtons.left, "◀", touchMove.left);
Draws the left arrow
drawArrowButton(uiButtons.right, "▶", touchMove.right);
Draws the right arrow
pop();
Restores drawing state

isInsideButton()

isInsideButton() is a collision detection helper that tests whether a point (px, py) is inside a square button. It performs axis-aligned bounding-box (AABB) collision detection by checking if the point falls within the button's bounds. This is used by touch event handlers to determine which button was pressed.

function isInsideButton(px, py, btn) {
  if (!btn) return false;
  const half = btn.size / 2;
  return (
    px >= btn.x - half &&
    px <= btn.x + half &&
    py >= btn.y - half &&
    py <= btn.y + half
  );
}
Line-by-line explanation (6 lines)

🔧 Subcomponents:

conditional Null safety check if (!btn) return false;

Prevents errors if button object doesn't exist

conditional Rectangle collision detection return ( px >= btn.x - half && px <= btn.x + half && py >= btn.y - half && py <= btn.y + half );

Tests if point (px, py) is inside the square button area

if (!btn) return false;
If button object is null or undefined, return false immediately to avoid errors
const half = btn.size / 2;
Calculates the distance from button center to edge
px >= btn.x - half &&
Checks if pointer X is at or to the right of the left edge
px <= btn.x + half &&
Checks if pointer X is at or to the left of the right edge
py >= btn.y - half &&
Checks if pointer Y is at or below the top edge
py <= btn.y + half
Checks if pointer Y is at or above the bottom edge; all four conditions must be true for a hit

handlePointerPress()

handlePointerPress() responds to mouse clicks or touch taps by checking which on-screen button was pressed and updating the touchMove object accordingly. It's called by mousePressed() and touchStarted() event handlers. The function resets all movement flags before checking button collisions to ensure only one movement direction is active.

function handlePointerPress(px, py) {
  // Reset then activate whichever button is under the pointer
  touchMove.forward = touchMove.back = touchMove.left = touchMove.right = false;

  if (isInsideButton(px, py, uiButtons.forward)) {
    touchMove.forward = true;
  } else if (isInsideButton(px, py, uiButtons.back)) {
    touchMove.back = true;
  } else if (isInsideButton(px, py, uiButtons.left)) {
    touchMove.left = true;
  } else if (isInsideButton(px, py, uiButtons.right)) {
    touchMove.right = true;
  }
}
Line-by-line explanation (9 lines)

🔧 Subcomponents:

calculation Reset all touch states touchMove.forward = touchMove.back = touchMove.left = touchMove.right = false;

Clears all movement flags before checking which button was pressed

conditional Button collision detection chain if (isInsideButton(px, py, uiButtons.forward)) { touchMove.forward = true; } else if (isInsideButton(px, py, uiButtons.back)) { touchMove.back = true; } else if (isInsideButton(px, py, uiButtons.left)) { touchMove.left = true; } else if (isInsideButton(px, py, uiButtons.right)) { touchMove.right = true; }

Tests which button contains the pointer and activates the corresponding movement flag

touchMove.forward = touchMove.back = touchMove.left = touchMove.right = false;
Resets all movement flags to false; this ensures only one button is active at a time
if (isInsideButton(px, py, uiButtons.forward)) {
Tests if pointer is inside the forward (up) button
touchMove.forward = true;
If forward button was hit, activate forward movement
} else if (isInsideButton(px, py, uiButtons.back)) {
Tests if pointer is inside the back (down) button
touchMove.back = true;
If back button was hit, activate backward movement
} else if (isInsideButton(px, py, uiButtons.left)) {
Tests if pointer is inside the left button
touchMove.left = true;
If left button was hit, activate left rotation
} else if (isInsideButton(px, py, uiButtons.right)) {
Tests if pointer is inside the right button
touchMove.right = true;
If right button was hit, activate right rotation

clearTouchMove()

clearTouchMove() is a simple helper that resets all touch/button input states to false. It's called by mouseReleased() and touchEnded() to stop movement when the user releases the mouse or lifts their finger.

function clearTouchMove() {
  touchMove.forward = touchMove.back = touchMove.left = touchMove.right = false;
}
Line-by-line explanation (1 lines)
touchMove.forward = touchMove.back = touchMove.left = touchMove.right = false;
Sets all movement flags to false, stopping all movement input

draw()

draw() is called 60 times per second and orchestrates the entire rendering pipeline. It updates camera movement, renders the 3D scene to the WEBGL buffer, creates a blurred copy via downscaling, composites the blurred version as the base, then overlays a sharp horizontal band positioned by the mouse/touch. This creates the tilt-shift miniature effect. The HUD is drawn last so it appears on top.

🔬 This block creates the blur by downscaling. What happens if you change blurBuffer.width and blurBuffer.height to cityBuffer.width and cityBuffer.height? Will the blur disappear and why?

  blurBuffer.push();
  blurBuffer.clear();
  blurBuffer.image(cityBuffer, 0, 0, blurBuffer.width, blurBuffer.height);
  blurBuffer.pop();
function draw() {
  // Update camera from keyboard / touch controls
  handleMovement();

  // 1) Render 3D city into WEBGL buffer
  drawCityToBuffer();

  // 2) Create a blurred version via downscale -> upscale
  blurBuffer.push();
  blurBuffer.clear();
  blurBuffer.image(cityBuffer, 0, 0, blurBuffer.width, blurBuffer.height);
  blurBuffer.pop();

  // 3) Draw blurred full-screen base
  background(0);
  image(blurBuffer, 0, 0, width, height);

  // 4) Compute focus band position (mouse/touch-controlled)
  let pointerY = mouseY;
  if (touches.length > 0) {
    pointerY = touches[0].y;
  }

  const focusCenter = constrain(pointerY, height * 0.25, height * 0.75);
  const focusHeight = height * 0.25;

  let y1 = focusCenter - focusHeight / 2;
  let y2 = focusCenter + focusHeight / 2;
  y1 = max(0, y1);
  y2 = min(height, y2);
  const bandH = y2 - y1;

  // 5) Overlay a SHARP band from the original 3D buffer
  image(
    cityBuffer,
    0, y1, width, bandH,  // destination rect
    0, y1, width, bandH   // source rect (same Y band)
  );

  // HUD (instructions + touch controls)
  drawHUD();
}
Line-by-line explanation (20 lines)

🔧 Subcomponents:

calculation Movement handling handleMovement();

Processes keyboard and touch input to update camera position each frame

calculation 3D city rendering drawCityToBuffer();

Renders the full 3D scene into the WEBGL buffer

calculation Blur effect creation blurBuffer.push(); blurBuffer.clear(); blurBuffer.image(cityBuffer, 0, 0, blurBuffer.width, blurBuffer.height); blurBuffer.pop();

Downscales and blurs the 3D render by copying it to a smaller buffer

calculation Display blurred base background(0); image(blurBuffer, 0, 0, width, height);

Clears the main canvas and displays the blurred buffer full-screen

calculation Focus band position calculation let pointerY = mouseY; if (touches.length > 0) { pointerY = touches[0].y; } const focusCenter = constrain(pointerY, height * 0.25, height * 0.75); const focusHeight = height * 0.25;

Calculates where the sharp focus band should be based on mouse or touch position

calculation Band boundary clamping let y1 = focusCenter - focusHeight / 2; let y2 = focusCenter + focusHeight / 2; y1 = max(0, y1); y2 = min(height, y2); const bandH = y2 - y1;

Ensures the focus band stays within canvas boundaries and calculates its height

calculation Sharp band overlay image( cityBuffer, 0, y1, width, bandH, 0, y1, width, bandH );

Overlays the sharp original buffer in a horizontal band on top of the blurred background

calculation HUD rendering drawHUD();

Draws instructions and movement buttons on top of everything

handleMovement();
Calls the movement handler to update camera position based on keyboard/touch input
drawCityToBuffer();
Renders the full 3D city scene into the WEBGL buffer at full resolution and sharpness
blurBuffer.push();
Saves the drawing state of the blur buffer
blurBuffer.clear();
Clears the blur buffer to prepare for new content
blurBuffer.image(cityBuffer, 0, 0, blurBuffer.width, blurBuffer.height);
Copies the full-resolution 3D buffer into the smaller blur buffer, automatically creating blur via downscaling
blurBuffer.pop();
Restores the drawing state
background(0);
Clears the main canvas to black
image(blurBuffer, 0, 0, width, height);
Displays the blurred version full-screen—this forms the base of the tilt-shift effect
let pointerY = mouseY;
Starts with the mouse Y position
if (touches.length > 0) {
Checks if any touch points are active
pointerY = touches[0].y;
If touch is active, use the first touch's Y position instead of mouse Y
const focusCenter = constrain(pointerY, height * 0.25, height * 0.75);
Centers the focus band at the pointer Y, but constrains it between 25% and 75% of canvas height
const focusHeight = height * 0.25;
Sets the focus band height to 25% of canvas height
let y1 = focusCenter - focusHeight / 2;
Calculates the top edge of the focus band
let y2 = focusCenter + focusHeight / 2;
Calculates the bottom edge of the focus band
y1 = max(0, y1);
Clamps top edge to not go above pixel 0
y2 = min(height, y2);
Clamps bottom edge to not go below canvas height
const bandH = y2 - y1;
Calculates the final clamped band height
image( cityBuffer, 0, y1, width, bandH, 0, y1, width, bandH );
Overlays the sharp buffer in a horizontal band matching the calculated y1 to y2 range—this is the core of the tilt-shift magic
drawHUD();
Renders the instruction panel and movement buttons on top

windowResized()

windowResized() is a p5.js event handler called automatically whenever the browser window is resized. It resizes the canvas to match the window, recreates both off-screen buffers at the new size, and reinitializes the city and camera. This ensures the sketch remains fully responsive to window resizing.

function windowResized() {
  resizeCanvas(windowWidth, windowHeight);
  pixelDensity(1);

  // Recreate buffers with new size
  cityBuffer = createGraphics(width, height, WEBGL);
  cityBuffer.pixelDensity(1);

  const blurScale = 4;
  blurBuffer = createGraphics(
    Math.max(1, Math.floor(width / blurScale)),
    Math.max(1, Math.floor(height / blurScale))
  );

  // Rebuild city + reset camera for new size
  initCity();
  initCamera();
}
Line-by-line explanation (8 lines)

🔧 Subcomponents:

calculation Canvas resizing resizeCanvas(windowWidth, windowHeight); pixelDensity(1);

Resizes main canvas to match new window size

calculation Buffer recreation cityBuffer = createGraphics(width, height, WEBGL); cityBuffer.pixelDensity(1); const blurScale = 4; blurBuffer = createGraphics( Math.max(1, Math.floor(width / blurScale)), Math.max(1, Math.floor(height / blurScale)) );

Recreates WEBGL and blur buffers at the new canvas size

calculation City and camera reset initCity(); initCamera();

Regenerates city layout and repositions camera for the new canvas aspect ratio

resizeCanvas(windowWidth, windowHeight);
Resizes the main canvas to the new window dimensions
pixelDensity(1);
Resets pixel density to 1 after resize
cityBuffer = createGraphics(width, height, WEBGL);
Recreates the WEBGL buffer at the new width and height
cityBuffer.pixelDensity(1);
Sets pixel density of the WEBGL buffer
const blurScale = 4;
Recalculates downscaling factor
blurBuffer = createGraphics( Math.max(1, Math.floor(width / blurScale)), Math.max(1, Math.floor(height / blurScale)) );
Recreates the blur buffer at the new downscaled dimensions
initCity();
Regenerates the city layout (buildings get repositioned based on new canvas size)
initCamera();
Resets camera to starting position for the new canvas dimensions

mousePressed()

mousePressed() is a p5.js event handler called once when the mouse button is pressed. It delegates to handlePointerPress() and returns false to prevent browser defaults. This works on both desktop (mouse clicks) and some mobile browsers (though touchStarted is more reliable for touch).

function mousePressed() {
  handlePointerPress(mouseX, mouseY);
  return false; // prevent text selection / scrolling
}
Line-by-line explanation (2 lines)
handlePointerPress(mouseX, mouseY);
Checks which on-screen button the mouse clicked and activates it
return false;
Prevents default browser behavior (text selection, page scrolling) when clicking on buttons

mouseReleased()

mouseReleased() is called when the mouse button is released. It clears all movement input flags to stop the camera from moving. Returning false prevents text selection or other browser defaults.

function mouseReleased() {
  clearTouchMove();
  return false;
}
Line-by-line explanation (2 lines)
clearTouchMove();
Resets all movement flags when mouse button is released
return false;
Prevents default browser behavior

touchStarted()

touchStarted() is called when a finger first touches the screen. It extracts the first touch point and passes its coordinates to handlePointerPress() to determine which button was tapped. This provides touch support for mobile devices.

function touchStarted() {
  if (touches.length > 0) {
    const t = touches[0];
    handlePointerPress(t.x, t.y);
  }
  return false; // prevent page scrolling
}
Line-by-line explanation (4 lines)

🔧 Subcomponents:

conditional Touch existence check if (touches.length > 0) {

Verifies that at least one touch point exists

calculation Touch handling const t = touches[0]; handlePointerPress(t.x, t.y);

Processes the first touch point and checks which button it hit

if (touches.length > 0) {
Checks if at least one finger is touching the screen
const t = touches[0];
Stores the first touch point (only one finger is used in this sketch)
handlePointerPress(t.x, t.y);
Passes the touch coordinates to the button press handler
return false;
Prevents page scrolling when touching buttons

touchEnded()

touchEnded() is called when the last finger leaves the screen. It clears all movement input to stop camera movement. Returning false prevents the browser's default touch handling (like page scrolling).

function touchEnded() {
  clearTouchMove();
  return false;
}
Line-by-line explanation (2 lines)
clearTouchMove();
Resets all movement flags when all fingers lift off the screen
return false;
Prevents default browser behavior

📦 Key Variables

cityBuffer p5.Renderer (WEBGL)

An off-screen WEBGL buffer where the full 3D city scene is rendered at high quality before effects are applied

let cityBuffer = createGraphics(width, height, WEBGL);
blurBuffer p5.Renderer (2D)

A smaller off-screen 2D buffer used to create the blur effect by downscaling the 3D scene

let blurBuffer = createGraphics(width/4, height/4);
buildings array of objects

Stores all building data (position, dimensions, color) for rendering each frame

let buildings = [{x: 0, z: 0, w: 50, d: 40, h: 120, col: color(200, 200, 210)}, ...];
cityCols number

The number of buildings in the horizontal (X) direction of the city grid

let cityCols = 16;
cityRows number

The number of buildings in the depth (Z) direction of the city grid

let cityRows = 10;
citySpacing number

The distance between adjacent buildings in the grid, calculated based on canvas size

let citySpacing = (width / max(cityCols, cityRows)) * 0.7;
cityStartX number

The X coordinate of the first column of buildings, calculated to center the city

let cityStartX = -((cityCols - 1) * citySpacing) / 2;
cityStartZ number

The Z coordinate of the first row of buildings, calculated to center the city

let cityStartZ = -((cityRows - 1) * citySpacing) / 2;
camX number

The camera's current X position in the 3D scene

let camX = 0;
camY number

The camera's current Y position (height above ground) in the 3D scene

let camY = 140;
camZ number

The camera's current Z position (depth) in the 3D scene

let camZ = 0;
camYaw number

The camera's rotation angle around the Y axis (yaw); controls which direction the camera faces

let camYaw = 0;
touchMove object with boolean properties

Tracks which movement direction is active (forward, back, left, right) from on-screen button presses

let touchMove = {forward: false, back: false, left: false, right: false};
uiButtons object with button objects

Stores the position and size of each on-screen movement button for collision detection

let uiButtons = {forward: {x: 200, y: 500, size: 56}, ...};

🔧 Potential Improvements (5)

Here are some ways this code could be enhanced:

PERFORMANCE drawCityToBuffer()

The camera's look-at point is recalculated every frame even though it's predictable based on yaw

💡 Pre-compute the forward direction vector in handleMovement() and reuse it in drawCityToBuffer() to avoid redundant sin/cos calculations

BUG handleMovement()

Camera can move outside constrained bounds if speed is very high or if margins are small—potential softlock at edge

💡 Apply constrain to camera position before movement calculations rather than after, or increase margin size to citySpacing * 5

STYLE All event handlers (mousePressed, touchStarted, etc.)

Four nearly identical event handlers make the code repetitive and harder to maintain

💡 Create a unified handlePointerEvent(px, py, isActive) function and call it from all event handlers to reduce duplication

FEATURE drawCityToBuffer()

All buildings use ambient or specular materials; no windows or architectural detail despite tilt-shift cinematography demanding visual richness

💡 Add a simple window pattern to building faces using scaled-down boxes or rectangles to simulate windows—would enhance miniature illusion

PERFORMANCE draw()

The blur buffer is recreated by copying the entire cityBuffer every frame, even though the size rarely changes

💡 Cache the scaled size; only recopy on windowResized() or when size actually changes, not every frame

🔄 Code Flow

Code flow showing setup, initcity, initcamera, handlemovement, drawcitytobuffer, drawarrowbutton, drawhud, isinsidebutton, handlepointerpress, cleartouchmove, draw, windowresized, mousepressed, mousereleased, touchstarted, touchended

💡 Click on function names in the diagram to jump to their code

graph TD start[Start] --> setup[setup] setup --> canvas-setup[Canvas Initialization] setup --> webgl-buffer[WEBGL Buffer Creation] setup --> blur-buffer[Blur Buffer Creation] setup --> initcity[initCity] setup --> initcamera[initCamera] setup --> draw[draw loop] click setup href "#fn-setup" click canvas-setup href "#sub-canvas-setup" click webgl-buffer href "#sub-webgl-buffer" click blur-buffer href "#sub-blur-buffer" click initcity href "#fn-initcity" click initcamera href "#fn-initcamera" draw --> handlemovement[handleMovement] draw --> drawcitytobuffer[drawCityToBuffer] draw --> create-blur[Create Blur Effect] draw --> display-blur[Display Blurred Base] draw --> focus-band-pos[Focus Band Position Calculation] draw --> band-boundary[Band Boundary Clamping] draw --> overlay-sharp[Overlay Sharp Band] draw --> drawhud[drawHUD] click draw href "#fn-draw" click handlemovement href "#fn-handlemovement" click drawcitytobuffer href "#fn-drawcitytobuffer" click create-blur href "#sub-create-blur" click display-blur href "#sub-display-blur" click focus-band-pos href "#sub-focus-band-pos" click band-boundary href "#sub-band-boundary" click overlay-sharp href "#sub-overlay-sharp" click drawhud href "#fn-drawhud" handlemovement --> rotation-check[Rotation Input Check] handlemovement --> speed-boost[Shift Key Sprint Boost] handlemovement --> forward-vector[Forward Direction Calculation] handlemovement --> forward-back-movement[Forward/Backward Movement] handlemovement --> boundary-constraint[Camera Boundary Constraint] click rotation-check href "#sub-rotation-check" click speed-boost href "#sub-speed-boost" click forward-vector href "#sub-forward-vector" click forward-back-movement href "#sub-forward-back-movement" click boundary-constraint href "#sub-boundary-constraint" drawcitytobuffer --> background-setup[Background and Fill Settings] drawcitytobuffer --> camera-setup[Camera Configuration] drawcitytobuffer --> perspective-setup[Perspective Configuration] drawcitytobuffer --> lighting-setup[Lighting Setup] drawcitytobuffer --> ground-plane[Ground Plane Rendering] drawcitytobuffer --> roads-z[Horizontal Roads Loop] drawcitytobuffer --> roads-x[Vertical Roads Loop] drawcitytobuffer --> buildings-loop[Buildings Rendering Loop] click background-setup href "#sub-background-setup" click camera-setup href "#sub-camera-setup" click perspective-setup href "#sub-perspective-setup" click lighting-setup href "#sub-lighting-setup" click ground-plane href "#sub-ground-plane" click roads-z href "#sub-roads-z" click roads-x href "#sub-roads-x" click buildings-loop href "#sub-buildings-loop" drawhud --> rect-mode-setup[Rect Mode Configuration] drawhud --> button-fill[Button Color Based on State] drawhud --> button-rect[Button Rectangle Drawing] drawhud --> button-label[Button Label Text] drawhud --> instruction-panel[Instruction Panel] drawhud --> instruction-text[Instruction Text] drawhud --> button-layout[Button Position Calculation] drawhud --> button-positions[Individual Button Positions] drawhud --> button-drawing[Button Rendering] click rect-mode-setup href "#sub-rect-mode-setup" click button-fill href "#sub-button-fill" click button-rect href "#sub-button-rect" click button-label href "#sub-button-label" click instruction-panel href "#sub-instruction-panel" click instruction-text href "#sub-instruction-text" click button-layout href "#sub-button-layout" click button-positions href "#sub-button-positions" click button-drawing href "#sub-button-drawing" mousepressed --> handlepointerpress[handlePointerPress] mousereleased --> cleartouchmove[clearTouchMove] touchstarted --> handlepointerpress touchended --> cleartouchmove click mousepressed href "#fn-mousepressed" click mousereleased href "#fn-mousereleased" click touchstarted href "#fn-touchstarted" click touchended href "#fn-touchended" windowresized --> canvas-resize[Canvas Resizing] windowresized --> buffer-recreate[Buffer Recreation] windowresized --> city-reset[City and Camera Reset] click windowresized href "#fn-windowresized" click canvas-resize href "#sub-canvas-resize" click buffer-recreate href "#sub-buffer-recreate" click city-reset href "#sub-city-reset"

❓ Frequently Asked Questions

What visual experience does the 'Theme of the Day' p5.js sketch create?

The sketch generates a 3D cityscape featuring varied buildings, roads, and realistic lighting effects, enhanced by a tilt-shift effect that blurs the background while keeping a sharp focus on the foreground.

How can users interact with the 'Theme of the Day' sketch?

Users can navigate the city in a first-person perspective using the W/S keys to move forward and backward, and A/D keys to turn left and right.

What creative coding concepts are demonstrated in this p5.js sketch?

The sketch showcases off-screen rendering using a WEBGL buffer, camera manipulation for immersive navigation, and a tilt-shift effect achieved through blurring techniques.

Preview

theme of the day - p5.js creative coding sketch preview
Sketch Preview
Code flow diagram showing the structure of theme of the day - Code flow showing setup, initcity, initcamera, handlemovement, drawcitytobuffer, drawarrowbutton, drawhud, isinsidebutton, handlepointerpress, cleartouchmove, draw, windowresized, mousepressed, mousereleased, touchstarted, touchended
Code Flow Diagram