
uhh very cool game for cdww

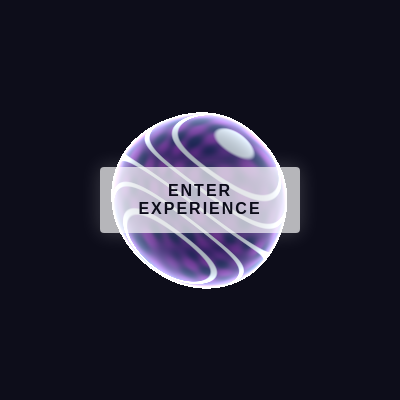
This sketch renders an interactive liquid chrome sphere using WebGL raymarching that ripples and deforms based on mouse movement. Simultaneously, it generates a reactive generative techno beat where the filter cutoff and volume respond to how fast you move your mouse.

🧪 Try This!

Experiment with the code by making these changes:

  1. Speed up the beat — Higher BPM makes the techno accelerate, increasing energy and intensity without changing any visuals
  2. Increase ripple responsiveness — Move the multiplier higher so even small mouse movements create large ripples on the sphere surface
  3. Make ripples denser — Higher frequency packs more ripples into the sphere, creating a more intricate, fine-grained texture
  4. Change the bass note sequence — Substitute different notes to create a new melodic pattern—try all C notes for a single-note hypnotic groove
  5. Slower velocity dampening — Decrease the multiplier so ripples persist longer after you stop moving, creating trailing effects
  6. Invert audio-visual coupling — The synth becomes muffled and quiet when you move fast, bright and loud when still—counterintuitive but hypnotic
Prefer the full editor? Open it there →

📖 About This Sketch

This sketch creates a mesmerizing liquid chrome sphere that responds to your mouse movements in real time. The sphere uses WebGL raymarching—a technique that fires invisible rays from the camera through every pixel and calculates where they hit a mathematically-defined 3D surface—to render a chrome-like material with rippling distortions. As you move your mouse, the ripples intensify and the procedural Tone.js synthesizers react to your velocity, creating an immersive audiovisual experience where your movement controls both the visuals and the sound.

The code is organized into two main systems: a GLSL fragment shader that defines the sphere's shape and raymarches to render it, and a p5.js sketch that manages mouse input, passes real-time uniforms to the shader, and orchestrates the Tone.js audio synthesis. By studying this sketch you will learn how to use WebGL shaders in p5.js, how to pass dynamic values like time and mouse position to GPU code, how Tone.js creates and sequences synthesizers, and how to couple visual and audio effects to a single input stream.

⚙️ How It Works

  1. When the page loads, setup() creates a fullscreen WebGL canvas and compiles the vertex and fragment shaders into a shader program. An 'ENTER EXPERIENCE' button appears, waiting for a user gesture to start the audio context (required by modern browsers).
  2. Every frame, draw() calculates your mouse's instantaneous velocity (difference between current and previous position) and smooths it using lerp to avoid jittery values.
  3. If audio has been started, the smoothed velocity magnitude is mapped to two audio parameters: the filter's cutoff frequency (faster movement = brighter/higher cutoff) and the master volume (faster movement = louder).
  4. The shader is activated and receives four uniforms: screen resolution, elapsed time in seconds, current mouse position, and smoothed mouse velocity.
  5. The fragment shader raymarches from the camera through each pixel, testing 80 steps to find where a ray hits the liquid sphere. The sphere's surface is defined by the map() function, which calculates a signed distance field that includes ripples modulated by mouse velocity and time.
  6. Once a hit is detected, the shader calculates surface normals, applies chrome-like reflections with dynamic environment mapping, and renders blue-to-purple-to-silver colors based on reflection direction, creating a liquid metal appearance.
  7. When you click 'ENTER EXPERIENCE', initAudio() starts the Tone.js transport, creates a kick drum (playing on every downbeat), hi-hats (on offbeats), and a 16th-note FM bassline that cycles through an 8-note pattern, all running at 130 BPM and all connected through the filter that responds to your mouse movement.

🎓 Concepts You'll Learn

WebGL raymarchingFragment shadersSigned distance fieldsReal-time uniformsMouse velocity trackingGenerative music synthesisTone.js sequencingAudio-visual coupling

📝 Code Breakdown

setup()

setup() runs exactly once when the sketch starts. It prepares the canvas, compiles shaders, and sets up the UI button that unlocks the audio system. The WEBGL parameter tells p5.js to use the GPU for rendering instead of the CPU, which is essential for running shaders.

function setup() {
  createCanvas(windowWidth, windowHeight, WEBGL);
  
  // Create UI overlay to trigger audio context
  startBtn = createButton('ENTER EXPERIENCE');
  startBtn.id('start-btn');
  startBtn.mousePressed(initAudio);
  
  liquidShader = createShader(vertShader, fragShader);
  noStroke();
}
Line-by-line explanation (6 lines)

🔧 Subcomponents:

function-call Canvas Setup createCanvas(windowWidth, windowHeight, WEBGL);

Creates a fullscreen WebGL-enabled canvas that can run GPU shaders

function-call Audio Button startBtn = createButton('ENTER EXPERIENCE');

Creates a clickable button that will initialize the audio system when pressed

function-call Shader Compilation liquidShader = createShader(vertShader, fragShader);

Compiles the vertex and fragment shader strings into a GPU program ready to use

createCanvas(windowWidth, windowHeight, WEBGL);
Creates a fullscreen canvas using WebGL rendering, which allows us to run custom shader code on the GPU
startBtn = createButton('ENTER EXPERIENCE');
Creates a clickable button that will appear on the page; we save it in a variable so we can remove it later
startBtn.id('start-btn');
Assigns a CSS id to the button so the stylesheet can style it with fonts, colors, and positioning
startBtn.mousePressed(initAudio);
Attaches a callback so that when the button is clicked, the initAudio() function runs and starts the music
liquidShader = createShader(vertShader, fragShader);
Compiles the vertex and fragment shader code into a program that the GPU can execute
noStroke();
Disables drawing outlines on shapes—we only want the filled rectangle from our shader
draw()

draw() runs every frame (60 times per second by default). This is where animation happens: every frame we recalculate mouse velocity, update audio parameters, activate the shader, pass dynamic uniforms, and trigger the shader to render by drawing a fullscreen rectangle. The key insight is that uniforms are the bridge between JavaScript and GPU code—they let the CPU send real-time data to shader code running on the GPU.

🔬 The 0.1 is the smoothing strength—it controls how quickly the smoothed velocity catches up to the raw velocity. What happens if you change 0.1 to 0.5 (faster smoothing) or to 0.02 (slower smoothing)? Which feels more responsive?

  // Smooth the velocity
  smoothVelX = lerp(smoothVelX, dx, 0.1);
  smoothVelY = lerp(smoothVelY, dy, 0.1);

🔬 This maps velocity to filter brightness: slow movement stays muffled (250 Hz), fast movement brightens (8000 Hz). What if you swap those—change 250 to 8000 and 8000 to 250? The audio will be bright when still and muffled when moving. Counterintuitive or cool?

    let targetFreq = map(velMag, 0, 40, 250, 8000, true);
    synthFilter.frequency.rampTo(targetFreq, 0.1);
function draw() {
  // Calculate instantaneous velocity
  let dx = mouseX - pmouseX;
  let dy = mouseY - pmouseY;

  // Smooth the velocity
  smoothVelX = lerp(smoothVelX, dx, 0.1);
  smoothVelY = lerp(smoothVelY, dy, 0.1);

  // Dampen velocity down to zero
  smoothVelX *= 0.96;
  smoothVelY *= 0.96;
  
  // --- AUDIO REACTIVITY ---
  if (audioStarted) {
    // Calculate the magnitude of our velocity
    let velMag = sqrt(smoothVelX * smoothVelX + smoothVelY * smoothVelY);
    
    // Map velocity to filter cutoff (low/muffled when still -> high/bright when moving fast)
    let targetFreq = map(velMag, 0, 40, 250, 8000, true);
    synthFilter.frequency.rampTo(targetFreq, 0.1);
    
    // Map velocity to volume (-20dB when still -> 0dB when moving)
    let targetVol = map(velMag, 0, 30, -20, 0, true);
    masterVolume.volume.rampTo(targetVol, 0.1);
  }

  // Activate shader
  shader(liquidShader);

  // Pass uniforms
  liquidShader.setUniform('u_resolution', [width, height]);
  liquidShader.setUniform('u_time', millis() / 1000.0);
  liquidShader.setUniform('u_mouse', [mouseX, mouseY]);
  liquidShader.setUniform('u_mouse_vel', [smoothVelX, smoothVelY]);

  // Draw fullscreen quad
  rect(-width / 2, -height / 2, width, height);
}
Line-by-line explanation (18 lines)

🔧 Subcomponents:

calculation Instantaneous Velocity let dx = mouseX - pmouseX; let dy = mouseY - pmouseY;

Calculates how many pixels the mouse moved this frame by comparing current position to previous frame position

calculation Velocity Smoothing smoothVelX = lerp(smoothVelX, dx, 0.1); smoothVelY = lerp(smoothVelY, dy, 0.1);

Uses linear interpolation to gradually blend the raw velocity toward the instantaneous velocity, preventing jittery jumps

calculation Velocity Decay smoothVelX *= 0.96; smoothVelY *= 0.96;

Reduces velocity toward zero each frame—when you stop moving, the effect gradually fades out

conditional Audio Reactivity if (audioStarted) { // Calculate the magnitude of our velocity let velMag = sqrt(smoothVelX * smoothVelX + smoothVelY * smoothVelY); // Map velocity to filter cutoff (low/muffled when still -> high/bright when moving fast) let targetFreq = map(velMag, 0, 40, 250, 8000, true); synthFilter.frequency.rampTo(targetFreq, 0.1); // Map velocity to volume (-20dB when still -> 0dB when moving) let targetVol = map(velMag, 0, 30, -20, 0, true); masterVolume.volume.rampTo(targetVol, 0.1); }

When audio is running, calculates speed and maps it to filter frequency (brightness) and volume, creating audio-visual coupling

function-call Shader Activation shader(liquidShader);

Tells p5.js to use this shader for all subsequent drawing commands

function-call Uniform Assignment liquidShader.setUniform('u_resolution', [width, height]); liquidShader.setUniform('u_time', millis() / 1000.0); liquidShader.setUniform('u_mouse', [mouseX, mouseY]); liquidShader.setUniform('u_mouse_vel', [smoothVelX, smoothVelY]);

Passes real-time data from JavaScript to the GPU shader so it can animate based on time and mouse input

let dx = mouseX - pmouseX;
Calculates horizontal mouse movement: current x position minus previous frame's x position
let dy = mouseY - pmouseY;
Calculates vertical mouse movement: current y position minus previous frame's y position
smoothVelX = lerp(smoothVelX, dx, 0.1);
Interpolates smoothVelX 10% of the way toward dx—this creates a lag that prevents jitter and creates momentum-like smoothing
smoothVelY = lerp(smoothVelY, dy, 0.1);
Same smoothing applied to vertical velocity
smoothVelX *= 0.96;
Multiplies smoothVelX by 0.96 each frame, reducing it by 4% per frame—this makes the velocity slowly decay to zero when you stop moving
smoothVelY *= 0.96;
Same decay applied to vertical velocity
if (audioStarted) {
Only runs the audio reactivity code if the user has clicked the button to start audio (required by browsers)
let velMag = sqrt(smoothVelX * smoothVelX + smoothVelY * smoothVelY);
Calculates the magnitude (length) of the 2D velocity vector—this is the overall speed of mouse movement regardless of direction
let targetFreq = map(velMag, 0, 40, 250, 8000, true);
Maps velocity magnitude (0–40 pixels/frame) to filter frequency (250–8000 Hz): slow = muffled, fast = bright. The 'true' clamps values to the output range.
synthFilter.frequency.rampTo(targetFreq, 0.1);
Tells the Tone.js filter to gradually change to the target frequency over 0.1 seconds, creating smooth audio transitions
let targetVol = map(velMag, 0, 30, -20, 0, true);
Maps velocity (0–30) to volume decibels (-20 to 0 dB): slow = quiet, fast = loud
masterVolume.volume.rampTo(targetVol, 0.1);
Gradually changes the master volume to the target over 0.1 seconds
shader(liquidShader);
Activates the compiled shader program so p5.js will use it for drawing
liquidShader.setUniform('u_resolution', [width, height]);
Passes the canvas dimensions to the shader as a 2-element array so it can calculate pixel coordinates correctly
liquidShader.setUniform('u_time', millis() / 1000.0);
Passes elapsed time in seconds (millis() returns milliseconds, so divide by 1000) to animate the ripples and wobbles
liquidShader.setUniform('u_mouse', [mouseX, mouseY]);
Passes current mouse position to the shader (not used in this version, but available for enhancement)
liquidShader.setUniform('u_mouse_vel', [smoothVelX, smoothVelY]);
Passes the smoothed mouse velocity to the shader so ripple amplitude responds to movement speed
rect(-width / 2, -height / 2, width, height);
Draws a fullscreen rectangle. In WEBGL mode with a shader active, this triggers the fragment shader to run on every pixel of the canvas

map(p) [Fragment Shader Function]

This function defines the signed distance field (SDF) that the raymarcher uses to find the surface. Every point in 3D space has a distance value, and the raymarcher steps along rays looking for where that distance equals zero (the surface). By adding ripples and wobbles to the base sphere distance, we deform the surface without changing the raymarching code itself. This is the power of SDFs: you can create complex, animated geometry by just modifying a mathematical function.

🔬 These three sin/cos waves create the ripple pattern. The numbers 8.0, 6.0, and 7.0 control how fast each axis ripples. What if you change them all to the same speed, like 8.0? What if you make one very fast (20.0) or very slow (1.0)?

    float ripples = sin(p.x * freq + u_time * 8.0) * 
                    cos(p.y * freq - u_time * 6.0) * 
                    sin(p.z * freq + u_time * 7.0);
float map(vec3 p) {
    float d = sdSphere(p, 1.0);
    float velMag = length(u_mouse_vel);
    
    // Scale velocity into a safe amplitude range for the ripples
    float amp = min(velMag * 0.015, 0.6);

    // High frequency ripples mapped to 3D space, activated by mouse movement
    float freq = 10.0;
    float ripples = sin(p.x * freq + u_time * 8.0) * 
                    cos(p.y * freq - u_time * 6.0) * 
                    sin(p.z * freq + u_time * 7.0);
                    
    d += ripples * amp;

    // Add a very subtle constant gentle wobble
    d += sin(p.x * 3.0 + u_time * 1.5) * cos(p.y * 3.0 + u_time * 1.2) * 0.03;

    return d;
}
Line-by-line explanation (11 lines)

🔧 Subcomponents:

function-call Base Sphere Distance float d = sdSphere(p, 1.0);

Calculates the signed distance from point p to a sphere of radius 1.0—the foundation of the surface

calculation Velocity Magnitude float velMag = length(u_mouse_vel);

Calculates how fast the mouse is moving overall (the length of the 2D velocity vector)

calculation Ripple Amplitude float amp = min(velMag * 0.015, 0.6);

Converts velocity into ripple size: faster movement = bigger ripples, but capped at 0.6 to prevent extreme deformations

calculation 3D Ripple Wave float ripples = sin(p.x * freq + u_time * 8.0) * cos(p.y * freq - u_time * 6.0) * sin(p.z * freq + u_time * 7.0);

Creates a 3D wave pattern using sin/cos at different frequencies and time rates—the result oscillates smoothly and creates organic rippling

calculation Autonomous Wobble d += sin(p.x * 3.0 + u_time * 1.5) * cos(p.y * 3.0 + u_time * 1.2) * 0.03;

Adds a slow, gentle pulsing to the sphere even when the mouse is still—creates hypnotic autonomous movement

float map(vec3 p) {
This is the signed distance field (SDF) function. It takes a 3D point and returns how far it is from the nearest surface. Negative = inside, positive = outside, zero = on surface.
float d = sdSphere(p, 1.0);
Calls sdSphere to get the distance from p to a sphere of radius 1.0 at origin. This is the base undeformed surface.
float velMag = length(u_mouse_vel);
Calculates the magnitude of the velocity uniform passed from JavaScript (length of a 2D vector is sqrt(x²+y²))
float amp = min(velMag * 0.015, 0.6);
Scales velocity into amplitude: multiply by 0.015 so reasonable speeds produce ripples, then cap at 0.6 to prevent crashes. min() picks the smaller value.
float freq = 10.0;
Sets the spatial frequency of ripples. Higher = more ripples packed into the sphere, lower = fewer, larger ripples.
float ripples = sin(p.x * freq + u_time * 8.0) *
First component: sin wave in x-direction, offset by time at 8x speed. Creates an animated wave along the x-axis.
cos(p.y * freq - u_time * 6.0) *
Second component: cos wave in y-direction at 6x speed (negative time = opposite direction). Multiplying sin*cos creates 2D interference patterns.
sin(p.z * freq + u_time * 7.0);
Third component: sin wave in z-direction at 7x speed. Multiplying all three creates a 3D ripple pattern that evolves over time.
d += ripples * amp;
Adds the ripple deformation to the base sphere distance. Multiplying by amp makes ripples stronger when you move the mouse fast.
d += sin(p.x * 3.0 + u_time * 1.5) * cos(p.y * 3.0 + u_time * 1.2) * 0.03;
Adds a very subtle slow wobble (lower frequency 3.0, slower time rates 1.5 and 1.2, tiny amplitude 0.03) that happens regardless of mouse movement
return d;
Returns the final signed distance, which the raymarcher uses to determine if a ray has hit the surface

calcNormal(p) [Fragment Shader Function]

Surface normals are essential for lighting and reflections—they tell you which direction the surface is facing. Since our SDF is defined mathematically, we can approximate the normal by computing the gradient (how much the function changes in each direction). This finite-difference technique is fast and works for any SDF.

🔬 The 0.001 is the step size for approximating the derivative. What if you make it larger, like 0.01 (rougher estimate) or smaller, like 0.0001 (more precise)? How does the sharpness of the reflections change?

    vec2 e = vec2(0.001, 0.0);
    return normalize(vec3(
        map(p + e.xyy) - map(p - e.xyy),
        map(p + e.yxy) - map(p - e.yxy),
        map(p + e.yyx) - map(p - e.yyx)
    ));
vec3 calcNormal(vec3 p) {
    vec2 e = vec2(0.001, 0.0);
    return normalize(vec3(
        map(p + e.xyy) - map(p - e.xyy),
        map(p + e.yxy) - map(p - e.yxy),
        map(p + e.yyx) - map(p - e.yyx)
    ));
}
Line-by-line explanation (6 lines)

🔧 Subcomponents:

calculation Epsilon for Differentiation vec2 e = vec2(0.001, 0.0);

Defines a tiny offset (0.001) used to approximate the gradient of the distance field by sampling nearby points

calculation Gradient Sampling return normalize(vec3( map(p + e.xyy) - map(p - e.xyy), map(p + e.yxy) - map(p - e.yxy), map(p + e.yyx) - map(p - e.yyx) ));

Samples the distance field in three perpendicular directions, calculates differences to approximate the gradient, then normalizes to get a unit-length surface normal

vec3 calcNormal(vec3 p) {
Takes a 3D point on the surface and returns the surface normal at that point—a unit vector perpendicular to the surface.
vec2 e = vec2(0.001, 0.0);
Creates a tiny offset vector. We use 0.001 (1/1000th of a pixel) to approximate the derivative without numerical errors.
map(p + e.xyy) - map(p - e.xyy),
Samples map() at points offset ±0.001 in the x-direction (e.xyy = [0.001, 0, 0]). The difference estimates how much map changes in the x-direction—the x-component of the gradient.
map(p + e.yxy) - map(p - e.yxy),
Samples in the y-direction (e.yxy = [0, 0.001, 0]) to estimate the y-component of the gradient.
map(p + e.yyx) - map(p - e.yyx)
Samples in the z-direction (e.yyx = [0, 0, 0.001]) to estimate the z-component of the gradient.
));
These three differences form a 3D gradient vector. We immediately normalize() it to make it a unit-length normal, which is what we need for lighting calculations.

sdSphere(p, radius) [Fragment Shader Function]

This is the most fundamental SDF—a perfect sphere. It's so simple it's elegant: just the distance from origin minus the radius. In raymarching, we repeatedly call map(p) which calls sdSphere as its base, and the raymarcher steps along rays finding where this distance equals zero.

float sdSphere(vec3 p, float radius) {
    return length(p) - radius;
}
Line-by-line explanation (2 lines)
float sdSphere(vec3 p, float radius) {
A signed distance function (SDF) that takes a 3D point and a radius, and returns the distance from p to the nearest point on a sphere
return length(p) - radius;
length(p) computes the distance from origin to point p (sqrt(x²+y²+z²)). Subtracting radius gives the signed distance: negative = inside sphere, positive = outside.

initAudio()

This function is the heart of the audio system. It uses Tone.js, a high-level Web Audio API library, to create three synthesizers (kick, bass, hi-hat), schedule them to play in a 16-step sequencer pattern, and start the transport (tempo metronome). Every 16th-note, the scheduled callback checks which step we're on and triggers the appropriate synthesizer. The modulo operator (%) is key—it lets us divide the 16 steps into patterns for each instrument. This is how most digital music sequencers work.

🔬 This array defines the 8-note bass pattern that repeats. What if you change all the notes to the same pitch, like all "C2"? Or transpose them up by one octave, changing C2→C3, Eb2→Eb3, etc.? How does the mood change?

  const bassNotes = ["C2", "C2", "Eb2", "C2", "F2", "C2", "Bb1", "C2"];
async function initAudio() {
  // Required: Start Tone context on user gesture
  await Tone.start();
  
  // Create master effects nodes controlled by the mouse movement
  masterVolume = new Tone.Volume(-20).toDestination();
  synthFilter = new Tone.Filter(250, "lowpass").connect(masterVolume);
  
  // 1. Kick Drum
  const kick = new Tone.MembraneSynth({
    pitchDecay: 0.05,
    octaves: 4,
    oscillator: { type: "sine" },
    envelope: { attack: 0.001, decay: 0.4, sustain: 0.01, release: 1.4 }
  }).connect(synthFilter);
  
  // 2. Gritty FM Bassline
  const bass = new Tone.FMSynth({
    harmonicity: 1,
    modulationIndex: 2,
    oscillator: { type: "square" },
    envelope: { attack: 0.01, decay: 0.2, sustain: 0.1, release: 0.5 }
  }).connect(synthFilter);
  
  // 3. Hi-Hat
  const hihat = new Tone.NoiseSynth({
    noise: { type: "white" },
    envelope: { attack: 0.001, decay: 0.1, sustain: 0, release: 0.1 }
  }).connect(synthFilter);
  
  // Bassline notes pattern
  const bassNotes = ["C2", "C2", "Eb2", "C2", "F2", "C2", "Bb1", "C2"];
  
  // Sequencer loop (16th notes)
  let step = 0;
  Tone.Transport.scheduleRepeat((time) => {
    // 4/4 Kick on the downbeat (0, 4, 8, 12)
    if (step % 4 === 0) {
      kick.triggerAttackRelease("C1", "8n", time);
    }
    
    // Offbeat hi-hat (2, 6, 10, 14)
    if (step % 4 === 2) {
      hihat.triggerAttackRelease("16n", time, 0.3);
    }
    
    // Driving 16th note bassline (skipping the kick beats)
    if (step % 4 !== 0) {
      bass.triggerAttackRelease(bassNotes[step % 8], "16n", time, 0.5);
    }
    
    step = (step + 1) % 16;
  }, "16n");

  // Set BPM and start transport
  Tone.Transport.bpm.value = 130;
  Tone.Transport.start();
  
  // Clean up UI and update state
  audioStarted = true;
  startBtn.remove();
}
Line-by-line explanation (32 lines)

🔧 Subcomponents:

function-call Audio Context Initialization await Tone.start();

Starts the Tone.js audio engine—required by modern browsers, must be called on user gesture like a click

calculation Master Audio Chain masterVolume = new Tone.Volume(-20).toDestination(); synthFilter = new Tone.Filter(250, "lowpass").connect(masterVolume);

Creates the effect chain: synthesizers → filter → volume → speakers. The filter and volume are controlled by mouse movement in draw().

object-creation Kick Drum Synthesizer const kick = new Tone.MembraneSynth({ pitchDecay: 0.05, octaves: 4, oscillator: { type: "sine" }, envelope: { attack: 0.001, decay: 0.4, sustain: 0.01, release: 1.4 } }).connect(synthFilter);

Creates a drum-like synthesizer with fast attack and slow decay, connected to the filter

object-creation FM Bass Synthesizer const bass = new Tone.FMSynth({ harmonicity: 1, modulationIndex: 2, oscillator: { type: "square" }, envelope: { attack: 0.01, decay: 0.2, sustain: 0.1, release: 0.5 } }).connect(synthFilter);

Creates a bass synthesizer using frequency modulation (FM) with a square wave for a gritty texture

object-creation Hi-Hat Cymbal const hihat = new Tone.NoiseSynth({ noise: { type: "white" }, envelope: { attack: 0.001, decay: 0.1, sustain: 0, release: 0.1 } }).connect(synthFilter);

Creates a percussive noise-based hi-hat with fast attack and decay

loop Sequencer Callback Tone.Transport.scheduleRepeat((time) => { // 4/4 Kick on the downbeat (0, 4, 8, 12) if (step % 4 === 0) { kick.triggerAttackRelease("C1", "8n", time); } // Offbeat hi-hat (2, 6, 10, 14) if (step % 4 === 2) { hihat.triggerAttackRelease("16n", time, 0.3); } // Driving 16th note bassline (skipping the kick beats) if (step % 4 !== 0) { bass.triggerAttackRelease(bassNotes[step % 8], "16n", time, 0.5); } step = (step + 1) % 16; }, "16n");

Runs a callback on every 16th note (16 times per beat). Uses modulo arithmetic to trigger kick on steps 0,4,8,12; hi-hat on 2,6,10,14; and bass on all other steps.

function-call Transport Start Tone.Transport.bpm.value = 130; Tone.Transport.start();

Sets the tempo to 130 beats per minute and starts the transport (the metronome that triggers all scheduled events)

async function initAudio() {
Defined as async so we can await Tone.start() before creating synthesizers
await Tone.start();
Starts the Web Audio API context. Browsers require this to be triggered by user gesture (like a click), which is why it's in a button callback.
masterVolume = new Tone.Volume(-20).toDestination();
Creates a Volume node starting at -20 decibels (quiet) and connects it to the destination (speakers). We save the reference so draw() can change it.
synthFilter = new Tone.Filter(250, "lowpass").connect(masterVolume);
Creates a low-pass filter starting at 250 Hz and chains it to the volume. All synthesizers will connect to this filter, so the filter controls the overall brightness.
const kick = new Tone.MembraneSynth({
Creates a MembraneSynth, which mimics a drum head (membrane). The name comes from the resonant, pitched decay of a drum.
pitchDecay: 0.05,
How quickly the pitch falls after the attack (0.05 seconds). Lower = more 'thump', higher = more pitched tone.
octaves: 4,
How far the pitch decays. Higher octaves = more pitch change, creating a more dramatic 'drop' sound.
oscillator: { type: "sine" },
Uses a sine wave oscillator, which is the fundamental, pure tone with no harmonics.
envelope: { attack: 0.001, decay: 0.4, sustain: 0.01, release: 1.4 }
ADSR envelope: attack 1ms (instant), decay 400ms (pitch falls), sustain 1% (barely audible background), release 1.4s (fades out after note ends). Creates a punchy drum feel.
const bass = new Tone.FMSynth({
Creates an FM (frequency modulation) synthesizer. One oscillator modulates the frequency of another, creating complex, evolving timbres.
harmonicity: 1,
The ratio of the modulator frequency to the carrier. 1 means they're the same frequency, creating inharmonic metallic tones.
modulationIndex: 2,
Controls how much the modulator affects the carrier frequency. Higher values = more extreme timbral variation.
oscillator: { type: "square" },
The carrier uses a square wave, which is more aggressive and gritty than a sine wave—perfect for techno bass.
envelope: { attack: 0.01, decay: 0.2, sustain: 0.1, release: 0.5 }
ADSR: 10ms attack (slightly slower than kick, less percussive), 200ms decay, sustain at 10%, 500ms release. More melodic than the kick.
const hihat = new Tone.NoiseSynth({
Creates a noise-based synthesizer. Instead of a pitched oscillator, it produces filtered noise to simulate percussion like hi-hats.
noise: { type: "white" },
White noise: all frequencies equally loud. Filtering it creates the hi-hat tone.
envelope: { attack: 0.001, decay: 0.1, sustain: 0, release: 0.1 }
ADSR: 1ms attack (instant), 100ms decay, 0% sustain (dies completely), 100ms release. Very short and crisp, ideal for hi-hats.
const bassNotes = ["C2", "C2", "Eb2", "C2", "F2", "C2", "Bb1", "C2"];
An 8-note melody pattern. This repeats every 8 16th-notes (2 beats). Notes are in standard notation: C2 is C in octave 2, Eb2 is E-flat, etc.
let step = 0;
Counter for which step in the 16-step sequence we're on. It cycles 0-15 and is used to determine which synthesizer plays.
Tone.Transport.scheduleRepeat((time) => {
Schedules a callback to run repeatedly. The time parameter is in seconds, exactly when this 16th-note should play (synced to the transport's tempo).
if (step % 4 === 0) {
Modulo check: step % 4 === 0 is true when step is 0, 4, 8, or 12. These are the downbeats in a 16-step sequence (4 beats of 4 steps each).
kick.triggerAttackRelease("C1", "8n", time);
Plays the kick: note C1 (low C), duration 8n (eighth note = half of a 16th note = 1 step), at the exact time from Tone.Transport
if (step % 4 === 2) {
True when step is 2, 6, 10, 14. These are the 'and' beats in standard hi-hat patterns.
hihat.triggerAttackRelease("16n", time, 0.3);
Plays the hi-hat for 16n duration. The 0.3 is the velocity (how loud). Hi-hats don't have pitch, so no note name is needed.
if (step % 4 !== 0) {
True when step is NOT 0, 4, 8, or 12. So bass plays on all 16th-note steps except the kick.
bass.triggerAttackRelease(bassNotes[step % 8], "16n", time, 0.5);
Plays the bass with a note from bassNotes[step % 8]. Since bassNotes has 8 notes and we have 16 steps, each note plays twice per cycle.
step = (step + 1) % 16;
Increments step and wraps it back to 0 after 15. This creates a looping 16-step sequence.
}, "16n");
Tells Tone.Transport to call this callback every "16n" (sixteenth note). At 130 BPM, that's 8 times per second.
Tone.Transport.bpm.value = 130;
Sets the tempo to 130 beats per minute. All note durations (16n, 8n, etc.) scale relative to this tempo.
Tone.Transport.start();
Starts the transport (the metronome), which begins calling all scheduled callbacks in sync with the tempo.
audioStarted = true;
Sets the global flag so draw() knows audio is running and can apply audio-reactive effects
startBtn.remove();
Deletes the 'ENTER EXPERIENCE' button from the page so it doesn't clutter the interface during playback

windowResized()

windowResized() is a p5.js callback that fires automatically on window resize events. Without it, the canvas would stay a fixed size when you resize the browser. By calling resizeCanvas(), we ensure the shader always renders fullscreen, and the resolution uniform passed to the shader stays accurate for proper pixel coordinate calculations.

function windowResized() {
  resizeCanvas(windowWidth, windowHeight);
}
Line-by-line explanation (2 lines)
function windowResized() {
p5.js automatically calls this function whenever the window is resized (browser window made bigger or smaller)
resizeCanvas(windowWidth, windowHeight);
Resizes the canvas to match the new window dimensions, ensuring the shader always fills the entire screen

📦 Key Variables

vertShader string

GLSL code for the vertex shader, which passes 3D vertex positions through to the fragment shader

const vertShader = `precision highp float; ...`;
fragShader string

GLSL code for the fragment shader, which raymarches the liquid sphere and computes colors for every pixel

const fragShader = `precision highp float; ...`;
liquidShader object

Compiled WebGL shader program created by createShader(), used in draw() to render the sphere

let liquidShader;
smoothVelX number

Smoothed horizontal mouse velocity, updated each frame using lerp to prevent jitter

let smoothVelX = 0;
smoothVelY number

Smoothed vertical mouse velocity, updated each frame and passed to the shader for ripple activation

let smoothVelY = 0;
audioStarted boolean

Flag tracking whether the user has clicked the 'ENTER EXPERIENCE' button and audio is running

let audioStarted = false;
startBtn object

Reference to the 'ENTER EXPERIENCE' button element, saved so we can remove it after audio starts

let startBtn;
masterVolume object

Tone.js Volume node controlling overall loudness, ramped up/down based on mouse speed in draw()

let masterVolume;
synthFilter object

Tone.js Filter node (lowpass) controlling brightness, ramped up/down based on mouse speed for audio-visual coupling

let synthFilter;

🔧 Potential Improvements (6)

Here are some ways this code could be enhanced:

BUG Fragment shader raymarching

If raymarching reaches t > 5.0 without hitting, it returns background color, but doesn't account for distance fog—distant misses look identical to near misses

💡 Add distance-based fog by interpolating color toward background based on t value, creating depth perception

PERFORMANCE Fragment shader

Raymarching 80 steps per pixel on a fullscreen canvas is expensive—on low-end devices, this can cause significant frame drops

💡 Add a quality setting based on devicePixelRatio or allow adjusting MAX_STEPS dynamically, or implement adaptive step size based on hit distance

STYLE JavaScript shader strings

The vertex and fragment shaders are stored as raw strings at the top level, making them hard to edit and validate without syntax highlighting

💡 Store shaders in separate .glsl files or use a template literal with proper GLSL syntax highlighting in your editor

FEATURE Audio system

The three synthesizers (kick, bass, hi-hat) are hardcoded with fixed envelopes and parameters—no way to customize the sound after initialization

💡 Expose key parameters (kick attack/decay, bass harmonicity, hi-hat noise type) as UI sliders or expose them to the draw() function so they respond to mouse position, not just velocity

FEATURE Visual rendering

The chrome shader has fixed color palette (dark blue, purple, silver)—it doesn't respond to audio or time-based variations beyond the environment map

💡 Map audio frequency spectrum (using Tone.js Analyser) to the color palette, or oscillate the color values based on beat detection for more dynamic visuals

BUG Audio reactivity in draw()

If audioStarted is false, the entire audio reactivity block is skipped, but the uniforms still pass unsmoothed velocity to the shader, creating inconsistency before the button is clicked

💡 Initialize smoothVelX/smoothVelY to always smooth, and let the shader always receive them; only control audio parameters conditionally

🔄 Code Flow

Code flow showing setup, draw, map, calcnormal, sdsphere, initaudio, windowresized

💡 Click on function names in the diagram to jump to their code

graph TD start[Start] --> setup[setup] setup --> canvas-creation[Canvas Setup] setup --> button-creation[Audio Button] setup --> shader-compilation[Shader Compilation] setup --> draw[draw loop] click setup href "#fn-setup" click canvas-creation href "#sub-canvas-creation" click button-creation href "#sub-button-creation" click shader-compilation href "#sub-shader-compilation" draw --> velocity-calculation[Instantaneous Velocity] draw --> velocity-smoothing[Velocity Smoothing] draw --> velocity-damping[Velocity Decay] draw --> audio-reactivity-block[Audio Reactivity] draw --> shader-activation[Shader Activation] draw --> uniform-passing[Uniform Assignment] click draw href "#fn-draw" click velocity-calculation href "#sub-velocity-calculation" click velocity-smoothing href "#sub-velocity-smoothing" click velocity-damping href "#sub-velocity-damping" click audio-reactivity-block href "#sub-audio-reactivity-block" click shader-activation href "#sub-shader-activation" click uniform-passing href "#sub-uniform-passing" audio-reactivity-block -->|if audio is running| velocity-magnitude[Velocity Magnitude] audio-reactivity-block -->|if audio is running| ripple-amplitude[Ripple Amplitude] audio-reactivity-block -->|if audio is running| master-chain[Master Audio Chain] click velocity-magnitude href "#sub-velocity-magnitude" click ripple-amplitude href "#sub-ripple-amplitude" click master-chain href "#sub-master-chain" master-chain --> kick-synth[Kick Drum Synthesizer] master-chain --> bass-synth[Bass Synthesizer] master-chain --> hihat-synth[Hi-Hat Cymbal] click kick-synth href "#sub-kick-synth" click bass-synth href "#sub-bass-synth" click hihat-synth href "#sub-hihat-synth" draw -->|every frame| map[map] map --> base-sphere[Base Sphere Distance] base-sphere --> sdsphere[sdsphere] click map href "#fn-map" click base-sphere href "#sub-base-sphere" click sdsphere href "#fn-sdsphere" draw -->|every frame| ripple-calculation[3D Ripple Wave] ripple-calculation --> wobble-effect[Autonomous Wobble] click ripple-calculation href "#sub-ripple-calculation" click wobble-effect href "#sub-wobble-effect" draw -->|every frame| calcnormal[calcnormal] calcnormal --> epsilon-definition[Epsilon for Differentiation] calcnormal --> normal-calculation[Gradient Sampling] click calcnormal href "#fn-calcnormal" click epsilon-definition href "#sub-epsilon-definition" click normal-calculation href "#sub-normal-calculation" setup --> initaudio[initaudio] initaudio --> tone-init[Audio Context Initialization] initaudio --> transport-start[Transport Start] initaudio --> sequencer-loop[Sequencer Callback] click initaudio href "#fn-initaudio" click tone-init href "#sub-tone-init" click transport-start href "#sub-transport-start" click sequencer-loop href "#sub-sequencer-loop" setup --> windowresized[windowresized] click windowresized href "#fn-windowresized"

❓ Frequently Asked Questions

What kind of visuals does the 'uhh very cool game for cdww' sketch produce?

The sketch generates a mesmerizing 3D representation of a liquid metal sphere, dynamically influenced by high-frequency ripples and subtle wobbles.

How can users interact with the sketch during playback?

Users can interact by moving their mouse, which creates ripples on the surface of the liquid metal sphere, adding a reactive element to the visual experience.

What creative coding techniques are showcased in this p5.js sketch?

This sketch demonstrates raymarching techniques and shader programming to create complex 3D shapes and dynamic visual effects based on user input.

Preview

uhh very cool game for cdww - p5.js creative coding sketch preview
Sketch Preview
Code flow diagram showing the structure of uhh very cool game for cdww - Code flow showing setup, draw, map, calcnormal, sdsphere, initaudio, windowresized
Code Flow Diagram