Wordle

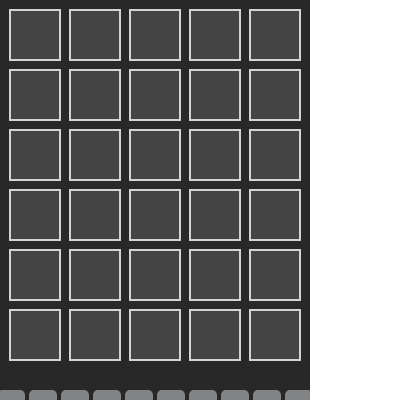
This sketch recreates Wordle, the daily word-guessing game, using object-oriented p5.js code. Players type 5-letter guesses into a grid of boxes and get color-coded feedback (green, yellow, gray) both on the grid and on an on-screen keyboard, until they guess the secret word or run out of six tries.

🧪 Try This!

Experiment with the code by making these changes:

  1. Reveal a fixed word for testing — Replacing the random word pick with a hardcoded word lets you test guesses predictably instead of restarting the sketch to get a word you know.
  2. Give yourself more attempts — Increasing the row count in setup() and the row limit in keyPressed() gives you 8 guesses instead of 6, making the game noticeably easier.
  3. Recolor the win message — Adding a fill() call right before the winning text() draws 'YAY! YOU WON!' in gold instead of white, making victories feel more celebratory.
Prefer the full editor? Open it there →

📖 About This Sketch

This sketch rebuilds the word-guessing game Wordle entirely in p5.js: a 5x6 grid of letter boxes, a secret target word picked at random from a word list, and an on-screen QWERTY keyboard that changes color as you play. It leans on two custom JavaScript classes (Box and Key), 2D arrays for the grid, keyboard event handling with keyPressed(), and string/array comparison logic to figure out which letters are green, yellow, or gray.

The code is organized around two small classes that know how to draw themselves, a big nested array called boxes that represents the game grid, and a handful of functions that manage game state: setup() builds the board and keyboard, draw() renders everything every frame, keyPressed() captures typing, and checkGuess() plus updateKeypadColor() contain the actual Wordle scoring algorithm. Studying this file teaches you how to combine classes, arrays, and conditional logic to build a real, playable game rather than just an animation.

⚙️ How It Works

  1. When the sketch loads, setup() creates a 310x550 canvas, picks a random 5-letter word from wordList as the secret target, builds a 6x5 grid of Box objects, and calls setupKeypad() to lay out three rows of Key objects for the on-screen keyboard.
  2. Every frame, draw() clears the background, loops through the 2D boxes array to draw every letter tile, loops through the keypad array to draw every key, and displays a win or lose message if the game has ended.
  3. Typing a letter key calls keyPressed(), which writes the uppercase letter into the current box and advances to the next box in the row; Backspace removes the last letter, and Enter submits the row.
  4. Submitting a row runs checkGuess(), which first marks any letters in the exact correct position green, then checks the remaining letters against the leftover target letters to mark yellows and grays, updating both the box colors and the matching keyboard key colors via updateKeypadColor().
  5. checkGuess() also compares the full guess to the target word to set won to true, or, if this was the sixth failed attempt, sets wrong to true - either of which stops further typing and displays the corresponding message in draw().

🎓 Concepts You'll Learn

ES6 classes2D arraysKeyboard event handlingString and array comparisonGame state managementObject-oriented drawingConditional logic for scoring

📝 Code Breakdown

Box constructor

Each Box is a small self-contained object that remembers its own position, color, and letter. This is the core idea of object-oriented programming: bundling data and behavior together so 30 boxes can each manage themselves.

class Box {
  constructor(x, y) {
    this.x = x;
    this.y = y;
    this.color = 'rgb(68,68,68)';
    this.text = '';
  }
Line-by-line explanation (4 lines)
this.x = x;
Stores the box's horizontal pixel position so it knows where to draw itself.
this.y = y;
Stores the box's vertical pixel position.
this.color = 'rgb(68,68,68)';
Sets the default dark-gray fill color before any guess feedback is applied.
this.text = '';
Starts with an empty letter - this gets filled in as the player types.

Box.draw()

draw() is called once per Box every frame from the main draw() loop. Keeping drawing logic inside the class means the rest of the sketch never needs to know HOW a box is drawn, only that it can be.

🔬 This draws the letter on top of the tile. What happens if you change textSize(32) to a much bigger or smaller number - does the letter stay centered?

    fill("white");
    noStroke();
    textSize(32);
    text(this.text, this.x + 25, this.y + 25);
  draw() {
    fill(this.color);
    stroke('lightgray');
    strokeWeight(2);
    rect(this.x, this.y, 50, 50);
    fill("white");
    noStroke();
    textSize(32);
    text(this.text, this.x + 25, this.y + 25);
  }
}
Line-by-line explanation (5 lines)
fill(this.color);
Sets the fill color for the box to whatever this.color currently is (gray, green, yellow, etc.).
stroke('lightgray');
Gives every box a light gray outline so tiles are visible against the dark background.
rect(this.x, this.y, 50, 50);
Draws the actual 50x50 pixel square tile at this box's stored position.
fill("white");
Switches the fill color to white so the letter text is readable on top of the tile.
text(this.text, this.x + 25, this.y + 25);
Draws the letter centered in the middle of the tile (offset by half the tile size).

Key constructor

Like Box, Key packages position, size, and appearance together. Storing char lets updateKeypadColor() later search through the keypad array to find 'the key for letter E' without needing a separate lookup table.

class Key {
  constructor(char, x, y, w, h) {
    this.char = char;
    this.x = x;
    this.y = y;
    this.w = w;
    this.h = h;
    this.color = '#818384';
  }
Line-by-line explanation (4 lines)
this.char = char;
Stores which letter this key represents, like 'Q' or 'A'.
this.w = w;
Stores the key's width so it knows how big to draw itself and how to detect clicks.
this.h = h;
Stores the key's height, used the same way as width.
this.color = '#818384';
Sets the default untested gray color, matching the UNTESTED_COLOR constant used later for comparisons.

Key.draw()

This mirrors Box.draw() but for keyboard keys, showing how similar drawing patterns (fill, shape, text) repeat across different classes in the same sketch.

  draw() {
    fill(this.color);
    noStroke();
    rect(this.x, this.y, this.w, this.h, 5);
    fill("white");
    textSize(18);
    text(this.char, this.x + this.w / 2, this.y + this.h / 2 + 6);
  }
Line-by-line explanation (2 lines)
rect(this.x, this.y, this.w, this.h, 5);
Draws the key as a rounded rectangle - the final 5 is the corner radius in pixels.
text(this.char, this.x + this.w / 2, this.y + this.h / 2 + 6);
Draws the letter roughly centered in the key, with a +6 pixel nudge downward to visually balance the text.

Key.isClicked()

isClicked() is written and ready to use, but notice it is never actually called anywhere in the sketch - a common gap when building click/touch interaction for on-screen buttons. This is a good example of a hit-test function you can reuse in mousePressed() or touchStarted().

🔬 This is a classic 'point inside a box' hit-test. What happens to click accuracy if you shrink the hit area by subtracting a few pixels from this.w and this.h?

  isClicked(px, py) {
    return px > this.x && px < this.x + this.w && py > this.y && py < this.y + this.h;
  }
  isClicked(px, py) {
    return px > this.x && px < this.x + this.w && py > this.y && py < this.y + this.h;
  }
}
Line-by-line explanation (1 lines)

🔧 Subcomponents:

calculation Point-in-rectangle test return px > this.x && px < this.x + this.w && py > this.y && py < this.y + this.h;

Checks whether a given point (like a mouse or touch position) falls inside this key's rectangle.

return px > this.x && px < this.x + this.w && py > this.y && py < this.y + this.h;
Combines four comparisons with && so the function only returns true if the point is inside all four edges of the key's rectangle - right of the left edge, left of the right edge, below the top edge, and above the bottom edge.

setup()

setup() runs once when the sketch starts. It's the natural place to build data structures like the boxes grid and keypad array before draw() starts rendering them every frame.

🔬 This nested loop builds a 6-row by 5-column grid. What happens if you change the inner loop's limit from 5 to 6 - do you get a 6-letter word grid, and what would break elsewhere in the code?

  for (let j = 0; j < 6; j++) {
    for (let i = 0; i < 5; i++) {
      let nbox = new Box(10 + i * 60, 10 + j * 60);
      boxes[j].push(nbox);
    }
  }
function setup() {
  createCanvas(310, 550);
  textAlign(CENTER, CENTER);
  
  targetWord = random(wordList).toUpperCase();
  console.log("Target word:", targetWord); 

  for (let j = 0; j < 6; j++) {
    for (let i = 0; i < 5; i++) {
      let nbox = new Box(10 + i * 60, 10 + j * 60);
      boxes[j].push(nbox);
    }
  }

  setupKeypad(); 
  }
Line-by-line explanation (7 lines)

🔧 Subcomponents:

for-loop Build the letter grid for (let j = 0; j < 6; j++) { for (let i = 0; i < 5; i++) {

Creates 6 rows of 5 Box objects each, positioning them 60 pixels apart, and stores them in the boxes 2D array.

createCanvas(310, 550);
Creates the drawing canvas sized to fit the 5x6 grid plus the keyboard beneath it.
textAlign(CENTER, CENTER);
Makes all future text() calls center both horizontally and vertically on their given coordinates, which is why letters land in the middle of tiles and keys.
targetWord = random(wordList).toUpperCase();
Picks one random word from the wordList array and converts it to uppercase, since guesses are compared in uppercase.
console.log("Target word:", targetWord);
Prints the secret word to the browser console - handy for testing/cheating while developing, but should probably be removed for a real release.
let nbox = new Box(10 + i * 60, 10 + j * 60);
Creates a new Box at a position calculated from its column (i) and row (j), spacing each tile 60 pixels apart with a 10 pixel margin.
boxes[j].push(nbox);
Adds the new box into row j of the boxes 2D array so it can be drawn and updated later.
setupKeypad();
Calls the helper function that builds all the on-screen keyboard keys.

setupKeypad()

This function shows how to lay out a row of UI elements dynamically by first computing the total row width, then centering it, rather than hardcoding pixel positions for every key.

🔬 This loop places one key per letter in the top row. What happens if you change paddingX to 0 or to a much larger number like 20?

  for (let i = 0; i < keypadRows[0].length; i++) {
    let char = keypadRows[0][i];
    keypad.push(new Key(char, startX1 + i * (keyWidth + paddingX), rowY, keyWidth, keyHeight));
  }
function setupKeypad() {
  let keyWidth = 28; 
  let keyHeight = 40;
  let rowY = 390; 
  let paddingX = 4;
  let paddingY = 6;

  let row1Width = (keyWidth + paddingX) * keypadRows[0].length - paddingX;
  let startX1 = (width - row1Width) / 2;
  for (let i = 0; i < keypadRows[0].length; i++) {
    let char = keypadRows[0][i];
    keypad.push(new Key(char, startX1 + i * (keyWidth + paddingX), rowY, keyWidth, keyHeight));
  }
  rowY += keyHeight + paddingY;

  let row2Width = (keyWidth + paddingX) * keypadRows[1].length - paddingX;
  let startX2 = (width - row2Width) / 2;
  for (let i = 0; i < keypadRows[1].length; i++) {
    let char = keypadRows[1][i];
    keypad.push(new Key(char, startX2 + i * (keyWidth + paddingX), rowY, keyWidth, keyHeight));
  }
  rowY += keyHeight + paddingY;

  let enterWidth = keyWidth * 1.5; 
  let backspaceWidth = keyWidth * 1.5; 
  let row3ContentWidth = enterWidth + paddingX + (keyWidth + paddingX) * keypadRows[2].length - paddingX + paddingX + backspaceWidth;
  let startX3 = (width - row3ContentWidth) / 2;

  for (let i = 0; i < keypadRows[2].length; i++) {
    let char = keypadRows[2][i];
    keypad.push(new Key(char, startX3 + i * (keyWidth + paddingX)+keyWidth * 1.5, rowY, keyWidth, keyHeight));
  }
  startX3 += (keyWidth + paddingX) * keypadRows[2].length;
}
Line-by-line explanation (4 lines)

🔧 Subcomponents:

for-loop Build QWERTYUIOP row for (let i = 0; i < keypadRows[0].length; i++) {

Creates a Key object for each letter in the first keyboard row and centers the whole row horizontally.

for-loop Build ASDFGHJKL row for (let i = 0; i < keypadRows[1].length; i++) {

Creates a Key object for each letter in the second row, positioned below the first.

for-loop Build ZXCVBNM row for (let i = 0; i < keypadRows[2].length; i++) {

Creates a Key object for each letter in the third row, leaving space on either side for Enter and Backspace keys.

let row1Width = (keyWidth + paddingX) * keypadRows[0].length - paddingX;
Calculates the total pixel width the first keyboard row will take up, so it can be centered.
let startX1 = (width - row1Width) / 2;
Finds the x position to start drawing the row so that it is horizontally centered on the canvas.
keypad.push(new Key(char, startX1 + i * (keyWidth + paddingX), rowY, keyWidth, keyHeight));
Creates a new Key for this letter at a calculated x position and adds it to the global keypad array.
rowY += keyHeight + paddingY;
Moves the vertical position down for the next keyboard row, based on key height plus a gap.

draw()

draw() is p5.js's main animation loop, running about 60 times per second. Here it doubles as the game's renderer, redrawing the grid and keyboard from scratch every frame and layering an end-game message on top when needed.

🔬 These two conditionals show the end-game messages. What happens if you add fill() or a different textSize() right before the winning text() call - can you make it a different color from the losing message?

  if (wrong){
    text("YOU FAILED \n THE WORD WAS: \n" + targetWord, width/2, height/2)
  }
  if (won){
    text("YAY! \n YOU WON!", width/2, height/2)
  }
function draw() {
  background(40);
  for (let row = 0; row < boxes.length; row++) {
    for (let col = 0; col < boxes[row].length; col++) {
      boxes[row][col].draw();
    }
  }

  for (let key of keypad) {
    key.draw();
  }

  stroke(0)
  strokeWeight(15)
  fill("white");
  textSize(32); 
  if (wrong){
    text("YOU FAILED \n THE WORD WAS: \n" + targetWord, width/2, height/2)
  }
  if (won){
    text("YAY! \n YOU WON!", width/2, height/2)
  }
}
Line-by-line explanation (6 lines)

🔧 Subcomponents:

for-loop Draw every box in the grid for (let row = 0; row < boxes.length; row++) { for (let col = 0; col < boxes[row].length; col++) {

Loops through the 2D boxes array and calls draw() on every tile, row by row.

for-loop Draw every keyboard key for (let key of keypad) { key.draw(); }

Loops through the flat keypad array and draws each on-screen key.

conditional Show win/lose message if (wrong){ text("YOU FAILED \n THE WORD WAS: \n" + targetWord, width/2, height/2) } if (won){ text("YAY! \n YOU WON!", width/2, height/2) }

Displays a game-over message once the player has either guessed correctly or used all six attempts.

background(40);
Repaints the whole canvas dark gray every frame, which is what erases the previous frame before redrawing everything fresh.
boxes[row][col].draw();
Tells each individual Box object to draw itself using its own stored color and text.
key.draw();
Tells each individual Key object in the keypad array to draw itself.
if (wrong){
Checks the global wrong flag, which becomes true after the sixth failed guess.
text("YOU FAILED \n THE WORD WAS: \n" + targetWord, width/2, height/2)
Displays a losing message that reveals the secret target word, using string concatenation to insert it into the message.
if (won){
Checks the global won flag, which becomes true the moment checkGuess() detects a correct guess.

keyPressed()

keyPressed() is a p5.js event function that runs automatically whenever any key is pressed. Using if/else if chains here lets one function handle three completely different kinds of input: letters, Backspace, and Enter.

🔬 This block only submits a guess when currentBox === 5 (all 5 letters typed). What happens if you loosen that to currentBox >= 3 - can you submit incomplete guesses?

  } else if (key === 'Enter') {
    if (currentBox === 5 && currentRow < 6){ 
      checkGuess(); 
      if (currentRow >= 5 && !won){
        wrong = true;
      }
      currentRow++;
      currentBox = 0;
    }
  }
function keyPressed() {
  if (won || wrong) return;

  if (key >= 'a' && key <= 'z' && key.length === 1) {
    if (currentBox < 5 && currentRow < 6) {
      boxes[currentRow][currentBox].text = key.toUpperCase();
      currentBox++;
    }
  } else if (key === 'Backspace') {
    if (currentBox > 0) {
      currentBox--;
      boxes[currentRow][currentBox].text = '';
    }
  } else if (key === 'Enter') {
    if (currentBox === 5 && currentRow < 6){ 
      checkGuess(); 
      if (currentRow >= 5 && !won){
        wrong = true;
      }
      currentRow++;
      currentBox = 0;
    }
  }
}
Line-by-line explanation (9 lines)

🔧 Subcomponents:

conditional Ignore input after game ends if (won || wrong) return;

Stops any further typing from being processed once the player has already won or lost.

conditional Handle letter keys if (key >= 'a' && key <= 'z' && key.length === 1) {

Detects a single lowercase letter keypress and writes it into the current box.

conditional Handle Backspace } else if (key === 'Backspace') {

Removes the last typed letter and moves the cursor back one box.

conditional Handle Enter } else if (key === 'Enter') {

Submits the current row for scoring once all 5 boxes are filled.

if (won || wrong) return;
Immediately exits the function if the game is already over, so keys stop doing anything.
if (key >= 'a' && key <= 'z' && key.length === 1) {
Checks that the pressed key is a single lowercase letter (p5.js's key variable gives lowercase letters by default).
boxes[currentRow][currentBox].text = key.toUpperCase();
Writes the typed letter (converted to uppercase for display) into the current box in the current row.
currentBox++;
Moves the typing cursor forward to the next box in the row.
if (currentBox === 5 && currentRow < 6){
Only allows submitting the row with Enter once all 5 letters have been typed.
checkGuess();
Runs the scoring logic that colors the row and keyboard based on how close the guess is.
if (currentRow >= 5 && !won){
Detects that this was the sixth (last) attempt and the player still hasn't won, triggering the loss condition.
currentRow++;
Moves to the next row for the next guess.
currentBox = 0;
Resets the typing cursor back to the first box of the new row.

checkGuess()

checkGuess() is the heart of the whole game - it implements the classic two-pass Wordle scoring algorithm: greens are found first and removed from the pool, THEN yellows/grays are calculated from what's left. This two-pass approach is what correctly handles repeated letters.

🔬 This first pass finds exact-position matches before anything else runs. What do you think would go wrong with double letters (like the two Ps in HAPPY) if you deleted the 'targetChars[i] = null;' line?

  for (let i = 0; i < 5; i++) {
    let char = row[i].text;
    if (char === targetWord[i]) {
      row[i].color = GREEN_COLOR;
      updateKeypadColor(char, GREEN_COLOR);
      targetChars[i] = null;
    }
  }
function checkGuess() {
  let row = boxes[currentRow];
  let guess = row.map(b => b.text).join("");

  let targetChars = targetWord.split('');

  for (let i = 0; i < 5; i++) {
    let char = row[i].text;
    if (char === targetWord[i]) {
      row[i].color = GREEN_COLOR;
      updateKeypadColor(char, GREEN_COLOR);
      targetChars[i] = null;
    }
  }

  
  for (let i = 0; i < 5; i++) {
    
    if (row[i].color === GREEN_COLOR) continue;

    let char = row[i].text;
    let charIndexInTarget = targetChars.indexOf(char);

    if (charIndexInTarget !== -1) {
      row[i].color = YELLOW_COLOR;
      updateKeypadColor(char, YELLOW_COLOR);
      targetChars[charIndexInTarget] = null; // Mark as used
    } else {
      row[i].color = GRAY_COLOR;
      updateKeypadColor(char, GRAY_COLOR);
    }
  }
  
  if (guess === targetWord) {
    won = true;
  }
}
Line-by-line explanation (9 lines)

🔧 Subcomponents:

for-loop First pass: mark greens for (let i = 0; i < 5; i++) { let char = row[i].text; if (char === targetWord[i]) {

Scans every letter first to find exact position matches, marking them green and removing them from the pool of remaining target letters.

for-loop Second pass: mark yellows and grays for (let i = 0; i < 5; i++) { if (row[i].color === GREEN_COLOR) continue;

For every letter not already green, checks if it exists elsewhere in the remaining target letters (yellow) or not at all (gray).

conditional Win detection if (guess === targetWord) { won = true; }

Compares the full guess string to the target word to decide if the player has won.

let row = boxes[currentRow];
Grabs a reference to the array of 5 Box objects for the row that was just submitted.
let guess = row.map(b => b.text).join("");
Builds a single string like 'HAPPY' by pulling the .text out of every box and joining them together.
let targetChars = targetWord.split('');
Splits the target word into an array of individual letters so they can be 'used up' one at a time during comparison.
if (char === targetWord[i]) {
Checks if the letter in this exact position matches the target word's letter in the same position - a green (correct spot) match.
targetChars[i] = null;
Removes this letter from the pool of remaining target letters so it can't be reused later to mark a false yellow.
if (row[i].color === GREEN_COLOR) continue;
Skips letters that were already marked green in the first pass, since they don't need to be checked again.
let charIndexInTarget = targetChars.indexOf(char);
Searches the remaining (non-green) target letters for this letter anywhere in the word.
targetChars[charIndexInTarget] = null; // Mark as used
Marks that letter as consumed so a repeated letter in the guess can't match the same target letter twice.
if (guess === targetWord) {
Compares the whole guessed word to the target word to check for a complete win, independent of the per-letter coloring.

updateKeypadColor()

This function solves a subtle real Wordle bug: without priority rules, a letter that was already known to be green (like the E in GREEN) could get overwritten with gray or yellow from a later guess. The nested conditionals encode a simple rule: colors can only improve, never get worse.

🔬 This chain of conditions enforces green > yellow > gray priority so a key never downgrades. What would happen visually if you removed the 'key.color === GREEN_COLOR' check entirely and let any newColor overwrite it?

      if (key.color === GREEN_COLOR) {
        // Green is the best, don't change
      } else if (key.color === YELLOW_COLOR && newColor === GREEN_COLOR) {
        key.color = newColor;
      } else if (key.color === GRAY_COLOR && (newColor === GREEN_COLOR || newColor === YELLOW_COLOR)) {
        key.color = newColor;
      }
function updateKeypadColor(char, newColor) {
  for (let key of keypad) {
    if (key.char === char) {
      if (key.color === GREEN_COLOR) {
        // Green is the best, don't change
      } else if (key.color === YELLOW_COLOR && newColor === GREEN_COLOR) {
        key.color = newColor;
      } else if (key.color === GRAY_COLOR && (newColor === GREEN_COLOR || newColor === YELLOW_COLOR)) {
        key.color = newColor;
      } else if (key.color === UNTESTED_COLOR && (newColor === GREEN_COLOR || newColor === YELLOW_COLOR || newColor === GRAY_COLOR)) {
        key.color = newColor;
      }
      break;
    }
  }
}
Line-by-line explanation (6 lines)

🔧 Subcomponents:

for-loop Find matching key for (let key of keypad) { if (key.char === char) {

Searches the keypad array for the single Key object whose letter matches the guessed character.

conditional Color priority rules if (key.color === GREEN_COLOR) { // Green is the best, don't change

Ensures a key's color can only be upgraded (gray to yellow to green) and never downgraded once set.

for (let key of keypad) {
Loops through every key on the on-screen keyboard looking for a specific letter.
if (key.char === char) {
Checks if this key represents the letter we want to update.
if (key.color === GREEN_COLOR) {
If the key is already green, does nothing - green is the best possible state and should never be overwritten.
} else if (key.color === YELLOW_COLOR && newColor === GREEN_COLOR) {
Only upgrades a yellow key to green, never lets it go back to yellow or gray.
} else if (key.color === UNTESTED_COLOR && (newColor === GREEN_COLOR || newColor === YELLOW_COLOR || newColor === GRAY_COLOR)) {
An untested (default gray) key can be set to any new color, since it has no prior information.
break;
Stops searching once the matching key has been found and updated, since there's only ever one key per letter.

touchStarted()

touchStarted() is a p5.js event function for handling mobile touch input, the touch-screen equivalent of mousePressed(). This particular implementation has a bug worth investigating: it calls handleKeypadClick(), a function that isn't defined anywhere else in the sketch.

function touchStarted() {
  event.preventDefault(); 
  if (touches.length > 0) {
    handleKeypadClick(touches[0].x, touches[0].y);
  }
}
Line-by-line explanation (3 lines)

🔧 Subcomponents:

conditional Check for an active touch if (touches.length > 0) {

Makes sure there is at least one active touch point before trying to read its coordinates.

event.preventDefault();
Stops the browser's default touch behavior (like scrolling or zooming) so the touch is used only by the sketch.
if (touches.length > 0) {
p5.js stores all active touch points in the touches array - this checks that the user is actually touching the screen.
handleKeypadClick(touches[0].x, touches[0].y);
Attempts to pass the first touch's coordinates to a function that should figure out which on-screen key was tapped.

📦 Key Variables

wordList array

A large list of valid 5-letter words that the game randomly picks from as the secret target word.

let wordList = ["apple", "beach", ...];
boxes array

A 2D array (6 rows x 5 columns) of Box objects representing every letter tile on the game board.

let boxes = [[], [], [], [], [], []];
currentRow number

Tracks which row (guess attempt, 0-5) the player is currently filling in.

let currentRow = 0;
currentBox number

Tracks which box (letter position, 0-4) within the current row the player is currently typing into.

let currentBox = 0;
targetWord string

Stores the randomly chosen secret word (in uppercase) that the player is trying to guess.

let targetWord = "";
wrong boolean

Becomes true once the player has used all 6 attempts without guessing correctly, ending the game in a loss.

let wrong = false;
won boolean

Becomes true the moment the player's guess exactly matches the target word, ending the game in a win.

let won = false;
keypad array

A flat array of Key objects representing every button on the on-screen QWERTY keyboard.

let keypad = [];
keypadRows array

Defines the letters in each of the three keyboard rows, used to lay out the keypad in setupKeypad().

const keypadRows = ["QWERTYUIOP", "ASDFGHJKL", "ZXCVBNM"];
UNTESTED_COLOR string

The default gray hex color for boxes/keys that haven't been scored yet.

const UNTESTED_COLOR = '#818384';
GRAY_COLOR string

The hex color used to mark a letter that isn't in the target word at all.

const GRAY_COLOR = '#3a3a3c';
YELLOW_COLOR string

The hex color used to mark a letter that's in the target word but in the wrong position.

const YELLOW_COLOR = '#b59f3b';
GREEN_COLOR string

The hex color used to mark a letter that's in exactly the right position.

const GREEN_COLOR = '#538d4e';

🔧 Potential Improvements (4)

Here are some ways this code could be enhanced:

BUG touchStarted()

The function calls handleKeypadClick(touches[0].x, touches[0].y), but handleKeypadClick is never defined anywhere in the sketch, so tapping the screen on a touch device will throw a runtime error.

💡 Write a handleKeypadClick(px, py) function that loops through the keypad array, calls key.isClicked(px, py) on each one, and simulates the equivalent of that key being typed (similar to the letter-handling branch of keyPressed()).

FEATURE Key.isClicked() / mousePressed

Key.isClicked() is fully implemented but never called - there is no mousePressed() function, so desktop users can only play by physically typing on a keyboard, not by clicking the on-screen keys.

💡 Add a mousePressed() function that loops through keypad, checks key.isClicked(mouseX, mouseY) for each key, and triggers the same letter/Backspace/Enter logic used in keyPressed().

STYLE wordList

The word list contains at least one non-word entry ('caneo') and some duplicate words (e.g. 'earth' appears twice), which could let an invalid word be chosen as the target or accepted as a valid guess.

💡 Run the array through a Set to remove duplicates and manually review entries for typos before using it as the answer pool.

BUG keyPressed() Enter handling

There is no check that the typed guess is actually a real word from wordList before scoring it - any 5 letters can be submitted, unlike real Wordle which rejects invalid words.

💡 Before calling checkGuess(), check if wordList.includes(guess.toLowerCase()) and, if not, show a brief 'not in word list' message instead of consuming a turn.

🔄 Code Flow

Code flow showing box, boxdraw, key, keydraw, keyisclicked, setup, setupkeypad, draw, keypressed, checkguess, updatekeypadcolor, touchstarted

💡 Click on function names in the diagram to jump to their code

graph TD start[Start] --> setup[setup] setup --> setup-grid-loop[setup-grid-loop] setup-grid-loop --> setupkeypad[setupkeypad] setupkeypad --> draw[draw loop] draw --> draw-grid-loop[draw-grid-loop] draw-grid-loop --> draw-keypad-loop[draw-keypad-loop] draw-keypad-loop --> draw-endgame-check[draw-endgame-check] draw-endgame-check --> keypressed[keypressed] draw-endgame-check --> touchstarted[touchstarted] draw --> draw-endgame-check draw-grid-loop --> boxdraw[boxdraw] draw-keypad-loop --> keydraw[keydraw] keypressed --> keypressed-guard[keypressed-guard] keypressed-guard --> keypressed-letter[keypressed-letter] keypressed-guard --> keypressed-backspace[keypressed-backspace] keypressed-guard --> keypressed-enter[keypressed-enter] keypressed-letter --> checkguess[checkguess] checkguess --> checkguess-green-pass[checkguess-green-pass] checkguess-green-pass --> checkguess-yellow-gray-pass[checkguess-yellow-gray-pass] checkguess-yellow-gray-pass --> checkguess-win-check[checkguess-win-check] checkguess-win-check --> updatekeypadcolor[updatekeypadcolor] updatekeypadcolor --> updatekeypad-find-key[updatekeypad-find-key] updatekeypad-find-key --> updatekeypad-priority[updatekeypad-priority] touchstarted --> touchstarted-check[touchstarted-check] touchstarted-check --> isclicked-boundcheck[isclicked-boundcheck] click setup href "#fn-setup" click setup-grid-loop href "#sub-setup-grid-loop" click setupkeypad href "#fn-setupkeypad" click draw href "#fn-draw" click draw-grid-loop href "#sub-draw-grid-loop" click draw-keypad-loop href "#sub-draw-keypad-loop" click draw-endgame-check href "#sub-draw-endgame-check" click keypressed href "#fn-keypressed" click keypressed-guard href "#sub-keypressed-guard" click keypressed-letter href "#sub-keypressed-letter" click keypressed-backspace href "#sub-keypressed-backspace" click keypressed-enter href "#sub-keypressed-enter" click checkguess href "#fn-checkguess" click checkguess-green-pass href "#sub-checkguess-green-pass" click checkguess-yellow-gray-pass href "#sub-checkguess-yellow-gray-pass" click checkguess-win-check href "#sub-checkguess-win-check" click updatekeypadcolor href "#fn-updatekeypadcolor" click updatekeypad-find-key href "#sub-updatekeypad-find-key" click updatekeypad-priority href "#sub-updatekeypad-priority" click touchstarted href "#fn-touchstarted" click touchstarted-check href "#sub-touchstarted-check" click isclicked-boundcheck href "#sub-isclicked-boundcheck"

❓ Frequently Asked Questions

What visual elements are featured in the Wordle sketch created with p5.js?

The Wordle sketch visually presents a grid of colored boxes for letters and interactive keys for input, creating a colorful and engaging word-guessing game layout.

How can users interact with the Wordle sketch?

Users can click on the virtual keys to input letters and attempt to guess the hidden word, making the experience interactive and fun.

What creative coding concepts does the Wordle sketch illustrate?

This sketch demonstrates object-oriented programming by using classes to define the behavior of boxes and keys, as well as handling user interactions within a graphical interface.

Preview

Wordle - p5.js creative coding sketch preview
Sketch Preview
Code flow diagram showing the structure of Wordle - Code flow showing box, boxdraw, key, keydraw, keyisclicked, setup, setupkeypad, draw, keypressed, checkguess, updatekeypadcolor, touchstarted
Code Flow Diagram