Sketch 2026-01-11 20:18

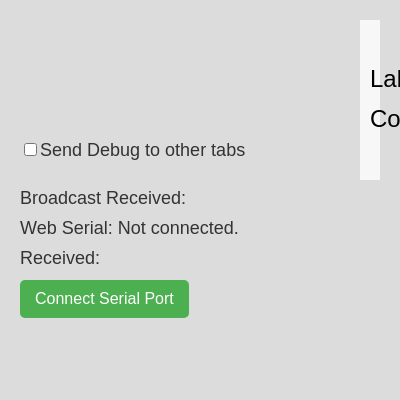
This sketch uses ml5.js to classify video from your webcam in real-time and sends the classification results to a microcontroller via Web Serial API. It displays the live video feed alongside the current prediction label and confidence percentage, creating a bridge between machine learning in the browser and hardware devices.

🧪 Try This!

Experiment with the code by making these changes:

  1. Change the baud rate to match your Arduino — If your Arduino uses 115200 baud (common in modern boards), the connection will fail at 9600—change it to match
  2. Make the video preview bigger — The video takes up half the canvas height—increase this to show it larger on screen
  3. Send predictions every 1 second instead of 3 — Faster updates mean the microcontroller gets new predictions sooner—useful for responsive hardware
  4. Display the second-best prediction instead of the top one — See the runner-up class—useful for debugging or exploring model uncertainty
  5. Make the prediction text box fully opaque — Increase the alpha from 200 to 255 so the white box is completely solid and blocks the video underneath
Prefer the full editor? Open it there →

📖 About This Sketch

This sketch connects three powerful web technologies: ml5.js for machine learning classification, the Web Serial API for communicating with microcontrollers, and the BroadcastChannel API for sharing data between browser tabs. When you load it, your webcam activates and a pre-trained Teachable Machine model continuously analyzes each video frame, displaying the top prediction label and confidence score on the canvas. Every few seconds, if the prediction changes, the sketch automatically sends that label to a connected Arduino or other serial device via USB.

The code is organized into setup and draw functions that handle UI and visualization, a classification pipeline (preload, modelLoaded, classifyVideo, gotResult) that powers the machine learning, and a suite of serial communication functions that manage USB connections and data transfer. By studying it, you will learn how to load and use a trained ml5.js model, display live video on a p5.js canvas, manage asynchronous serial I/O, and coordinate multiple streams of real-time data.

⚙️ How It Works

  1. When the page loads, preload() fetches the Teachable Machine model from the URL specified in modelURL, while setup() initializes the canvas, hides the raw video element, and creates UI buttons and status text for serial connection control.
  2. Once the model loads, modelLoaded() is called and classifyVideo() begins feeding each video frame to the classifier in a loop—ml5.js processes the frame and calls gotResult() with the results.
  3. In gotResult(), the results array is sorted by confidence, the top prediction is stored in currentClassification, and if BroadcastChannel is enabled and the debug checkbox is ticked, the prediction is broadcast to other open tabs on the same origin.
  4. The draw() loop runs 60 times per second: it clears the canvas, scales and displays the video feed in the top-left, draws a semi-transparent rectangle next to it containing the current label and confidence formatted as a percentage, and checks whether enough time has passed and the label has changed to send the new label over serial to the connected microcontroller.
  5. When you click 'Connect Serial Port', connectSerial() opens a browser dialog to select a USB device, opens the port at 9600 baud, and starts readSerial() which waits for incoming messages and displays them on screen.
  6. Clicking 'Disconnect' or unplugging the cable calls portDisconnected(), which closes the port and resets all serial variables so the button text changes back to 'Connect Serial Port' and is ready to reconnect.

🎓 Concepts You'll Learn

Machine learning classificationWebcam video captureWeb Serial APIAsynchronous I/OBroadcastChannel APICanvas drawing and transforms

📝 Code Breakdown

preload()

preload() is a special p5.js function that runs before setup()—use it to load images, fonts, or (in this case) machine learning models so they are ready when your sketch starts.

function preload() {
  // Load the Teachable Machine model
  // Reference: https://learn.ml5js.org/docs/#/reference/image-classifier?id=createclassifier
  classifier = ml5.imageClassifier(modelURL, modelLoaded);
}
Line-by-line explanation (1 lines)
classifier = ml5.imageClassifier(modelURL, modelLoaded);
Loads the Teachable Machine model from the URL and calls modelLoaded() when it finishes—preload() ensures this happens before setup() runs

setup()

setup() runs once when the sketch starts. It initializes the canvas, requests webcam permission, and sets up all UI elements (buttons, checkboxes, paragraphs) with proper styling. It also checks for browser API support (BroadcastChannel, Web Serial) and shows error messages if they are not available.

function setup() {
  createCanvas(windowWidth, windowHeight); // Create a responsive canvas
  
  // Create the video capture from the webcam
  video = createCapture(VIDEO);
  video.hide(); // Hide the HTML video element as we'll draw it on the canvas

  // Initial display message while the model loads
  textSize(32);
  textAlign(CENTER, CENTER);
  fill(0);
  text('Loading model...', width / 2, height / 2);

  // --- BroadcastChannel Setup ---
  if ('BroadcastChannel' in window) {
    debugChannel = new BroadcastChannel('p5js-debug'); // Create a channel with a unique name
    debugChannel.onmessage = handleDebugMessage; // Assign a handler for incoming messages
    console.log('BroadcastChannel "p5js-debug" initialized.');

    // Add a checkbox to toggle debug sending
    debugSendCheckbox = createCheckbox('Send Debug to other tabs', false);
    debugSendCheckbox.position(videoMargin, height - 260); // Use videoMargin for x
    debugSendCheckbox.style('font-size', '18px');
    debugSendCheckbox.style('color', '#333');
    debugSendCheckbox.style('font-family', 'sans-serif');

    // Add a paragraph to display received BroadcastChannel data
    receivedBroadcastDataP = createP('Broadcast Received: ');
    receivedBroadcastDataP.position(videoMargin, height - 230); // Use videoMargin for x
    receivedBroadcastDataP.style('font-size', '18px');
    receivedBroadcastDataP.style('color', '#333');
    receivedBroadcastDataP.style('font-family', 'sans-serif');

  } else {
    console.warn('BroadcastChannel API not supported in this browser. Debug transmission to other tabs will not work.');
  }

  // --- Web Serial Setup ---
  // Create p5 DOM elements for serial status and received data
  serialStatusP = createP('Web Serial: Not connected.');
  serialStatusP.position(videoMargin, height - 200); // Use videoMargin for x
  serialStatusP.style('font-size', '18px');
  serialStatusP.style('color', '#333');
  serialStatusP.style('font-family', 'sans-serif'); // Add a standard font for consistency

  receivedSerialDataP = createP('Received: '); // Renamed for clarity
  receivedSerialDataP.position(videoMargin, height - 170); // Use videoMargin for x
  receivedSerialDataP.style('font-size', '18px');
  receivedSerialDataP.style('color', '#333');
  receivedSerialDataP.style('font-family', 'sans-serif'); // Add a standard font for consistency

  // Check if Web Serial API is supported
  if ('serial' in navigator) {
    // Create the "Connect Serial Port" button
    serialConnectButton = createButton('Connect Serial Port');
    serialConnectButton.position(videoMargin, height - 120); // Use videoMargin for x
    serialConnectButton.mousePressed(connectSerial); // Call connectSerial() when button is pressed
    serialConnectButton.style('font-size', '16px');
    serialConnectButton.style('padding', '10px 15px');
    serialConnectButton.style('background-color', '#4CAF50');
    serialConnectButton.style('color', 'white');
    serialConnectButton.style('border', 'none');
    serialConnectButton.style('border-radius', '5px');
    serialConnectButton.style('cursor', 'pointer');

    // Add event listener for port disconnection (e.g., USB cable unplugged)
    navigator.serial.addEventListener('disconnect', portDisconnected);

  } else {
    // Display an error message if Web Serial is not supported
    serialStatusP.html('Web Serial API not supported in this browser. Try Chrome/Edge.');
    serialStatusP.style('color', 'red');
  }
}
Line-by-line explanation (9 lines)

🔧 Subcomponents:

conditional BroadcastChannel Setup if ('BroadcastChannel' in window) {

Checks if the browser supports BroadcastChannel and creates a debug channel to share predictions with other tabs

conditional Web Serial Setup if ('serial' in navigator) {

Checks if the browser supports Web Serial API and creates the connect button; shows an error message if not supported

createCanvas(windowWidth, windowHeight);
Creates a canvas that fills the entire browser window—windowWidth and windowHeight respond to the actual window size
video = createCapture(VIDEO);
Requests permission to access your webcam and stores the video stream in the variable 'video'
video.hide();
Hides the default HTML video element that p5.js creates—we will draw it on the canvas manually instead
debugChannel = new BroadcastChannel('p5js-debug');
Creates a named communication channel that allows this tab to broadcast messages to all other tabs with the same channel name
debugChannel.onmessage = handleDebugMessage;
Registers a handler function to run whenever this tab receives a message from another tab on the same channel
debugSendCheckbox = createCheckbox('Send Debug to other tabs', false);
Creates a checkbox that lets you toggle whether to broadcast debug data—false means it starts unchecked
serialConnectButton = createButton('Connect Serial Port');
Creates a button that will trigger the connectSerial() function when clicked
serialConnectButton.mousePressed(connectSerial);
Links the button click event to the connectSerial function, so clicking opens the serial port selection dialog
navigator.serial.addEventListener('disconnect', portDisconnected);
Registers portDisconnected() to fire automatically if the USB cable is unplugged or the device disconnects

modelLoaded()

This callback function is called automatically by ml5.js once the Teachable Machine model has finished loading. It sets a flag to mark the model ready and kicks off the classification pipeline.

function modelLoaded() {
  console.log('Model Loaded!');
  classifier.ready = true; // Set a custom flag to indicate the model is ready
  currentClassification.label = 'Model Loaded. Starting classification...';
  classifyVideo(); // Start classifying once the model is loaded
}
Line-by-line explanation (3 lines)
classifier.ready = true;
Sets a custom property on the classifier object to signal that the model is loaded and ready to classify frames
currentClassification.label = 'Model Loaded. Starting classification...';
Updates the display to show a status message instead of 'Loading model...'
classifyVideo();
Triggers the first call to classifyVideo(), which begins the continuous classification loop

classifyVideo()

classifyVideo() is the entry point to the classification loop. It checks readiness, calls the ml5.js classifier on the current frame, and uses setTimeout as a safeguard to prevent errors if the model isn't ready yet. Once gotResult() is called with results, it will call classifyVideo() again to process the next frame continuously.

function classifyVideo() {
  // Ensure the video is loaded and the model is ready before attempting to classify
  if (video && classifier.ready) {
    // Classify the current video frame and call gotResult when done
    // Reference: https://learn.ml5js.org/docs/#/reference/image-classifier?id=classify
    classifier.classify(video, gotResult);
  } else {
    // If not ready, try again after a short delay
    setTimeout(classifyVideo, 100);
  }
}
Line-by-line explanation (3 lines)

🔧 Subcomponents:

conditional Readiness Check if (video && classifier.ready) {

Ensures both the video stream and the ML model are ready before attempting classification

conditional Retry Mechanism } else { setTimeout(classifyVideo, 100); }

If not ready, schedules another check 100 milliseconds later instead of crashing

if (video && classifier.ready) {
Checks that both the video stream exists and the model has finished loading
classifier.classify(video, gotResult);
Sends the current video frame to ml5.js for classification; gotResult() is called asynchronously once the prediction is ready
setTimeout(classifyVideo, 100);
If not ready yet, schedules this function to run again after 100 milliseconds, creating a polling loop

gotResult(error, results)

gotResult() is the callback that ml5.js invokes with the classification results for each frame. It handles errors gracefully, extracts the top prediction, updates the global currentClassification object, optionally broadcasts to other tabs, and recursively calls classifyVideo() to keep the pipeline flowing.

🔬 This code sorts predictions by confidence and picks the first one. What if you changed results[0] to results[results.length - 1]? Which prediction would you see—the most confident or the least confident?

  // Sort results by confidence in descending order to get the top prediction
  results.sort((a, b) => b.confidence - a.confidence);
  const topResult = results[0];
function gotResult(error, results) {
  // If there's an error during classification, log it
  if (error) {
    console.error(error);
    currentClassification.label = 'Error: ' + error.message;
    currentClassification.confidence = 0;
    // Don't stop classifying, try again
    classifyVideo();
    return;
  }

  // If no error, results will be an array of objects
  // Each object has a 'label' and 'confidence'
  // Sort results by confidence in descending order to get the top prediction
  results.sort((a, b) => b.confidence - a.confidence);
  const topResult = results[0];

  // Update the current classification result
  currentClassification.label = topResult.label;
  currentClassification.confidence = topResult.confidence;

  // --- BroadcastChannel: Send debug data ---
  if (debugChannel && debugSendCheckbox.checked()) {
    // Send the entire currentClassification object
    debugChannel.postMessage(currentClassification);
    console.log('Debug (BroadcastChannel) Sent:', currentClassification);
  }

  // Keep classifying the video feed recursively
  classifyVideo();
}
Line-by-line explanation (8 lines)

🔧 Subcomponents:

conditional Error Handling if (error) {

Catches and displays any errors from the classifier, then retries instead of crashing

calculation Sort by Confidence results.sort((a, b) => b.confidence - a.confidence);

Arranges predictions from highest to lowest confidence so the top result is at index 0

conditional BroadcastChannel Send if (debugChannel && debugSendCheckbox.checked()) {

Sends the current prediction to other tabs only if BroadcastChannel is available and the user has enabled debug mode

if (error) {
Checks if the classifier encountered an error during this frame
currentClassification.label = 'Error: ' + error.message;
Displays the error message on the canvas instead of a prediction
results.sort((a, b) => b.confidence - a.confidence);
Sorts the array of results in descending order by confidence—highest confidence comes first
const topResult = results[0];
Extracts the top (most confident) prediction from the sorted array
currentClassification.label = topResult.label;
Updates the global prediction label with the name of the top class
currentClassification.confidence = topResult.confidence;
Updates the global confidence with the model's confidence in that prediction (0 to 1)
debugChannel.postMessage(currentClassification);
Broadcasts the prediction to all other browser tabs listening on the 'p5js-debug' channel
classifyVideo();
Recursively calls classifyVideo() to process the next frame, keeping the loop running continuously

draw()

draw() runs 60 times per second and is the main animation loop. It clears the canvas, scales and displays the video feed, draws a text box with the current prediction and confidence, and checks whether to send that prediction over serial. The responsive scaling logic ensures the video preview adapts gracefully to different screen sizes.

🔬 This sets preview height to half the canvas height. What happens if you change 'height / 2' to 'height / 3'? To 'height * 0.75'? How does the video preview size respond to those changes?

    // Calculate preview size while maintaining aspect ratio
    // Let's make the preview height about half the canvas height, minus margins.
    let previewHeight = height / 2 - 2 * videoMargin;
    let previewWidth = (previewHeight / video.height) * video.width;

🔬 These two text() lines display the label above and confidence below the text box center. What if you changed textYOffset - 20 to textYOffset (removing the offset) for the first line? Where would both lines appear?

    text(`Label: ${currentClassification.label}`, textRectX + 10, textYOffset - 20); // Adjust y for two lines
    // Use nf() to format confidence as a percentage with 2 decimal places
    text(`Confidence: ${nf(currentClassification.confidence * 100, 0, 2)}%`, textRectX + 10, textYOffset + 20);
function draw() {
  background(220); // Clear the canvas each frame

  if (video && classifier.ready) {
    // Calculate preview size while maintaining aspect ratio
    // Let's make the preview height about half the canvas height, minus margins.
    let previewHeight = height / 2 - 2 * videoMargin;
    let previewWidth = (previewHeight / video.height) * video.width;

    // Ensure previewWidth doesn't exceed available space if canvas is very narrow
    // (e.g., if canvas width is less than previewWidth + videoMargin * 2)
    let availableWidthForVideo = width - 2 * videoMargin;
    if (previewWidth > availableWidthForVideo) {
      previewWidth = availableWidthForVideo;
      previewHeight = (previewWidth / video.width) * video.height;
    }

    // Draw the video feed at the top-left with margin
    image(video, videoMargin, videoMargin, previewWidth, previewHeight);

    // Classification text and background rectangle to the right of the video preview.
    let textRectX = videoMargin + previewWidth + videoMargin;
    let textRectWidth = width - textRectX - videoMargin;
    let textRectHeight = previewHeight; // Make it the same height as the video preview
    let textRectY = videoMargin; // Align with the top of the video

    fill(255, 200); // White with 200 alpha
    noStroke();
    rect(textRectX, textRectY, textRectWidth, textRectHeight);

    // Display the current classification result
    fill(0);
    textSize(24);
    textAlign(LEFT, CENTER);
    // Center text vertically within its rectangle
    let textYOffset = textRectY + textRectHeight / 2;
    text(`Label: ${currentClassification.label}`, textRectX + 10, textYOffset - 20); // Adjust y for two lines
    // Use nf() to format confidence as a percentage with 2 decimal places
    text(`Confidence: ${nf(currentClassification.confidence * 100, 0, 2)}%`, textRectX + 10, textYOffset + 20);

    // --- Web Serial: Send classification data ---
    // Send the classification label if connected, it's a new label, and enough time has passed
    if (port && writer && currentClassification.label !== lastSentLabel && millis() - lastClassificationSendTime > classificationSendInterval) {
      const dataToSend = currentClassification.label + '\n'; // Add newline for easy parsing on microcontroller
      writeSerial(dataToSend);
      lastSentLabel = currentClassification.label;
      lastClassificationSendTime = millis();
    }
  } else if (!classifier.ready) {
    // Display loading message if the model is not yet ready
    textSize(32);
    textAlign(CENTER, CENTER);
    fill(0);
    text('Loading model...', width / 2, height / 2);
  }
}
Line-by-line explanation (12 lines)

🔧 Subcomponents:

calculation Aspect Ratio Calculation let previewWidth = (previewHeight / video.height) * video.width;

Maintains the video's original aspect ratio when scaling it to fit the canvas

conditional Responsive Width Check if (previewWidth > availableWidthForVideo) {

Prevents the video from exceeding available horizontal space on narrow screens

calculation Video Display image(video, videoMargin, videoMargin, previewWidth, previewHeight);

Renders the webcam feed on the canvas at the calculated size

calculation Text Box Layout let textRectX = videoMargin + previewWidth + videoMargin;

Positions the prediction text box to the right of the video preview

conditional Serial Send Check if (port && writer && currentClassification.label !== lastSentLabel && millis() - lastClassificationSendTime > classificationSendInterval) {

Sends the classification label to serial only when connected, the label has changed, and enough time has passed

background(220);
Clears the canvas with light gray (220) each frame to prevent the video trail from accumulating
let previewHeight = height / 2 - 2 * videoMargin;
Sets the video preview to be half the canvas height, minus margins on top and bottom
let previewWidth = (previewHeight / video.height) * video.width;
Calculates the width needed to keep the video's aspect ratio unchanged
if (previewWidth > availableWidthForVideo) {
Checks if the scaled video would be too wide for the screen, and if so, shrinks it further
image(video, videoMargin, videoMargin, previewWidth, previewHeight);
Draws the video frame at position (videoMargin, videoMargin) with the calculated width and height
let textRectX = videoMargin + previewWidth + videoMargin;
Positions the text box to the right of the video: the video's right edge plus another margin
rect(textRectX, textRectY, textRectWidth, textRectHeight);
Draws a semi-transparent white rectangle behind the classification text for readability
text(`Label: ${currentClassification.label}`, textRectX + 10, textYOffset - 20);
Displays the classification label inside the text box, 10 pixels from the left edge
text(`Confidence: ${nf(currentClassification.confidence * 100, 0, 2)}%`, textRectX + 10, textYOffset + 20);
Displays the confidence as a percentage with 2 decimal places (e.g., '85.32%')
if (port && writer && currentClassification.label !== lastSentLabel && millis() - lastClassificationSendTime > classificationSendInterval) {
Checks four conditions: port is connected, writer exists, the label is new, and enough time has passed since the last send
const dataToSend = currentClassification.label + '\n';
Appends a newline character so the microcontroller knows where one label ends and the next begins
writeSerial(dataToSend);
Sends the label to the connected serial device via USB

windowResized()

windowResized() is called automatically by p5.js whenever the browser window is resized. It resizes the canvas and repositions all UI elements (buttons, checkboxes, paragraphs) so they stay correctly laid out on screens of different sizes.

function windowResized() {
  resizeCanvas(windowWidth, windowHeight); // Adjust canvas size on window resize
  // Re-position p5 DOM elements on window resize
  if (debugSendCheckbox) debugSendCheckbox.position(videoMargin, height - 260); // Use videoMargin for x
  if (receivedBroadcastDataP) receivedBroadcastDataP.position(videoMargin, height - 230); // Use videoMargin for x
  if (serialStatusP) serialStatusP.position(videoMargin, height - 200); // Use videoMargin for x
  if (receivedSerialDataP) receivedSerialDataP.position(videoMargin, height - 170); // Use videoMargin for x
  if (serialConnectButton) serialConnectButton.position(videoMargin, height - 120); // Use videoMargin for x
}
Line-by-line explanation (3 lines)
resizeCanvas(windowWidth, windowHeight);
Adjusts the canvas to fill the new window size when the user resizes their browser
if (debugSendCheckbox) debugSendCheckbox.position(videoMargin, height - 260);
Checks if the checkbox exists, then repositions it based on the new canvas height
if (serialConnectButton) serialConnectButton.position(videoMargin, height - 120);
Checks if the button exists, then repositions it so it stays at the correct position on the smaller or larger screen

handleDebugMessage(event)

This function is registered as the handler for BroadcastChannel messages in setup(). Whenever another tab running the same sketch sends a prediction via BroadcastChannel, this function fires automatically with the prediction data and updates the UI to show what was received.

function handleDebugMessage(event) {
  // Log received debug messages to the console
  console.log('Debug (BroadcastChannel) Received from another tab:', event.data);
  // Update the dedicated paragraph with the received data
  if (receivedBroadcastDataP) {
    receivedBroadcastDataP.html(`Broadcast Received: Label: ${event.data.label}, Confidence: ${nf(event.data.confidence * 100, 0, 2)}%`);
  }
}
Line-by-line explanation (2 lines)
console.log('Debug (BroadcastChannel) Received from another tab:', event.data);
Logs the incoming prediction from another tab to the browser's developer console
receivedBroadcastDataP.html(`Broadcast Received: Label: ${event.data.label}, Confidence: ${nf(event.data.confidence * 100, 0, 2)}%`);
Updates the on-screen paragraph to display the received prediction with label and confidence formatted as a percentage

connectSerial()

connectSerial() is called when you click the 'Connect Serial Port' button. It uses the Web Serial API to let you select a USB device, opens the connection at the specified baud rate, sets up text encoding/decoding streams, and starts listening for incoming data. The 'async/await' syntax pauses at certain steps (like port selection) until that operation completes.

async function connectSerial() {
  try {
    // Request a serial port from the user
    port = await navigator.serial.requestPort();
    serialStatusP.html('Web Serial: Connecting...');

    // Open the port with a specified baud rate
    // IMPORTANT: This baud rate (9600) must match the one used by your microcontroller (e.g., Arduino Serial.begin(9600);)
    await port.open({ baudRate: 9600 });
    serialStatusP.html('Web Serial: Connected!');
    serialConnectButton.html('Disconnect Serial Port'); // Change button text
    serialConnectButton.mousePressed(disconnectSerial); // Change button action to disconnect

    // Create TextDecoderStream and TextEncoderStream for easy text handling
    const textDecoder = new TextDecoderStream();
    const textEncoder = new TextEncoderStream();
    reader = textDecoder.readable.getReader(); // Reader for incoming text data
    writer = textEncoder.writable.getWriter(); // Writer for outgoing text data

    // Pipe the port's readable stream through the decoder
    port.readable.pipeTo(textDecoder.writable);
    // Pipe the encoder's readable stream to the port's writable stream
    port.writable.pipeTo(textEncoder.writable);

    readSerial(); // Start continuously reading data from the port
  } catch (error) {
    console.error('Error connecting to serial port:', error);
    serialStatusP.html('Web Serial: Connection failed. ' + error.message);
  }
}
Line-by-line explanation (11 lines)

🔧 Subcomponents:

calculation Port Request port = await navigator.serial.requestPort();

Opens a browser dialog for the user to select a USB device to connect to

calculation Port Opening await port.open({ baudRate: 9600 });

Opens the selected port at 9600 baud rate (must match the microcontroller's setting)

calculation Stream Setup port.readable.pipeTo(textDecoder.writable);

Connects the serial port's data stream to a text decoder so incoming bytes are converted to readable strings

port = await navigator.serial.requestPort();
Opens a browser dialog letting the user select which USB device to connect to—async/await pauses until the user makes a choice
serialStatusP.html('Web Serial: Connecting...');
Updates the status text to indicate the connection is in progress
await port.open({ baudRate: 9600 });
Opens the serial port at 9600 bits per second—this MUST match your microcontroller's Serial.begin() speed (e.g., Serial.begin(9600) in Arduino code)
serialConnectButton.mousePressed(disconnectSerial);
Changes the button's action from connectSerial to disconnectSerial so it now disconnects when clicked
const textDecoder = new TextDecoderStream();
Creates a decoder that converts incoming binary data from the serial port into readable text strings
const textEncoder = new TextEncoderStream();
Creates an encoder that converts outgoing text strings into binary data the serial port can send
reader = textDecoder.readable.getReader();
Creates a reader object so this sketch can read incoming messages from the decoder stream
writer = textEncoder.writable.getWriter();
Creates a writer object so this sketch can write outgoing messages to the encoder stream
port.readable.pipeTo(textDecoder.writable);
Connects the serial port's input to the text decoder so incoming bytes become readable text
port.writable.pipeTo(textEncoder.writable);
Connects the text encoder's output to the serial port so outgoing text becomes bytes sent via USB
readSerial();
Starts the continuous reading loop to listen for incoming data from the microcontroller

disconnectSerial()

disconnectSerial() is called when you click 'Disconnect Serial Port'. It safely closes the reader, writer, and port streams, and then calls portDisconnected() to reset the UI and variables. The try/catch structure protects against errors during disconnection.

async function disconnectSerial() {
  try {
    if (reader) await reader.cancel(); // Cancel any pending read operations
    if (writer) await writer.close(); // Close the writer stream
    if (port) await port.close(); // Close the serial port

    portDisconnected(); // Reset variables and UI
  } catch (error) {
    console.error('Error disconnecting serial port:', error);
    serialStatusP.html('Web Serial: Disconnection failed. ' + error.message);
  }
}
Line-by-line explanation (4 lines)
if (reader) await reader.cancel();
Stops any ongoing read operation on the reader stream if it exists
if (writer) await writer.close();
Closes the writer stream to stop sending data to the port
if (port) await port.close();
Closes the serial port itself, releasing the USB connection
portDisconnected();
Calls the cleanup function to reset all variables and update the UI

readSerial()

readSerial() runs in an infinite loop after the port connects, waiting for incoming messages. It uses 'await reader.read()' to pause until the next message arrives, then displays it. The loop exits gracefully if the port closes or if an error occurs, and always calls portDisconnected() to clean up.

🔬 This code reads incoming data and displays it. What if you added a console.log() before receivedSerialDataP.html() to log each message received? Try: console.log('Received from serial:', value);

      const { value, done } = await reader.read();
      if (done) {
        console.log('Reader closed.');
        break; // Exit loop if reader is closed
      }
      receivedSerialDataP.html(`Received: ${value}`); // Display received data
async function readSerial() {
  while (port && port.readable) {
    try {
      const { value, done } = await reader.read();
      if (done) {
        console.log('Reader closed.');
        break; // Exit loop if reader is closed
      }
      receivedSerialDataP.html(`Received: ${value}`); // Display received data
      // For more complex data, you might parse 'value' here (e.g., JSON.parse(value))
    } catch (error) {
      console.error('Error reading from serial port:', error);
      serialStatusP.html('Web Serial: Read error. ' + error.message);
      break; // Exit loop on error
    }
  }
  portDisconnected(); // Assume disconnected if loop exits (e.g., due to error or port closure)
}
Line-by-line explanation (6 lines)

🔧 Subcomponents:

while-loop Continuous Read Loop while (port && port.readable) {

Continuously waits for and reads incoming data from the serial port as long as the port is open

calculation Read Operation const { value, done } = await reader.read();

Waits for the next chunk of text data from the decoder stream; 'done' signals if the stream has ended

while (port && port.readable) {
Loops continuously as long as the port exists and is readable—exits if the port closes
const { value, done } = await reader.read();
Waits for the next message from the serial port and unpacks it into 'value' (the data) and 'done' (whether the stream ended)
if (done) {
Checks if the reader stream closed (the port was disconnected)
receivedSerialDataP.html(`Received: ${value}`);
Updates the on-screen paragraph to display the latest message received from the microcontroller
catch (error) {
If an error occurs during reading (e.g., the USB cable was unplugged), this block handles it
portDisconnected();
Cleans up after the loop exits, resetting variables and UI to reflect that the port is no longer connected

writeSerial(data)

writeSerial(data) is called from draw() to send the current classification label to the microcontroller. It checks that the port is connected before writing, logs the data sent, and handles errors gracefully if the write fails or the port is disconnected.

async function writeSerial(data) {
  if (port && writer) {
    try {
      await writer.write(data);
      console.log('Sent:', data.trim()); // Log sent data without the trailing newline
    } catch (error) {
      console.error('Error writing to serial port:', error);
      serialStatusP.html('Web Serial: Write error. ' + error.message);
      portDisconnected(); // Assume disconnected on write error
    }
  } else {
    console.warn('Cannot write: Serial port not connected.');
    serialStatusP.html('Web Serial: Cannot write, not connected.');
  }
}
Line-by-line explanation (6 lines)

🔧 Subcomponents:

conditional Connection Check if (port && writer) {

Ensures the port is open and the writer stream exists before attempting to send data

if (port && writer) {
Checks that both the port and writer exist before attempting to send—prevents errors if disconnected
await writer.write(data);
Sends the data string over the USB serial port; 'await' pauses until the data is fully sent
console.log('Sent:', data.trim());
Logs the sent message to the console without the trailing newline (trim() removes it) for debugging
catch (error) {
If the write fails (e.g., USB cable disconnected), this handles the error
portDisconnected();
Assumes the port is now disconnected if a write error occurs, and resets the UI
console.warn('Cannot write: Serial port not connected.');
If the port isn't connected, logs a warning and updates the status text instead of crashing

portDisconnected()

portDisconnected() is a cleanup function called either when you click 'Disconnect' or when the port is lost (cable unplugged or error). It sets all serial variables to undefined, updates the UI, and resets the label tracking so the connection can be re-established fresh.

function portDisconnected() {
  console.log('Serial port disconnected.');
  port = undefined;
  reader = undefined;
  writer = undefined;
  serialStatusP.html('Web Serial: Disconnected.');
  receivedSerialDataP.html('Received: ');
  if (serialConnectButton) {
    serialConnectButton.html('Connect Serial Port');
    serialConnectButton.mousePressed(connectSerial); // Change button action back to connect
  }
  lastSentLabel = ''; // Reset to ensure label is sent again on reconnect
  lastClassificationSendTime = 0; // Reset timer too
}
Line-by-line explanation (6 lines)
port = undefined;
Clears the port reference so the sketch knows it is no longer connected
reader = undefined;
Clears the reader so no more data can be read
writer = undefined;
Clears the writer so no more data can be sent
serialStatusP.html('Web Serial: Disconnected.');
Updates the status text to show 'Disconnected'
serialConnectButton.mousePressed(connectSerial);
Changes the button action back to connectSerial so you can reconnect
lastSentLabel = '';
Resets the last sent label to empty string so the first label is sent again when you reconnect

📦 Key Variables

classifier object

Holds the ml5.js image classifier instance loaded from Teachable Machine—used to classify each video frame

let classifier; // set in preload() by ml5.imageClassifier()
video object

Stores the webcam video stream from createCapture(VIDEO)—passed to the classifier for frame-by-frame analysis

let video; // initialized in setup()
modelURL string

The URL to your Teachable Machine model—change this to point to your own trained model

let modelURL = 'https://api.gen-ai.fi/model/NdjaeKeF/';
currentClassification object

Stores the latest classification result with 'label' (class name) and 'confidence' (0 to 1) properties

let currentClassification = { label: 'Loading model...', confidence: 0 };
port object

Holds the Web Serial port connection to the microcontroller—undefined when disconnected

let port; // set by connectSerial()
reader object

Reads incoming text data from the serial port stream

let reader; // created in connectSerial()
writer object

Writes outgoing text data to the serial port stream

let writer; // created in connectSerial()
serialConnectButton object

The p5.js button element that toggles serial connection on and off

let serialConnectButton; // created in setup()
serialStatusP object

The p5.js paragraph element displaying serial connection status

let serialStatusP; // created in setup()
receivedSerialDataP object

The p5.js paragraph element displaying the last message received from the microcontroller

let receivedSerialDataP; // created in setup()
classificationSendInterval number

Milliseconds to wait between sending the same classification label to serial—prevents flooding the microcontroller

let classificationSendInterval = 3000; // send every 3 seconds
lastClassificationSendTime number

Timestamp of the last time a label was sent to serial—used to enforce the send interval

let lastClassificationSendTime = 0;
lastSentLabel string

Stores the label sent most recently to avoid sending the same label repeatedly

let lastSentLabel = '';
debugChannel object

The BroadcastChannel instance for sending predictions to other browser tabs

let debugChannel; // created in setup() if supported
debugSendCheckbox object

The p5.js checkbox element that toggles whether to broadcast debug data to other tabs

let debugSendCheckbox; // created in setup()
receivedBroadcastDataP object

The p5.js paragraph element displaying predictions received from other tabs via BroadcastChannel

let receivedBroadcastDataP; // created in setup()
videoMargin number

Pixel spacing around the video preview and UI elements for consistent layout

let videoMargin = 20;

🔧 Potential Improvements (6)

Here are some ways this code could be enhanced:

BUG connectSerial()

If the user cancels the port selection dialog, 'port' remains undefined but no error message is shown

💡 Add a catch for the 'NotFoundError' when the user cancels: check error.name === 'NotFoundError' and display a friendly message instead of a generic error

BUG readSerial()

If readSerial() exits due to an error, it calls portDisconnected() but the port might still technically be open, causing a mismatch in state

💡 In the catch block, explicitly close the port: if (port) await port.close(); before calling portDisconnected()

PERFORMANCE gotResult()

Every frame, the results array is sorted—sorting is O(n log n) and unnecessary if you only need the top prediction

💡 Find the maximum confidence result with a single loop instead: let topResult = results.reduce((a, b) => a.confidence > b.confidence ? a : b);

STYLE global variables

Many variables are declared without descriptive comments, making it hard for beginners to understand their purpose

💡 Add inline comments to each variable declaration explaining what it stores and when it's used

FEATURE writeSerial()

The sketch only sends the label, not the confidence score—a microcontroller might want to know how certain the prediction is

💡 Modify dataToSend to include confidence: const dataToSend = `${currentClassification.label},${currentClassification.confidence}\n`; and update parsing on the Arduino

STYLE draw()

The text positioning logic (textYOffset - 20, textYOffset + 20) is hardcoded and might not scale well on very large or very small screens

💡 Calculate text spacing relative to textRectHeight: let textLineHeight = textRectHeight / 4; then use textYOffset - textLineHeight for label and textYOffset + textLineHeight for confidence

🔄 Code Flow

Code flow showing preload, setup, modelLoaded, classifyVideo, gotResult, draw, windowResized, handleDebugMessage, connectSerial, disconnectSerial, readSerial, writeSerial, portDisconnected

💡 Click on function names in the diagram to jump to their code

graph TD start[Start] --> setup[setup] click setup href "#fn-setup" setup --> broadcast-channel-init[BroadcastChannel Setup] click broadcast-channel-init href "#sub-broadcast-channel-init" setup --> web-serial-init[Web Serial Setup] click web-serial-init href "#sub-web-serial-init" setup --> modelLoaded[modelLoaded] click modelLoaded href "#fn-modelLoaded" setup --> draw[draw loop] click draw href "#fn-draw" draw --> ready-check[Readiness Check] click ready-check href "#sub-ready-check" ready-check -->|Ready| classifyVideo[classifyVideo] click classifyVideo href "#fn-classifyVideo" ready-check -->|Not Ready| retry-timeout[Retry Mechanism] click retry-timeout href "#sub-retry-timeout" retry-timeout --> classifyVideo classifyVideo --> gotResult[gotResult] click gotResult href "#fn-gotResult" gotResult --> error-handling[Error Handling] click error-handling href "#sub-error-handling" error-handling -->|Error| classifyVideo error-handling -->|No Error| sort-results[Sort by Confidence] click sort-results href "#sub-sort-results" sort-results --> broadcast-send[BroadcastChannel Send] click broadcast-send href "#sub-broadcast-send" draw --> aspect-ratio-calc[Aspect Ratio Calculation] click aspect-ratio-calc href "#sub-aspect-ratio-calc" draw --> responsive-width-check[Responsive Width Check] click responsive-width-check href "#sub-responsive-width-check" draw --> video-display[Video Display] click video-display href "#sub-video-display" draw --> text-box-layout[Text Box Layout] click text-box-layout href "#sub-text-box-layout" draw --> serial-send-check[Serial Send Check] click serial-send-check href "#sub-serial-send-check" connectSerial[connectSerial] --> port-request[Port Request] click connectSerial href "#fn-connectSerial" click port-request href "#sub-port-request" port-request --> port-open[Port Opening] click port-open href "#sub-port-open" port-open --> stream-setup[Stream Setup] click stream-setup href "#sub-stream-setup" readSerial[readSerial] --> read-loop[Continuous Read Loop] click readSerial href "#fn-readSerial" read-loop --> read-operation[Read Operation] click read-operation href "#sub-read-operation" read-loop -->|Port Closed/Error| portDisconnected[portDisconnected] click portDisconnected href "#fn-portDisconnected" disconnectSerial[disconnectSerial] --> portDisconnected click disconnectSerial href "#fn-disconnectSerial" windowResized[windowResized] --> setup click windowResized href "#fn-windowResized" handleDebugMessage[handleDebugMessage] -->|Received| updateUI[Update UI] click handleDebugMessage href "#fn-handleDebugMessage"

❓ Frequently Asked Questions

What visual elements does the p5.js sketch create?

The sketch utilizes a webcam feed to display real-time video and overlays text indicating the current state of the machine learning model.

How can users interact with the p5.js creative coding sketch?

Users can connect or disconnect from a serial port using a button, allowing for real-time data transmission related to the classifications made by the model.

What creative coding technique is demonstrated in this p5.js sketch?

The sketch demonstrates the integration of machine learning with live video input, showcasing how to utilize a Teachable Machine model for image classification in a web environment.

Preview

Sketch 2026-01-11 20:18 - p5.js creative coding sketch preview
Sketch Preview
Code flow diagram showing the structure of Sketch 2026-01-11 20:18 - Code flow showing preload, setup, modelLoaded, classifyVideo, gotResult, draw, windowResized, handleDebugMessage, connectSerial, disconnectSerial, readSerial, writeSerial, portDisconnected
Code Flow Diagram